Enterprise Steam supports Local, OpenID, LDAP, SAML and PAM authentication.
No additional configuration is required for Local authentication.
Refer to the sections that follow for information on how to configure LDAP, SAML and PAM authentication.
Enterprise Steam ships with a built-in SQLite database. By default, Enterprise Steam uses this database to store user and cluster management metadata. You can use this database, or you can configure Enterprise Steam to work with your existing LDAP directory.
Navigate to the Authentication page.
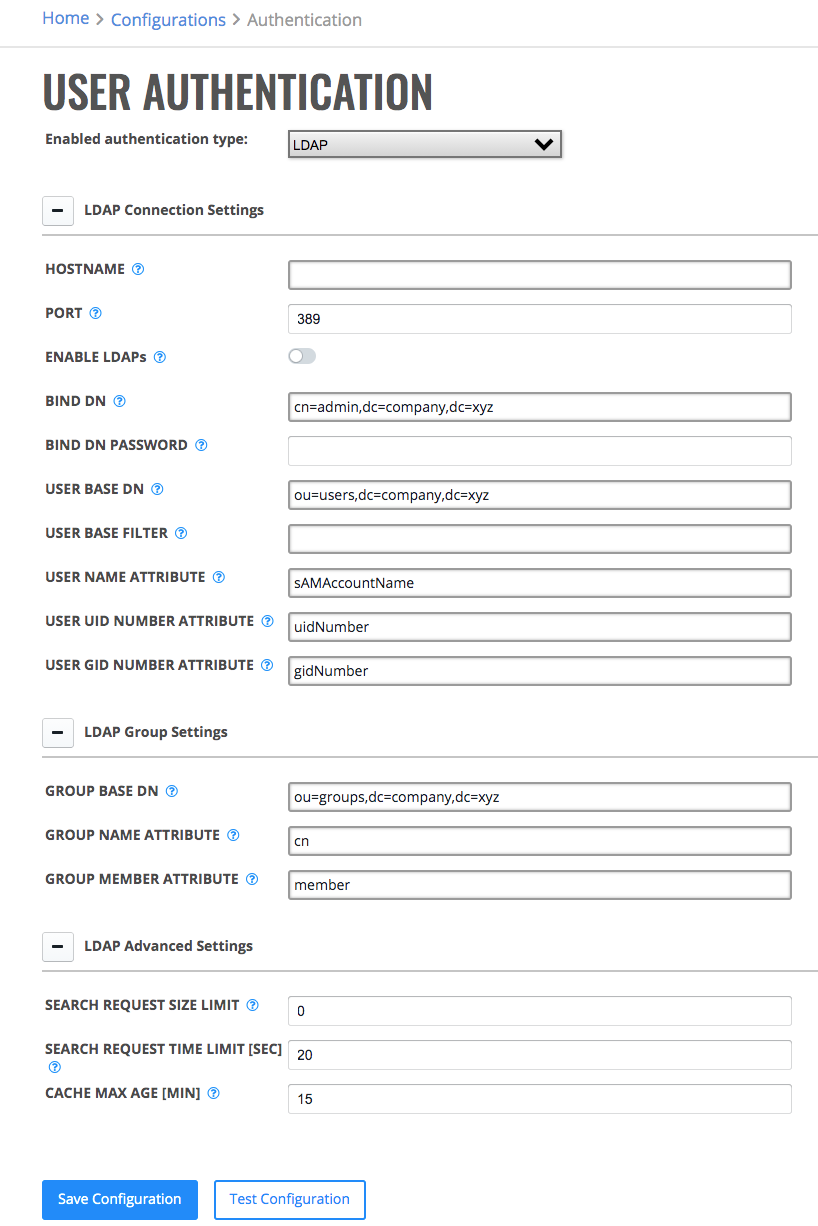
Select LDAP in the Enabled authentication type drop down menu. Click Save Configuration at any point in order to activate LDAP authentication.
Click Create New LDAP Connection to connect to an LDAP server
Field
Description
Example
LDAP Connection Settings
Name
Name of the LDAP Connection
h2o_internal
Hostname
The LDAP host server address
ldap.0xdata.loc
Port
The LDAP server port
389 for LDAP or 636 for LDAPs
Enable LDAPs
Enable this if your LDAP
supports Secured LDAP/LDAPs.
Internal cert authority
Enable this if your LDAPs
server certificate is signed
by internal cert authority
Internal CA path
The path to the public key
of the certificate authority
that signed the LDAPs server
certificate (PEM format)
Bind DN
The Distinguished Name used
by the LDAP server if
extended access is required.
This can be left blank if
anonymous bind is sufficient.
cn=admin,dc=0xdata,dc=loc
Bind DN Password/Confirm
The password for the Bind DN
user
h2o
User Base DN
The location of the LDAP
users, specified by the DN of
your user subtree
ou=users,dc=0xdata,dc=loc
User Base Filter
The LDAP search filter used
to filter users
department=IT
User Name Attribute
The User Attribute that
contains the username
uid
User UID Number
Attribute
The User Attribute that
contains numeric UNIX UID
uidNumber
User GID Number
Attribute
The User Attribute that
contains numeric UNIX GID
gidNumber
LDAP Group Settings
Group Base DN
The location of your LDAP
groups, specified by the
DN of your user subtree
ou=groups,dc=0xdata,dc=loc
Group Name Attribute
The Group Attribute that
contains the username
cn
Static Member Attribute
The attribute for static
group entries
memberUid
LDAP Advanced Settings
Search Request Size Limit
Limit the size of search
results. 0 indicates
unlimited.
Search Request Time Limit
Limit the time allotted for
completing search results. 0
indicates unlimited.
0
Cache Max Age (in mins)
The maxium age in minutes of
of LDAP record in cache
before forcing a refresh.
Use 0 for no cache (not
recommended).
5
CA Certificate Path
Specify CAs to use for
contacting LDAP servers.
Leave empty to use system
root CAs.
Click Test connection when you are done. A valid response message indicates that the configuration was successful.
Click Save changes.
Repeat steps 3-5 to add additional connections
When multiple LDAP servers are connected, they are displayed in the order they are used to authenticate users.
Modify the priority using the arrows on the LDAP configuration page.
After LDAP is configured, users can log in to Enterprise Steam using their LDAP username and password.
Perform the the following steps to configure Enterprise Steam to use OpenID connect authentication.
Navigate the Authentication page.
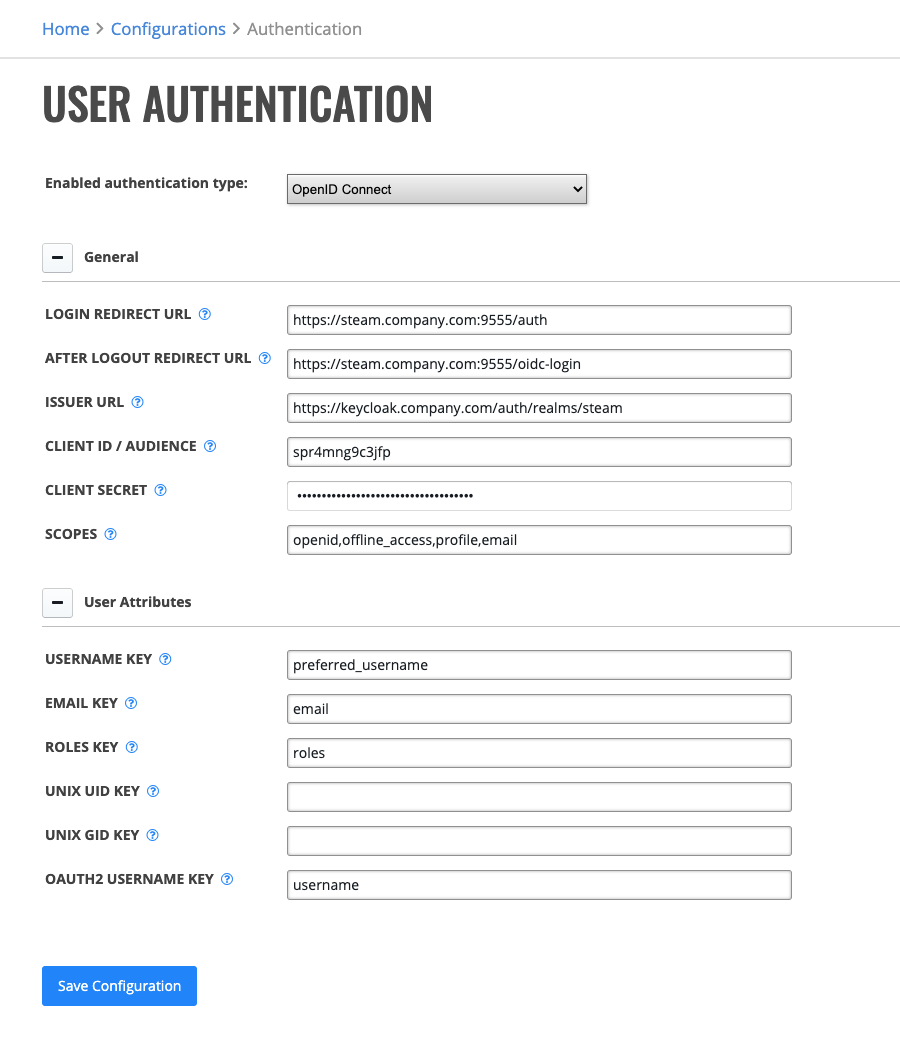
Select OpenID Connect in the Enabled authentication type drop down menu, then configure the following settings:
Field
Description
General settings
Redirect URL
This field is preset but might need to be edited if Enterprise Steam is
behind a reverse proxy. OpenID provider will require login redirect URL
that needs to be added to allowed redirect URLs.
After Logout Redirect URL
This field is preset but might need to be edited if Enterprise Steam is
behind a reverse proxy. OpenID provider will require after logout
redirect URL that needs to be added to allowed redirect URLs.
Client secret provided by OpenID provider when registering Client ID.
Scopes
Scope of user information Enterprise Steam will request from
the OpenID provider. Comma-separated values. The recommended scopes
are ‘openid, profile, email’.
ACR Values
Comma-separated list of allowed authentication context classes.
User Attributes
Username Key
Key that specifies username attribute from userinfo data.
Email key
Key that specifies email attribute from userinfo data (ex: email)
Roles key
Key that specifies roles attribute from userinfo data (ex: roles)
Unix UID key
Optional key that specifies UNIX uid attribute from userinfo data.
Unix GID key
Optional key that specifies UNIX gid attribute from userinfo data.
Advanced Settings
Logout ID token hint
Indicates whether id_token_hint should be passed in a logout URL
parameter.
User attribute keys support nesting. For example realm.roles is a valid key.
Perform the the following steps to configure Enterprise Steam to use PAM authentication.
Navigate the Authentication page.
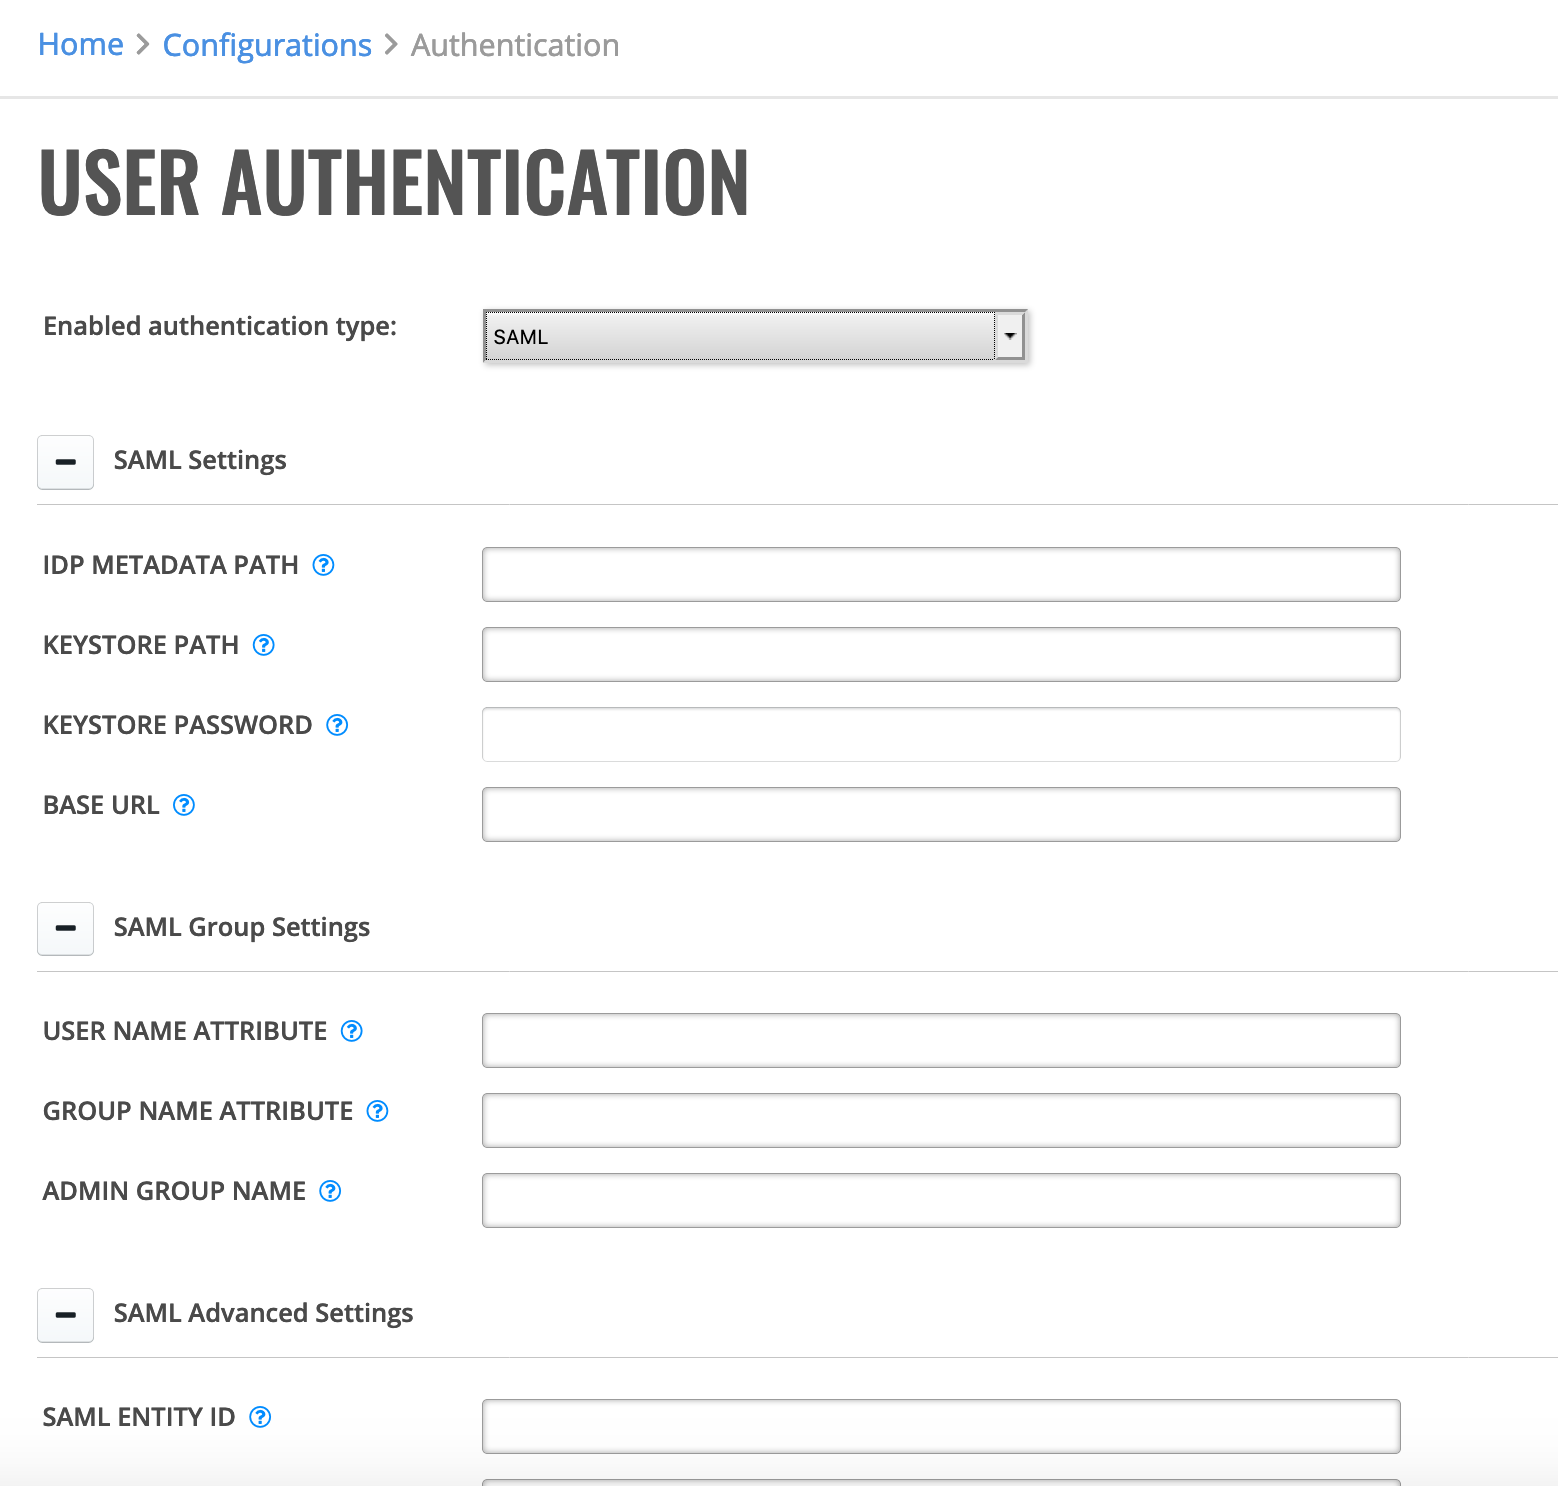
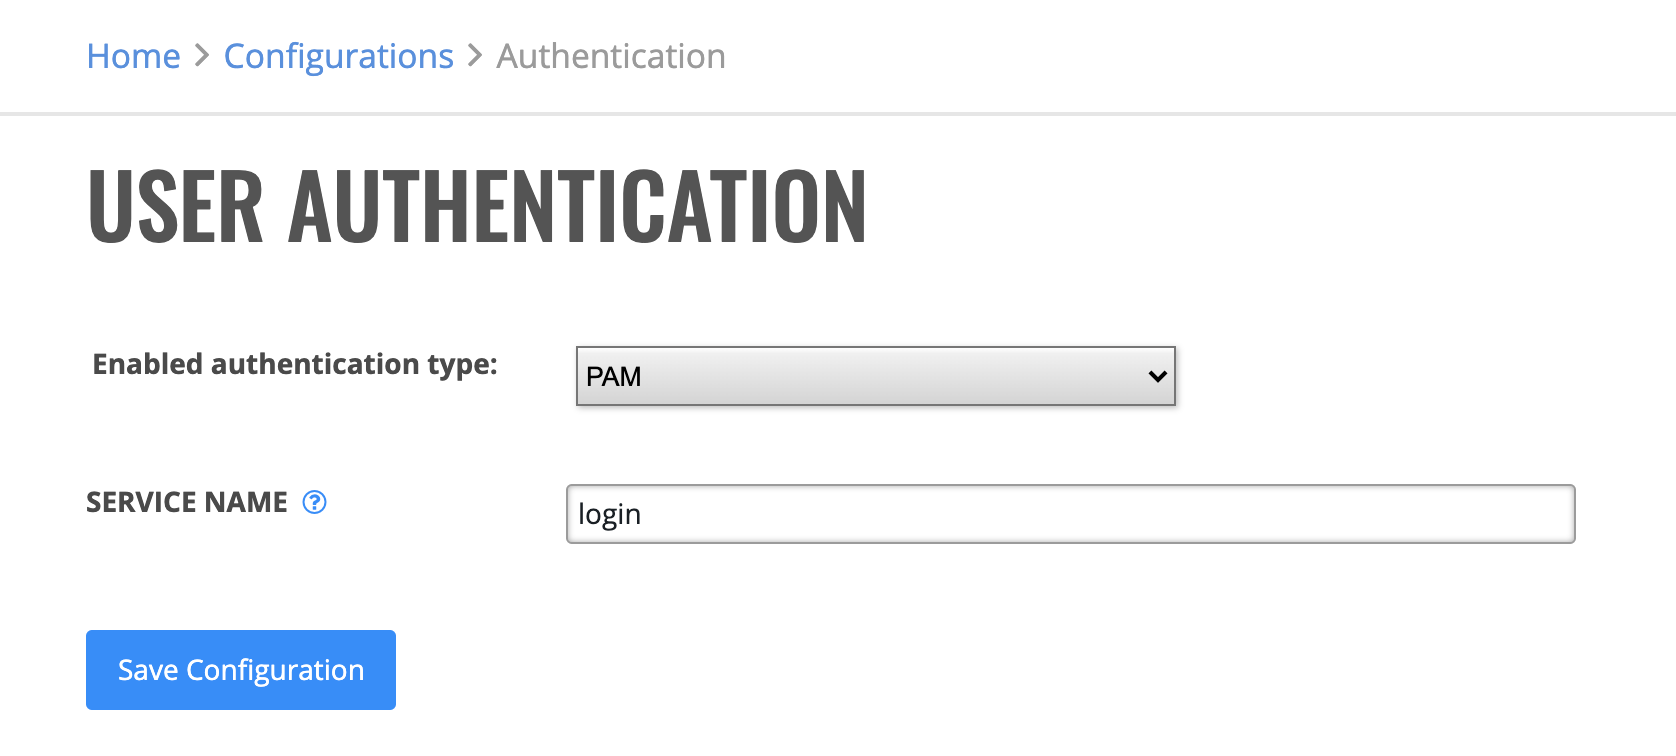
Select PAM in the Enabled authentication type drop down menu, then configure the following SAML settings:
Field
Description
PAM Settings
Service Name
ServiceName specifies the name of the service to apply. The policy for
the service will be read from the file /etc/pam.d/service_name or, if
that file does not exist, from /etc/pam.conf.
Personal access tokens (PATs) are an alternative to using passwords for authentication to Enterprise Steam when using the API or the command line.
Note: Treat your tokens like passwords and keep them secret.
When working with the API, use tokens as environment variables instead of hardcoding them into your programs.
For security reasons, after you navigate off the page, you will not be able to see the token again.
When you generate a new token, any previously issued tokens will be revoked.
Click on Tokens under the API section to open the Personal Access Token page.
Click Generate New Token to generate and retrieve your token.
By default, the Users page shows all current Enterprise Steam users. (Note that you can also specify to show deactivated Enterprise Steam users as well.) This section describes how to add, edit, and deactivate users.
Admins can add users into the Enterprise Steam SQLite database from within the UI.
Click the Create User button on the Users Page.
Username: Enter the name of the user. Note that the name must match with a username in your YARN system.
Password/Confirm Password: Specify and confirm a password for the user.
Role: Specify the role(s) for this user. Note that Enterprise Steam ships with two default roles: admin and standard user.
YARN Queues: Optionally specify a list of YARN queues associated with this user.
Cluster Profile: Specify the cluster profile(s) that this user will be part of. Note that Enterprise Steam ships with a number of default cluster profiles.
Click Create User when you are done.
Upon successful completion, the new user will appear in the list of Enterprise Steam users.
On the Users page, click the Edit link beside the user you want to edit.
This opens the Edit User Details form.
Change the user’s roles or cluster profile.
You can also specify an authentication type of LDAP, Local, or SAML, and you can specify YARN queues for the user. Click Confirm when you are done.
Note: A message will display in the UI if you remove all roles from a user.
If a user is added with Local Authentication, then admins can reset the user’s password by clicking the Reset Local Password link for the desired user.
A new password will display at the top of the screen for approximately 5 seconds.
This new password should then be provided to the user so that he/she can log in to Enterprise Steam.
Note that this option is not available for users added with LDAP or SAML authentication.
There are just 2 roles in Enterprise Steam: regular user and admin.
Use this screen to map user groups to Enterprise Steam roles.
The user groups must be provided through your authentication service - see the Authentication configuration for more details.
By default, all incoming users are assigned the role of standard user and only the initial administrator is the admin.
On this screen you may map from user groups to steam roles.
First, type identity group name to the input field below desired access role header.
Value * serves as a wildcard representing any number of characters and can be used on its own to represent any group name.
Clicking on the plus button validates and maps group to the corresponding role.
Following rules apply:
input does not allow for duplicate groups names
group names are compared and stored case-insensitive
The Profiles page allow you to define individual cluster sizes and configurations. Admins can then give different users access to the different clusters by specifying a specific profile when launching a new cluster.
Enterprise Steam comes with these default profiles:
default-h2o: Default profile for H2O on Hadoop
default-sparkling-internal: Default profile for Sparkling Water on Hadoop in internal backend mode
default-sparkling-external: Default profile for Sparkling Water on Hadoop in external backend mode
default-driverless-kubernetes: Default profile for Driverless AI on Kubernetes
default-h2o-kubernetes: Default profile for H2O on Kubernetes
From this page, you can edit any of the default profiles, add additional profiles, copy profiles, and delete profiles.
On the Configurations page, click the Profiles option to open the Profiles page. This page shows a list of available profiles.
In the Create New Profile section of this page, enter a name for the new profile and select an available type. Click Create when you are ready. This opens the Creating Profiles form. Note that this form varies depending on the Type.
H2O Type
YARN Queues: Optionally specify a comma-separated list of YARN queues available for user of this profile. Leave empty if you want to let the user to specify this parameter when launching the cluster.
User groups: Optionally specify a comma-separated list of User groups that will have access to this cluster. Enter * to allow any User user to access this profile. Leave empty if you want to manually assign each cluster profile to each user.
Cluster Limit Per User: Specify the maximum number of clusters that a user with this profile can launch.
Disable automatic cluster sizing: Enable to use cluster launch screen prior to 1.7.0 release. Enabling this option will disable automatic cluster sizing feature.
Enable cluster saving: Allow users to save cluster data. Data is saved to the HDFS home directory of the user.
Hadoop Launch Options: Command line launch options applied to hadoop for all clusters launched with this profile.
H2O Launch Options: Command line launch options applied to h2o for all clusters launched with this profile.
Environment Variables: Environment variables set for all clusters launched with this profile.
H2O Nodes: Specify the minimum, maximum, and default number of allowed H2O nodes (cluster size) for this profile.
H2O Node Memory (GB): Specify the minimum, maximum, and default amount of memory to allocate to H2O for each node (in GB).
H2O Node Threads: Specify the minimum, maximum, and default number of H2O threads (CPUs) to use for each node. 0 defaults to using all CPUs on the host.
H2O Node Extra Memory (%): Specify the minimum, maximum, and default extra memory for internal JVM use outside of the Java heap. (This corresponds to the extramempercent Hadoop launch parameter.)
Maximum Idle Time (hrs): Specify the minimum, maximum, and default idle time in hours.
Maximum Uptime (hrs): Specify the minimum, maximum, and default uptime in hours.
YARN Virtual Cores: Specify the minimum, maximum, and default number of YARN virtual cores.
Sparkling Water - Internal Backend Type
YARN Queues: Optionally specify a comma-separated list of YARN queues available for user of this profile. Leave empty if you want to let the user to specify this parameter when launching the cluster.
User groups: Optionally specify a comma-separated list of User groups that will have access to this cluster. Enter * to allow any User user to access this profile. Leave empty if you want to manually assign each cluster profile to each user.
Cluster Limit Per User: Specify the maximum number of clusters that a user with this profile can launch.
Python Environments: Select the environment(s) that will be associated with this profile. This list of available environments comes from the Python Environments page.
Spark Properties: Optionally enter additional Spark properties for this cluster. Specify one property per line using ‘key=value’ format.
Disable automatic cluster sizing: Enable to use cluster launch screen prior to 1.7.0 release. Enabling this option will disable automatic cluster sizing feature.
Enable cluster saving: Allow users to save cluster data. Data is saved to the HDFS home directory of the user.
Driver Cores: Specify the minimum, maximum, and default number of driver cores.
Driver Memory (GB): Specify the minimum, maximum, and default driver memory (in GB).
Number of Executors: Specify the minimum, maximum, and default number of executors.
Executor Cores: Specify the minimum, maximum, and default number of cores per executor.
Executor Memory: Specify the minimum, maximum, and default amount of executor memory per node (in GB).
H2O Node Threads: Specify the minimum, maximum, and default number of H2O threads (CPUs) to use for each node. 0 defaults to using all CPUs on the host.
Startup Timeout (seconds): Specify the minimum, maximum, and default startup timeout in seconds. The cluster will terminate if it cannot start within this time.
Sparkling Water - External Backend Type
YARN Queues: Optionally specify a comma-separated list of YARN queues available for user of this profile. Leave empty if you want to let the user to specify this parameter when launching the cluster.
User groups: Optionally specify a comma-separated list of User groups that will have access to this cluster. Enter * to allow any User user to access this profile. Leave empty if you want to manually assign each cluster profile to each user.
Cluster Limit Per User: Specify the maximum number of clusters that a user with this profile can launch.
Python Environments: Select the environment(s) that will be associated with this profile. This list of available environments comes from the Python Environments page.
Spark Properties: Optionally enter additional Spark properties for this cluster. Specify one property per line using ‘key=value’ format.
Disable automatic cluster sizing: Enable to use cluster launch screen prior to 1.7.0 release. Enabling this option will disable automatic cluster sizing feature.
Enable cluster saving: Allow users to save cluster data. Data is saved to the HDFS home directory of the user.
Driver Cores: Specify the minimum, maximum, and default number of driver cores.
Driver Memory (GB): Specify the minimum, maximum, and default driver memory (in GB).
Number of Executors: Specify the minimum, maximum, and default number of executors.
Executor Cores: Specify the minimum, maximum, and default number of cores per executor.
Executor Memory: Specify the minimum, maximum, and default amount of executor memory per node (in GB).
H2O Nodes: Specify the minimum, maximum, and default number of allowed H2O nodes (cluster size) for this profile.
H2O Node Memory (GB): Specify the minimum, maximum, and default amount of memory to allocate to H2O for each node (in GB).
H2O Node Threads: Specify the minimum, maximum, and default number of H2O threads (CPUs) to use for each node. 0 defaults to using all CPUs on the host.
Startup Timeout (seconds): Specify the minimum, maximum, and default startup timeout in seconds. The cluster will terminate if it cannot start within this time.
Driverlesss AI - Kubernetes
This profile type allows you to set up a profile resource limit for some of the parameters. This value is set to no limit by default. Setting a value will limit combined resource usage by instances that started with this profile to the specified value.
User groups: Optionally specify a comma-separated list of User groups that will have access to this cluster. Enter * to allow any User user to access this profile. Leave empty if you want to manually assign each cluster profile to each user.
Instance Limit Per User: Limit the amount of Driverless AI instances a single user can launch with this profile.
License Manager Project Name: Name of the project that will be used when contacting License Manager.
Config.toml override: Enter additional Driverless AI configuration in TOML format that will be applied over the standard config.toml.
Allow user override on launch: Allow users to override allow-listed Driverless AI configuration in TOML format.
Allow-list for instance launch: Enter additional Driverless AI configuration in TOML format that will be available to user instances for override. Default value must be provided for each property (e.g. check_distribution_shift_drop = “auto”).
Node Selector: Enter Kubernetes labels (using ‘key: value’ format, one per line). Instances will be scheduled only on Kubernetes nodes with these labels. The most common usage is one key-value pair. Leave empty to use any node.
Extra Environmental Variables: Enter extra environmental variables passed to the DriverlessAI image (using ‘NAME=value’ format, one per line).
Custom pod labels: Extra Kubernetes labels attached to pods of this profile. Use ‘key: value’ format, one per line.
Custom pod annotations: Extra Kubernetes annotations attached to pods of this profile. Use ‘key: value’ format, one per line.
Pod tolerations: DAI pods tolerations. Provide text in Kubernetes readable YAML format. Example value:
Init containers: Initialization containers belonging to the DAI pod. Provide text in Kubernetes readable YAML format. See Using Kubernetes Init Containers for details.
Volume Mounts: Decide which volume mounts are available to this profile.
Number of CPUs: Specify the minimum, maximum, default number and optionally profile limit of CPUs.
Number of GPUs: Specify the minimum, maximum, default number and optionally profile limit of GPUs.
Memory (GB): Specify the minimum, maximum, default amount and optionally profile limit of memory in GB.
Storage (GB): Specify the minimum, maximum, default amount and optionally profile limit of storage in GB.
Maximum Idle Time (hrs): Specify the minimum, maximum, and default idle time in hours.
Maximum Uptime (hrs): Specify the minimum, maximum, and default uptime in hours.
Startup Timeout (seconds): Specify the minimum, maximum, and default startup timeout in seconds. The instance will fail if it cannot start within this time.
H2O - Kubernetes
User groups: Optionally specify a comma-separated list of User groups that will have access to this cluster. Enter * to allow any User user to access this profile. Leave empty if you want to manually assign each cluster profile to each user.
Cluster Limit Per User: Limit the amount of H2O clusters a single user can launch with this profile.
H2O Options: Extra command line options passed to H2O
Java Options: Extra command line options passed to Java
Node Selector: Enter Kubernetes labels (using ‘key: value’ format, one per line). Clusters will be scheduled only on Kubernetes nodes with these labels. The most common usage is one key-value pair. Leave empty to use any node.
Custom pod labels: Extra Kubernetes labels attached to pods of this profile. Use ‘key: value’ format, one per line.
Custom pod annotations: Extra Kubernetes annotations attached to pods of this profile. Use ‘key: value’ format, one per line.
Pod tolerations: H2O pods tolerations. Provide text in Kubernetes readable YAML format. Example value:
Init containers: Initialization containers belonging to the DAI pod. Provide text in Kubernetes readable YAML format. See Using Kubernetes Init Containers for details.
Volume Mounts: Decide which volume mounts are available to this profile.
Number of Nodes: Specify the minimum, maximum, default number and optionally profile limit for number of nodes.
Number of CPUs: Specify the minimum, maximum, default number and optionally profile limit of CPUs per node.
Number of GPUs: Specify the minimum, maximum, default number and optionally profile limit of GPUs per node.
Memory (GB): Specify the minimum, maximum, default amount and optionally profile limit of memory per node in GB.
Maximum Idle Time (hrs): Specify the minimum, maximum, and default idle time in hours.
Maximum Uptime (hrs): Specify the minimum, maximum, and default uptime in hours.
Click Save when you are done.
Upon completion, the new profile will appear in the Existing Profile section. If necessary, you can update or delete existing profiles directly from this section.
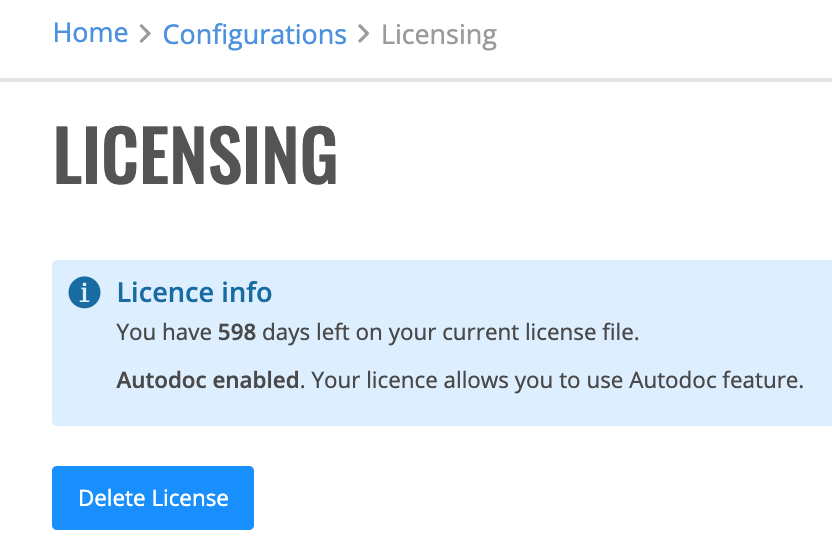
The Licensing page shows you how long you have left on your current license. If your license expires, you will be prompted to enter a new Enterprise Steam license.
By default, a self-signed TLS certificate will be autogenerated by Steam. It is advised to change this to a valid secure certificate.
Specify the base URL for all paths.
Specify the certificate file used by both the Steam process and Steam’s haproxy process.
Specify the private key PEM file used by both the Steam process and Steam’s haproxy process.
Specify whether to set the Secure cookie flag. Only recommended when TLS is enabled.
Specify the server strict transport value. The HTTP Strict-Transport-Security response header is a security feature that lets a web site tell browsers that it should only be communicated with using HTTPS instead of using HTTP. This value is in seconds, and the default value is equivalent to 20 years (max-age=631135819). Leave this empty to disable this setting.
Specify the server X-XSS protection value. The HTTP X-XSS-Protection response header is a feature of Internet Explorer, Chrome and Safari that stops pages from loading when they detect reflected cross-site scripting (XSS) attacks. When this value is set to 1 and a cross-site scripting attack is detected, the browser will sanitize the page (remove the unsafe parts). This value defaults to 0
Specify the Server Content Security Policy (CSP). CSP is an added layer of security that helps to detect and mitigate certain types of attacks, including Cross Site Scripting (XSS) and data injection attacks. This defaults to:
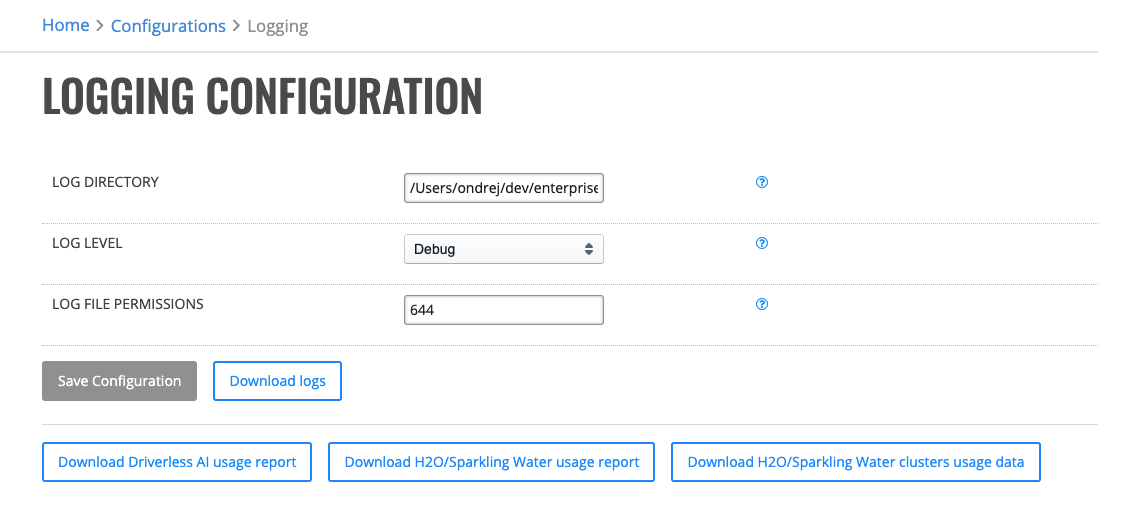
This page allows you to configure or edit Enterprise Steam logging information and download existing logs.
You can also download usage report for H2O, Sparkling Water and Driverless AI.
Specify the Log Directory. Steam will save application logs into this directory.
Specify the Log Level. The Steam log level can be set to Panic, Fatal, Error, Warning, Info, or Debug.
Specify the Log File Permissions. This represents the Unix permission of the log files and defaults to 644.
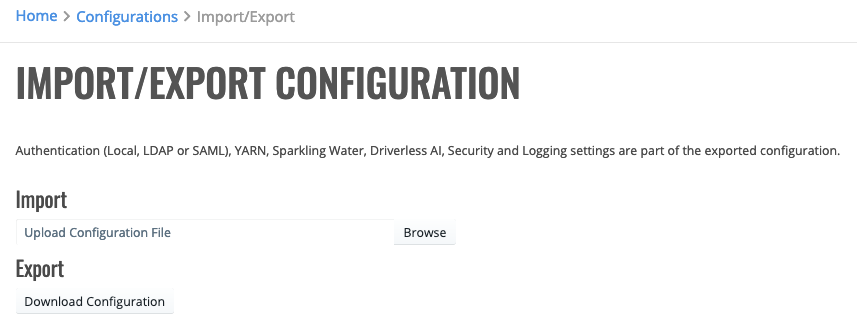
This page allows you to import or export current configuration for authentication, YARN, Sparkling Water, Driverless AI, security, and logging.
You can import a new configuration file by clicking the Browse button and navigating to the configuration file. Or you can download an existing configuration file to your local machine.