H2O on Kubernetes
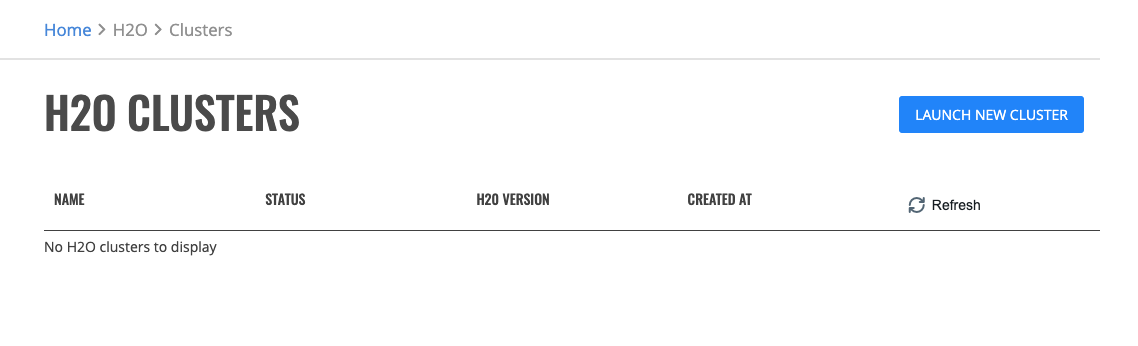
The H2O page shows clusters created by the current user, the state of the cluster, and the cluster creation date. From this page, you can launch a new H2O cluster, view the details of existing clusters, or delete a cluster.
Note: When Enterprise Steam is started for the first time, no clusters will appear in the UI.
Launch Cluster
Select Launch New Cluster.
Select a Cluster Profile from the dropdown menu to use when setting up the new cluster. Cluster profiles are configured by the Steam administrator and provide the allowed minimum, maximum and default values for each options in a cluster profile.
Configure the new cluster.
Cluster Name: Specify a name for this cluster.
H2O Version: Specify the H2O version to use.
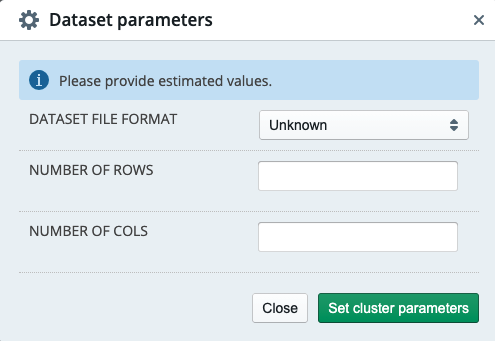
Dataset parameters: Optionally provide estimated dataset parameters described in section below. Cluster parameters will be preset to accommodate your dataset within selected profile limits.
Number of Nodes: Specify the number of nodes.
Number of CPUs: Specify the number of CPUs per node.
Number of GPUs: Specify the number of GPUs per node.
Memory per Node [GB]: Specify the amount of memory per node in GB.
Maximum Idle Time [HRS]: Specify the maximum number of hours that the cluster can be idle before shutting down.
Maximum Uptime [HRS]: Specify the maximum number of hours that the cluster can be running.
Startup Timeout [SEC]: Specify the timeout duration (in seconds) to wait for the cluster to form before failing.
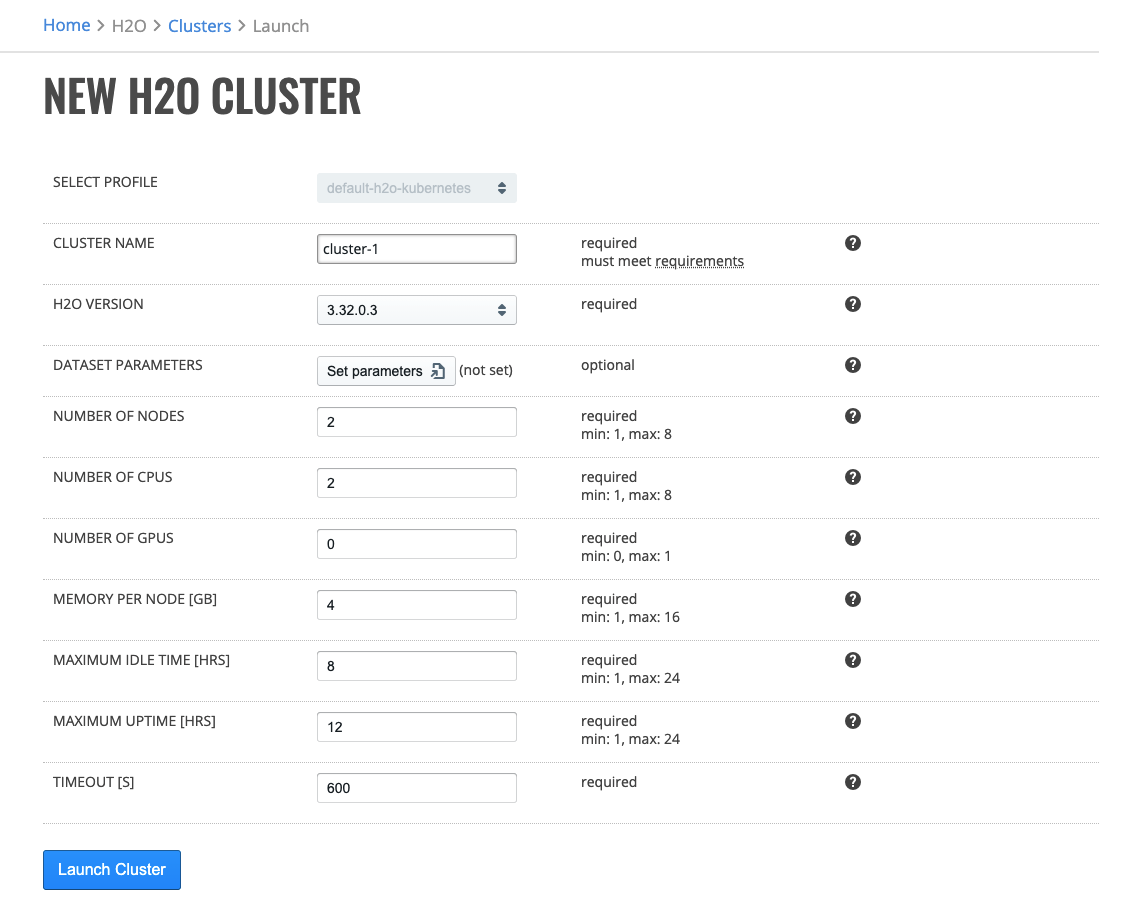
Click the Launch New Cluster button to launch a new cluster.
Upon successful validation of parameters, the cluster will begin starting and you will be taken back to the H2O on Kubernetes page. It takes up to 5 minutes for H2O cluster to launch.
Running Cluster
Once the H2O cluster is up and running you can access H2O Flow or manage the cluster through the Actions button.
Accessing H2O Flow
Once the cluster has started you may click on the cluster name. This opens H2O Flow in a new tab.
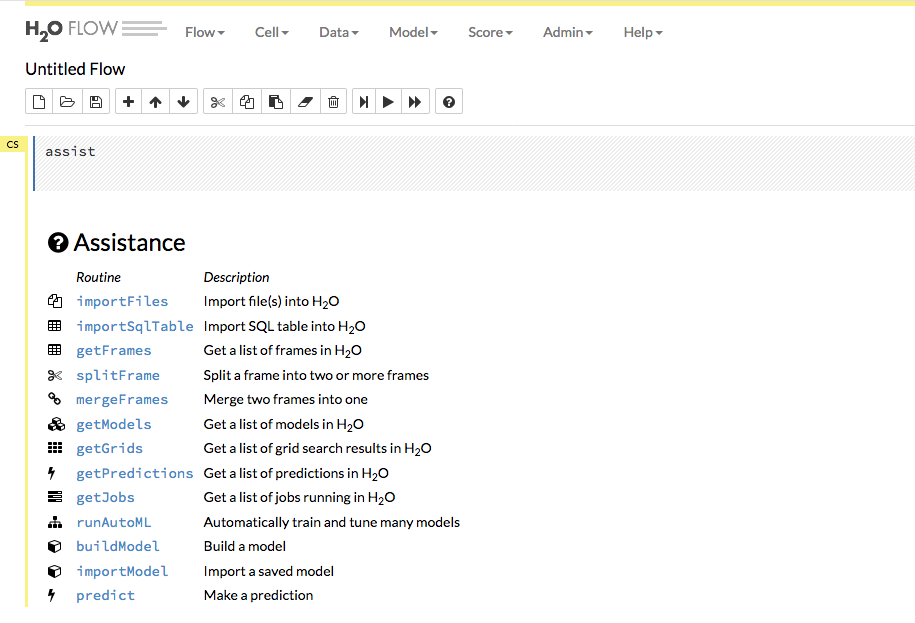
Use the menu items at the top to import/upload your data into Flow and to build and score models.
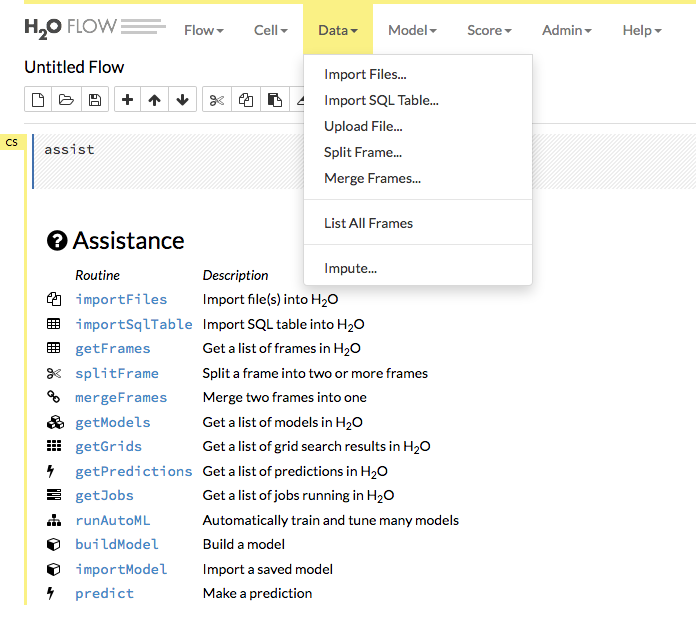
The Data dropdown allows you to import or upload a dataset, import SQL table, split or merge frames, and impute data.
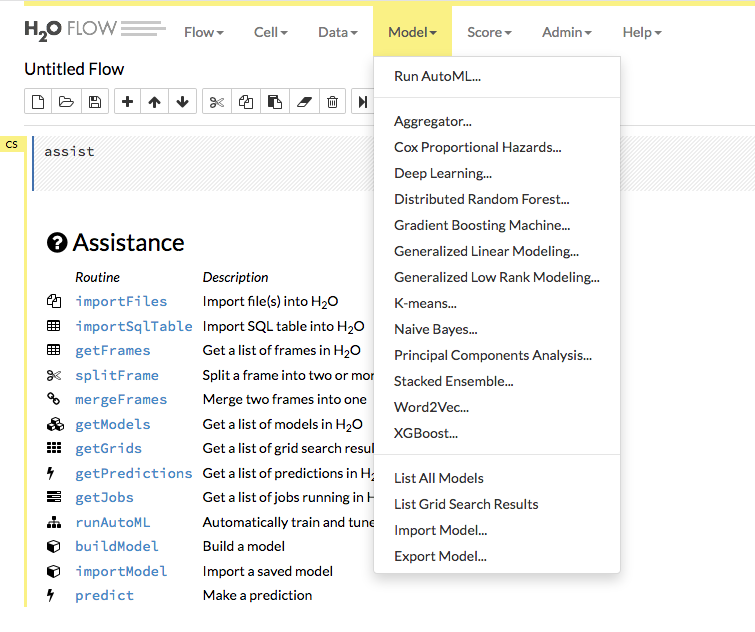
Use the Model dropdown to select an algorithm and begin building models or to import/export models.
Refer to the H2O Flow documentation for more information on how to use H2O Flow.
Cluster Details
To view the details of a cluster, click the Actions > Detail option. The cluster detail displays the following information:
Cluster Events
To view the events of a cluster, click the Actions > Events option.
Cluster Logs
You can see H2O logs by clicking on the Actions > Logs option. On this page you may download a complete log bundle for troubleshooting.
Terminating Clusters
To stop a Running cluster, click the Actions > Terminate option. When the confirmation window appears, click the Yes, Terminate button to stop the cluster.