Admin User Management
Manage user accounts, view user activity, and transfer or delete user data in Driverless AI.
Note
You must have administrator privileges to access this feature.
Overview
The Admin User Management Panel provides tools to manage user accounts and their associated entities, including projects, datasets, experiments, and deployments. Use this page to:
View user details and activity summaries
Manage user entities (datasets, experiments, deployments, and more)
Transfer entities between users
Delete individual entities or entire user accounts
Access user management
To open the User Management Panel:
In the top navigation bar, click Administration.

Select USER MANAGEMENT.
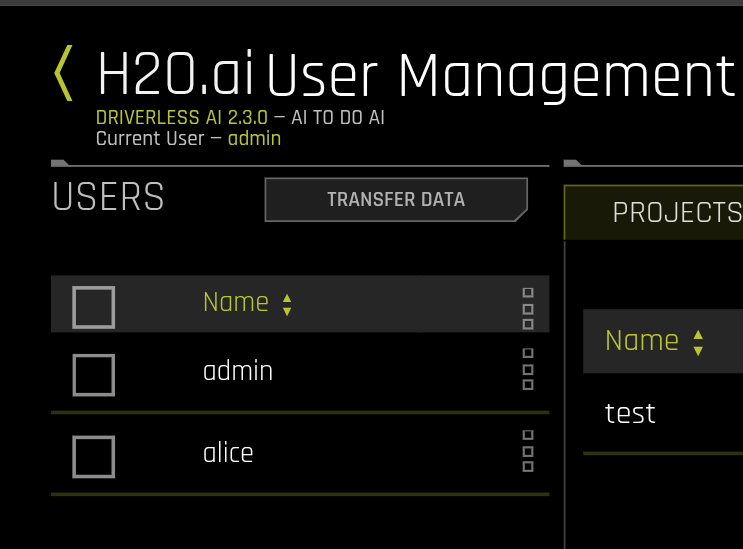
The User Management Panel displays a list of users on the left and an entity panel on the right. The current logged-in user is shown at the top of the page.
Page layout
The User Management Panel has two main sections:
USERS panel
The left panel lists all user accounts. Each entry shows:
Username
Checkbox for selecting multiple users
Actions menu for user-specific operations
Note
The Transfer Data button appears at the top of this panel when exactly two users are selected and both are logged out.
Entity panel
The right panel displays entities for the selected user across eight tabs:
Projects: Projects created by the user
Datasets: Uploaded or generated datasets
AutoViz: AutoViz visualizations
Experiments: Experiments and their results
Diagnostics: Model diagnostic reports
MLI: Machine Learning Interpretability reports
Recipes: Custom recipes
Deployments: Deployments created by the user
Each entity shows relevant details such as name, size, status, and creation date. Click column headers to sort.

View user details
To view information about a user:
In the USERS panel, click the actions menu next to the username.
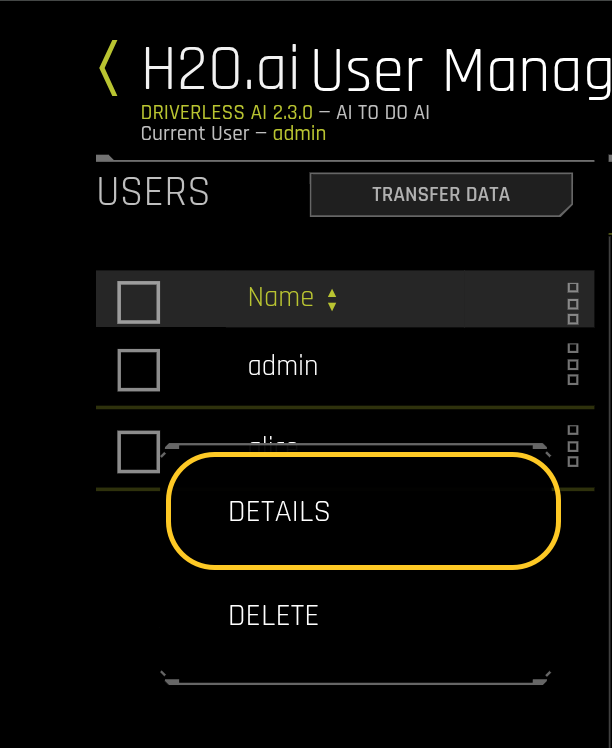
Select DETAILS.
The User Details dialog displays:
Username: Login name
Is logged in: Current login status (true/false)
Created: Account creation timestamp
User Directory: Path to user’s working directory
Directory size: Total size of user’s directory in bytes
User Insights: Activity summary showing counts for:
Projects
Datasets
Visualizations
Experiments
Model Diagnostics
Interpretations
Custom recipes
Deployments
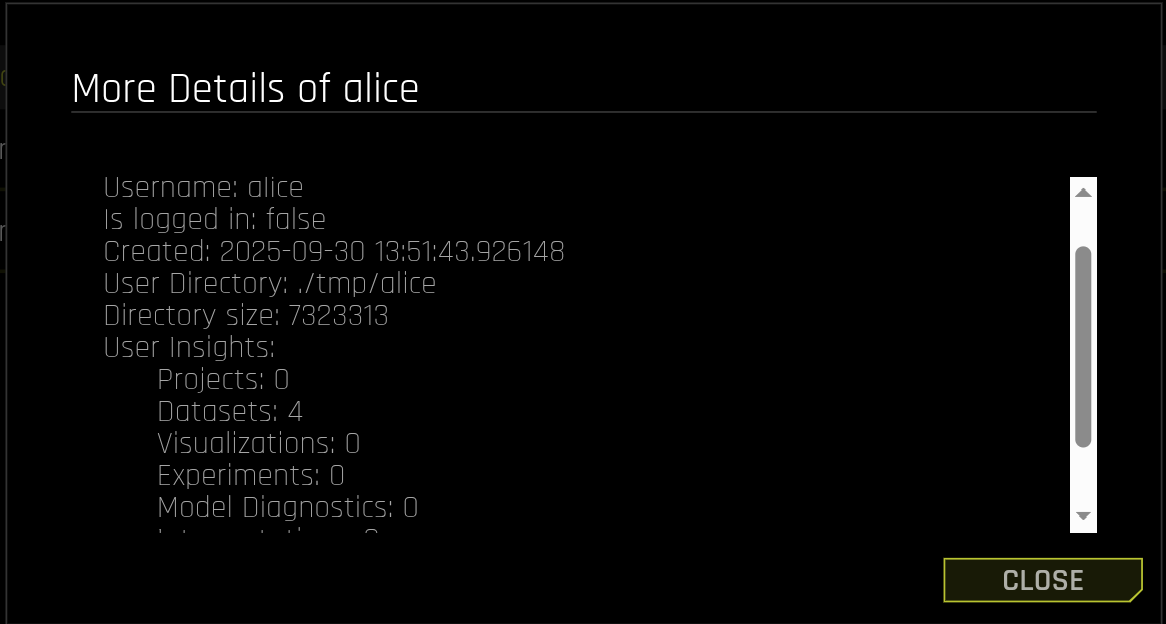
Click CLOSE when finished.
Manage user entities
View entities
To view a user’s entities:
Click anywhere in the user’s row in the USERS panel.
The Entity panel updates to show that user’s entities.
Click tabs at the top of the Entity panel to switch between entity types.
Delete entities
You can delete individual entities without removing the user account.
Note
Projects cannot be deleted individually. All other entity types can be deleted.
To delete an entity:
Select a user from the USERS panel.
Open the appropriate entity tab in the Entity panel.
Click the actions menu next to the entity.
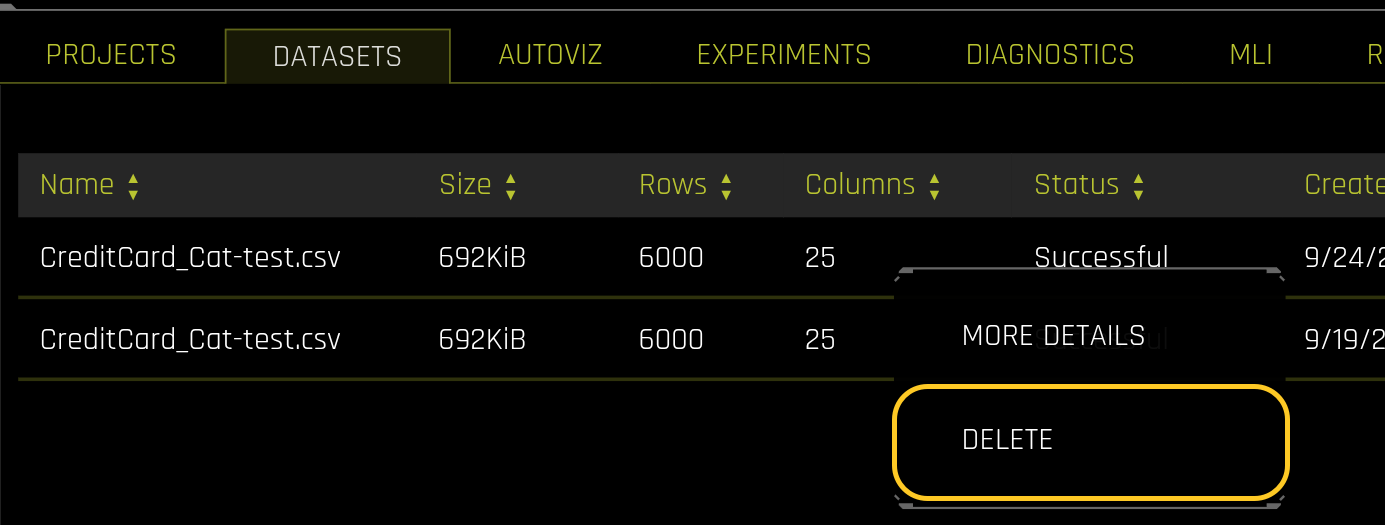
Select DELETE to confirm the deletion.
Caution
Deletion is permanent and cannot be undone. Back up any important data before proceeding.
Transfer data between users
Transfer all entities from one user to another. This is useful for:
Consolidating data from multiple accounts
Preserving work before deleting an account
Reassigning projects to different users
Note
Prerequisites
Before transferring data:
Select exactly two users
Verify both users have been logged out
Confirm you have administrator privileges
Transfer process
To transfer data:
In the USERS panel, select exactly two users using their checkboxes.
Verify neither user is logged in. The Transfer Data button enables only when both users are logged out.
Click TRANSFER DATA.
In the Transfer Data dialog:
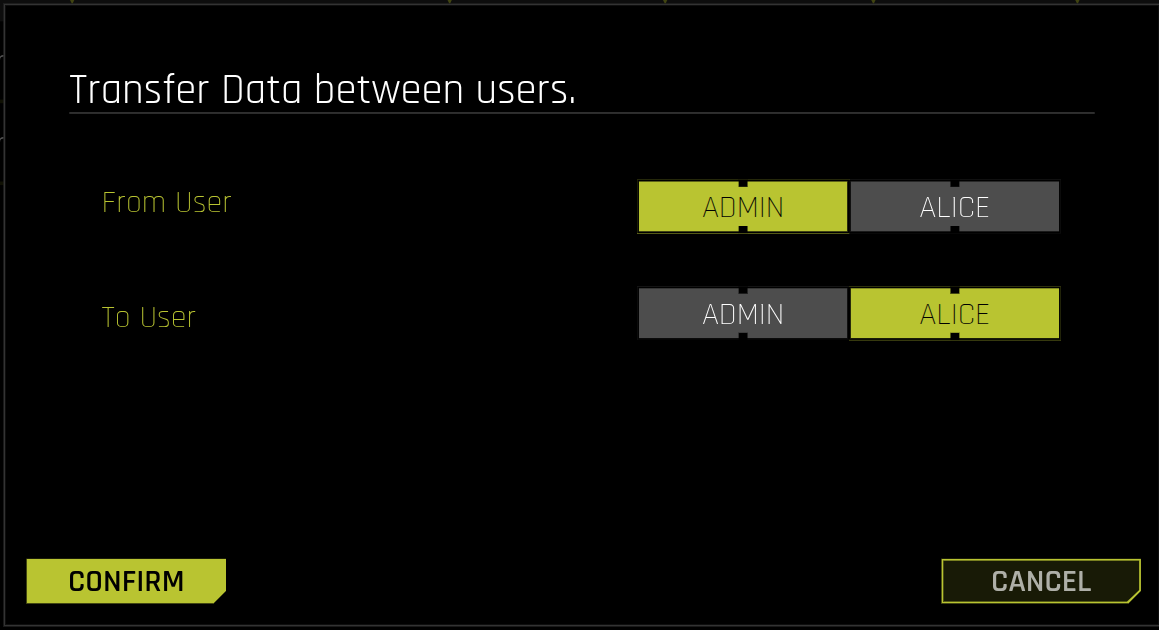
Use the From User toggle to select the source user.
Use the To User toggle to select the destination user.
Review your selections.
Click CONFIRM.
Wait for the transfer to complete.
Important
All entities move from the source user to the destination user
Both users must be logged out
The source account remains but contains no entities after transfer
Large transfers may take several minutes
Delete a user account
Deleting a user account permanently removes the user and all associated data.
Caution
User deletion is permanent and cannot be undone. All entities (datasets, experiments, models, deployments) are permanently deleted.
Before you begin
Before deleting a user:
Transfer any data that needs to be retained
Verify the account is no longer needed
Confirm all important data is backed up
Ensure the user is logged out
Delete a user
To delete a user account:
In the USERS panel, click the actions menu next to the username.
Select DELETE.
Review the warning in the confirmation dialog:
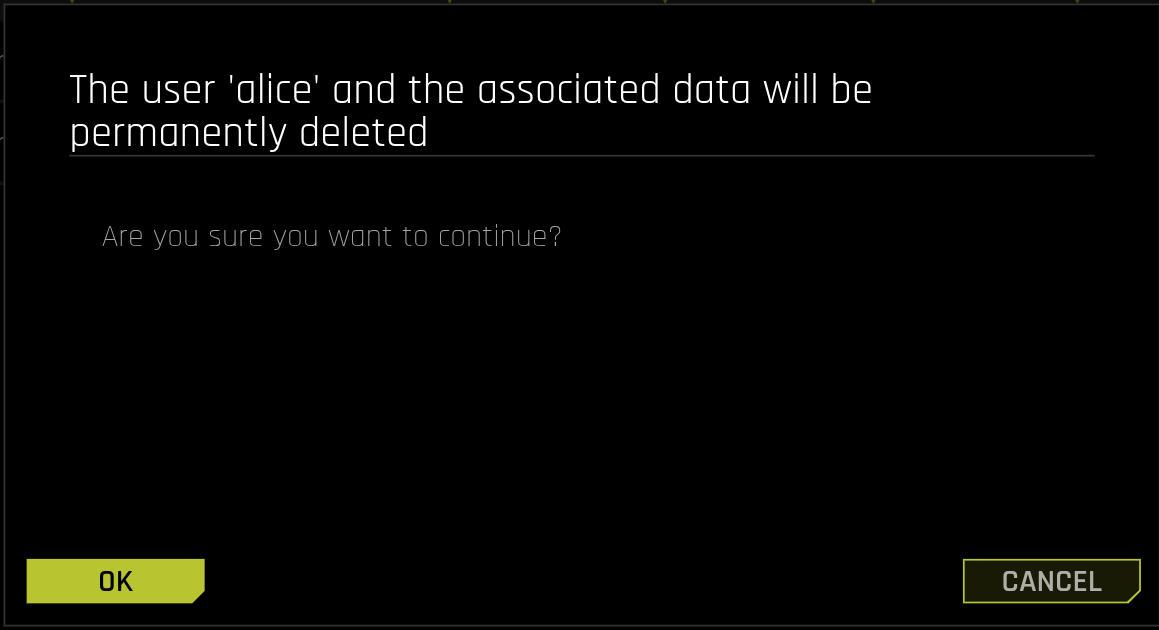
Click OK to proceed, or CANCEL to abort.
Troubleshooting
Cannot delete user
If you encounter an error when deleting a user:
Verify the user is logged out
Confirm you have administrator privileges
Contact your system administrator if the issue persists
Entities not visible
If the Entity panel appears empty:
Verify you selected a user in the USERS panel (not just the checkbox)
Check all entity tabs, as entities may exist in different tabs
Refresh the page
Contact your system administrator if the issue persists