Roles and Permissions
Overview
The Roles and Permissions page provides a structured approach to Role-Based Access Control (RBAC) that lets administrators define and manage user access based on predefined roles. Each role is associated with a set of permissions, ensuring that users can perform only the actions permitted within their assigned roles.
Additionally, the Roles and Permissions page allows administrators to assign system roles (roles) to an IdP role, providing seamless integration with external identity providers. An Identity Provider (IdP) system manages user identities and authentication, letting organizations implement Single Sign-On (SSO) and centralized access control across multiple applications. This integration ensures consistent role management and secure user access across all connected services.
A set of available permissions corresponds to Jobs. For example, the following two actions are Jobs, which in turn are permissions that can be given to a role:
- Add a Collection
- Delete a Collection
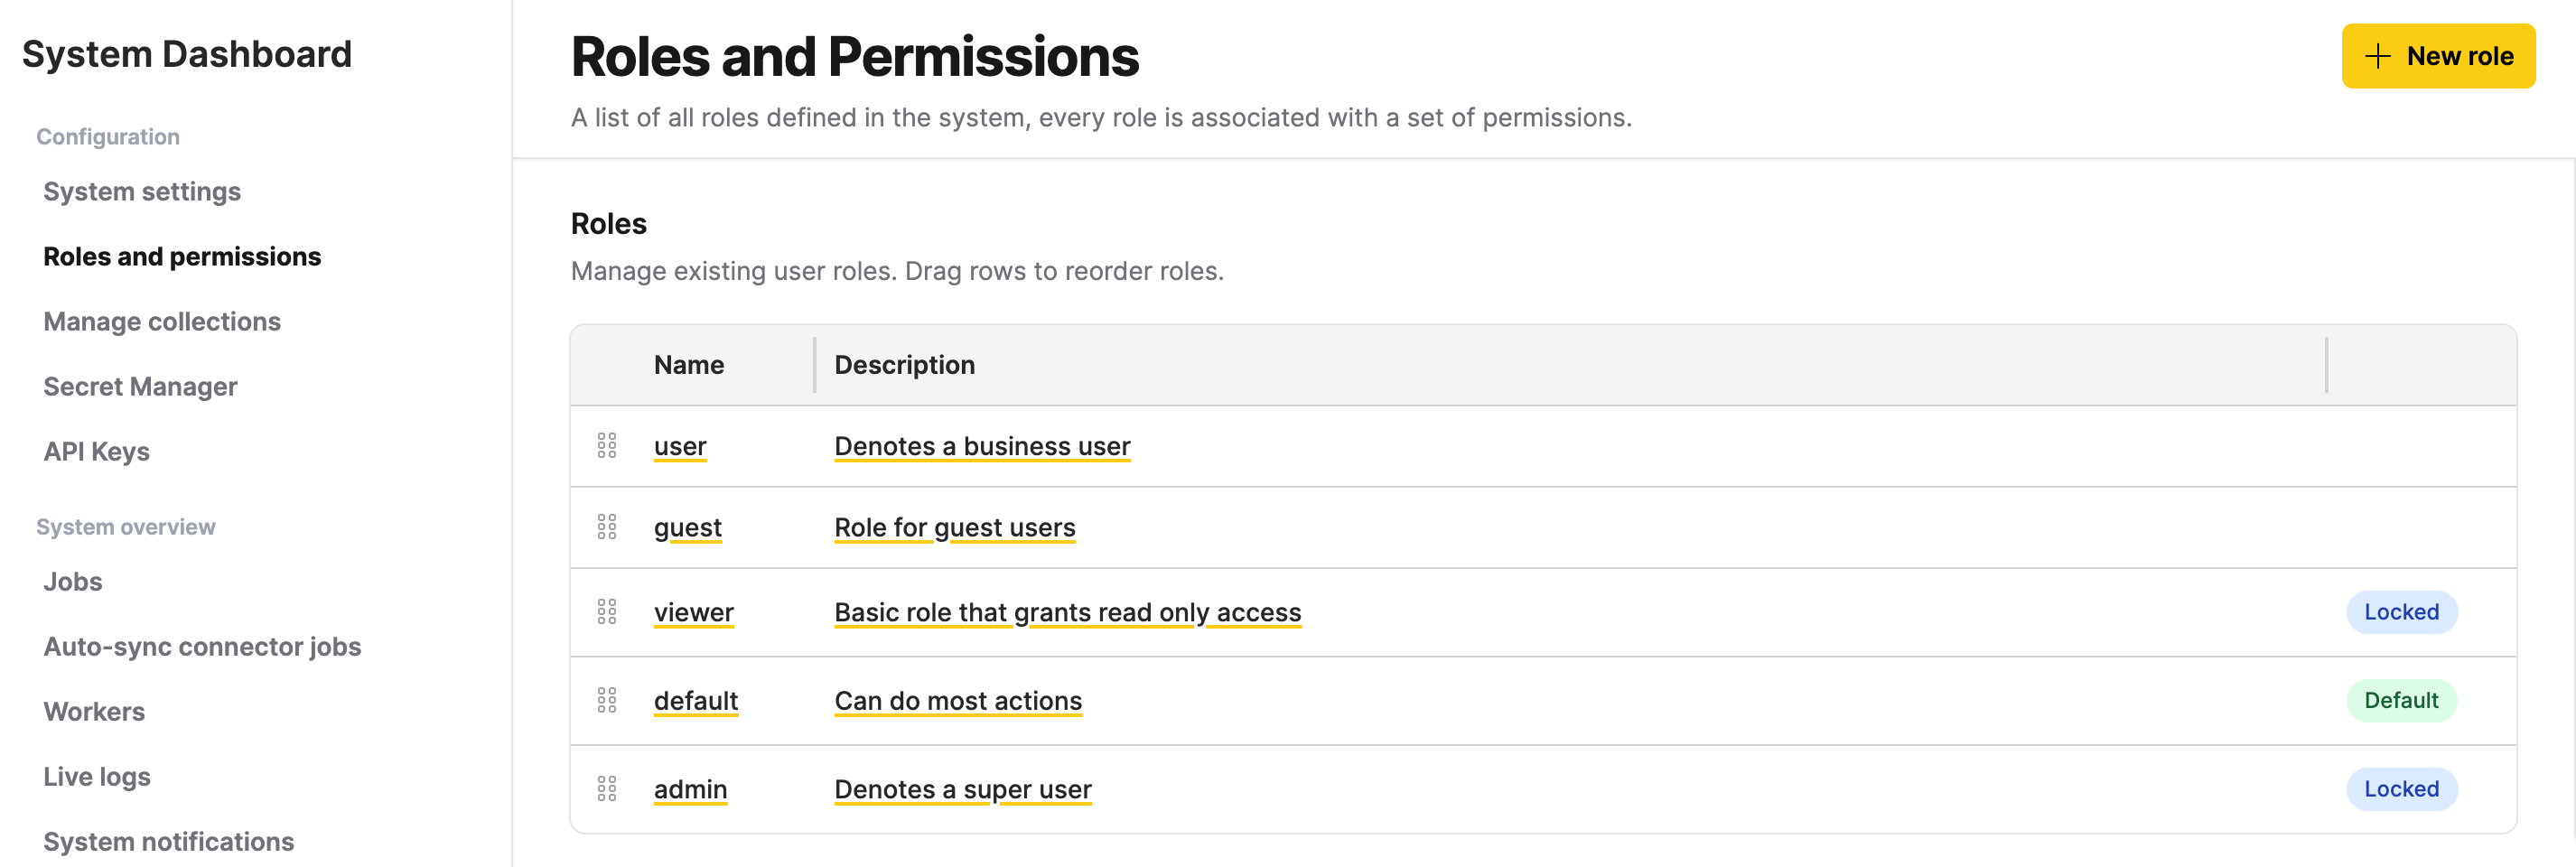
Access the Roles and Permissions page
To access the Roles and Permissions page:
- In Enterprise h2oGPTe, click Account Circle.
- In the System Dashboard navigation menu, click Roles and permissions.
Roles
Create a role
To create a new role:
- In Enterprise h2oGPTe, click Account Circle.
- Select System Dashboard.
- In the System Dashboard navigation menu, click Roles and permissions.
- Click + New role.
- In the Role name box, enter a name for the new role.
- Optional: In the Description box, enter a description for the new role.
- In the Permissions section, select the permissions for the new role.
note
To learn about the available permissions, see Permissions.
- Click + Create.

Update a role
To update a role:
- In Enterprise h2oGPTe, click Account Circle.
- Select System Dashboard.
- In the System Dashboard navigation menu, click Roles and permissions.
- In the Roles table, click the role you want to update.
- Update the previously defined permissions.
- Click Update.
Delete a role
To delete a role:
- In Enterprise h2oGPTe, click Account Circle.
- Select System Dashboard.
- In the System Dashboard navigation menu, click Roles and permissions.
- In the Roles table, click the role you want to delete.
- Click Delete.
- In the Delete role card, click Delete.
Manage the default role
The default role is automatically assigned to every new non-guest user when they sign in for the first time. It determines which permissions a newly registered user receives without any administrator intervention.
Enterprise h2oGPTe includes a built-in role named default that has the most common permissions pre-enabled and is assigned to new users on first login.
Identify the default role
In the Roles table, the role currently used as the default displays a green default badge. System roles such as admin and viewer display a blue locked badge and cannot be deleted.
Change the permissions granted to new users
Requires the Manage roles permission.
To change which permissions new users receive on first login, edit the role that is currently marked as the default:
- In Enterprise h2oGPTe, click Account Circle.
- Select System Dashboard.
- In the System Dashboard navigation menu, click Roles and permissions.
- In the Roles table, click the role with the green default badge.
- Adjust the Permissions as needed: remove any permissions that should not be granted to new users automatically, and add any that should.
- Click Update.
Changes to the default role's permissions take effect immediately for all users who hold that role. To assign the default role to existing users who don't have it, use the Assign a role to a user workflow below.
Constraints
- The role currently marked as the default is protected from deletion.
- Guest users are never assigned the default role; they always receive the built-in
guestrole. - The UI does not support changing which role is designated as the default. To designate a different role, contact your system administrator.
Assign a role to a user
To assign a (created) role to a user:
- In Enterprise h2oGPTe, click Account Circle.
- Select System Dashboard.
- In the System Dashboard navigation menu, click Roles and permissions.
- In the User Permissions table, locate/search for the user you want to assign a role to.
- In the Roles list, select a role.
IdP roles
Assign a role to an IdP role
To assign a (created) role to an IdP role:
- In Enterprise h2oGPTe, click Account Circle.
- Select System Dashboard.
- In the System Dashboard navigation menu, click Roles and permissions.
- Click + Add role mapping.
- In the IDP Role Name box, enter an IdP role name.
caution
Enter a valid existing IdP role name.
- In the Optional description box, enter a description for the IdP role.
- Click Add.
- In the IDP Roles to Internal Roles Mapping table, locate/search for the IdP role you want to assign a role.
- In the Roles list, select a role.
note
To learn about the available permissions, see Permissions.
Delete an assigned role to an IdP role
To delete an assigned role to an IdP role:
- In Enterprise h2oGPTe, click Account Circle.
- Select System Dashboard.
- In the System Dashboard navigation menu, click Roles and permissions.
- In the IDP Roles to Internal Roles Mapping table, click the checkbox of the assigned role to an IdP role you want to delete.
- Click Delete.
- In the Are you sure? box, click Delete.
Permissions
Permissions are organized into 16 categories: Admin, Display, Collections, Chats, Documents, Prompt Templates, Agents, Custom Agents, Custom Agent Tools, API Keys, Data Connectors, Document AI, Memory Blocks, Scheduled Tasks, AI Assistants, and Forums.
When creating or editing a role, select the permissions you want to assign from these categories in the Permissions section of the role editor.
For the complete permissions catalog with identifiers, per-role defaults, and API management, see Roles and Permissions Reference.
- Submit and view feedback for this page
- Send feedback about Enterprise h2oGPTe to cloud-feedback@h2o.ai