Scheduled Tasks
Use scheduled tasks to automate chat completions and agent workflows. You can schedule prompts to run once at a specific time, on a fixed interval, or on a daily, weekly, or monthly recurring schedule.
In the Enterprise h2oGPTe navigation menu, click Scheduled Tasks.
Viewing scheduled tasks requires the h2ogpte/display/scheduled_tasks permission. Creating, editing, and deleting tasks require the h2ogpte/scheduled_task/create, h2ogpte/scheduled_task/edit, and h2ogpte/scheduled_task/delete permissions respectively. Administrators with the h2ogpte/scheduled_task/manage permission can manage all users' tasks. To configure role permissions, see Roles and Permissions.
Tasks tab
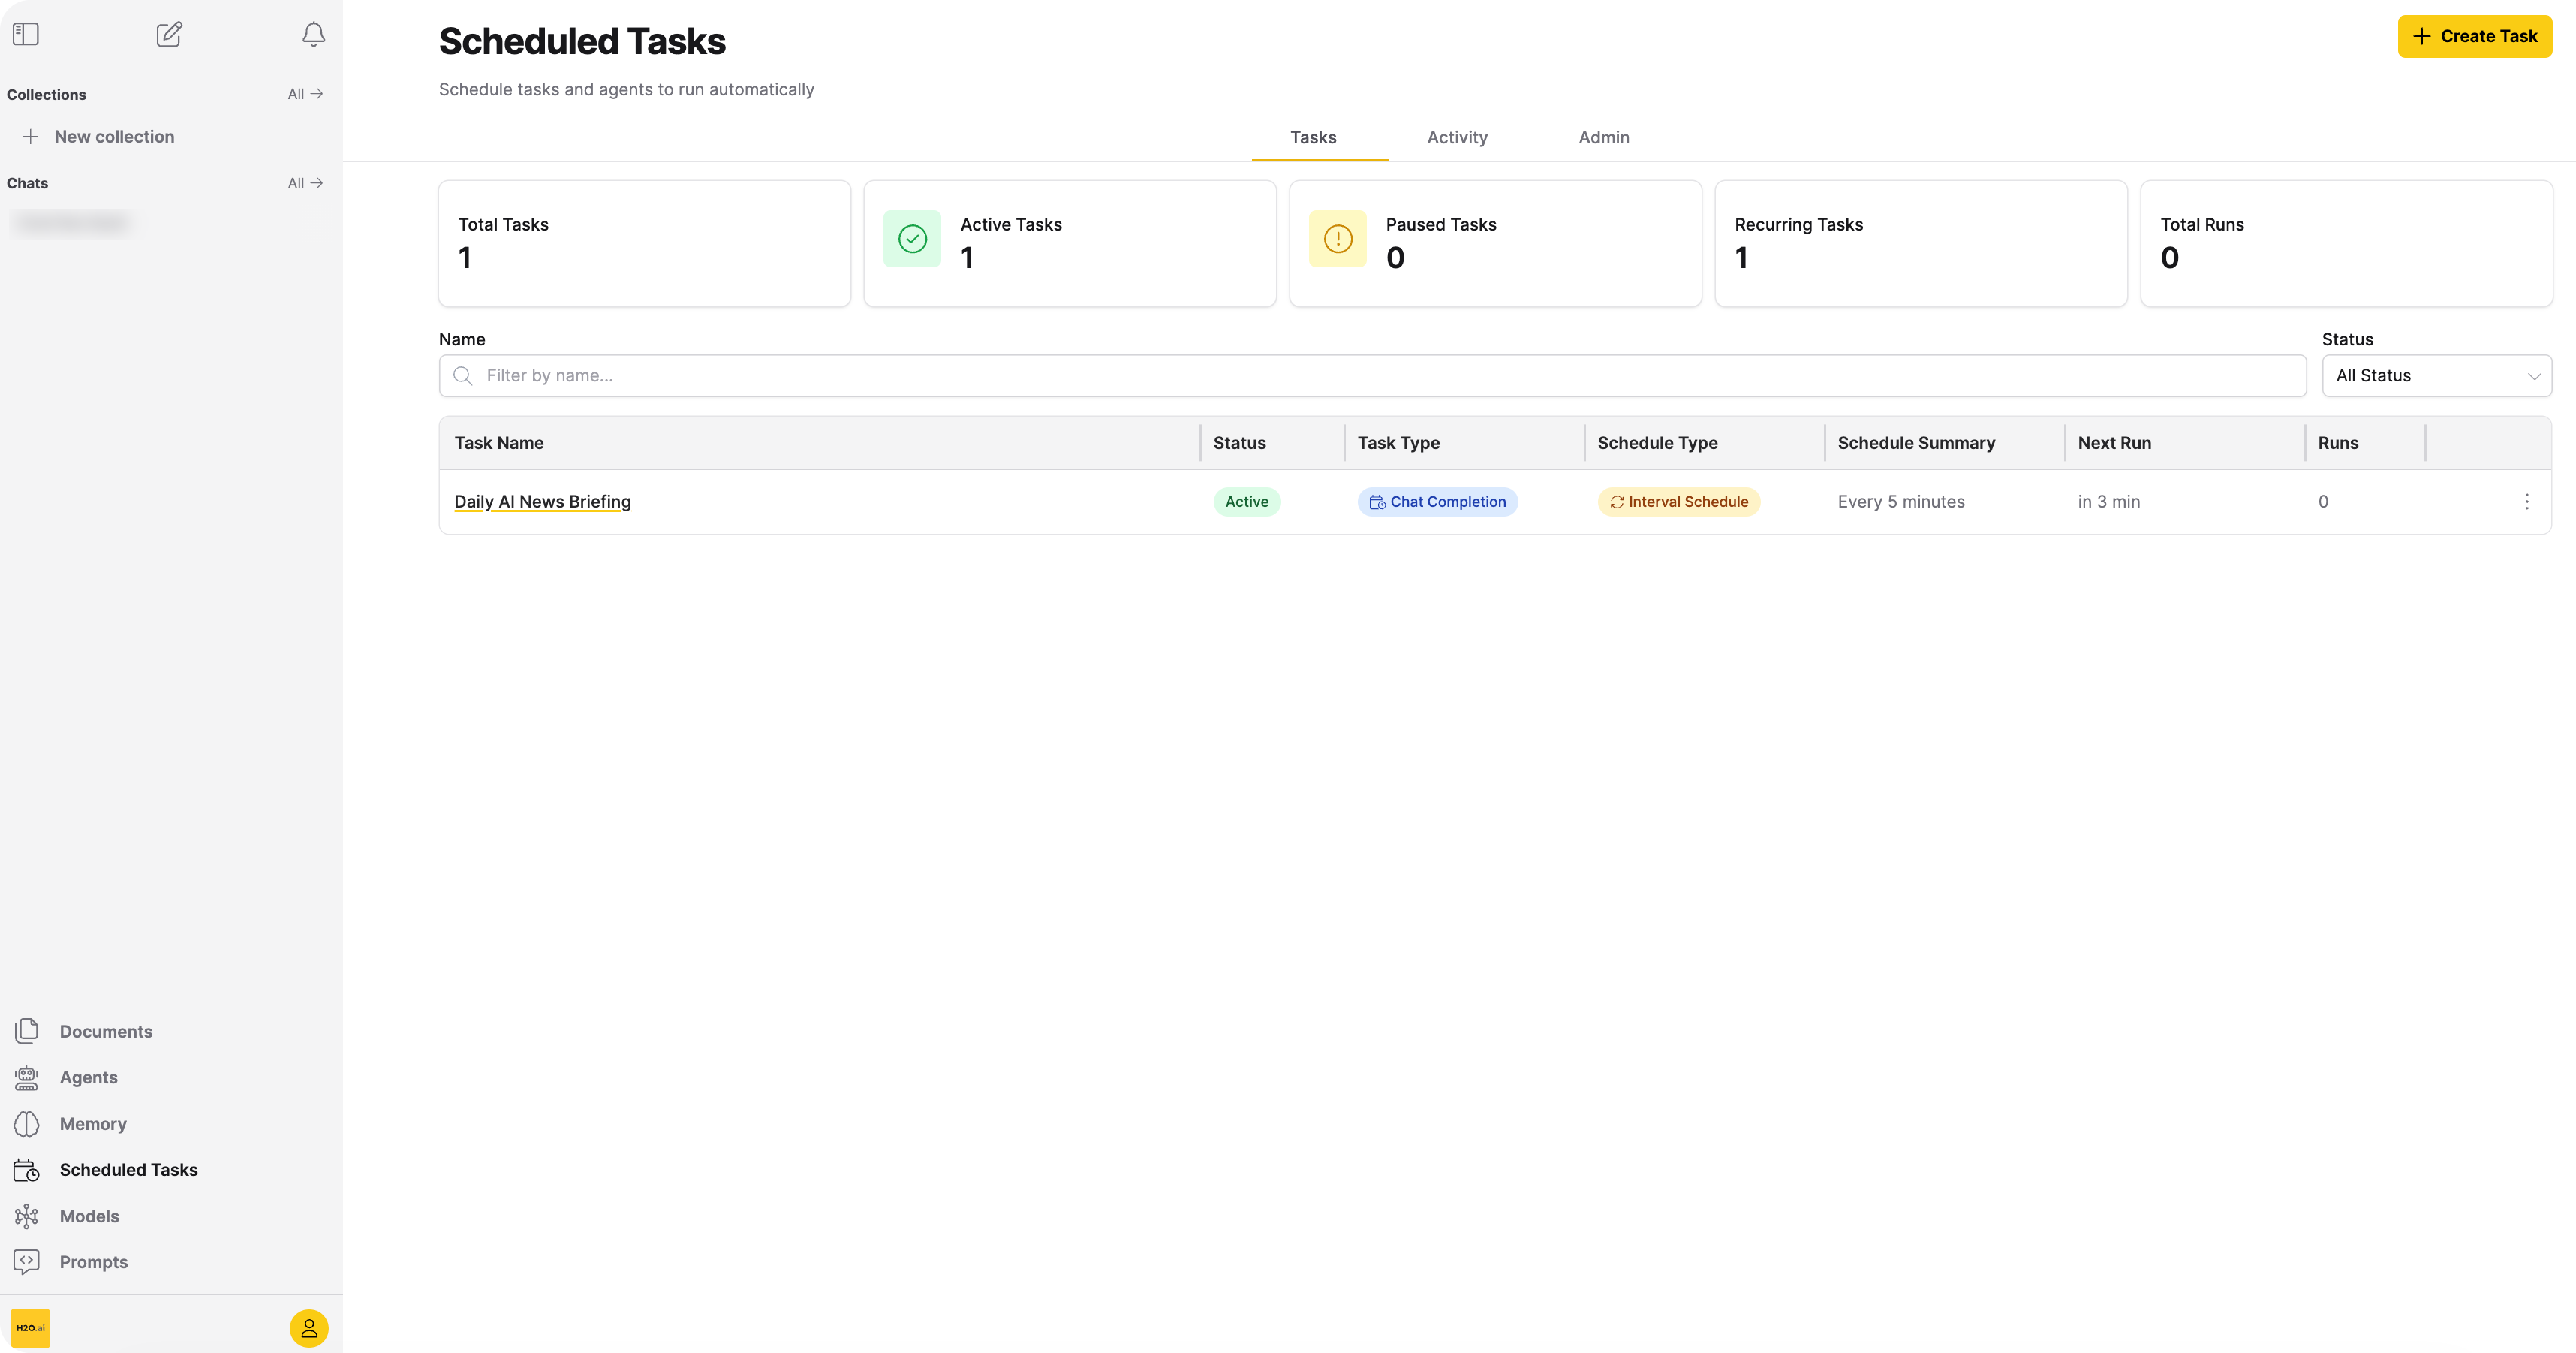
The Tasks tab displays summary cards and a searchable task table. Data refreshes automatically in the background while the page is open.
Summary cards show the following metrics: Total Tasks, Active Tasks, Paused Tasks, Recurring Tasks, and Total Runs.
Each row in the task table includes the following columns: Task Name, Status, Task Type, Schedule Type, Schedule Summary, Next Run, Runs, and an actions menu.
To filter tasks, enter a name in the Name filter or select a status (Active, Paused, Completed, or Expired) from the Status dropdown.
Actions menu
The actions available in each task row's menu depend on the task status.
For active and paused tasks:
- Run Now: Triggers the task immediately. The task remains paused after a manual run and continues to skip its automatic schedule until you resume it. Disabled while the task is currently running.
- Edit Task Settings: Opens the Edit Scheduled Task dialog with pre-filled values.
- Pause / Resume: Temporarily stops or resumes scheduling of the task.
- Delete: Permanently deletes the task and all its execution history.
For completed and expired tasks:
- View task details: Opens the task detail panel.
- Delete: Permanently deletes the task and all its execution history.
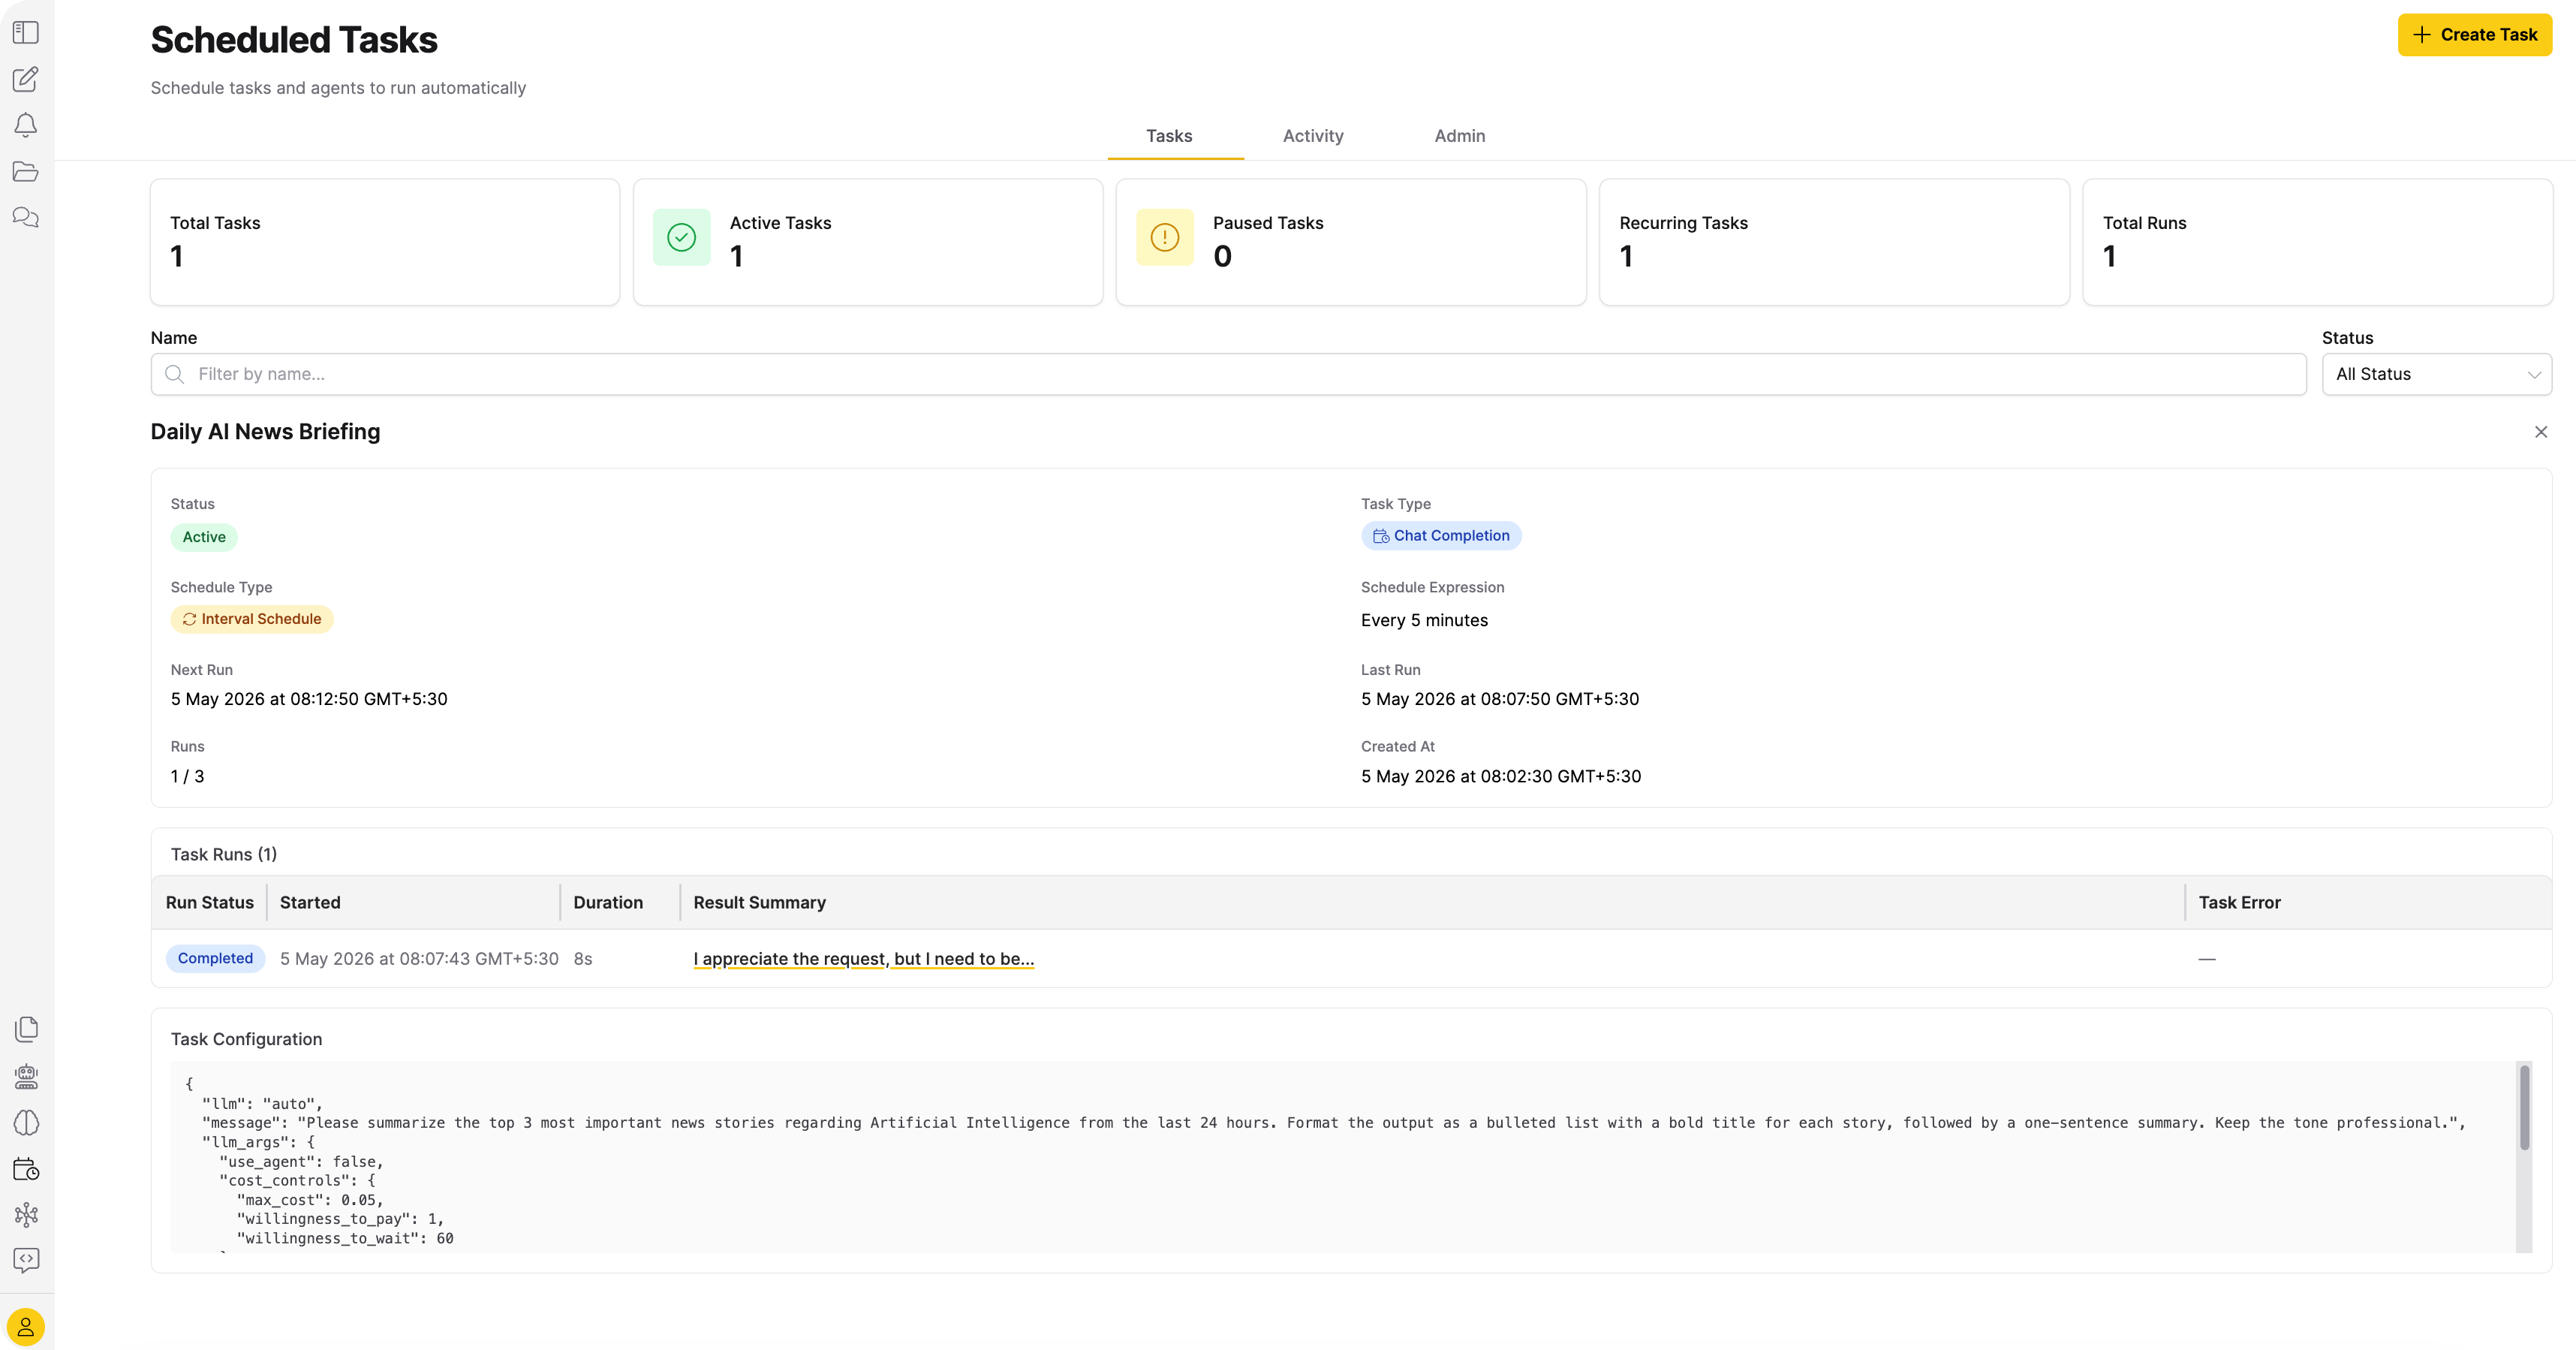
Task details
Click a task name to open its detail panel. The detail panel shows the following information:
- Description, Status, Task Type, Schedule Type, and Schedule Expression
- Next Run time (shown only for active tasks) and Last Run time
- Scheduled executions (shown as
count / maxwhen a maximum is set) and Created At date - Email Notification address (if configured)
- Task Configuration JSON (if available)
Below the task details, a Task Runs table lists each run for that task with the following columns: Run Status, Trigger, Started, Duration, Result Summary, and Task Error. Click a Task Error value to view full error details.
Create a scheduled task
To create a scheduled task:
-
On the Scheduled Tasks page, click Create Task.
-
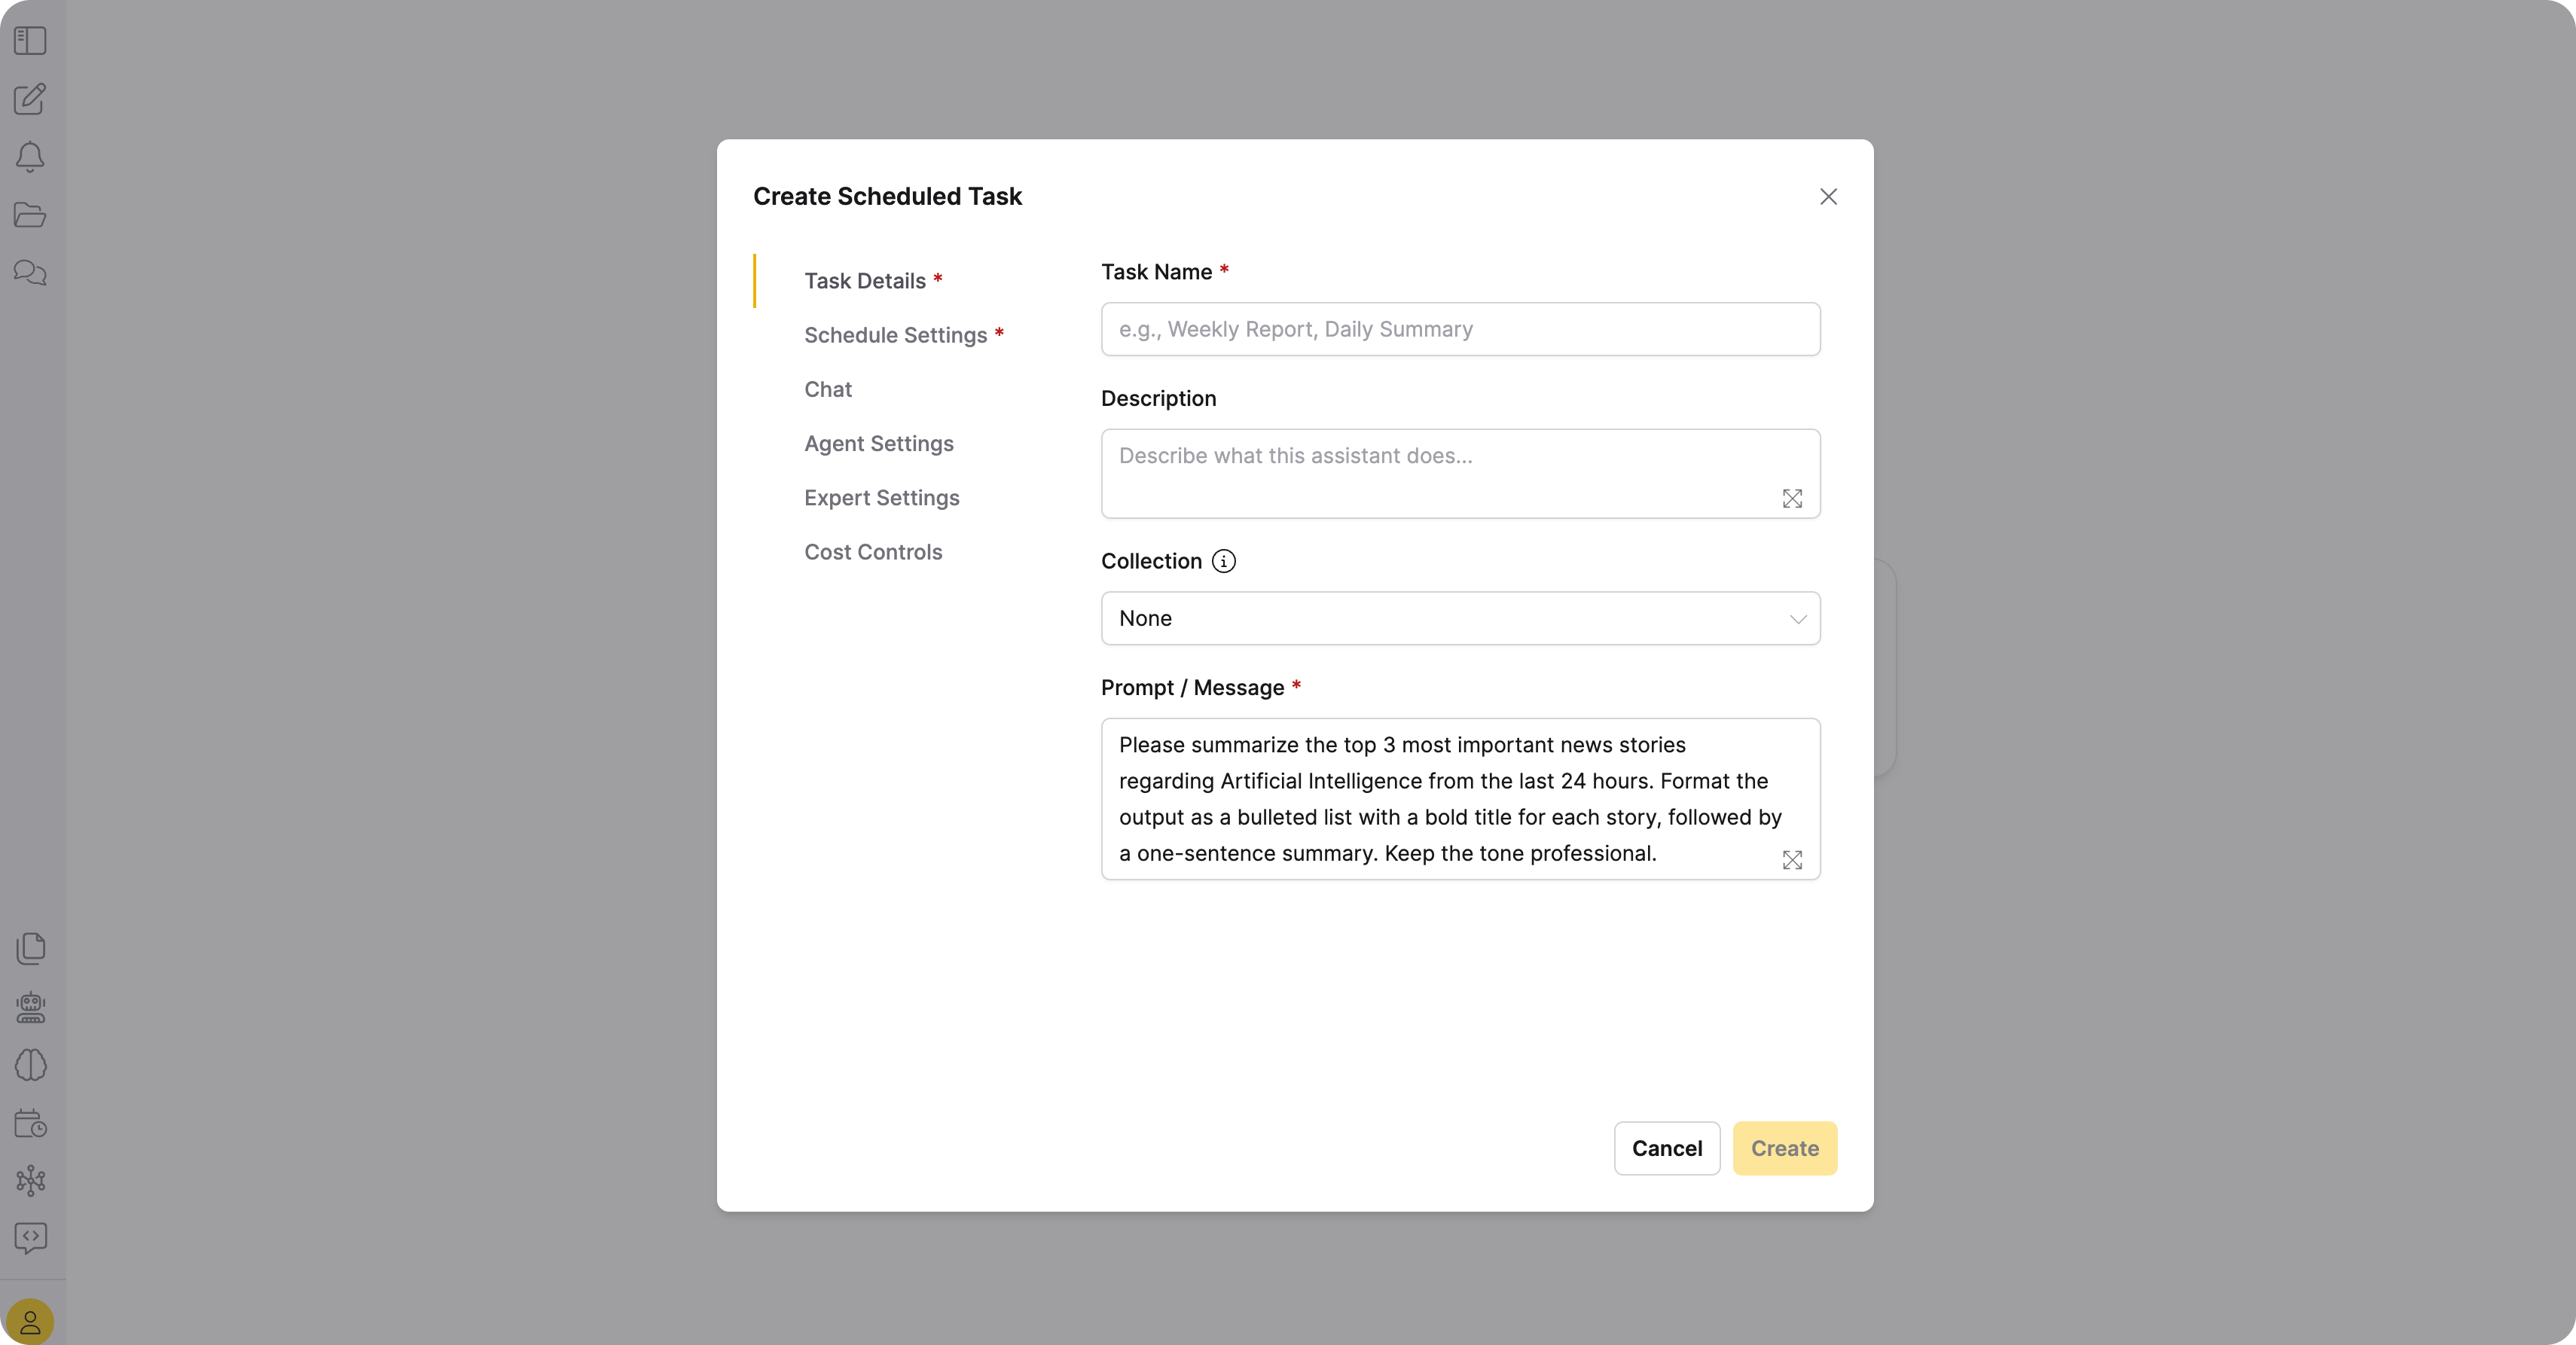
On the Task Details tab, configure the following fields:
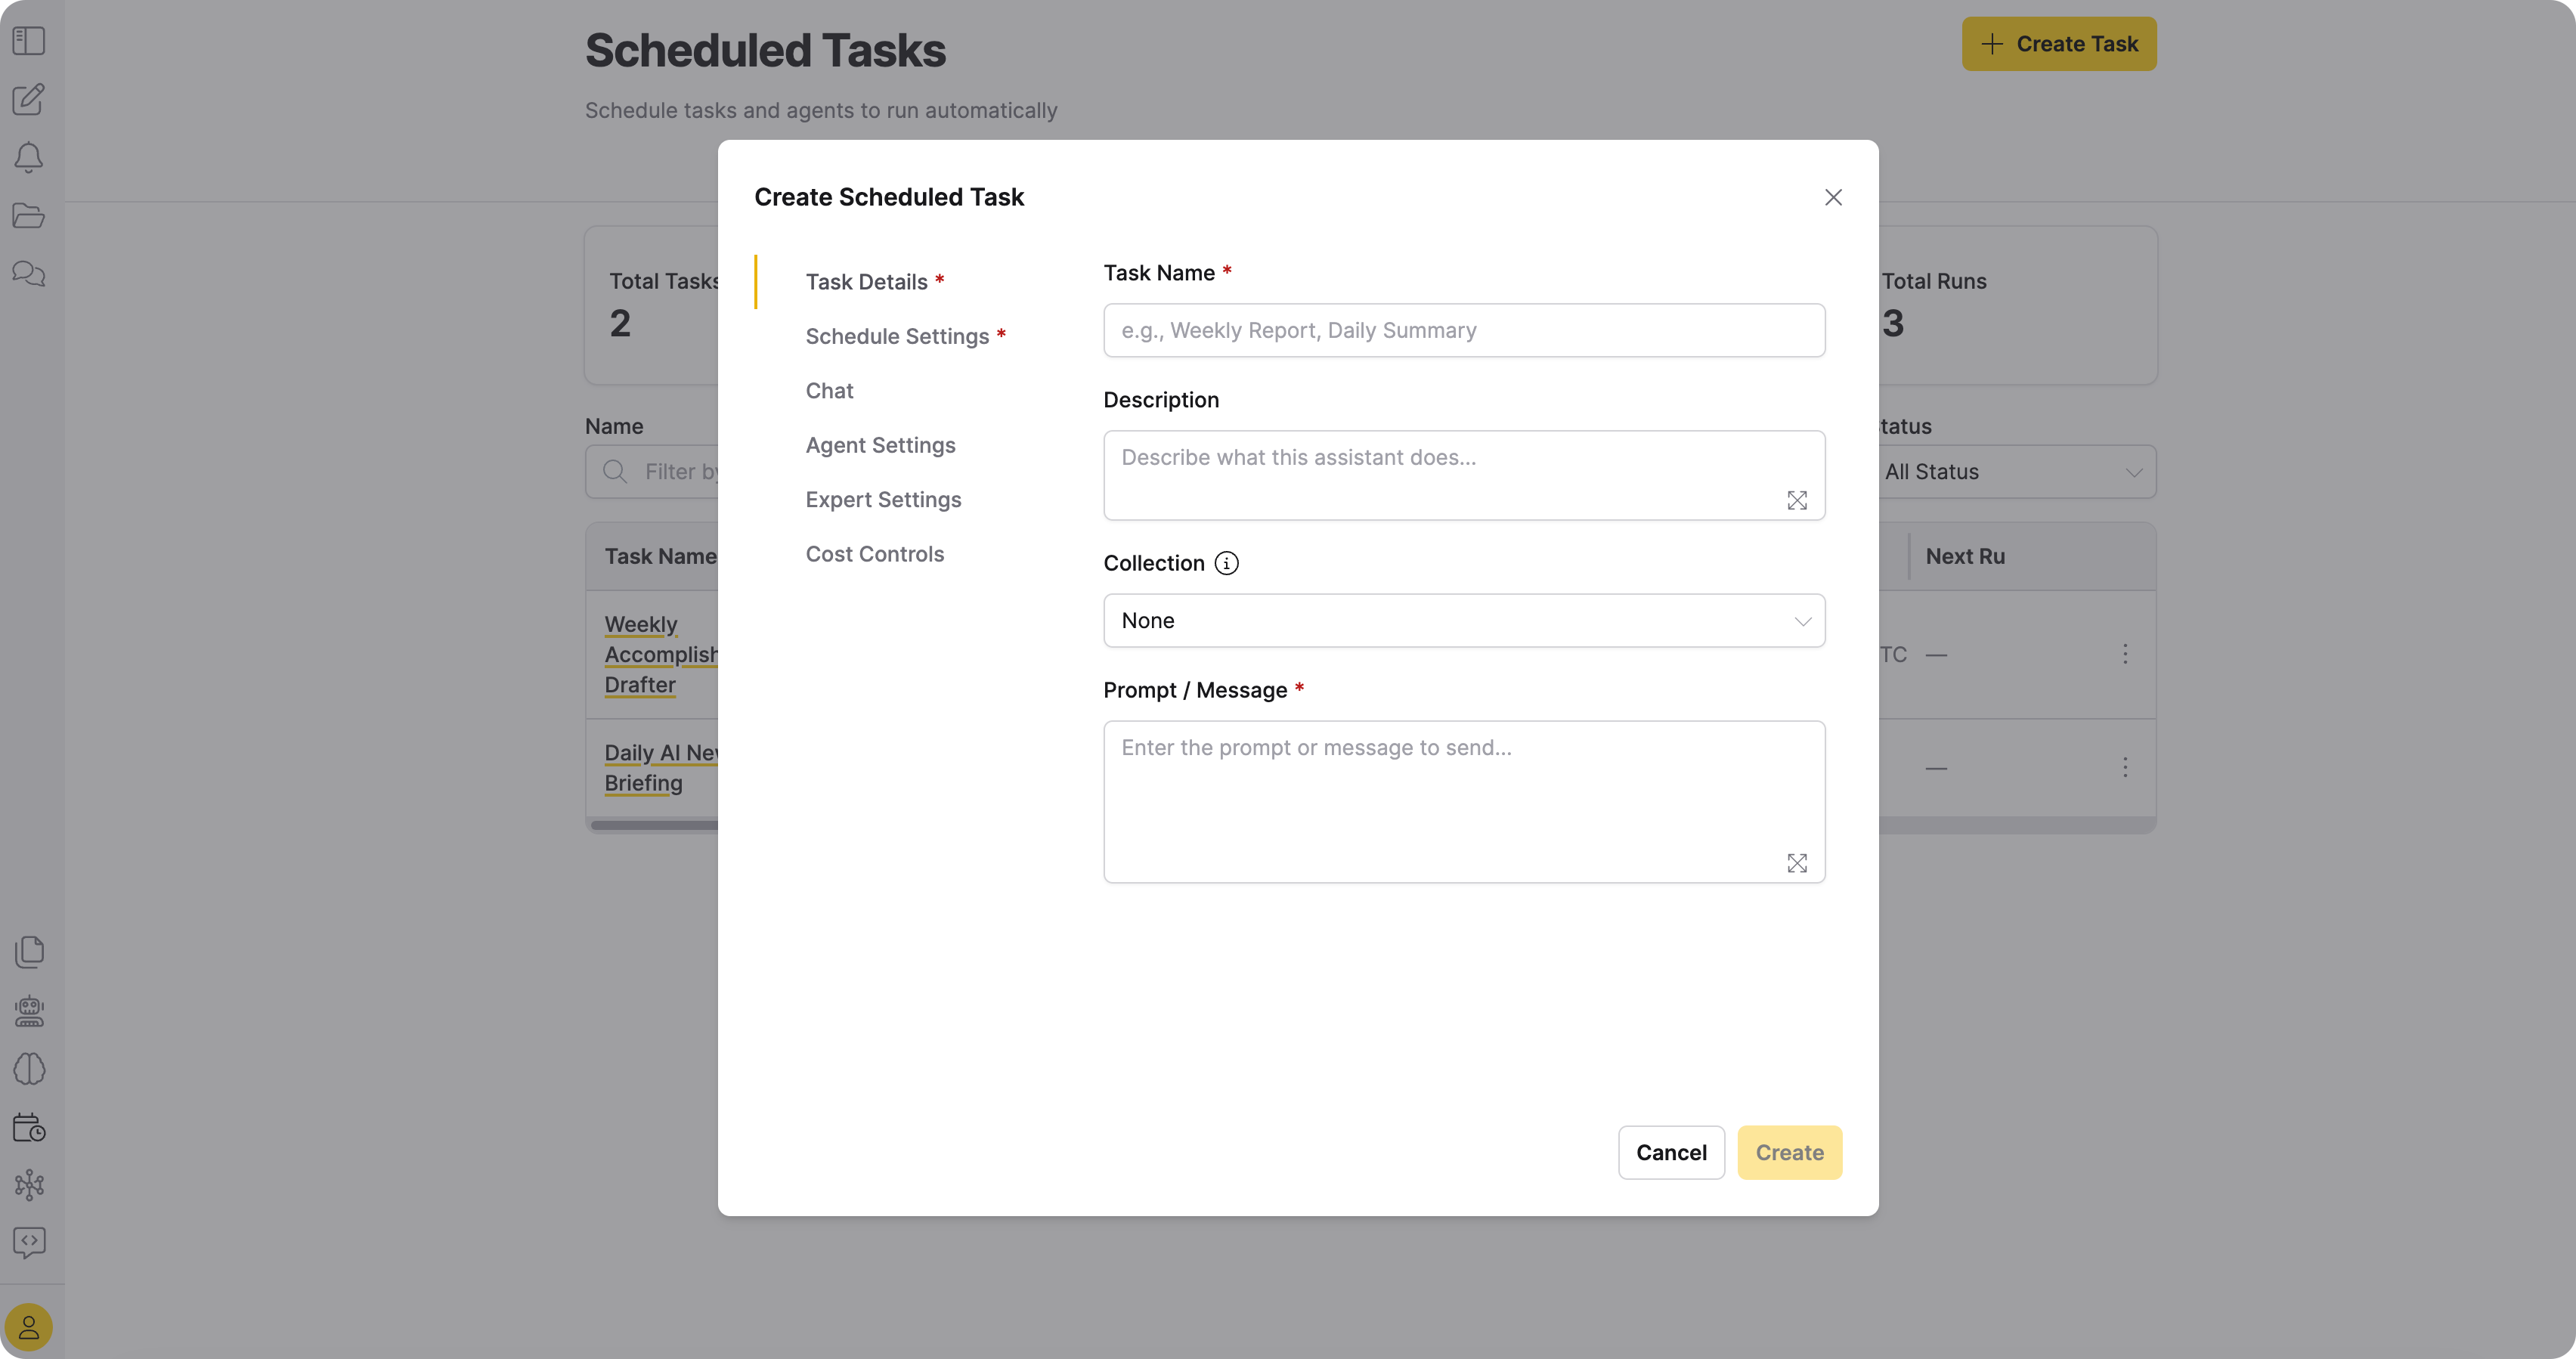
Field Required Description Task Name Yes Name for the scheduled task. Description No Description of the task. Collection No Collection whose settings apply to the task. When selected, the Chat, Agent Settings, Expert Settings, and Cost Controls tabs are hidden and settings come from the collection. Prompt / Message Yes Prompt or message to send on each execution. -
On the Schedule Settings tab, configure the schedule:
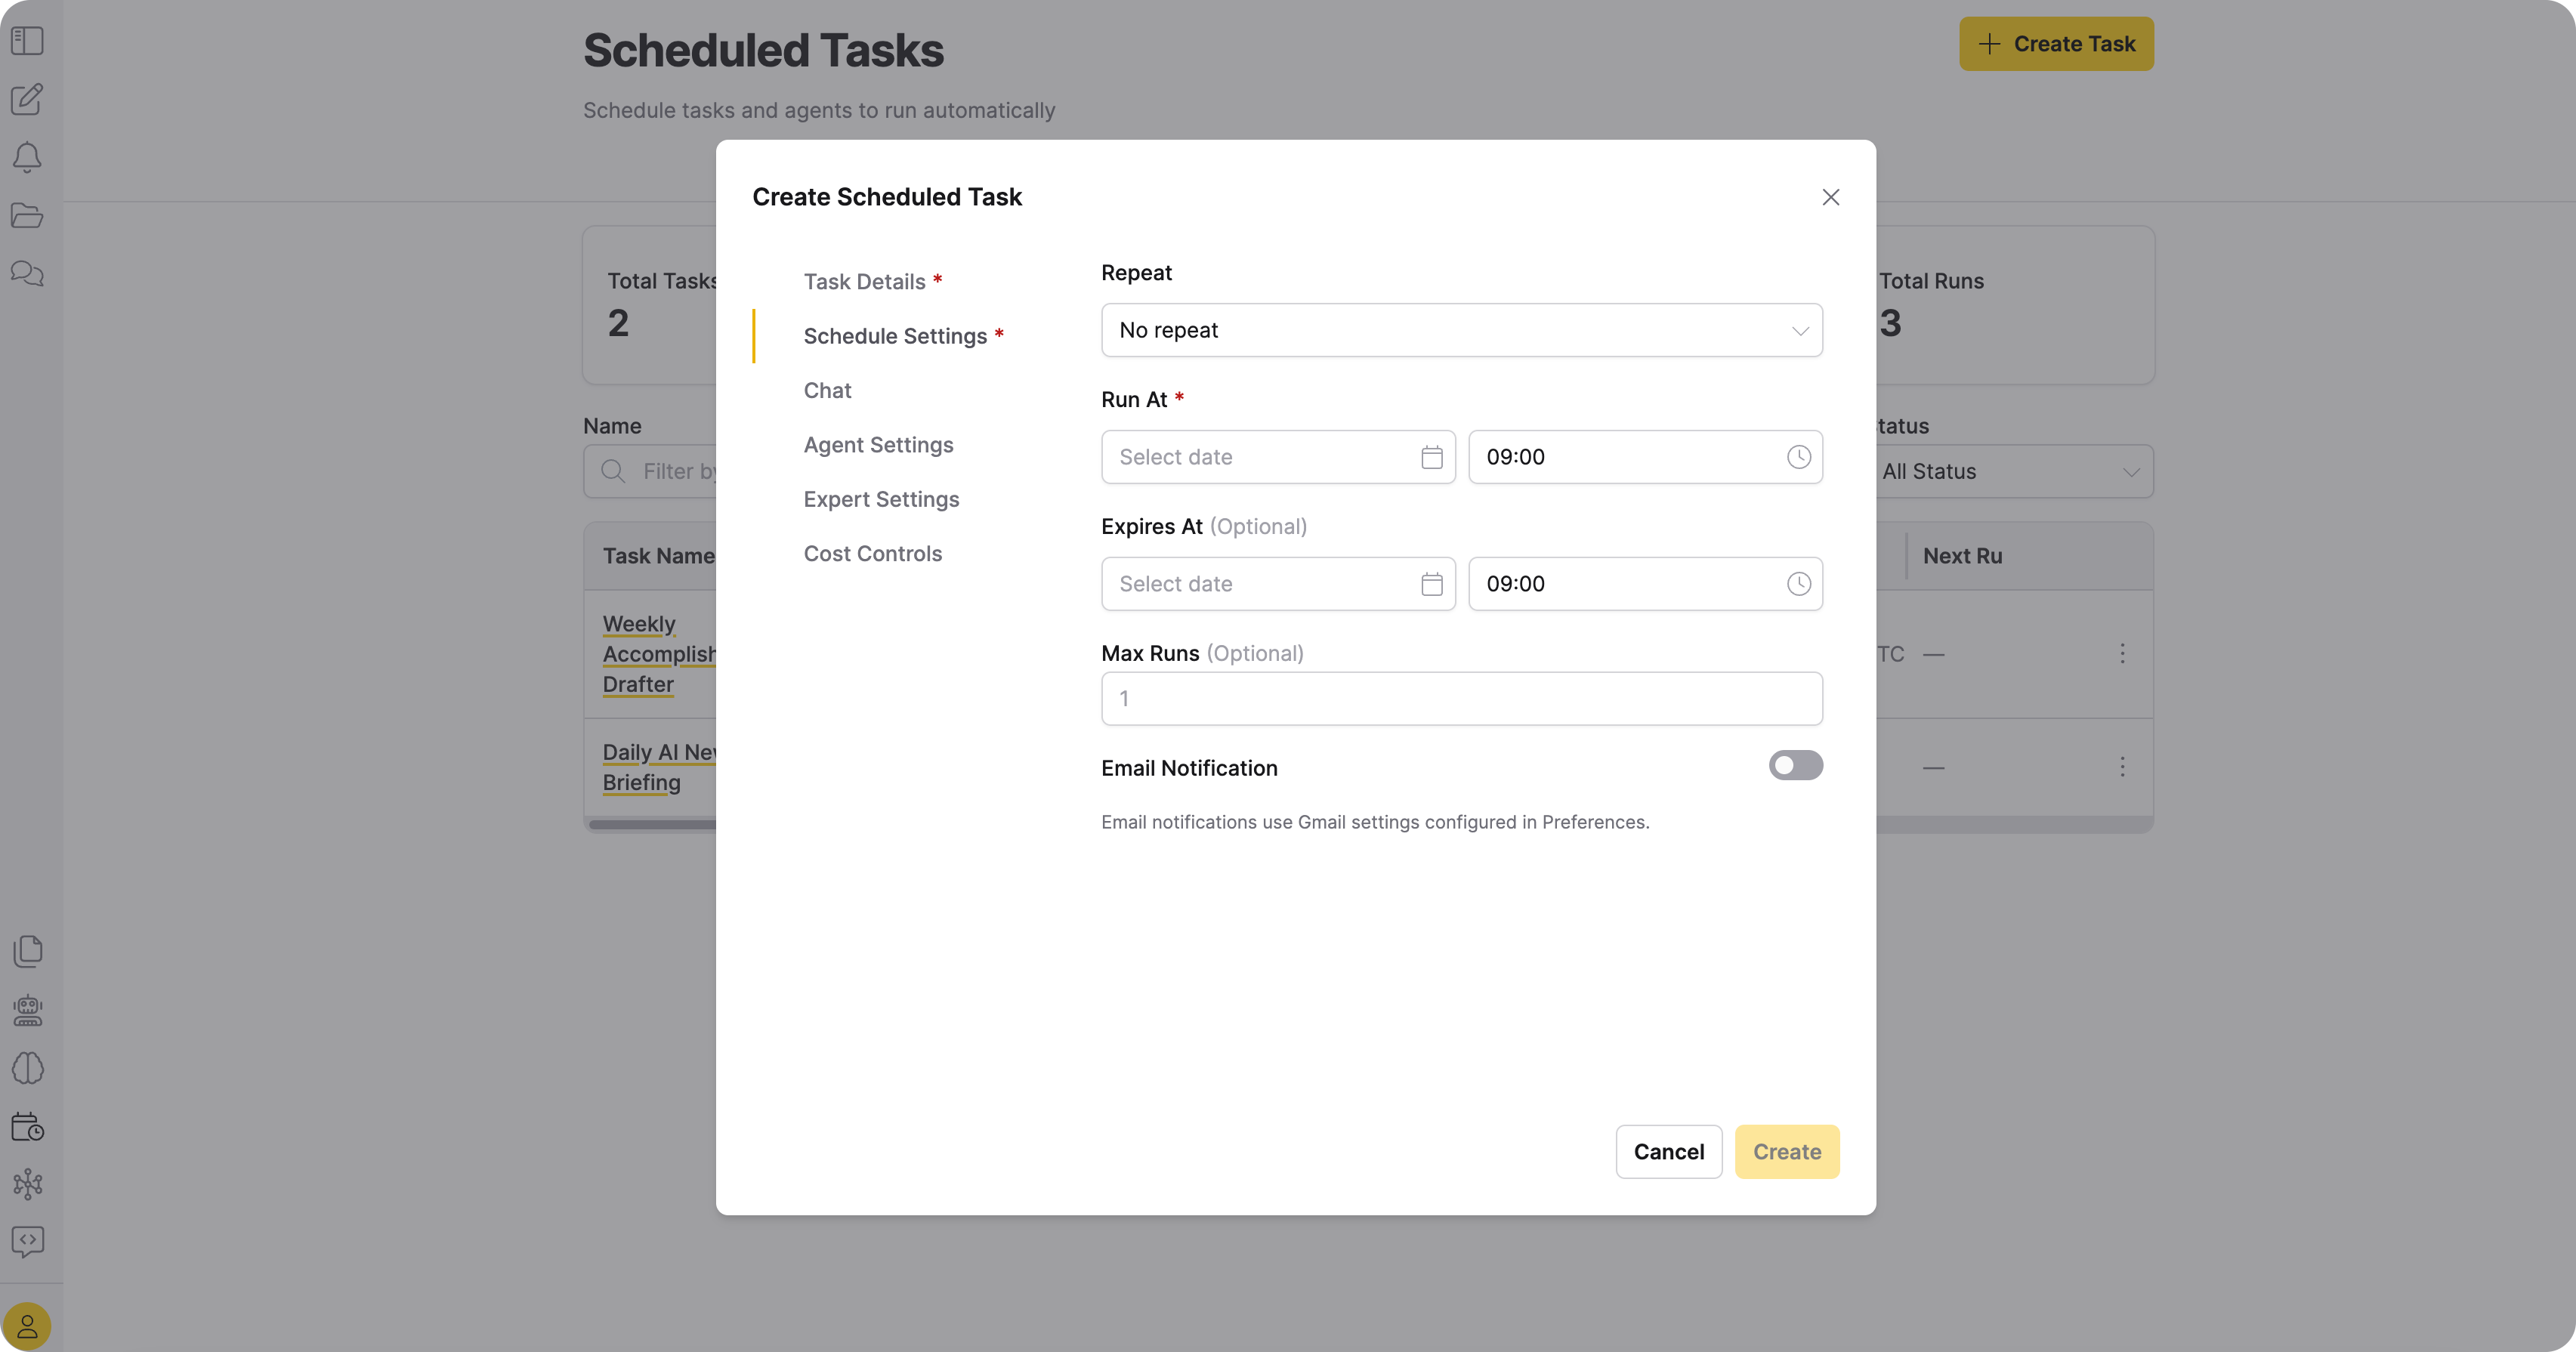
Field Required Description Repeat Yes No repeat (one-time), Every... (interval), Daily, Weekly, or Monthly. Run At Yes (one-time) Date and time to run the task. Every / Unit Yes (interval) Interval value and unit (Minutes or Hours). Day of Week Yes (weekly) Monday through Sunday. Day of Month Yes (monthly) 1 through 31. Time Yes (recurring) Local time of day to run. Timezone Yes (recurring) Timezone for the scheduled time. Expires At No Date after which the task stops running. Max scheduled executions No Max number of runs. Leave empty for unlimited. noteEmail notifications use Gmail settings configured in Preferences. To enable notifications, toggle Email Notification on in the Schedule Settings tab.
-
(Optional) Configure the remaining tabs:
Tab Description Chat Configures LLM parameters and includes a collection selector. Agent Settings Configures agent behavior. Expert Settings Provides advanced model options. Cost Controls Sets cost limits. For details, see Customize a Chat session.
-
Click Create.
Schedule a prompt from chat
To schedule a prompt from a chat session:
-
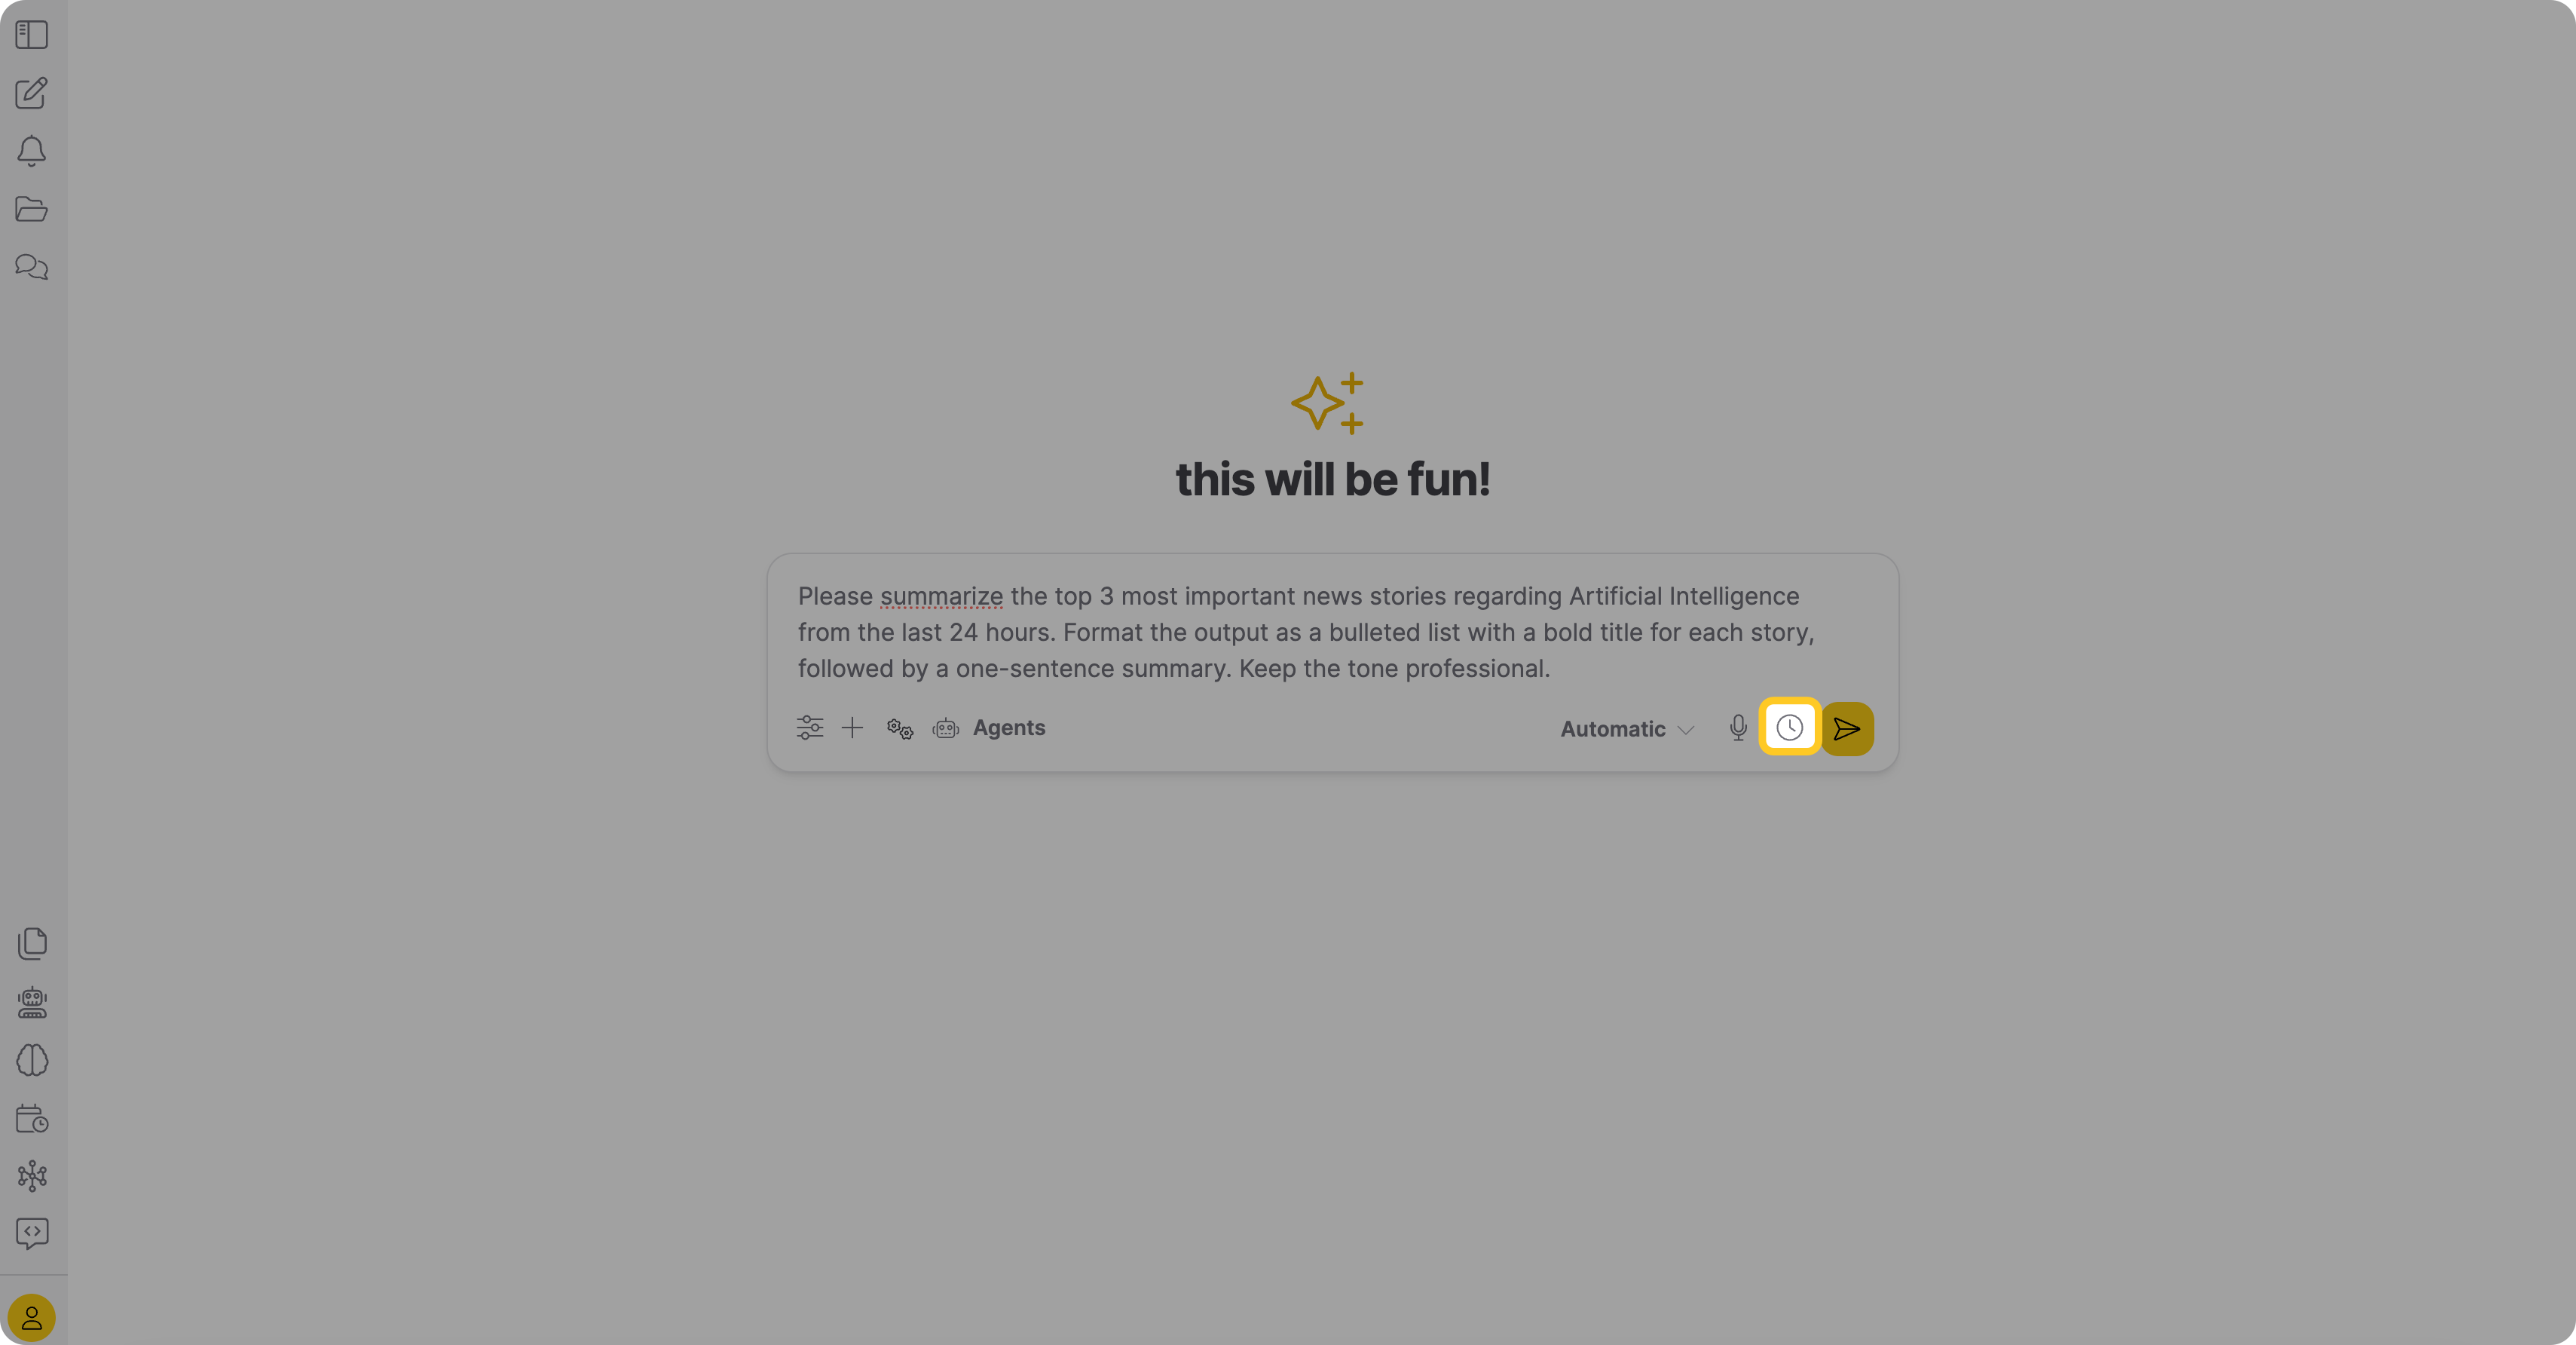
In the chat input area, click the Schedule this prompt (clock) icon.
-
The Create Scheduled Task dialog opens with the Prompt / Message field pre-filled from the chat input. Enter a Task Name.
-
On the Schedule Settings tab, configure the schedule. From the Repeat dropdown, select how often the task should run. You can select from No repeat (one-time), Every… (interval), Daily, Weekly, or Monthly. If you choose the Every… option, use the newly revealed Every and Unit fields to set a custom interval (for example, every 5 minutes).

-
In Run At, enter the date and time for the task. Optionally, set an Expires At date or a Max Executions limit.
-
(Optional) To receive email notifications when the task completes, enable the Email Notification toggle.
noteEmail notifications use Gmail settings configured in Preferences. Configure your Gmail address and app password there before enabling this option.
-
Click Create.
The task appears on the Scheduled Tasks page with the prompt and chat settings from your current session.
Activity tab
The Activity tab shows execution history across all your scheduled tasks. Each row includes the following columns:
| Column | Description |
|---|---|
| Task Name | Name of the scheduled task. |
| Status | Current execution status. Possible values: Completed, Failed, Running, or Pending. |
| Trigger | How the run was initiated: Scheduled run or Manual run. |
| Started | Date and time when the execution started. |
| Duration | How long the execution took to complete. |
| Result Summary | Brief summary of the execution result. |
| Task Error | Error message if the execution failed. Click to view full details. |
To filter executions, select a status from the Status dropdown.

Admin tab
The Admin tab is visible only to administrators and shows all scheduled tasks across all users.
Admin summary cards display the following metrics:
| Metric | Description |
|---|---|
| Total Tasks | Total number of scheduled tasks across all users. |
| Active Tasks | Number of currently active tasks. |
| Unique Task Users | Number of distinct users who have scheduled tasks. |
| Failed Today | Number of task executions that failed today. |
| Running Now | Number of task executions currently in progress. |
The administrator task table includes the following columns:
| Column | Description |
|---|---|
| Task Name | Name of the scheduled task. |
| Task Owner | User who created the task. |
| Task Type | Chat Completion or Agent Task. |
| Schedule Type | How the task is scheduled (one-time, interval, daily, weekly, or monthly). |
| Status | Current task status: Active, Paused, Completed, or Expired. |
| Scheduled executions | Total number of executions for the task. |
| Next Run | Date and time of the next scheduled run. Only shown for active tasks; displays — for paused, completed, or expired tasks. |
Unlike the Tasks tab, the administrator table doesn't include a Schedule Summary column. Administrators can pause, resume, or delete any user's tasks, but can't trigger or edit another user's task settings.
To filter tasks by owner, select a user from the User dropdown.

Related topics
- Submit and view feedback for this page
- Send feedback about Enterprise h2oGPTe to cloud-feedback@h2o.ai