Agent response view
Overview
The agent response view appears when you start an agent chat and provides a structured interface for tracking agent tasks. It features customizable view modes (Simplified, Standard, and Detailed) and background streaming, which lets you navigate to other chats or pages while the agent is working, without losing any progress or metadata.
View modes
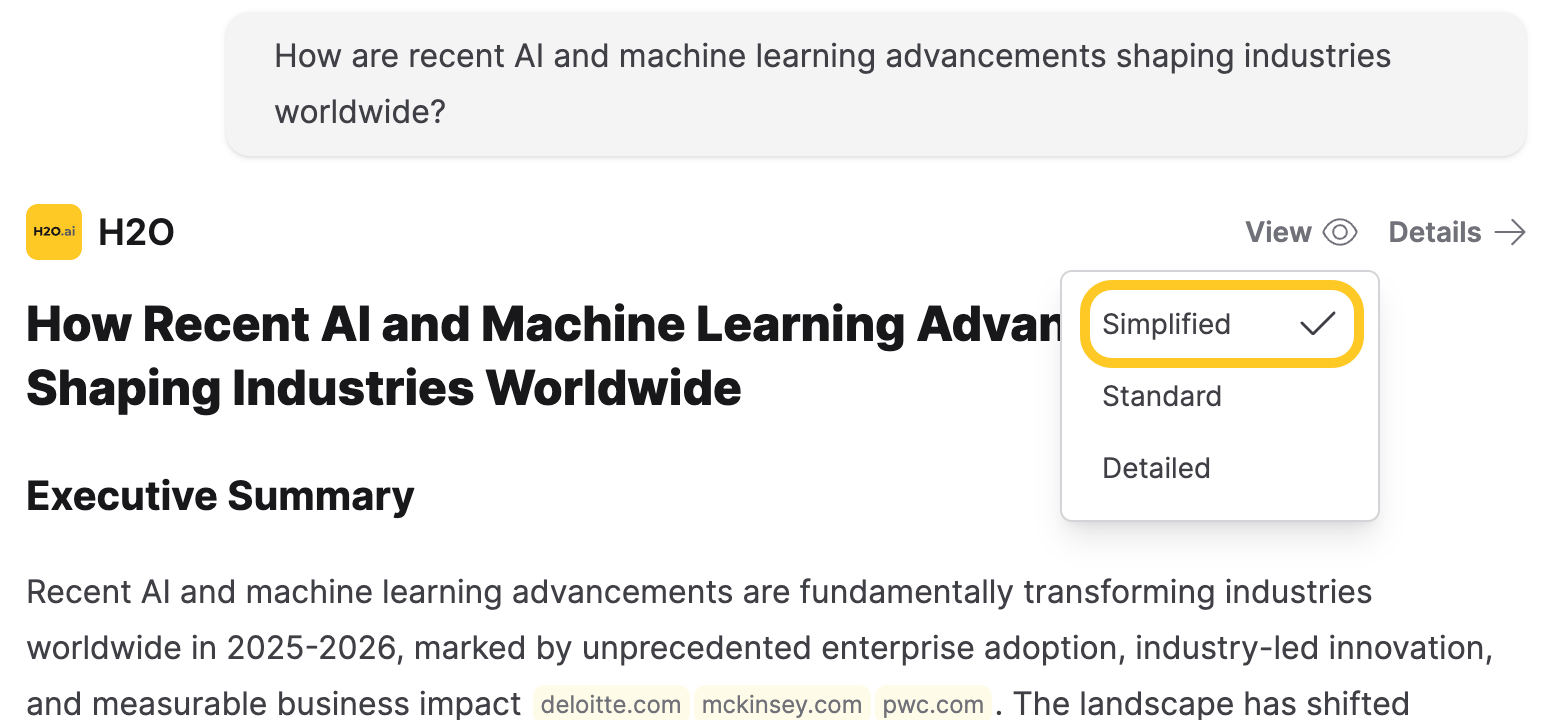
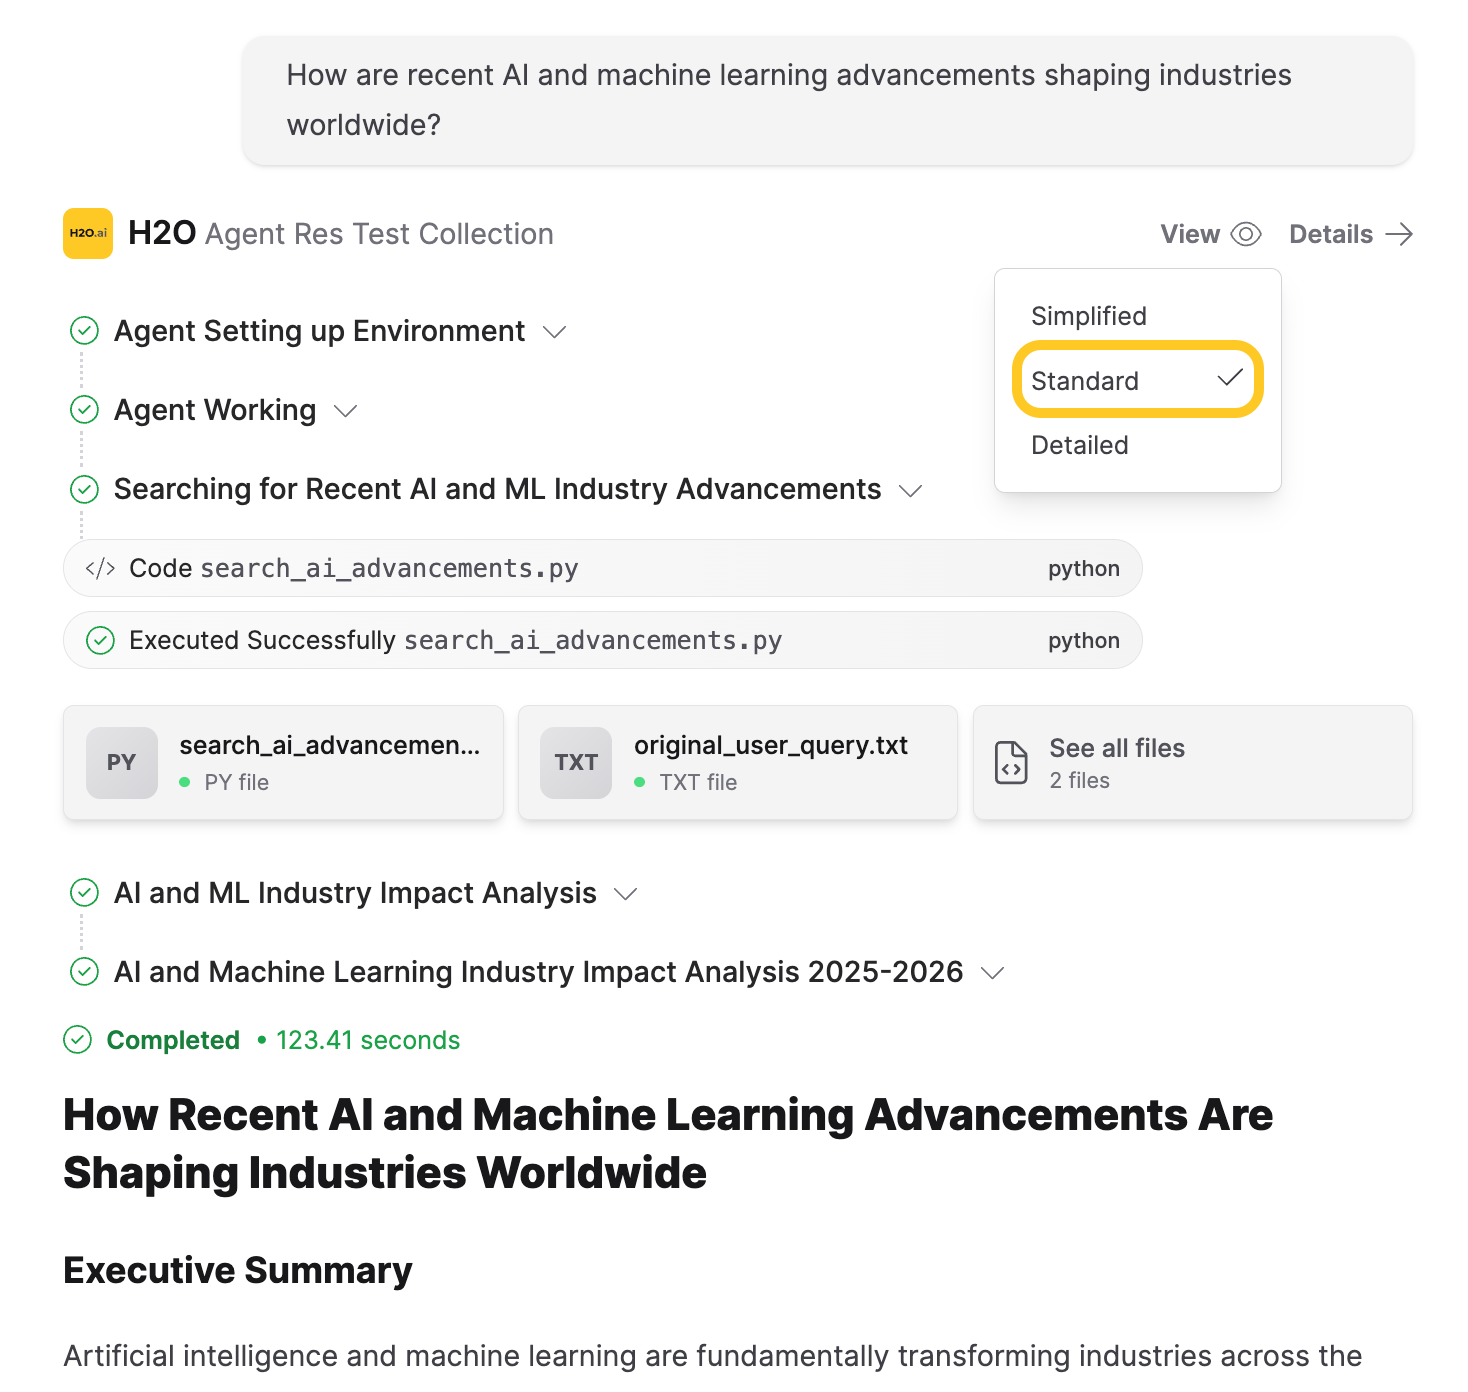
The interface offers three unique view modes, each designed to effectively support different complex workflows. Click View at the top-right of the agent response to switch between view modes.
- Simplified view: The main UI displays only the final response, omitting the chain of thoughts, which is the reasoning process the model uses to arrive at its answer.
- Standard view: Shows the chain of thoughts in the main UI. The right panel does not open automatically, keeping the interface cleaner unless you choose to inspect details.
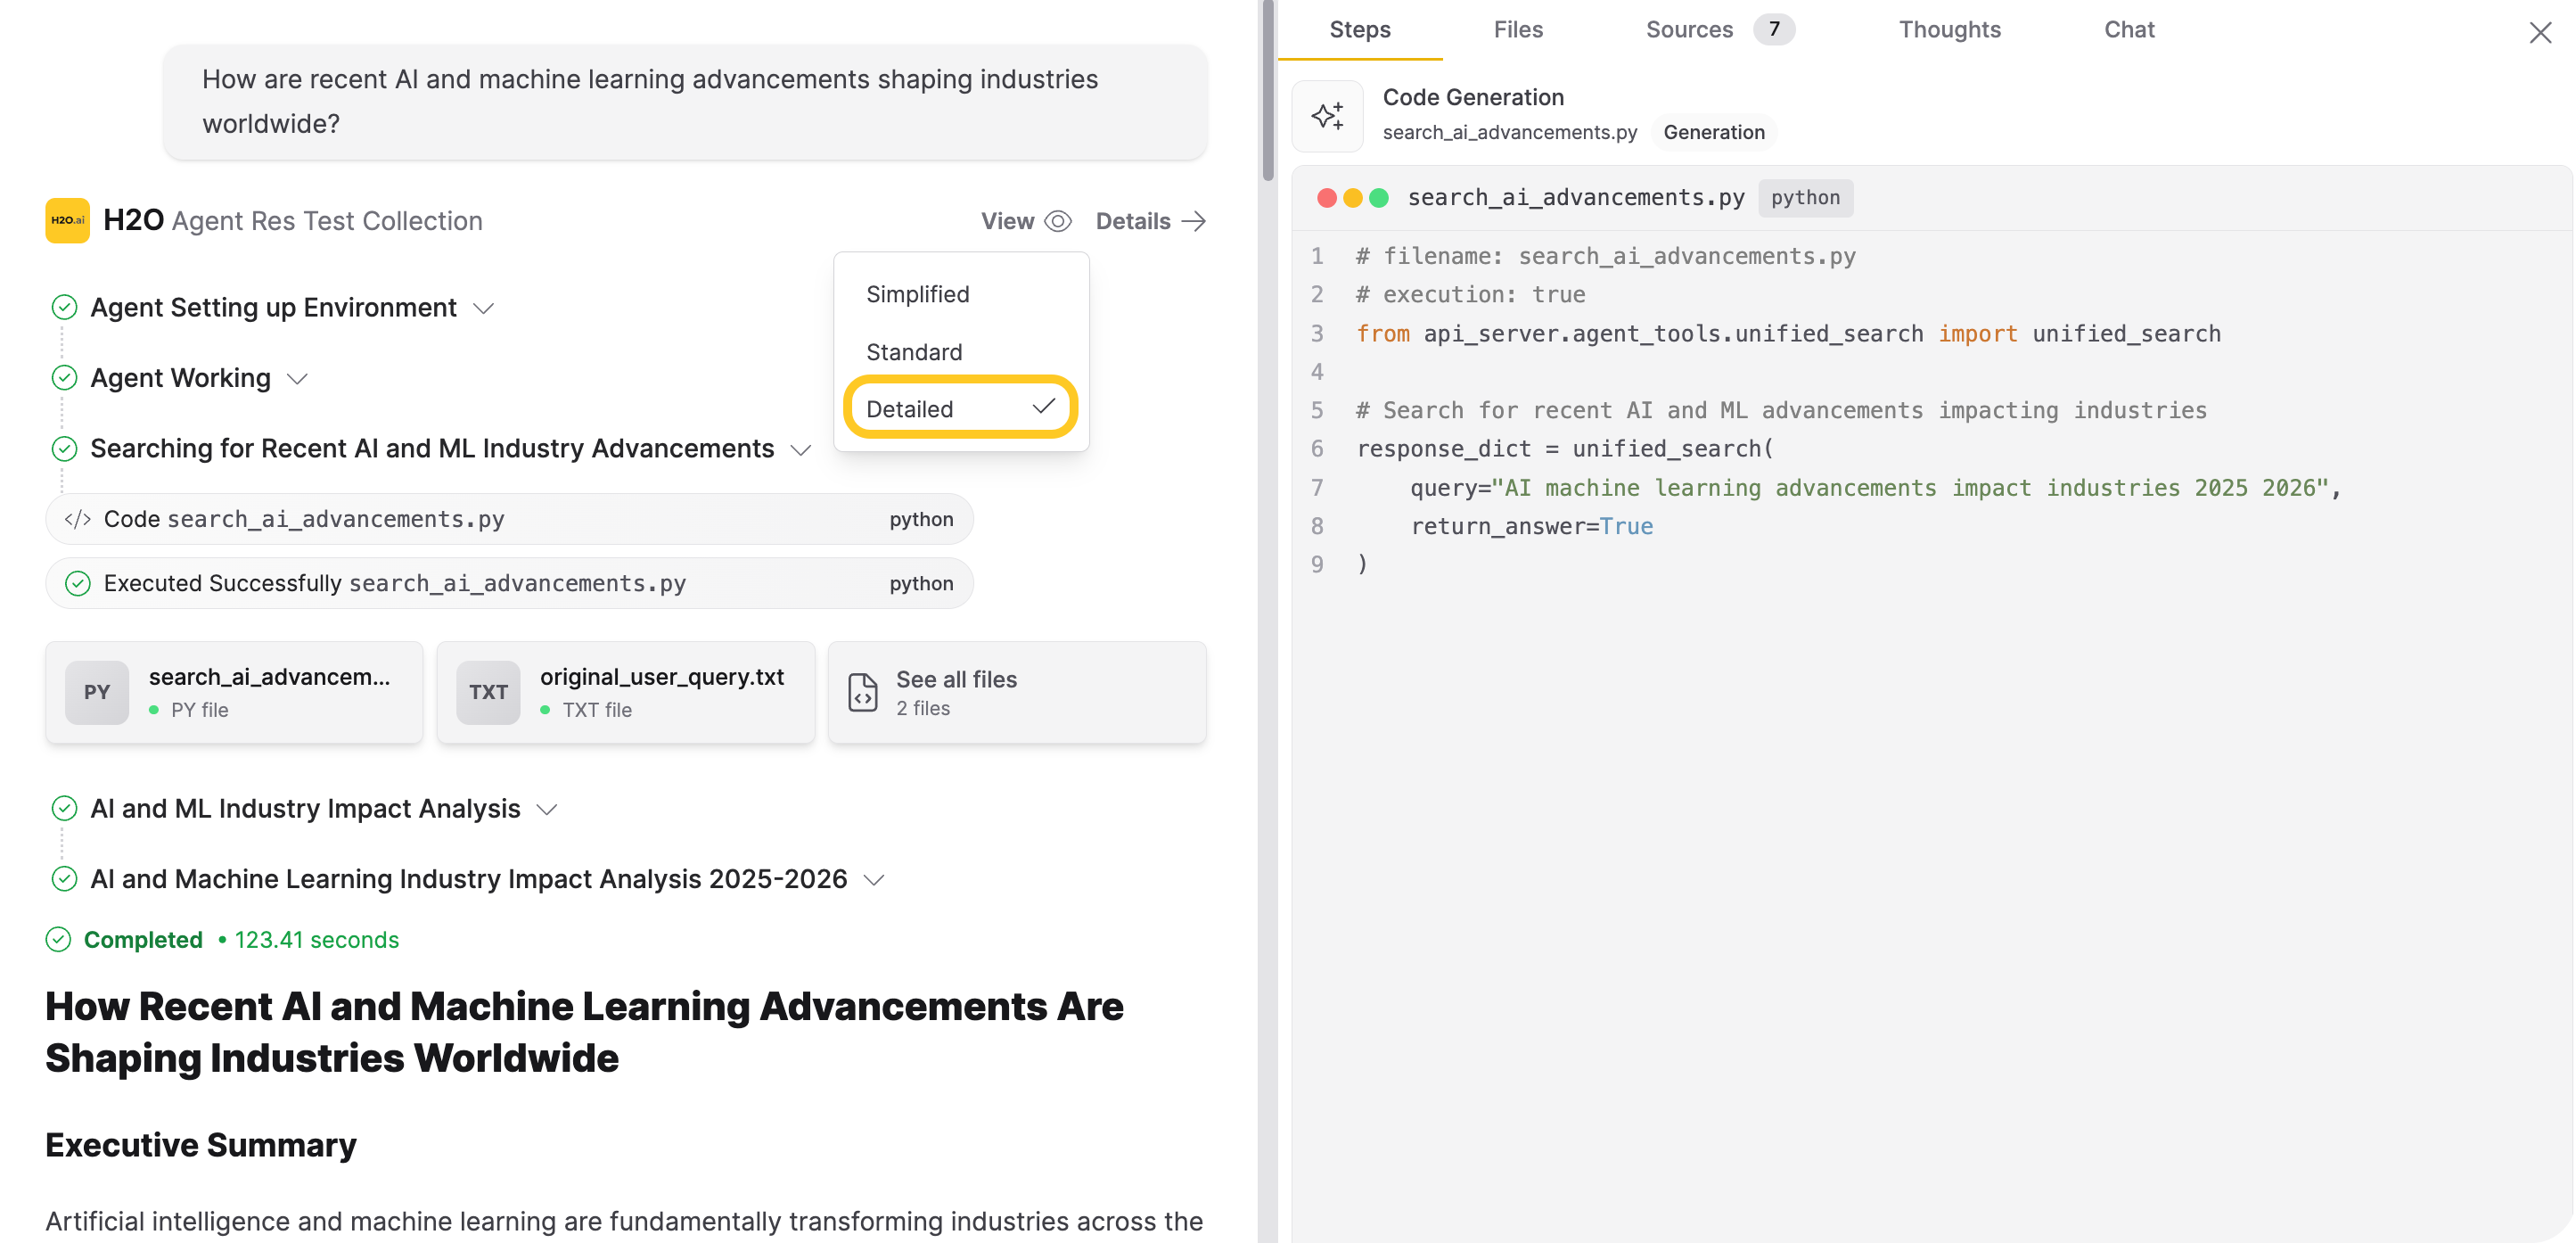
- Detailed view: Shows the chain of thoughts in the main UI and the right panel opens automatically during streaming to show progress.
Right panel features
The right panel provides detailed information about the agent's execution. Click Details to open the right panel. It contains the following sections:
-
Steps: An organized timeline of code generation, execution steps, results, and file generation.
-
Files: A file explorer listing the files the agent stored for the chat session. See Agent files for details.
-
Sources: A list of external web sources referenced by the agent, showing titles, domains, and content snippets. Appears only when sources exist.
-
Thoughts: A panel displaying the agent's analysis.
-
Chat: Internal agent-to-agent chat logs. Visible when internal agent chat data is available, typically after task completion.
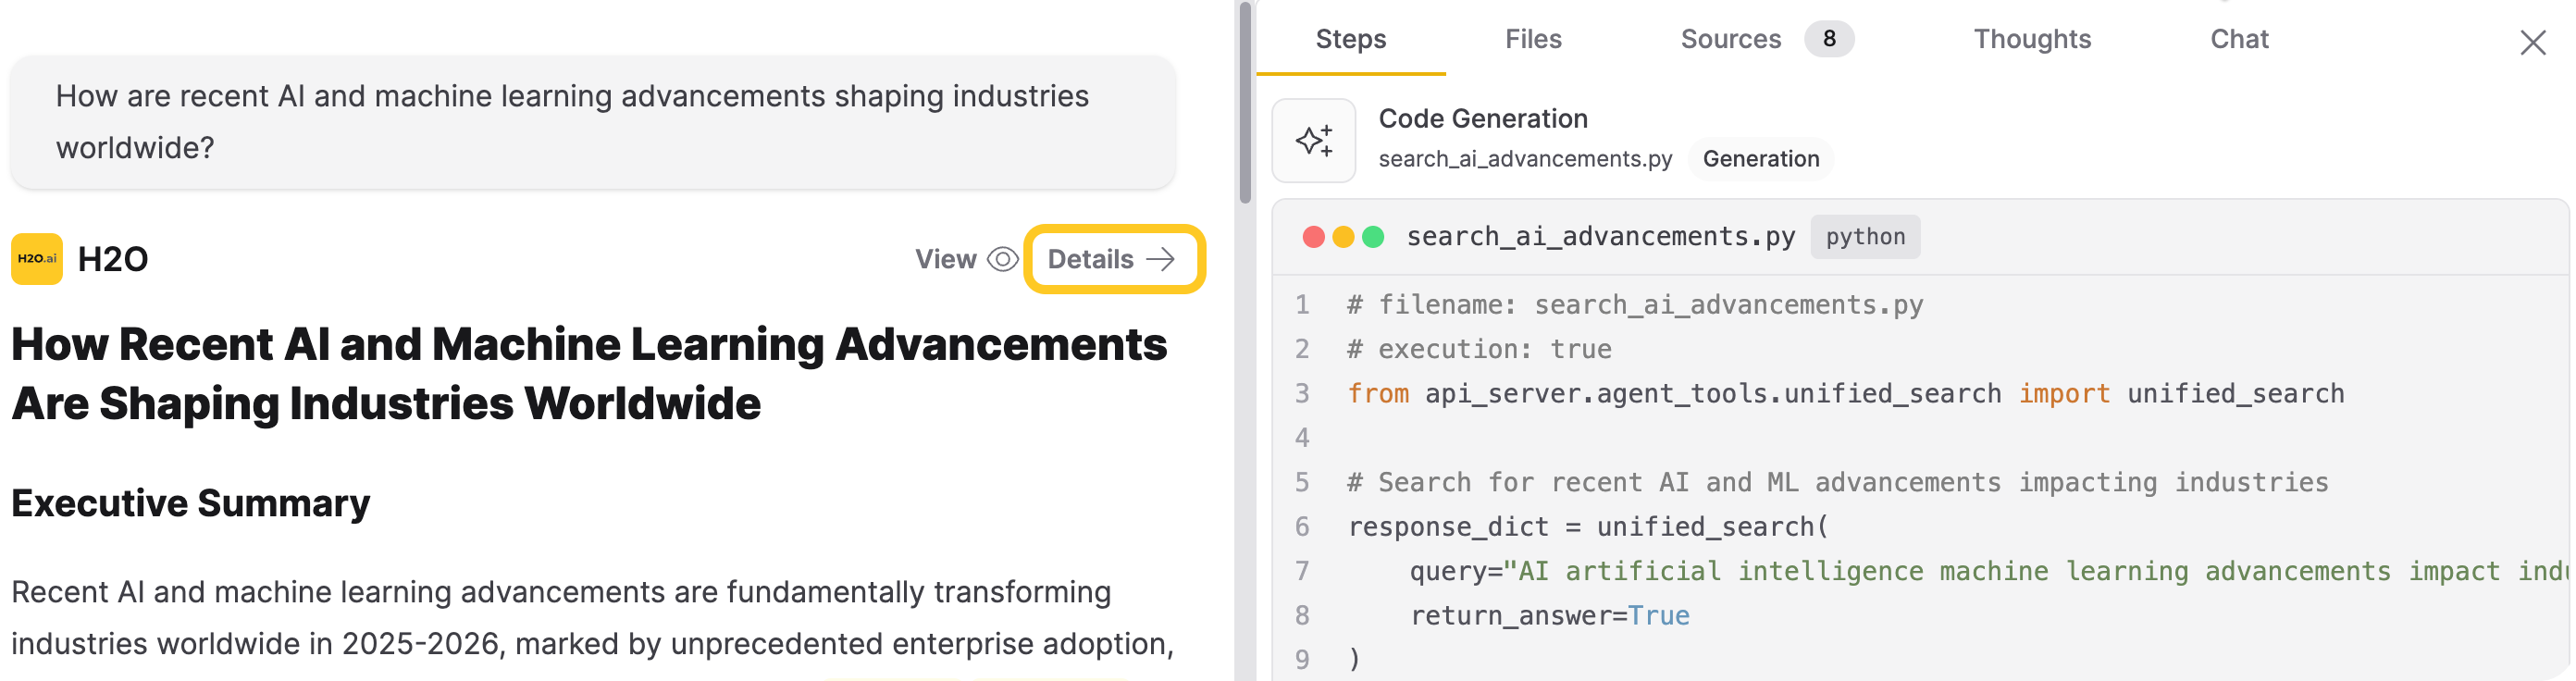
Not all tabs appear for every conversation. Sources appear only when sources exist.
File actions
The file actions menu lets you download, import, or package agent-generated files directly from the right panel.
Click Files in the right panel, then click the menu icon to see the available options.
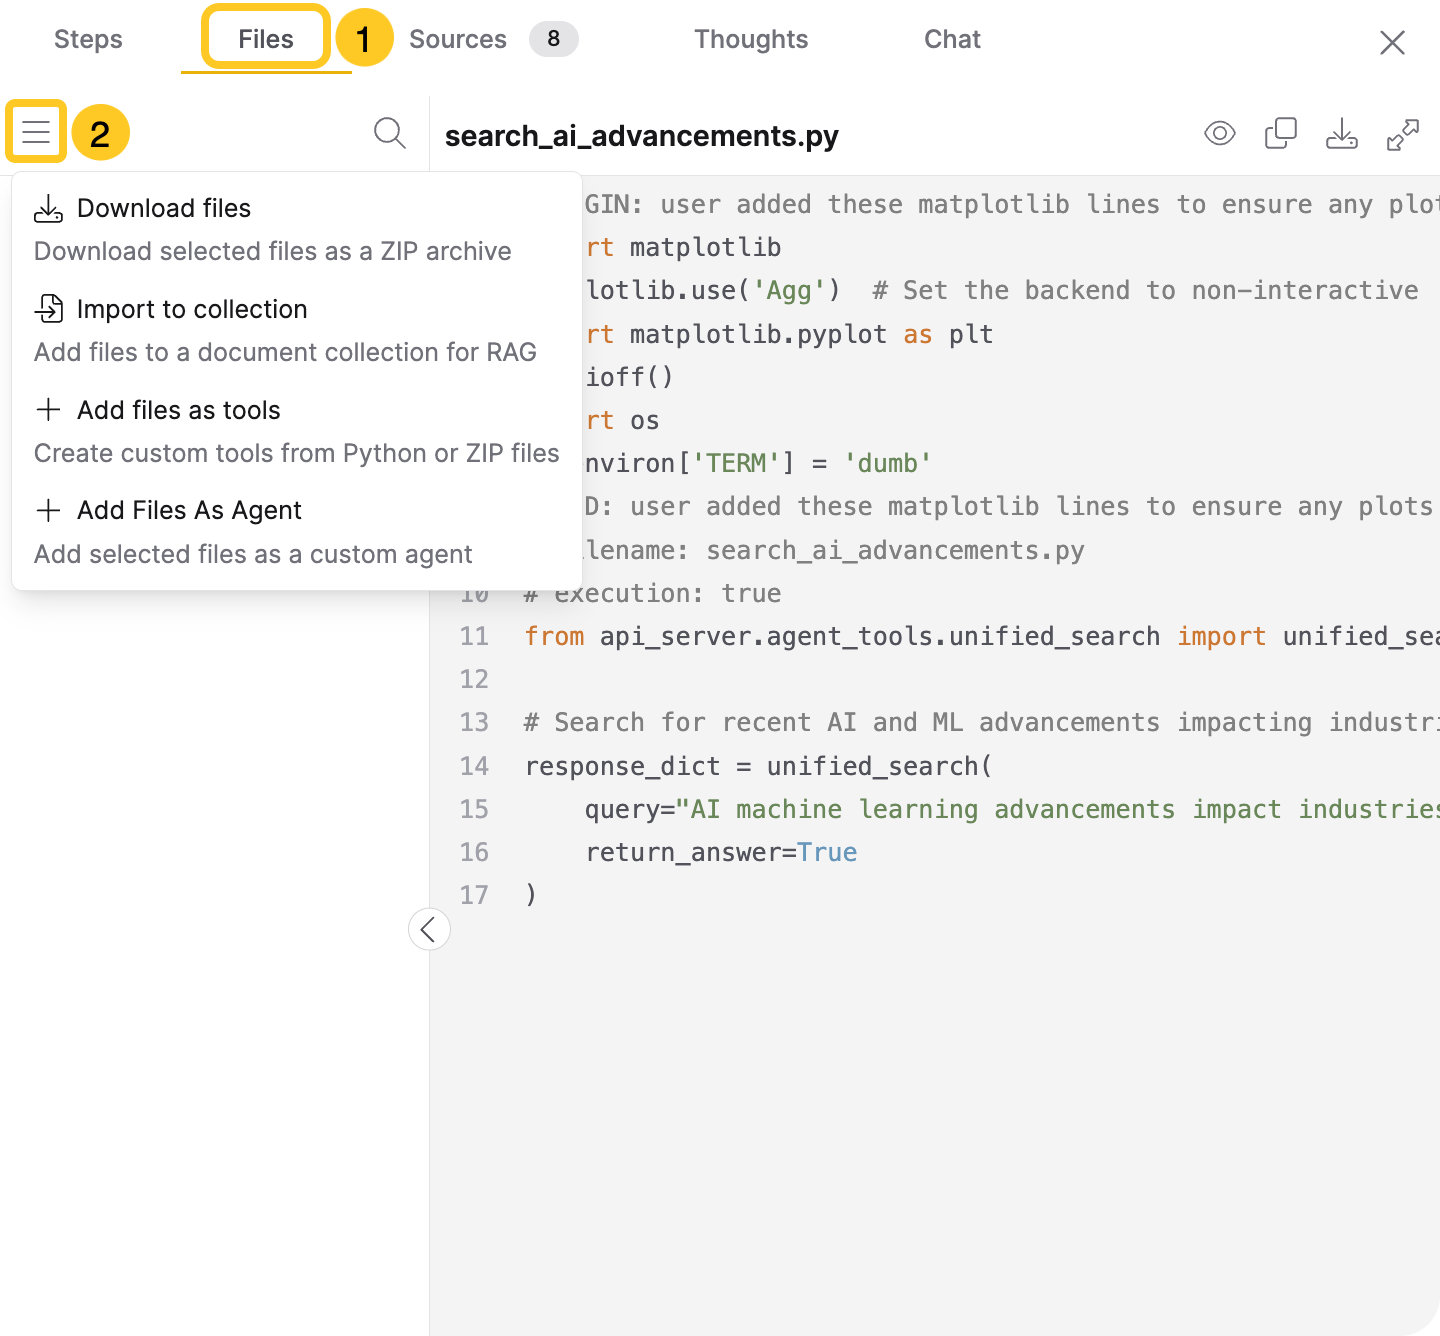
You can also scroll to the bottom of the agent response and click See all files to directly open Files in the right panel.
Download files
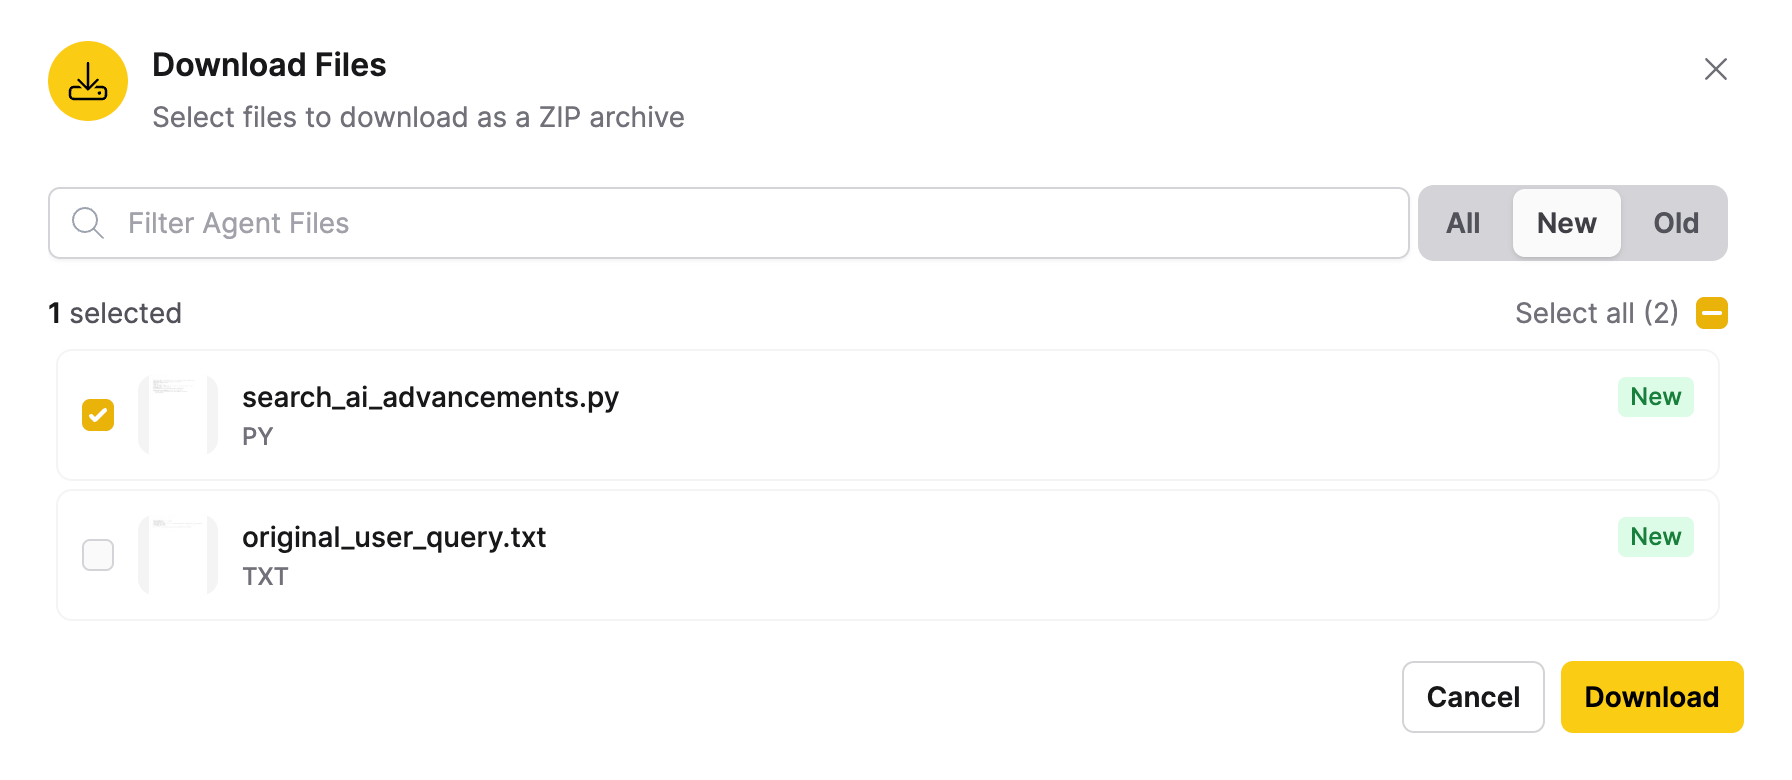
Download selected files in the form of a ZIP archive.
The Download Files dialog includes:
- A search bar to filter files
- A toggle to switch between All, New, and Old files
- An option to select files or Select all
- A Download button
Import files to collection
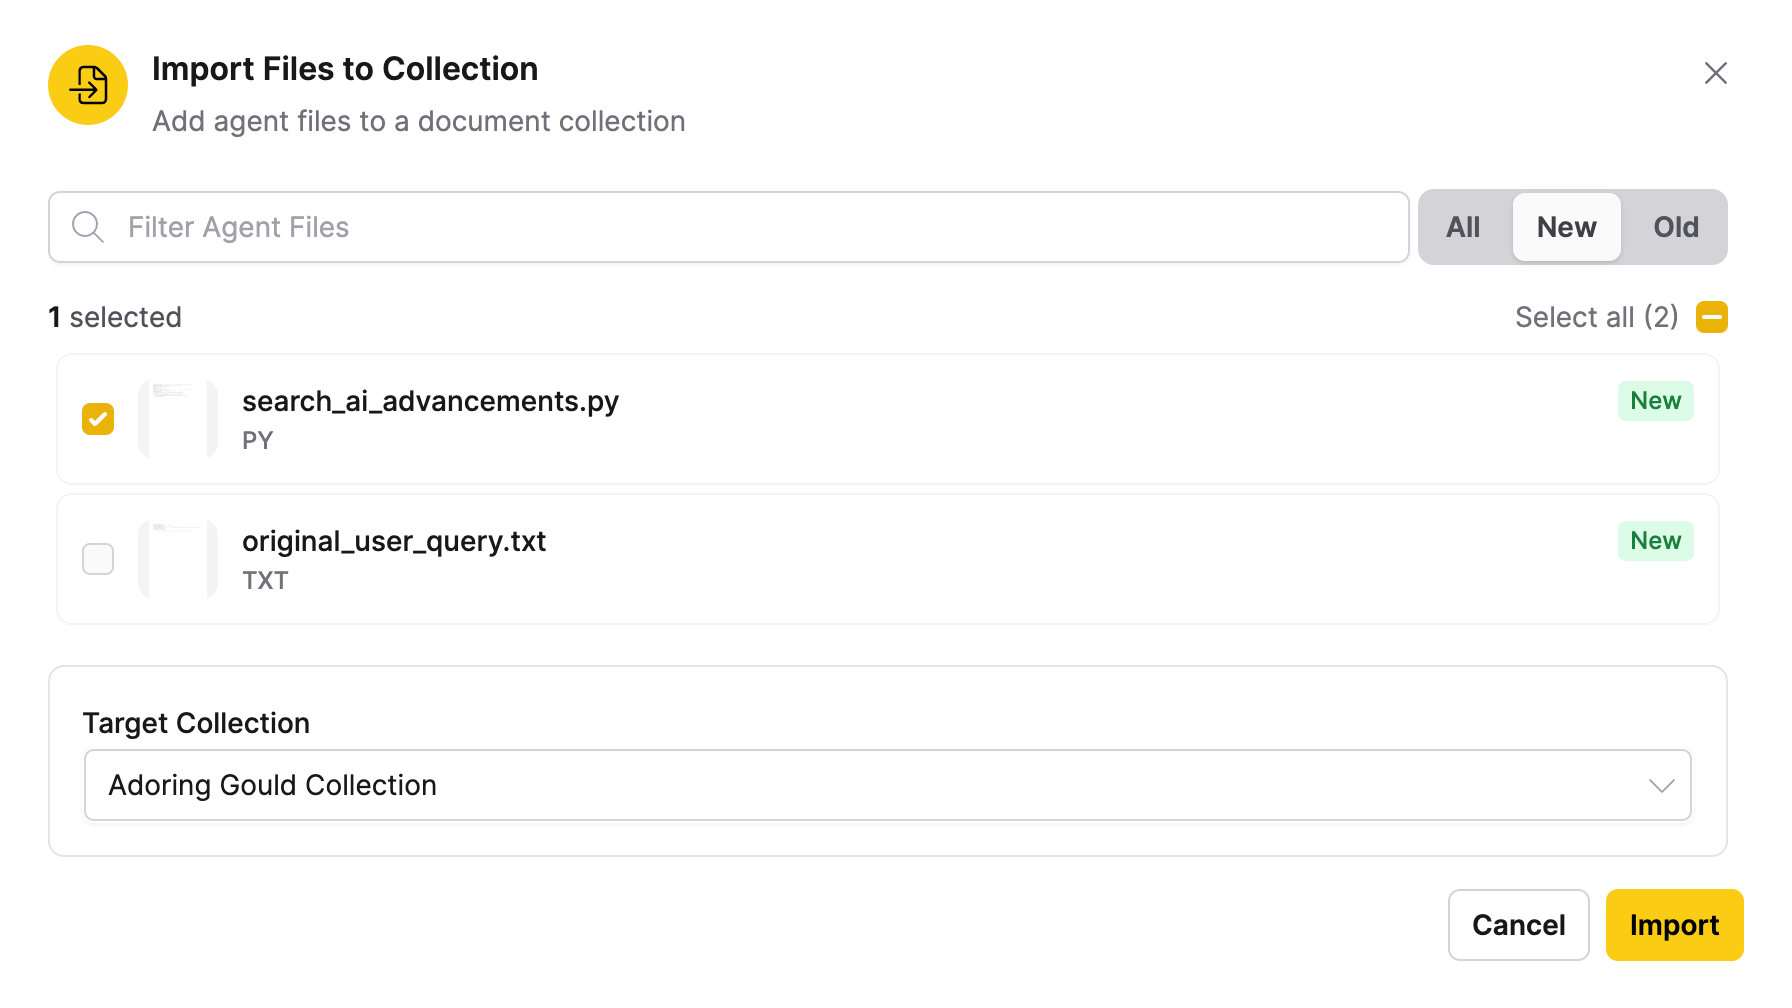
Add selected files to a collection directly.
The Import Files to Collection dialog includes:
- A search bar to filter files
- A toggle to switch between All, New, and Old files
- An option to select files or Select all
- A dropdown to select the target Collection
- An Import button
Select the files to add, then choose the Collection from the Target Collection dropdown.
Add files as tools
Turn .py or .zip files that the agent has already generated directly into tools—no download and re-upload required. Configure tool settings for the selected files, or package multiple files as a single tool.
In the Add Files as Tool dialog, select the agent-generated files.
This dialog displays only .py and .zip files. All other file types are hidden.
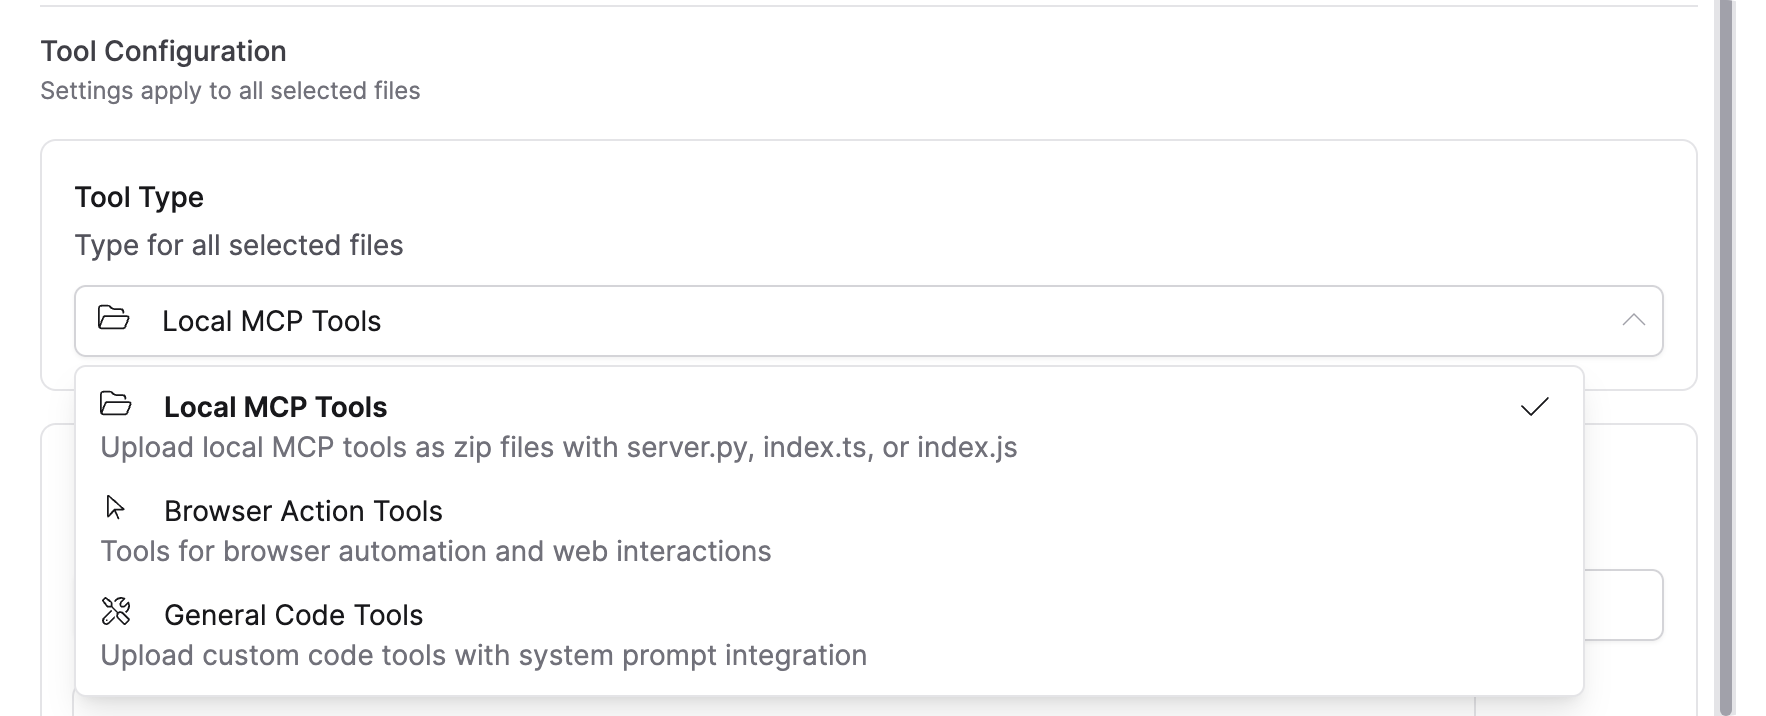
Under Tool Configuration, configure the settings to apply to the selected files, and then add the tool. Use the Tool Type dropdown to select from three types of tools (Local MCP Tools, Browser Action Tools, or General Code Tools):
- On success, a confirmation message appears (for example, Tool added successfully) and h2oGPTe registers the new tool to your account.
- On failure, an error message describes the cause based on the tool type selected:
- General Code: Tool name must be unique. Please choose a different name and try again.
- Browser Action: Tool name must be unique and should start with "browser_". Please check your configuration and try again.
- Local MCP: Please ensure your tool name is unique and the tool zip file contains a server.py, index.ts, or index.js file. Check your upload and try again.
- After registration, the current chat's Tools list refreshes automatically. The new tool appears under the Custom Tool label (to distinguish it from Built-In tools) and is enabled by default if you selected Enable by Default.
1. Local MCP Tools
- Select Local MCP Tools from the dropdown to create a custom MCP server tool.
- Select an agent-generated
.zipfile containing aserver.pyentry point (required), along with optionalenvs.jsonanddescription.mdfiles. - Enter a descriptive and unique name for your local MCP tool under MCP Server Name as this is the display name for the tool in the tools list.
- Under MCP Usage Mode, select Runner, Creator, or both.
- Optionally, select Enable by Default to make the tool available in new conversations.
- Click Add Tool.
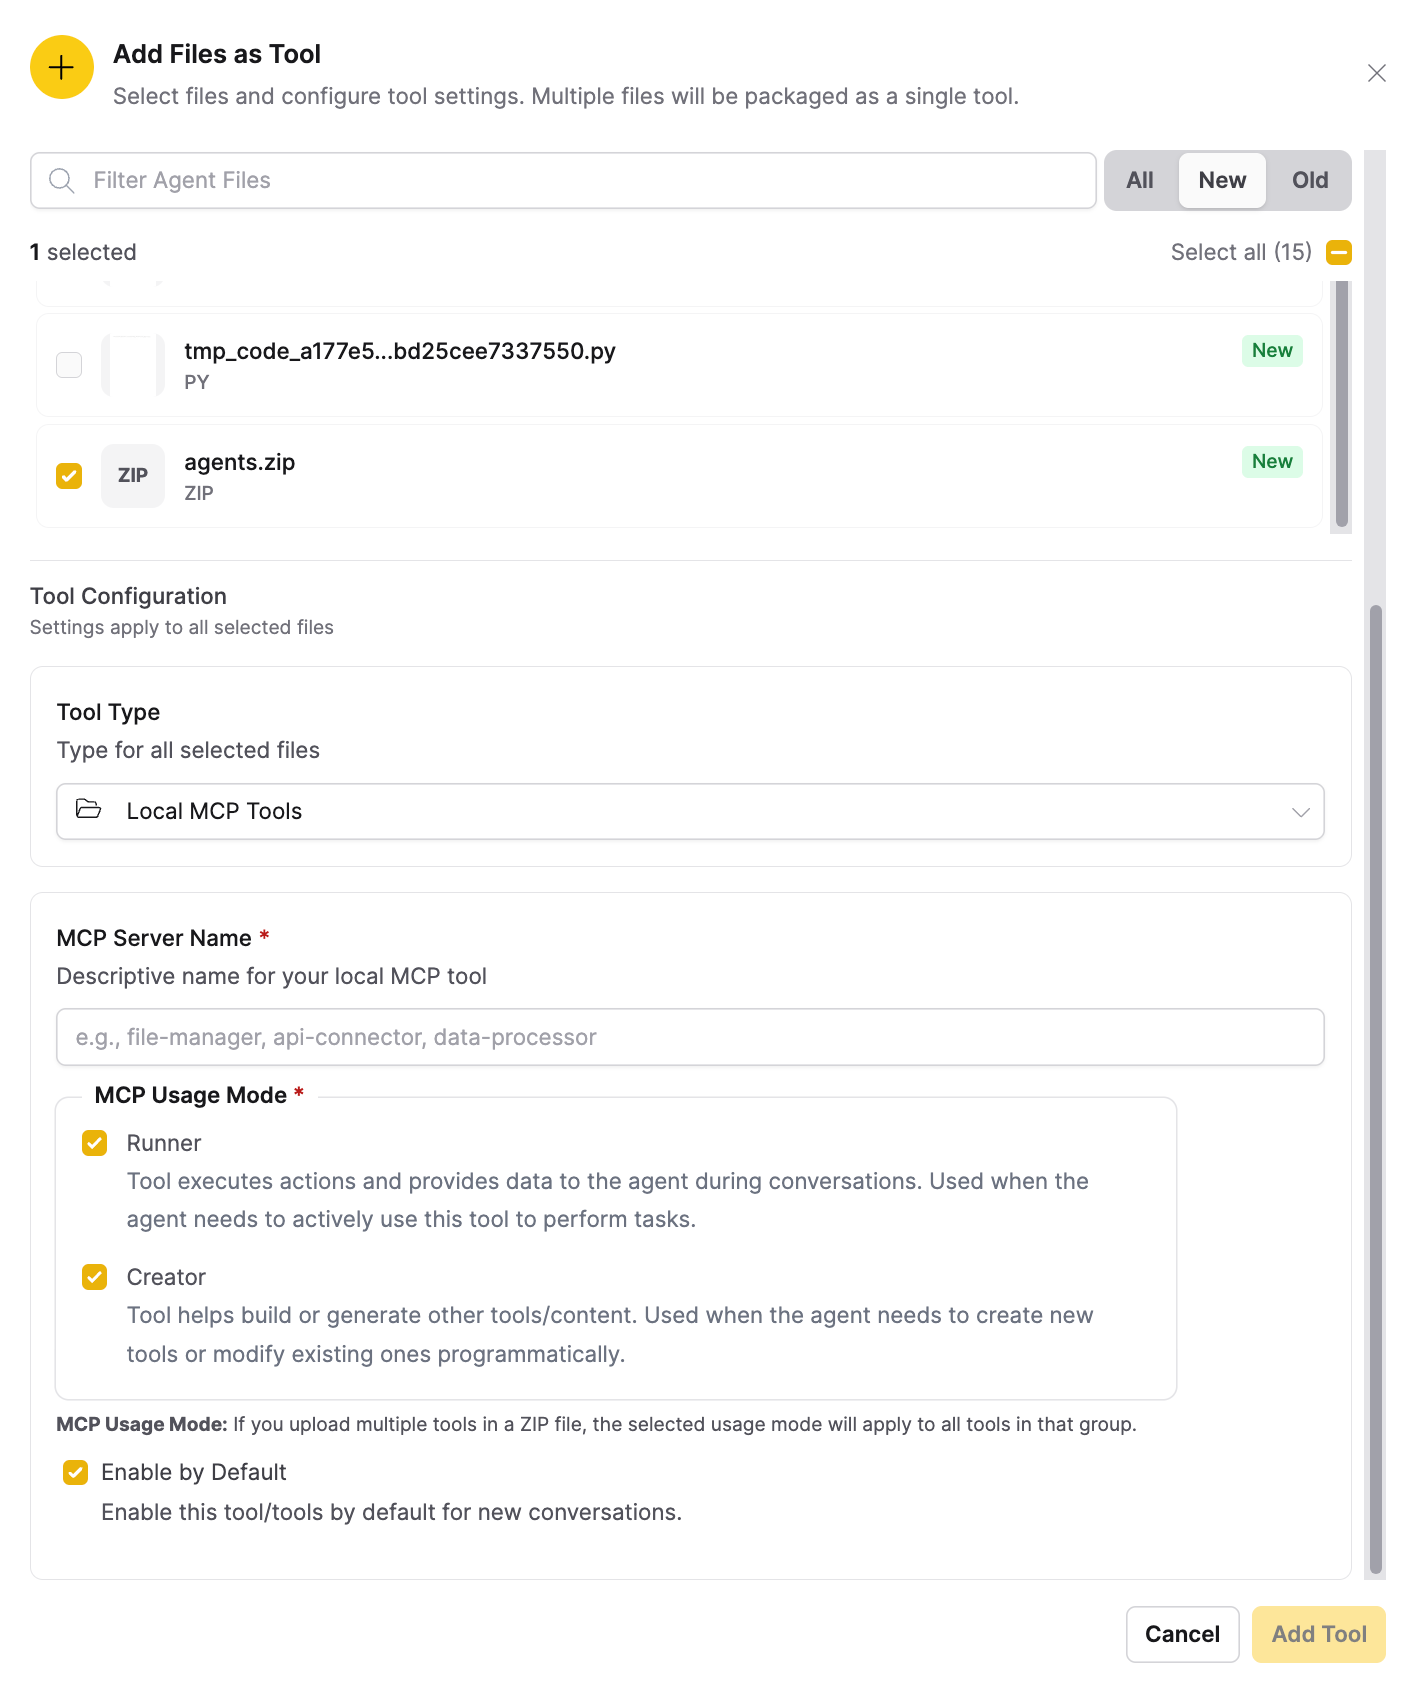
See Local MCP Tools to learn more about local MCP tools and MCP usage modes.
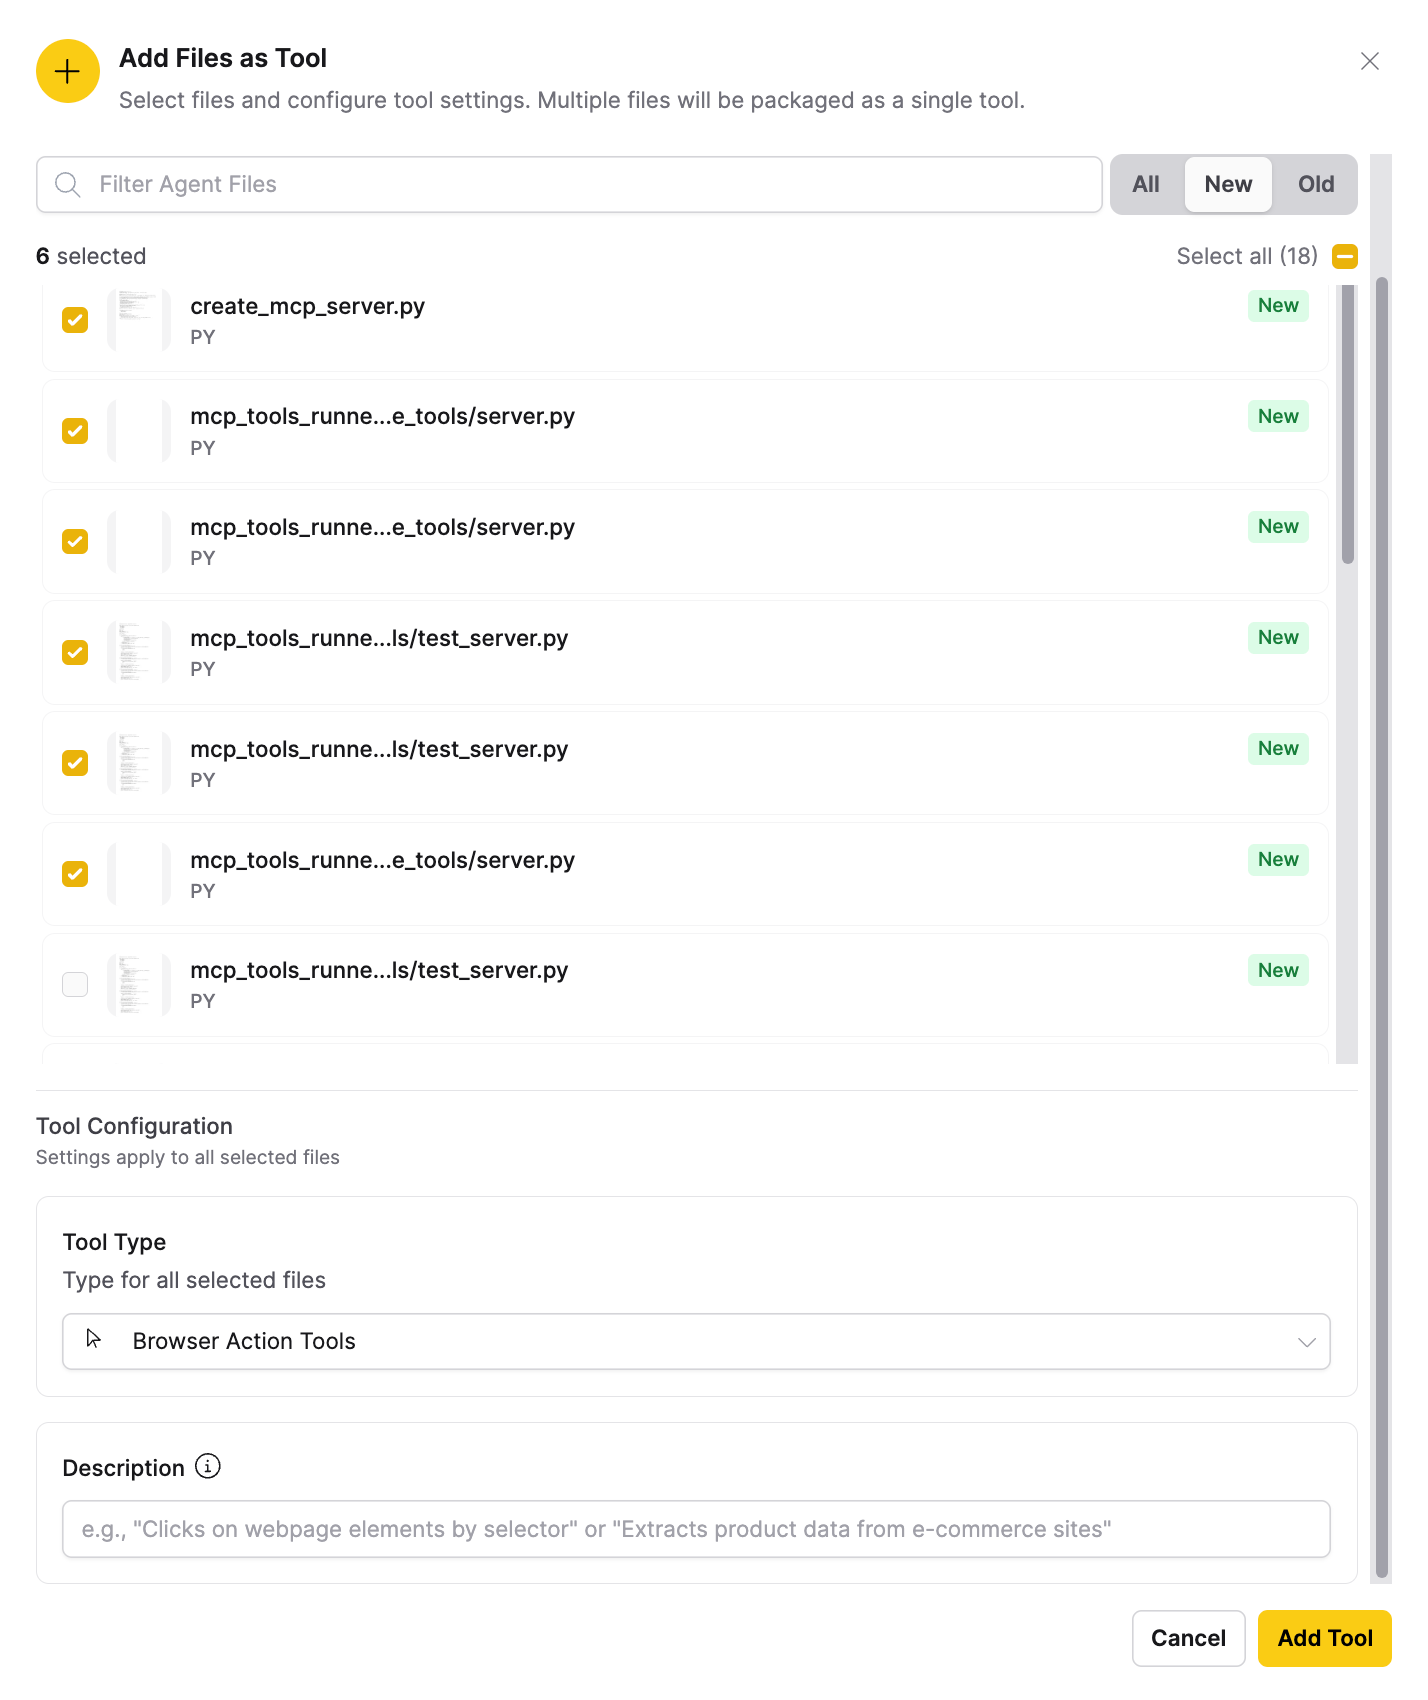
2. Browser Action Tools
- Select Browser Action Tools to add a tool for browser automation and web interactions.
- When uploading multiple files, provide a common description that applies to all tools.
- Click Add Tool.
3. General Code Tools
-
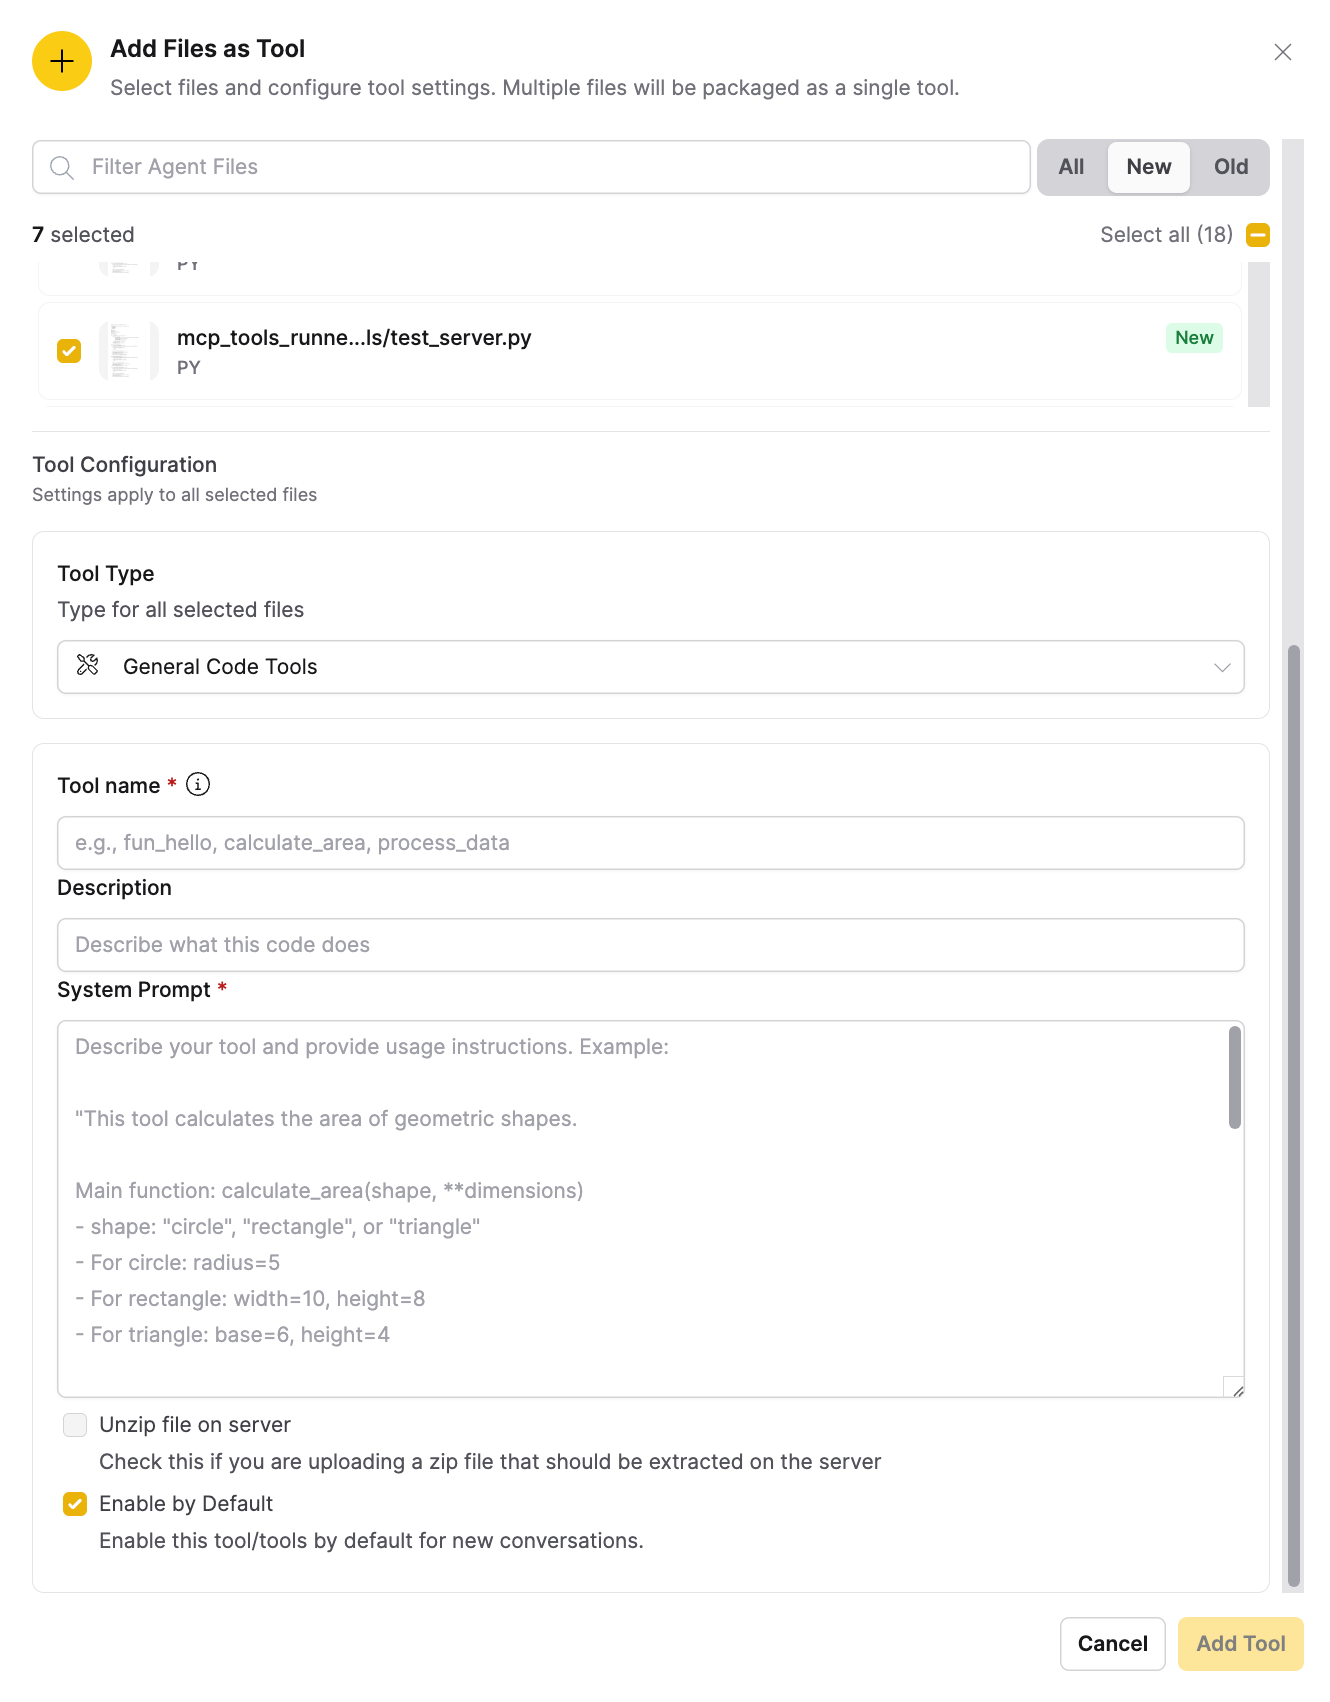
Select General Code Tools to upload custom code tools with system prompt integration.
-
Tool name: Enter the primary function name that the agent will call. This must exactly match your main function name.
-
Description: Describe what the code does.
-
System Prompt: Describe your tool and provide usage instructions.
-
Unzip file on server: Select this checkbox if you are uploading a .zip file that needs to be extracted on the server.
-
Enable by Default: Select this checkbox to enable the tools by default for new conversations.
-
Click Add Tool.
Add files as agent
You can select multiple files and package them into a single custom agent.
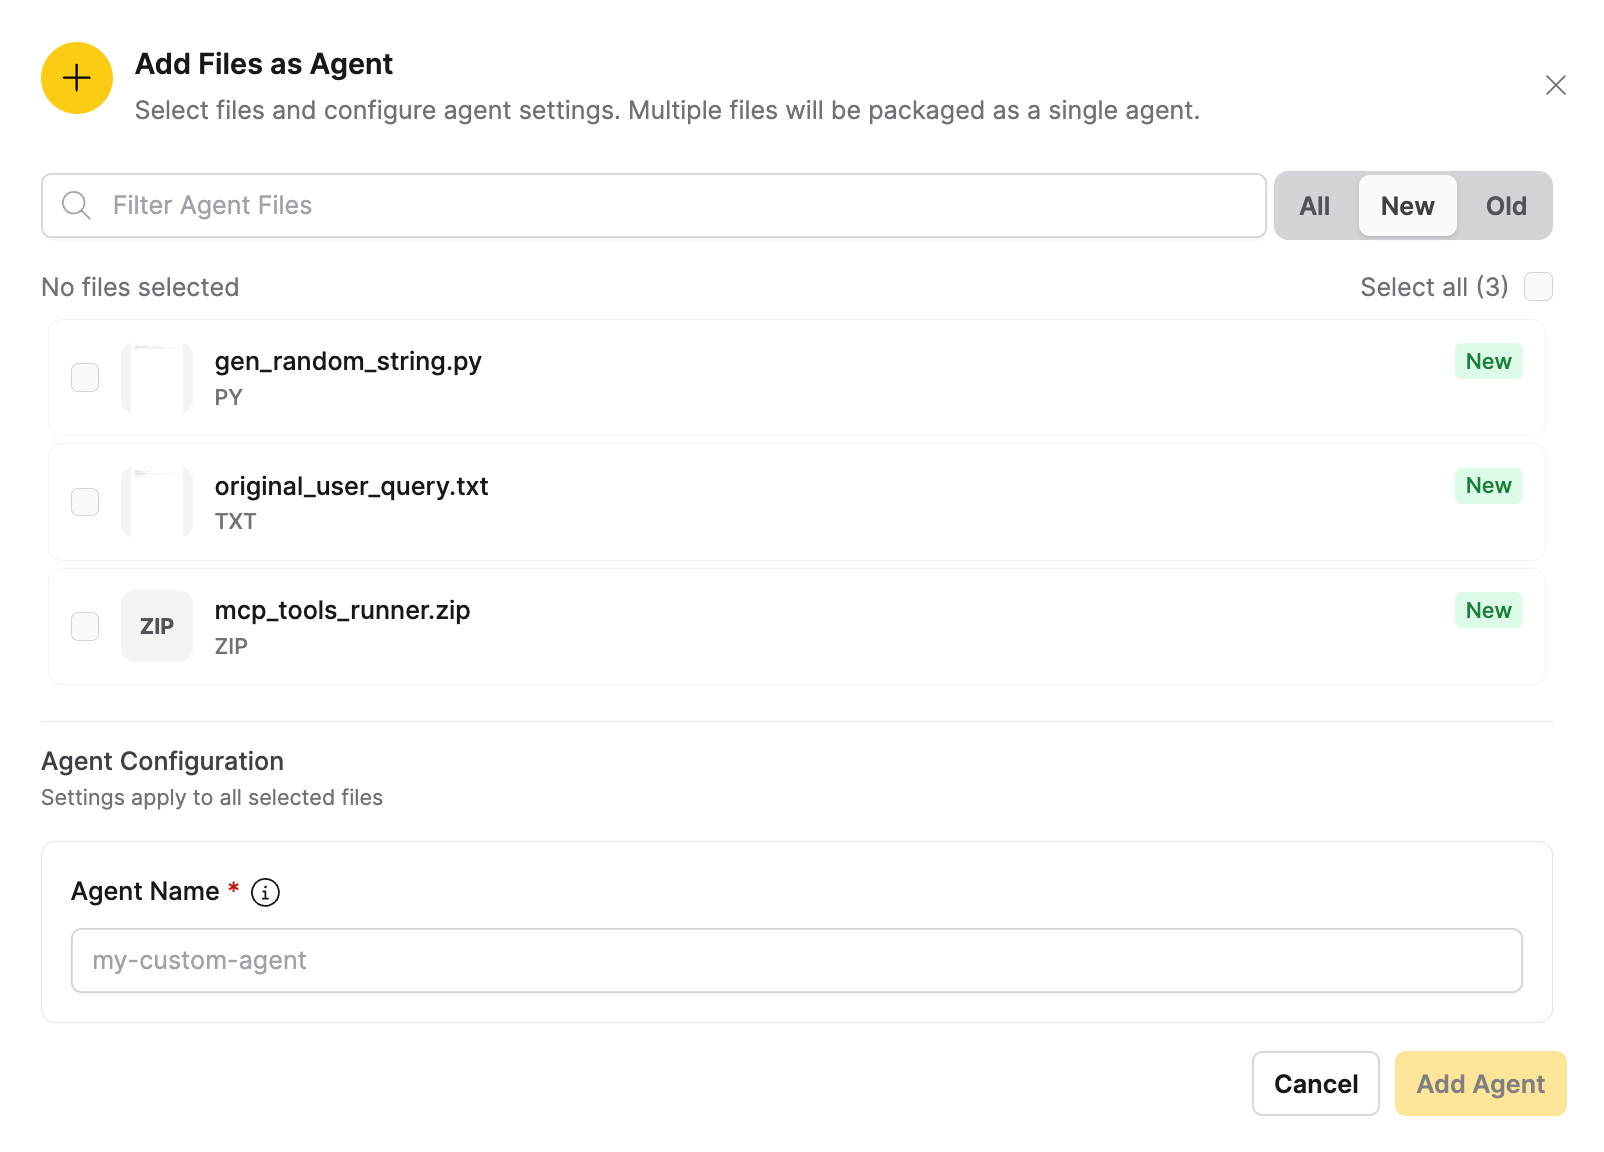
The Add Files as Agent dialog includes:
- A search bar to filter files
- A toggle to switch between All, New, and Old files
- An option to select files or Select all
- An Agent Configuration section with settings for the packaged agent
- An Agent Name field where you enter a unique identifier for the packaged agent
- An Add Agent button
After you click Add Agent, a notification confirms when the custom agent is ready to use in your chats.
See Review agent behavior to understand how an agent completes a request.
Files within the workspace cannot directly access other files. For example, an HTML file cannot link to or reference another file in the workspace. HTML and React previews render in a sandboxed iframe with a limited set of packages available.
Agent-generated HTML files are rendered in a sandboxed iframe. If you want an agent-generated HTML file to show images directly in the UI preview, instruct the agent to use Base64 encoding. Otherwise, images generated with relative file paths will only be visible when downloaded and viewed locally.
Get an email when a run finishes
Agent runs such as Deep Research, Agent Builder, and Tool Builder can take a long time. Instead of keeping the tab open, you can ask Enterprise h2oGPTe to email you a short notice as soon as the run finishes.
Prerequisites
You must be signed in; guests never see the bell. Once signed in, you always see the bell, but it stays unavailable until your account can receive email. You need both of the following:
- An address to send to. Enterprise h2oGPTe uses the email address on your account. If your account has no email address, it falls back to the Gmail address you saved under Email notifications (Gmail). You cannot choose another recipient; the notice always goes to whoever started the run.
- A way to send it. Either your administrator has configured system email for the deployment, or you have saved both your Gmail address and a Gmail app password under Email notifications (Gmail).
To set up your own Gmail credentials, open the profile menu and click Email notifications (Gmail). See Email notifications (Gmail) for the fields and how to clear them.
Turn the notification on
- Start an agent chat and send your prompt.
- While the agent is running, click the bell icon in the agent response header, to the left of the View and Details controls.
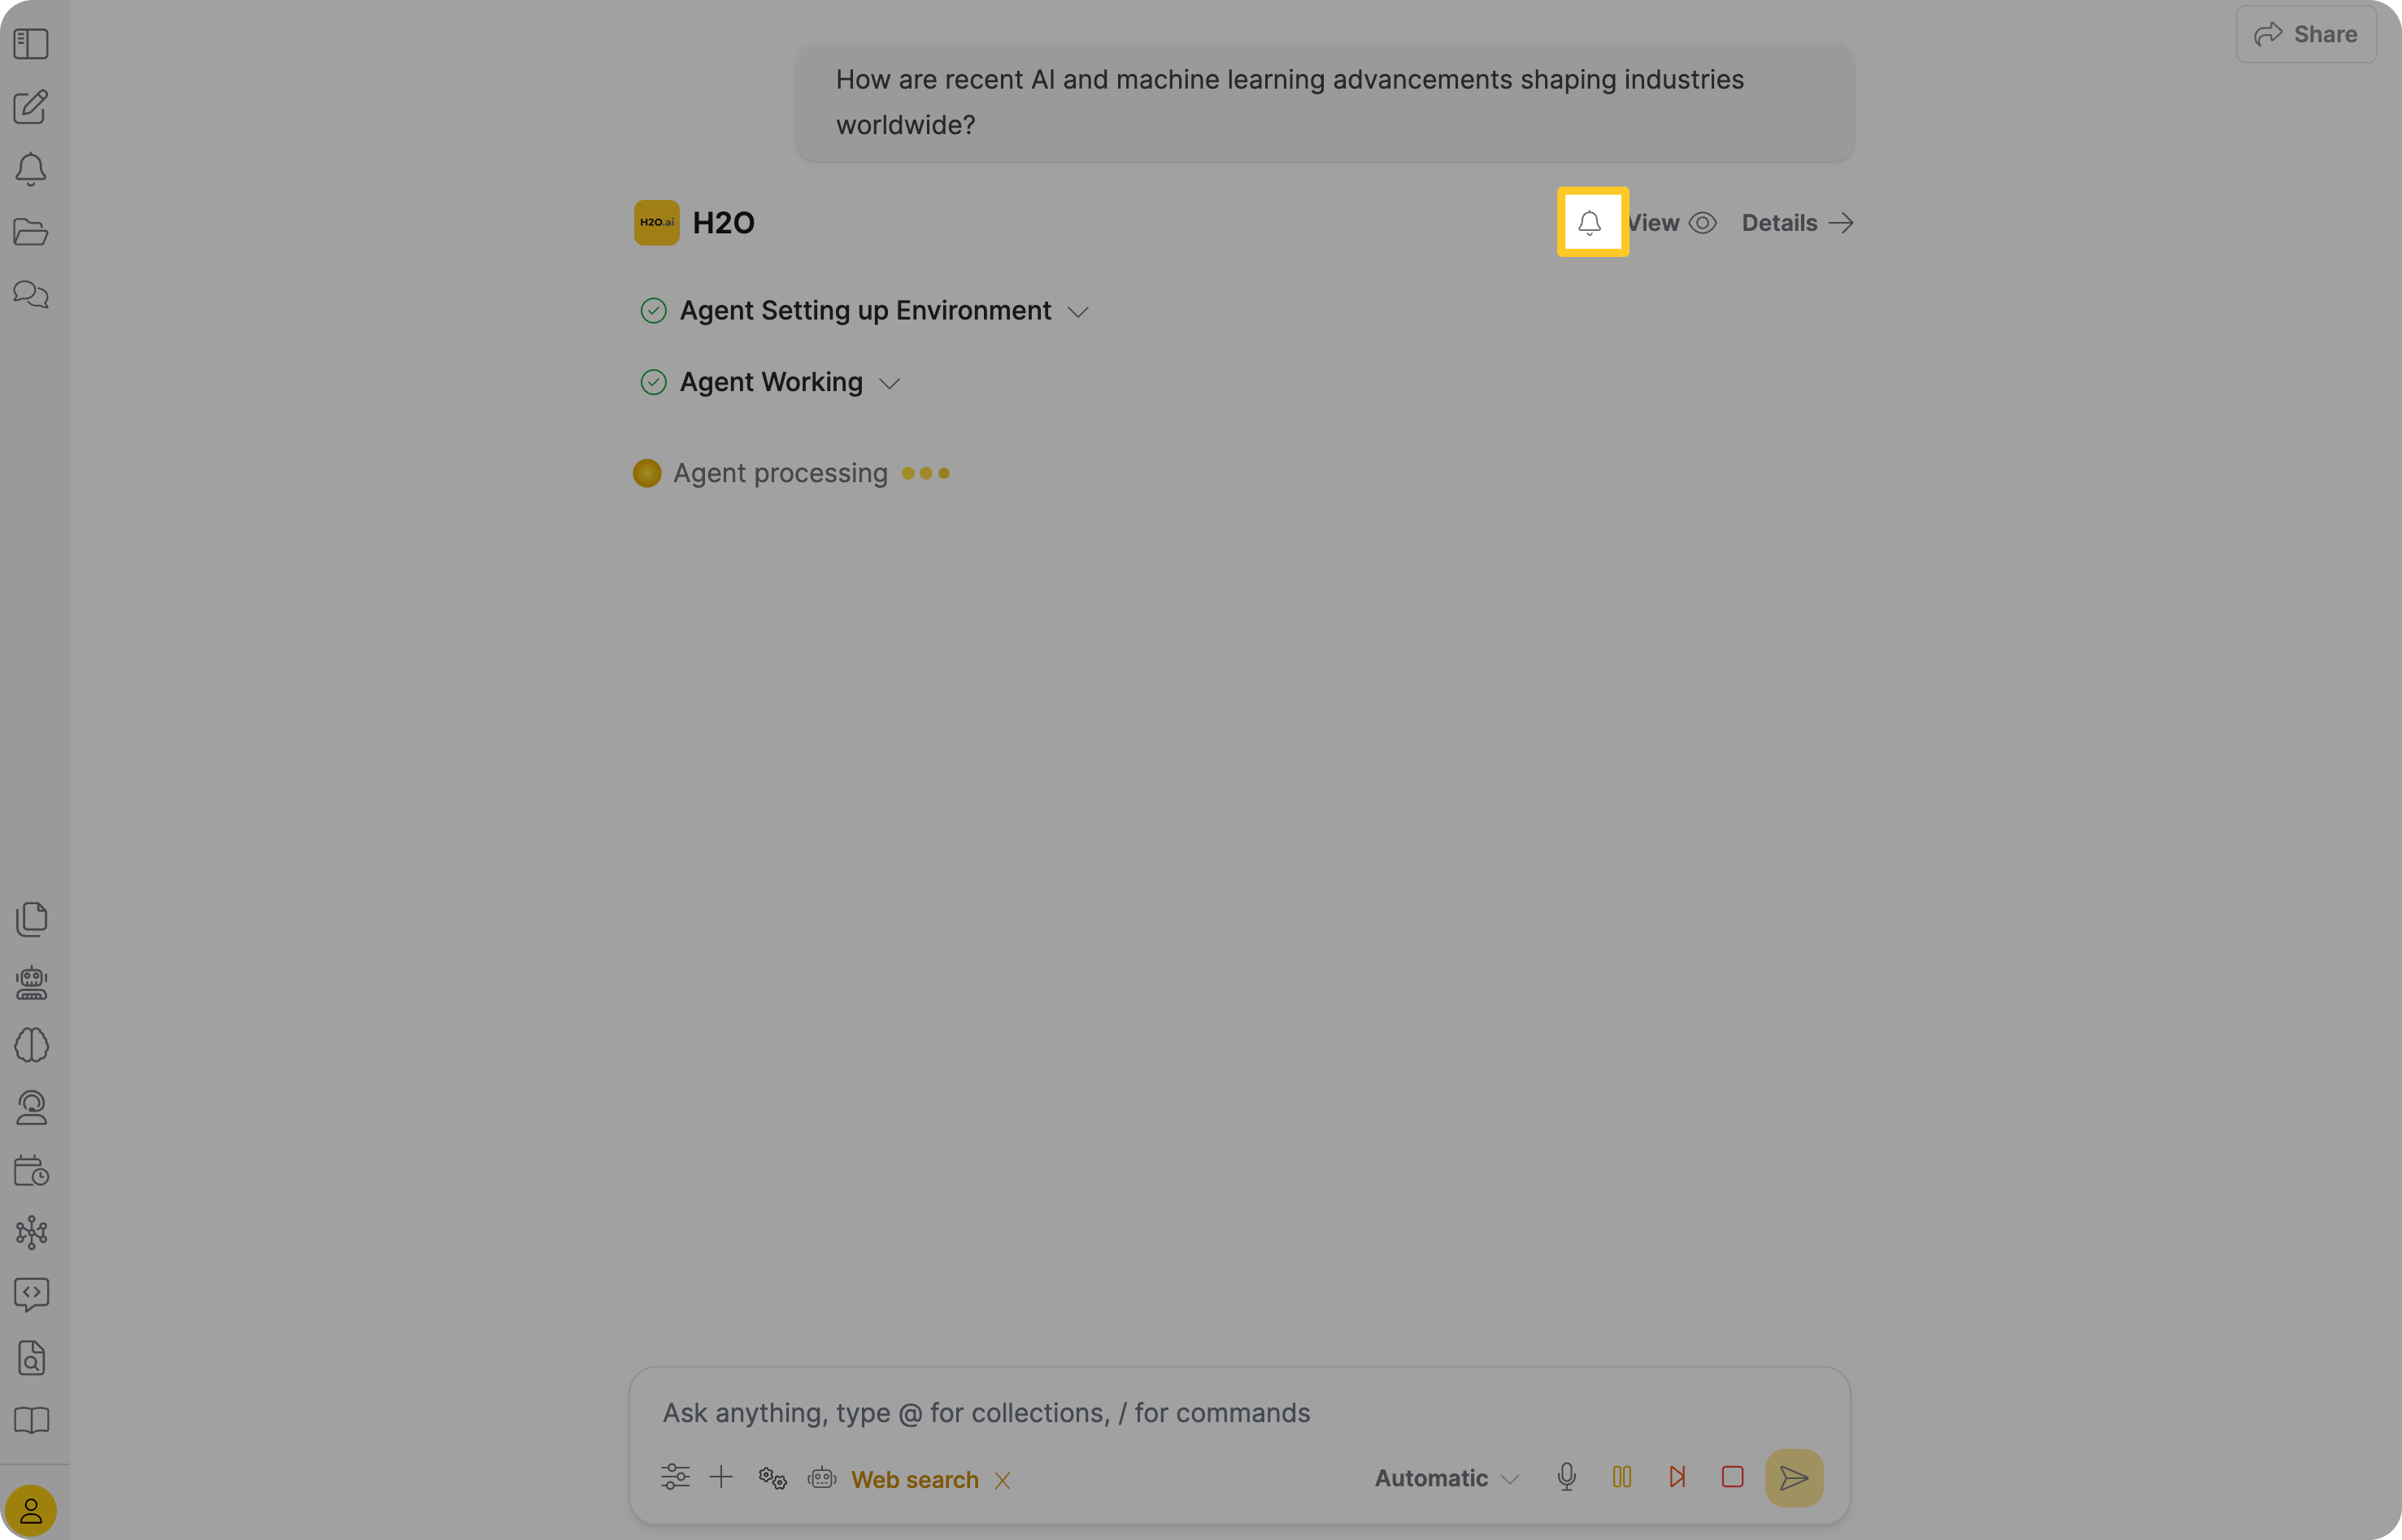
The bell fills in to show that the notification is on, so you can close the tab. The choice is saved immediately.
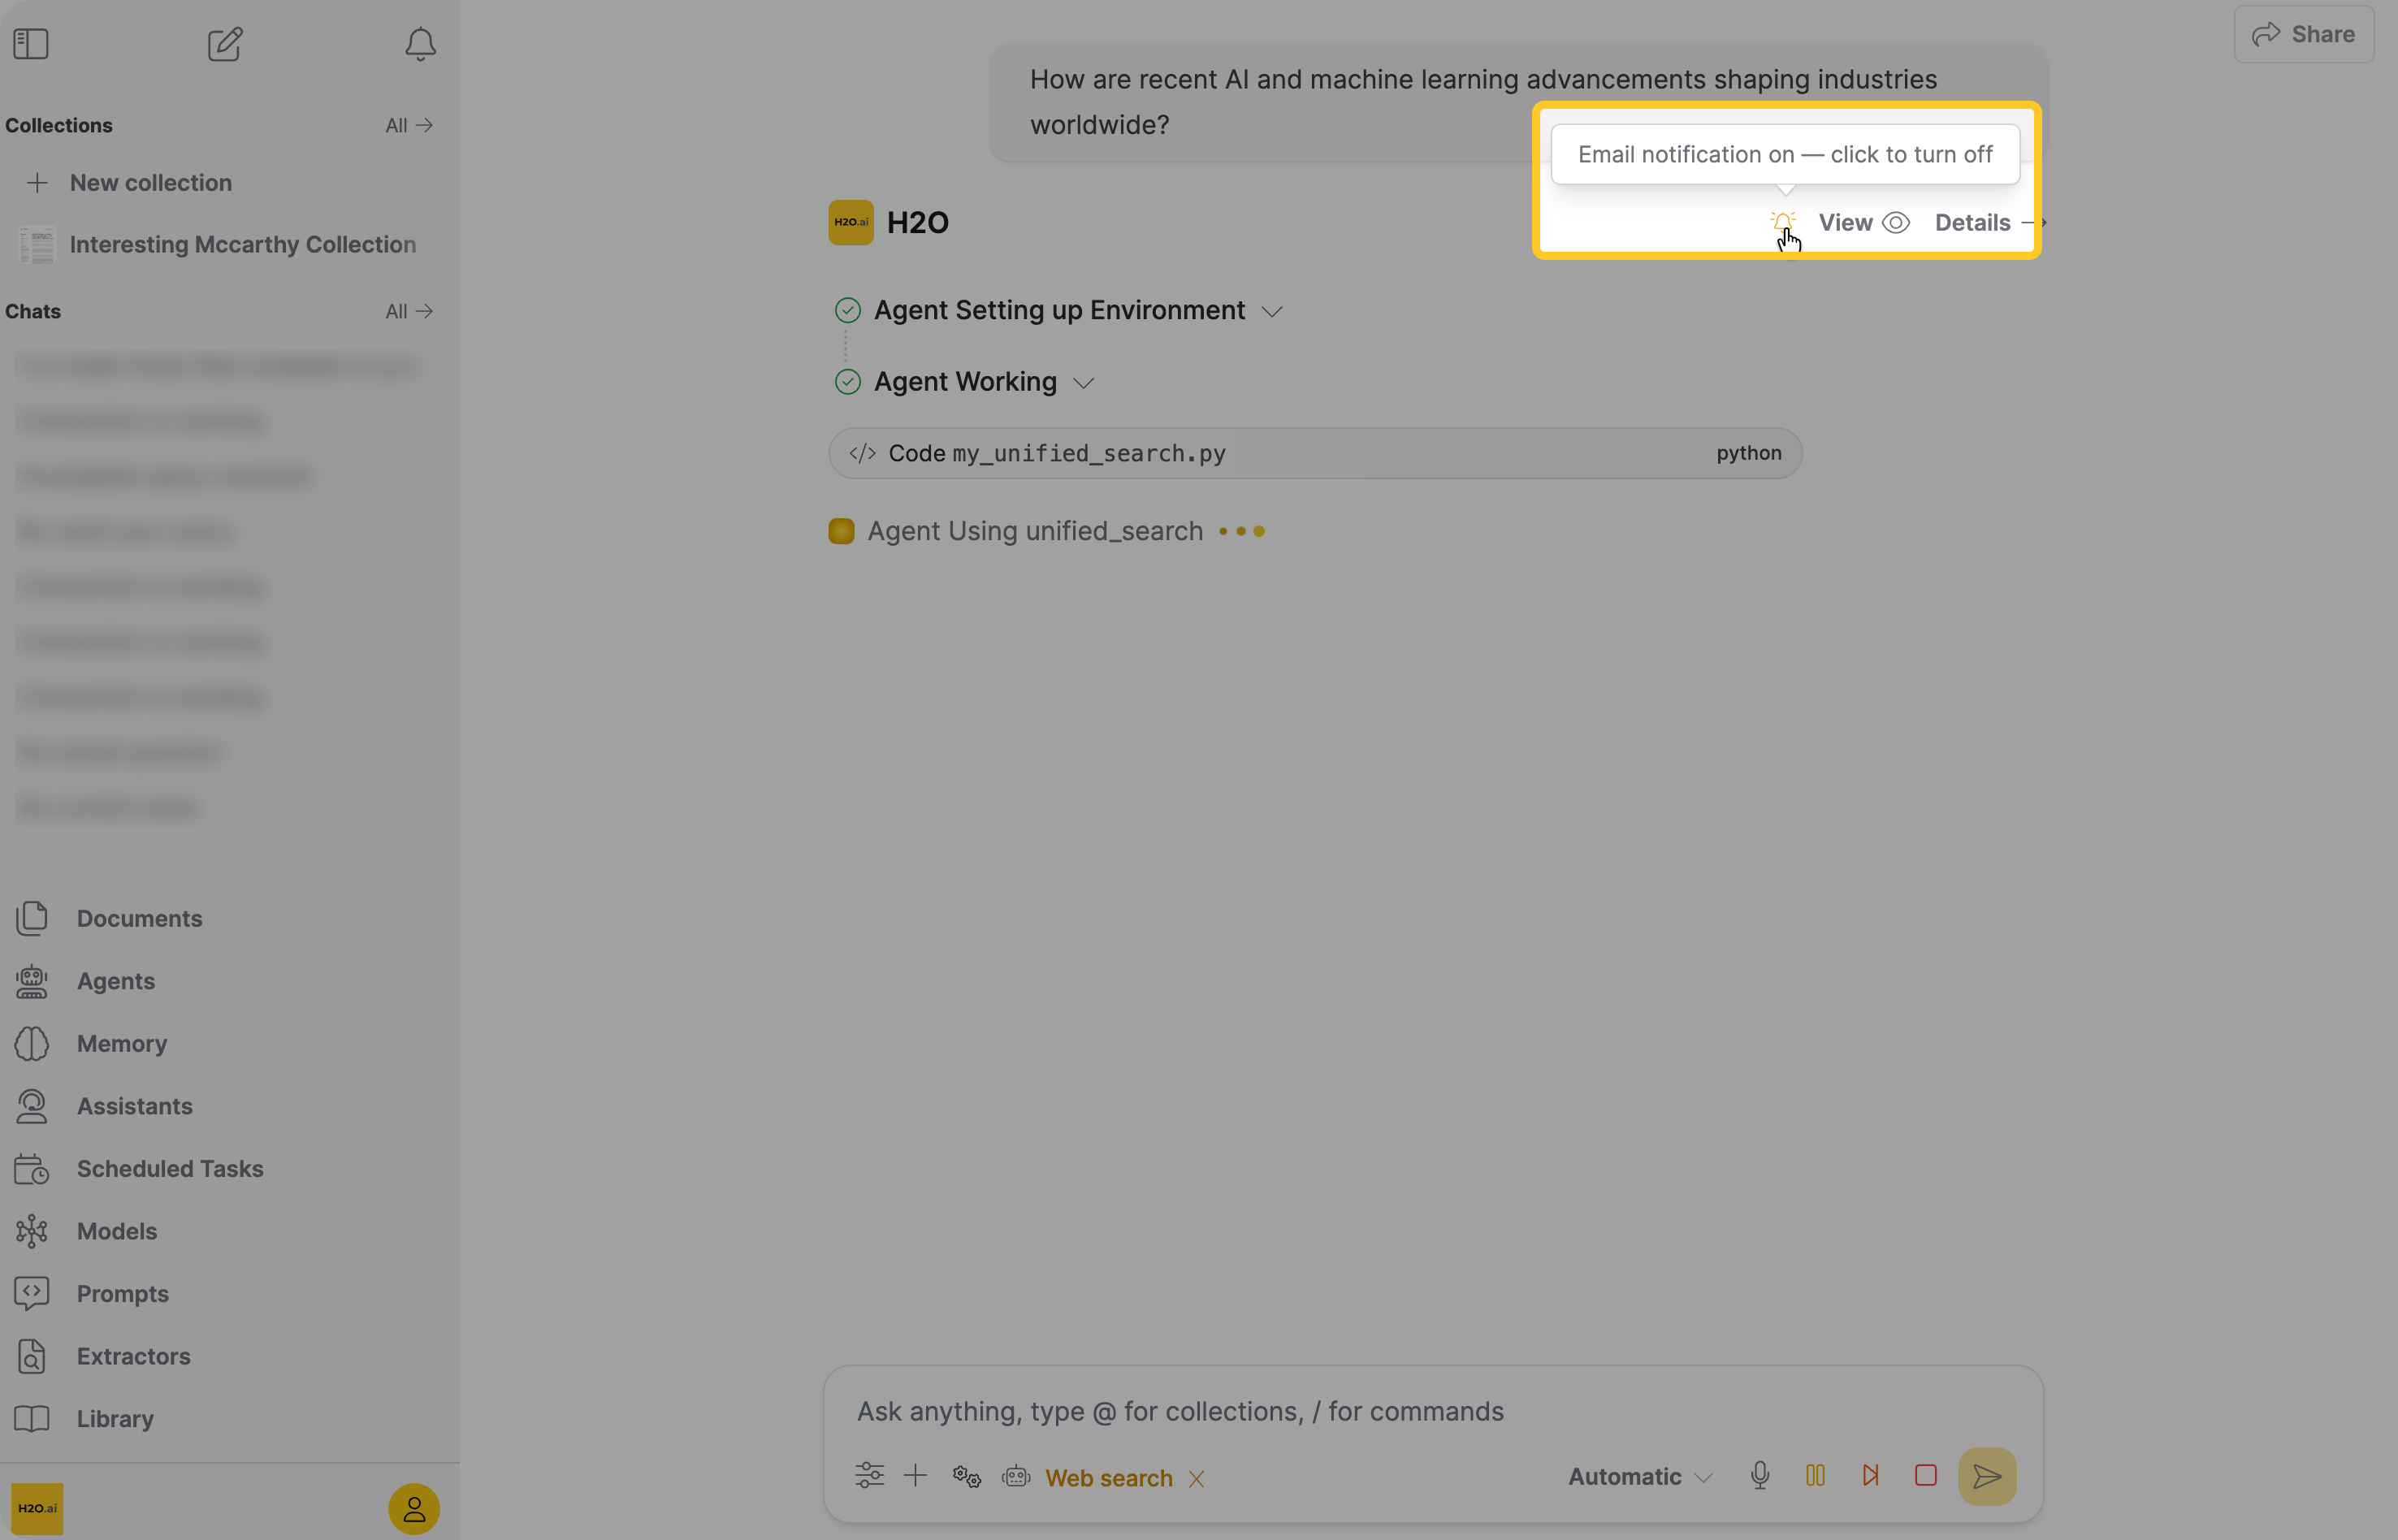
You can turn the notification on or off as many times as you like while the run is still streaming, including after reloading the page mid-run.
After the run finishes, the bell keeps your last choice:
- If the notification was on, the bell stays visible but becomes inactive, with the tooltip Email notification was on for this run.
- If the notification was off, the bell disappears from the finished response.
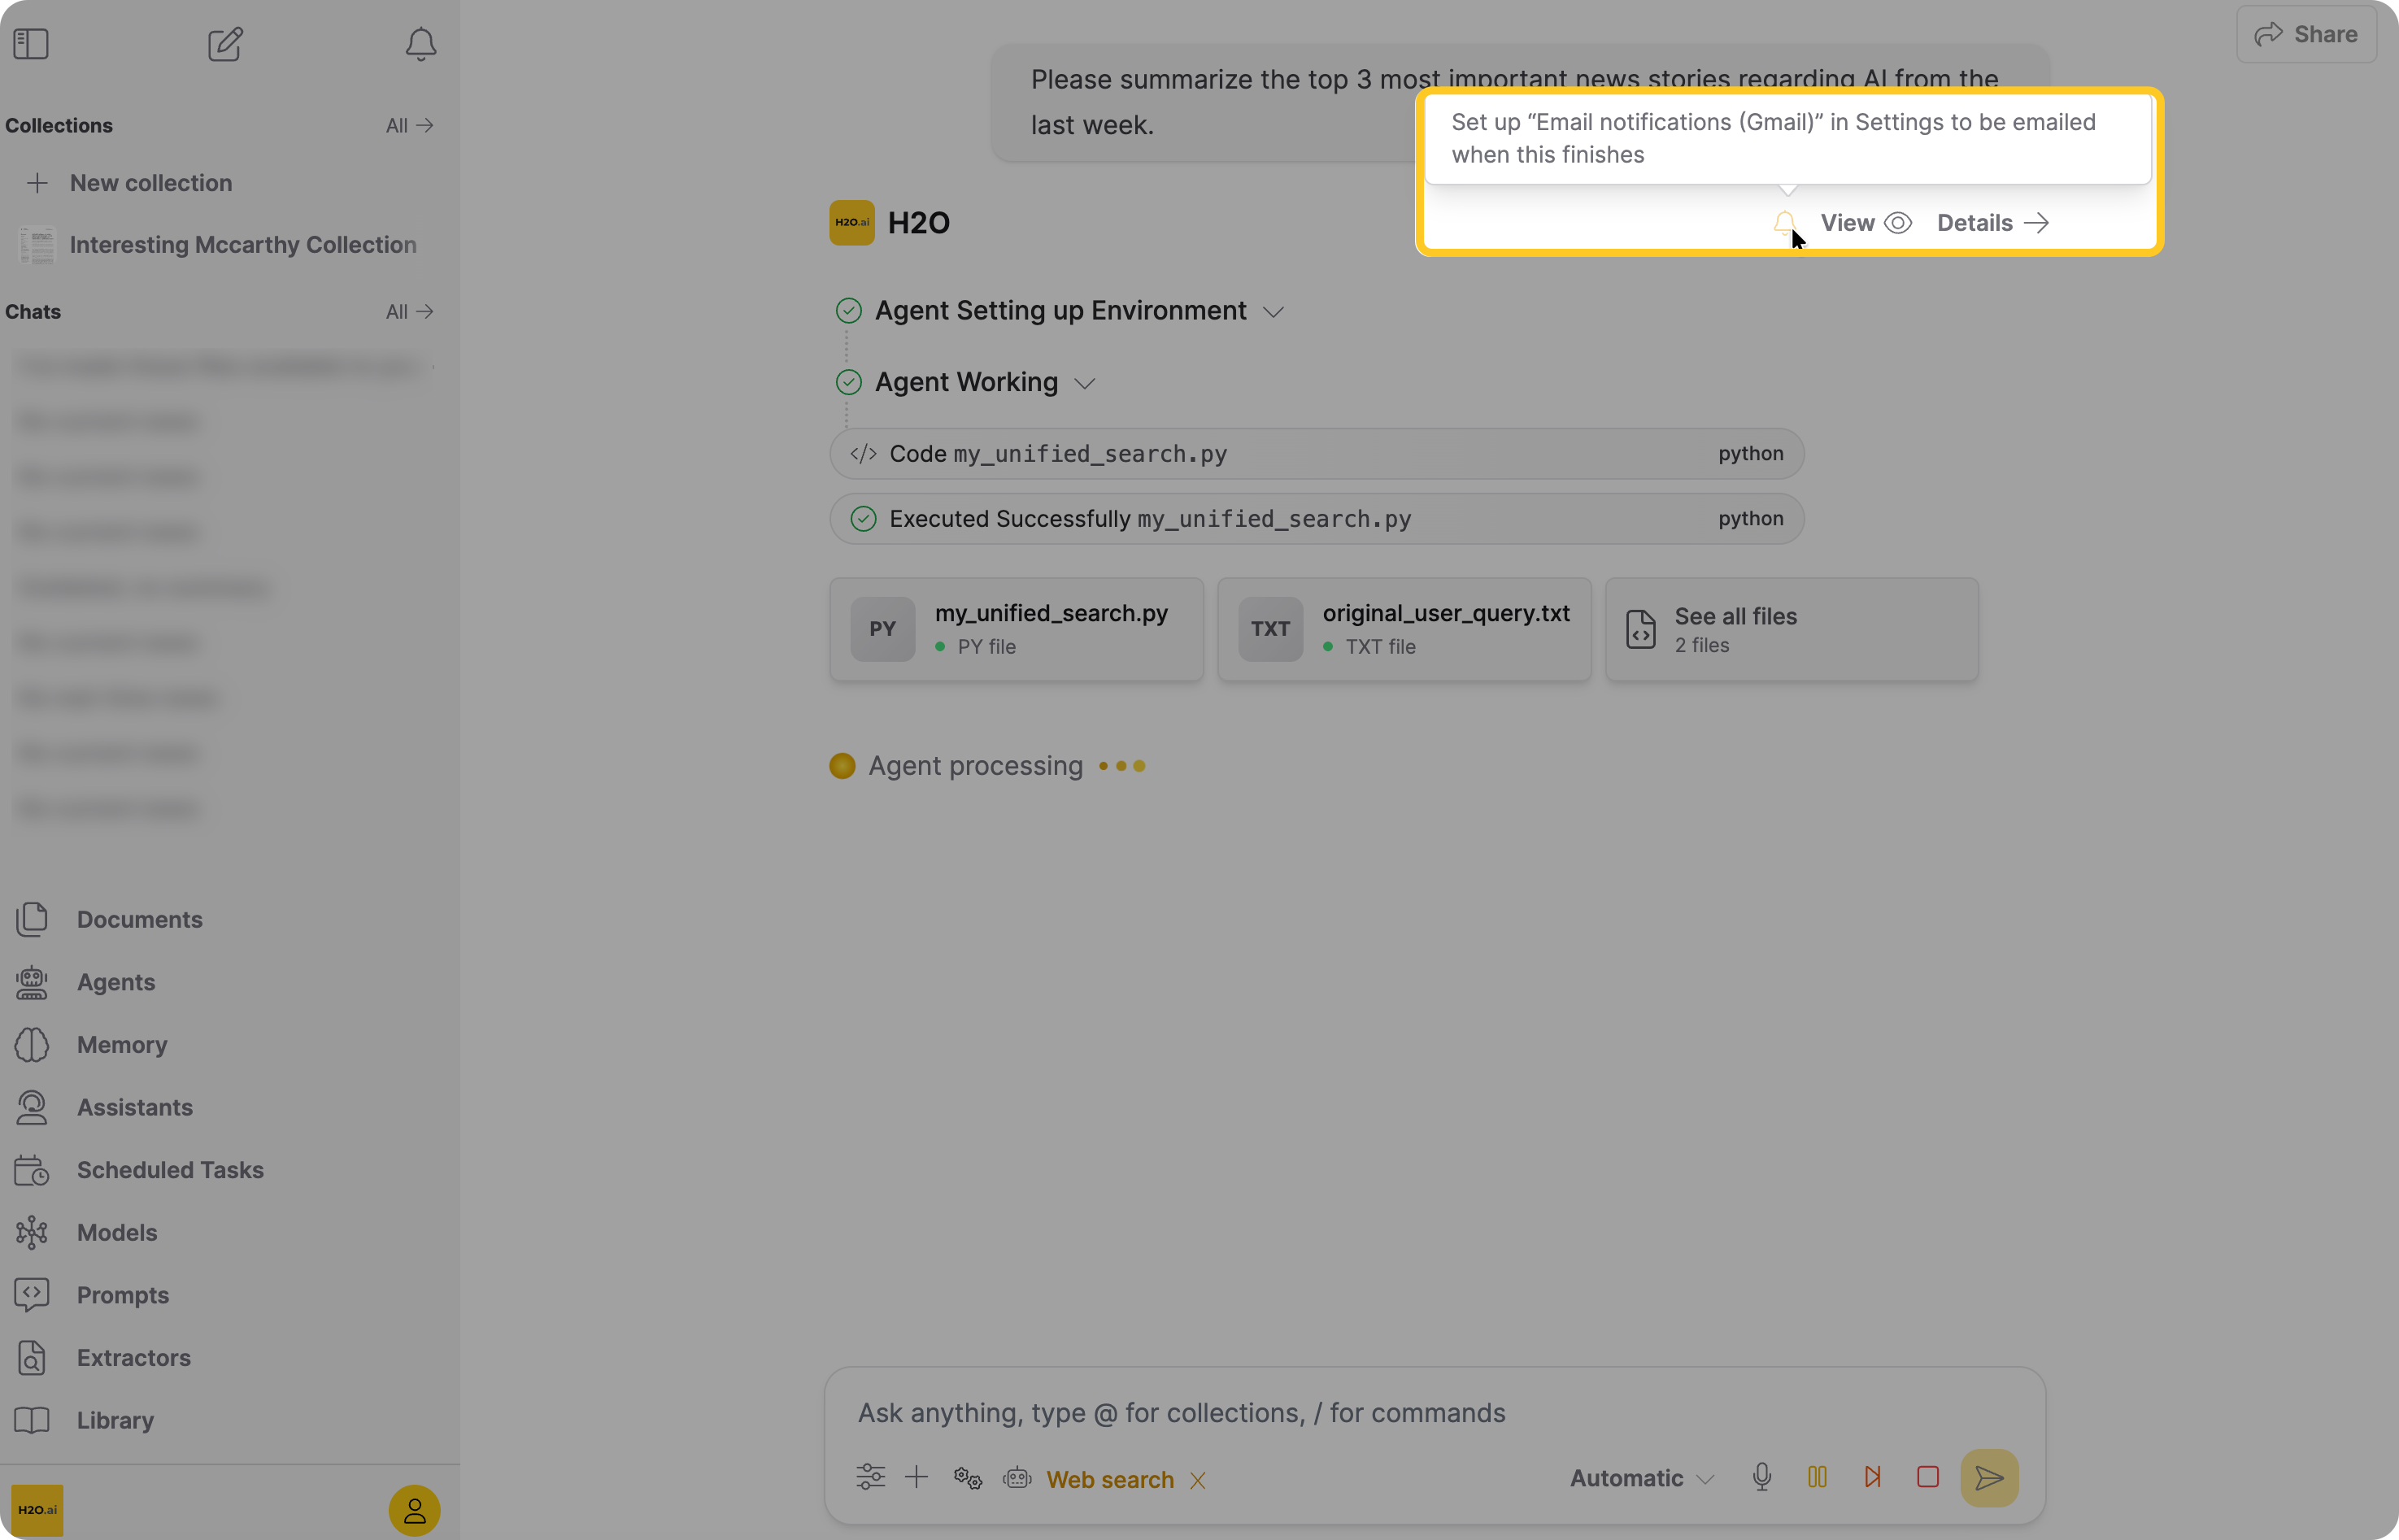
If the bell is unavailable during a run, its tooltip reads Set up "Email notifications (Gmail)" in Settings to be emailed when this finishes. Save your Gmail address and app password from the profile menu, and the bell becomes clickable immediately; you do not need to reload the chat.
What the email contains
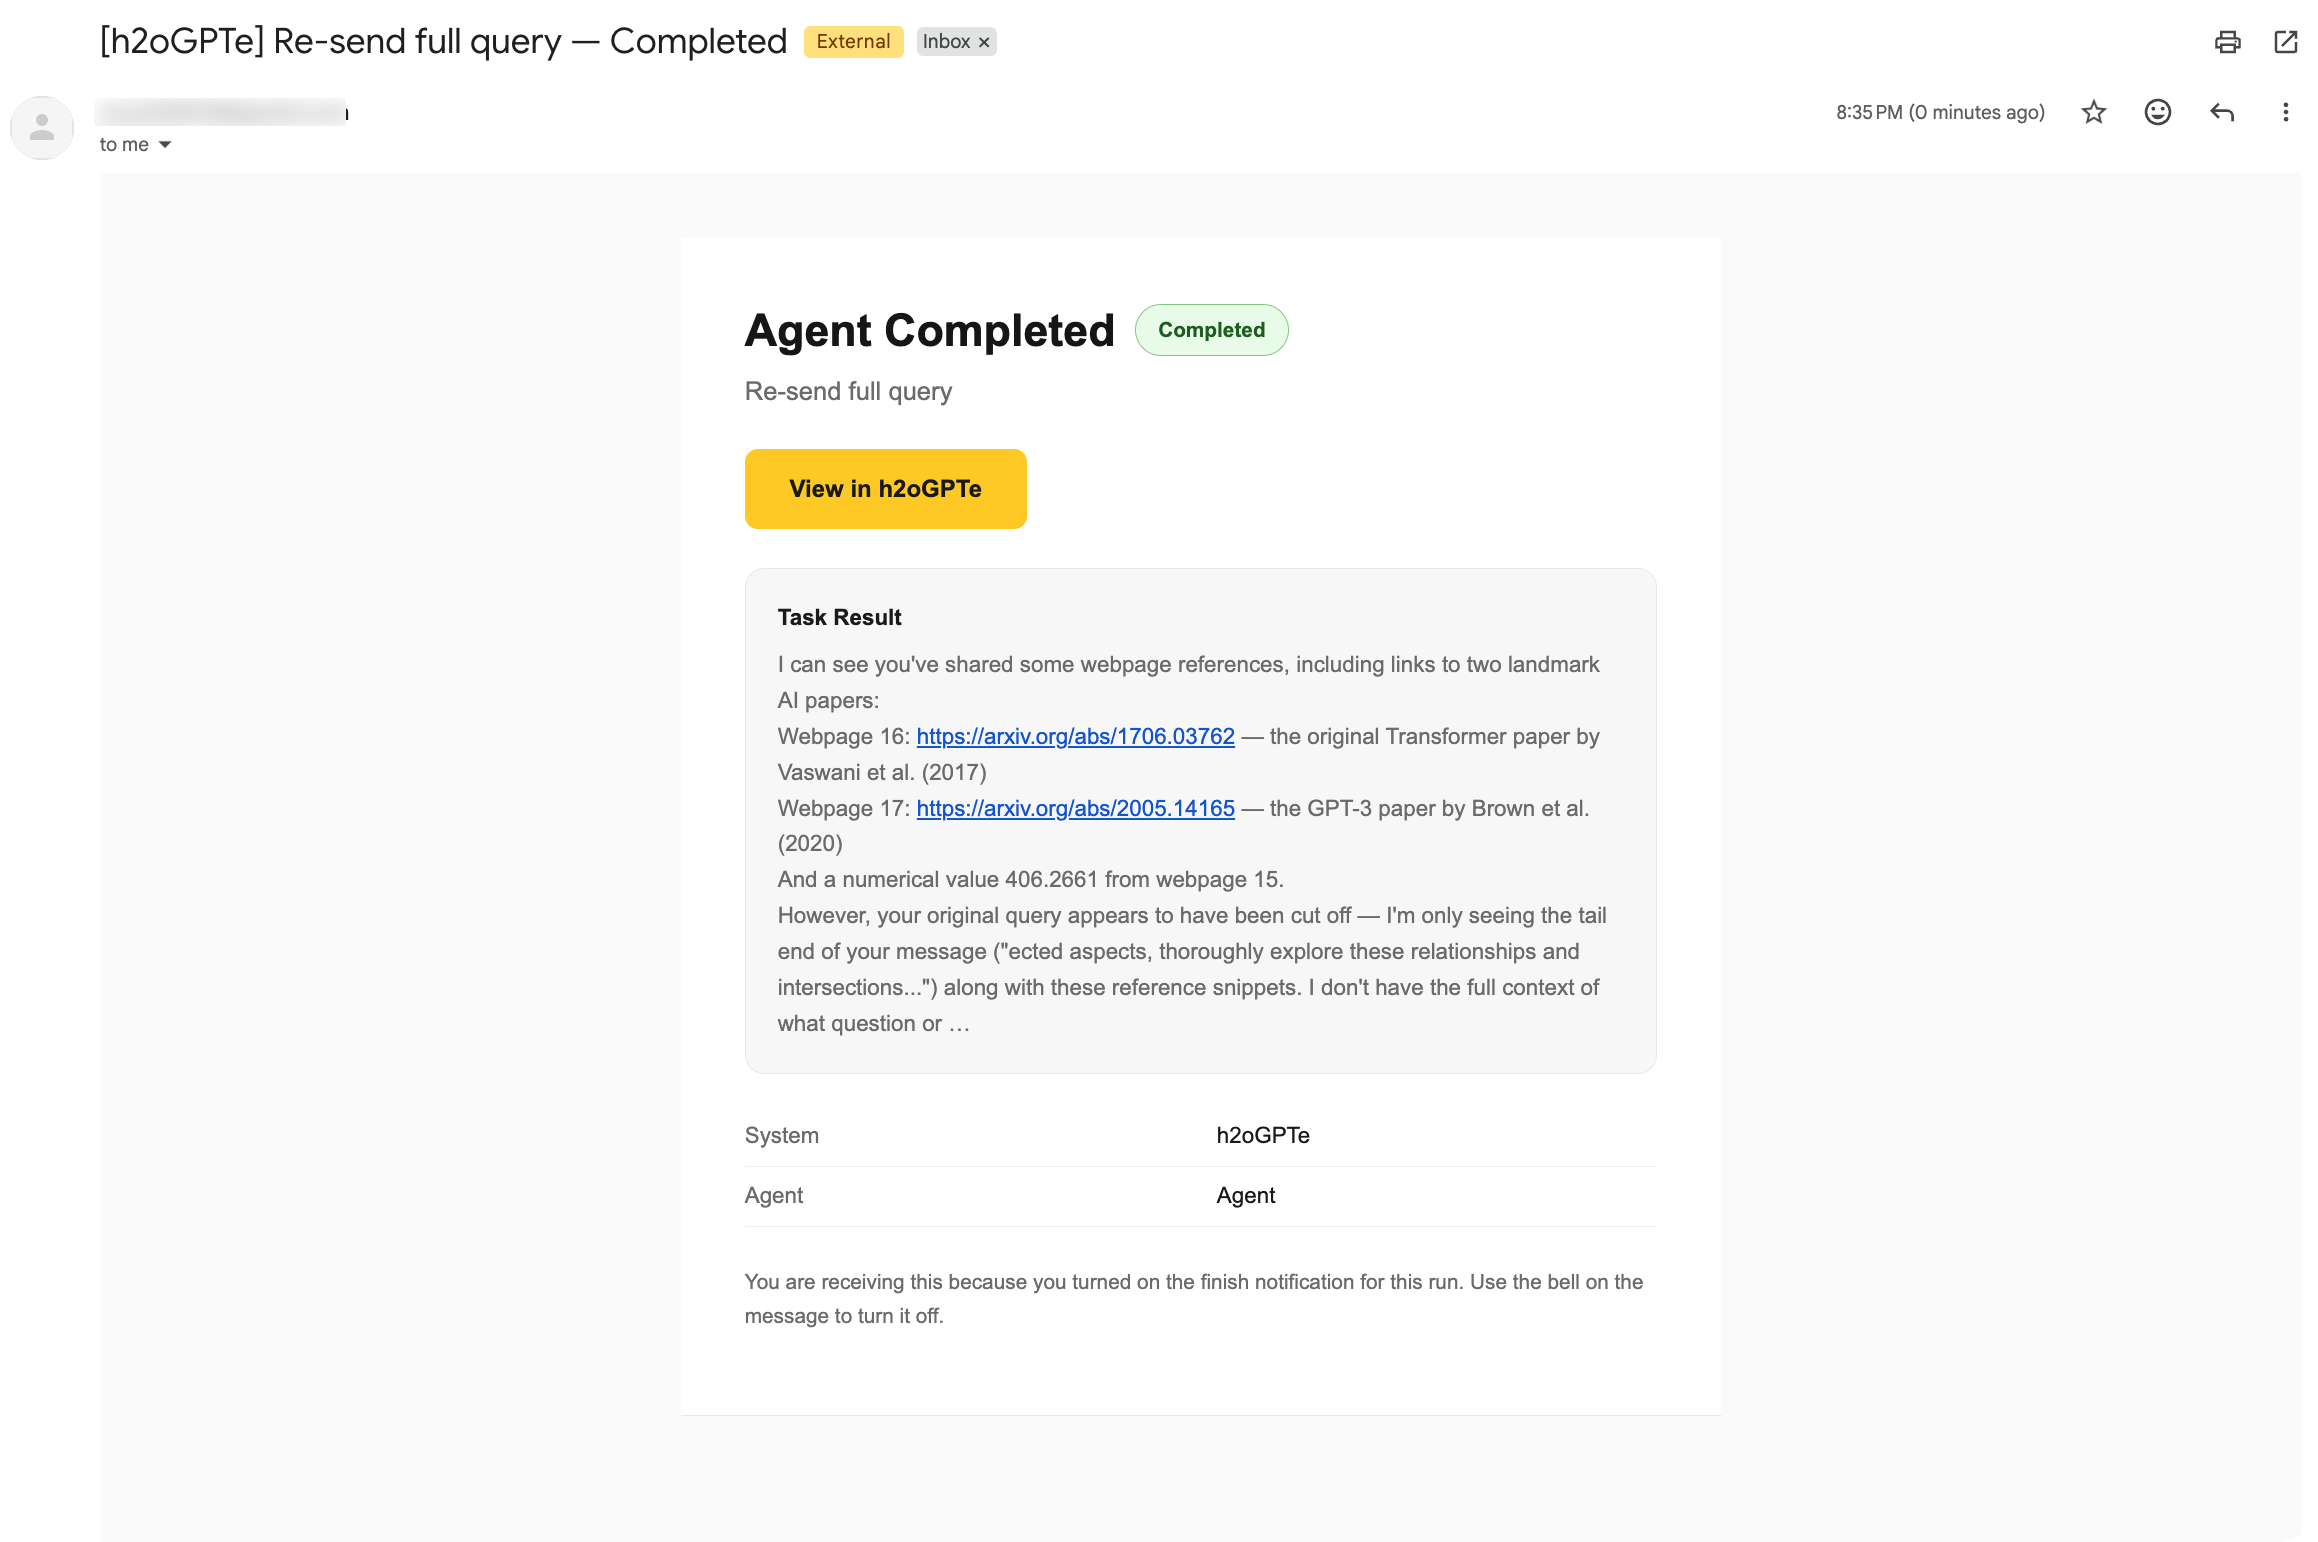
The email is a short status notice with a link back to the chat:
| Part | Description |
|---|---|
| Subject | The name of your deployment, the chat title (or the agent name, such as Deep Research, if the chat has no title), and whether the run Completed or Failed. |
| Status | Completed or Failed. On a failure, the error message is included. |
| Preview | The first few lines of the answer as plain text, replaced by the error message on a failed run. Code blocks are removed, and a preview that leaves anything out ends with an ellipsis (…). |
| View link | A button labeled View in followed by your deployment name. It opens the chat so you can read the full response. |
| Footer | A reminder that you turned on the finish notification for this run, and that you can turn it off from the bell in the chat. |
When no email is sent
Even with the notification turned on, no email is sent in the following cases:
- You stopped the run before it finished.
- The run belongs to a scheduled task. Scheduled tasks send their own completion emails, so the bell does not add a second one.
- Your saved Gmail app password is incorrect. Sending fails silently, with no error shown in the UI.
Who can see the bell
Only the person who started the run sees the bell, and only they can change it. Collaborators who open the chat through a shared collection don't see it, and neither do viewers of a publicly shared chat.
Turning the notification on or off is recorded in the audit trail.
Further reading
See Agents overview to learn more about Enterprise h2oGPTe agents, getting started with agents, how agents work, and creating custom agent tools.
- Submit and view feedback for this page
- Send feedback about Enterprise h2oGPTe to cloud-feedback@h2o.ai