Starting H2O-3 Secure
You can start H2O-3 Secure from Python, R, or the command line. The instructions below assume that you already downloaded and installed H2O-3 Secure. If you haven't, contact enterprise@h2o.ai for the download link and follow Downloading and installing H2O-3 Secure.
Starting H2O-3 launches a compute engine for your session. The engine's REST API is the control channel between your client code and the engine, and anyone who can reach it can run code and access files with the engine's permissions. The defaults below keep a locally started engine private to your machine. For other deployments, see Deployment model and responsibilities and Security.
From Python
Use the h2o.init() function to initialize H2O-3 Secure. In most cases, simply using h2o.init() is all that you are required to do.
Options to initialize H2O-3 Secure in Python
This function accepts the following options:
-
url: Full URL of the server to connect to (this can be used instead ofip+port+https). -
ip: The ip address (or host name) of the server where H2O-3 Secure is running. -
port: Port number that H2O-3 Secure service is listening to. -
name: Cluster name. IfNone, while connecting to an existing cluster, it will not check the cluster name. If set, then it will connect only if the target cluster name matches. If no instance is found and it decides to start a local one then this will be used as the cluster name or a random one will be generated if set toNone. -
https: Set toTrueto connect viahttps://instead ofhttp://. -
insecure: When using https, setting this toTruewill disable SSL certificates verification. -
username: The username to log in with when using basic authentication. -
password: The password to log in with when using basic authentication. -
cookies: Cookie (or list of) to add to each request. -
proxy: The proxy server address. -
start_h2o: IfFalse, do not attempt to start an H2O-3 Secure server when a connection to an existing one failed. -
nthreads: "Number of threads" option when launching a new H2O-3 Secure server. -
ice_root: The directory for temporary files for the new H2O-3 Secure server. -
log_dir: Directory for H2O-3 Secure logs to be stored if a new instance is started. Ignored if connecting to an existing node. -
log_level: The logger level for H2O-3 Secure if a new instance is started. One ofTRACE,DEBUG,INFO,WARN,ERRR, orFATAL. Default isINFO. Ignored if connecting to an existing node. -
enable_assertions: Enable assertions in Java for the new H2O-3 Secure server. -
max_mem_size: Maximum memory to use for the new H2O-3 Secure server. Integer input will be evaluated as gigabytes. Other units can be specified by passing in a string (for example,"160M"for 160 megabytes).noteIf
max_mem_sizeis not defined, then the amount of memory that H2O-3 Secure allocates will be determined by the default memory of the Java Virtual Machine (JVM). This amount depends on the Java version, but it will generally be 25% of the machine's physical memory. -
min_mem_size: Minimum memory to use for the new H2O-3 Secure server. Integer input will be evaluated as gigabytes. Other units can be specified by passing in a string (for example,"160M"for 160 megabytes). -
strict_version_check: IfTrue, an error will be raised if the client and server versions don't match. -
ignore_config: Indicates whether a processing of a.h2oconfigfile should be conducted or not. Default value isFalse. -
extra_classpath: List of paths to libraries that should be included on the Java classpath when starting H2O-3 Secure from Python. -
kwargs: (All other deprecated attributes.) -
jvm_custom_args: User-defined arguments for the JVM H2O-3 Secure is instantiated in. Ignored if there is an instance of H2O-3 Secure already running and the client connects to it. -
bind_to_localhost: A flag indicating whether access to the H2O-3 Secure instance should be restricted to the local machine (default) or if it can be reached from other computers on the network. Keep the default unless the engine runs inside a platform that restricts network access to it.
Example
import h2o
h2o.init(ip="localhost", port=54323)

Checking whether there is an H2O instance running at http://localhost:54323..... not found.
Attempting to start a local H2O server...
  Java Version: java version "1.8.0_25"; Java(TM) SE Runtime Environment (build 1.8.0_25-b17); Java HotSpot(TM) 64-Bit Server VM (build 25.25-b02, mixed mode)
  Starting server from /Users/techwriter/anaconda/lib/python2.7/site-packages/h2o/backend/bin/h2o.jar
  Ice root: /var/folders/yl/cq5nhky53hjcl9wrqxt39kz80000gn/T/tmpN2xfkW
  JVM stdout: /var/folders/yl/cq5nhky53hjcl9wrqxt39kz80000gn/T/tmpN2xfkW/h2o_techwriter_started_from_python.out
  JVM stderr: /var/folders/yl/cq5nhky53hjcl9wrqxt39kz80000gn/T/tmpN2xfkW/h2o_techwriter_started_from_python.err
  Server is running at http://127.0.0.1:54323
Connecting to H2O server at http://127.0.0.1:54323... successful.
--------------------------  ---------------------------------
H2O_cluster_uptime:         02 secs
H2O_cluster_timezone:       America/Los_Angeles
H2O_data_parsing_timezone:  UTC
H2O_cluster_version:        <version>
H2O_cluster_version_age:    12 days
H2O_cluster_name:           H2O_from_python_angelabartz_52yc47
H2O_cluster_total_nodes:    1
H2O_cluster_free_memory:    2 Gb
H2O_cluster_total_cores:    8
H2O_cluster_allowed_cores:  8
H2O_cluster_status:         accepting new members, healthy
H2O_connection_url:         http://127.0.0.1:54321
H2O_connection_proxy:       {"http": null, "https": null}
H2O_internal_security:      False
H2O_API_Extensions:         Amazon S3, XGBoost, Algos, AutoML, Core V3, TargetEncoder, Core V4
Python_version:             3.7.7 final
--------------------------  ---------------------------------
From Anaconda
Use the following steps to run H2O-3 Secure in an Anaconda Cloud environment. This section assumes that you have installed H2O-3 Secure on Anaconda. To get the package, contact enterprise@h2o.ai for the download link.
Launching Jupyter Notebook
-
Open a Terminal window and launch Jupyter Notebook.
user$ jupyter notebook -
Create a new Python notebook by clicking New. At this point, you can begin using Jupyter Notebook to run H2O-3 Secure Python commands. See the following example.
GBM example
After you successfully launch Jupyter notebook, enter the following commands to run a GBM example.
-
Import the H2O-3 Secure and GBM modules.

-
Initialize H2O-3 Secure using
h2o.init().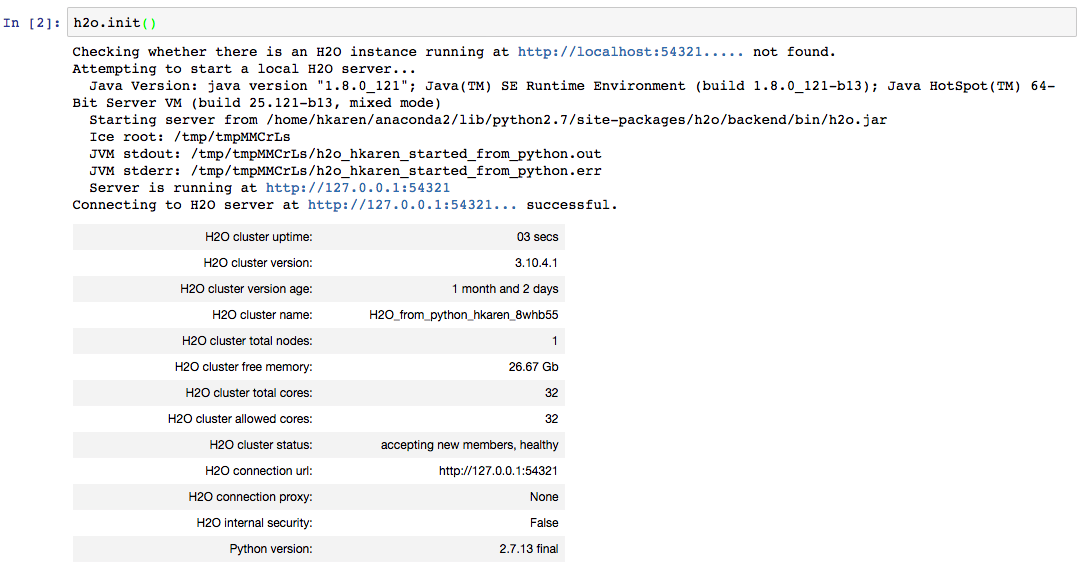
-
Import the Airlines dataset. This dataset will be used to classify whether a flight will be delayed.

-
Convert columns to factors.

-
Set the predictor names and the response column name.

-
Split the dataset into training and validation sets.

-
Specify the number of bins that will be included in the histogram and then split.

-
Train the models.
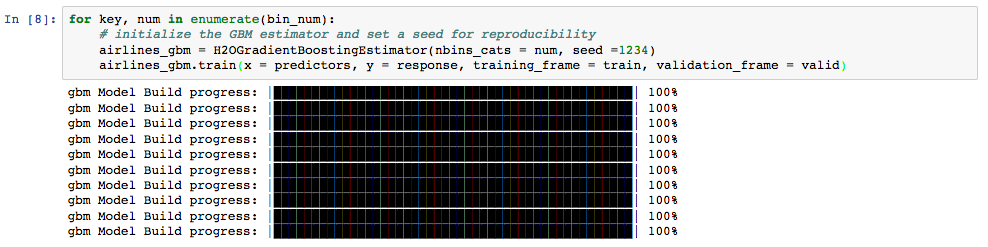
-
Print the AUC scores for the training data and the validation data.

Troubleshooting
If your system includes two versions of Anaconda (a global installation and a user-specific installation), be sure to use the User Anaconda. Using the Global Anaconda will result in an error when you attempt to run commands in Jupyter Notebook. You can verify the version that you are using by running which pip (Mac) or where pip (Windows). If your system shows that your environment is set up to use Global Anaconda by default, then change the PATH environment variable to use the User Anaconda.
From R
Use the h2o.init() method to initialize H2O-3 Secure. In most cases, simply using h2o.init() is all that you are required to do.
Options to initialize H2O-3 Secure in R
This method accepts the following options:
-
nthreads: This launches H2O-3 Secure using all available CPUs and is only applicable if you launch H2O locally using R. If you start H2O-3 Secure locally outside of R, the nthreads parameter is not applicable. -
ip: The IP address of the server where H2O-3 Secure is running. -
port: The port number of the H2O-3 Secure server. -
startH2O: (Optional) A logical value indicating whether to try to start H2O-3 Secure from R if no connection with H2O-3 Secure is detected. This is only possible ifip = "localhost"orip = "127.0.0.1". If an existing connection is detected, R does not start H2O-3 Secure. -
forceDL: (Optional) A logical value indicating whether to force download of the H2O-3 Secure executable. This defaults toFALSE, so the executable will only be downloaded if it does not already exist in the H2O-3 Secure R library resources directory ath2o/java/h2o.jar. -
enable_assertions: (Optional) A logical value indicating whether H2O-3 Secure should be launched with assertions enabled. This is used mainly for error checking and debugging purposes. -
license: (Optional) A character string value specifying the full path of the license file. -
max_log_file_size: Maximum size of INFO and DEBUG log files. The file is rolled over after the specified size has been reached. The range for this option is1 MBto99999 MB. The value defaults to3 MB. -
max_mem_size: (Optional) A character string specifying the maximum size, in bytes, of the memory allocation pool to H2O-3 Secure. This value must be a multiple of 1024 greater than 2 MB. Append the lettermorMto indicate megabytes, orgorGto indicate gigabytes.noteIf
max_mem_sizeis not defined, then the amount of memory that H2O allocates will be determined by the default memory of the Java Virtual Machine (JVM). This amount depends on the Java version, but it will generally be 25% of the machine's physical memory. -
min_mem_size: (Optional) A character string specifying the minimum size, in bytes, of the memory allocation pool to H2O-3 Secure. This value must a multiple of 1024 greater than 2 MB. Append the lettermorMto indicate megabytes, orgorGto indicate gigabytes. -
ice_root: (Optional) A directory to handle object spillage. The default varies by OS. -
strict_version_check: (Optional) Setting this toFALSEis unsupported and should only be done when advised by technical support. -
ignore_config: (Optional) This option allows you to specify whether to perform processing of a.h2oconfigfile. Whenh2o.init()is specified, a call to a config reader method is invoked. This call can result in path issues when there is no "root" (for example, with a Windows network drive) because the config file reader searches up to "root." When there is no "root," the path to search will continue to expand, eventually result in an error. This value defaults toFALSE. -
proxy: (Optional) A character string specifying the proxy path. -
https: (Optional) Set this toTRUEto use https instead of http. -
insecure: (Optional) Set this toTRUEto disable SSL certificate checking. -
username: (Optional) The username to log in with. -
password: (Optional) The password to log in with. -
cookies: (Optional) Vector (or list) of cookies to add to request. -
context_path: (Optional) The last part of connection URL. For example,http://<ip>:<port>/<context_path> -
use_spnego: (Optional) Set this to TRUE to connect to an H2O-3 Secure cluster with SPNEGO authentication. This defaults to FALSE and is mutually exclusive withusernameandpassword.
Connection process
By default, h2o.init() first checks if an H2O-3 Secure instance is connectible. If it cannot connect and start = TRUE with ip = "localhost", it will attempt to start an instance of H2O-3 Secure at localhost:54321. If an open ip and port of your choice are passed in, then this method will attempt to start an H2O-3 Secure instance at that specified ip and port.
When initializing H2O-3 Secure locally, this method searches for the h2o.jar file in the R library resources (system.file("java", "h2o.jar", package = "h2o")), and if the file does not exist, it will automatically attempt to download the correct version from Amazon S3. The user must have Internet access for this process to be successful.
Once connected, the h2o.init() method checks to see if the local H2O-3 Secure R package version matches the version of H2O-3 Secure running on the server. If there is a mismatch and you indicates you want to upgrade, it will remove the local H2O-3 Secure R package and download/install the H2O-3 Secure R package from the server.
You may want to manually upgrade your package rather than waiting until being prompted. This requires that you fully uninstall and reinstall the H2O-3 Secure package and the H2O-3 Secure client package. You must unload packages running in the environment before upgrading. We also recommended that you restart R or R studio after upgrading.
Example
library h2o
h2o.init()

H2O is not running yet, starting it now...

Note:  In case of errors look at the following log files:
    /var/folders/yl/cq5nhky53hjcl9wrqxt39kz80000gn/T//RtmpKtZXsy/h2o_techwriter_started_from_r.out
    /var/folders/yl/cq5nhky53hjcl9wrqxt39kz80000gn/T//RtmpKtZXsy/h2o_techwriter_started_from_r.err

java version "1.8.0_25"
Java(TM) SE Runtime Environment (build 1.8.0_25-b17)
Java HotSpot(TM) 64-Bit Server VM (build 25.25-b02, mixed mode)

Starting H2O JVM and connecting: .. Connection successful!

R is connected to the H2O cluster:
  H2O cluster uptime:         2 seconds 73 milliseconds
  H2O cluster timezone:       America/Los_Angeles
  H2O data parsing timezone:  UTC
  H2O cluster version:        <version>
  H2O cluster version age:    9 days
  H2O cluster name:           H2O_started_from_R_angelabartz_dxr691
  H2O cluster total nodes:    1
  H2O cluster total memory:   2.00 GB
  H2O cluster total cores:    8
  H2O cluster allowed cores:  8
  H2O cluster healthy:        TRUE
  H2O Connection ip:          localhost
  H2O Connection port:        54321
  H2O Connection proxy:       NA
  H2O Internal Security:      FALSE
  H2O API Extensions:         Amazon S3, XGBoost, Algos, AutoML, Core V3, TargetEncoder, Core V4
  R Version:                  R version 3.5.1 (2018-07-02)
From the command line
You can use Terminal (Mac) or Command Prompt (Windows) to launch H2O-3 Secure.
When you launch from the command line, you can include additional instructions to H2O-3 Secure such as how many nodes to launch, how much memory to allocate for each node, that you can assign names to the nodes in the cluster, and more.
Launching h2o.jar directly is intended for development and for platforms that manage the H2O-3 process. The REST API listens on all network interfaces unless you restrict it with -ip or -web_ip. Run the engine as an unprivileged user, bind it to a specific interface, and enable authentication and TLS when it's reachable from other machines. See Security.
H2O-3 Secure requires some space in the /tmp directory to launch. If you cannot launch H2O-3 Secure, try freeing up some space in the /tmp directory, then try launching H2O-3 Secure again.
For more detailed instructions on how to build and launch H2O-3 OSS (including how to clone the repository, how to pull from the repository, and how to install required dependencies), see the developer documentation.
The following argument types are available:
- JVM options
- H2O options
- Authentication options
The arguments use the following format: java <JVM Options> -jar h2o.jar <H2O Options>.
JVM options
The following are the available JVM options:
-version: Display Java version info.-Xmx<Heap Size>: Configure the memory allocation option-Xmxto set the total heap size for an H2O-3 Secure node. By default, this option is set to 1 GB (-Xmx1g). When launching nodes, we recommend allocating a total of four times the memory of your data.
Do not try to launch H2O-3 Secure with more memory than you have available. If -Xmx<Heap Size> is not defined, then the amount of memory that H2O-3 Secure allocates will be determined by the default memory of the JVM. This amount depends on the Java version, but it will generally be 25% of the machine's physical memory.
H2O options
The following are the available H2O options:
-hor-help: Display this information in the command line output.-version: Specify to print version information and exit.-name <H2OClusterName>: Assign a name to the H2O-3 Secure instance in the cluster (where<H2OClusterName>is the name of the cluster). Nodes with the same cluster name will form an H2O-3 Secure cluster (also known as an H2O-3 Secure cloud).-flatfile <FileName>: Specify a flatfile of IP address for faster cluster formation (where<FileName>is the name of the flatfile).-ip <IPnodeAddress>: Specify an IP for the machine other than the defaultlocalhost, for example:
- IPv4:
-ip 178.16.2.223- IPv6:
-ip 2001:db8:1234:0:0:0:0:1(Short version of IPv6 with::is not supported.)
If you are selecting a link-local address fe80::/96, it is necessary to specify the zone index (for example, %en0 for fe80::2acf:e9ff:fe15:e0f3%en0) in order to select the right interface.
-port <#>: Specify a PORT used for REST API. The communication port will be the port with value +1 higher.-baseport: Specifies the starting port to find a free port for REST API, the internal communication port will be port with value +1 higher.-network <ip_address/subnet_mask>: Specify an IP addresses with a subnet mask. The IP address discovery code binds to the first interface that matches one of the networks in the comma-separated list; to specify an IP address, use-network. To specify a range, use a comma to separate the IP addresses:-network 123.45.67.0/22,123.45.68.0/24. For example,10.1.2.0/24supports 256 possibilities. IPv4 and IPv6 addresses are supported.
- IPv4:
-network 178.0.0.0/8- IPv6:
-network 2001:db8:1234:0:0:0:0:0/48(short version of IPv6 with::is not supported.)
-
-ice_root <fileSystemPath>: Specify a directory for H2O-3 Secure to spill temporary data to disk (where<fileSystemPath>is the file path). -
-log_dir <fileSystemPath>: Specify the directory where H2O-3 Secure writes logs to disk. (This usually has a good default that you need not change. -
-log_level <TRACE,DEBUG,INFO,WARN,ERRR,FATAL>: Specify to write messages at this logging level, or above. The default is INFO. -
-flow_dir <server-side or HDFS directory>: Specify a directory for saved flows. The default is/Users/h2o-<H2OUserName>/h2oflows(where<H2OUserName>is your user name). -
-file_deny_glob <GLOB pattern>: Specify the glob pattern to deny access to certain directories. This is a defense-in-depth control for paths reached through the REST API; run the engine as an unprivileged user to control file access. See File access. The default is{/bin/*,/etc/*,/var/*,/usr/*,/proc/*,**/.**}. -
-nthreads <#ofThreads>: Specify the maximum number of threads in the low-priority batch work queue (where<#ofThreads>is the number of threads). -
-notify_local <fileSystemPath>: Specifies a file to write to when the node is up. The file system path contains a single line with the IP and port of the embedded web server. For example, 192.168.1.100:54321. -
-context_path <context_path>: The context path for Jetty. -
features: Disable availability of features considered to be experimental or beta. Currently, this only works with algorithms. Options include:stable: Only stable algorithms will be enabled; beta and experimental will not.beta: Only beta and stable algorithms will be enabled; experimental will not.experimental: Enables all algorithms (default).
Authentication options
The following are the available authentication options. Use them when the launching platform doesn't already restrict access to the control port. See Security for configuration details.
-jks <filename>: Specify a Java keystore file.-jks_pass <password>: Specify the Java keystore password.-jks_alias <alias>: Optional, use if the keystore has multiple certificates and you want to use a specific one.-hash_login: Specify to use Jetty HashLoginService. This defaults toFalse.-ldap_login: Specify to use Jetty LdapLoginService. This defaults toFalse.-kerberos_login: Specify to use Kerberos LoginService. This defaults toFalse.-pam_login: Specify to use the Pluggable Authentication Module (PAM) LoginService. This defaults toFalse.-login_conf <filename>: Specify the LoginService configuration file.-form_auth: Enables Form-based authentication for the web interface. This defaults to Basic authentication.-session_timeout <minutes>: Specifies the number of minutes that a session can remain idle before the server invalidates the session and requests a new login. Requires-form_auth. This defaults to no timeout.-internal_security_conf <filename>: Specify the path (absolute or relative) to a file containing all internal security related configurations.
H2O-3 Secure networking
H2O-3 Secure internal communication
By default, H2O-3 Secure selects the IP and PORT for internal communication automatically using the following process (if not specified):
- Retrieve a list of available interfaces (which are up).
- Sort them with "bond" interfaces put on the top.
- Extract associated IPs for each interface.
- Pick only reachable IPs (that filter IPs provided by interfaces, such as awdl):
- If there is a site IP, use it.
- Otherwise, if there is a link local IP, use it. (For IPv6, the link IP 0xfe80/96 is associated with each interface.)
- Or finally, try to find a local IP. (Use loopback or try to use Google DNS to find IP for this machine.)
The port is selected by looking for a free port starting with port 54322. The IP, PORT and network selection can be changed by the following options:
-ipnetwork-port-baseport
Cluster formation behavior
New H2O-3 Secure nodes join to form a cluster during launch. After a job has started on the cluster, it prevents new members from joining.
Cluster formation examples
To start an H2O-3 Secure node with 4 GB of memory and a default cluster name: java -Xmx4g -jar h2o.jar
To start an H2O-3 Secure node with 6 GB of memory and a specific cluster name: java -Xmx6g -jar h2o.jar -name MyCluster
To start an H2O-3 Secure cluster with three 2 GB nodes using the default cluster names: java -Xmx2g -jar h2o.jar & java -Xmx2g -jar h2o.jar & java -Xmx2g -jar h2o.jar &
Wait for the INFO: Registered: # schemas in: #mS output before entering the above command again to add another node (the number for # will vary).
Clouding up: Cluster creation
H2O-3 Secure provides two modes for cluster creation:
- Multicast based
- Flatfile based
Multicast
In this mode, H2O-3 Secure uses IP multicast to announce the existence of H2O nodes. Each node selects the same multicast group and port based on a specified shared cluster name (see the -name option). For example, for IPv4/PORT, a generated multicast group is 228.246.114.236:58614 (for cluster name michal); for IPv6/PORT, a generated multicast group is ff05:0:3ff6:72ec:0:0:3ff6:72ec:58614 (for cluster name michal and a link-local address which enforces a link-local scope).
For IPv6, the scope of the multicast address is enforced by a selected node IP. For example, if IP the selection process selects a link-local address, then the scope of the multicast will be a link-local. This can be modified by specifying the JVM variable sys.ai.h2o.network.ipv6.scope which enforces addressing scope use in the multicast group address. For example, -Dsys.ai.h2o.network.ipv6.scope=0x0005000000000000 enforces the site local scope. For more details please consult the class water.util.NetworkUtils.
See the following image on scopes for more information.
Flatfile
The flatfile describes a topology of an H2O-3 Secure cluster. The flatfile definition is passed through the -flatfile option. It needs to be passed at each node in the cluster, but the definition is not the same at each node. However, transitive closure of all the definitions should contains all nodes.
For example, in the following definition the resulting cluster will be formed by nodes A, B, C.
| Nodes | nodeA | nodeB | nodeC |
|---|---|---|---|
| Flatfile | A,B | A, B | B, C |
The node A transitively sees node C through node B flatfile definition, and vice versa.
The flatfile contains a list of nodes in the form IP:PORT that are going to compose a resulting cluster (each node is on a separated line and everything prefixed by # is ignored). Running H2O-3 Secure on a multi-node cluster lets you use more memory for large-scale tasks (for example, creating models from huge datasets) than would be possible on a single node.
IPv4:
# run two nodes on 108
10.10.65.108:54322
10.10.65.108:54325
IPv6:
0:0:0:0:0:0:0:1:54321
0:0:0:0:0:0:0:1:54323
Web server
By default, the web server IP is auto-configured in the same way as the internal communication IP. Nevertheless, the created socket listens on all available interfaces. A specific IP can be specified with the -web_ip option. Unless the engine runs inside a platform that restricts network access to it, set -web_ip (for example, -web_ip 127.0.0.1 when the client runs on the same host).
Options
-web_ip: specifies IP for web server to expose the REST API.
Dual stacks
Dual stack machines support IPv4 and IPv6 network stacks. H2O-3 Secure prefers IPV4, however the preference can be changed through JVM system options java.net.preferIPv4Addresses and java.net.preferIPv6Addresses. For example:
-Djava.net.preferIPv6Addresses=true -Djava.net.preferIPv4Addresses=true- H2O-3 Secure will try to select IPv4.-Djava.net.preferIPv6Addresses=true -Djava.net.preferIPv4Addresses=false- H2O-3 Secure will try to select IPv6.
Connecting to an H2O-3 Secure cluster by name
You can connect to an already live H2O-3 Secure cluster by providing the cluster name.
The following examples show how to connect through the cluster name in a programmatic way. You will first save the connection details where the file name is the cluster name. The connection details are then programmatically picked up by the cluster name.
First, start a cluster and save the cluster information:
- Python
# Create a cluster called 'saved-cluster'
cluster_name = 'saved-cluster'
import h2o
h2o.init(name=cluster_name)

import json
def save_cluster_details(cluster):
  cluster_details = cluster.get_status().as_data_frame().iloc[0]
  name = cluster_details.H2O_cluster_name
  url = cluster_details.H2O_connection_url
  file_path = '{}.json'.format(name)
  with open(file_path,'w') as fp:
    json.dump(url, fp)
  return file_path

save_cluster_details(h2o.cluster())
'saved-cluster.json'
Then, connect to that cluster by importing the cluster details that were saved:
- Python
import h2o
import json

cluster_name = 'saved-cluster'

# Load the URL:
with open ('{}.json'.format(cluster_name), 'r') as fp:
  url = json.load(fp)

# Connect via the URL:
h2o.connect(url=url)
Best practices
- Use
h2o.import_file/h2o.importFileinstead ofh2o.upload_file/h2o.uploadFilewhen possible. - Set the correct cluster size for your given dataset size. The rule of thumb is to use at least 4 times the size of your data. For example, if the dataset is 10 GB, you should allocate at least 40 GB of memory.
- Submit and view feedback for this page
- Send feedback about H2O-3 Secure to cloud-feedback@h2o.ai