Trusted Roles
The Trusted Roles page allows you to manage IAM (Identity and Access Management) roles for applications in your H2O AI Managed Cloud (HAMC) environment. This page provides a centralized interface to configure role ARNs (Amazon Resource Names) that control access to cloud resources.
Click Trusted Roles under Environment management on the left-navigation bar to open the Trusted Roles page.
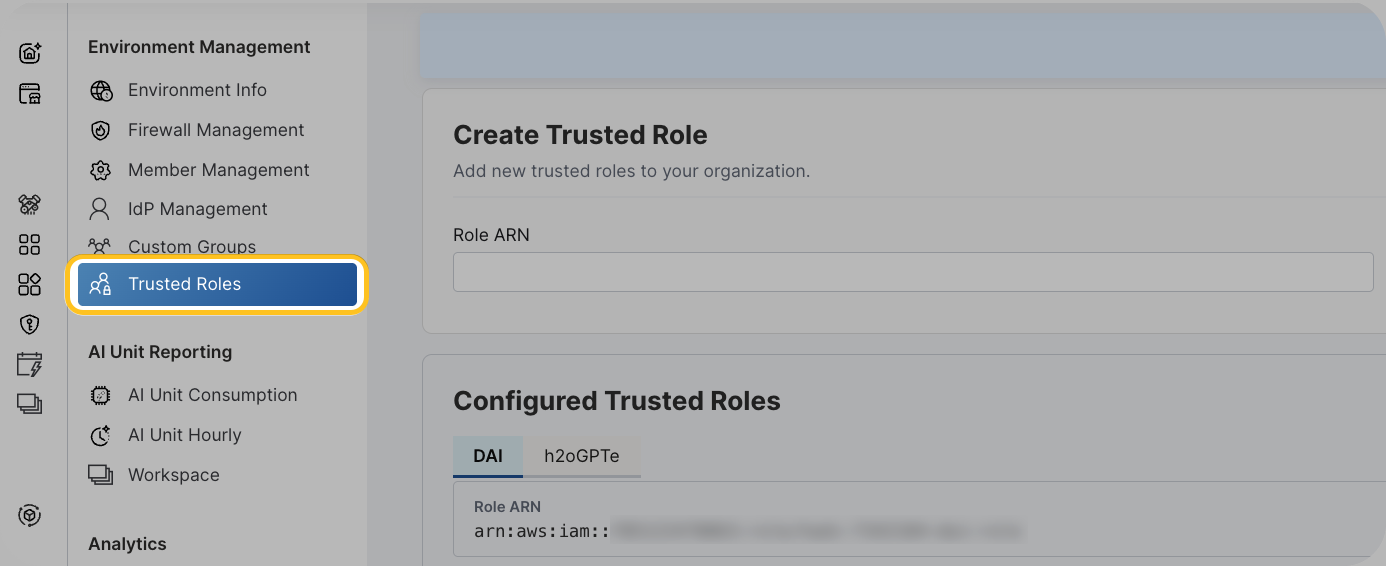
Overview
Both Driverless AI and h2oGPTe have their own IAM roles that define what cloud resources they can access. The Trusted Roles page allows you to:
- View existing role configurations for each application
- Add new role ARNs through the user interface
- Manage role assignments to ensure proper access control
- Update role statements to reflect your security requirements
Application-specific roles
Driverless AI roles
Driverless AI requires specific IAM roles to access compute resources, storage, and other AWS services. The Trusted Roles page displays:
- Current role ARNs assigned to Driverless AI
- Role statement resources that define access permissions
- Options to add or update role configurations
h2oGPTe roles
h2oGPTe has its own set of IAM roles for accessing language models, data storage, and other cloud resources. The page shows:
- Current role ARNs assigned to h2oGPTe
- Associated role statement resources
- Configuration options for role management
Create trusted role
To add a new role ARN for an application:
- Select the application (Driverless AI or h2oGPTe) where you want to add a role from the drop-down.
- In the Role ARN input field, enter the complete role ARN.
note
- Role ARNs must follow AWS IAM role ARN format:
arn:aws:iam::<account-id>:role/<role-name> - The system validates ARNs against the pattern:
arn:[^:]+:iam::\d{12}:role/[\w+=,.@-/]+ - Ensure the ARN is valid and the role exists in your AWS account
- Role ARNs must follow AWS IAM role ARN format:
- Click Create Role to apply the new role.
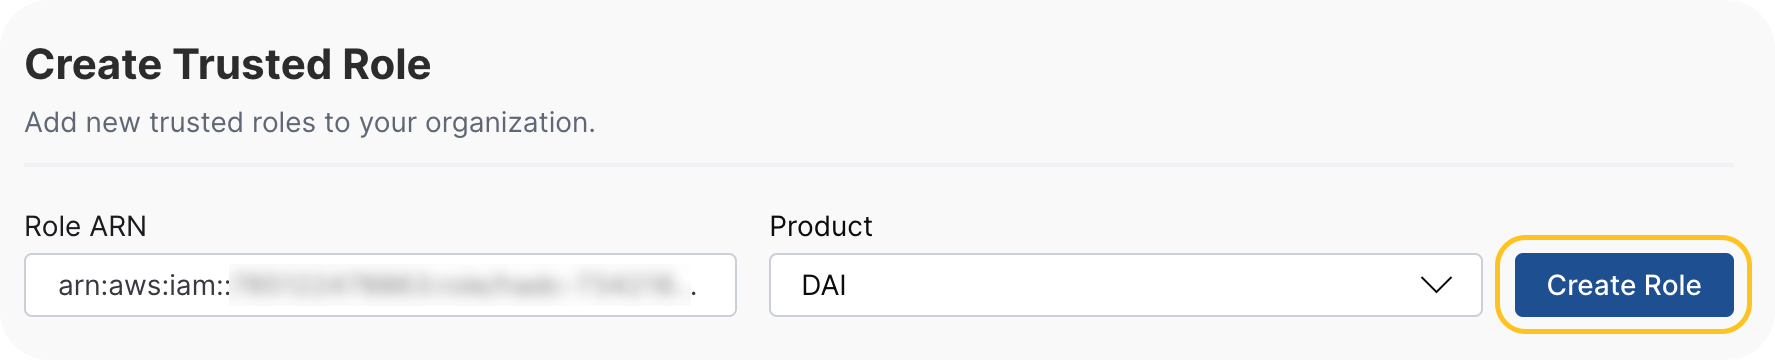
If the specified role does not exist, the system automatically creates the role and adds the ARN to it.
Manage existing roles
To manage existing role ARNs:
- Review the list of configured roles for each application under Configured Trusted Roles.
- To remove a role, select the roles and click Delete Selected.
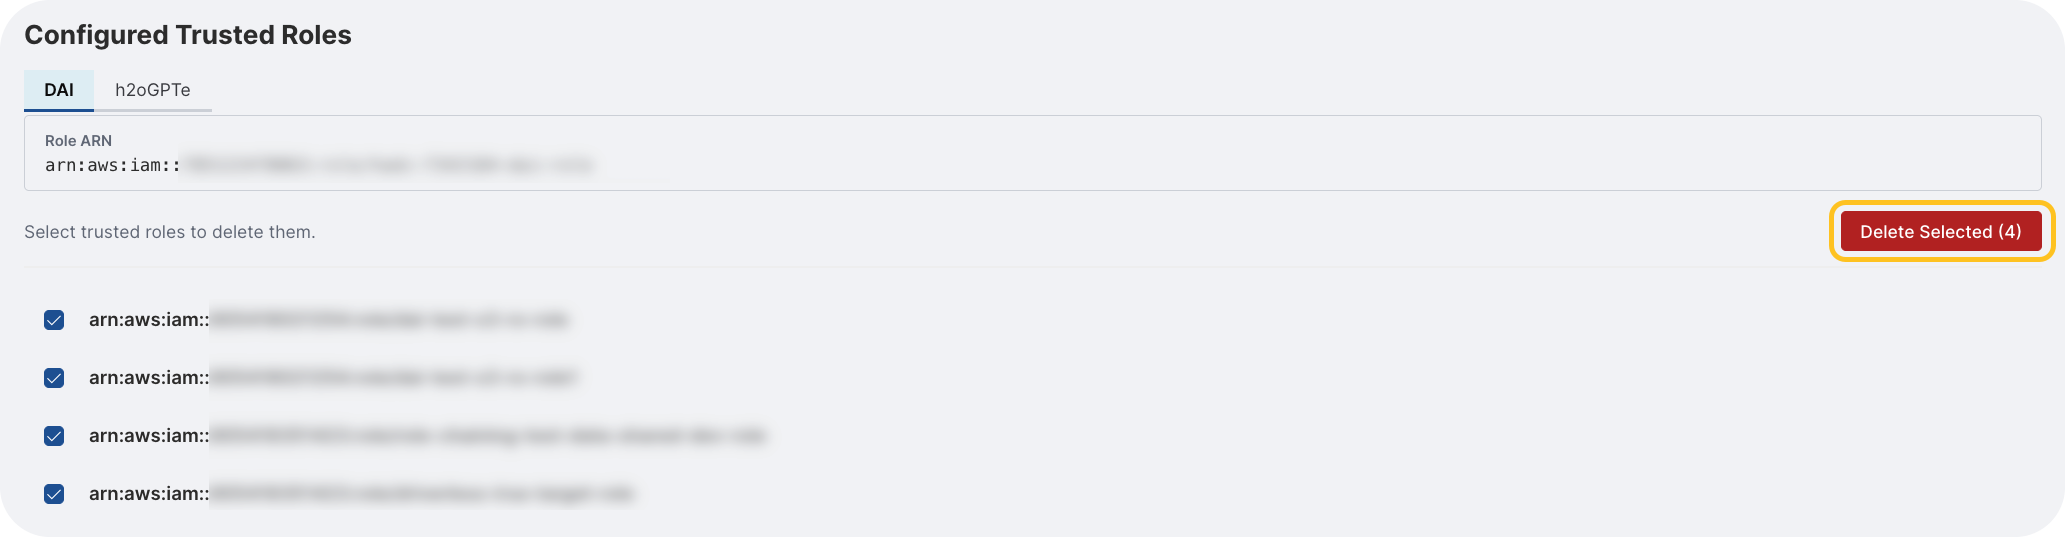
- To update a role, remove the existing role and add the new role ARN.
- Removing a role ARN immediately revokes the application's ability to assume that role.
- If the ARN being deleted is the last one in a role, the entire role is removed.
- Submit and view feedback for this page
- Send feedback about H2O Admin Center to cloud-feedback@h2o.ai