JDBC Setup
Driverless AI allows you to explore Java Database Connectivity (JDBC) data sources from within the Driverless AI application. This section provides instructions for configuring Driverless AI to work with JDBC.
Tested Databases
The following databases have been tested for minimal functionality. Note that JDBC drivers that are not included in this list should work with Driverless AI. We recommend that you test out your JDBC driver even if you do not see it on list of tested databases. See the Adding an Untested JDBC Driver section at the end of this chapter for information on how to try out an untested JDBC driver.
Oracle DB
PostgreSQL
Amazon Redshift
Teradata
Retrieve the JDBC Driver
Download JDBC Driver JAR files:
Note: Remember to take note of the driver classpath, as it is needed for the configuration steps (for example, org.postgresql.Driver).
Copy the driver JAR to a location that is visible to Driverless AI.
Note: The folder storing the JDBC jar file must be visible/readable by the dai process user.
Start Driverless AI
This example enables the JDBC connector for PostgresQL.
Notes:
The JDBC connection strings will vary depending on the database that is used.
The configuration requires a JSON key (typically the name of the database being configured) to be associated with a nested JSON that contains the
url,jarpath, andclasspathfields. In addition, this should take the format:"""{"my_jdbc_database": {"url": "jdbc:my_jdbc_database://hostname:port/database", "jarpath": "/path/to/my/jdbc/database.jar", "classpath": "com.my.jdbc.Driver"}}"""
Export the Driverless AI config.toml file or add it to ~/.bashrc. For example:
# DEB and RPM
export DRIVERLESS_AI_CONFIG_FILE="/etc/dai/config.toml"

# TAR SH
export DRIVERLESS_AI_CONFIG_FILE="/path/to/your/unpacked/dai/directory/config.toml"
Edit the following values in the config.toml file.
# File System Support # upload : standard upload feature # file : local file system/server file system # hdfs : Hadoop file system, remember to configure the HDFS config folder path and keytab below # dtap : Blue Data Tap file system, remember to configure the DTap section below # s3 : Amazon S3, optionally configure secret and access key below # gcs: Google Cloud Storage, remember to configure gcs_path_to_service_account_json below # gbq: Google Big Query, remember to configure gcs_path_to_service_account_json below # minio: Minio Cloud Storage, remember to configure secret and access key below # snow: Snowflake Data Warehouse, remember to configure Snowflake credentials below (account name, username, password) # kdb: KDB+ Time Series Database, remember to configure KDB credentials below (hostname and port, optionally: username, password, classpath, and jvm_args) # azrbs: Azure Blob Storage, remember to configure Azure credentials below (account name, account key) # jdbc: JDBC Connector, remember to configure JDBC below. (jdbc_app_configs) # hive: Hive Connector, remember to configure Hive below. (hive_app_configs) # recipe_url: load custom recipe from URL # recipe_file: load custom recipe from local file system enabled_file_systems = "upload, file, hdfs, jdbc" # Configuration for JDBC Connector. # JSON/Dictionary String with multiple keys. # Format as a single line without using carriage returns (the following example is formatted for readability). # Use triple quotations to ensure that the text is read as a single string. # Example: # """{ # "postgres": { # "url": "jdbc:postgresql://ip address:port/postgres", # "jarpath": "/path/to/postgres_driver.jar", # "classpath": "org.postgresql.Driver" # }, # "mysql": { # "url":"mysql connection string", # "jarpath": "/path/to/mysql_driver.jar", # "classpath": "my.sql.classpath.Driver" # } # }""" jdbc_app_configs = """{"postgres": {"url": "jdbc:postgress://localhost:5432/my_database", "jarpath": "/path/to/postgresql/jdbc/driver.jar", "classpath": "org.postgresql.Driver"}}""" # extra jvm args for jdbc connector jdbc_app_jvm_args = "" # alternative classpath for jdbc connector jdbc_app_classpath = ""Note: The expected input of
jdbc_app_configsis a JSON string. Double quotation marks ("...") must be used to denote keys and values within the JSON dictionary, and outer quotations must be formatted as either""",''', or'. Depending on how the configuration value is applied, different forms of outer quotations may be required. The following examples show two unique methods for applying outer quotations.
Configuration value applied with the config.toml file:
jdbc_app_configs = """{"my_json_string": "value", "json_key_2": "value2"}"""
Configuration value applied with an environment variable:
DRIVERLESS_AI_JDBC_APP_CONFIGS='{"my_json_string": "value", "json_key_2": "value2"}'
Save the changes when you are done, then stop/restart Driverless AI.
After the JDBC connector is enabled, you can add datasets by selecting JDBC from the Add Dataset (or Drag and Drop) drop-down menu.
Adding Datasets Using JDBC
After the JDBC connector is enabled, you can add datasets by selecting JDBC from the Add Dataset (or Drag and Drop) drop-down menu.
Click on the Add Dataset button on the Datasets page.
Select JDBC from the list that appears.
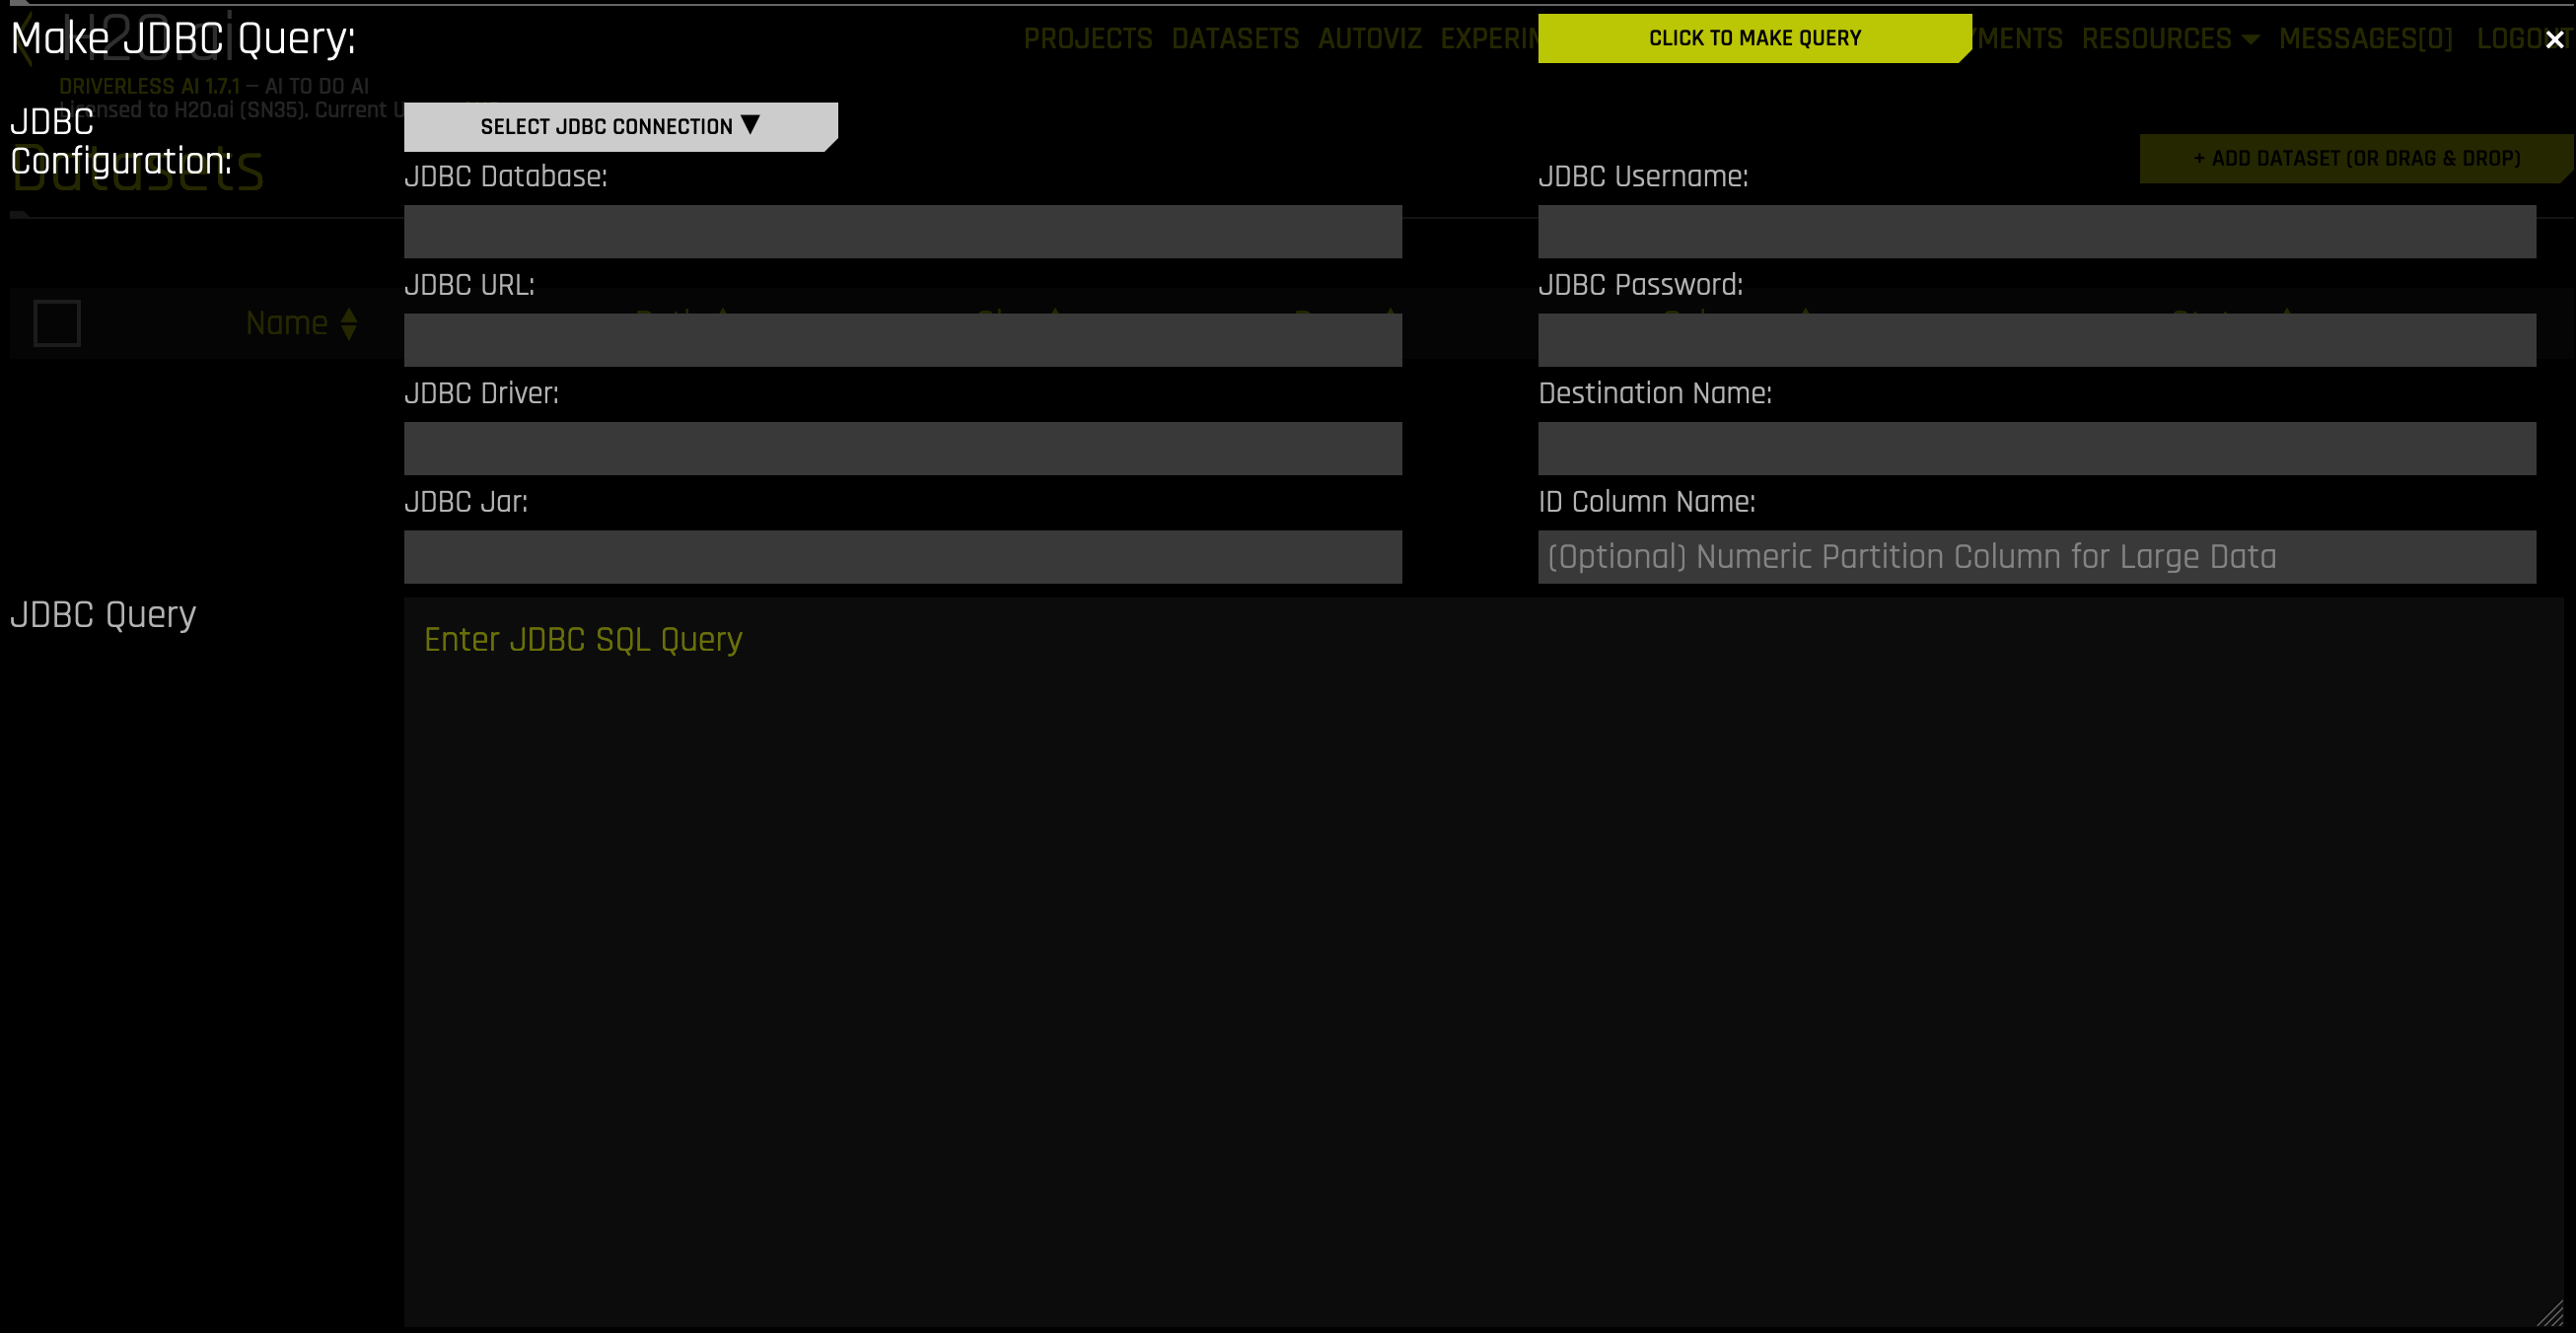
Click on the Select JDBC Connection button to select a JDBC configuration.
The form will populate with the JDBC Database, URL, Driver, and Jar information. Complete the following remaining fields:
JDBC Username: Enter your JDBC username.
JDBC Password: Enter your JDBC password.
Destination Name: Enter a name for the new dataset.
(Optional) ID Column Name: Enter a name for the ID column. Specify this field when making large data queries.
Notes:
Due to resource sharing within Driverless AI, the JDBC Connector is only allocated a relatively small amount of memory.
When making large queries, the ID column is used to partition the data into manageable portions. This ensures that the maximum memory allocation is not exceeded.
If a query that is larger than the maximum memory allocation is made without specifying an ID column, the query will not complete successfully.
Write a SQL Query in the format of the database that you want to query. (See the Query Examples section below.) The format will vary depending on the database that is used.
Click the Click to Make Query button to execute the query. The time it takes to complete depends on the size of the data being queried and the network speeds to the database.
On a successful query, you will be returned to the datasets page, and the queried data will be available as a new dataset.
Query Examples
The following are sample configurations and queries for Oracle DB and PostgreSQL:
Oracle DB
Configuration:
jdbc_app_configs = '{"oracledb": {"url": "jdbc:oracle:thin:@localhost:1521/oracledatabase", "jarpath": "/home/ubuntu/jdbc-jars/ojdbc8.jar", "classpath": "oracle.jdbc.OracleDriver"}}'
Sample Query:
Select oracledb from the Select JDBC Connection dropdown menu.
JDBC Username:
oracleuserJDBC Password:
oracleuserpasswordID Column Name:
Query:
SELECT MIN(ID) AS NEW_ID, EDUCATION, COUNT(EDUCATION) FROM my_oracle_schema.creditcardtrain GROUP BY EDUCATIONNote: Because this query does not specify an ID Column Name, it will only work for small data. However, the NEW_ID column can be used as the ID Column if the query is for larger data.
Click the Click to Make Query button to execute the query.
PostgreSQL
Configuration:
jdbc_app_configs = '{"postgres": {"url": "jdbc:postgresql://localhost:5432/postgresdatabase", "jarpath": "/home/ubuntu/postgres-artifacts/postgres/Driver.jar", "classpath": "org.postgresql.Driver"}}'
Sample Query:
Select postgres from the Select JDBC Connection dropdown menu.
JDBC Username:
postgres_userJDBC Password:
pguserpasswordID Column Name:
idQuery:
SELECT * FROM loan_level WHERE LOAN_TYPE = 5 (selects all columns from table loan_level with column LOAN_TYPE containing value 5)
Click the Click to Make Query button to execute the query.
Adding an Untested JDBC Driver
We encourage you to try out JDBC drivers that are not tested in house.
Download the JDBC jar for your database.
Move your JDBC jar file to a location that DAI can access.
Modify the following config.toml settings. Note that these can also be specified as environment variables when starting Driverless AI in Docker:
# enable the JDBC file system
enabled_file_systems = "upload, file, hdfs, s3, recipe_file, jdbc"

# Configure the JDBC Connector.
# JSON/Dictionary String with multiple keys.
# Format as a single line without using carriage returns (the following example is formatted for readability).
# Use triple quotations to ensure that the text is read as a single string.
# Example:
jdbc_app_configs = """{"my_jdbc_database": {"url": "jdbc:my_jdbc_database://hostname:port/database",
                       "jarpath": "/path/to/my/jdbc/database.jar",
                       "classpath": "com.my.jdbc.Driver"}}"""

# optional extra jvm args for jdbc connector
jdbc_app_jvm_args = ""

# optional alternative classpath for jdbc connector
jdbc_app_classpath = ""
Save the changes when you are done, then stop/restart Driverless AI.