Snowflake Setup
Driverless AI allows you to explore Snowflake data sources from within the Driverless AI application. This section provides instructions for configuring Driverless AI to work with Snowflake. This setup requires you to enable authentication. If you enable Snowflake connectors, those file systems will be available in the UI, but you will not be able to use those connectors without authentication.
Snowflake with Authentication
This example enables the Snowflake data connector with authentication by passing the account, user, and password variables.
Export the Driverless AI config.toml file or add it to ~/.bashrc. For example:
# DEB and RPM
export DRIVERLESS_AI_CONFIG_FILE="/etc/dai/config.toml"

# TAR SH
export DRIVERLESS_AI_CONFIG_FILE="/path/to/your/unpacked/dai/directory/config.toml"
Specify the following configuration options in the config.toml file.
# File System Support
# upload : standard upload feature
# file : local file system/server file system
# hdfs : Hadoop file system, remember to configure the HDFS config folder path and keytab below
# dtap : Blue Data Tap file system, remember to configure the DTap section below
# s3 : Amazon S3, optionally configure secret and access key below
# gcs: Google Cloud Storage, remember to configure gcs_path_to_service_account_json below
# gbq: Google Big Query, remember to configure gcs_path_to_service_account_json below
# minio: Minio Cloud Storage, remember to configure secret and access key below
# snow: Snowflake Data Warehouse, remember to configure Snowflake credentials below (account name, username, password)
# kdb: KDB+ Time Series Database, remember to configure KDB credentials below (hostname and port, optionally: username, password, classpath, and jvm_args)
# azrbs: Azure Blob Storage, remember to configure Azure credentials below (account name, account key)
# jdbc: JDBC Connector, remember to configure JDBC below. (jdbc_app_configs)
# hive: Hive Connector, remember to configure Hive below. (hive_app_configs)
# recipe_url: load custom recipe from URL
# recipe_file: load custom recipe from local file system
enabled_file_systems = "file, snow"

# Snowflake Connector credentials
snowflake_account = "<account_id>"
snowflake_user = "<username>"
snowflake_password = "<password>"
Save the changes when you are done, then stop/restart Driverless AI.
Adding Datasets from Snowflake
After the Snowflake connector is enabled, you can add datasets by selecting Snowflake from the Add Dataset (or Drag and Drop) drop-down menu.

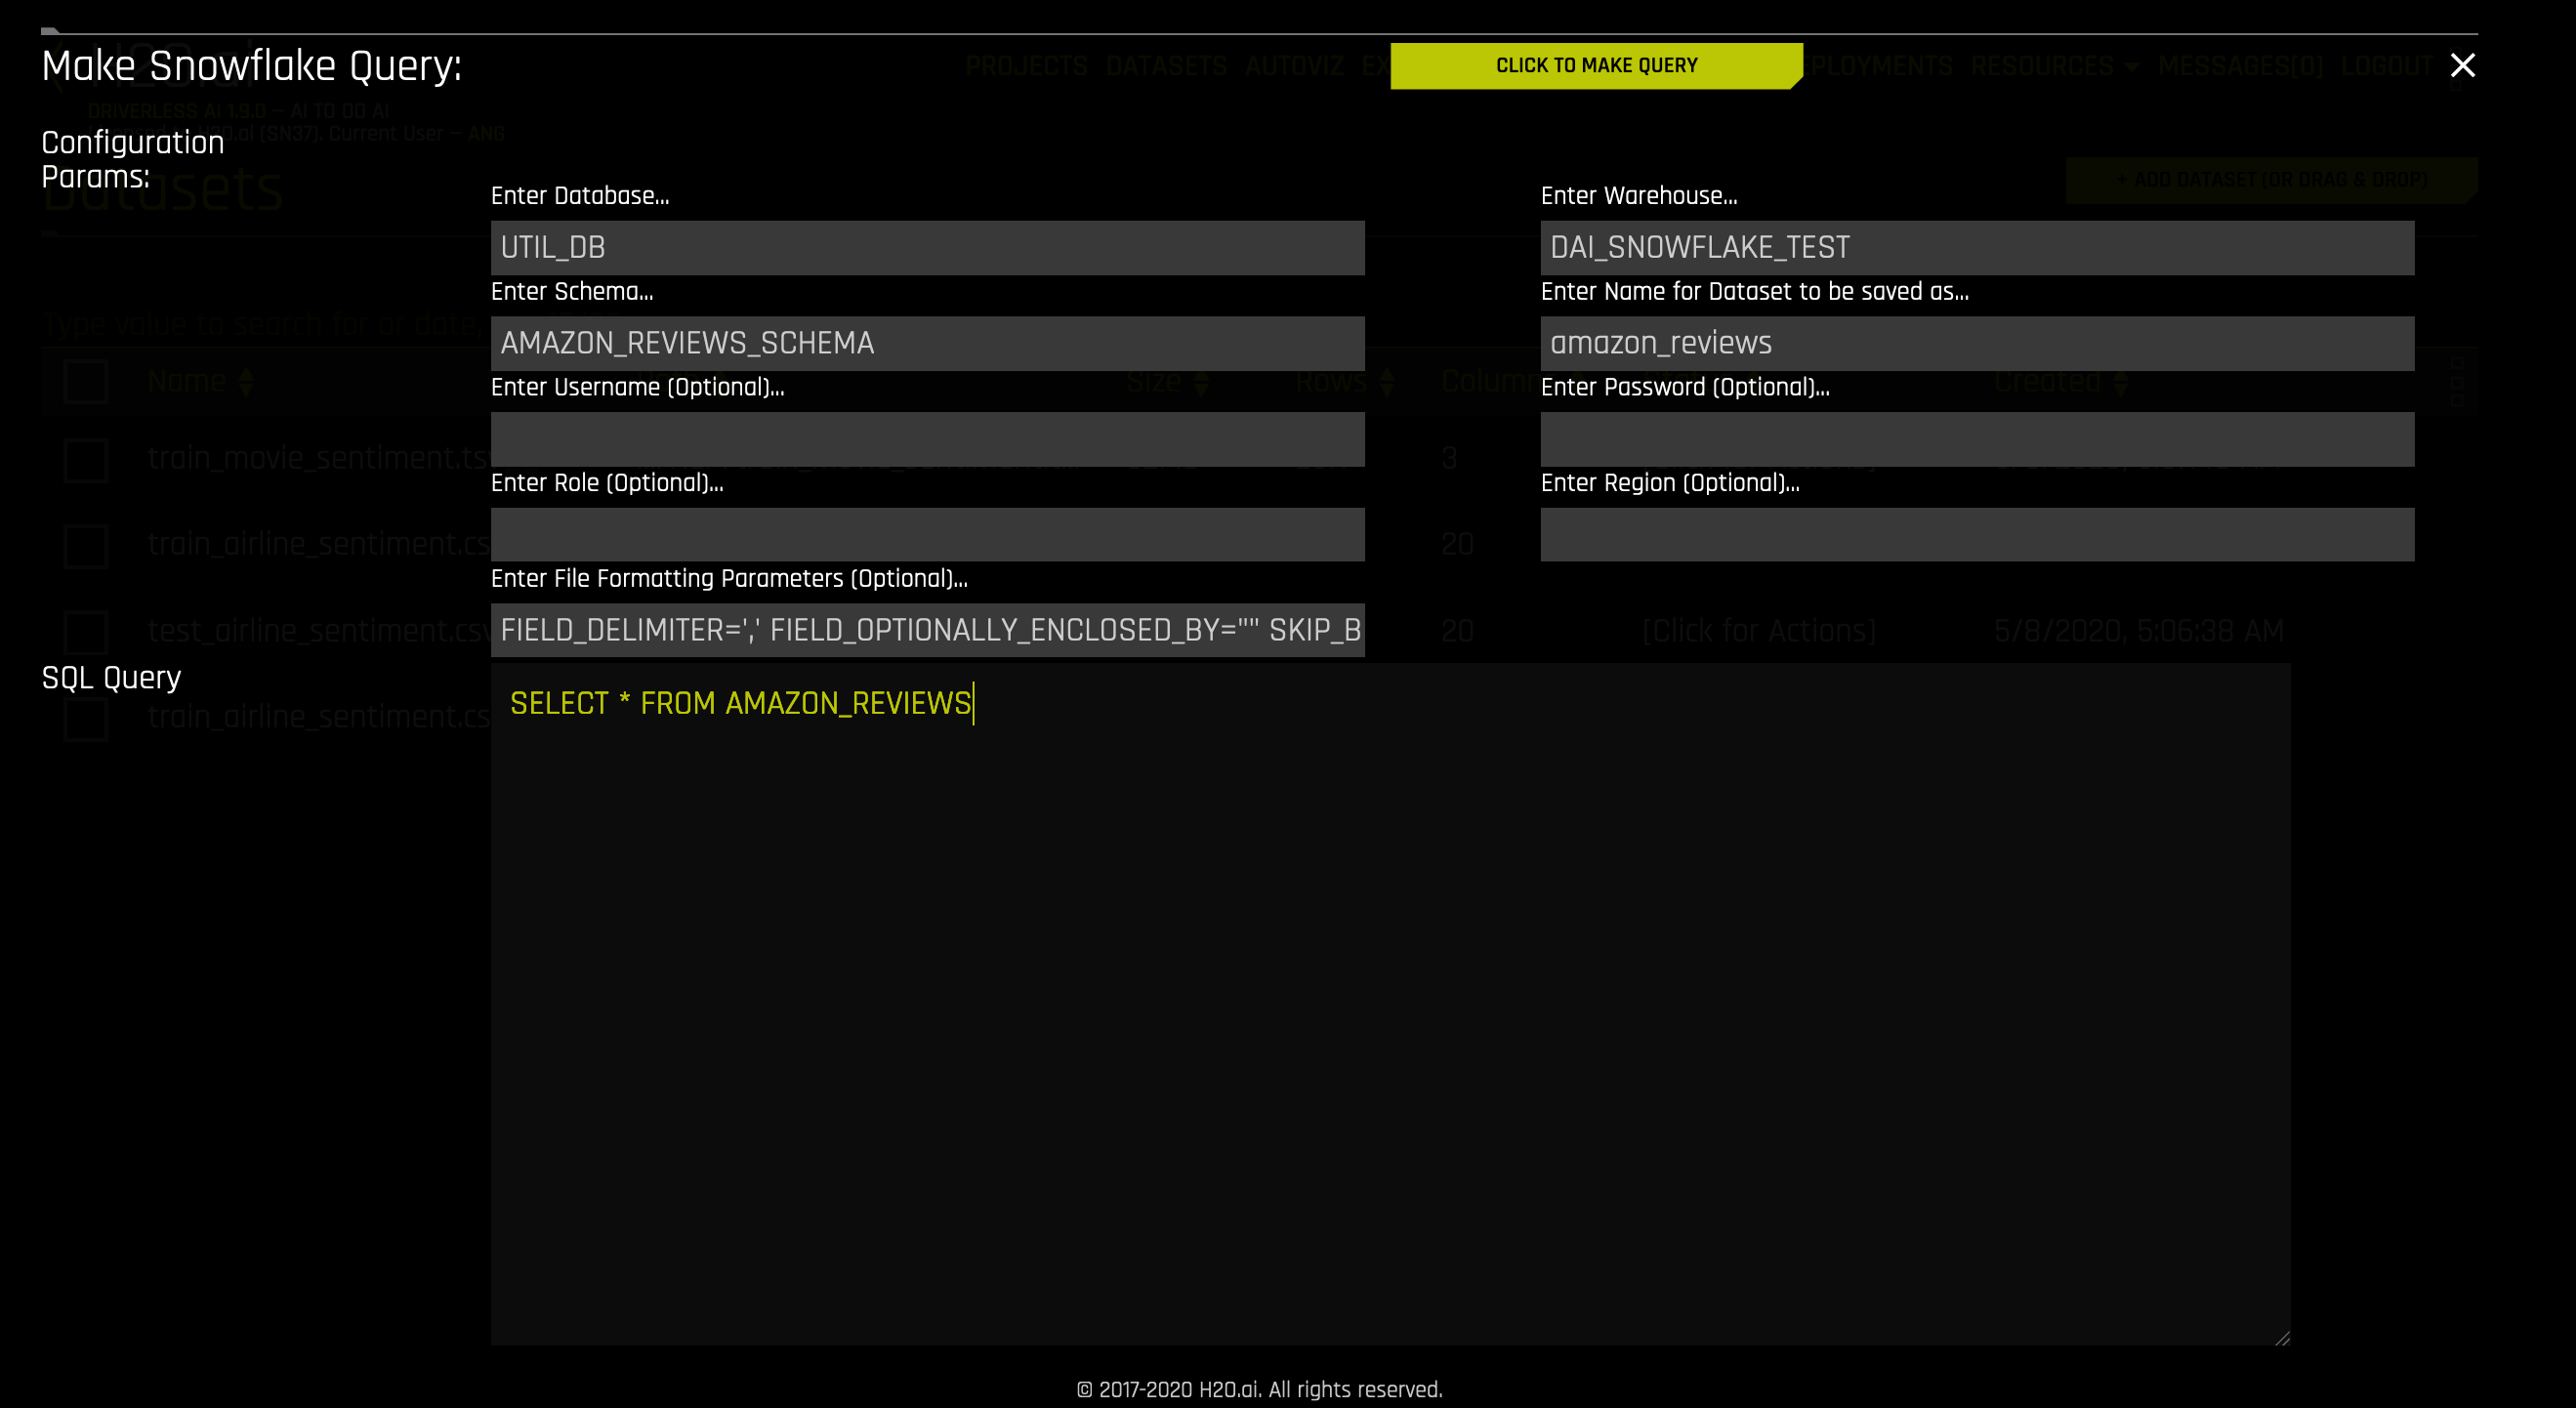
Specify the following information to add your dataset.
Enter Database: Specify the name of the Snowflake database that you are querying.
Enter Warehouse: Specify the name of the Snowflake warehouse that you are querying.
Enter Schema: Specify the schema of the dataset that you are querying.
Enter Name for the Dataset to be saved as: Specify an the name for this dataset as it will appear in Driverless AI.
Enter Username (Optional): Specify the username associated with this Snowflake account. This can be left blank if
snowflake_userwas specified in the config.toml when starting Driverless AI; otherwise, this field is required.Enter Password (Optional): Specify the password associated with this Snowflake account. This can be left blank if
snowflake_passwordwas specified in the config.toml when starting Driverless AI; otherwise, this field is required.Enter Region: (Optional) Specify the region of the warehouse that you are querying. This can be found in the Snowflake-provided URL to access your database (as in <optional-deployment-name>.<region>.<cloud-provider>.snowflakecomputing.com). This is optional and can also be left blank if
snowflake_urlwas specified with a<region>in the config.toml when starting Driverless AI.Enter Role: (Optional) Specify your role as designated within Snowflake. See https://docs.snowflake.net/manuals/user-guide/security-access-control-overview.html for more information.
Enter File Formatting Params: (Optional) Specify any additional parameters for formatting your datasets. Available parameters are listed in https://docs.snowflake.com/en/sql-reference/sql/create-file-format.html#type-csv. (Note: Use only parameters for
TYPE = CSV.) For example, if your dataset includes a text column that contains commas, you can specify a different delimiter usingFIELD_DELIMITER='character'. Separate multiple parameters with spaces only. For example:
FIELD_DELIMITER=',' FIELD_OPTIONALLY_ENCLOSED_BY="" SKIP_BLANK_LINES=TRUENote: Be sure that the specified delimiter is not also used as a character within a cell; otherwise an error will occur. For example, you might specify the following to load the “AMAZON_REVIEWS” dataset:
Database: UTIL_DB
Warehouse: DAI_SNOWFLAKE_TEST
Schema: AMAZON_REVIEWS_SCHEMA
Query: SELECT * FROM AMAZON_REVIEWS
Enter File Formatting Parameters (Optional): FIELD_OPTIONALLY_ENCLOSED_BY = ‘”’
In the above example, if the
FIELD_OPTIONALLY_ENCLOSED_BYoption is not set, the following row will result in a failure to import the dataset (as the dataset’s delimiter is,by default):positive, 2012-05-03,Wonderful\, tasty taffy,0,0,3,5,2012,Thu,0Note: Numeric columns from Snowflake that have NULL values are sometimes converted to strings (for example, \ \N). To prevent this from occuring, add
NULL_IF=()to the input of FILE FORMATTING PARAMETERS.
Enter Snowflake Query: Specify the Snowflake query that you want to execute.
When you are finished, select the Click to Make Query button to add the dataset.