Export Artifacts
In some cases, you might find that you do not want your users to download artifacts directly to their machines. Driverless AI provides several configuration options/environment variables that enable exporting of artifacts instead of downloading. Artifacts can be exported to a file system directory, an Amazon S3 bucket, or a Bitbucket repository.
Note: The option to download artifacts is automatically disabled when exporting is enabled.
Enabling Artifact Exports
The config.toml file exposes the following variables:
enable_artifacts_upload: Replace all the downloads on the experiment page to exports, and allow users to push to the artifact store configured withartifacts_store. This is disabled by default.artifacts_store: Specify one of the following storage methods:file_system: Store artifacts in the file system directory specified by theartifacts_file_system_directorysetting.S3: Store artifacts in the S3 bucket specified by theartifacts_s3_bucketsetting.bitbucket: Stores artifacts in a Bitbucket repository.
Specify the following for the storage method you selected:
File System Directory
artifacts_file_system_directory: The file system location where artifacts will be copied. This is expected to be a directory on your server.
AWS S3
artifacts_s3_bucket: The AWS S3 bucket where artifacts will be stored.
Bitbucket
bitbucket_skip_cert_verification: Specify whether to skip certificate verification for Bitbucket when using a repo with HTTPS. This is disabled by default.bitbucket_tmp_relative_dir: Specify a local temporary directory to clone artifacts to (relative todata_directory).
Note: The option to disable artifact downloads does not extend to datasets. Whether users can download datasets is controlled by the enable_dataset_downloading configuration option, which is set to true by default. Set this to false if you do not want users to download datasets to their local machine. There is currently no configuration option that enables exporting datasets to a file system.
Docker Image Users
The following example shows how to enable artifact exporting to a file system when starting the Driverless AI Docker image.
docker run \
  --pid=host \
  --init \
  --rm \
  --shm-size=256m \
  -e DRIVERLESS_AI_ENABLE_ARTIFACTS_UPLOAD="true" \
  -e DRIVERLESS_AI_ARTIFACTS_STORE="file_system" \
  -e DRIVERLESS_AI_ARTIFACTS_FILE_SYSTEM_DIRECTORY="tmp" \
  -u `id -u`:`id -g` \
  -p 12345:12345 \
  -v `pwd`/data:/data \
  -v `pwd`/log:/log \
  -v `pwd`/license:/license \
  -v `pwd`/tmp:/tmp \
  harbor.h2o.ai/h2oai/dai-centos7-x86_64:TAG
Native Install Users
The following example shows how to enable artifact exporting to a file system on native installs.
Export the Driverless AI config.toml file or add it to ~/.bashrc. For example:
# DEB and RPM
export DRIVERLESS_AI_CONFIG_FILE="/etc/dai/config.toml"

# TAR SH
export DRIVERLESS_AI_CONFIG_FILE="/path/to/your/unpacked/dai/directory/config.toml"
Edit the following configuration option in the config.toml file. Save your changes when you are done.
# Replace all the downloads on the experiment page to exports and allow users to push to the artifact store configured with artifacts_store
enable_artifacts_upload = true

# Artifacts store.
# file_system: stores artifacts on a file system directory denoted by artifacts_file_system_directory.
#
artifacts_store = "file_system"

# File system location where artifacts will be copied in case artifacts_store is set to file_system
artifacts_file_system_directory = "tmp"
Start Driverless AI. Note that the command used to start Driverless AI varies depending on your install type.
# Deb or RPM with systemd (preferred for Deb and RPM):
# Start Driverless AI.
sudo systemctl start dai

# Deb or RPM without systemd:
# Start Driverless AI.
sudo -H -u dai /opt/h2oai/dai/run-dai.sh

# Tar.sh
# Start Driverless AI
./run-dai.sh
Exporting an Artifact
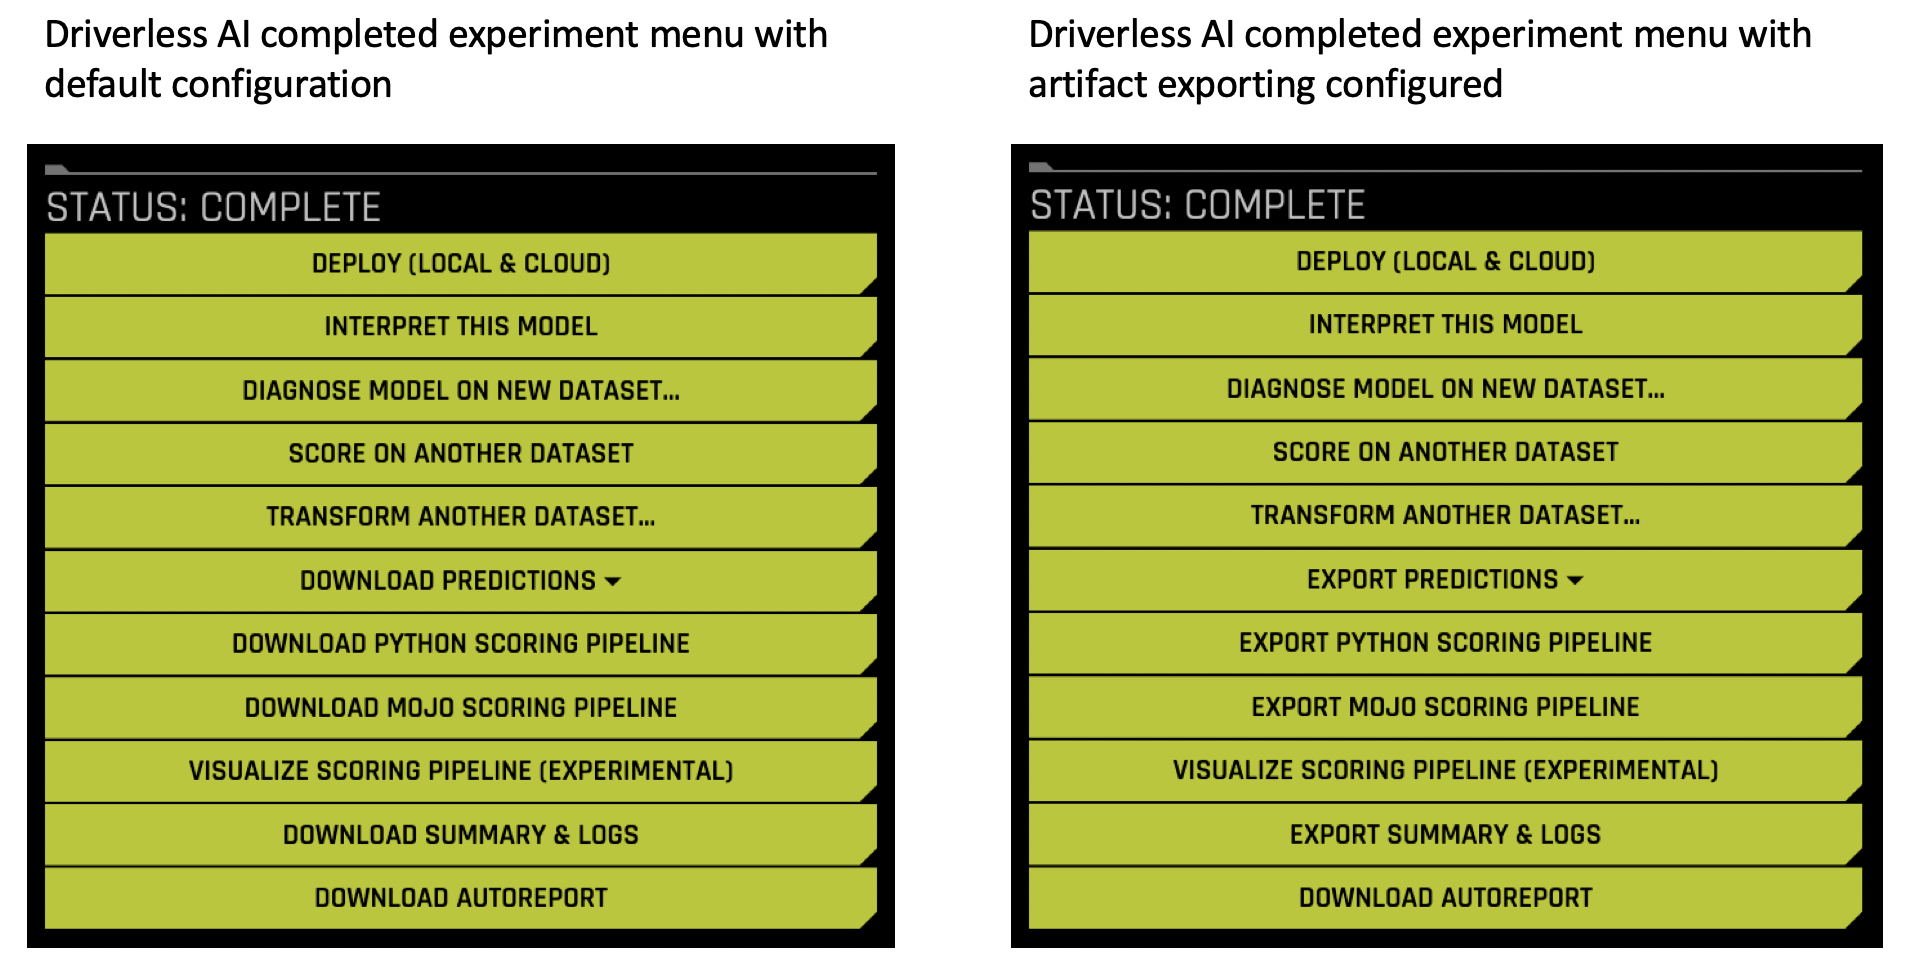
When the export artifacts options are enabled/configured, the menu options on the Completed Experiment page will change. Specifically, all “Download” options (with the exception of Autoreport) will change to “Export.”
Click on an artifact to begin exporting. For example, click on Export Summary and Logs.
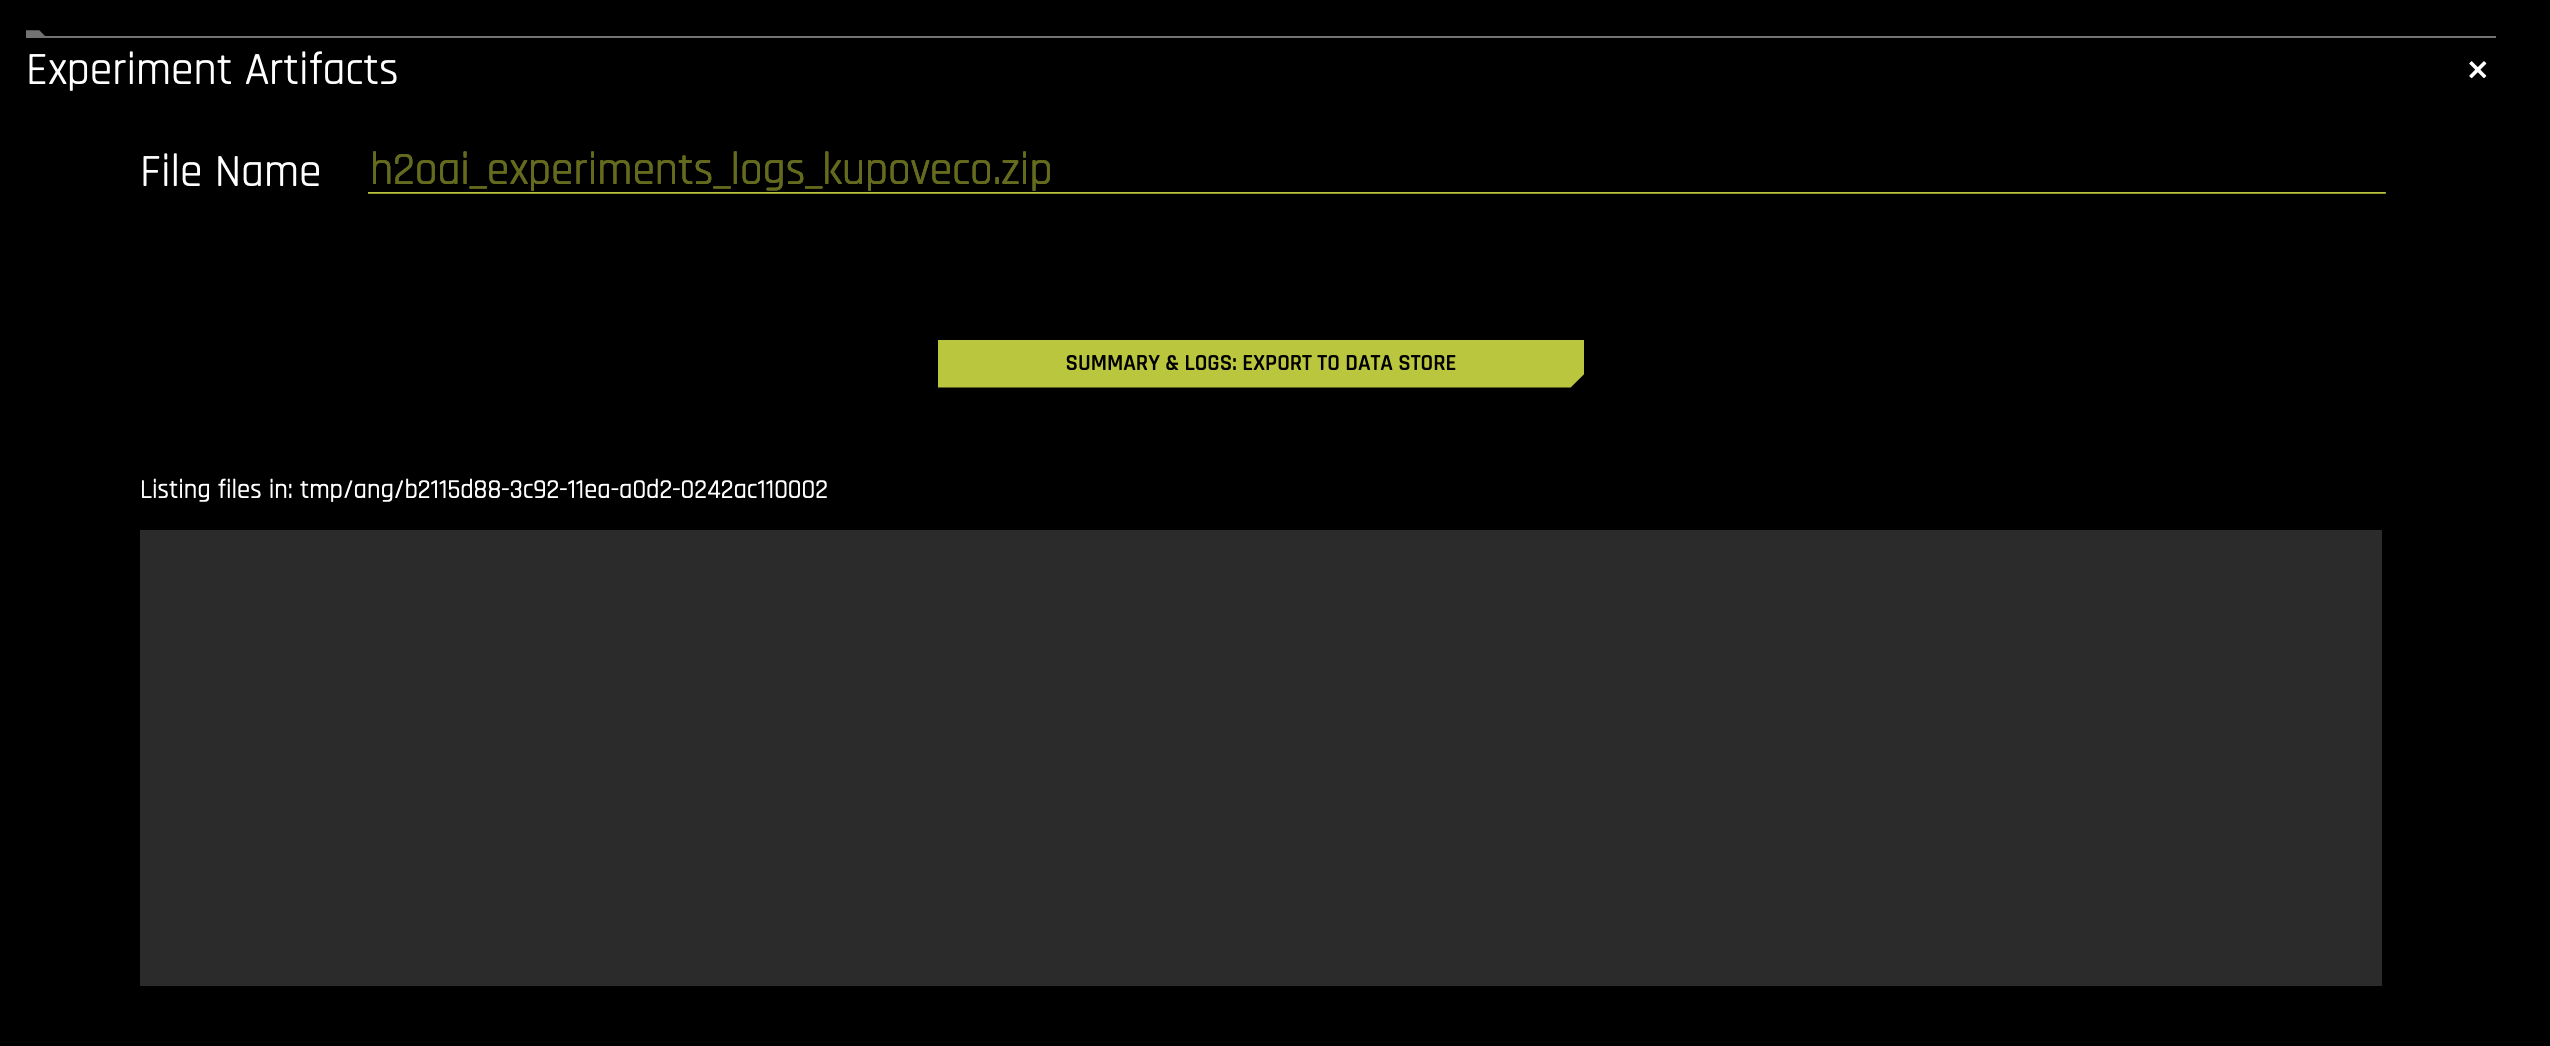
Specify a file name or use the default file name. This denotes the new name to be given to the exported artifact. By default, this name matches the selected export artifact name.
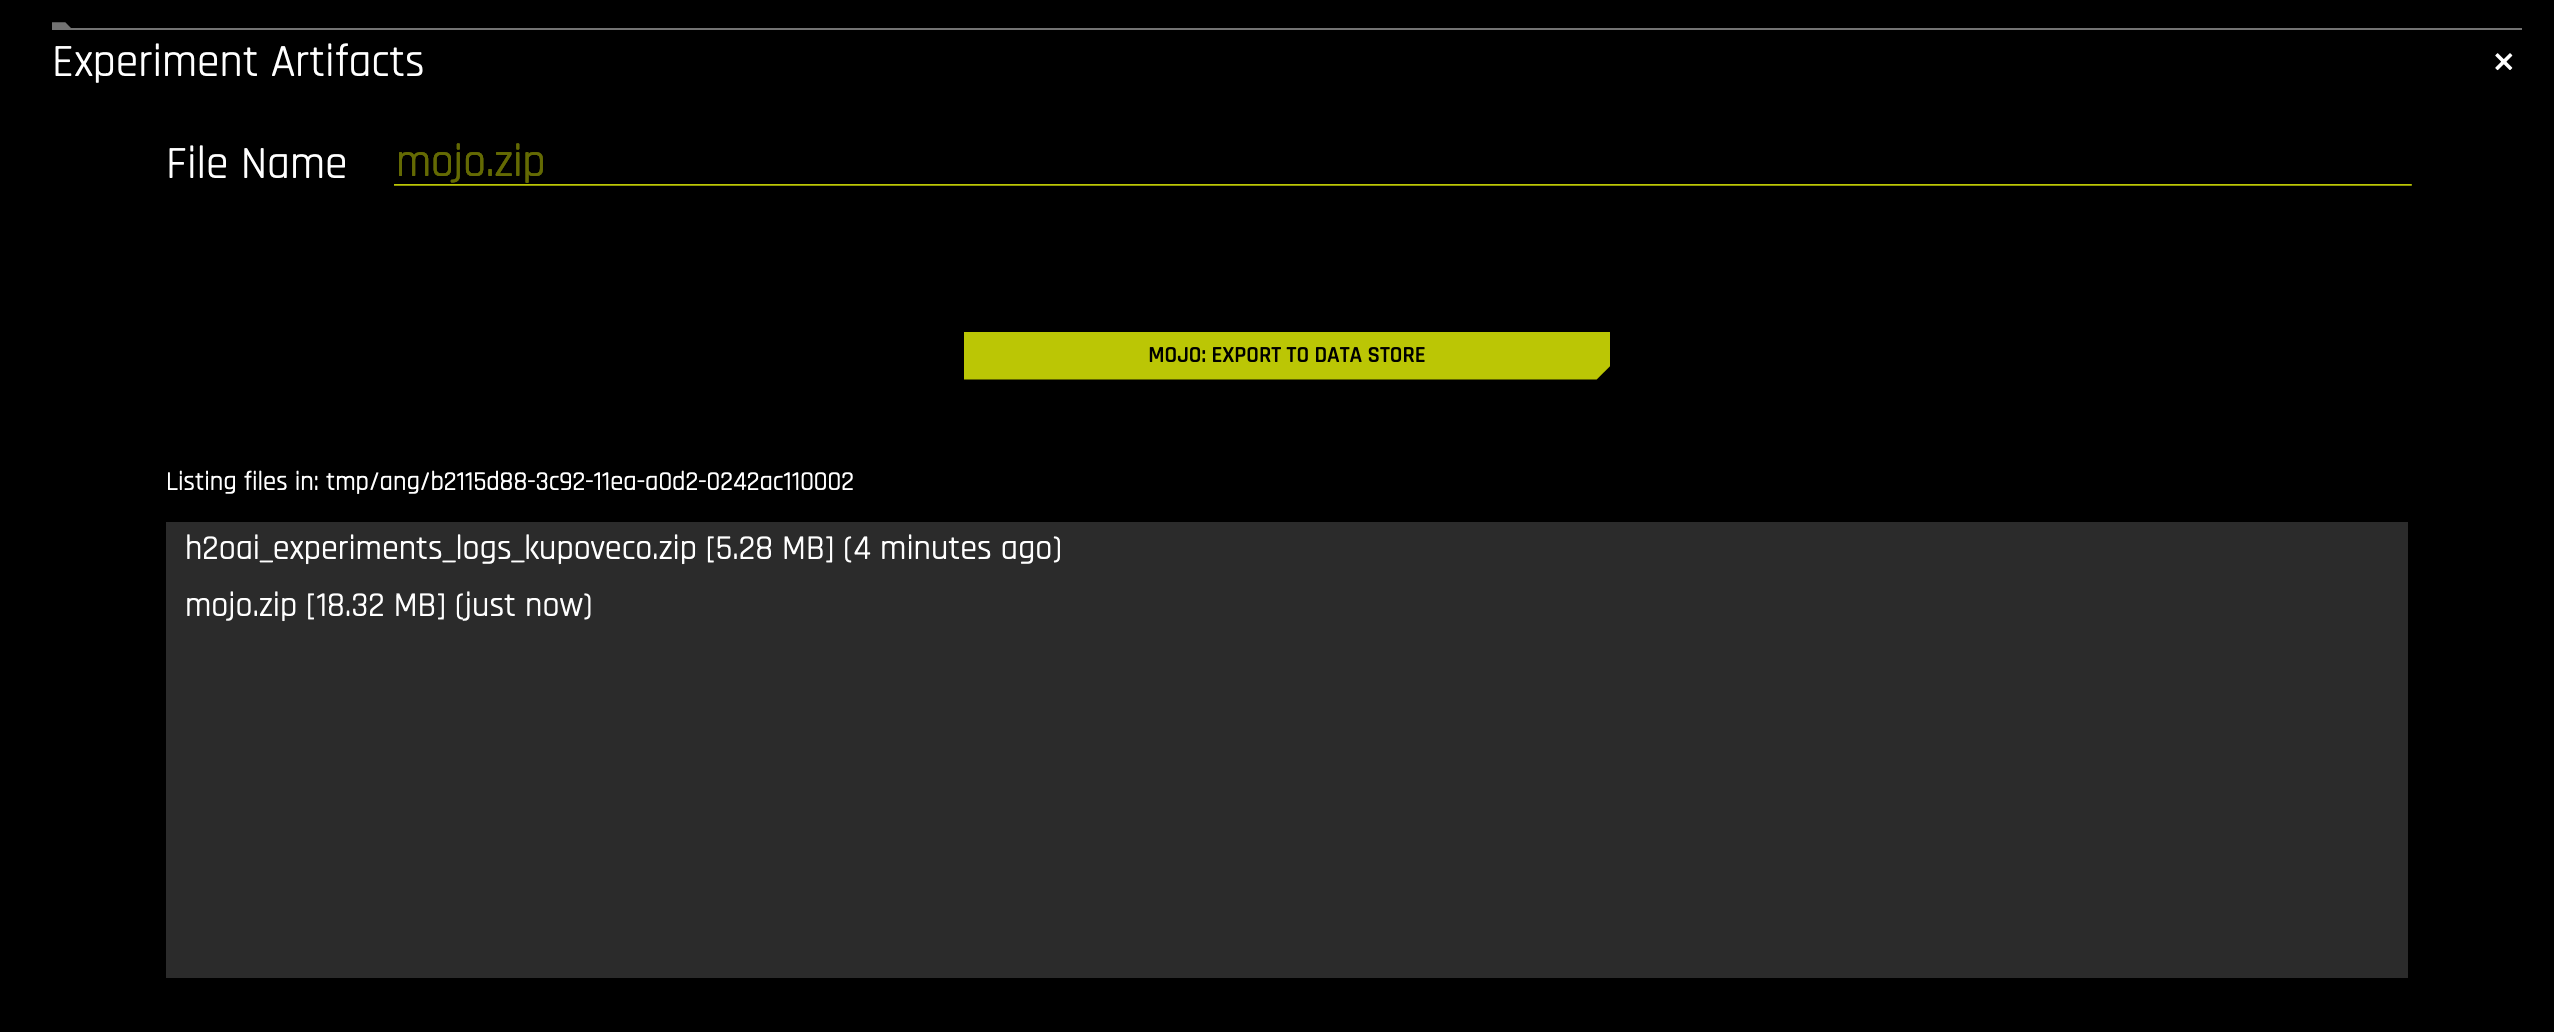
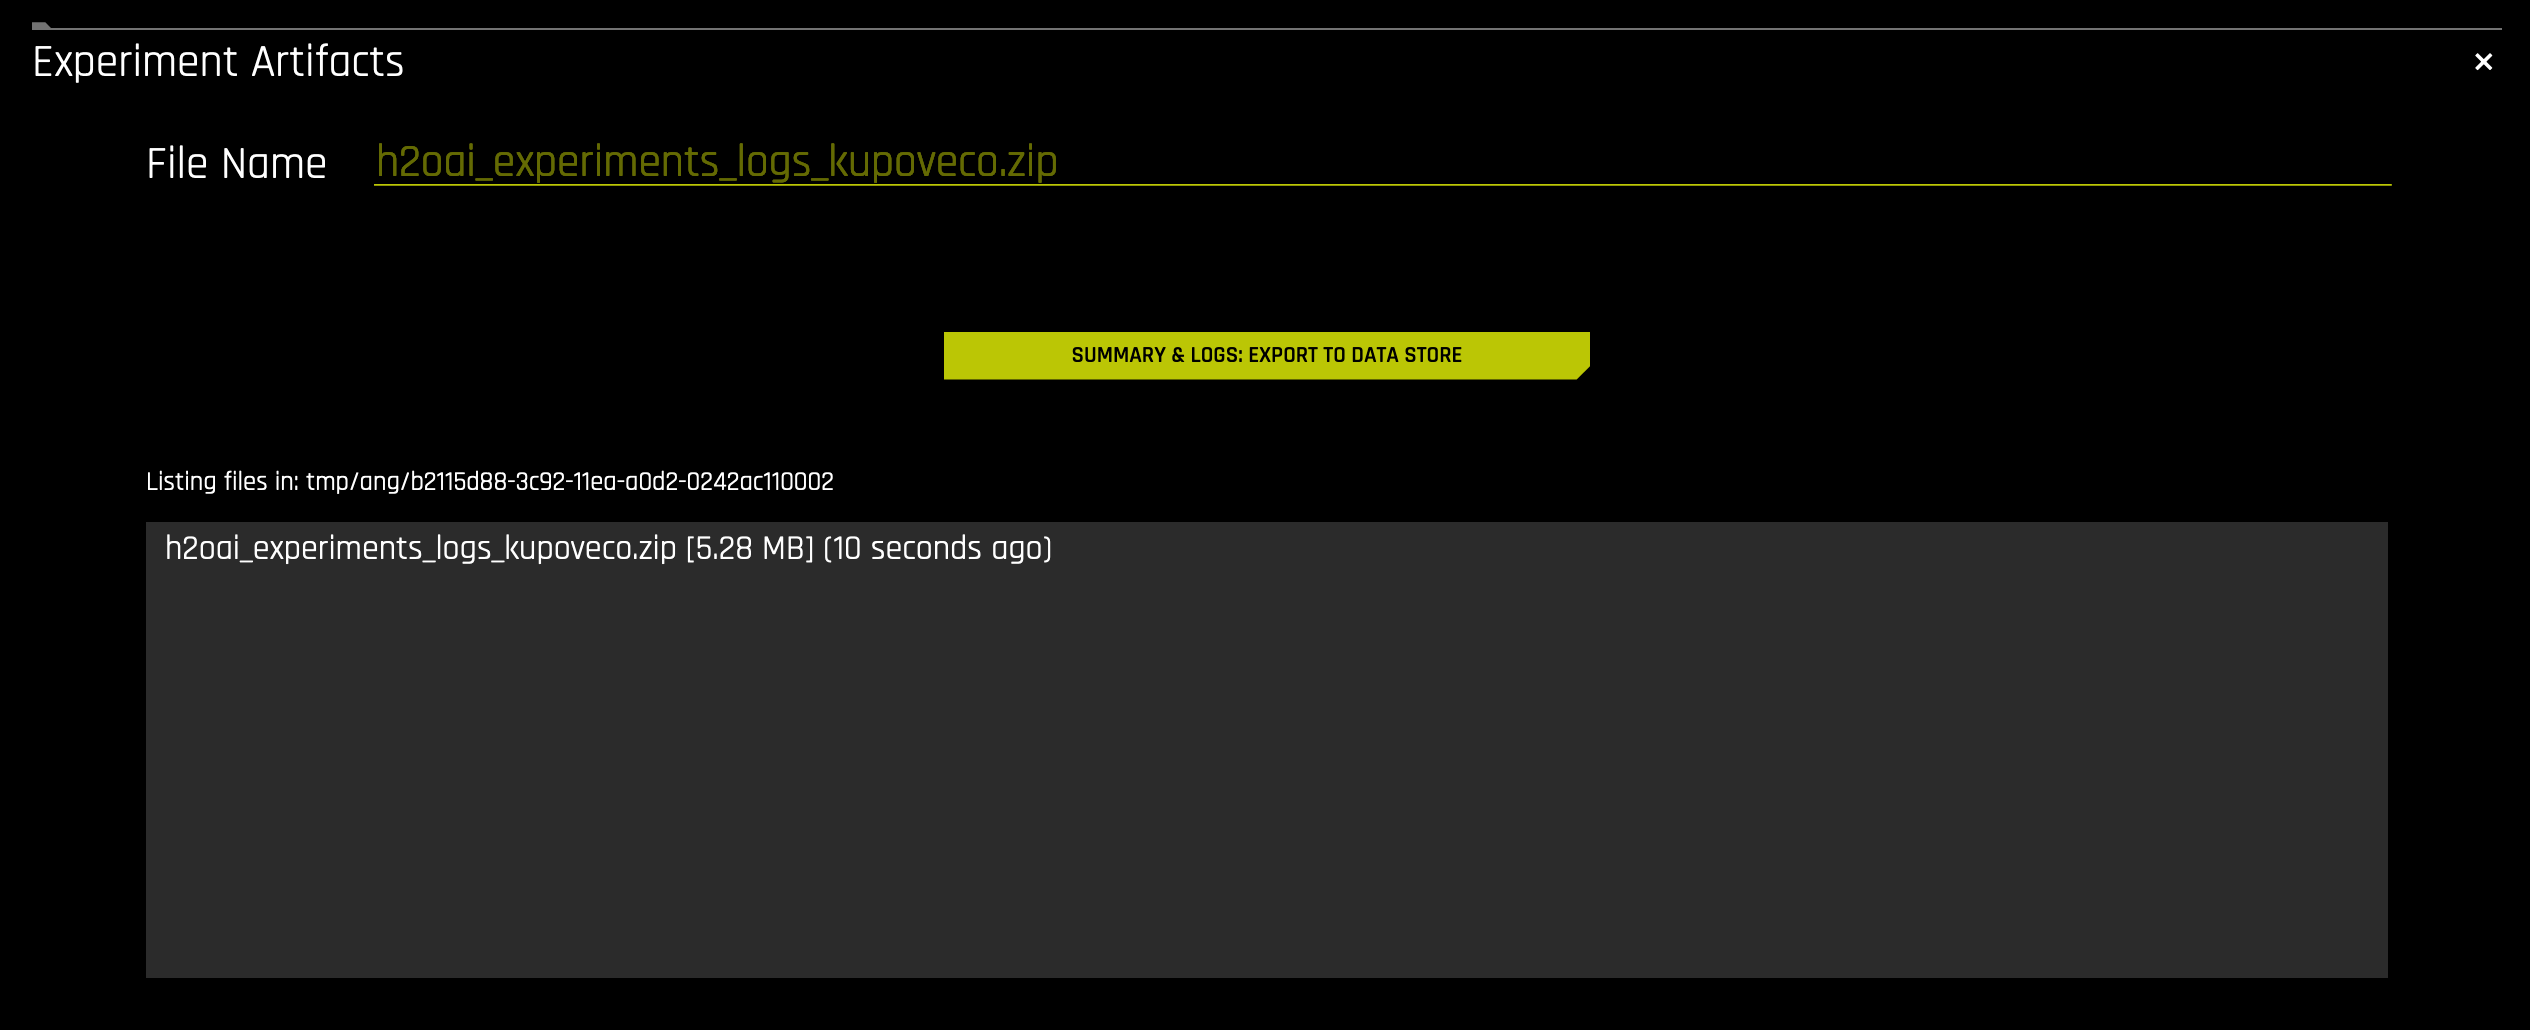
Now click the Summary and Logs: Export to Data Store button. (Note that this button name changes depending on the artifact that you select.) This begins the export action. Upon completion, the exported artifact will display in the list of artifacts. The directory structure is: <path_to_export_to>/<user>/<experiment_id>/
Continue exporting additional artifacts for this experiment.