Project Workspace
Driverless AI provides a Project Workspace for managing datasets and experiments related to a specific business problem or use case. Whether you are trying to detect fraud or predict user retention, datasets and experiments can be stored and saved in the individual projects. A Leaderboard on the Projects page allows you to easily compare performance and results and identify the best solution for your problem.
To create a Project Workspace:
Click the Projects option on the top menu.
Click New Project.
Specify a name for the project and provide a description.
Click Create Project. This creates an empty Project page.

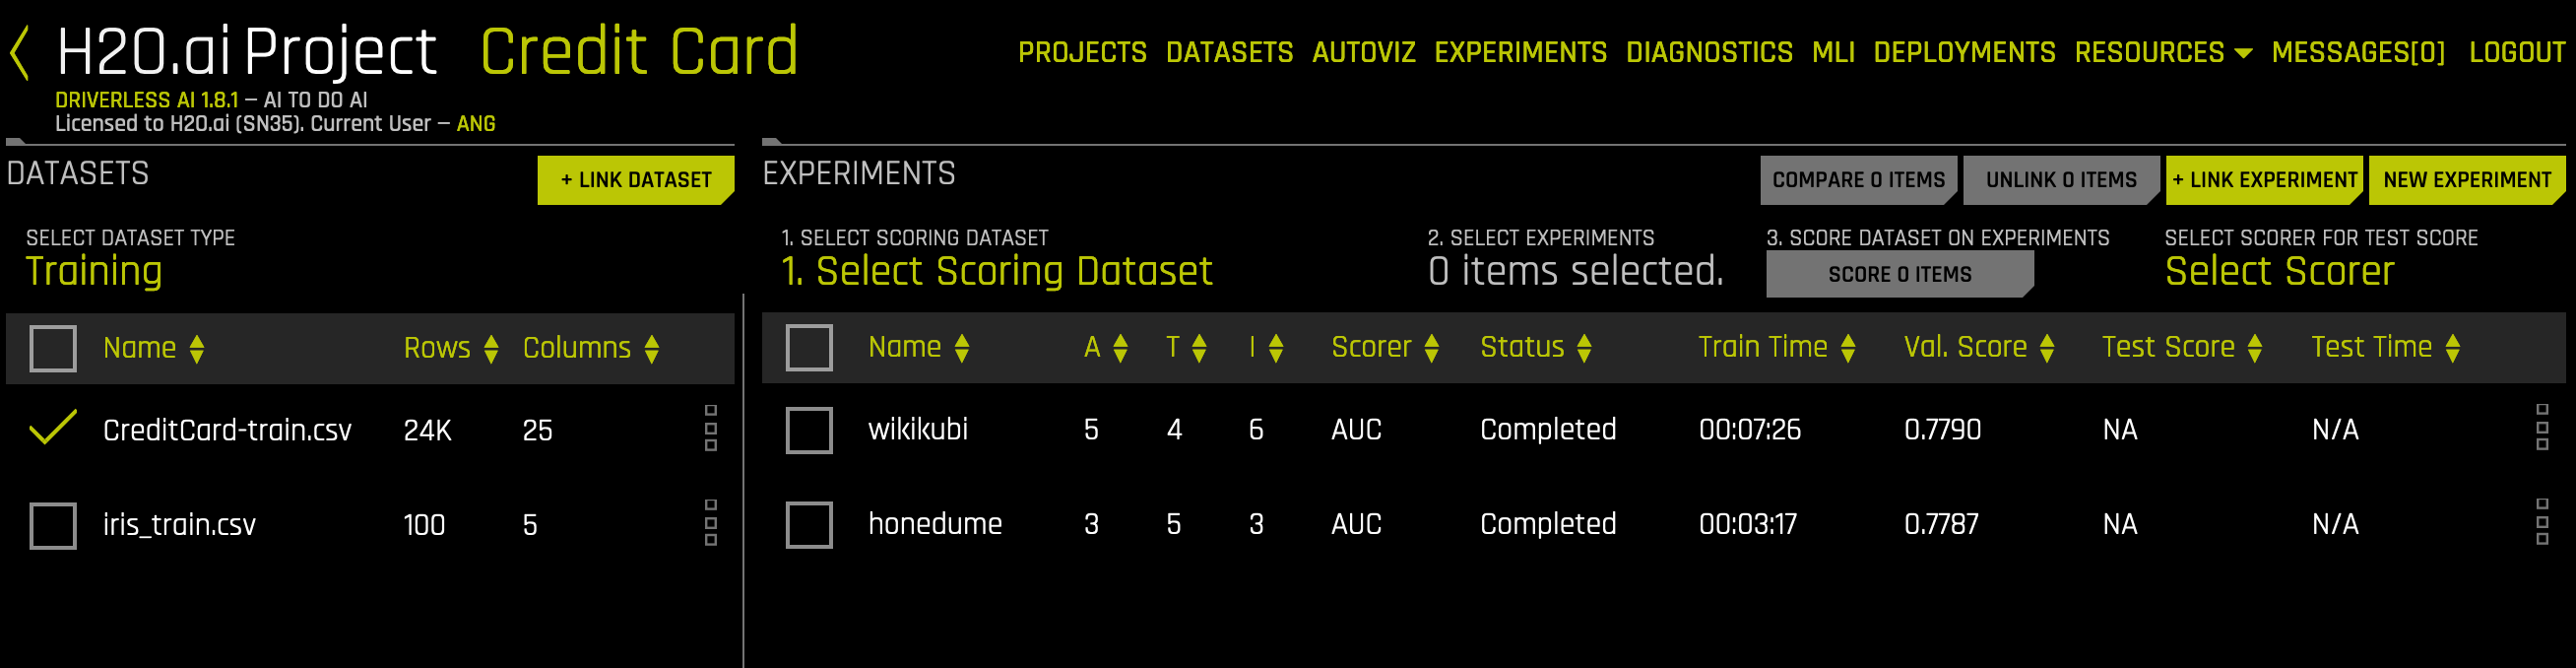
From the Projects page, you can link datasets and/or experiments, and you can run new experiments. When you link an existing experiment to a Project, the datasets used for the experiment will automatically be linked to this project (if not already linked).
Linking Datasets
Any dataset that has been added to Driverless AI can be linked to a project. In addition, when you link an experiment, the datasets used for that experiment are also automatically linked to the project.
To link a dataset:
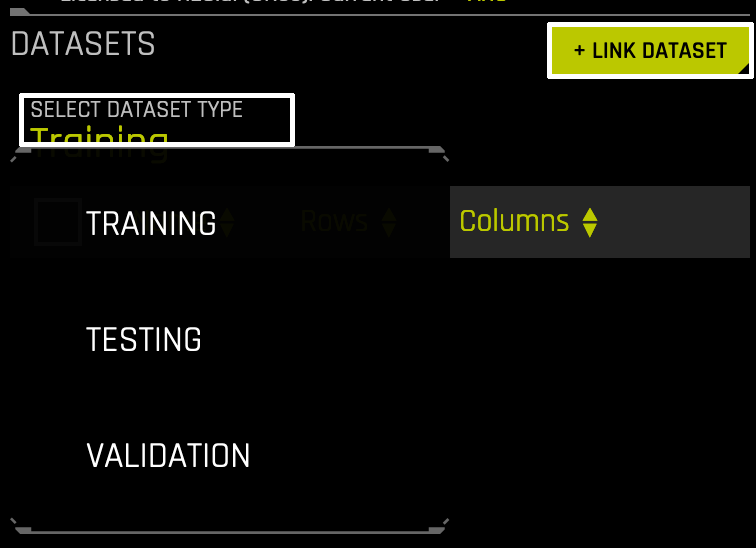
Select Training, Validation, or Test from the dropdown menu.
Click the Link Dataset button.
Select the dataset(s) that you want to link.
The list available datasets link include those that were added on The Datasets Page, or you can browse datasets in your file system. Be sure to select the correct dropdown option before linking a training, validation, or test dataset. This is because, when you run a new experiment in the project, the training data, validation data, and test data options for that experiment come from list of datasets linked here. You will not be able to, for example, select any datasets from within the Training tab when specifying a test dataset on the experiment.
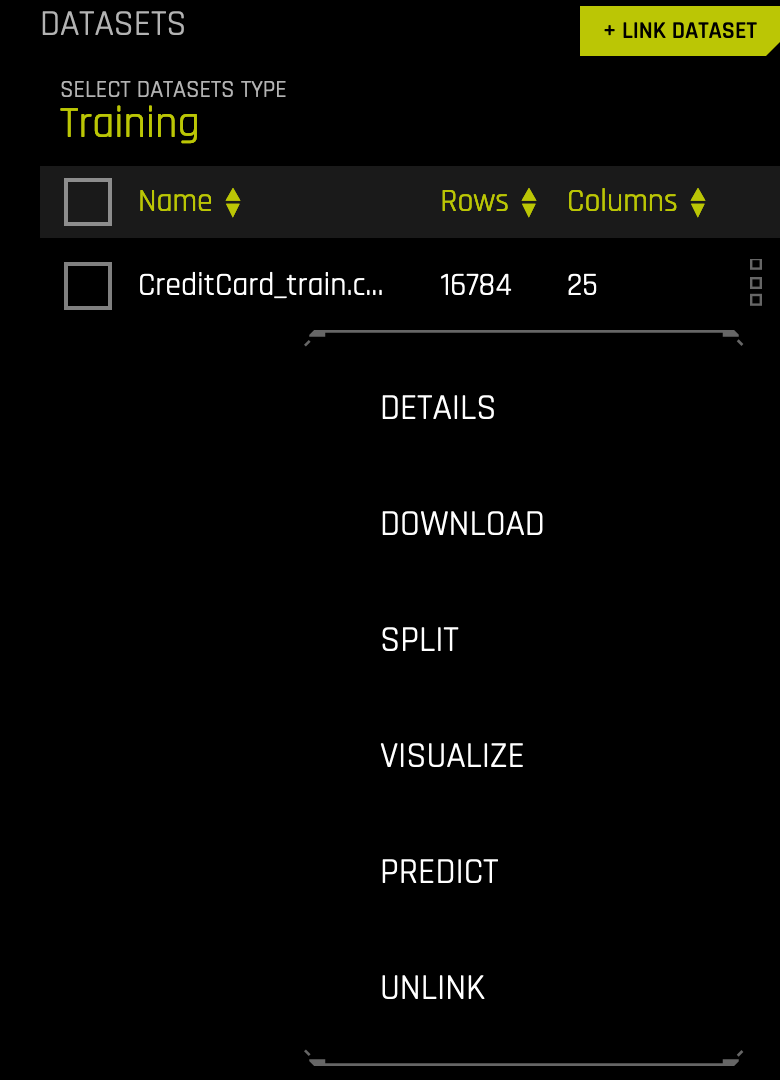
When datasets are linked, the same menu options are available here as on the Datasets page. Refer to The Datasets Page section for more information.
Linking Experiments
Existing experiments can be selected and linked to a Project. Additionally, you can run a new experiment or checkpointing an existing experiment from this page, and those experiments will automatically be linked to this Project.
Link an existing experiment to the project by clicking Link Experiment and then selecting the experiment(s) to include. When you link experiments, the datasets used to create the experiments are also automatically linked.
Selecting Datasets
In the Datasets section, you can select a training, validation, or testing dataset. The Experiments section will show experiments in the Project that use the selected dataset.
New Experiments
When experiments are run from within a Project, only linked datasets or datasets available on the file system can be used.
Click the New Experiment link to begin a new experiment.
Select your training data and optionally your validation and/or testing data.
Specify your desired experiment settings (refer to Experiment Settings and Expert Settings), and then click Launch Experiment.
As the experiment is running, it will be listed at the top of the Experiments Leaderboard until it is completed. It will also be available on the Experiments page.
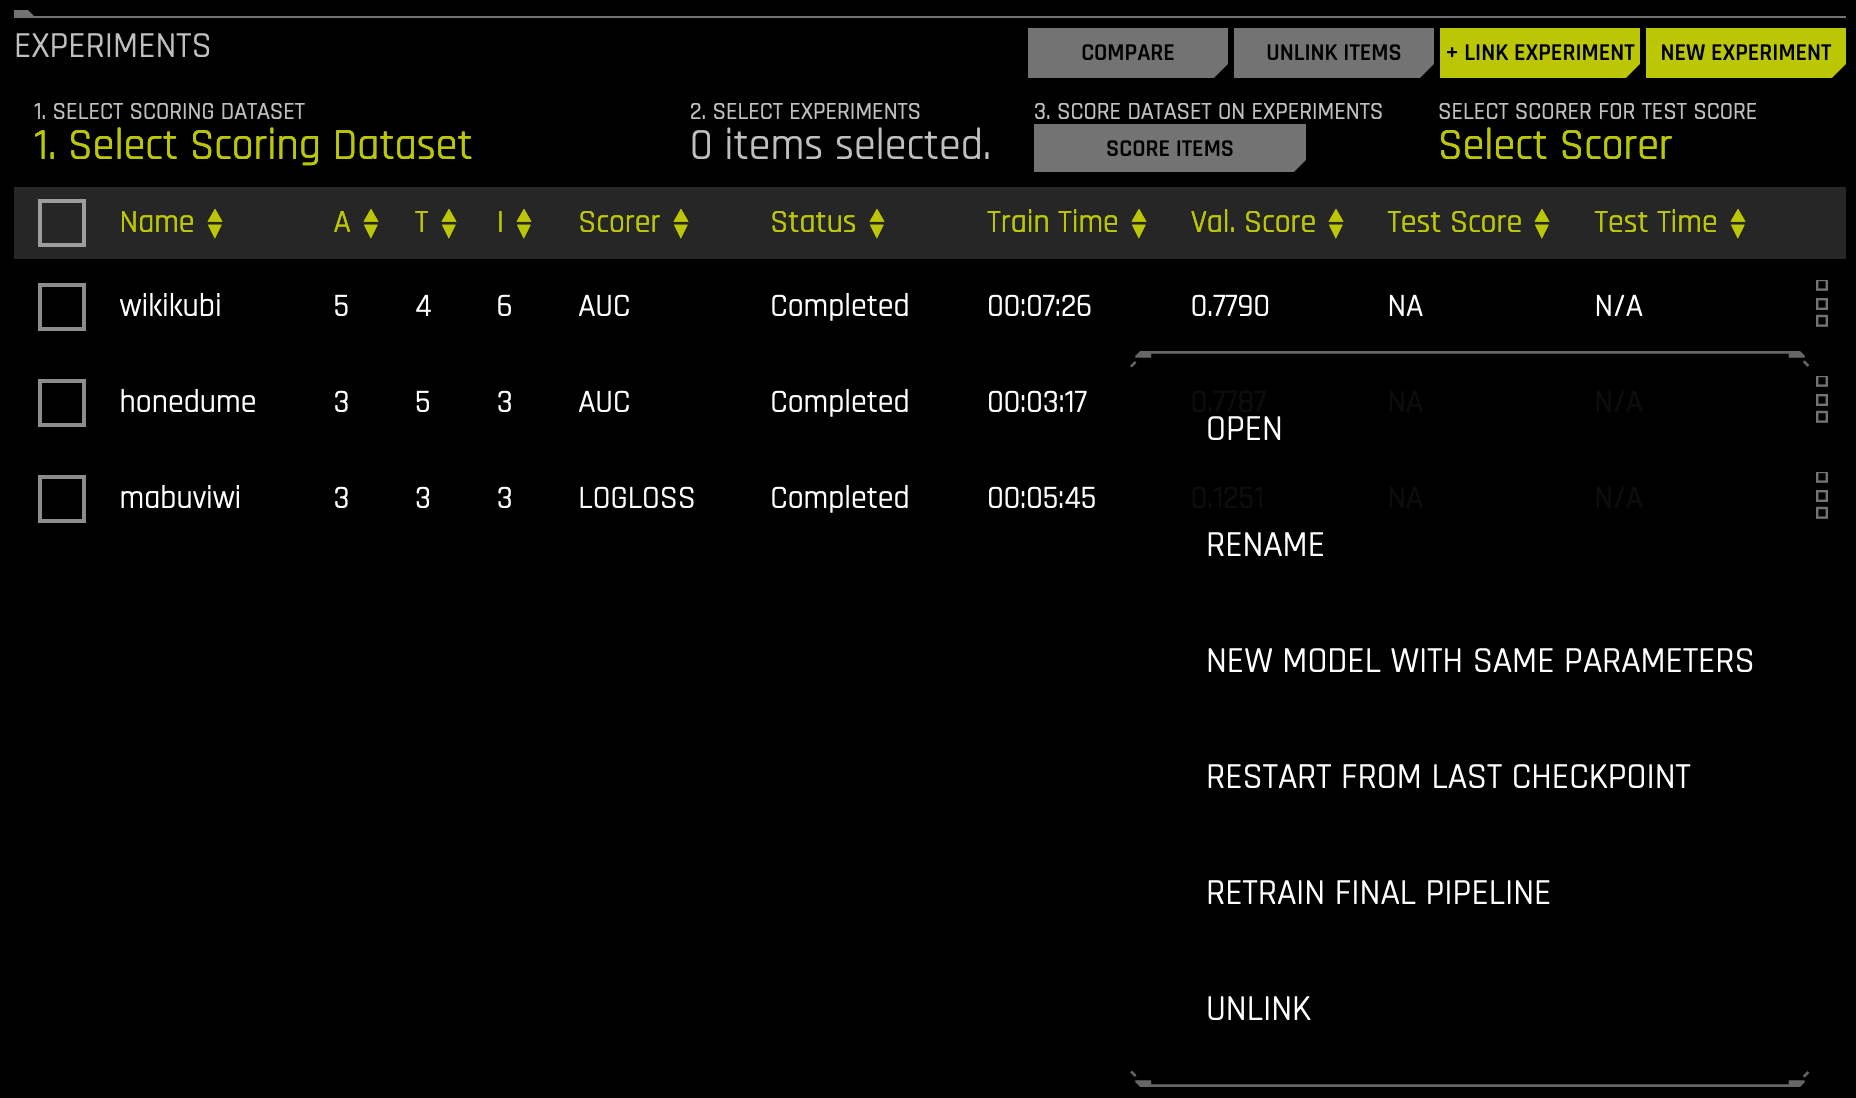
Checkpointing Experiments
When experiments are linked to a Project, the same checkpointing options for experiments are available here as on the Experiments page. Refer to Checkpointing, Rerunning, and Retraining for more information.
Experiments List
When attempting to solve a business problem, a normal workflow will include running multiple experiments, either with different/new data or with a variety of settings, and the optimal solution can vary for different users and/or business problems. For some users, the model with the highest accuracy for validation and test data could be the most optimal one. Other users might be willing to make an acceptable compromise on the accuracy of the model for a model with greater performance (faster prediction). For some, it could also mean how quickly the model could be trained with acceptable levels of accuracy. The Experiments list makes it easy for you to find the best solution for your business problem.
The list is organized based on experiment name. You can change the sorting of experiments by selecting the up/down arrows beside a column heading in the experiment menu.
Hover over the right menu of an experiment to view additional information about the experiment, including the problem type, datasets used, and the target column.
Experiment Scoring
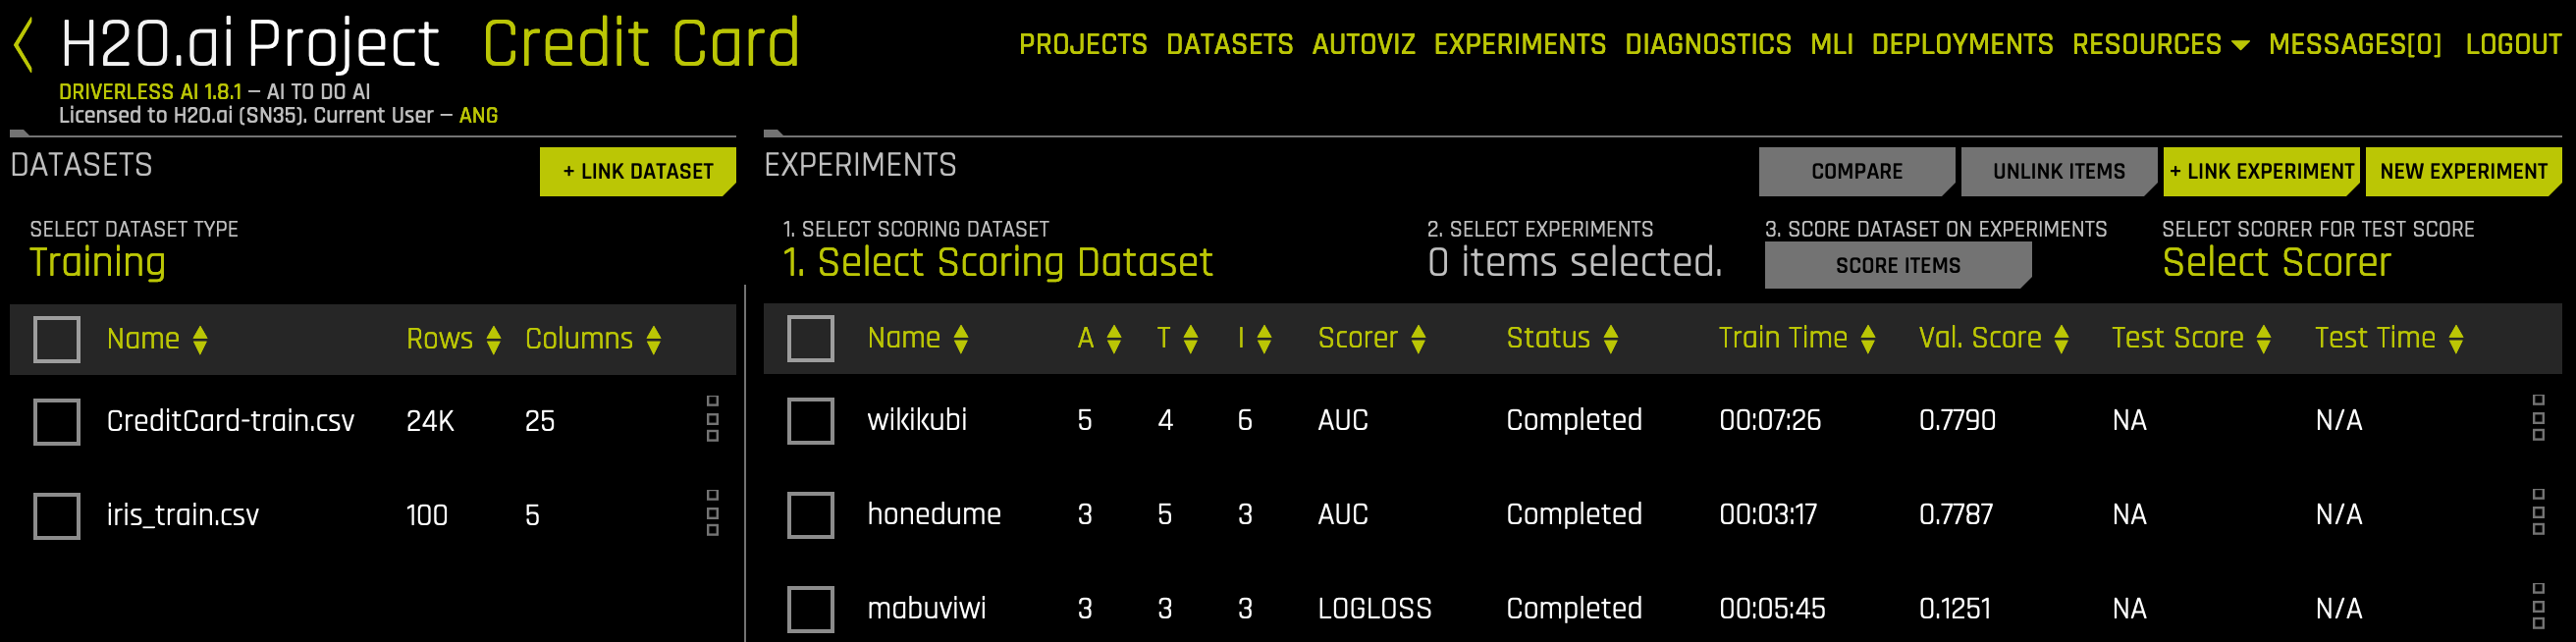
Experiments linked to projects do not automatically include a test score. To view Test Scores in the Leaderboard, you must first complete the scoring step for a particular dataset and experiment combination. Without the scoring step, no scoring data is available to populate in the Test Score and Score Time columns. Experiments that do not include a test score or that have an invalid scorer (for example, if the R2 scorer is selected for classification experiments) show N/A in the Leaderboard. Also, if None is selected for the scorer, then all experiments will show N/A.
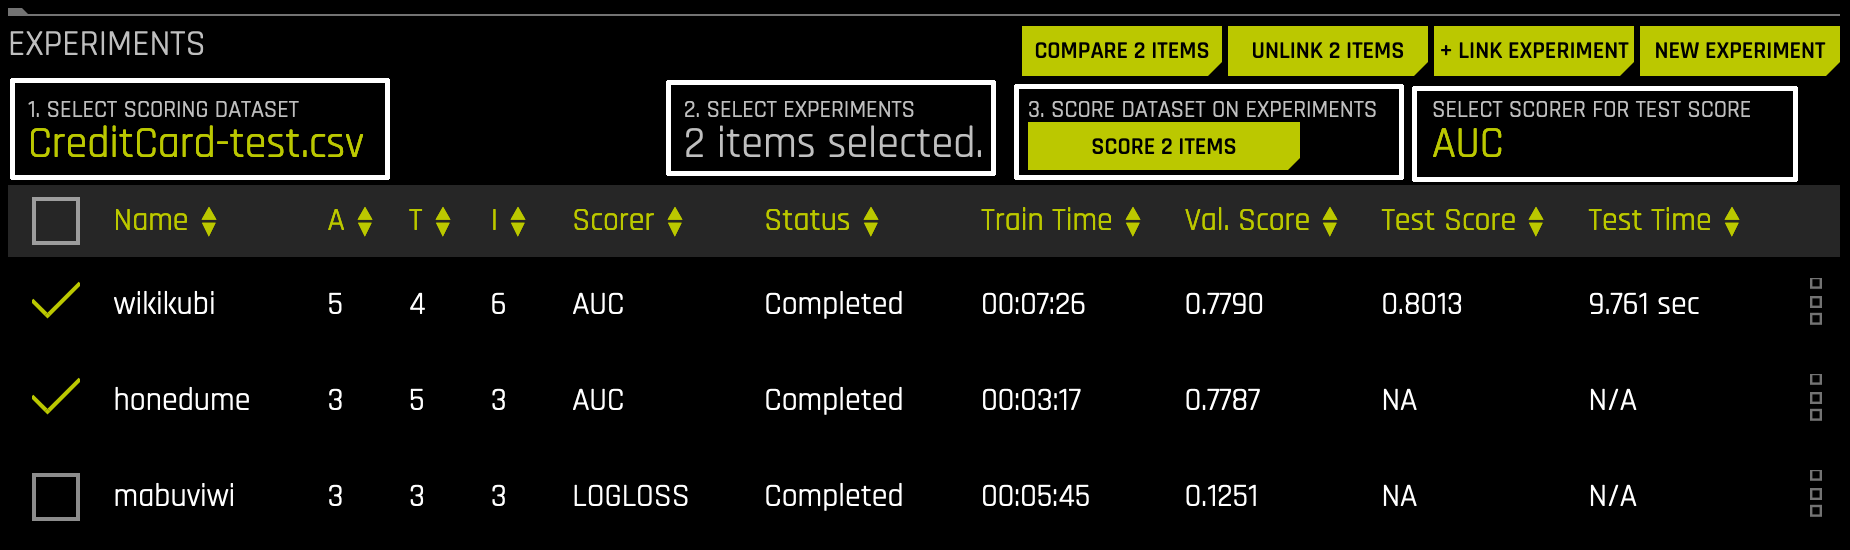
To score the experiment:
Click Select Scoring Dataset at the top of the Experiments list and select a linked Test Dataset or a test dataset available on the file system.
Select the model or models that you want to score.
Click the Select Scorer button at the top of the Experiments list and select a scorer.
Click the Score n Items button.
This starts the Model Diagnostic process and scores the selected experiment(s) against the selected scorer and dataset. (Refer to Diagnosing a Model for more information.) Upon completion, the experiment(s) will be populated with a test score, and the performance information will also be available on the Model Diagnostics page.
Notes:
If an experiment has already scored a dataset, Driverless AI will not score it again. The scoring step is deterministic, so for a particular test dataset and experiment combination, the score will be same regardless of how many times you repeat it.
The test dataset absolutely needs to have all the columns that are expected by the various experiments you are scoring it on. However, the columns of the test dataset need not be exactly the same as input features expected by the experiment. There can be additional columns in the test dataset. If these columns were not used for training, they will be ignored. This feature gives you the ability to train experiments on different training datasets (i.e., having different features), and if you have an “uber test dataset” that includes all these feature columns, then you can use the same dataset to score these experiments.
You will notice a Score Time in the Experiments Leaderboard. This values shows the total time (in seconds) that it took for calculating the experiment scores for all applicable scorers for the experiment type. This is valuable to users who need to estimate the runtime performance of an experiment.
Comparing Experiments
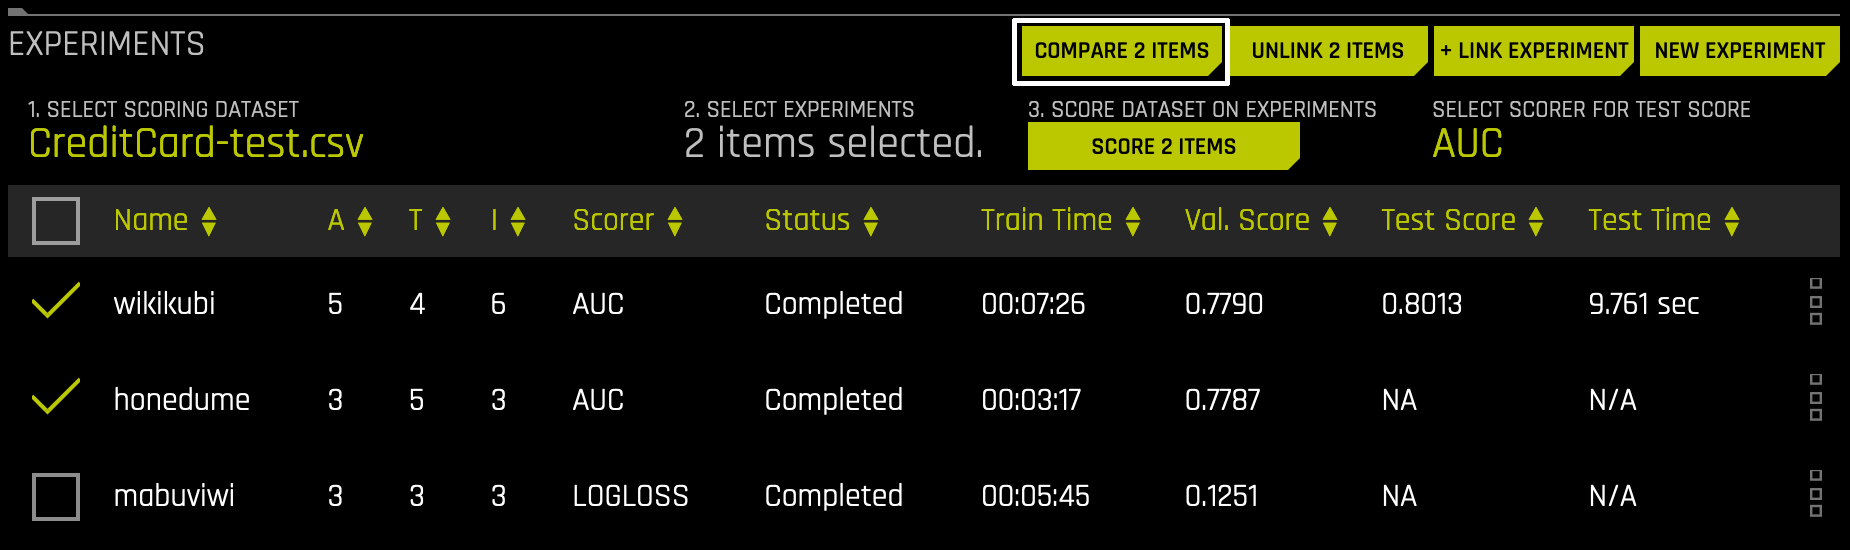
You can compare two or three experiments and view side-by-side detailed information about each.
Click the Select button at the top of the Leaderboard and select either two or three experiments that you want to compare. You cannot compare more than three experiments.
Click the Compare n Items button.
This opens the Compare Experiments page. This page includes the experiment summary and metric plots for each experiment. The metric plots vary depending on whether this is a classification or regression experiment.
For classification experiments, this page includes:
Variable Importance list
Confusion Matrix
ROC Curve
Precision Recall Curve
Lift Chart
Gains Chart
Kolmogorov-Smirnov Chart
For regression experiments, this page includes:
Variable Importance list
Actual vs. Predicted Graph

Unlinking Data on a Projects Page
Unlinking datasets and/or experiments does not delete that data from Driverless AI. The datasets and experiments will still be available on the Datasets and Experiments pages.
Unlink a dataset by clicking on the dataset and selecting Unlink from the menu. Note: You cannot unlink datasets that are tied to experiments in the same project.
Unlink an experiment by clicking on the experiment and selecting Unlink from the menu. Note that this will not automatically unlink datasets that were tied to the experiment.
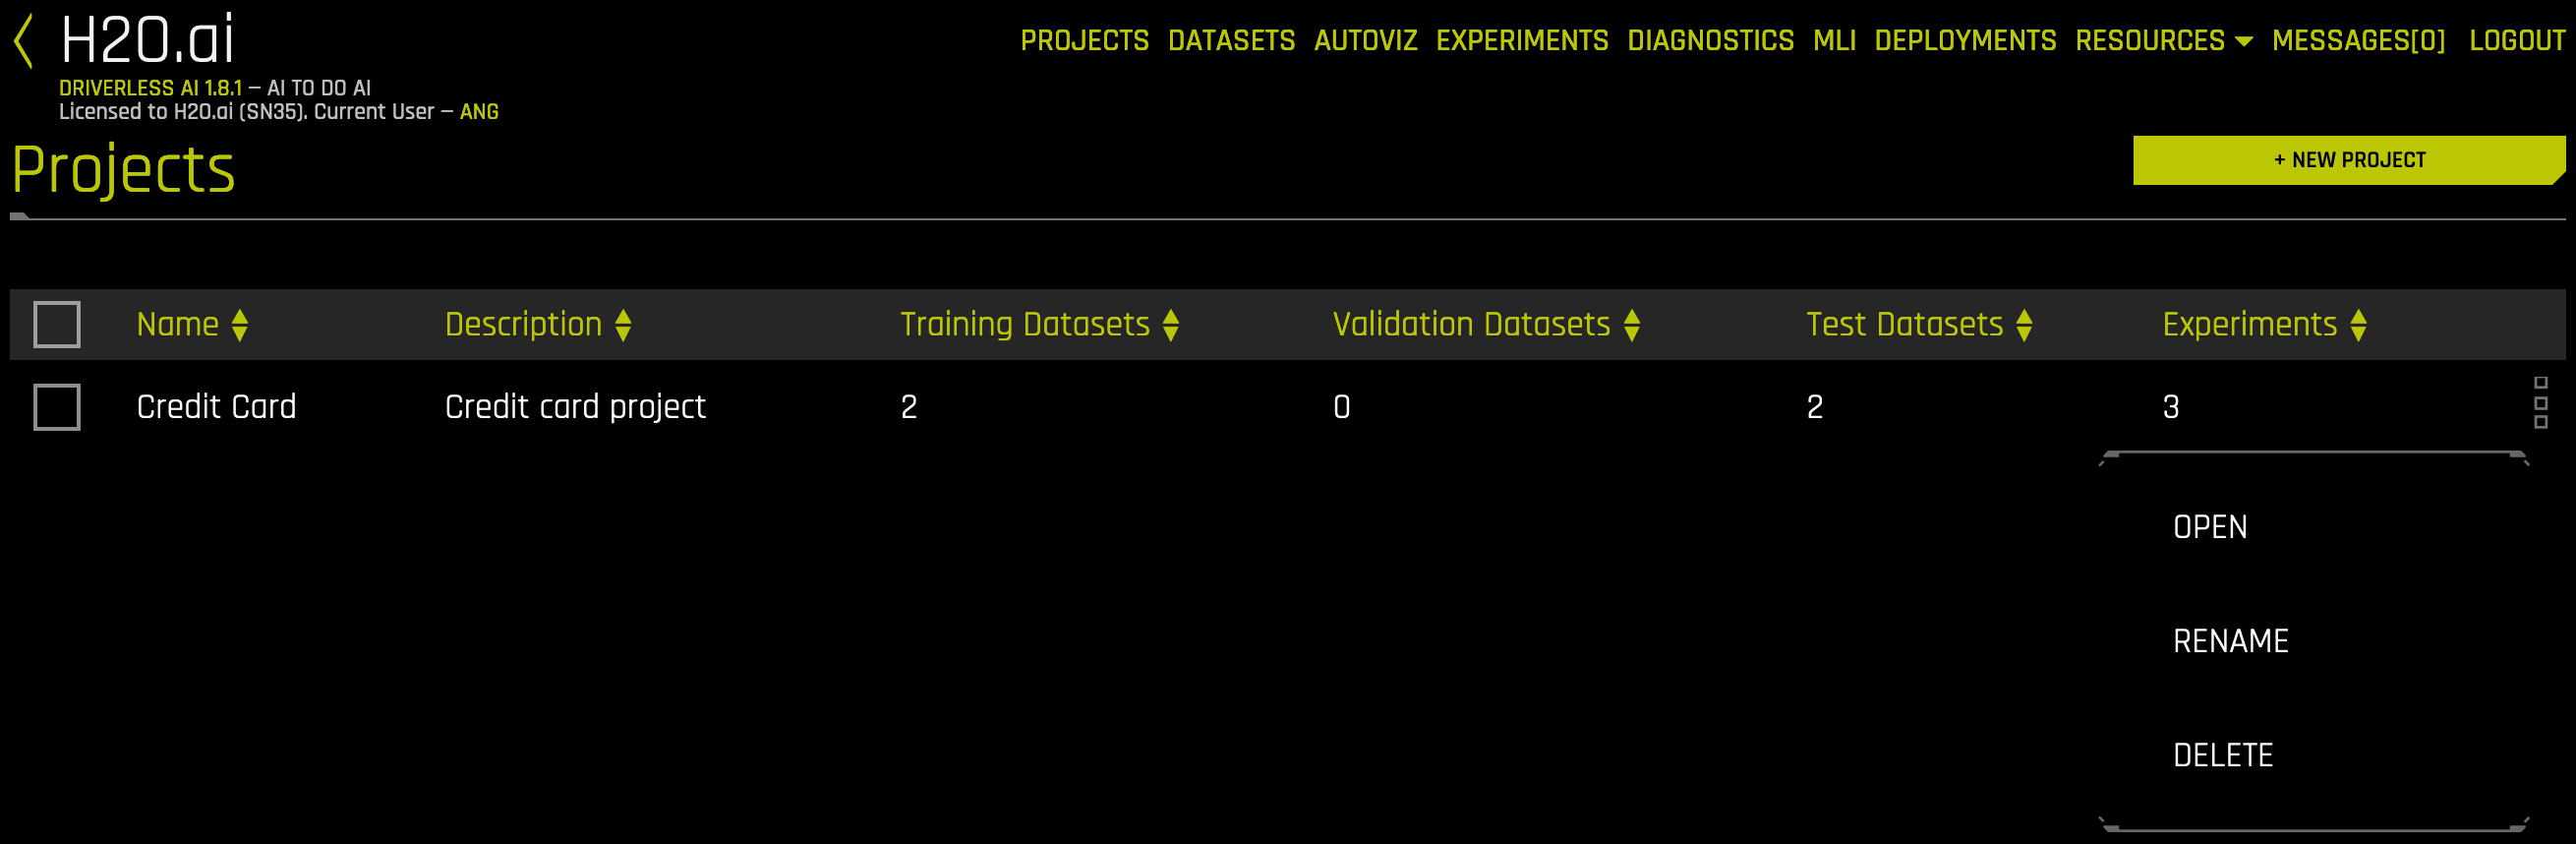
Deleting Projects
To delete a project, click the Projects option on the top menu to open the main Projects page. Click the dotted menu the right-most column, and then select Delete. You will be prompted to confirm the deletion.
Note that deleting projects does not delete datasets and experiments from Driverless AI. Any datasets and experiments from deleted projects will still be available on the Datasets and Experiments pages.