H2O Driverless AI Experiment Setup Wizard
This page describes the H2O Driverless AI Experiment Setup Wizard.
Overview
You can use the H2O Driverless AI Experiment Setup Wizard to customize a machine learning model to fit your specific data and use case needs. It ensures that the experiment settings are fine-tuned to your unique requirements. The Wizard guides you through understanding your data and lets you input details about your use case. This information helps in determining the most appropriate settings for your experiment. Key areas covered include preventing data leakage, handling natural language processing (NLP), choosing the right validation method, ensuring model reproducibility, and facilitating model deployment.
Streamline Best Practices
The H2O AI Wizard analyzes your dataset and helps you create an optimal dataset for modeling based on data science best practices. You can view recommendations and explanations of those best practices directly in the user interface.
For example, part of the machine learning process is to evaluate which columns in a dataset are useful in predicting some target. Manually going through and identifying possible data leakage across all columns is often time-consuming. With a pure autoML approach, there is a risk that columns may be dropped that should remain as a key feature in the dataset. The H2O AI Wizard brings the strongest aspects of human expertise and automation together to build highly accurate machine learning models.
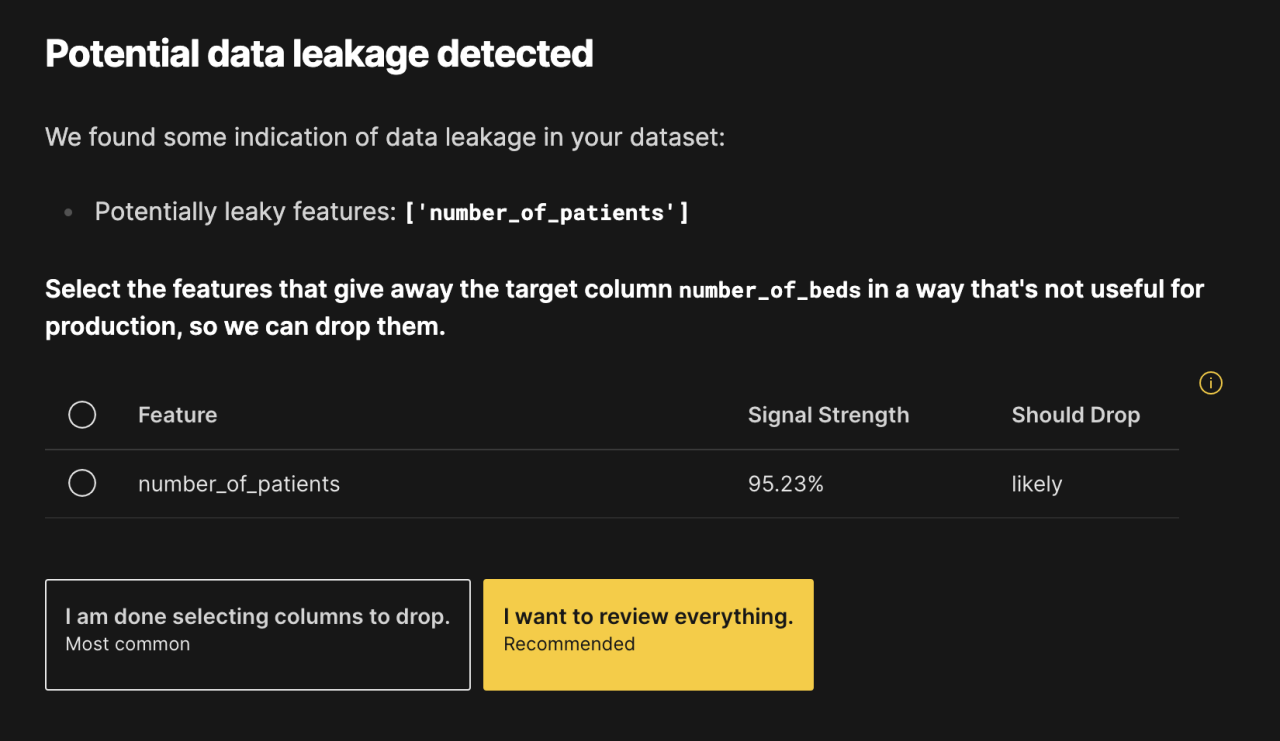
The DAI Wizard lets you employ subject matter expertise to select and drop features with the potential to cause data leakage.
Improve Model Performance
Human input provides the H2O AI Wizard with the necessary context to create and improve model performance based on specific use case requirements.
You can select your preferences for model complexity, deployment size, and training time.
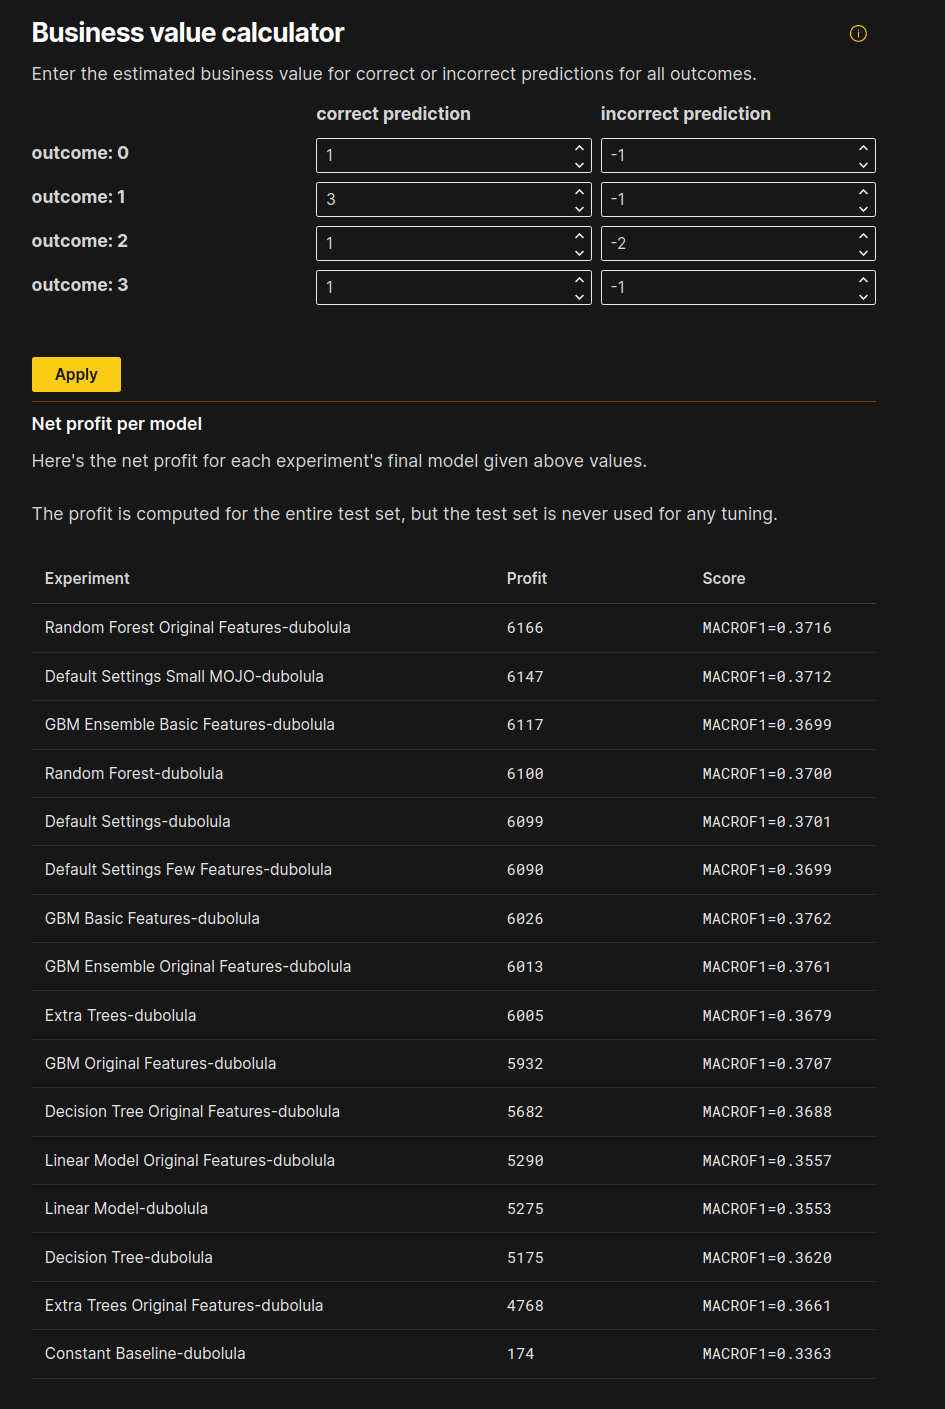
Once models have been built, the H2O AI Wizard lets you assign dollar values to different model outcomes. How much gain occurs from a correct prediction? How much cost is associated with an incorrect prediction? This helps identify which model generates the greatest overall profit.
The DAI Wizard automatically alerts users to potential data issues, focusing on those that can specifically influence model accuracy. It reviews the target column providing distribution information and frequency of classes. This helps the user quickly identify that the target column is aligned with business expectations.

The DAI Wizard then automatically detects ID columns in the dataset. Including ID columns can negatively influence model performance by preventing it from generalizing on new datasets.

Signal strength detects how influential a column is in predicting a target. The H2O AI Wizard calculates models on demand to determine the signal strength of each feature.
Expand Knowledge Base
The H2O AI Wizard instructs H2O Driverless AI on the appropriate machine learning techniques to select. For each question asked, an information panel opens to provide more details about each technique and its importance in model development. This educates users on data science and machine learning best practices.
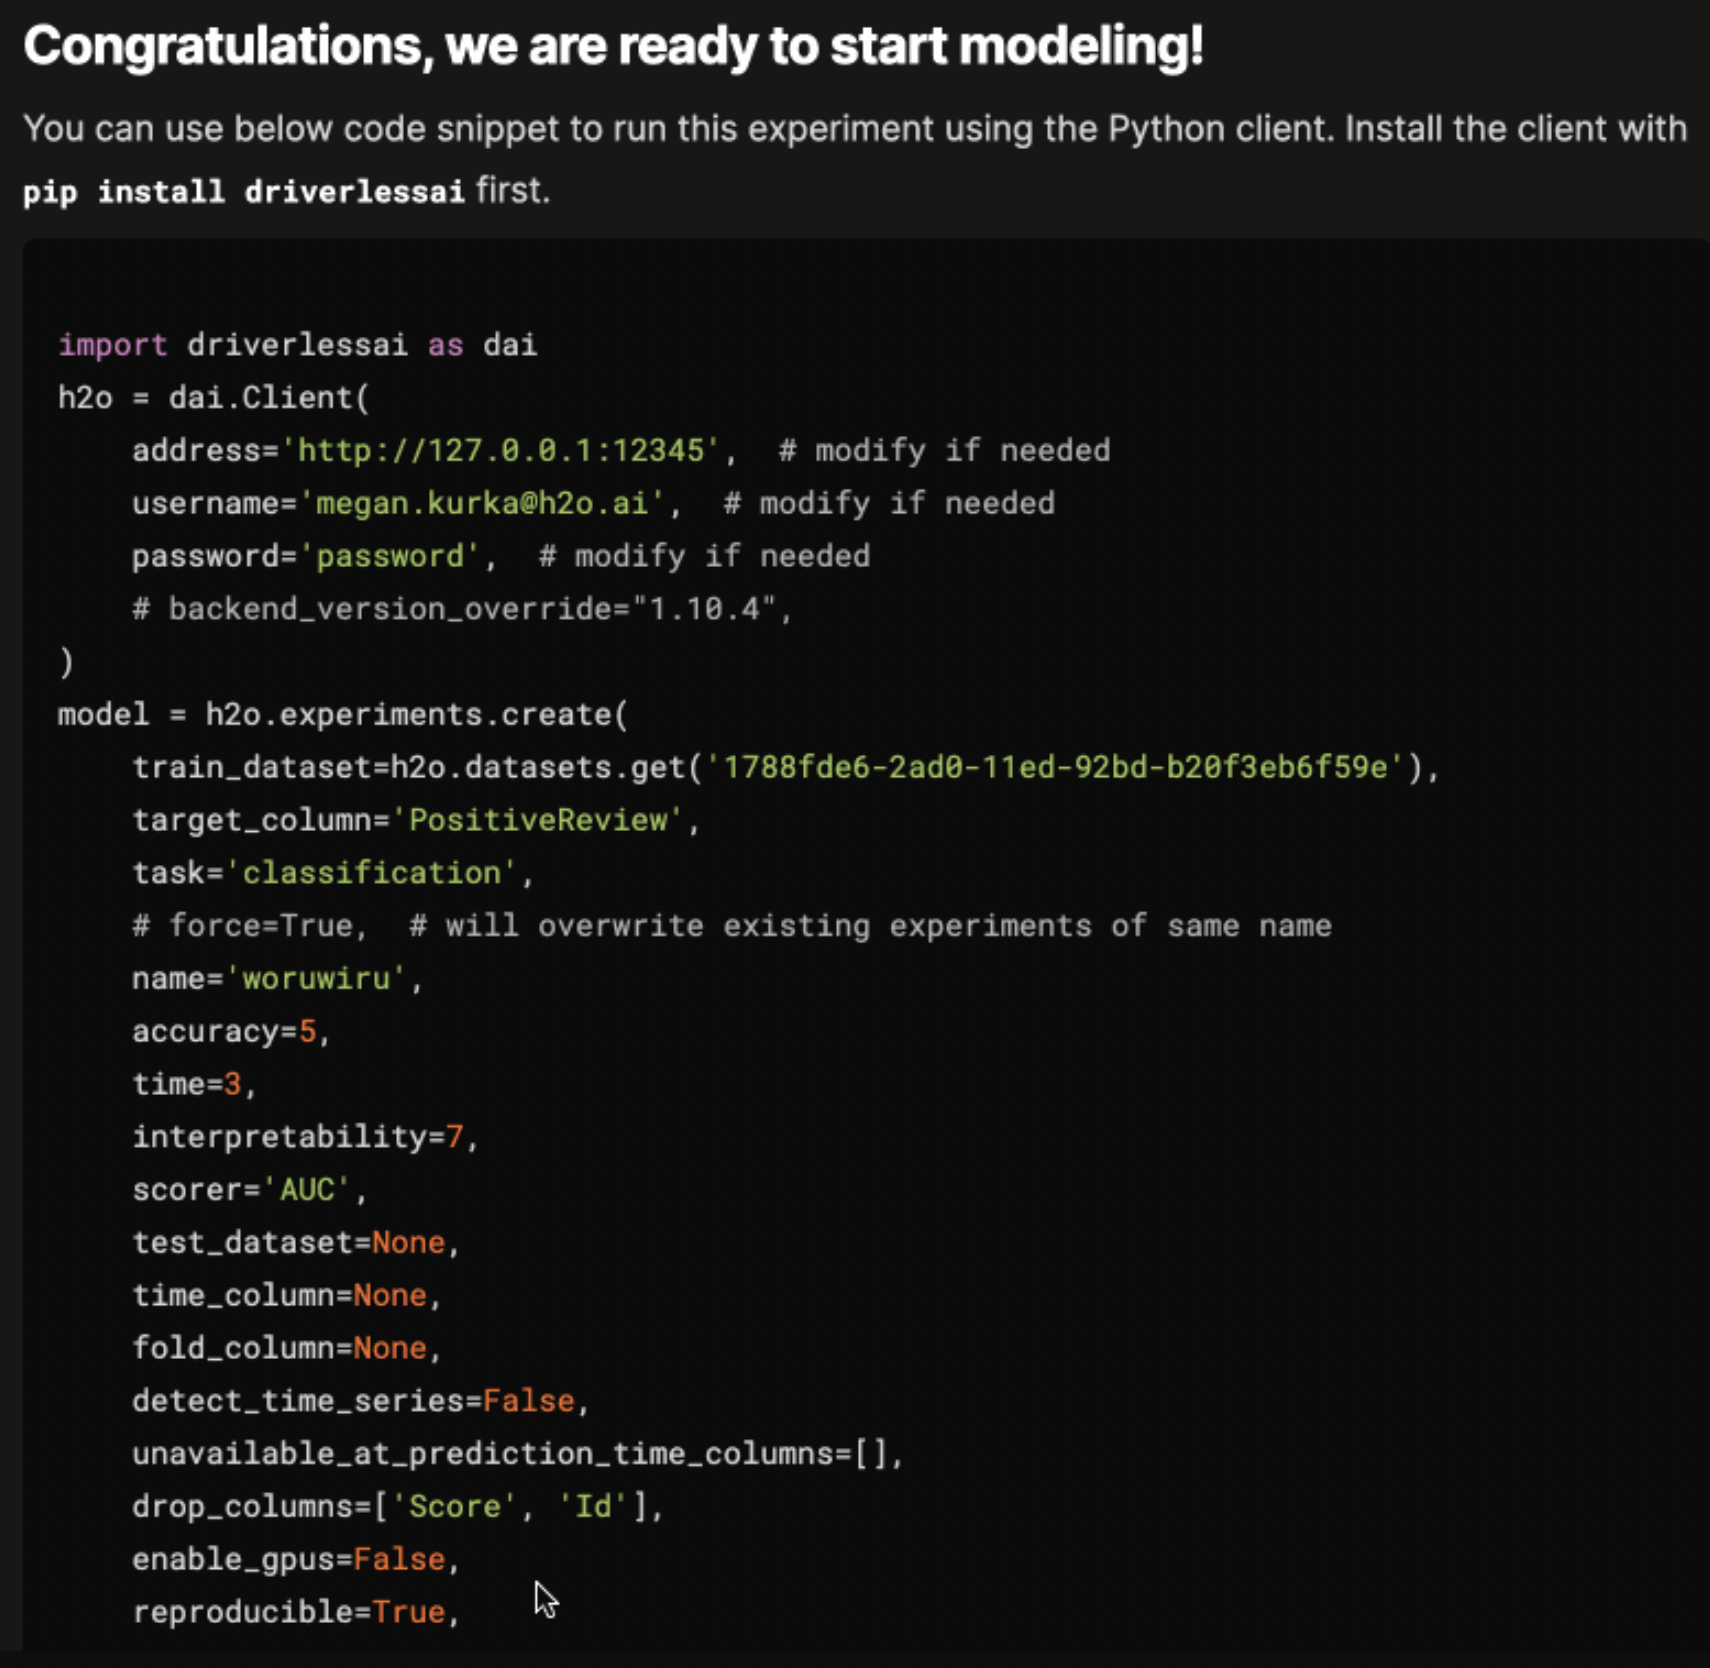
While the built-in educational components of the H2O AI Wizard explains the importance of key data science concepts directly in the user interface, it also auto-generates the code needed to launch the same experiment from a Python notebook. This lets you seamlessly switch between Python and the UI.
Notes:
This feature is currently in an experimental state.
A Dataset Join Wizard that makes it simple for you to join two datasets together is also available in Driverless AI. For more information, see Dataset Join Wizard.
The following sections describe how to access and use the H2O Driverless AI Wizard.
Access the Driverless AI Wizard
Choose one of the following methods to access the Driverless AI Wizard:
On the Datasets page, click the name of the dataset you want to use for the experiment and select Predict Wizard from the list of options.
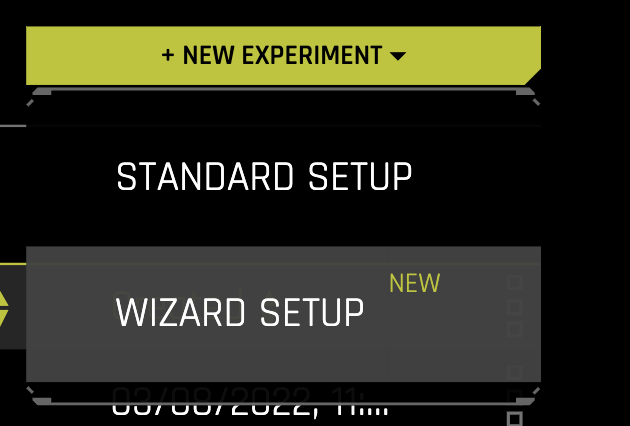
On the Experiments page, click the New Experiment button and select Wizard Setup. If this method is used, then the Driverless AI Wizard prompts you to select a dataset to use for the experiment.
Driverless AI Wizard sample walkthrough
The following example walks through the Driverless AI Wizard. Note that this walkthrough does not contain every possible step that the wizard offers.
Select the option that best describes your role and specify how many years of experience you have with machine learning and data science. In this example, the options Data Scientist and <1 year are selected. Click Continue to proceed.
Select a dataset. Select a tabular dataset with training data. Each row in the dataset must contain predictor variables (features) that can be used to predict the target column. In this example, the Rain in Australia dataset is selected.
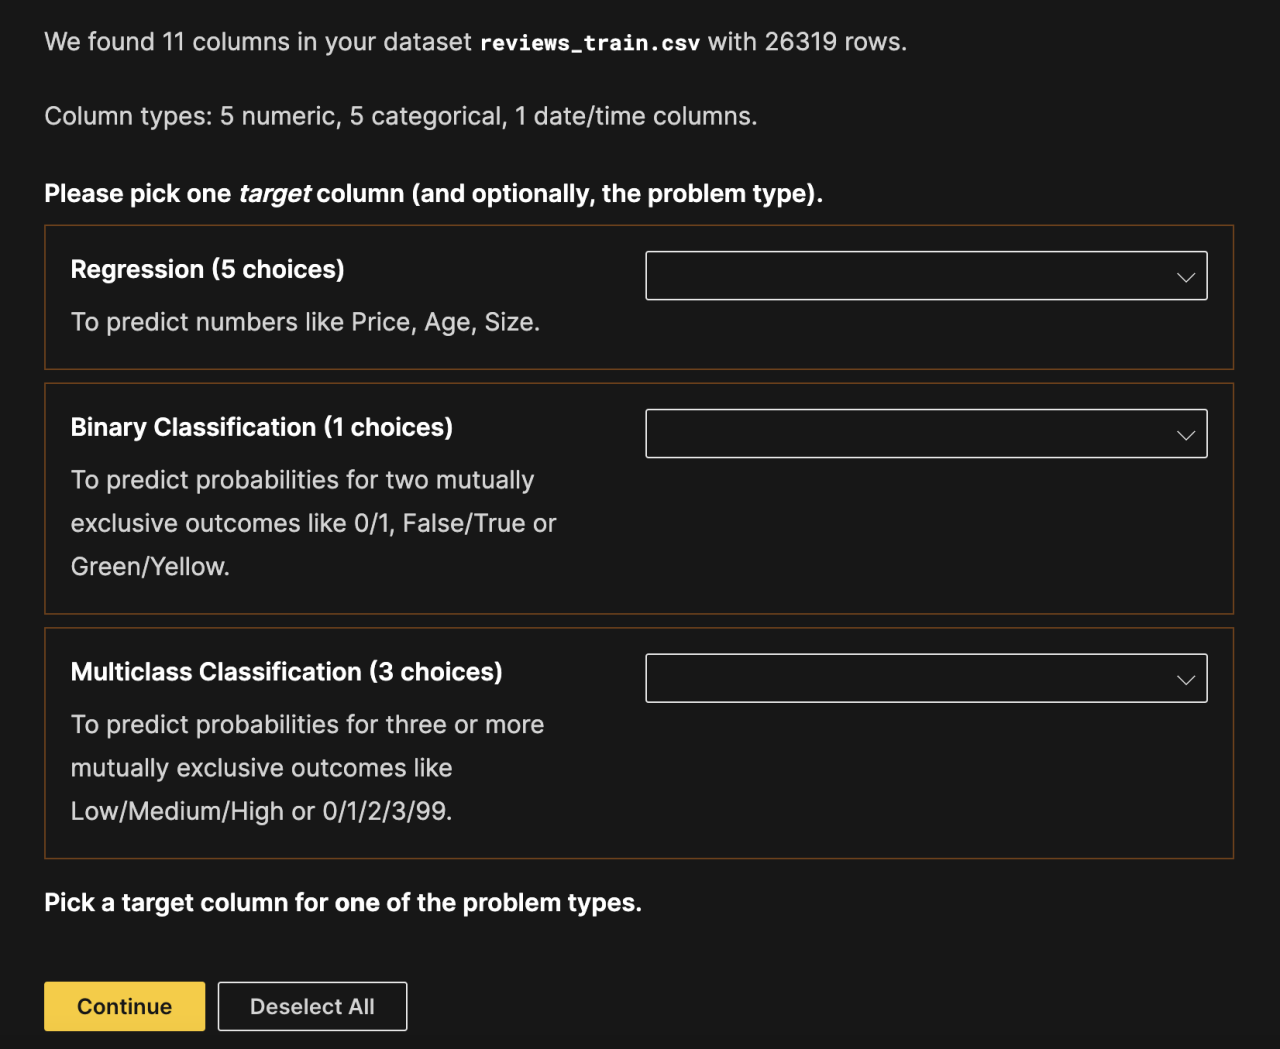
Select a problem type and target column. Specify a problem type and a target column for that problem type. Note that you can select a target column for only one of the available problem types. The goal in this example is to use the Rain in Australia dataset to predict next-day rain by training classification models, so RainTomorrow is specified as the target column in the Binary Classification section. Click Continue to proceed.
Target column analysis. The Driverless AI Wizard provides information about the selected target column and prompts you to confirm that the target column looks as expected. Click Yes to proceed, or click No to return to the previous page and select a different column.
Exclude columns. The Driverless AI Wizard prompts you to check for columns to drop from the experiment. Dropped columns are not used as predictors for the target column. If you already know which column(s) you want to drop, then you can click the Yes, I want to have a look button to select the column(s) you want to drop. If you don’t want to proceed without dropping any columns, click the No, don’t drop any columns button.
Model deployment. The Driverless AI Wizard prompts you to specify the deployment scenario that you need to support. Select one of the following options. (Note that H2O MLOps supports all deployment artifacts, including Python, C++ MOJO, and Java MOJO. For more details, refer to the support matrix in the setup wizard.)
MLOps: MLOps in H2O AI Cloud or standalone Python. Supported by all models.
Java MOJO: Low latency, standalone, runs anywhere. Only for some models.
C++ MOJO - Triton/Python/R: Low latency, standalone, easy integration. For most models.

Importance of time order. If your dataset contains at least one date or datetime column that doesn’t contain missing values, the Driverless AI Wizard prompts you to specify how important time order is to the experiment. In this example, the Time order doesn’t matter option is selected.
Provide a test set. Specify a test set to use for the experiment. You can select an existing test set, create a test set from the training data, or skip this step entirely. To refresh the list of available datasets, click the Refresh dataset list button. In this example, the Create test set from training data option is selected.
Split the training data. Use the slider to specify what fraction of the training dataset you want to use for testing. The Driverless AI Wizard automatically suggests a percentage based on the size of your training dataset. In this example, 15 percent of the training dataset is used for testing. Click Split my training data to proceed.
Confirm the train / test split. The Driverless AI Wizard lists the following information for both the training and testing data based on the percentage specified in the preceding step:
The size of each dataset.
The number of rows and columns in each dataset.
Whether either dataset has any temporal order.
If this information looks as expected, click Yes to continue. Otherwise, click I need to make changes to return to step 8.
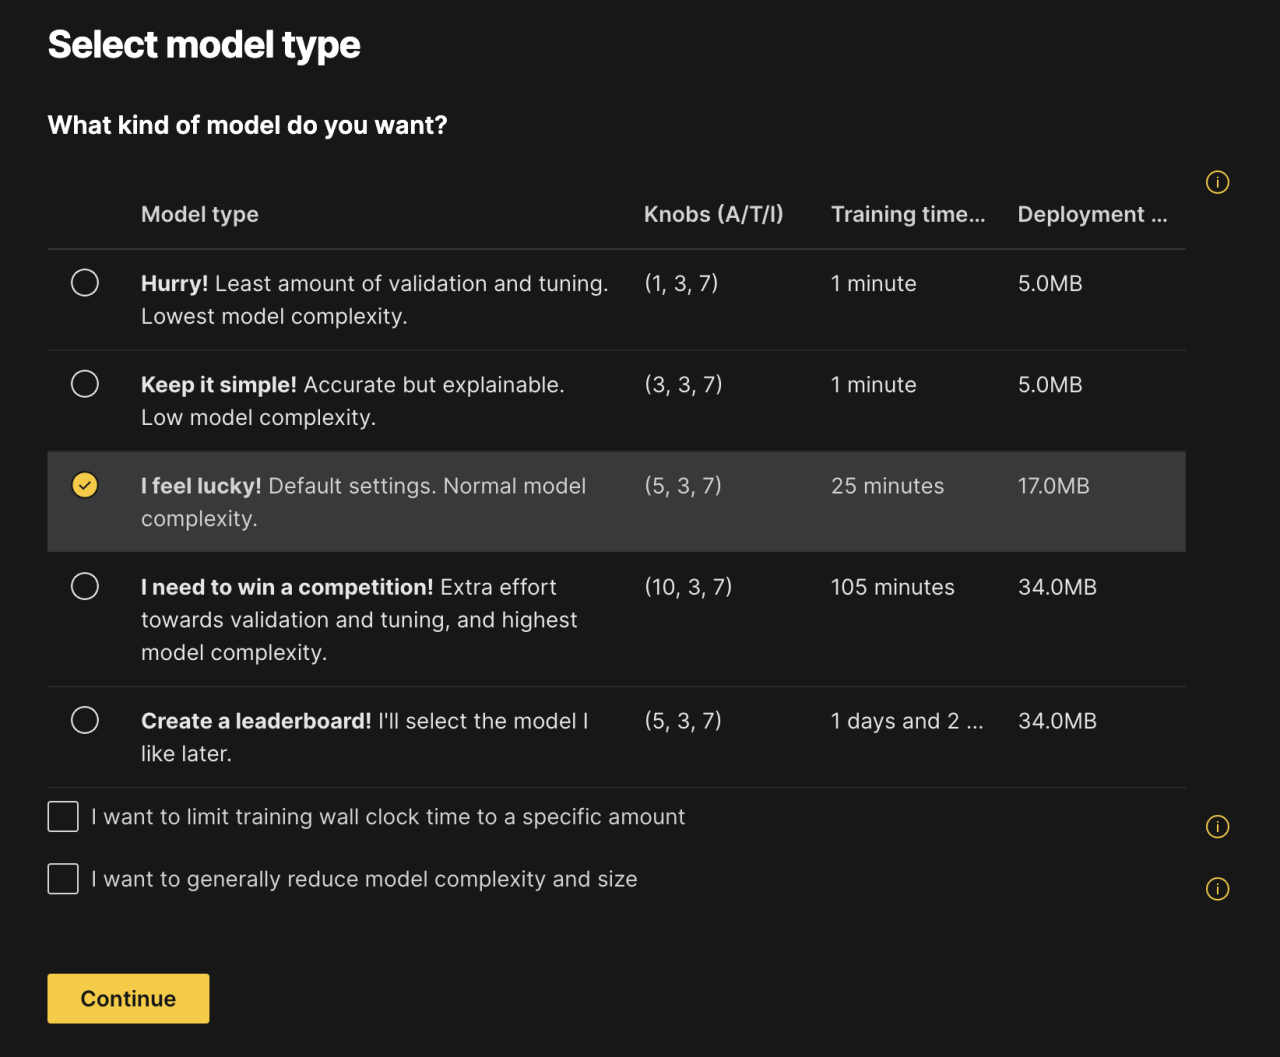
Select a model type. Specify a model type based on settings for Accuracy, Time, and Interpretability, as well as training time and deployment size. You can also optionally specify whether you have strict runtime limits or if you want to limit the complexity of the model. In this example, the Keep it simple option is selected. Click Continue to proceed.
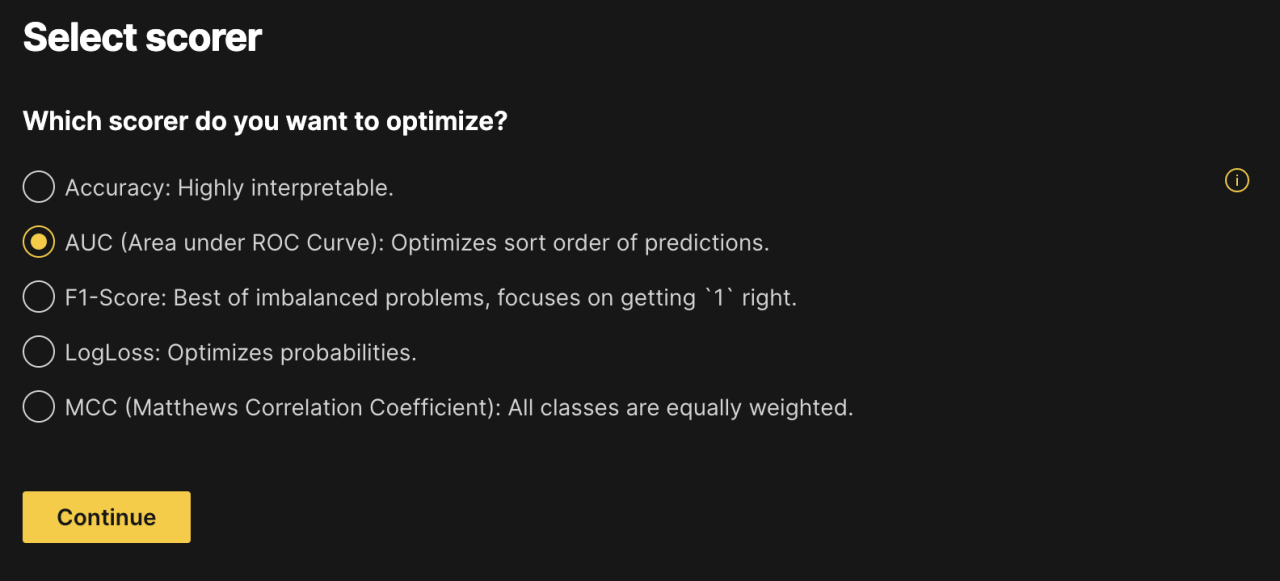
Select a scorer. Specify a scorer to optimize. In this example, Area under ROC Curve (AUC) is selected. Click Continue to proceed.
Experiment parameters. The Driverless AI Wizard lists all of the experiment parameters that have been configured up until this point. From this page, you can specify a name for the experiment and begin training, show additional details about the experiment (Python code and Expert Settings), or cancel the experiment and restart from the beginning of the wizard. In this example, Start Training is selected.
The experiment now appears on the Experiments page in Driverless AI. You can view the progress of the experiment and click a link that takes you to the experiment in Driverless AI.