Modifying Datasets
Viewing dataset details
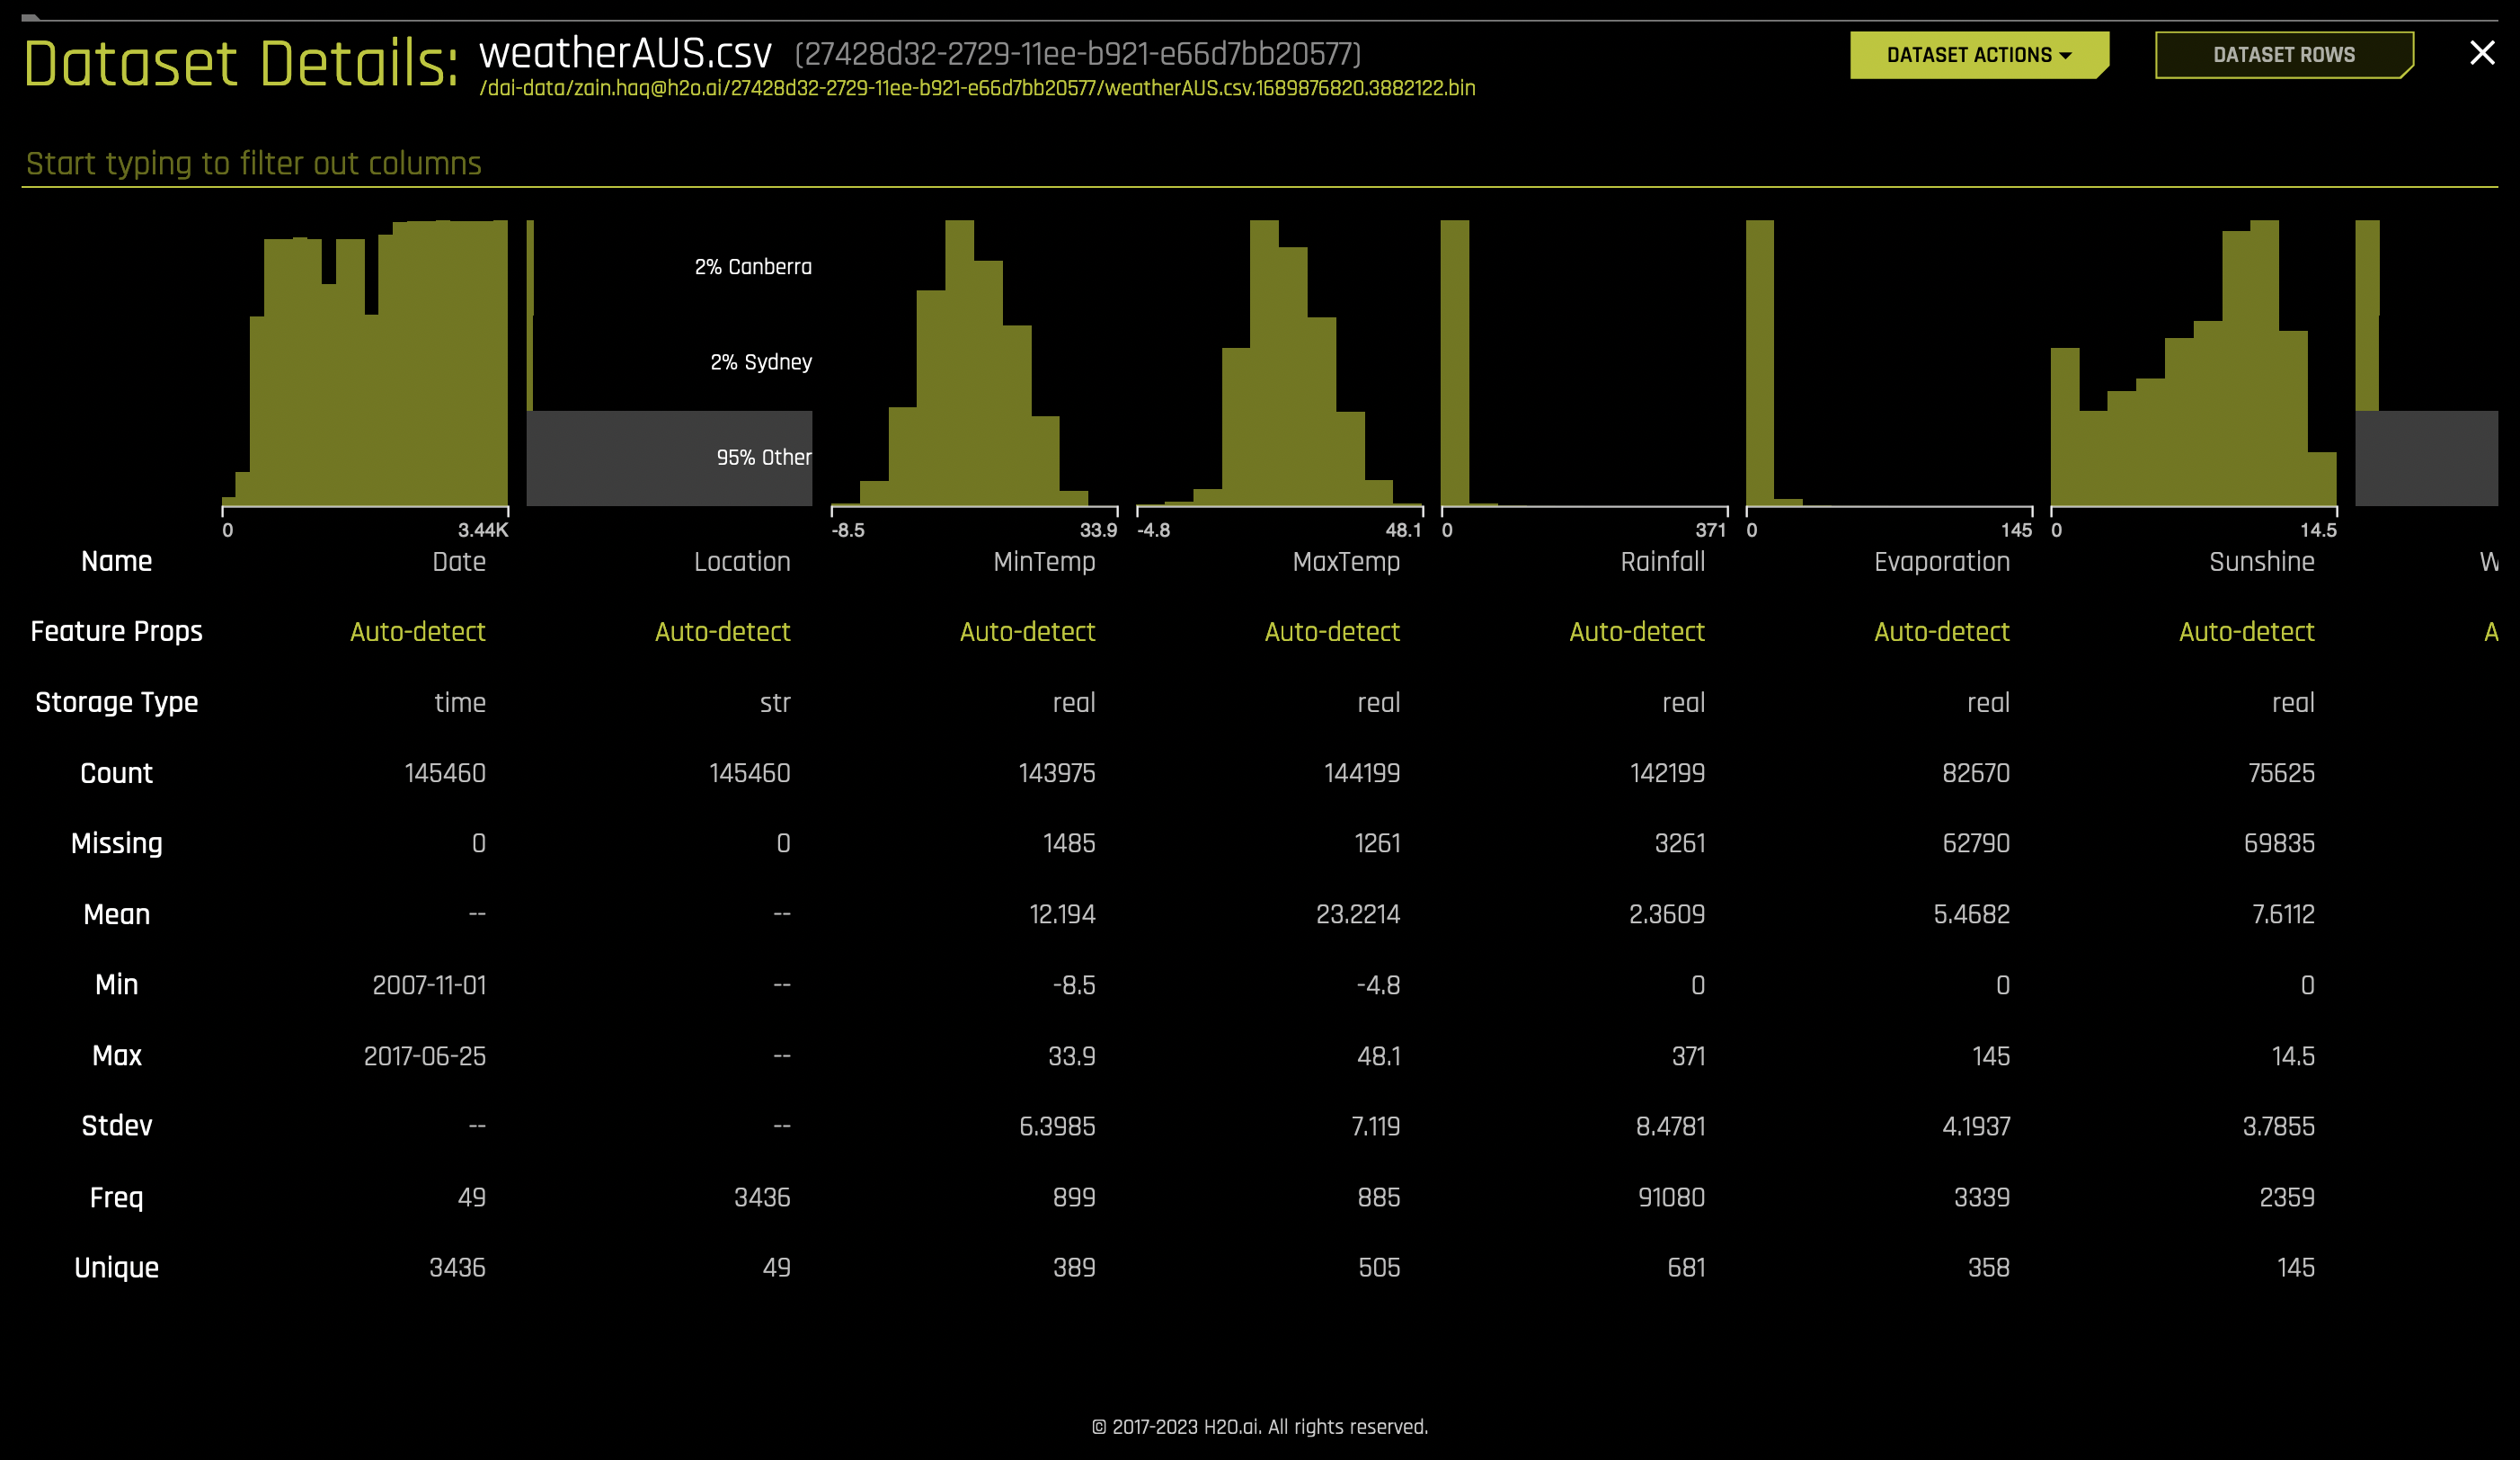
To view a summary of a dataset or to preview the dataset, click on the dataset or select the [Click for Actions] button next to the dataset that you want to view and select Details from the submenu that appears. This opens the Dataset Details page, which provides a summary of the dataset that lists each of the dataset’s columns and displays accompanying rows for column name, feature engineering type (categorical, date, datetime, ID, numerical, text, or image), storage type (integer, string, real, boolean, or time), count, number of missing values, mean, minimum, maximum, standard deviation, frequency, and number of unique values.
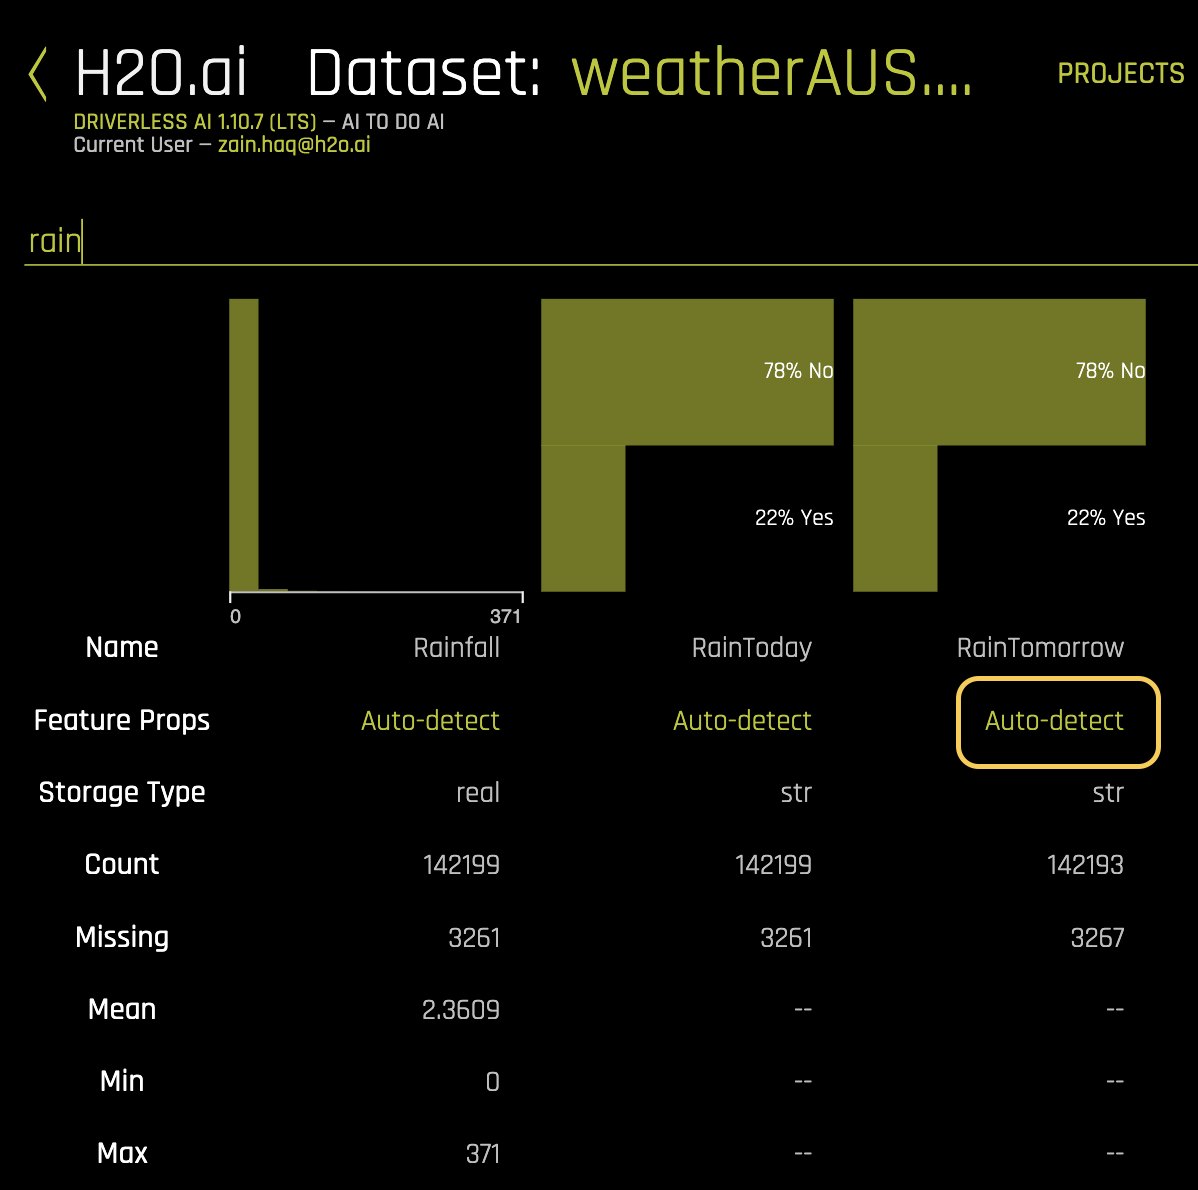
Hover over the top of a column to view a summary of the first 20 rows of that column. To view information for a specific column, type the column name in the field above the graph.
To switch the view and preview the dataset, click the Dataset Rows button in the top right portion of the UI. Click the Dataset Overview button to return to the original view.
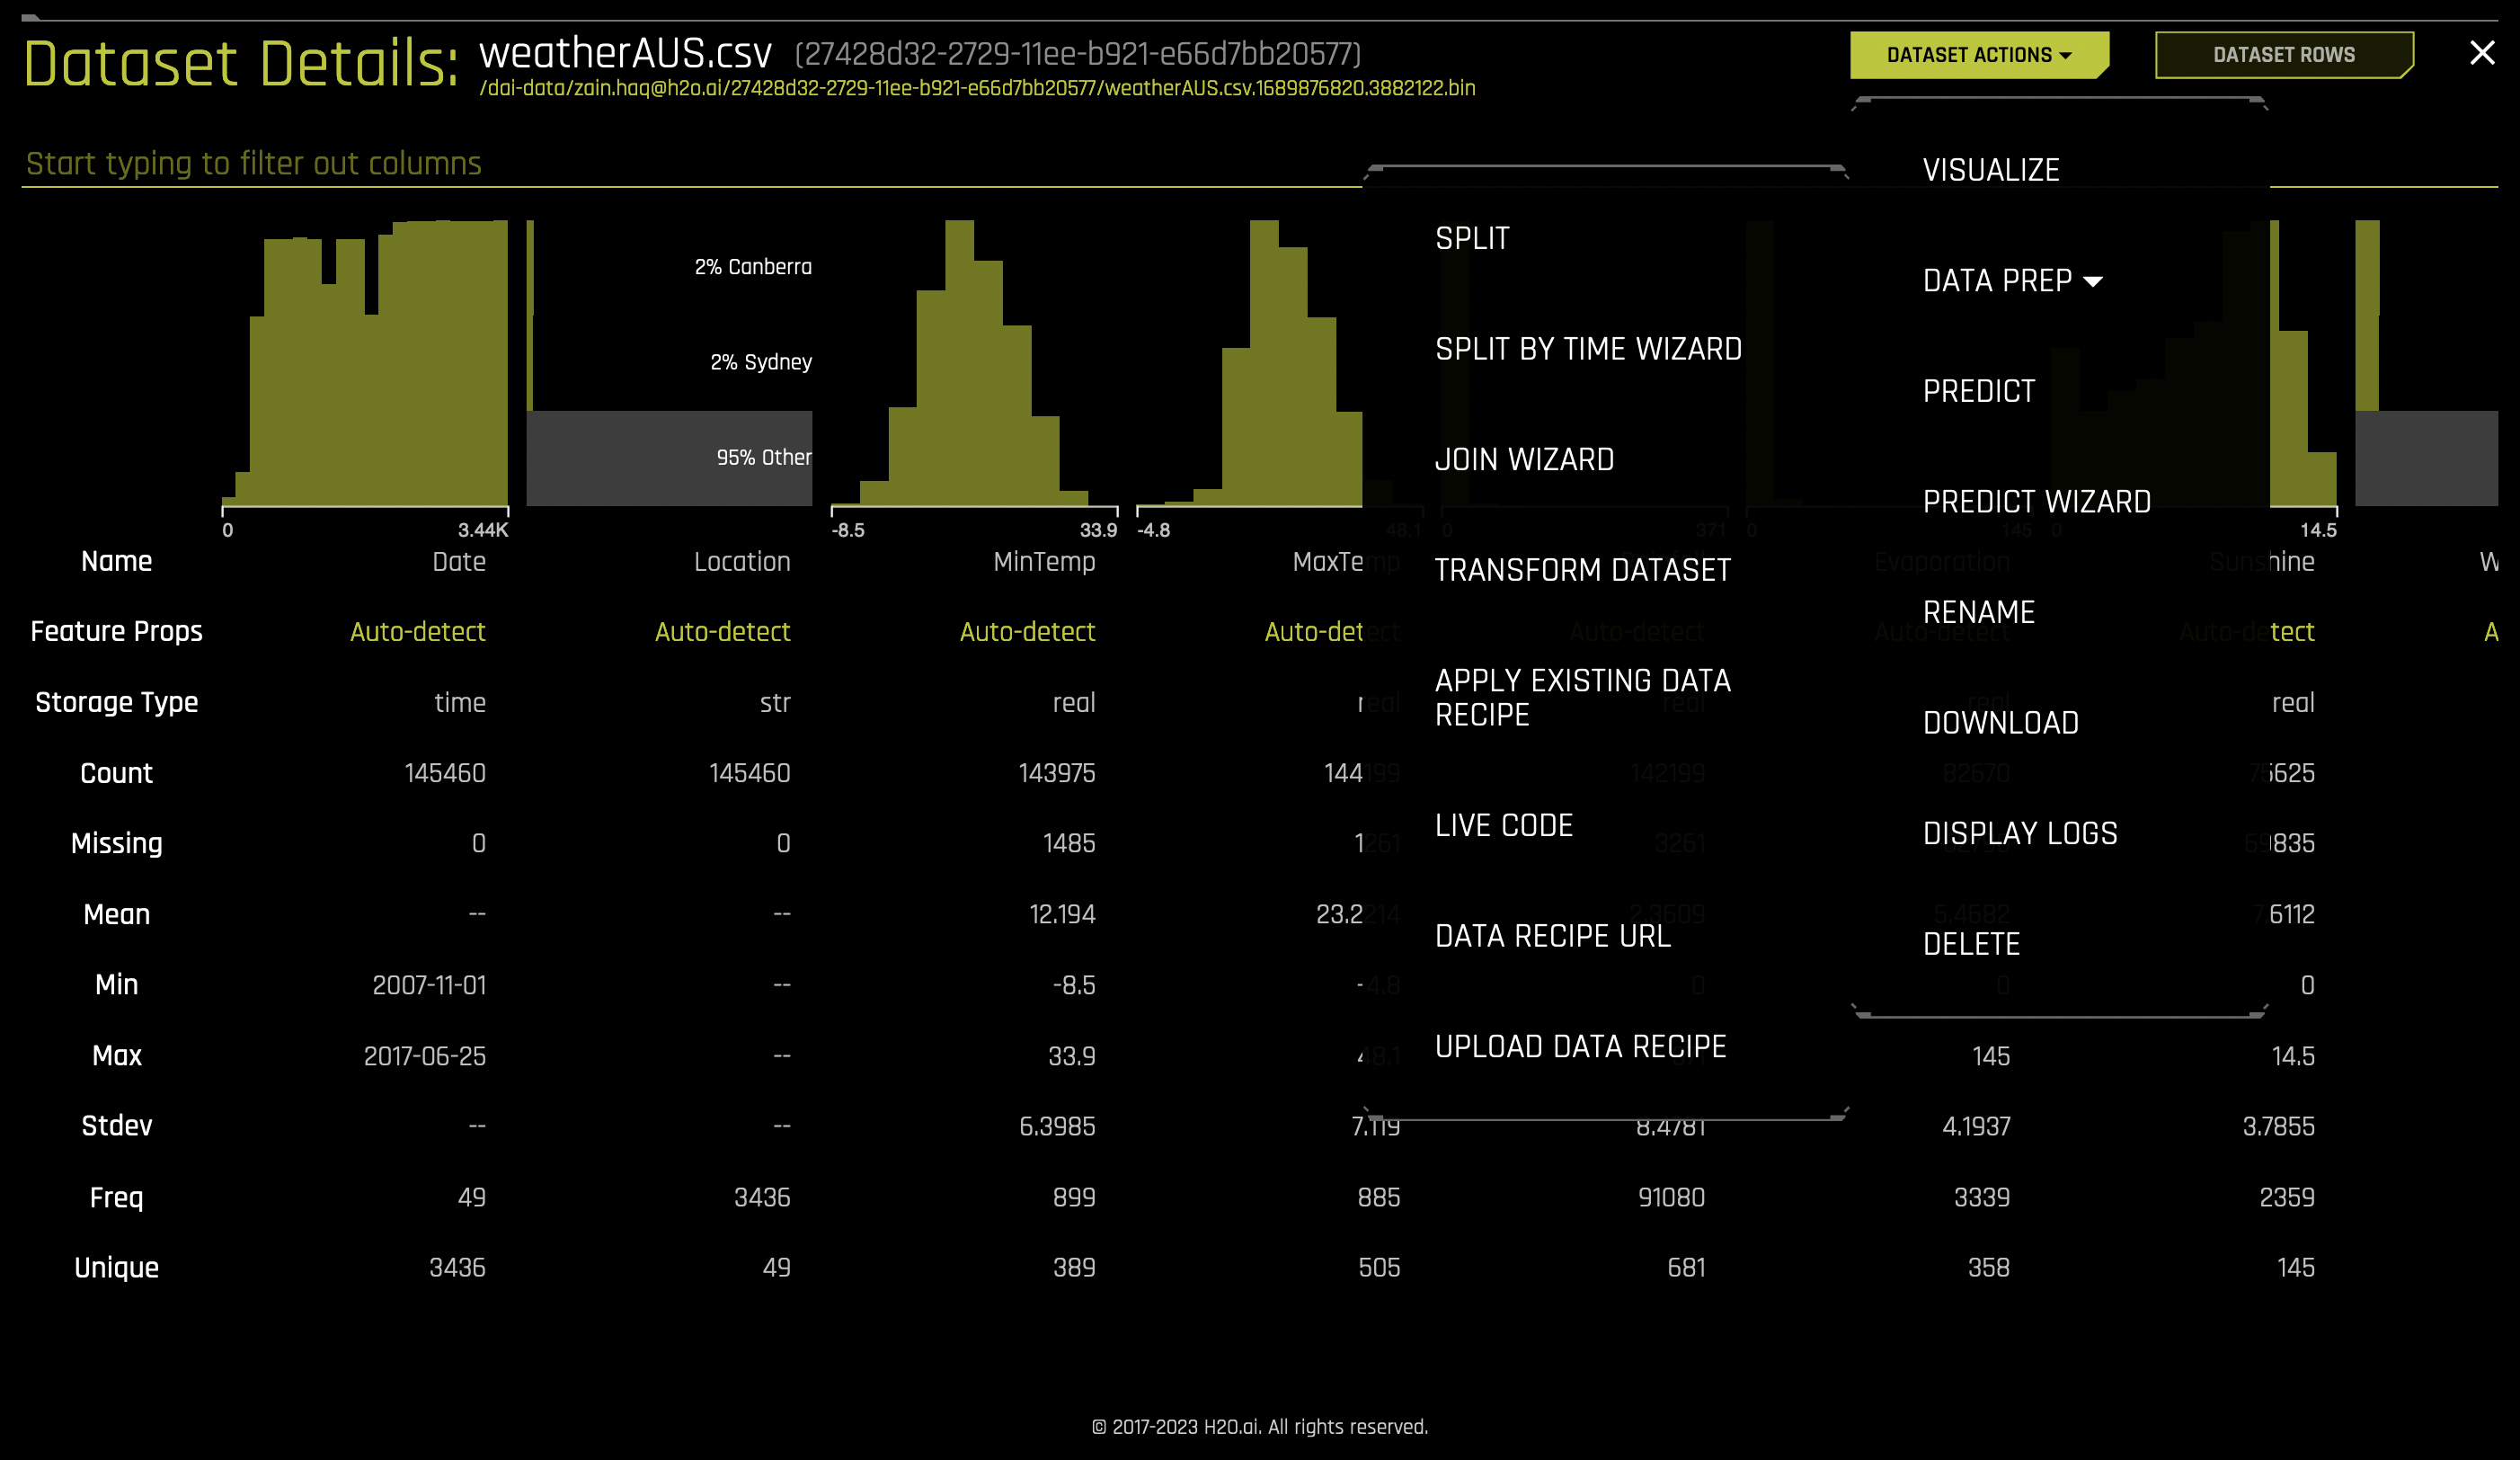
A number of dataset-specific actions are available from this page by clicking Dataset Actions. These are the same options that are available from the Datasets page. For more information on these options, see Dataset options.
Change column feature engineering type
Driverless AI also lets you change a column’s feature engineering type. If a column’s data type or distribution does not match the manner in which you want the column to be handled during an experiment, changing the feature engineering type can help to make the column fit better. For example, an integer zip code can be changed into a categorical so that it is only used with categorical-related feature engineering. For Date and Datetime columns, you can specify the datetime format. To change the feature engineering type or format of a column, click Auto-detect, and then select the new feature engineering type for that column.
Modify by custom data recipe
The option to create a new dataset by modifying an existing dataset with custom recipes is also available from this page. Scoring pipelines can be created on the new dataset by building an experiment. This feature is useful when you want to make changes to the training data that you would not need to make on the new data you are predicting on. For example, you can change the target column from regression to classification, add a weight column to mark specific training rows as being more important, or remove outliers that you do not want to model on. For more information, see Modifying Datasets With Recipes.
Click Dataset Actions > Data Prep and select from the following options:
Apply Existing Data Recipe: Apply an existing data recipe to the dataset. For more information on adding recipes, see Custom Recipe Management.
Live Code: Manually enter custom recipe code that is used to modify the dataset. Click the Get Preview button to preview the code’s effect on the dataset, then click Apply to create a new dataset. To download the entered code script as a Python file, click the Download button.
Data Recipe URL: Load a custom recipe from a URL to use to modify the dataset. The URL must point to either an HTML or raw version of the file, a GitHub repository or tree, or a local file. Sample custom data recipes are available in the driverlessai-recipes repository.
Upload Data Recipe: If you have a custom recipe available on your local system, click this button to upload that recipe.
Notes:
These options are enabled by default. You can disable them by removing
recipe_fileandrecipe_urlfrom theenabled_file_systemsconfiguration option.Modifying a dataset with a recipe does not overwrite the original dataset. The dataset that is selected for modification remains in the list of available datasets in its original form, and the modified dataset appears in this list as a new dataset.
Changes made to the original dataset through this feature are not applied to any new data that is scored.
Due to locale, parsing a datetime column with Live Code or a Data Recipe may result in an error or return different results when compared to running the same code outside of DAI. The following example illustrates the issue that might occur with certain datetime formats and describes how you can convert them so that they are accepted by DAI:
import locale
import pandas as pd
from datetime import datetime

X = pd.DataFrame(["01-JAN-2022", "01-FEB-2022", "01-MAR-2022"], columns=["time"])

for locale_str in ["en_US.UTF8", "de_DE.UTF8"]:
    try:
        locale.setlocale(locale.LC_TIME, locale_str)
    except Exception as e:
        print(f"Unsupported locale setting: {locale_str}")
        continue
    try:
        pd.to_datetime(X.time, format="%d-%b-%Y")
        print(f"Successfully converted X.time with locale {locale_str}")
    except Exception as e:
        print(f"Failed to convert X.time with locale {locale_str}: {e}")

# Example Output:
# ===============
# Successfully converted X.time with locale en_US.UTF8
# Failed to convert X.time with locale de_DE.UTF8: time data '01-MAR-2022' does not match format '%d-%b-%Y' (match)

# Convert X.time to a locale.LC_TIME independent format to avoid issues in Driverless AI:
locale.setlocale(locale.LC_TIME, "en_US.UTF8") # set the correct locale for the given datetime format
X["time"] = pd.to_datetime(X.time, format="%d-%b-%Y").dt.strftime("%Y-%m-%d") # convert to a locale independent format (by avoiding '%b')
Rename datasets
In Driverless AI, you can rename datasets from the Datasets Overview page.
To rename a dataset, click on the dataset or select the [Click for Actions] button beside the dataset that you want to rename, and then select Rename from the submenu that appears.
Note: If the name of a dataset is changed, every instance of the dataset in Driverless AI is changed to reflect the new name.