Using Driverless AI configuration options
This page describes how to use Driverless AI (DAI) configuration options.
Understanding DAI configuration options
Driverless AI features many different kinds of configuration options that you can use to configure various aspects of your DAI environment, including authentication, data connectors, UI, experiments, and MLI. The following methods can be used to control the available DAI configuration options:
Administrators can edit the
config.tomlfile, which is a configuration file that uses the TOML v0.5.0 file format. Theconfig.tomlfile lets you control all of the configuration options documented in the Driverless AI Configuration Options page. For more information, see Using the config.toml File.Using the Expert Settings window, which is accessible from the Experiment Setup page by clicking Expert Settings.
Using the built-in TOML config editor, which is accessible from the Expert Settings window.
Setting options as environment variables.
참고
Some configuration options, such as those related to authentication and data connectors, are applied when starting the DAI server and cannot be changed without restarting the DAI server.
Understanding Expert Settings
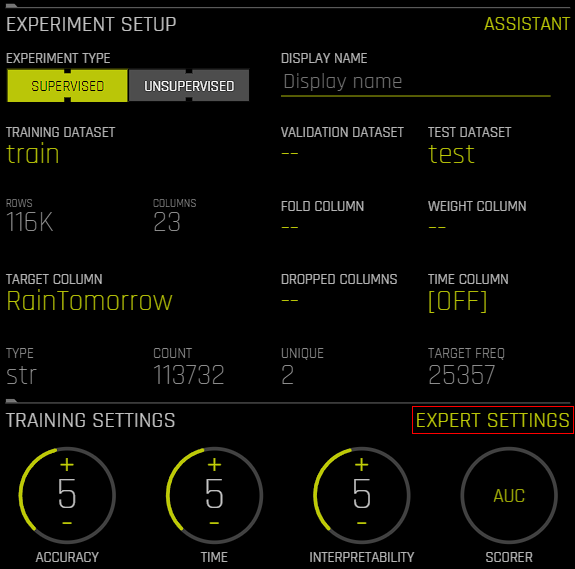
When creating an experiment, you can specify basic settings for the experiment such as whether to drop specific columns or whether to include a validation dataset. However, you may want to customize the experiment in a manner that is beyond the scope of these basic settings—in this case, Expert Settings can be used to further fine-tune the experiment. For example, you can use Expert Settings to include specific models or transformers as part of the experiment. To open the Expert Settings window, click Expert Settings on the Experiment Setup page.
Notes:
For supervised experiments, the Expert Settings window cannot be accessed until a target column has been selected.
Some of the settings listed in the Driverless AI Configuration Options page are not exposed in the Expert Settings window.
If you change one or more settings in the Expert Settings window, the experiment preview on the Experiment Setup page automatically updates to reflect your changes.
Navigating the Expert Settings window
The following sections describe how to navigate the Expert Settings window.
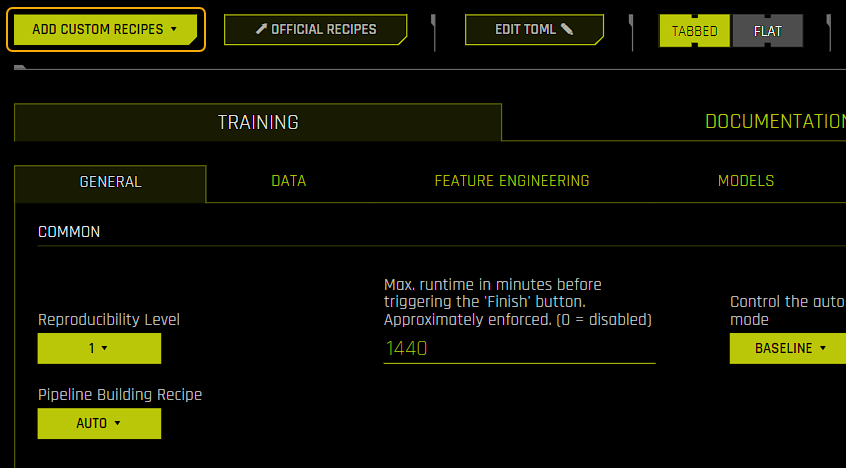
Tabbed view
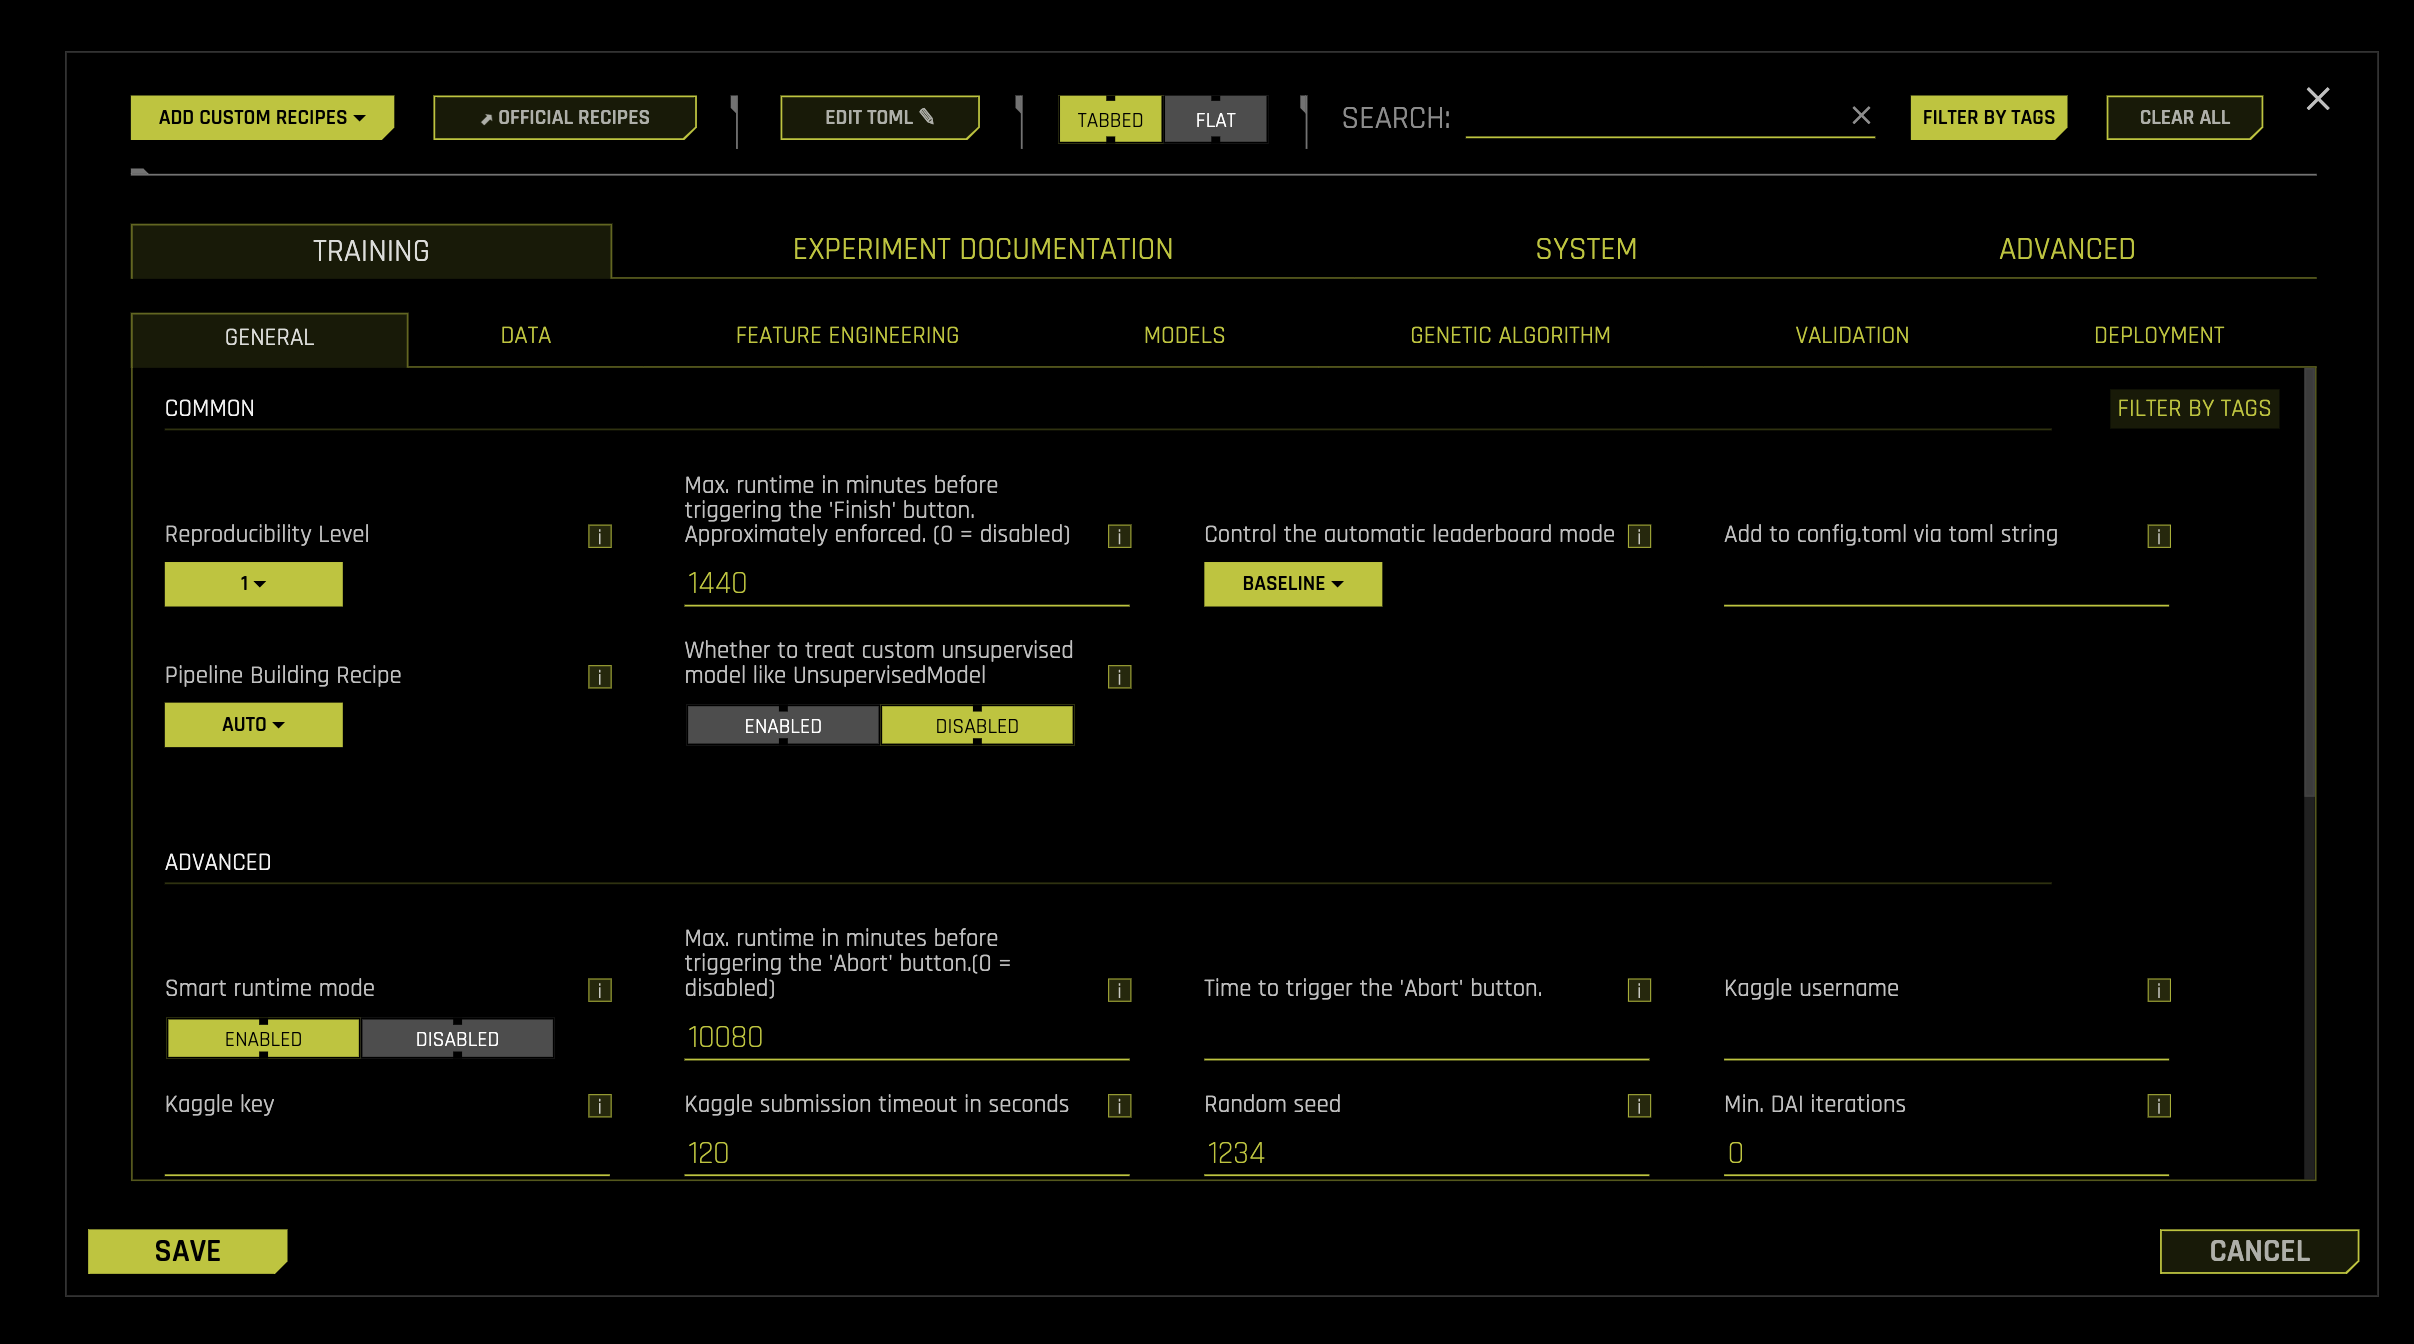
When the Tabbed view is selected, the available Expert Settings are organized into the following tabs and sub-tabs. For each sub-tab in the following list, the available settings are organized into Common, Advanced, Image, NLP, Time Series, and Unsupervised settings.
Training: Configure settings related to the model training process.
General
Data
Feature Engineering
Models
Genetic Algorithm
Validation
Deployment
Experiment documentation: Configure settings related to AutoDoc, model performance, and model interpretation.
General
Data
Models
Model Performance
Interpretation
System: Configure system-related settings.
Deployment
System
Extra: Configure additional advanced settings.
Advanced
Detailed Expert Settings Reference
For comprehensive documentation of all available settings in each tab, see:
Training Settings - Complete reference for Training tab settings
Experiment Documentation Settings - Complete reference for Experiment Documentation tab settings
System Settings - Complete reference for System settings
Extra Settings - Complete reference for Additional advanced settings
Tabbed view: sub-tabs
The following is a list of sub-tab level categories:
Common
Advanced
Image
NLP
Time Series
Unsupervised
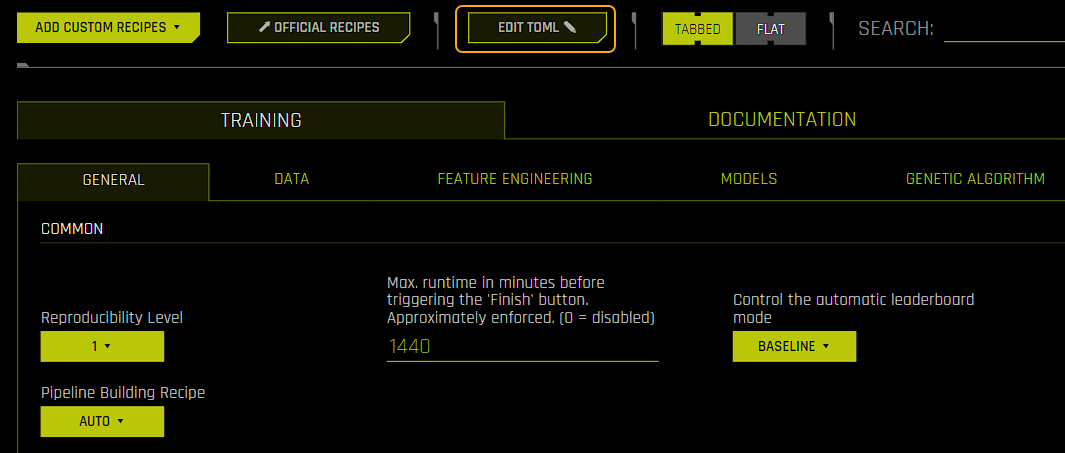
Flat view
You can also select the Flat view to view all of the available settings in a single searchable window. This window uses the same sub-tab level categorization described in the preceding section.
Searching for specific settings
To locate a specific Expert Setting, click the search box and type the configuration name of the Expert Setting you want to locate. For some Expert Settings, additional results for related Expert Settings are also displayed.
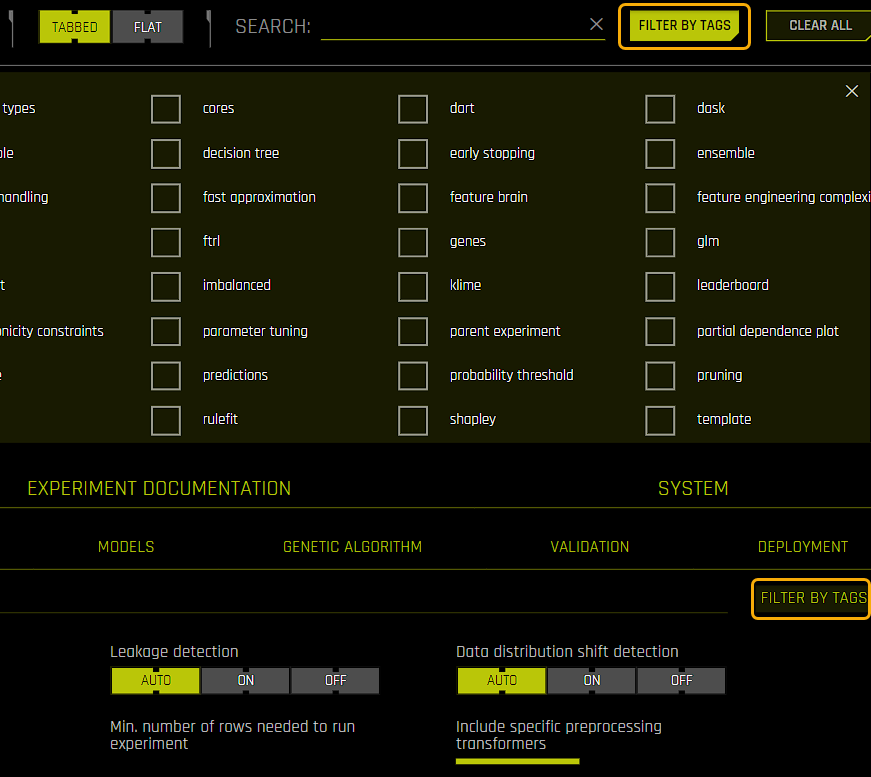
Filtering settings by tags
To filter the list of available settings by specific tags, click the Filter by Tags button and select the checkbox next to the tag(s) that you want to filter the list of available settings by. Note that both global and sub-tab level filtering are supported.
Setting information
To view information about a specific Expert Setting, click the information icon next to the setting you want to learn more about. The information dialog provides the config name and a description of the setting.
Adding custom recipes
You can add custom recipes from the Expert Settings window by clicking the Add Custom Recipes button. Select one of the following options:
From computer: Add a custom recipe as a Python or ZIP file from your local file system.
From URL: Add one or more custom recipes from a URL that points to one of the following locations:
A GitHub repository. For example, you can enter
https://github.com/h2oai/driverlessai-recipes/to add all the custom recipes contained in the official Recipes for Driverless AI repository.A GitHub tree. For example, you can enter
https://github.com/h2oai/driverlessai-recipes/tree/master/modelsto add only the custom model recipes contained in the official Recipes for Driverless AI repository, or enterhttps://github.com/h2oai/driverlessai-recipes/tree/master/models/algorithmsto add only the custom algorithm recipes contained in the repository.A file system path. This option is equivalent to the File System option when adding datasets.
참고
You can add multiple custom recipes at a time by entering the URL of a GitHub repository or GitHub tree that contains multiple recipes.
From Bitbucket: Add a custom recipe from a Bitbucket repository. To use this option, your Bitbucket username and password must be provided along with the custom recipe Bitbucket URL.
With Editor: Add a custom recipe with a built-in code editor.
Note that you can also view the official Recipes for Driverless AI repository from the Expert Settings window by clicking the Official Recipes button.
Using the built-in TOML config editor
The TOML configuration editor lets you manually add, remove, or edit Expert Setting parameters. Note that for a given experiment, you can only change the settings that are visible in the Expert Settings window, not application-level settings. To open the built-in TOML configuration editor, click Edit TOML in the Expert Settings window. Opening the built-in TOML editor is currently the best way to review changed configuration items in a single location.
The built-in TOML editor is synchronized with the Expert Settings window. This means that if you change the default value of an expert setting from the Expert Settings window, that change is displayed in the TOML configuration editor. For example, if you set the Make MOJO scoring pipeline setting in the Experiment tab to Off, then the line make_mojo_scoring_pipeline = "off" is displayed in the TOML editor. Conversely, if you make changes using the TOML editor, those changes are also visible from the Expert Settings window. You can confirm that your changes have been correctly entered into the editor by checking whether the relevant settings have also changed in the Expert Settings window.
To confirm your changes, click Save. The experiment preview updates to reflect your specified configuration changes.
경고
Do not edit the last_recipe setting or the section below the [recipe_activation] line. This section provides Driverless AI with information about which custom recipes can be used by the experiment. This is important for keeping experiments comparable when performing retrain / refit operations.
참고
The settings listed in the Driverless AI Configuration Options page cannot be edited from the built-in TOML editor unless they are exposed in the Expert Settings window.
For information on TOML, see TOML v0.5.0.
Order of settings in the TOML editor
When using the built-in TOML editor, ensure that settings are added in the following order:
Booleans, integers, strings, and lists
Unprocessed dictionaries, which are automatically processed after clicking the Save button
Processed dictionaries
Checking TOML validity
The TOML Python library can be used to check the validity of your TOML to avoid errors when using the built-in TOML editor. To install the TOML Python library, run the following command:
pip install toml
The following examples demonstrate how the TOML Python library can be used to check whether your TOML is valid.
Entering a valid string: In the following example, no error is returned after entering the TOML string, which means that the entered string is valid. The
toml.loads()function is then used to convert the string into a dictionary.
>>> import toml
>>> a = "params_tune_lightgbm = \"{'min_child_samples': [1,2,5,100,1000], 'min_data_in_bin': [1,2,3,10,100,1000]}\""
>>> a
'params_tune_lightgbm = "{\'min_child_samples\': [1,2,5,100,1000], \'min_data_in_bin\': [1,2,3,10,100,1000]}"'
>>> toml.loads(a)
{'params_tune_lightgbm': "{'min_child_samples': [1,2,5,100,1000], 'min_data_in_bin': [1,2,3,10,100,1000]}"}
Entering an invalid string: In the following example, an error is returned after attempting to convert the entered TOML string into a dictionary, which means that the entered string is not valid.
>>> import toml
>>> a = "params_tune_lightgbm = \'{'min_child_samples': [1,2,5,100,1000], 'min_data_in_bin': [1,2,3,10,100,1000]}\""
>>> a
'params_tune_lightgbm = \'{\'min_child_samples\': [1,2,5,100,1000], \'min_data_in_bin\': [1,2,3,10,100,1000]}"'
>>> toml.loads(a)
The following error is returned:
Traceback (most recent call last):
  File "<stdin>", line 1, in <module>
  File "/home/jon/minicondadai_py311/lib/python3.11/site-packages/toml/decoder.py", line 362, in loads
    raise TomlDecodeError("Unterminated string found."
toml.decoder.TomlDecodeError: Unterminated string found. Reached end of file. (line 1 column 105 char 104)
Sample use case: Hyperparameter tuning
The following steps describe how to perform hyperparameter tuning by using the params_tune_lightgbm Expert Setting.
On the Experiments page, click the New Experiment button and select a training dataset to use for the experiment.
Select a target column and specify a test dataset to use for the experiment.
Click Expert Settings to open the Expert Settings window.
Go to the Training tab, then the Models sub-tab. For the Include specific models setting, click Uncheck All and select LightGBM from the list of available models. Click Done to confirm your selection. Completing this step lets you view how only LightGBM mutates.
In the Expert Settings window, enter
params_tuneinto the search box to view all of the availableparams_tuneTOMLs.After you have located the
params_tune_lightgbmsetting, enter the following value:
{'min_child_samples': [1,2,5,100,1000], 'min_data_in_bin': [1,2,3,10,100,1000]}
Click the Save button.
Check the experiment preview to ensure that LightGBM is the only selected model, and then click the Launch Experiment button.
After the experiment has been completed, download and view the experiment log to confirm that hyperparameter tuning was successfully performed.