使用 AutoDoc
以下各节介绍 Driverless AI 的 AutoDoc 功能。
了解 AutoDoc
AutoDoc 功能用于为各 Driverless AI 实验生成自动化机器学习文档。此可编辑文档包含实验摘要以及其他重要细节,例如特征工程和最终模型性能。
要下载并查看 Word 格式的实验报告示例,click here.
AutoDoc 支持
AutoDoc 仅支持某些 Driverless AI 版本的连续实验。请参阅下表,查看您的版本所支持的连续实验类型:
AutoDoc 通过以下版本支持恢复实验
1.7.0 和更低版本
1.7.1
1.9.0 和更高版本
相同设置的新实验
是
是
是
从最后一个检查点重新开始
否
是
是
重新训练最终管道
否
否
是
注解
为确保在本机安装上正确生成 AutoDoc 管道可视化,推荐安装 fontconfig 。
AutoDoc 不支持基于先前已中止或失败的实验而创建的实验。
但是仍会为不受支持的连续实验创建报告,但这些报告将仅包含以下文本:”AutoDoc 暂不支持连续实验。”
自定义 AutoDoc
所有 Driverless AI 实验均可生成标准或自定义 AutoDoc。标准 AutoDoc 使用 Driverless AI 自带的默认 AutoDoc 模板,而自定义 AutoDoc 则使用 Driverless AI 自动填充的用户特定模板。
如果您对创建自定义 AutoDoc 感兴趣,请联系 support@h2o.ai。如果您已购买自定义 Autodoc 模板,并想要了解如何从实验中生成自定义 AutoDoc,请参阅 生成自定义 AutoDoc.
注解
关于自定义 AutoDoc 占位符列表,请参见 AutoDoc 自定义模板占位符.
自定义 AutoDoc 是 Driverless AI 某些版本特有的功能。
带有 AutoDoc 的 BYOR 插件
实验 AutoDoc 支持使用自定义评分器、转换器或模型的实验。自定义评分器和转换器的存档方式与 Driverless AI 评分器和转换器相同。如果 Driverless AI 使用了自定义转换器,则此转换器将包含在其显示名称项下的“特征转换”表中;否则,将仅包含在“特征演进”部分。(请注意:自定义转换器目前在本节中显示为 “None”。)自定义模型包括标准性能指标和性能图;但是,不包括 Driverless AI 无法访问的信息,或者显示为 “custom”、”unavailable” 或 “auto” 的信息。例如,在“模型调优”表中,增强器被列为 “custom”,在“替代模型”一节中,模型包文档被列为 “unavailable”。
生成 AutoDoc
可使用三种不同的方式生成 AutoDoc:
请注意:
请参阅 配置 AutoDoc,了解更多关于如何在 AutoDoc 中配置图表以及启用/禁用特定章节的信息。
以上方式同样适用于自定义 AutoDoc。请参阅 生成自定义 AutoDoc,了解更多信息。
实验 UI
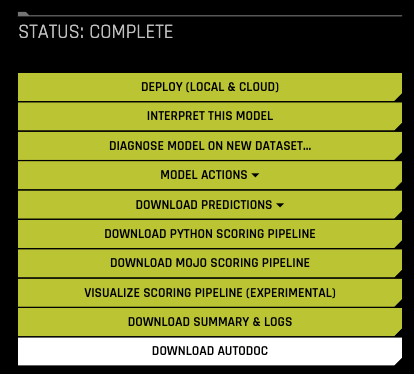
导航至 实验 页面,点击您想要生成 AutoDoc 的已完成实验。
如果先前没有为此实验启用 AutoDoc,则点击 创建 AutoDoc 按钮。

如果先前已为此实验启用 AutoDoc,则点击 下载 AutoDoc 按钮。
MLI UI
导航至 MLI 页面,点击您想要生成 AutoDoc 的已完成实验。
从 MLI 插件菜单中选择 AutoDoc,并可选择可包含在 AutoDoc 中的解释器(标准 AutoDoc 支持 k-LIME 解释器和 DT Surrogate 解释器)。
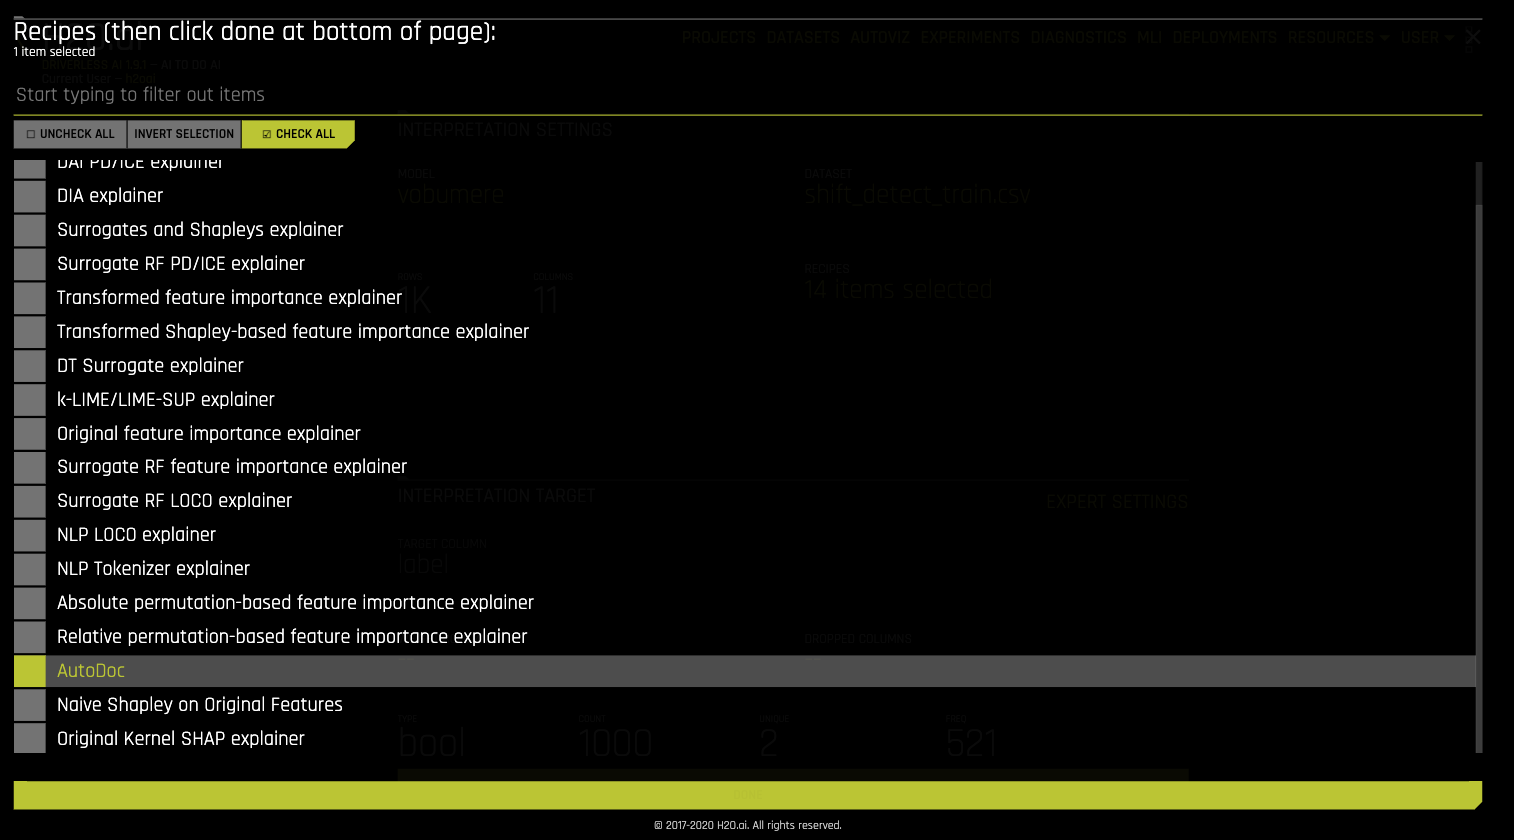
带有解释器的标准 AutoDoc:

Python 客户端
AutoDoc 功能
create_and_download_autodoc()make_autodoc_sync()
对于本地下载:
create_and_download_autodoc(
    model_key:str,
    template_path:str='',
    config_overrides:str='',
    dest_path:str='.',
    mli_key:str='',
    individual_rows:list=[],
    external_dataset_keys:list=[])
若需将 AutoDoc 保存至 DAI 实验目录中(如果已禁止本地下载,则建议使用):
make_autodoc_sync(
    model_key:str,
    template_path:str='',
    config_overrides:str='',
    mli_key:str='',
    individual_rows:list=[],
    external_dataset_keys:list=[])
model_key: 实验密钥字符串。template_path: 自定义 AutoDoc 模板的完整路径。config_overrides: 用于为 AutoDoc 覆盖配置的 TOML 字符串格式。dest_path: 用于保存 AutoDoc 的本地路径。mli_key: mli 密钥字符串。individual_rows: 训练数据集中相应行的行索引列表,可显示列表中的其他信息(ICE、LOCO、KLIME)。external_dataset_keys: DAI 数据集密钥列表。
driverlessai
连接至正在运行的 DAI 实例:
import driverlessai
address = 'http://ip_where_driverless_is_running:12345'
username = 'username'
password = 'password'
dai = driverlessai.Client(address=address, username=username, password=username)
生成 AutoDoc 并下载至当前工作目录:
report = dai._backend.create_and_download_autodoc(
    model_key=exp_key,
    dest_path:str='.',
)
配置 AutoDoc
AutoDoc 的图表和章节可通过四种不同的工作流进行配置:
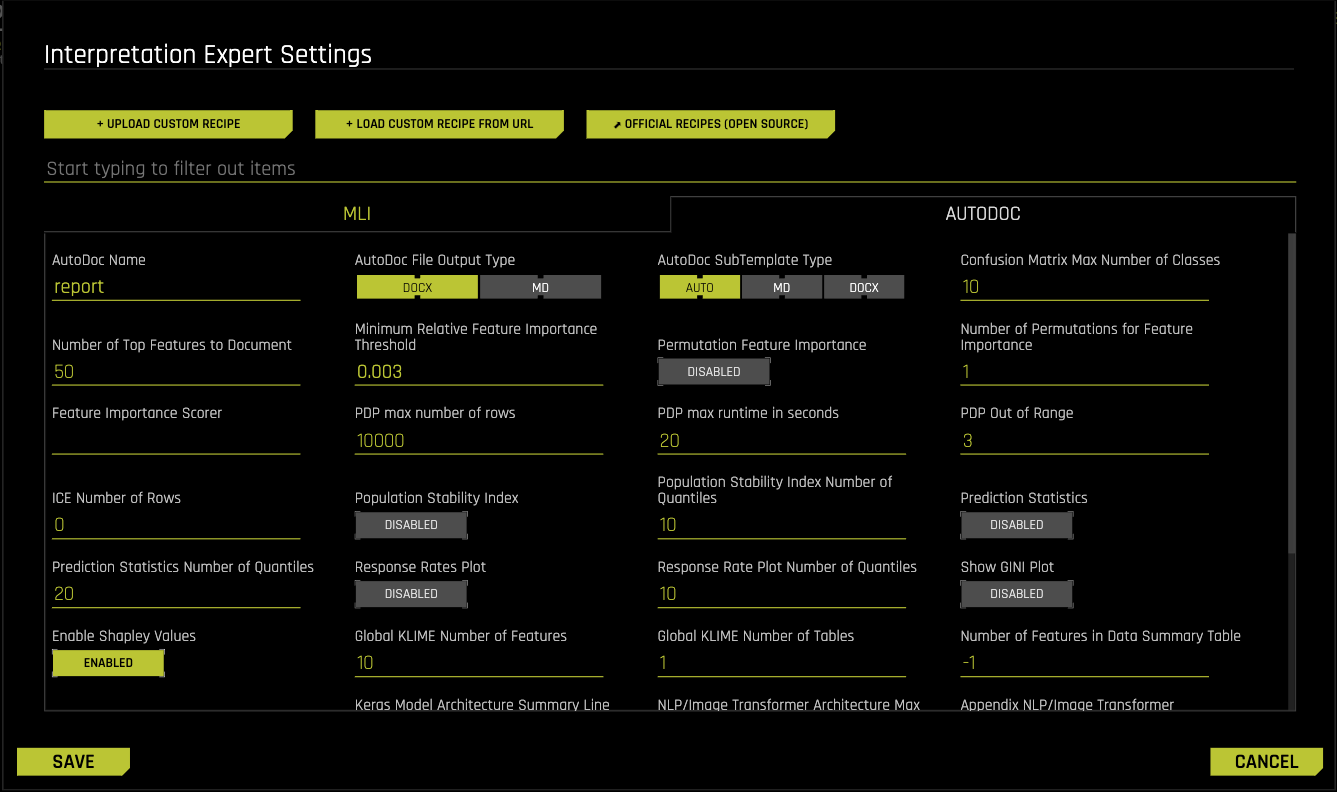
实验 UI 专家设置

MLI UI 专家设置
Python 客户端
AutoDoc 的所有配置选项均列于 config.toml file 中。以下是几个常用的配置参数:
import toml

# Set the document to limit features displayed to the top ten
config_dict={
   "autodoc_num_features": 10
}

# Partial Dependence Plots (PDP) and ICE Plots
config_dict["autodoc_pd_max_runtime"] = 60
config_dict["autodoc_num_rows"] = 4

# Prediction statistics
config_dict["autodoc_prediction_stats"] = True
config_dict["autodoc_prediction_stats_n_quantiles"] = 10

# Population Stability Index (PSI)
config_dict["autodoc_population_stability_index"] = True
config_dict["autodoc_population_stability_index_n_quantiles"] = 10

# Permutation feature importance
config_dict["autodoc_include_permutation_feature_importance"] = True
config_dict["autodoc_feature_importance_scorer"] = "GINI"
config_dict["autodoc_feature_importance_num_perm"] = 1

# Response rates (only applicable to Binary classification)
config_dict["autodoc_response_rate"] = True
config_dict["autodoc_response_rate_n_quantiles"] = 10

toml_string = toml.dumps(config_dict)
print(toml_string)
设置这些参数后,生成 AutoDoc 并下载至当前工作目录:
driverlessai
report = dai._backend.create_and_download_autodoc(
    model_key=exp_key,
    config_overrides=config_overrides,
    dest_path:str='.',
)
生成自定义 AutoDoc
本节介绍如何使用自定义 Autodoc 模板生成 AutoDoc。从以下选项中选择:
让 Driverless AI 将自定义 AutoDoc 用于所有实验
让 Driverless AI 将自定义 AutoDoc 用于单个实验
注解
关于自定义 AutoDoc 占位符列表,请参见 AutoDoc 自定义模板占位符.
AutoDoc 模板目录必须映射到 Driverless AI 容器或 pod。
用于所有实验的自定义 AutoDoc
要使用自定义 AutoDoc 模板,编辑 config.toml 文件以指向您的自定义 AutoDoc 的位置。使用以下 config.toml 设置:
autodoc_template:指定主模板文件的路径。autodoc_additional_template_folder:如果您有其他自定义子模板,使用此设置指定其他 AutoDoc 模板的位置。注意,如果此字段保留为空,则只使用默认子模板文件夹。
要生成自定义 AutoDoc,Driverless AI 必须具有访问自定义模板的权限。为确保 Driverless AI 具有访问权限,将下例中的路径更新为您自己的路径:
autodoc_template="/full/path/to/your/custom_autodoc_template.docx"

# Required if you have additional custom sub-templates.
autodoc_additional_template_folder="/path/to/additional_templates_folder"
用于单个实验的自定义 AutoDoc
您可以将 template_path 变量设置为自定义 AutoDoc 的路径,从而使用 Python 客户端从实验中生成标准或自定义 AutoDoc。
template_path='/full/path/to/your/custom_autodoc_template.docx'
Python 客户端:driverlessai
report = dai._backend.create_and_download_autodoc(
    model_key=exp_key,
    template_path=template_path,
    dest_path:str='.',
)