Driverless AI
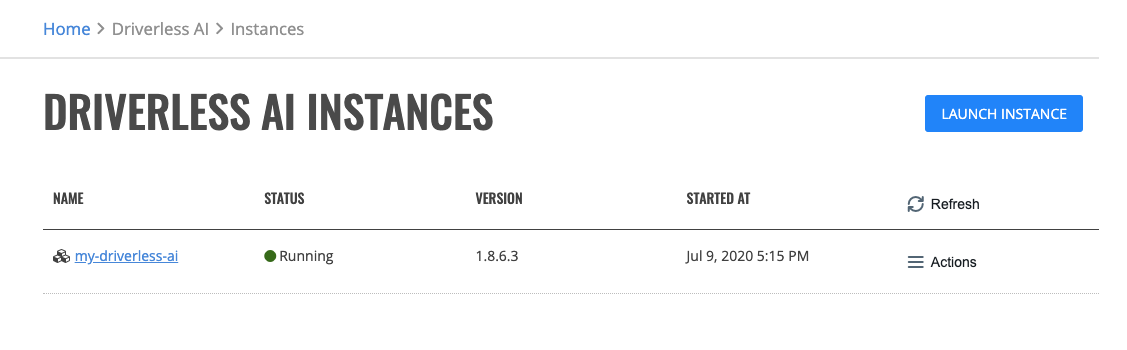
The Driverless AI page shows instances created by the current user, the state of the instance, Driverless AI version and the instance creation date. From this page, you can launch a new Driverless AI instance and manage existing instances.
Launching Instance
Click the Launch Instance button.
Select the profile to associate with this instance.
Specify values for the options below:
Instance Name: Specify a unique name for the Driverless AI instance.
Version: Select the Driverless AI version.
Number of CPUS: Specify the number of CPUs.
Number of GPUS: Specify the number of GPUs.
Memory [GB]: Specify the amount of memory.
Storage [GB]: Specify the amount of storage.
Maximum Idle Time [HRS]: Specify the maximum idle time of the Driverless AI instance. Instance will stop if it is idle for longer than maximum idle time. When the instance stops, it can be started again.
Maximum Uptime [HRS]: Set the duration after which the instance automatically stops. When the instance stops, it can be started again.
Timeout [S]: Specify the number of seconds to wait for the Driverless AI instance instance to come up.
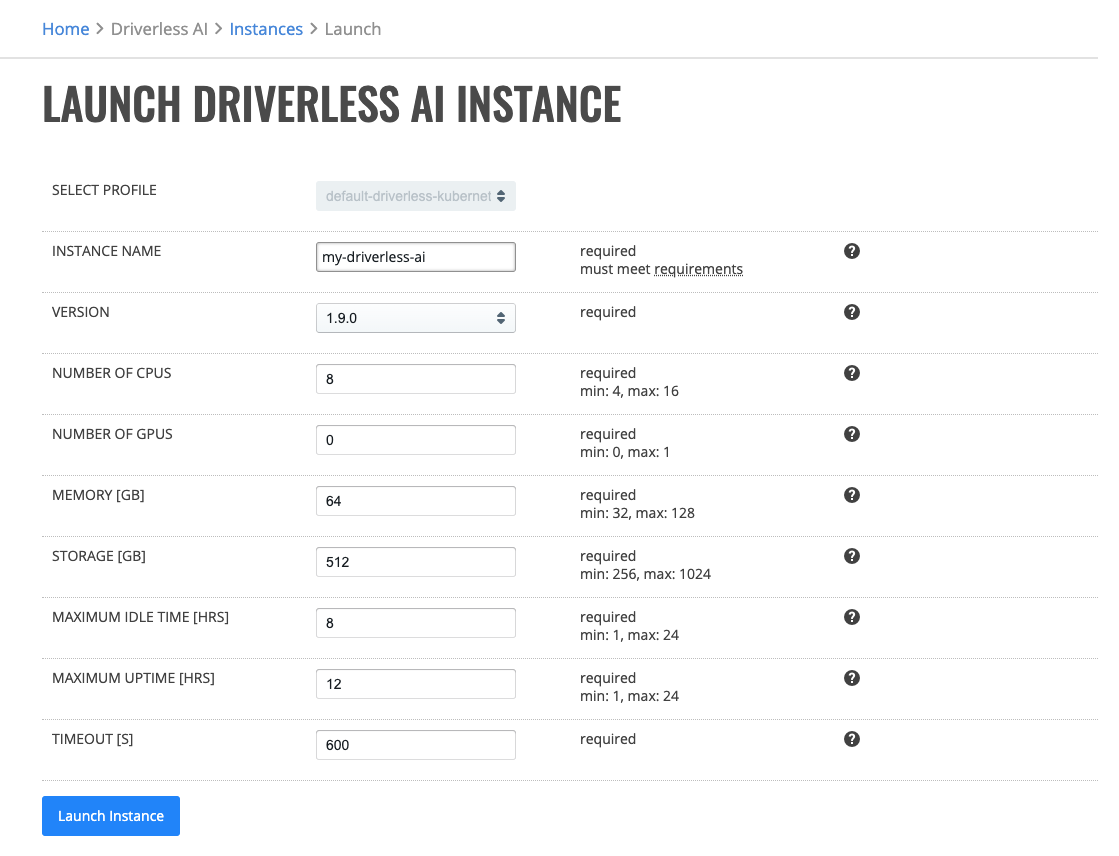
If a selected profile allows you to override specified Driverless AI TOML configuration, you can do so in the last field of the instance launch screen.

Click Launch Instance to create the instance.
Upon successful validation of parameters, the instance will begin starting and you will be taken back to the previous page. It takes up to 5 minutes for Driverless AI instance to launch.
Accessing Driverless AI
After the Driverless AI Instance is launched, to access Driverless AI click the Instance Name. This will open up your Driverless AI instance onto the Datasets page.
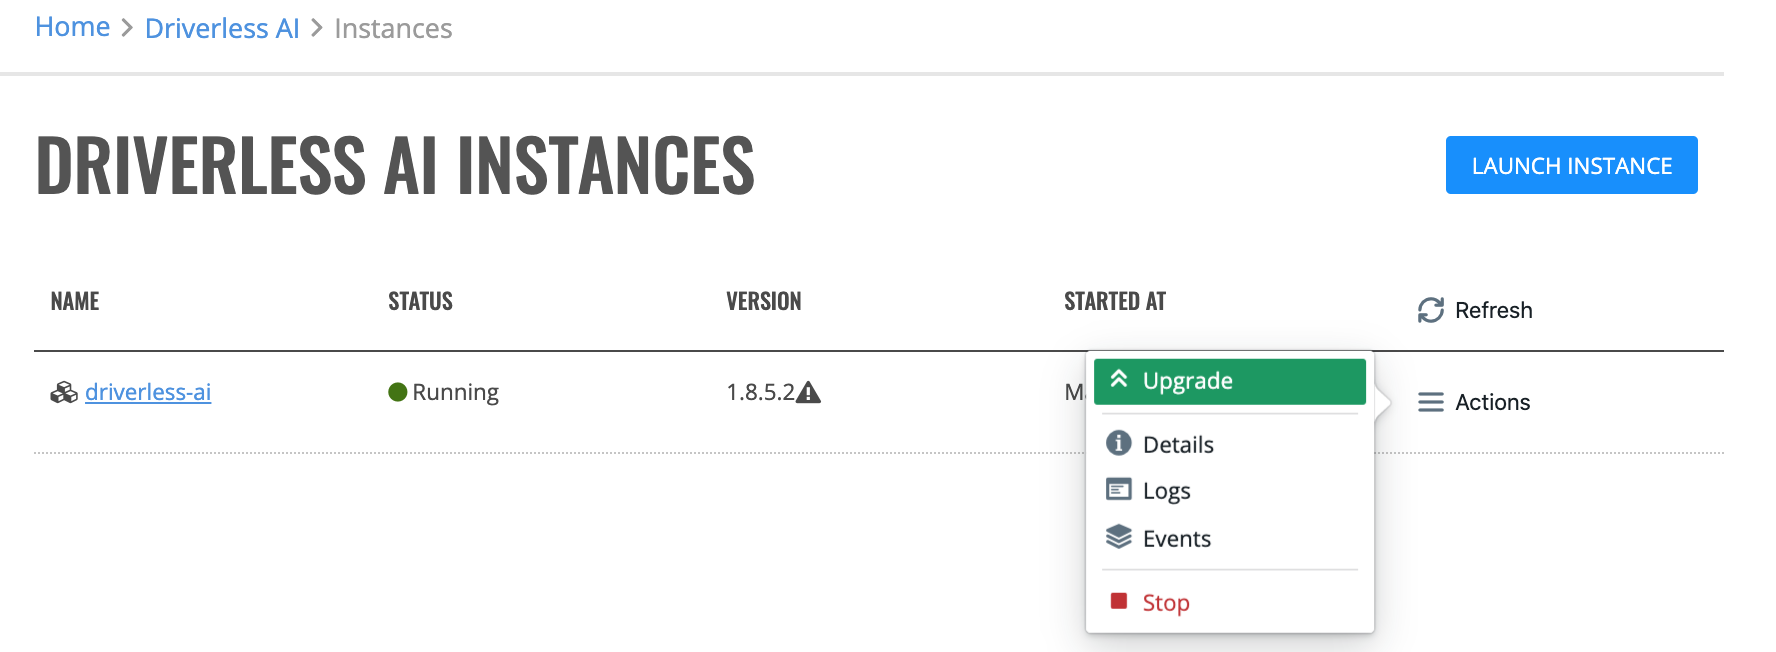
Upgrading Instance
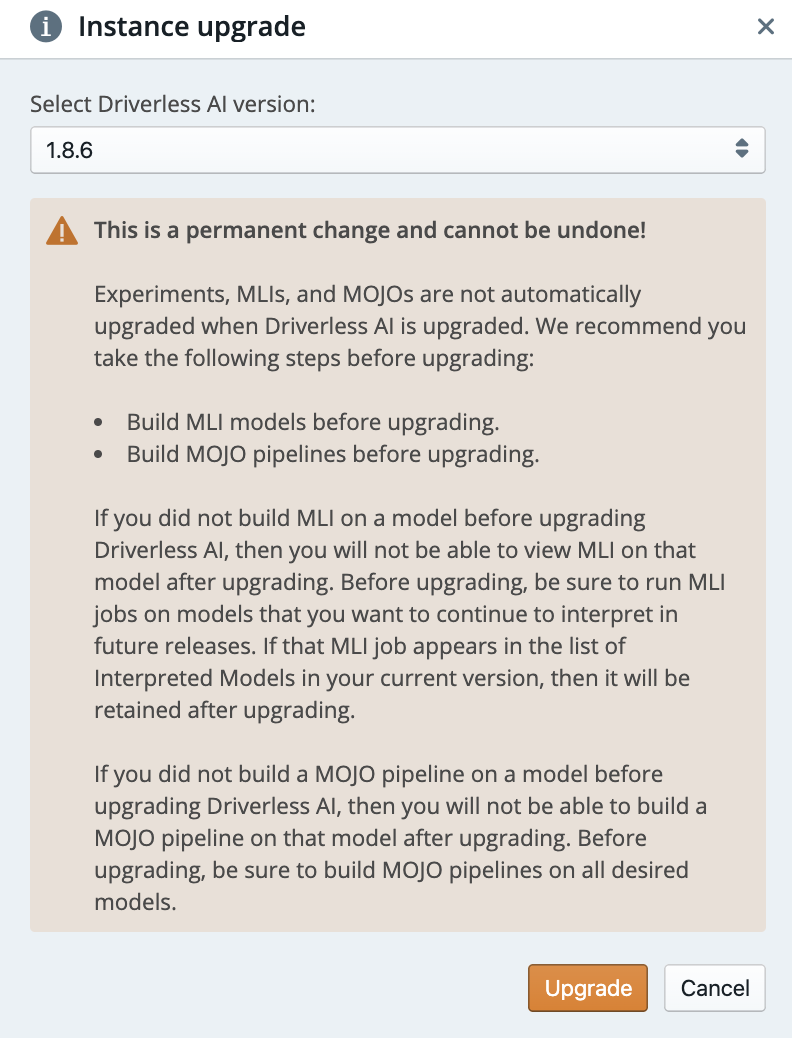
You can upgrade an instance to a newer version of Driverless AI.
Note: The instance must be in a “Stopped” state before you can upgrade.
Before you upgrade your instance, a prompt will appear allowing you to select the Driverless AI version to upgrade to. Click the Upgrade button to upgrade the instance.
Instance Details
To view the details of a instance, click the Actions > Detail option.

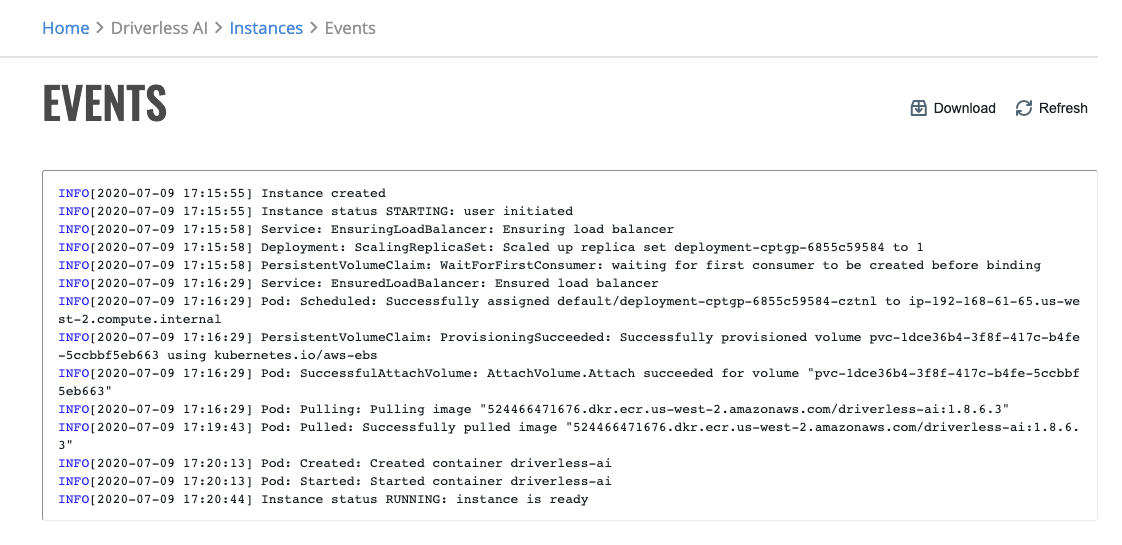
Instance Events
To view the events of a instance, click the Actions > Events option.
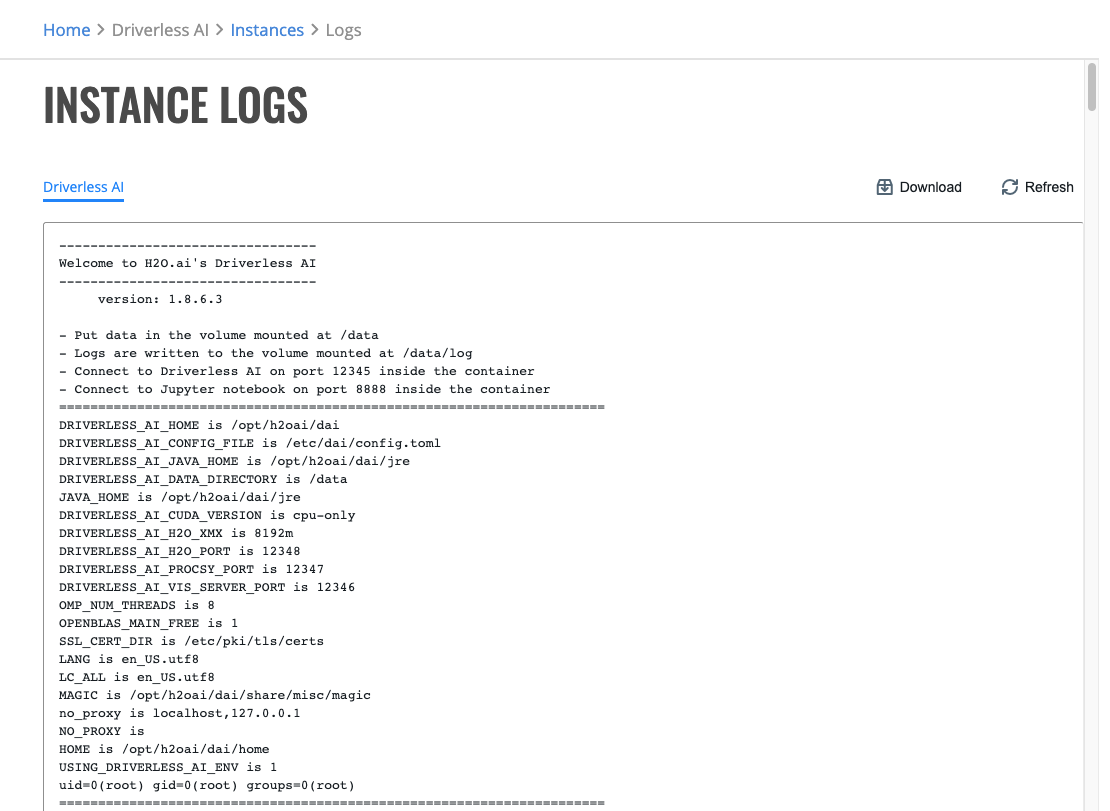
Instance Logs
You can see Driverless AI instance logs by clicking on the Actions > Logs option. On this page you may download a complete log bundle for troubleshooting.
Note: Logs are only available for a running Driverless AI Instance.
Stopping Instance
You can stop a Running Driverless AI instance by clicking on Actions > Stop beside the instance that you want to stop.
Marking Instance as Failed
On a rare occasion, an instance might get stuck in a Stopping state due to infrastructure failure. To manually resolve this situation, you can mark instance as Failed with Actions > Mark as failed.
Starting Instance
To start a Stopped Driverless AI instance, click the Actions > Start option. On the restart instance page, click Start Instance to restart the instance. You may change the parameters of the instance.
Note: When restarting a Driverless AI instance, you cannot change the Name, Version, or Storage of the instance.
Terminating Instance
You can terminate a Stopped Driverless AI instance by clicking the Actions > Terminate option. A prompt for terminating the server will appear warning you that terminating the instance will cause you to lose all experiments on that instance. To terminate the instance, click the Yes, Terminate button.
Steam admin guide: init_container to add JDBC jar in DAI
DAI does not ship with all supported data connectors. The following example demonstrates how to connect with the MSSQL database.
Create an image to download the jdbc
FROM alpine:3.14
RUN wget https://github.com/microsoft/mssql-jdbc/releases/download/v9.4.1/mssql-jdbc-9.4.1.jre8.jar
RUN chmod 777 mssql-jdbc-9.4.1.jre8.jar
Build this image from the above Dockerfile:
docker image build -t jdbc_init_container:0.1
Tag this image to the container registry attached to your K8s:
docker tag jdbc_init_container:0.1 psrgcr.azurecr.io/jdbc_init_container:0.3
Log in to the container registry:
docker login psrgcr.azurecr.io
Push the image to container registry:
docker push psrgcr.azurecr.io/jdbc_init_container:0.3
Config Steam profile to add init_container
Copy the following config into the Init containers section in Steam Profile:
initContainers:
- name: jdbc-mount-init
  image: psrgcr.azurecr.io/jdbc_init_container:0.3
  command: ["/bin/sh", "-c", "cp -rf /mssql-jdbc-9.4.1.jre8.jar /dai-data"]
  securityContext:
    runAsUser: 1000
  volumeMounts:
  - mountPath: /dai-data
    name: data
Enable jdbc in config.toml override:
enabled_file_systems = "upload, file, hdfs, jdbc, azrbs"
Launch DAI and connect to DAI.
kubectl exec -ti -n steam \
  steam-829300c2-c4f8-4a79-bd8b-7cda8ee783e8 \
  -c driverless-ai -- /bin/bash
Validate that the jar exists when DAI launches successfully.
bash-4.2$ ls -ltrh /dai-data/mssql-jdbc-9.4.1.jre8.jar
-rwxr-xr-x 1 dai dai 1.3M Dec  9 18:42 /dai-data/mssql-jdbc-9.4.1.jre8.jar
bash-4.2$