H2O Drive integration
Notebook Engine lets you browse, open, and save notebooks in H2O Drive, the cloud storage of H2O AI Cloud, without leaving JupyterLab.
Files in the local workspace live on the storage volume of your engine. They remain in place when you pause and resume the engine, but they're removed when the engine is deleted. Saving a copy to H2O Drive keeps your work outside the engine, so it remains available after the engine is deleted, and from other H2O AI Cloud applications that use H2O Drive.
This page describes the H2O Drive integration in Notebook Engine, which you use from JupyterLab. Sandbox Engine has a separate H2O Drive integration that you use from the Python client. For more information, see Sandbox H2O Drive client.
Prerequisites
Before you use the H2O Drive integration, make sure you have the following:
- A running Notebook Engine that you can open: In the AI Engines list, click Visit on your engine to open its JupyterLab interface. For more information, see Access Your Notebook Engine.
- A Notebook Engine image that includes the integration: In JupyterLab, open the Files panel and look for the H2O Drive tab. If the tab isn't there, ask your administrator for suitable permissions.
- An engine that isn't shared: On the Engine Details panel, check that Shared is turned off. Shared shows the current setting rather than the value at the last resume, so also check that Last Resumed At is later than the time you changed it. To turn sharing off, pause the engine, clear the Shared toggle, and resume the engine. For more information, see View Engine Configuration, Step 5: Configure Shared Access, and Edit a Notebook Engine.
- H2O Drive available in your H2O AI Cloud environment: Your administrator controls this. If the H2O Drive tab appears but every action fails, see Troubleshooting.
Notebook Engine signs you in to H2O Drive automatically with your H2O AI Cloud account. There's nothing to configure or authenticate.
A shared engine runs without your H2O AI Cloud credentials, so H2O Drive can't reach your storage. The H2O Drive tab still appears, but every action fails, with the same symptom as an environment where H2O Drive isn't available. Check this first, because it's the one cause you can resolve yourself.
The credentials are issued when the engine is created and each time it's resumed, so turning Shared off takes effect only after you resume the engine.
Files you copy from H2O Drive into the local workspace stay on the engine when you pause and resume it. If you later turn Shared on, any user who can access engines in your workspace can open, change, and delete those files, and can run code in your engine. Delete local copies of sensitive files before you share the engine.
Open the H2O Drive tab
- In your Notebook Engine, open the Files panel in the JupyterLab left sidebar.
- Select the H2O Drive tab.
The Files panel has two tabs:
- Local: The file browser for the local workspace of your engine. Notebooks opened from the local workspace, or copied from an H2O Drive folder, open and run here.
- H2O Drive: A browser for your personal H2O Drive storage.
How you open a notebook determines where JupyterLab saves your changes. A notebook is open directly on H2O Drive when JupyterLab opened it at its H2O Drive path rather than as a local copy, and every save of such a notebook writes back to H2O Drive. For which actions produce one, see Open a notebook from H2O Drive.
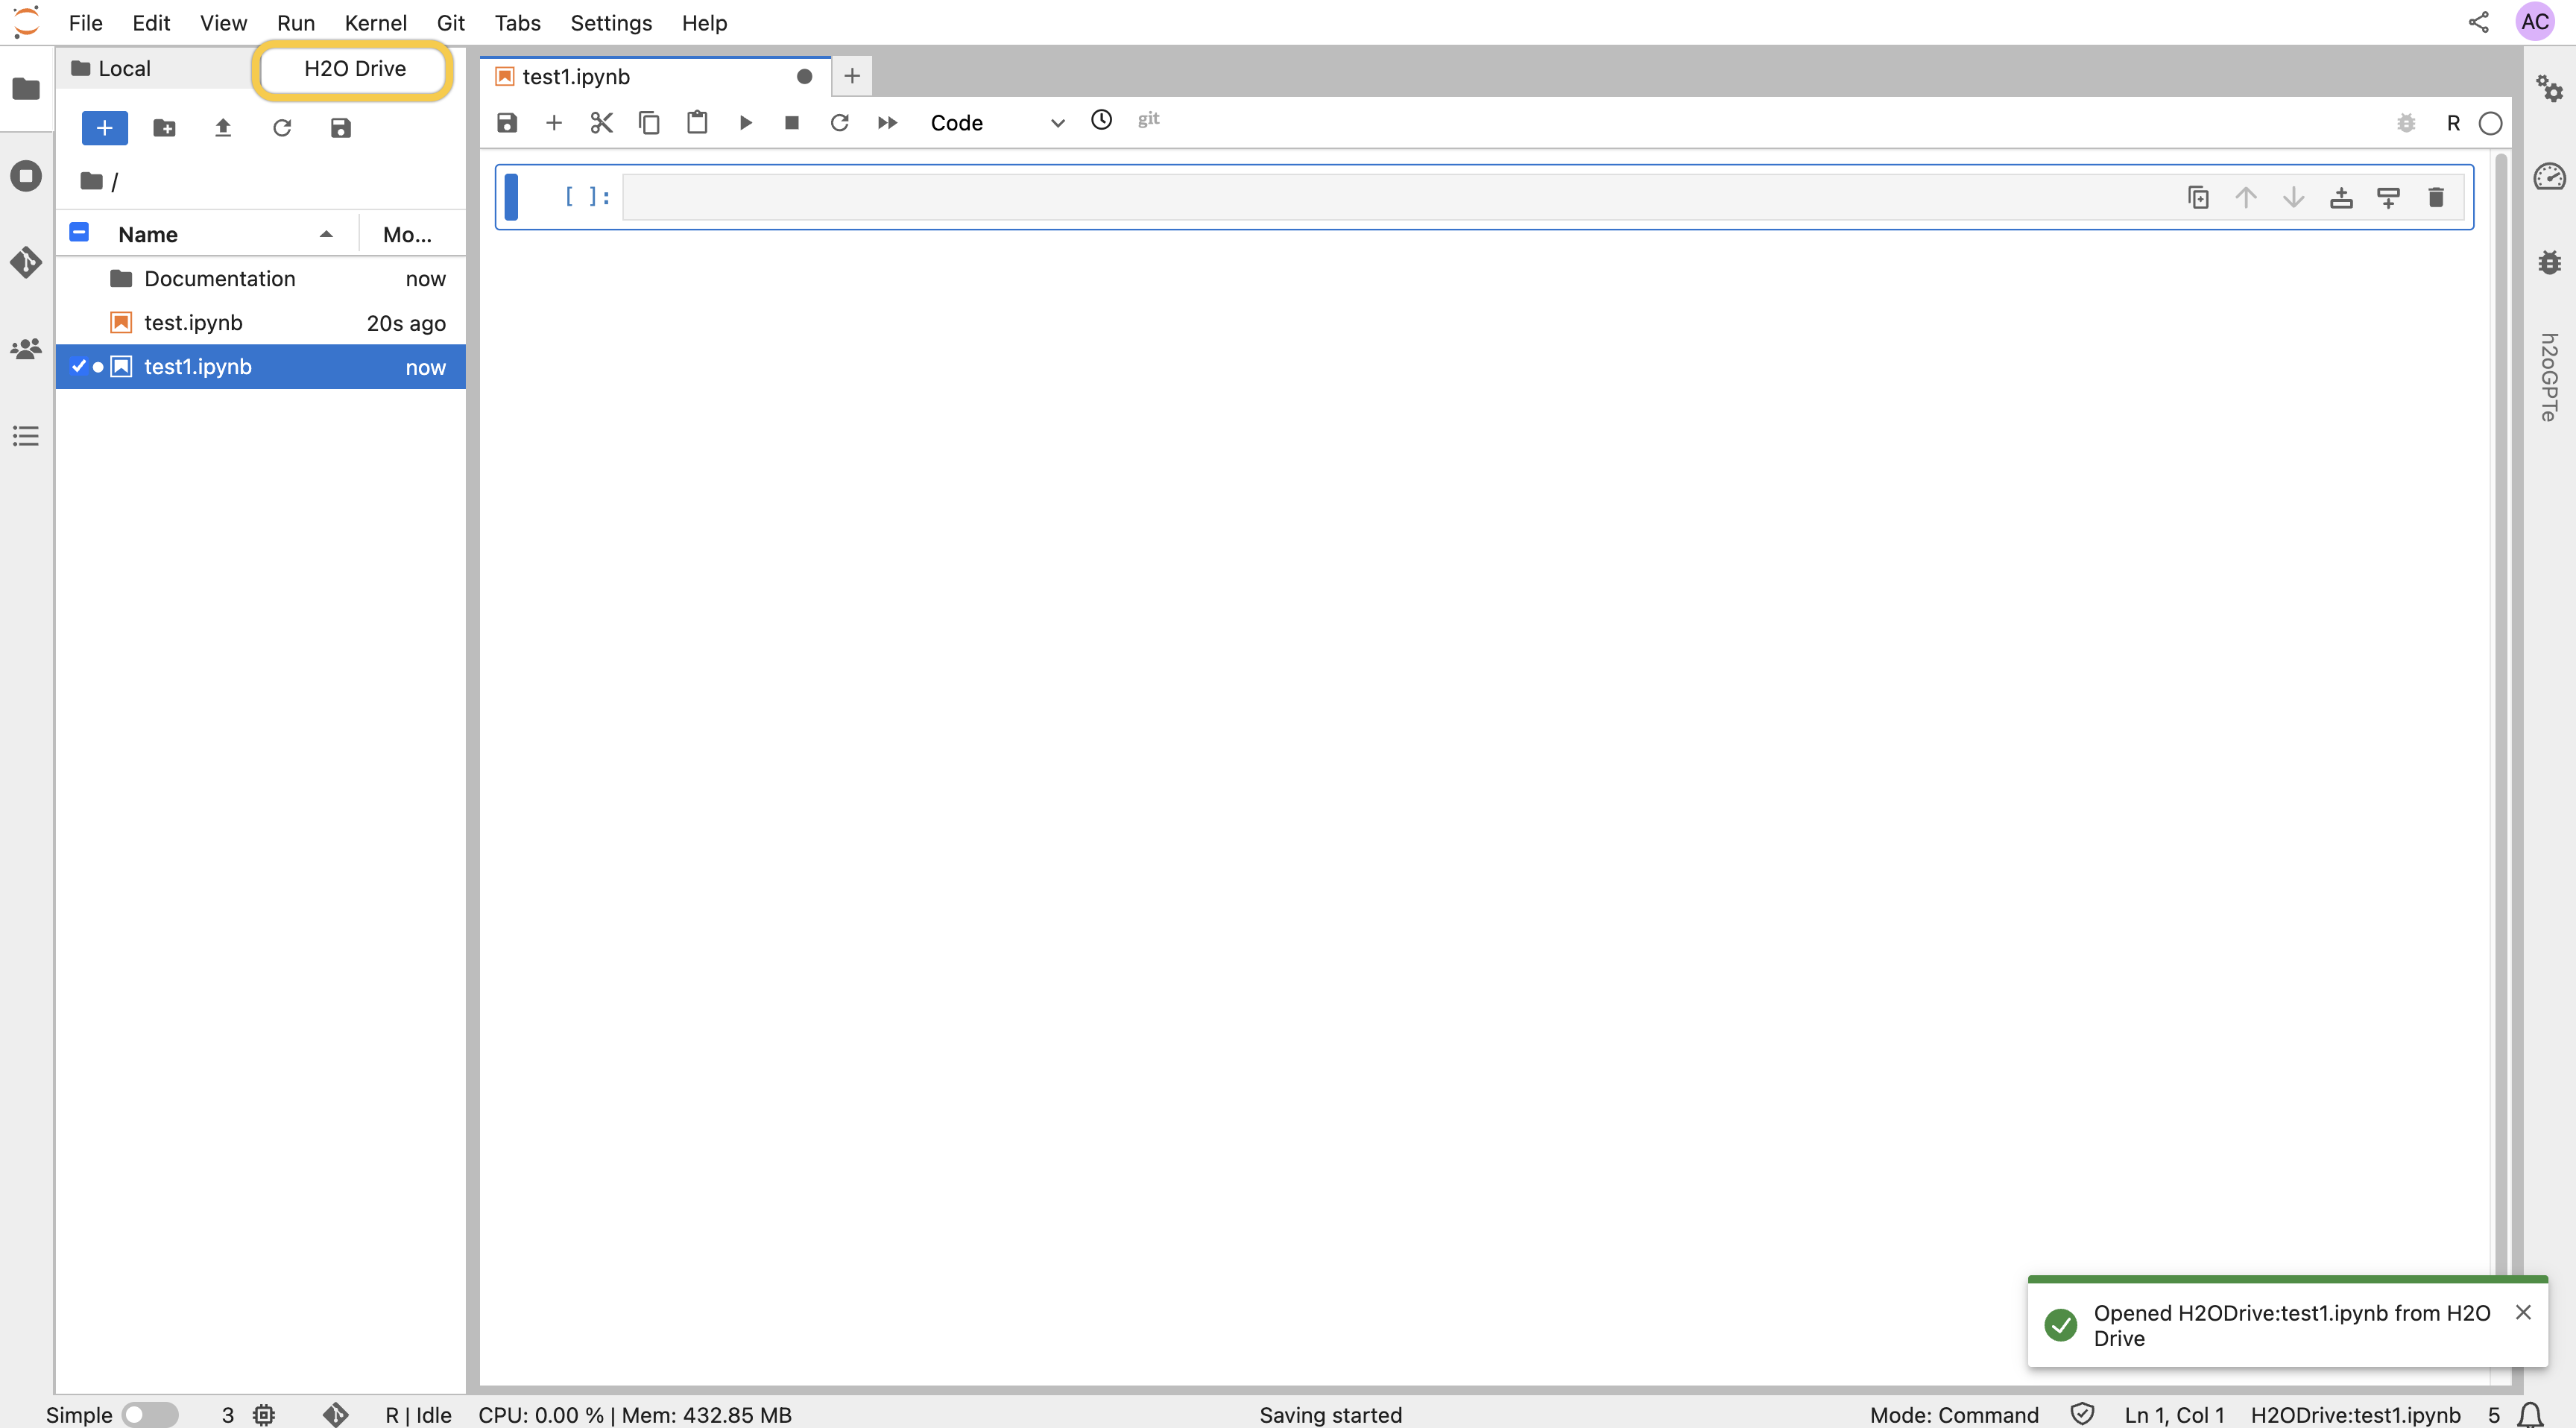
The tab you select determines where File > New > Notebook creates a notebook. With the H2O Drive tab selected, the new notebook is created in H2O Drive instead of the local workspace. The Launcher is less predictable: it follows the selected tab only while the Local tab is showing the top level of your local workspace. If the Local tab is showing a folder, the Launcher creates the notebook in that folder even when the H2O Drive tab is selected. Use File > New > Notebook when you want to control where the notebook is created.
H2O Drive toolbar actions
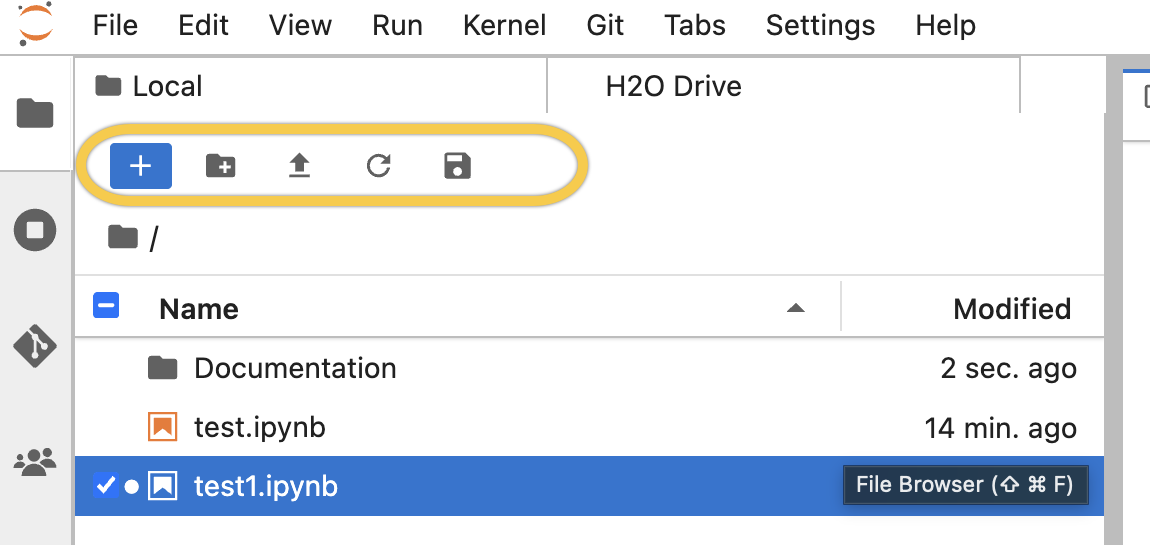
The H2O Drive tab has its own toolbar, listed in the following table. The Local tab has a different toolbar, which includes Git actions that the H2O Drive tab doesn't, so check that the H2O Drive tab is selected before you use these buttons. The toolbar buttons show icons only. Point to an icon to see its name.
| Button | Description |
|---|---|
| New notebook in H2O Drive (plus icon) | Creates an empty notebook in the H2O Drive folder you're viewing, without opening it. Double-clicking it later follows the usual rules: a notebook at the top level of your H2O Drive opens directly on H2O Drive, and a notebook inside a folder is copied to your local workspace. See Open a notebook from H2O Drive. |
| New folder in H2O Drive (folder-with-plus icon) | Creates a folder in the H2O Drive folder you're viewing. |
| Upload Files (upward arrow icon) | Uploads files from your computer into the H2O Drive folder you're viewing. A file added this way isn't stored in its original form. See Limitations. |
| Refresh H2O Drive listing (circular arrow icon) | Reloads the H2O Drive file listing. |
| Save active notebook to H2O Drive (floppy disk icon) | Uploads the notebook or file you're currently editing to the top level of your H2O Drive, replacing any object that has the same name. A notebook that JupyterLab opened at its H2O Drive path is written back to its own location instead. See Save a notebook to H2O Drive. |
To open, rename, delete, duplicate, or download a file within H2O Drive, right-click it in the H2O Drive tab. Open opens the file directly on H2O Drive — use it only for .ipynb notebooks and UTF-8 text files, and use Download for any other file type (see Limitations). For how opening works, see Open a notebook from H2O Drive.
Rename and Delete are permanent: renaming onto an existing name replaces that object without asking you to confirm, deleting a folder removes everything under it, and the confirmation dialog offers a trash that H2O Drive doesn't have. See Limitations.
To copy a file into another H2O Drive folder:
- Right-click the file and select Copy.
- Open the destination folder.
- Right-click an empty part of the listing and select Paste.
Copying a folder this way fails with a Paste Error message. Copying between the Local and H2O Drive tabs isn't supported.
Open a notebook from H2O Drive
A notebook is open directly on H2O Drive when JupyterLab opened it at its H2O Drive path rather than as a local copy. Every save of such a notebook writes back to the H2O Drive object, including autosave, which saves your unsaved changes within a minute of an edit.
The Enterprise h2oGPTe assistant is in agent mode by default and can edit and run cells. A notebook that is open directly on H2O Drive has no checkpoints and no earlier versions, and autosave overwrites the only copy within a minute of an edit, so there's nothing to revert to. Copy the notebook to your local workspace before you let the assistant work on it.
Only .ipynb notebooks and UTF-8 text files are safe to double-click. Double-clicking a file of any other type at the top level of your H2O Drive overwrites the H2O Drive object with a corrupted copy. To retrieve such a file, right-click it and select Download instead. See Limitations.
Double-clicking a notebook from inside an H2O Drive folder copies it to your local workspace. The local copy overwrites any local file that has the same name, without asking you to confirm, and two H2O Drive files that share a filename in different folders resolve to the same local file.
- In the Files panel, select the H2O Drive tab.
- Optional: If the notebook is inside a folder, double-click the folder to open it. The breadcrumb above the listing shows the folder you're in; select a segment of it to go back.
- Double-click the notebook you want to open.
What happens next depends on where the notebook sits in H2O Drive:
- A notebook at the top level of your H2O Drive opens directly on H2O Drive. No local copy is made, and the message reads
Opened H2ODrive:<name> from H2O Drive. - A notebook inside an H2O Drive folder is copied to the top level of your local workspace and opens there, and the message reads
Opened <name> from H2O Drive. You then edit and run the local copy, and your edits reach H2O Drive only when you save the notebook to H2O Drive again.
You can also right-click a notebook and select Open, which opens it directly on H2O Drive at its own path, including inside a folder.
Save a notebook to H2O Drive
Saving a notebook from your local workspace writes to the top level of your H2O Drive under the filename of the notebook, regardless of which H2O Drive folder you're browsing. The upload replaces any H2O Drive object that has the same name, without asking you to confirm.
If you opened the notebook from an H2O Drive folder, saving it therefore creates a second copy at the top level, and the original in the folder becomes stale.
- Open the notebook you want to save.
- Click the notebook's tab in the JupyterLab main work area to make it the active document.
- Do either of the following:
- On the H2O Drive tab of the Files panel, click Save active notebook to H2O Drive in the toolbar.
- In the JupyterLab command palette (View > Activate Command Palette), run Save Notebook to H2O Drive, the palette's name for the same action.
For a notebook in the local workspace, Notebook Engine saves the notebook locally first, then uploads it, and the message Saved <name> to H2O Drive appears when the upload finishes.
A notebook that is open directly on H2O Drive is written straight back to its own location, and <name> is the notebook's H2O Drive path, including any folder it sits in.
The same steps save a supported text file, such as a .py or .md file: open the file, click its tab to make it the active document, and save it to H2O Drive.
A notebook that is open directly on H2O Drive already saves to H2O Drive on every save, so you don't need this action for it. Anything that opens an existing object at its H2O Drive path, and anything that creates and opens a notebook while the H2O Drive tab is selected, produces a notebook that is open directly on H2O Drive. This includes the following:
- You double-click a notebook at the top level of your H2O Drive.
- You right-click a notebook in the H2O Drive tab and select Open, which also works for a notebook inside a folder.
- You create a notebook with File > New > Notebook while the H2O Drive tab is selected.
- You create a notebook from the Launcher while the H2O Drive tab is selected and the Local tab is showing the top level of your local workspace.
- The Enterprise h2oGPTe assistant creates a notebook while the H2O Drive tab is selected.
The New notebook in H2O Drive toolbar button is the one exception: it creates the notebook without opening it, so the notebook isn't open directly on H2O Drive until you open it.
Limitations and troubleshooting
The H2O Drive integration has limitations that can cost you work, including uploads that don't store your file, deletes with no trash, and renames that replace an existing object without asking. For those, and for the messages you might see, see H2O Drive limitations and H2O Drive troubleshooting.
Related topics
- Enterprise h2oGPTe assistant
- Create a new Notebook Engine
- Manage a Notebook Engine
- Notebook Engine profiles
- H2O Drive documentation
- Submit and view feedback for this page
- Send feedback about AI Engine Manager to cloud-feedback@h2o.ai