OpenID Connect Authentication Examples
This section describes how to enable OpenID Connect authentication in Driverless AI. It provides two examples. The first describes how to enable OpenID connect and log in to the Driverless AI UI. The second describes additional token-based authentication settings, which allows you to run the Driverless AI Python client. (Note that token-based authentication is not yet supported on the Driverless AI R client.) This section assumes that you have an understanding of OpenID Connect.
Note: Admin users can view their user identity details when using OpenID.
The OpenID Connect Protocol
OpenID Connect follows a distinct protocol during the authentication process:
A request is sent from the client (RP) to the OpenID provider (OP).
The OP authenticates the end user and obtains authorization.
The OP responds with an ID Token. (An Access Token is usually provided as well.)
The Relying Party (RP) can send a request with the Access Token to the UserInfo Endpoint.
The UserInfo Endpoint returns Claims about the End User.
Refer to the OpenID Connect Basic Client Implementer’s Guide for more information: https://openid.net/specs/openid-connect-basic-1_0.html
Understanding the Well-Known Endpoint
In order to begin the process of configuring Driverless AI for OpenID-based authentication, the end user must retrieve OpenID Connect metadata about their authorization server by requesting information from the well-known endpoint. This information is subsequently used to configure further interactions with the provider.
The well-known endpoint is typically configured as follows:
https://yourOpenIDProviderHostname/.well-known/openid-configuration
Configuration Options
OpenID Configuration Options
The following options in the config.toml file are used for enabling OpenID-based authentication. Setting these options lets you log in to the Driverless AI UI using OpenID.
# The OpenID server URL. (Ex: https://oidp.ourdomain.com) Do not end with a "/"
auth_openid_provider_base_uri= "https://yourOpenIDProviderHostname"

# The uri to pull OpenID config data from. (You can extract most of required OpenID config from this URL.)
# Usually located at: /auth/realms/master/.well-known/openid-configuration

# Quote method from urllib.parse used to encode payload dict in Authentication Request
auth_openid_urlencode_quote_via="quote"

# These endpoints are made available by the well-known endpoint of the OpenID provider
# All endpoints should start with a "/"
auth_openid_auth_uri=""
auth_openid_token_uri=""
auth_openid_userinfo_uri=""
auth_openid_logout_uri=""

# In most cases, these values are usually 'code' and 'authorization_code' (as shown below)
# Supported values for response_type and grant_type are listed in the response of well-known endpoint
auth_openid_response_type="code"
auth_openid_grant_type="authorization_code"

# Scope values—supported values are available in the response from the well-known endpoint
# 'openid' is required
# Additional scopes may be necessary if the response to the userinfo request
# does not include enough information to use for authentication
# Separate additional scopes with a blank space.
# See https://openid.net/specs/openid-connect-basic-1_0.html#Scopes for more info
auth_openid_scope="openid"

# The OpenID client details that are available from the provider
# A new client for Driverless AI in your OpenID provider must be created if one does not already exist
auth_openid_client_id=""
auth_openid_client_secret=""

# Sample redirect value: http[s]://driverlessai-server-address:port/openid/callback
# Ensure that the client configuration in the OpenID provider (see previous step) includes
# this exact URL as one of the possible redirect URLs for the client
# If these do not match, the OpenID connection will fail
auth_openid_redirect_uri=""

# Token endpoint response key configs
auth_openid_access_token_expiry_key="expires_in"
auth_openid_refresh_token_expiry_key="refresh_expires_in"

# UserInfo response key configs for all users who log in to Driverless AI
# The userinfo_auth_key and userinfi_auth_value are
# a key value combination in the userinfo response that remain static for everyone
# If this key value pair does not exist in the user_info response,
# then the Authentication is considered failed
auth_openid_userinfo_auth_key=""
auth_openid_userinfo_auth_value=""

# Key that specifies username in user_info json (we will use value of this key as username in Driverless AI)
auth_openid_userinfo_username_key=""

# Enable advanced matching for OpenID authentication
# When enabled, the ObjectPath expression is used to evaluate the user's identity
# Disabled by default
# For more information, refer to http://objectpath.org/
auth_openid_use_objectpath_match=false

# Set the ObjectPath expression
# Used to evaluate whether a user is allowed to login to Driverless AI
# The user is allowed to log in when the expression evaluates to True
# Examples:
# $.our_claim is "our_value" (simple claim equality)
# "expected_role" in @.roles (list of claims contains required value)
auth_openid_use_objectpath_expression=""
Token-Based Authentication Configuration Options
The following additional options in the config.toml file are used for enabling token-based authentication. Token-based authentication allows clients to authenticate with the Driverless AI server by providing a token with each request. This is targeted for (but not limited to) the environments with OpenID Connect authentication. If these options are not set, then clients are not able to authenticate with the server when OpenID Connect is configured as the authentication method.
# Sets token introspection URL for OpenID Connect authentication.(needs to be an absolute URL)
auth_openid_token_introspection_url = ""

# Enables option to use Bearer token for authentication with the RPC endpoint.
api_token_introspection_enabled = false

# Sets the method that is used to introspect the bearer token.
# OAUTH2_TOKEN_INTROSPECTION: Uses  OAuth 2.0 Token Introspection (RPC 7662)
# endpoint to introspect the bearer token.
# This useful when 'openid' is used as the authentication method.
# Uses 'auth_openid_client_id' and 'auth_openid_client_secret' and to
# authenticate with the authorization server and
# `auth_openid_token_introspection_url` to perform the introspection.
#
api_token_introspection_method = "OAUTH2_TOKEN_INTROSPECTION"

# Sets the minimun of the scopes that the access token needs to have
# in order to pass the introspection. Space separated./
# This is passed to the introspection endpoint and also verified after response
# for the servers that don't enforce scopes.
# Keeping this empty turns any the verification off.
#
api_token_oauth2_scopes = ""

# Which field of the response returned by the token introspection endpoint should be used as a username.
api_token_oauth2_username_field_name = "username"

# Enables the option to initiate a PKCE flow from the UI in order to obtain tokens usable with Driverless clients
oauth2_client_tokens_enabled = false

# Sets up client id that will be used in the OAuth 2.0 Authorization Code Flow to obtain the tokens. Client needs to be public and be able to use PKCE with S256 code challenge.
oauth2_client_tokens_client_id = ""

# Sets up the absolute url to the authorize endpoint.
oauth2_client_tokens_authorize_url = ""

# Sets up the absolute url to the token endpoint.
oauth2_client_tokens_token_url = ""

# Sets up the absolute url to the token introspection endpoint.It's displayed in the UI so that clients can inspect the token expiration.
oauth2_client_tokens_introspection_url = ""

# Sets up the absolute to the redirect url where Driverless handles the redirect part of the Authorization Code Flow. this <Driverless base url>/oauth2/client_token
oauth2_client_tokens_redirect_url = ""

# Sets up the scope for the requested tokens. Space seprated list.
oauth2_client_tokens_scope = "openid profile ai.h2o.storage"
Example 1: Enabling OpenID Connect
This example describes how to start Driverless AI in the Docker image and with native installs after OpenID has been configured. Note that this example does not enable tokens, so the Driverless AI Python client will be incompatible with this installation.
Edit the OpenID configuration options in your config.toml file as described in the Configuration Options section.
Mount the edited config.toml file into the Docker container.
  docker run --gpus all \
    --net=openid-network \
    --name="dai-with-openid" \
    --pid=host \
    --init \
    --rm \
    --shm-size=2g --cap-add=SYS_NICE --ulimit nofile=131071:131071 --ulimit nproc=16384:16384 \
    -u `id -u`:`id -g` \
    -p 12345:12345 \
    -v "`pwd`/DAI_DATA/data":/data \
    -v "`pwd`/DAI_DATA/log":/log \
    -v "`pwd`/DAI_DATA/license":/license \
    -v "`pwd`/DAI_DATA/tmp":/tmp \
    -v "`pwd`/DAI_DATA/config":/config \
    -e DRIVERLESS_AI_CONFIG_FILE="/config/config.toml" \
    h2oai/dai-ubi8-x86_64:2.4.4-cuda11.8.0.xx
The next step is to launch and log in to Driverless AI. Refer to Logging in to Driverless AI.
Export the Driverless AI config.toml file or add it to ~/.bashrc. For example:
# DEB and RPM
export DRIVERLESS_AI_CONFIG_FILE="/etc/dai/config.toml"

# TAR SH
export DRIVERLESS_AI_CONFIG_FILE="/path/to/your/unpacked/dai/directory/config.toml"
Edit the OpenID configuration properties in the config.toml file as described in the Configuration Options section.
Start (or restart) Driverless AI.
The next step is to launch and log in to Driverless AI. Refer to Logging in to Driverless AI.
Example 2: Enabling Token-based Authentication with OpenID Connect
Similar to Example 1, this example describes how to start Driverless AI in the Docker image and with native installs after OpenID has been configured. It also enables tokens for compatibility with the Driverless AI Python client.
Edit the OpenID configuration options in your config.toml file as described in the Configuration Options section. Be sure to also enable the token-based authentication options described in the Token-Based Authentication Configuration Options options section.
Mount the edited config.toml file into the Docker container.
  docker run --gpus all \
    --net=openid-network \
    --name="dai-with-openid" \
    --pid=host \
    --init \
    --rm \
    --shm-size=2g --cap-add=SYS_NICE --ulimit nofile=131071:131071 --ulimit nproc=16384:16384 \
    -u `id -u`:`id -g` \
    -p 12345:12345 \
    -v "`pwd`/DAI_DATA/data":/data \
    -v "`pwd`/DAI_DATA/log":/log \
    -v "`pwd`/DAI_DATA/license":/license \
    -v "`pwd`/DAI_DATA/tmp":/tmp \
    -v "`pwd`/DAI_DATA/config":/config \
    -e DRIVERLESS_AI_CONFIG_FILE="/config/config.toml" \
    h2oai/dai-ubi8-x86_64:2.4.4-cuda11.8.0.xx
The next step is to launch and log in to Driverless AI. Refer to Logging in to Driverless AI.
Export the Driverless AI config.toml file or add it to ~/.bashrc. For example:
# DEB and RPM
export DRIVERLESS_AI_CONFIG_FILE="/etc/dai/config.toml"

# TAR SH
export DRIVERLESS_AI_CONFIG_FILE="/path/to/your/unpacked/dai/directory/config.toml"
Edit the OpenID configuration properties in the config.toml file as described in the Configuration Options section. Be sure to also enable the token-based authentication options described in the Token-Based Authentication Configuration Options options section.
Start (or restart) Driverless AI.
The next step is to launch and log in to Driverless AI. Refer to Logging in to Driverless AI.
The following is an example of how to enable token-based authentication with OpenID Connect for the Driverless AI Python Client:
# setup a token provider with a refresh token from the Driverless AI web UI
token_provider = driverlessai.token_providers.OAuth2TokenProvider(
    refresh_token="eyJhbGciOiJIUzI1N...",
    client_id="python_client",
    token_endpoint_url="https://keycloak-server/auth/realms/driverlessai/protocol/openid-connect/token",
    token_introspection_url="https://keycloak-server/auth/realms/driverlessai/protocol/openid-connect/token/introspect"
)

# use the token provider to get authorization to connect to the
# Driverless AI server
dai = driverlessai.Client(
    address="https://localhost:12345",
    token_provider=token_provider.ensure_fresh_token
)
Parameters:
refresh_token (str) – token from Driverless AI server web UI, used to obtain fresh access token when needed
client_id (str) – public ID for the Python client
token_endpoint_url (str) – Authorization server URL to get an access or refresh token
token_introspection_url (str) – Authorization server URL to get information about a token
access_token (Optional [str]) – token authorizing Python client access
client_secret (Optional [str]) – private secret for the Python client
For more information, see http://docs.h2o.ai/driverless-ai/pyclient/docs/html/utils.html#oauth-2-0-token-provider.
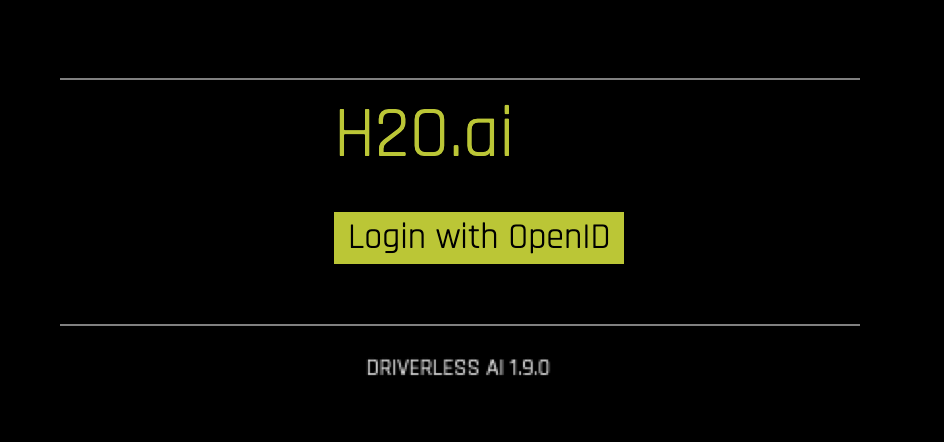
Logging in to Driverless AI
Open a browser and launch Driverless AI. Notice the you will be prompted to log in with OpenID.