Tutorial 3B: Model deployment with a model's Python scoring pipeline
Overview
This tutorial explores one of the options available to deploy a built model. In particular, this tutorial builds an image regression model to explore how you can deploy a model in any external Python environment using the model's standalone Python scoring pipeline.
Objectives
- Understand how to download a built model's standalone Python scoring pipeline.
- Learn how to score new data using a model's Python scoring pipeline.
Prerequisites
- Access to H2O Hydrogen Torch v1.4.0
- Basic understanding of Python
- Understanding of Docker
- Complete Tutorial 1A: Default hyperparameter values
Step 1: Import dataset
For this tutorial, let's utilize the demo out-of-the-box preprocessed coins_image_regression.zip dataset. The dataset contains a collection of 6,028 images with one or more coins. Each image has been labeled to indicate the sum of its coins. The currency of the coins is the Brazilian Real (R$). Let's import the dataset:
- In the H2O Hydrogen Torch navigation menu, click Import dataset.
- In the File name list, select coins_image_regression.zip.
- Click Continue.
- Click Continue.
- Click Continue.

Step 2: Build model
Let's quickly build an image regression model capable of predicting the sum of Brazilian Real (R$) coins in images. After creating the model, we use the model's Python scoring pipeline to generate predictions (deploy the model).
- In the H2O Hydrogen Torch navigation menu, click Create experiment.
- In the Dataset list, select coins_image_regression.
- In the Experiment name box, enter
tutorial-3b. - Click Run experiment.
Step 3: Download model's Python scoring pipeline
After a few minutes, you can utilize (observe) the completed experiment (model). Now that our experiment is complete, let's download the model's Python scoring pipeline to deploy the model in a Python environment.
- In the Experiments table, click tutorial-3b.
- Click Download scoring.
note
H2O Hydrogen Torch downloads a file with the following naming convention:
scoring_tutorial-3b_*.
Step 4: Deploy Python scoring pipeline
The downloaded Python scoring pipeline, in particular, contains the following files that we will utilize in a moment:
- Dockerfile.scoring: a Dockerfile that contains all the commands to assemble an H2O Hydrogen Torch scoring image.
- hydrogen_torch-*.whl: a wheel package containing the necessary H2O Hydrogen Torch framework functionality to generate predictions
- images: a folder containing sample images from the validation dataset
- scoring_pipeline.py: an example Python script demonstrating how to load the model and score new data
To deploy our model, we need to build a docker image and start a Docker container. Right after, we will use the scoring_pipeline.py file to score new data.
- Build a Docker image.
Note
To build a Docker image, run the following command:
docker build -t ht_scoring -f Dockerfile.scoring .. - Run a Docker container
Note
- To run the Docker container on CPU, run the following command:
docker run -it --rm --shm-size 2G ht_scoring bash. - To run the Docker on GPU, run the following command:
docker run -it --rm --gpus all --shm-size 2G ht_scoring bash.
- To run the Docker container on CPU, run the following command:
Step 5: Score new data
Now that you're inside a Docker container with model's Python scoring pipeline, we can score on new data using the trained model weights. For instance, using the scoring_pipeline.py file, let's score the images inside the images folder.
-
Run the scoring_pipeline.py file.
Note- To run it, run the following command:
python3.10 scoring_pipeline.py.
- To run it, run the following command:
After running the scoring_pipeline.py file, we obtain the following result that you can save (for example, save to a database or disk):
           image_path  pred_label
0  115_1479348288.jpg  124.839821
1  150_1479430338.jpg  146.037811
2   50_1477139904.jpg   52.514061
3   50_1477282128.jpg   49.487492
4   55_1477843506.jpg   56.258987
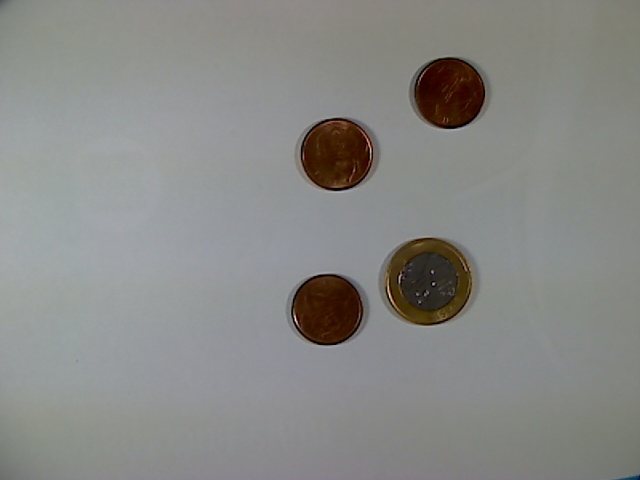
115_1479348288.jpg |
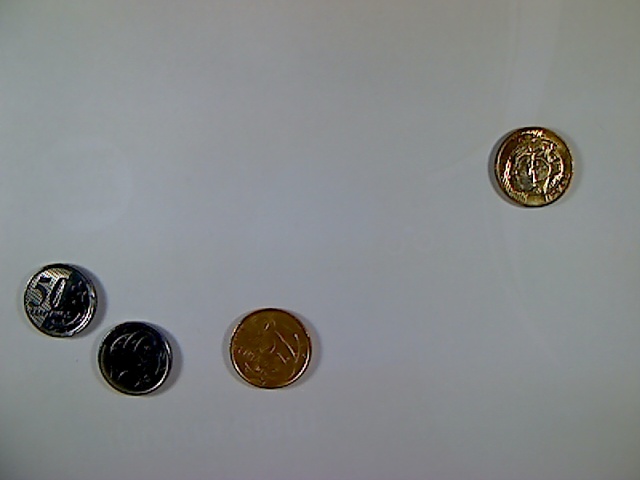
150_1479430338.jpg |
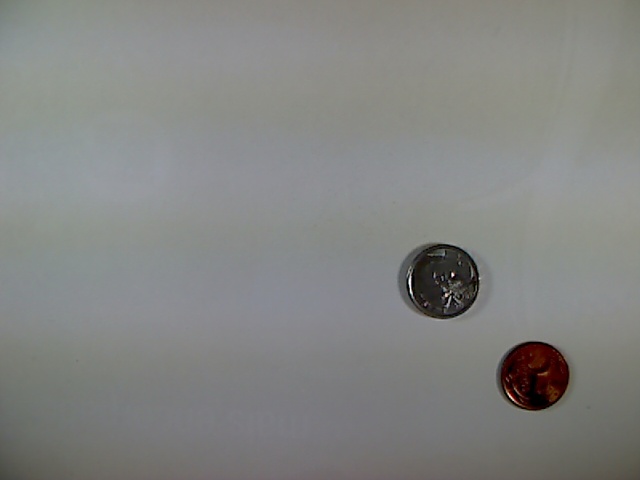
50_1477139904.jpg |
50_1477282128.jpg b |
55_1477843506.jpg |


Summary
In this tutorial, we learned how to deploy a docker image and score new data using the Python scoring pipeline.
Next
Now that you know how to deploy a built model with it's Python scoring pipeline, consider the following tutorials to learn about the other options to deploy a built model:
- Tutorial 1B: Model deployment in the H2O Hydrogen Torch UI
- Tutorial 2B: Model deployment with a model's H2O MLOps pipeline
- Tutorial 4B: Model deployment to H2O MLOps through the H2O Hydrogen Torch UI
- Submit and view feedback for this page
- Send feedback about H2O Hydrogen Torch to cloud-feedback@h2o.ai