Create a deployment
Experiments that are imported into MLOps must first be registered before being deployed. For more information, see Understand model registration and versioning.
The following steps describe how to deploy a model version in MLOps.
-
In the main navigation, click Projects. And
-
Select the project that contains the model you want to deploy.
-
On the project page, click the Deployments tab, then click Create Deployment.
-
In the Create a new deployment panel, specify the following:
-
Deployment Type: You can choose to deploy a model to score requests in either real time with a REST endpoint or in batches. Note that batch deployments are currently available through H2O eScorer for MOJO artifacts only. H2O eScorer needs to be installed first, and the eScorer Model Registry is separate from the H2O MLOps Model Registry.

-
Enter a name and, optionally, a description for the deployment.

-
Deployment mode: Specify a deployment mode for the deployment. Select one of the following options:
- Single model: Select one model/model version for the deployment by clicking on the Select Model button.
- A/B test: A/B testing in MLOps lets you compare the performance of two or more models. When requests are sent to an A/B deployment, they are directed to the selected models at a specified ratio known as the traffic percentage. For example, if the deployment consists of two models and the traffic percentage is set to 50% / 50%, each model receives half of the total incoming requests. Select two models/model versions by clicking on the Select Models button, and then configure the traffic (that is, request percentage allocation) to each model. Note that model monitoring is not available for this deployment mode.
- Champion/challenger: This deployment mode lets you continuously compare your chosen best model (Champion) to a Challenger model. Select a champion and challenger model by clicking the Select Models button. Before creating the deployment, review your selected models and replace them if necessary. Note that model monitoring is not available for this deployment mode.

-
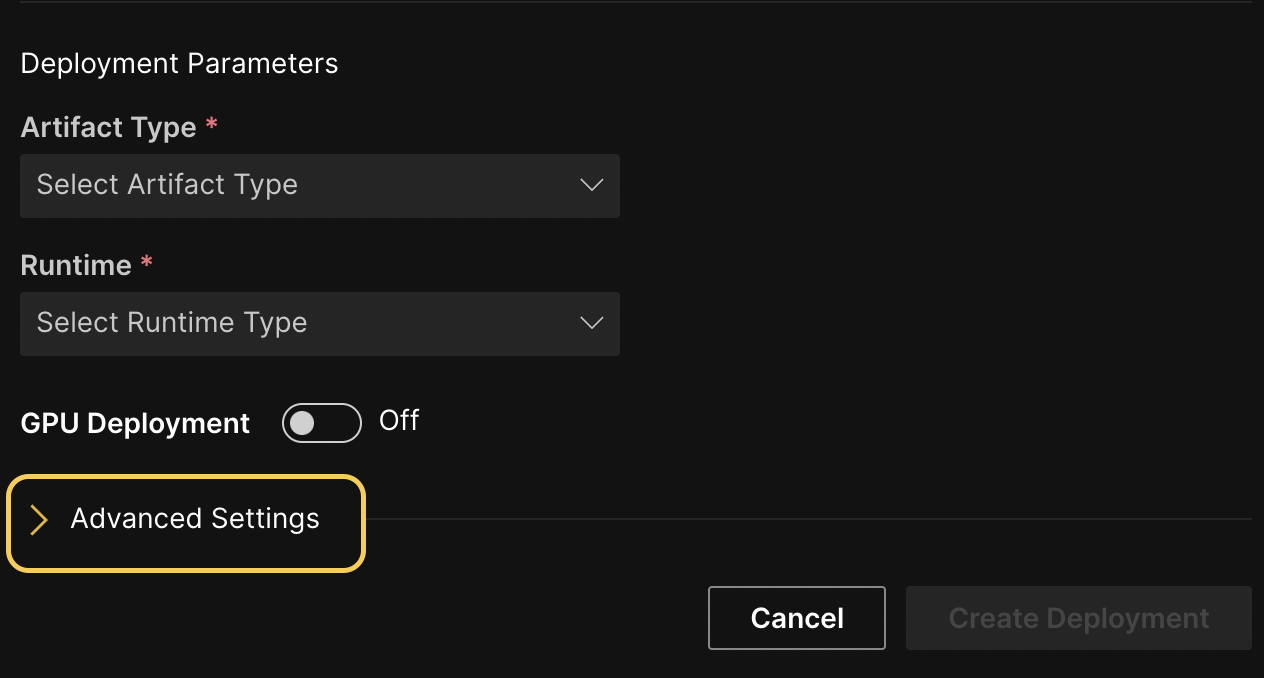
Artifact type and runtime: Select an artifact type and runtime for the deployment. (Note: For more information on scoring runtimes in H2O MLOps, see Scoring runtimes.) Each entry in the Artifact Type drop-down represents an artifact that is linked to the selected experiment and is deployable by MLOps. Note that admins have the option to configure and add additional runtimes.

-
-
GPU Deployment toggle: For GPU-enabled model deployments, you can set the appropriate Kubernetes (K8s) requests and limits by clicking the GPU Deployment toggle. Note that you must still select an appropriate affinity and toleration for GPU deployments. For more information, see Kubernetes options.
-
Click Create Deployment.
Advanced settings
This section describes various advanced settings that you can configure for your deployment. To expand the Advanced settings section, click the > expander arrow in the Create a new deployment panel.
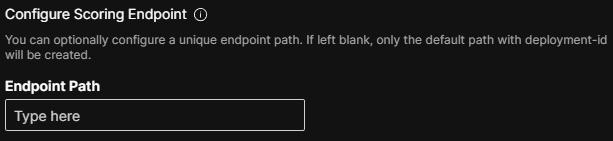
Configure scoring endpoint
Optionally specify an endpoint path to use as a REST endpoint for your deployment. You can use this feature to specify a unique alias for the deployment scoring endpoint so that, for example, you can maintain a static endpoint for a downstream application. Note that this is an endpoint alias that you can update or remove from the deployment. To add additional endpoints, remove endpoints, and update existing endpoints to point to a different deployment, use the H2O MLOps Python client. For more information, see Configure scoring endpoints with the H2O MLOps Python client.
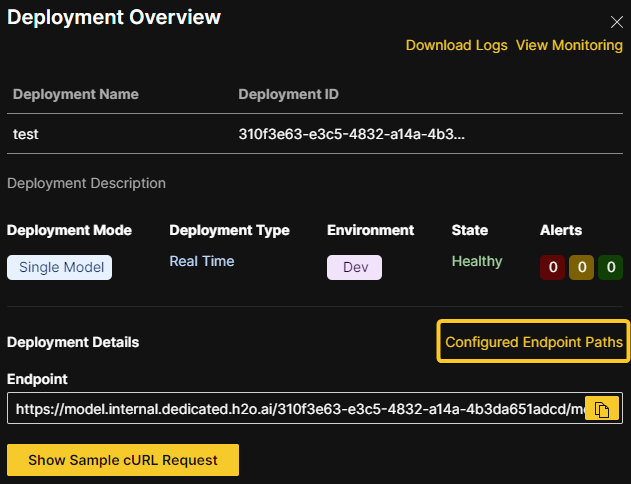
View configurable endpoints
To view the configurable endpoints associated with a deployment, click Configured Endpoint Paths in the Deployment Overview panel.
Endpoint security
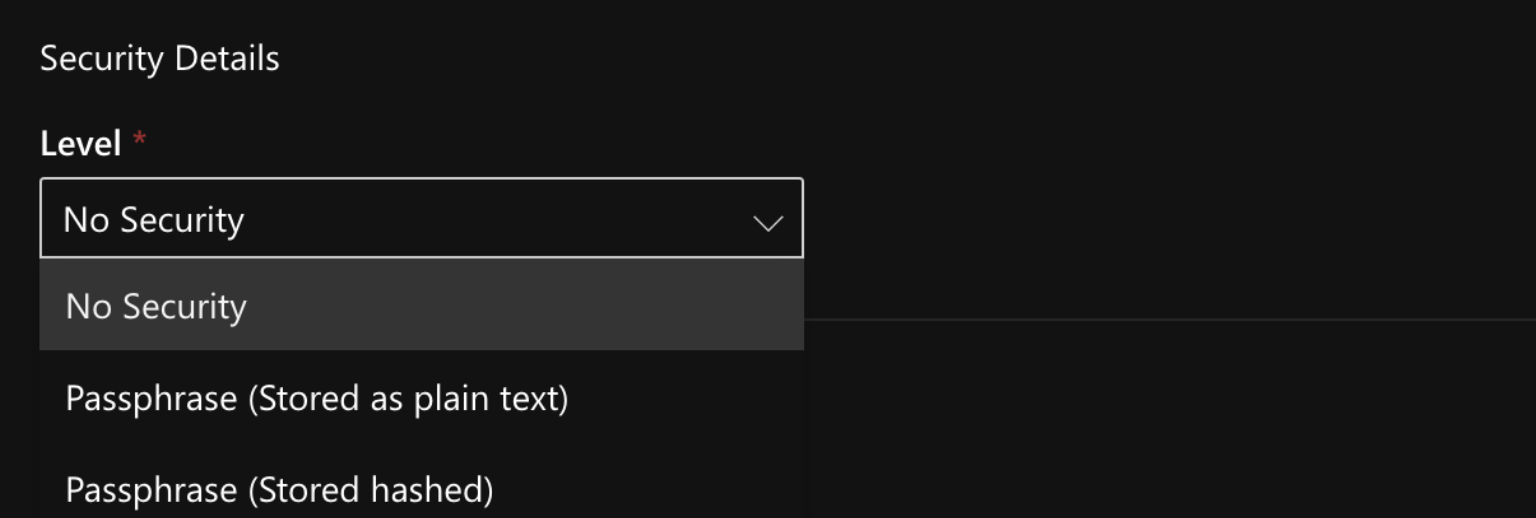
Select one of the following levels of endpoint security.
The default security option can be configured at securityOptions.default in the values.yaml file (charts/mlops/values.yaml). By default, this is set to Passphrase (stored as plain text).
-
No security - To skip configuration of endpoint security, select this option.
-
Passphrase (Stored as plain text) - The passphrase is stored in plain text in the database. If this option is selected, the passphrase is visible in the UI after the model is deployed.
-
Passphrase (Stored hashed) - The passphrase is stored as a hashed value in the database. If this option is selected, the passphrase is not visible in the UI after the model is deployed.
- To display this option in the Wave app UI (on the Create Deployment panel dropdown) add
PASSPHRASE_HASH_TYPE_PBKDF2undersecurityOptions.activatedin thevalues.yamlfile (charts/mlops/values.yaml) . Note that havingPASSPHRASE_HASH_TYPE_BCRYPTis neither sufficient nor required.
securityOptions:
activated:
    - .......
    - "PASSPHRASE_HASH_TYPE_PBKDF2"
- ....... - To display this option in the Wave app UI (on the Create Deployment panel dropdown) add
-
Token Authentication - Supports multiple different OIDC token issuers. Note that this option requires the following additional configuration when deploying the MLOps:
-
To display this option in the Wave app UI (specifically, the Security Details drop-down), update
securityOptions.activatedin thevalues.yamlfile (charts/mlops/values.yaml) to include the valueAUTHORIZATION_PROTOCOL_OIDCin the list:securityOptions:
activated:
- .......
- "AUTHORIZATION_PROTOCOL_OIDC"
- ....... -
Set
deployer.config.securityProxy.oidcIssuers(OIDC issuer-related values) in thevalues.yamlfile. These include the OIDC Issuer URL and TLS credentials.
-
Kubernetes options
Each of the following Kubernetes (K8s) options (resource requests, limits, node affinity, and toleration) are applied on a per-replica basis. For GPU-enabled model deployments, you can set the appropriate Kubernetes (K8s) requests and limits by clicking the GPU Deployment toggle. Note that you must still select an appropriate affinity and toleration for GPU deployments.
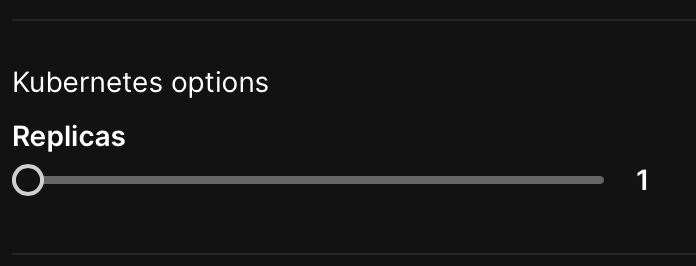
- Replicas (optional): Specify the number of static replicas of the model you want to create. You can configure the maximum number of replicas that can be specified here by updating
maxDeploymentReplicasin thevalues.yamlfile (charts/mlops/values.yaml). By default, themaxDeploymentReplicasvalue is set to 5. Specifying multiple replicas is useful for load balancing and achieving high availability for scoring tasks. For H2O MLOps version 0.65 and later, set replicas to zero to scale down the deployment. In versions prior to 0.65, set the number of replicas to -1 to achieve the same effect.
Each of the following Kubernetes options (resource requests, limits, node affinity, and toleration) are applied on a per-replica basis.
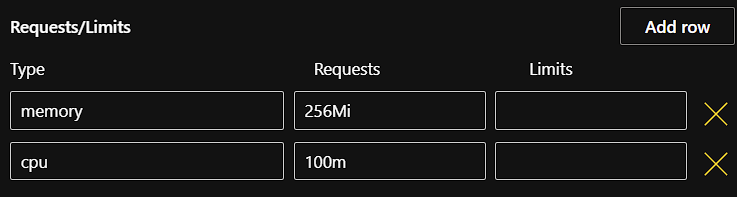
- Resource requests and limits (optional): You can control the amount of resources an MLOps deployment uses with resource requests and limits. Note that by default, the Kubernetes resource requests and limits fields are automatically populated based on the selected runtime and artifact type.
Resource requests determine the amount of resources the deployment asks Kubernetes to provide it. For example, if a replica requests 256Mi of memory, Kubernetes schedules the deployment on any node that has enough memory available to satisfy the stated requirement.
Resource limits determine the maximum amount of resources that are available to a deployment. If a deployment exceeds a limit on the amount of memory allocated to it, the deployment is restarted. Note that the deployment does not restart if it exceeds a CPU limit.
Additional fields for any existing custom resources that have been set up by an admin in your Kubernetes cluster can be added by clicking the Add row button.
- The resource requests and limits fields must be defined using the quantity suffixes used in Kubernetes. The default values for Memory and CPU requests are 256Mi and 100m respectively. For more information, see Resource units in Kubernetes.
- By default, resources are not limited.
- When specifying custom resources, if Kubernetes is not able to satisfy the stated custom value(s), then the pod cannot be scheduled.
- You can use the H2O MLOps Python client to update the Kubernetes resources and replicas of a deployment after creating it. For more information, see Scaling deployment Kubernetes resources post-deployment.
- For more information on resource requests and limits in Kubernetes, see Resource Management for Pods and Containers.
-
Node affinity (optional): Specify a node affinity for the deployment. Note that admins have the ability to customize how node affinity is set up. For more information on node affinity, see Configuring node affinity and toleration and the official Kubernetes documentation on node affinity.
-
Toleration (optional): Specify a toleration for the scorer (pod). Note that admins have the ability to customize how toleration is set up. For more information on toleration, see Configure node affinity and toleration and the official Kubernetes documentation on taints and tolerations.

For more information about Pod Disruption Budget (PDB), see Pod Disruption Budget (PDB).
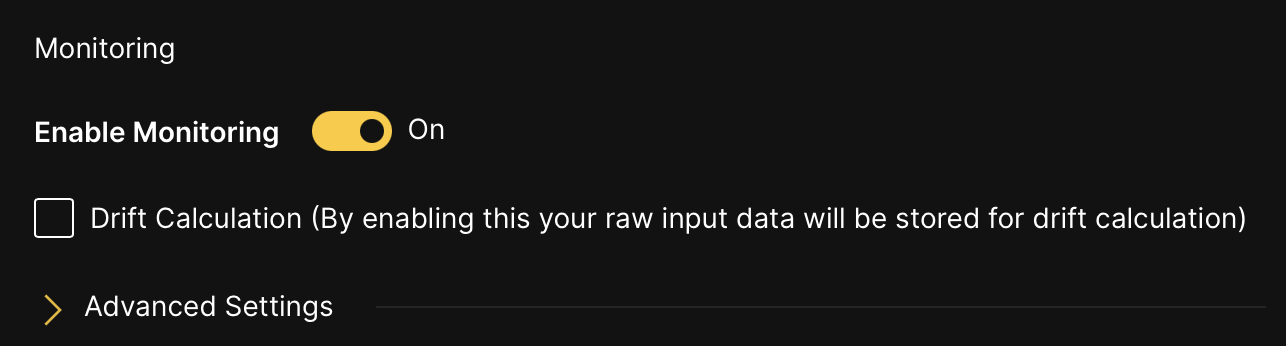
Enable or turn off model monitoring
To enable or turn off the model monitoring option, click the Enable Monitoring toggle. By default, the model monitoring option is turned off. If model monitoring is enabled, scoring data is saved. Additionally, if you enable the Drift Calculation option, your raw input data is stored for drift calculation.
Driverless AI Deployment Wizard
The following steps describe how you can create H2O MLOps deployments directly from the completed experiment page in H2O Driverless AI.
To use this deployment option, you must specify h2o_mlops_ui_url in the config.toml file.
-
On the completed experiment page, click Deploy.
-
Click the H2O MLOps button. This action results in one of the following outcomes:
-
The experiment is assigned to a single Project: You are redirected to the Project detail page in the H2O MLOps app.
-
The experiment is assigned to multiple Projects: Select a project to go to in the H2O MLOps app. Alternatively, create a new Project to assign the experiment to. If you choose to create a new Project, you are prompted to enter a name and description for the Project. Once the new Project has been created and the experiment has been linked to it, you can click the Go to MLOps page button to navigate to the Project detail page in the H2O MLOps app.
-
The experiment isn't assigned to any Project: Select a Project to link the experiment to. Alternatively, create a new Project and link the experiment to it.
-
Deploying NLP models
H2O MLOps supports the deployment of Driverless AI and MLflow natural language processing (NLP) models.
Driverless AI
To deploy a Driverless AI NLP model, refer to the following steps:
-
In Driverless AI, pick a text dataset such as the Amazon Fine Food Reviews dataset or Airline Twitter Sentiment dataset.
-
Train a DAI model following the NLP-specific steps described in the documentation on NLP experiments in DAI.
-
Link the NLP experiment to an MLOps project. For more information, see the Driverless AI documentation on linking experiments.
-
Deploy as either a MOJO or a Python scoring pipeline. Note that using PyTorch or TensorFlow may make the MOJO unsupported.
-
The scorer is available at the endpoint URL provided by MLOps. You can use
curlto test the endpoint. To see how this might look, refer to the following example request:ububtu@ubuntu:/home/ubuntu$ curl -X POST -H "Content-Type: application/json" -d @- DEPLOYMENT_ENDPOINT_URL << EOF
> {
> "fields": [
> "Description",
> "Summary"
> ],
> "rows": [
> [
> "text",
> "text"
> ]
> ]
> }
> EOF
{"fields":["PositiveReview.0","PositiveReview.1"],"id":"1c2ec2f0-74c7-11ec-ad8e-3ee53b9e28aa","score":[["0.24813014","0.75186986"]]}nick@NPng-P5550:~/h2oworkspace/mlops-byom-images/python-scorer$
MLflow
To deploy an MLflow NLP model, refer to the following steps:
-
Train your model.
-
Wrap the model in an MLflow model. For more information, see the example on uploading an MLflow custom Python model.
-
Upload and deploy the model using MLOps. For more information, see Adding experiments and Deploying a model.
MLOps Processing Deployments
The following example demonstrates how to make an H2O MLOps deployment that implements custom logic to pre/post/chain process any number of other MLOps deployments.
import mlflow
import pandas
import requests
import typing
Processing Model Creation
Helper methods.
def convert_scores_to_pandas(
    scores_json: typing.Dict[str, typing.Any],
) -> pandas.DataFrame:
    return pandas.DataFrame(
        data=scores_json["score"], columns=scores_json["fields"]
    ).astype(float, errors="ignore")

def score_to_json(
    pdf: pandas.DataFrame,
    score_url: str,
    score_passphrase: typing.Optional[str],
    include_fields_in_output: typing.Optional[typing.List[str]]
) -> typing.Dict[str, typing.Any]:
    payload = dict(
        fields=list(pdf.columns),
        rows=pdf.fillna("").astype(str).to_dict("split")["data"],
    )
    if include_fields_in_output:
        payload["includeFieldsInOutput"] = include_fields_in_output
    result = requests.post(
        url=score_url, json=payload, headers={"Authorization": f"Bearer {score_passphrase}"}
    )
    result.raise_for_status()
    return result.json()

def score_to_pandas(
    pdf: pandas.DataFrame,
    score_url: str,
    score_passphrase: typing.Optional[str],
    include_fields_in_output: typing.Optional[typing.List[str]]
) -> typing.Dict[str, typing.Any]:
    scores_json = score_to_json(
        pdf, score_url, score_passphrase, include_fields_in_output
    )
    return convert_scores_to_pandas(scores_json)
MLflow model definition example. Note that you can implement any pre, post, chaining, etc. logic, utilizing the score helper methods to get results from other models.
class CCProcessor(mlflow.pyfunc.PythonModel):
    """Converts output to binary result based on threshold."""

    def predict(self, context, model_input) -> pandas.DataFrame:
        target_column = "default payment next month"
        id_column = "ID"
        threshold = 0.3

        scores_dataframe = score_to_pandas(
            model_input,
            score_url="https://model.internal.dedicated.h2o.ai/3ae169a7-21a6-419b-bbf2-bce0ef3463bc/model/score",
            score_passphrase="j3UyU2PLB6k3tnpYW1CfusDXPgm72mu2kaR2elxL9jA",
            include_fields_in_output=[id_column]
        )

        processed_dataframe = pandas.DataFrame()
        processed_dataframe[id_column] = scores_dataframe[id_column].astype(int)
        processed_dataframe[
            f"{target_column} | threshold={threshold}"
        ] = scores_dataframe[f"{target_column}.1"] > threshold
        return processed_dataframe
Test predict method.
x = pandas.read_csv("/Users/jgranados/datasets/creditcard.csv")[:10]
y = CCProcessor().predict(context=None, model_input=x)
y
| ID | default payment next month | threshold=0.3 | |
|---|---|---|
| 0 | 1 | True |
| 1 | 2 | True |
| 2 | 3 | False |
| 3 | 4 | False |
| 4 | 5 | False |
| 5 | 6 | False |
| 6 | 7 | False |
| 7 | 8 | False |
| 8 | 9 | True |
| 9 | 10 | False |
Define schema (required) using dataframes from testing.
model_signature = mlflow.models.signature.infer_signature(x,y)
model_signature
    inputs:
      ['ID': long, 'LIMIT_BAL': long, 'SEX': long, 'EDUCATION': long, 'MARRIAGE': long, 'AGE': long, 'PAY_0': long, 'PAY_2': long, 'PAY_3': long, 'PAY_4': long, 'PAY_5': long, 'PAY_6': long, 'BILL_AMT1': long, 'BILL_AMT2': long, 'BILL_AMT3': long, 'BILL_AMT4': long, 'BILL_AMT5': long, 'BILL_AMT6': long, 'PAY_AMT1': long, 'PAY_AMT2': long, 'PAY_AMT3': long, 'PAY_AMT4': long, 'PAY_AMT5': long, 'PAY_AMT6': long, 'default payment next month': long]
    outputs:
      ['ID': long, 'default payment next month | threshold=0.3': boolean]
Save processor model.
model_path = "processor"

mlflow.pyfunc.save_model(
    path=model_path,
    python_model=CCProcessor(),
    signature=model_signature,
)
Test MLFlow can load and score the saved model.
model = mlflow.pyfunc.load_model(model_path)
print(model.metadata.get_input_schema())
print(model.metadata.get_output_schema())
model.predict(x)
    ['ID': long, 'LIMIT_BAL': long, 'SEX': long, 'EDUCATION': long, 'MARRIAGE': long, 'AGE': long, 'PAY_0': long, 'PAY_2': long, 'PAY_3': long, 'PAY_4': long, 'PAY_5': long, 'PAY_6': long, 'BILL_AMT1': long, 'BILL_AMT2': long, 'BILL_AMT3': long, 'BILL_AMT4': long, 'BILL_AMT5': long, 'BILL_AMT6': long, 'PAY_AMT1': long, 'PAY_AMT2': long, 'PAY_AMT3': long, 'PAY_AMT4': long, 'PAY_AMT5': long, 'PAY_AMT6': long, 'default payment next month': long]
    ['ID': long, 'default payment next month | threshold=0.3': boolean]
| ID | default payment next month | threshold=0.3 | |
|---|---|---|
| 0 | 1 | True |
| 1 | 2 | True |
| 2 | 3 | False |
| 3 | 4 | False |
| 4 | 5 | False |
| 5 | 6 | False |
| 6 | 7 | False |
| 7 | 8 | False |
| 8 | 9 | True |
| 9 | 10 | False |
Make archive to upload and deploy using MLOps UI or Python client.
import shutil

zip_path = shutil.make_archive(
    "processor_mlflow", "zip", "processor"
)
Scoring
Assumes archive has been deployed on MLOps.
Deployment to be processed
Example of unprocessed output.
result = requests.post(
    url="https://model.internal.dedicated.h2o.ai/3ae169a7-21a6-419b-bbf2-bce0ef3463bc/model/score",
    json=dict(
        fields=list(x.columns),
        rows=x.fillna("").astype(str).to_dict("split")["data"],
    ),
    headers={"Authorization": f"Bearer j3UyU2PLB6k3tnpYW1CfusDXPgm72mu2kaR2elxL9jA"}
)
result.raise_for_status()
result.json()
    {'fields': ['default payment next month.0', 'default payment next month.1'],
     'id': '29644d94-69ce-11ed-8dd0-42a220533d6d',
     'score': [['0.5026670558588076', '0.4973329441411924'],
      ['0.5757092185564415', '0.4242907814435585'],
      ['0.7779584616197291', '0.22204153838027083'],
      ['0.7571721069431696', '0.24282789305683036'],
      ['0.8100351192319214', '0.1899648807680786'],
      ['0.7414997325267836', '0.25850026747321647'],
      ['0.8639312267025963', '0.13606877329740377'],
      ['0.7468108781657142', '0.25318912183428577'],
      ['0.6648249807372442', '0.3351750192627559'],
      ['0.7785471596551806', '0.22145284034481938']]}
Processing deployment
Example of processed output.
requests.get(
    "https://model.internal.dedicated.h2o.ai/c51d99b8-1563-440f-9868-7b23353bb402/model/schema"
).json()["schema"]["outputFields"]
    [{'name': 'ID', 'dataType': 'Int64'},
     {'name': 'default payment next month | threshold=0.3', 'dataType': 'Bool'}]
result = requests.post(
    url="https://model.internal.dedicated.h2o.ai/c51d99b8-1563-440f-9868-7b23353bb402/model/score",
    json=dict(
        fields=list(x.columns),
        rows=x.fillna("").astype(str).to_dict("split")["data"],
    )
)
result.raise_for_status()
result.json()
    {'fields': ['ID', 'default payment next month | threshold=0.3'],
     'id': '3ee67d43-5219-48dc-a02f-cea2b4e5c49d',
     'score': [['1', 'True'],
      ['2', 'True'],
      ['3', 'False'],
      ['4', 'False'],
      ['5', 'False'],
      ['6', 'False'],
      ['7', 'False'],
      ['8', 'False'],
      ['9', 'True'],
      ['10', 'False']]}
- Submit and view feedback for this page
- Send feedback about H2O MLOps to cloud-feedback@h2o.ai