Batch scoring
Batch scoring is the process of making predictions on a large set of data all at once, instead of one-by-one in real time. This feature supports usage through both the UI and H2O MLOps Python client.
Batch scoring jobs in H2O MLOps create a dedicated Kubernetes runtime that reads data from an input source and stores the predicted results in an output location.
To run a batch scoring job, you must define the source of the input data and the location (sink) for the scored output.
H2O MLOps supports the following source and sink types:
- Azure Blob Storage
- Amazon S3
- Google Cloud Storage (GCS)
- MinIO
- JDBC
- Feature Store
- Supported input formats: JDBC tables, CSV files with and without headers, and JSON files.
- Supported output formats: JDBC tables, CSV files without headers, and JSON files.
- Feature Store: Does not require a MIME type or location. Data format is managed by the Feature Store. Feature Store must be configured in your H2O MLOps deployment before it appears as a source or sink option.
Batch scoring with the UI
This section describes how to start a batch scoring job using the H2O MLOps UI.
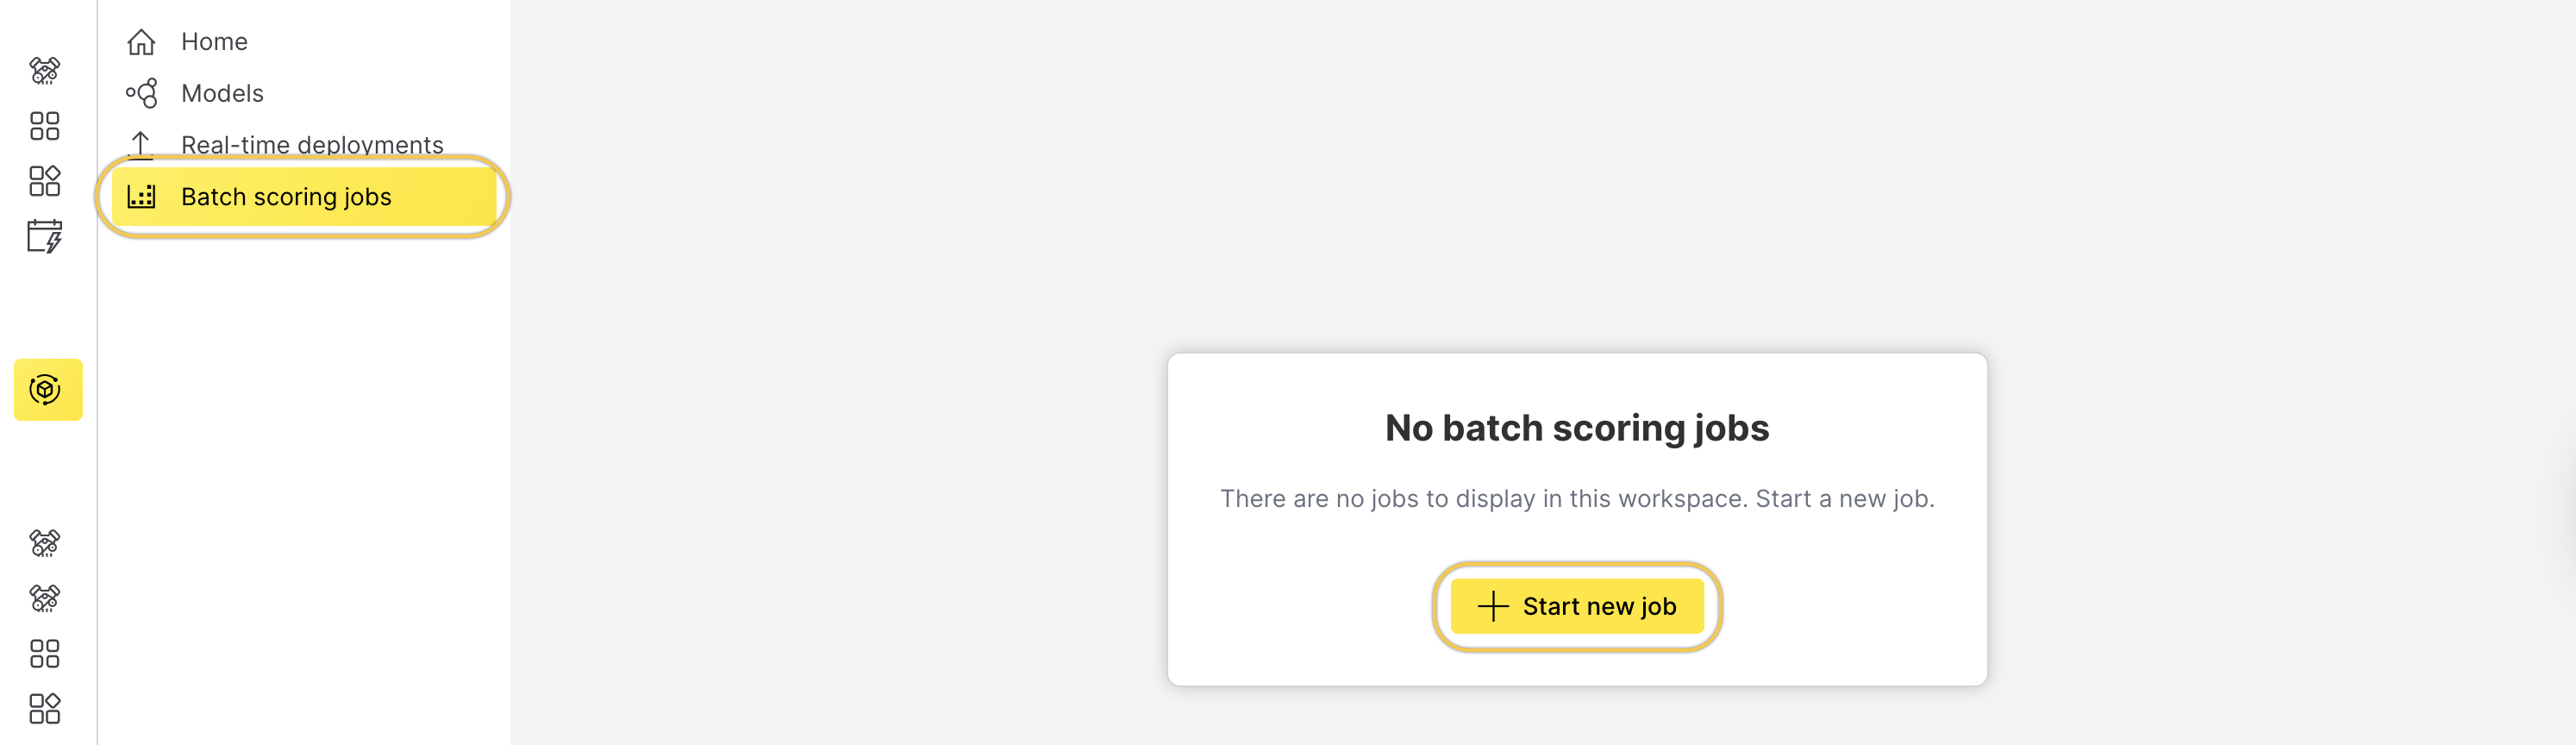
To batch score a model using the UI, follow these steps:
-
On the left navigation bar, click Batch scoring jobs.
-
Click Start new job.
-
On the Start new job page, enter a name for the batch scoring job in the Job name field.
-
Select the model from the Model drop-down menu.
-
Choose the artifact type and runtime from the Artifact type and runtime drop-down menu.
-
Under Kubernetes options, configure Kubernetes options, such as the number of replicas and resource requests and limits.
-
Under Advanced settings, configure the batch size.
-
Specify the source and sink configuration.
Select the appropriate spec type (for example, S3 Spec) from the Source spec drop-down menu and fill out the configuration fields.
Source spec
noteThe MinIO specification uses the same configuration fields as the S3 specification. To select MinIO as the source spec type, choose S3 spec from the source spec drop-down menu.
- S3 spec
- Azure Blob Storage spec
- GCS spec
- JDBC spec
- Feature Store spec
For S3 Spec, provide the following details:
- accessKeyID (required): The unique identifier for AWS authentication. Not required for public S3 buckets.
- secretAccessKey (required): The private password for AWS authentication. Not required for public S3 buckets.
- sessionToken: The temporary security token for time-limited access to AWS resources.
- pathStyle: Select this option to enable path-style URL construction for the S3 bucket.
- region (required): The AWS geographical region where resources or services will be accessed.
- endpoint: The custom URL to override default AWS service endpoint for specialized configurations.
- partSize: The size of each partition in bytes for reading data.
For Azure Blob Storage spec, provide the following details:
- accountKey: The Azure storage account key. or
- sasToken: The shared access signature (SAS) token for accessing the storage account.
note
- Either
accountKeyorsasTokenis required to authenticate the source. You don't need to provide both. - If you use a
sasToken, make sure it includesread,write, andlistpermissions.
- Either
- containerName (required): The name of the blob storage container.
- partitionSize: The size of each partition in bytes for reading data.
For GCS spec, provide the following details:
- credentials (required): The service account JSON credentials.
- projectID (required): The Google Cloud Project ID.
- endpoint: The custom endpoint URL.
- partSize: The size of each partition in bytes for reading data.
For JDBC spec, provide the following details:
- secretParams: The set of key-value pairs that contain sensitive parameters (for example, passwords) used to dynamically construct the JDBC connection string. Each key and value must be a string. For example, you can use
postgres://user:{{pass}}, wherepassis defined insecretParams. - driver (required): The JDBC driver to use. Supported values include
mysql,postgres,mssql, andoracle. - table (required): The table to read from. You can also use any valid SQL expression for a
FROMclause, such as a subquery enclosed in parentheses. - numPartitions: The number of partitions to divide the table into for parallel reads. Required if partitioning is enabled. This setting determines the level of read parallelism.
- lowerBound: The lower boundary value used to compute partition strides. It is not used to filter rows and must match the data type of the
partitionColumn. - upperBound: The upper boundary value used to compute partition strides. Like
lowerBound, this is only used for partitioning and must match the data type of thepartitionColumn. - partitionColumn: The column used to determine how the data is partitioned. This must be a numeric, date, or timestamp column.
H2O Feature Store manages versioned feature sets for machine learning workflows. To use a feature set as the batch scoring input, you need the feature set ID and version from your Feature Store project.
To find the feature set ID and version, open the Feature Store UI, navigate to your project, and select the feature set. The ID and version are displayed on the feature set details page.
For Feature Store spec, provide the following details:
- featureSetID (required): The UUID of the feature set to use as the input data source (for example,
550e8400-e29b-41d4-a716-446655440000). You can find this value on the feature set details page in the Feature Store UI. - featureSetVersion (required): The version of the feature set as a dotted decimal string (for example,
1.0). You can find this value on the feature set details page in the Feature Store UI.
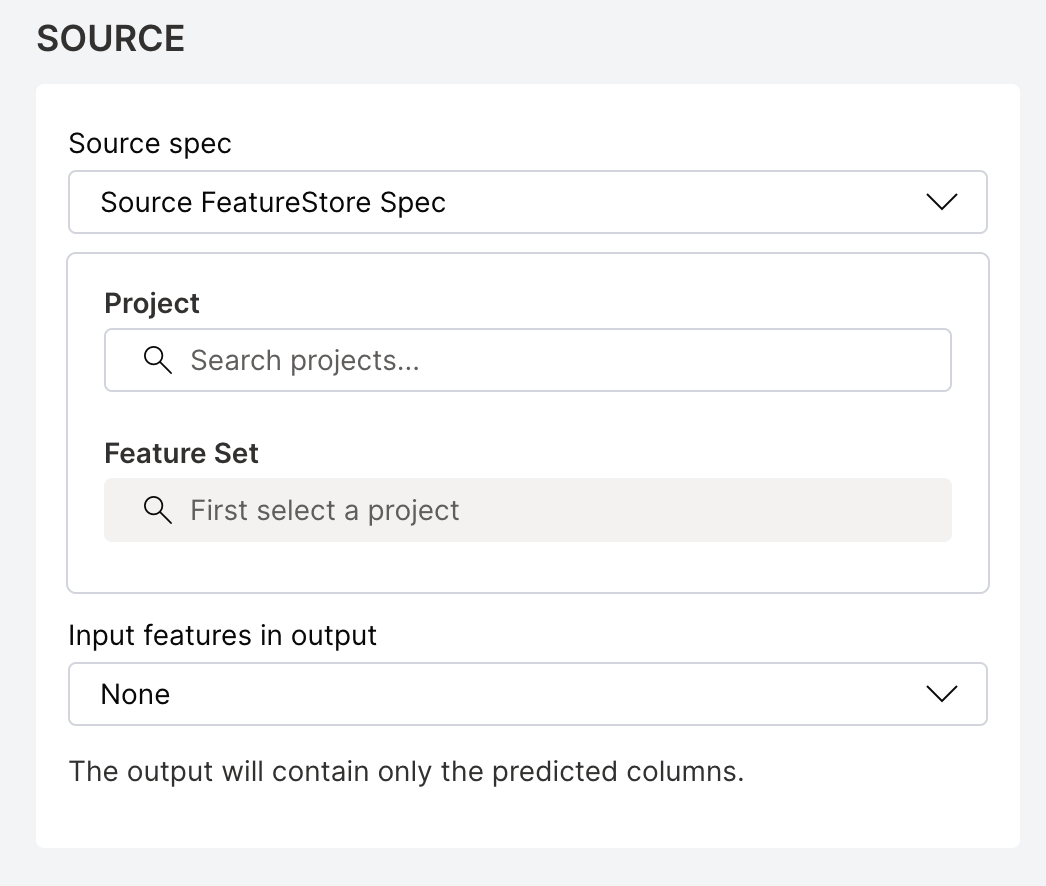 note
noteThe Feature Store source does not require a MIME type or location. When you select Feature Store as the source, you can skip the Source MIME type and Source location fields.
- Source MIME type (required, except for Feature Store): The MIME type (media type) of the input data. Select an appropriate option from the drop-down menu.
- Source location (required, except for Feature Store): The path to the input data source.
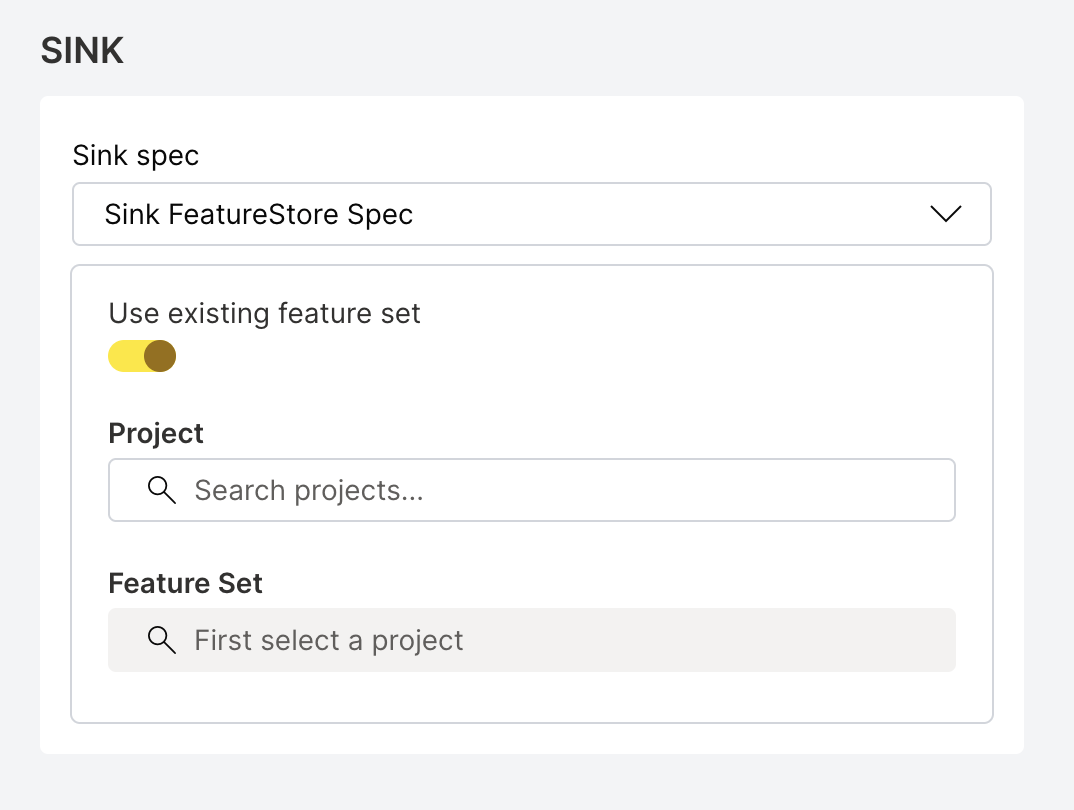
Select the appropriate spec type (for example, S3 Spec) from the Sink spec drop-down menu and fill out the configuration fields.
Sink spec
noteThe MinIO specification uses the same configuration fields as the S3 specification. To select MinIO as the sink spec type, choose S3 spec from the sink spec drop-down menu.
- S3 spec
- Azure Blob Storage spec
- GCS spec
- JDBC spec
- Feature Store spec
For S3 Spec, provide the following details:
- accessKeyID (required): The unique identifier for AWS authentication.
- secretAccessKey (required): The private password for AWS authentication.
- sessionToken: The temporary security token for time-limited access to AWS resources.
- pathStyle: Select this option to enable path-style URL construction for the S3 bucket.
- region (required): The AWS geographical region where resources or services will be accessed.
- endpoint: The custom URL to override default AWS service endpoint for specialized configurations.
- writeConcurrency: The number of concurrent write operations.
For Azure Blob Storage spec, provide the following details:
- accountKey: The Azure storage account key. or
- sasToken: The shared access signature (SAS) token for accessing the storage account.
note
- Either
accountKeyorsasTokenis required to authenticate the sink. You don't need to provide both. - If you use a
sasToken, make sure it includesread,write, andlistpermissions.
- Either
- containerName (required): The name of the blob storage container.
- writeConcurrency: The number of concurrent write operations allowed.
For GCS spec, provide the following details:
- credentials (required): The service account JSON credentials.
- projectID (required): The Google Cloud Project ID.
- endpoint: The custom endpoint URL.
- writeConcurrency: The number of concurrent write operations.
For JDBC spec, provide the following details:
- secretParams: The set of key-value pairs that contain sensitive parameters (for example, passwords) used to dynamically construct the JDBC connection string. Each key and value must be a string. For example, you can use
postgres://user:{{pass}}, wherepassis defined insecretParams. - driver (required): The JDBC driver to use. Supported values include
mysql,postgres,mssql, andoracle. - table (required): The JDBC table to write into.
H2O Feature Store manages versioned feature sets for machine learning workflows. You can write batch scoring results to an existing feature set or create a new one.
Using an existing feature set:
Provide the following details:
- featureSetID (required): The UUID of the existing feature set to write results to (for example,
550e8400-e29b-41d4-a716-446655440000). You can find this value on the feature set details page in the Feature Store UI. - featureSetVersion (required): The version of the feature set as a dotted decimal string (for example,
1.0). This field is mandatory whenfeatureSetIDis provided. You can find this value on the feature set details page in the Feature Store UI.
Creating a new feature set:
Provide the following details:
- projectID (required): The Feature Store project ID where the new feature set is created. You can find this value on the project overview page in the Feature Store UI.
- featureSetName (required): The name for the new feature set.
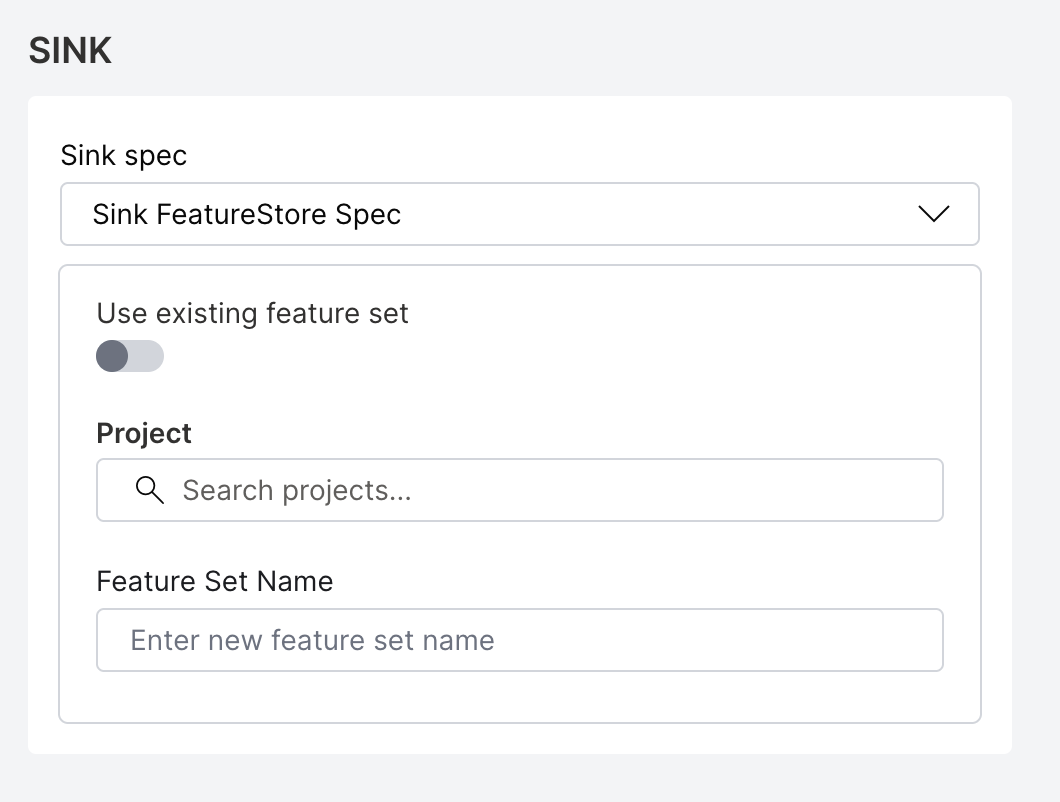 note
note- To use an existing feature set, provide
featureSetIDandfeatureSetVersion. To create a new feature set, provideprojectIDandfeatureSetNameinstead. These two options are mutually exclusive. - The Feature Store sink does not require a MIME type or location. When you select Feature Store as the sink, you can skip the Sink MIME type and Sink location fields.
- Sink MIME type (required, except for Feature Store): The MIME type (media type) of the output data. Select an appropriate option from the drop-down menu.
- Sink location (required, except for Feature Store): The destination path where the output data will be written.
-
After filling out the configuration fields, click Start job to initiate the batch scoring job.
Batch scoring with Python client
To learn how to perform batch scoring using the H2O MLOps Python client, see the Batch scoring example in the Python client examples section.
- Submit and view feedback for this page
- Send feedback about H2O MLOps to cloud-feedback@h2o.ai