Databricks hosted Azure Active Directory
The following sections describe how to configure Databricks hosted Azure Active Directory (Azure AD) to integrate with H2O MLOps as an external model repository.
Configure Azure AD in Keycloak
The following steps describe how to configure Azure AD in Keycloak.
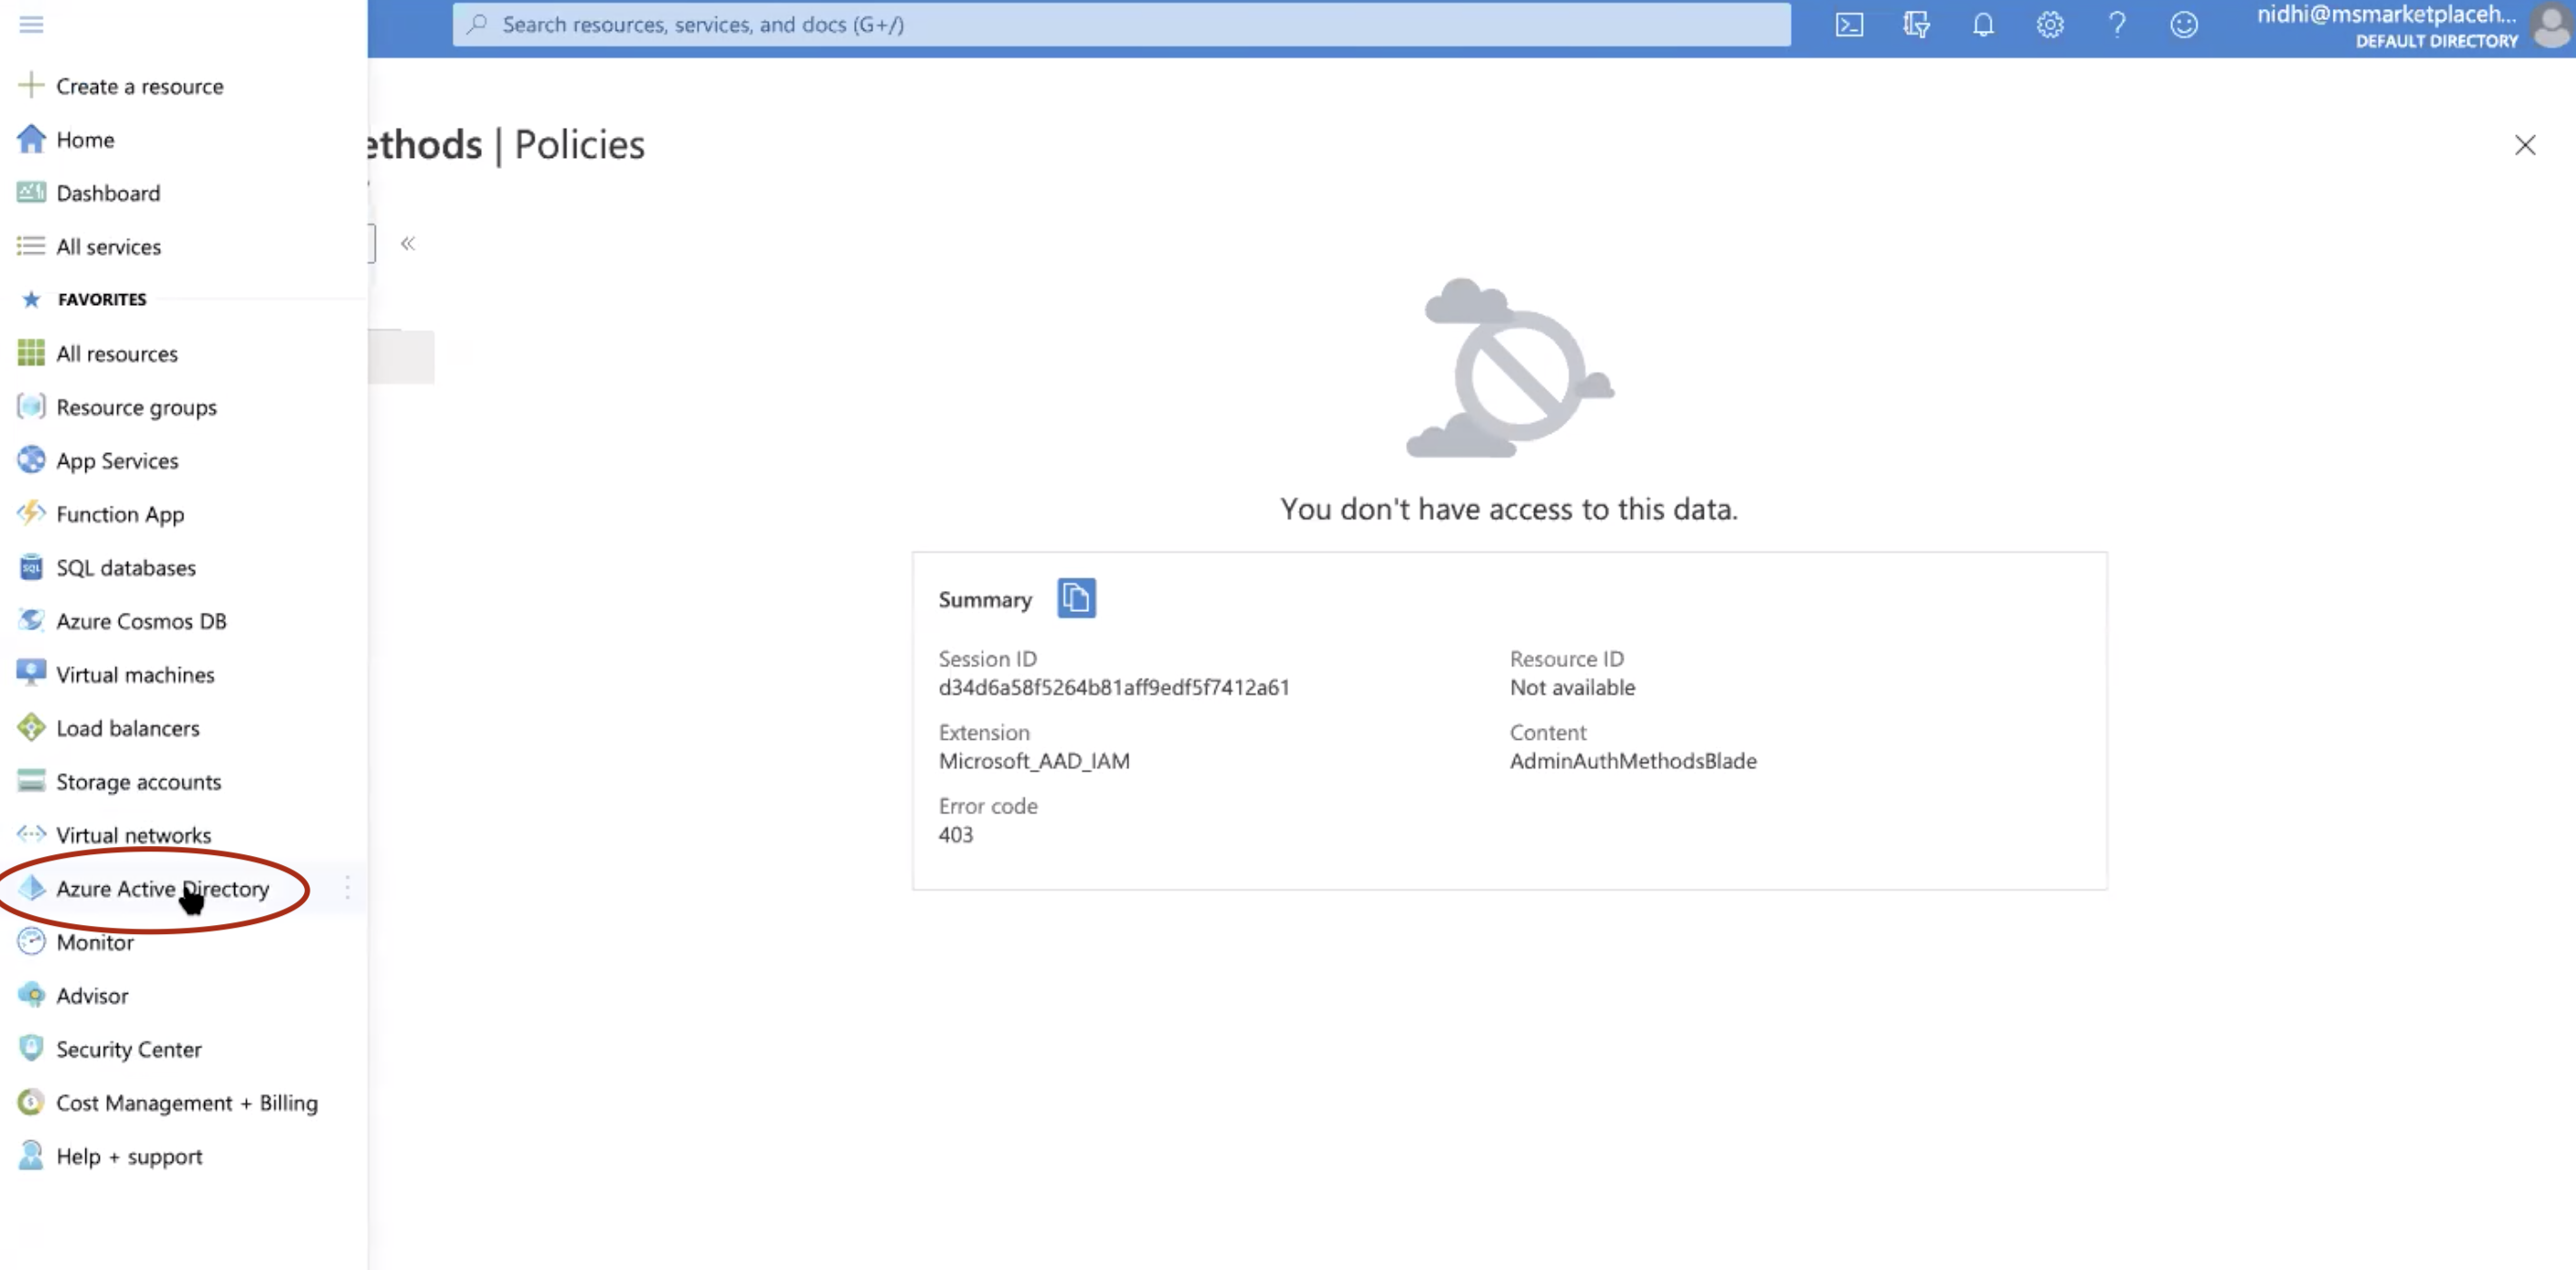
Log in to Microsoft Azure Portal. Click the ≡ Menu and select Azure Active Directory.
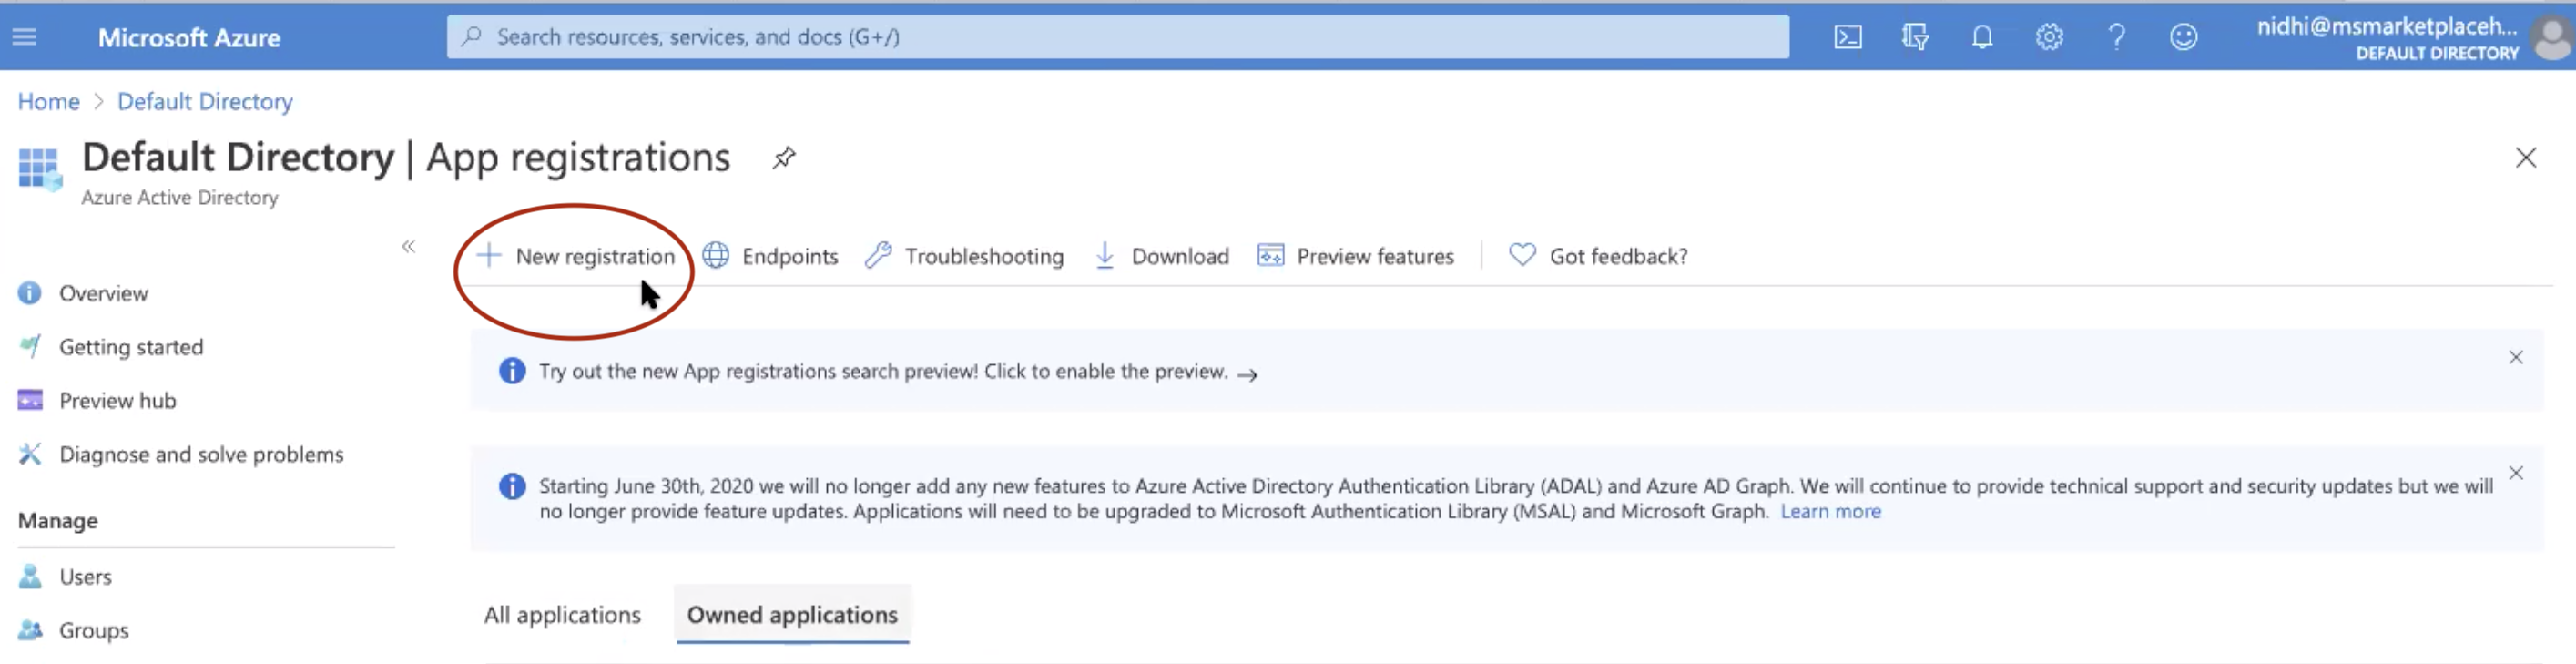
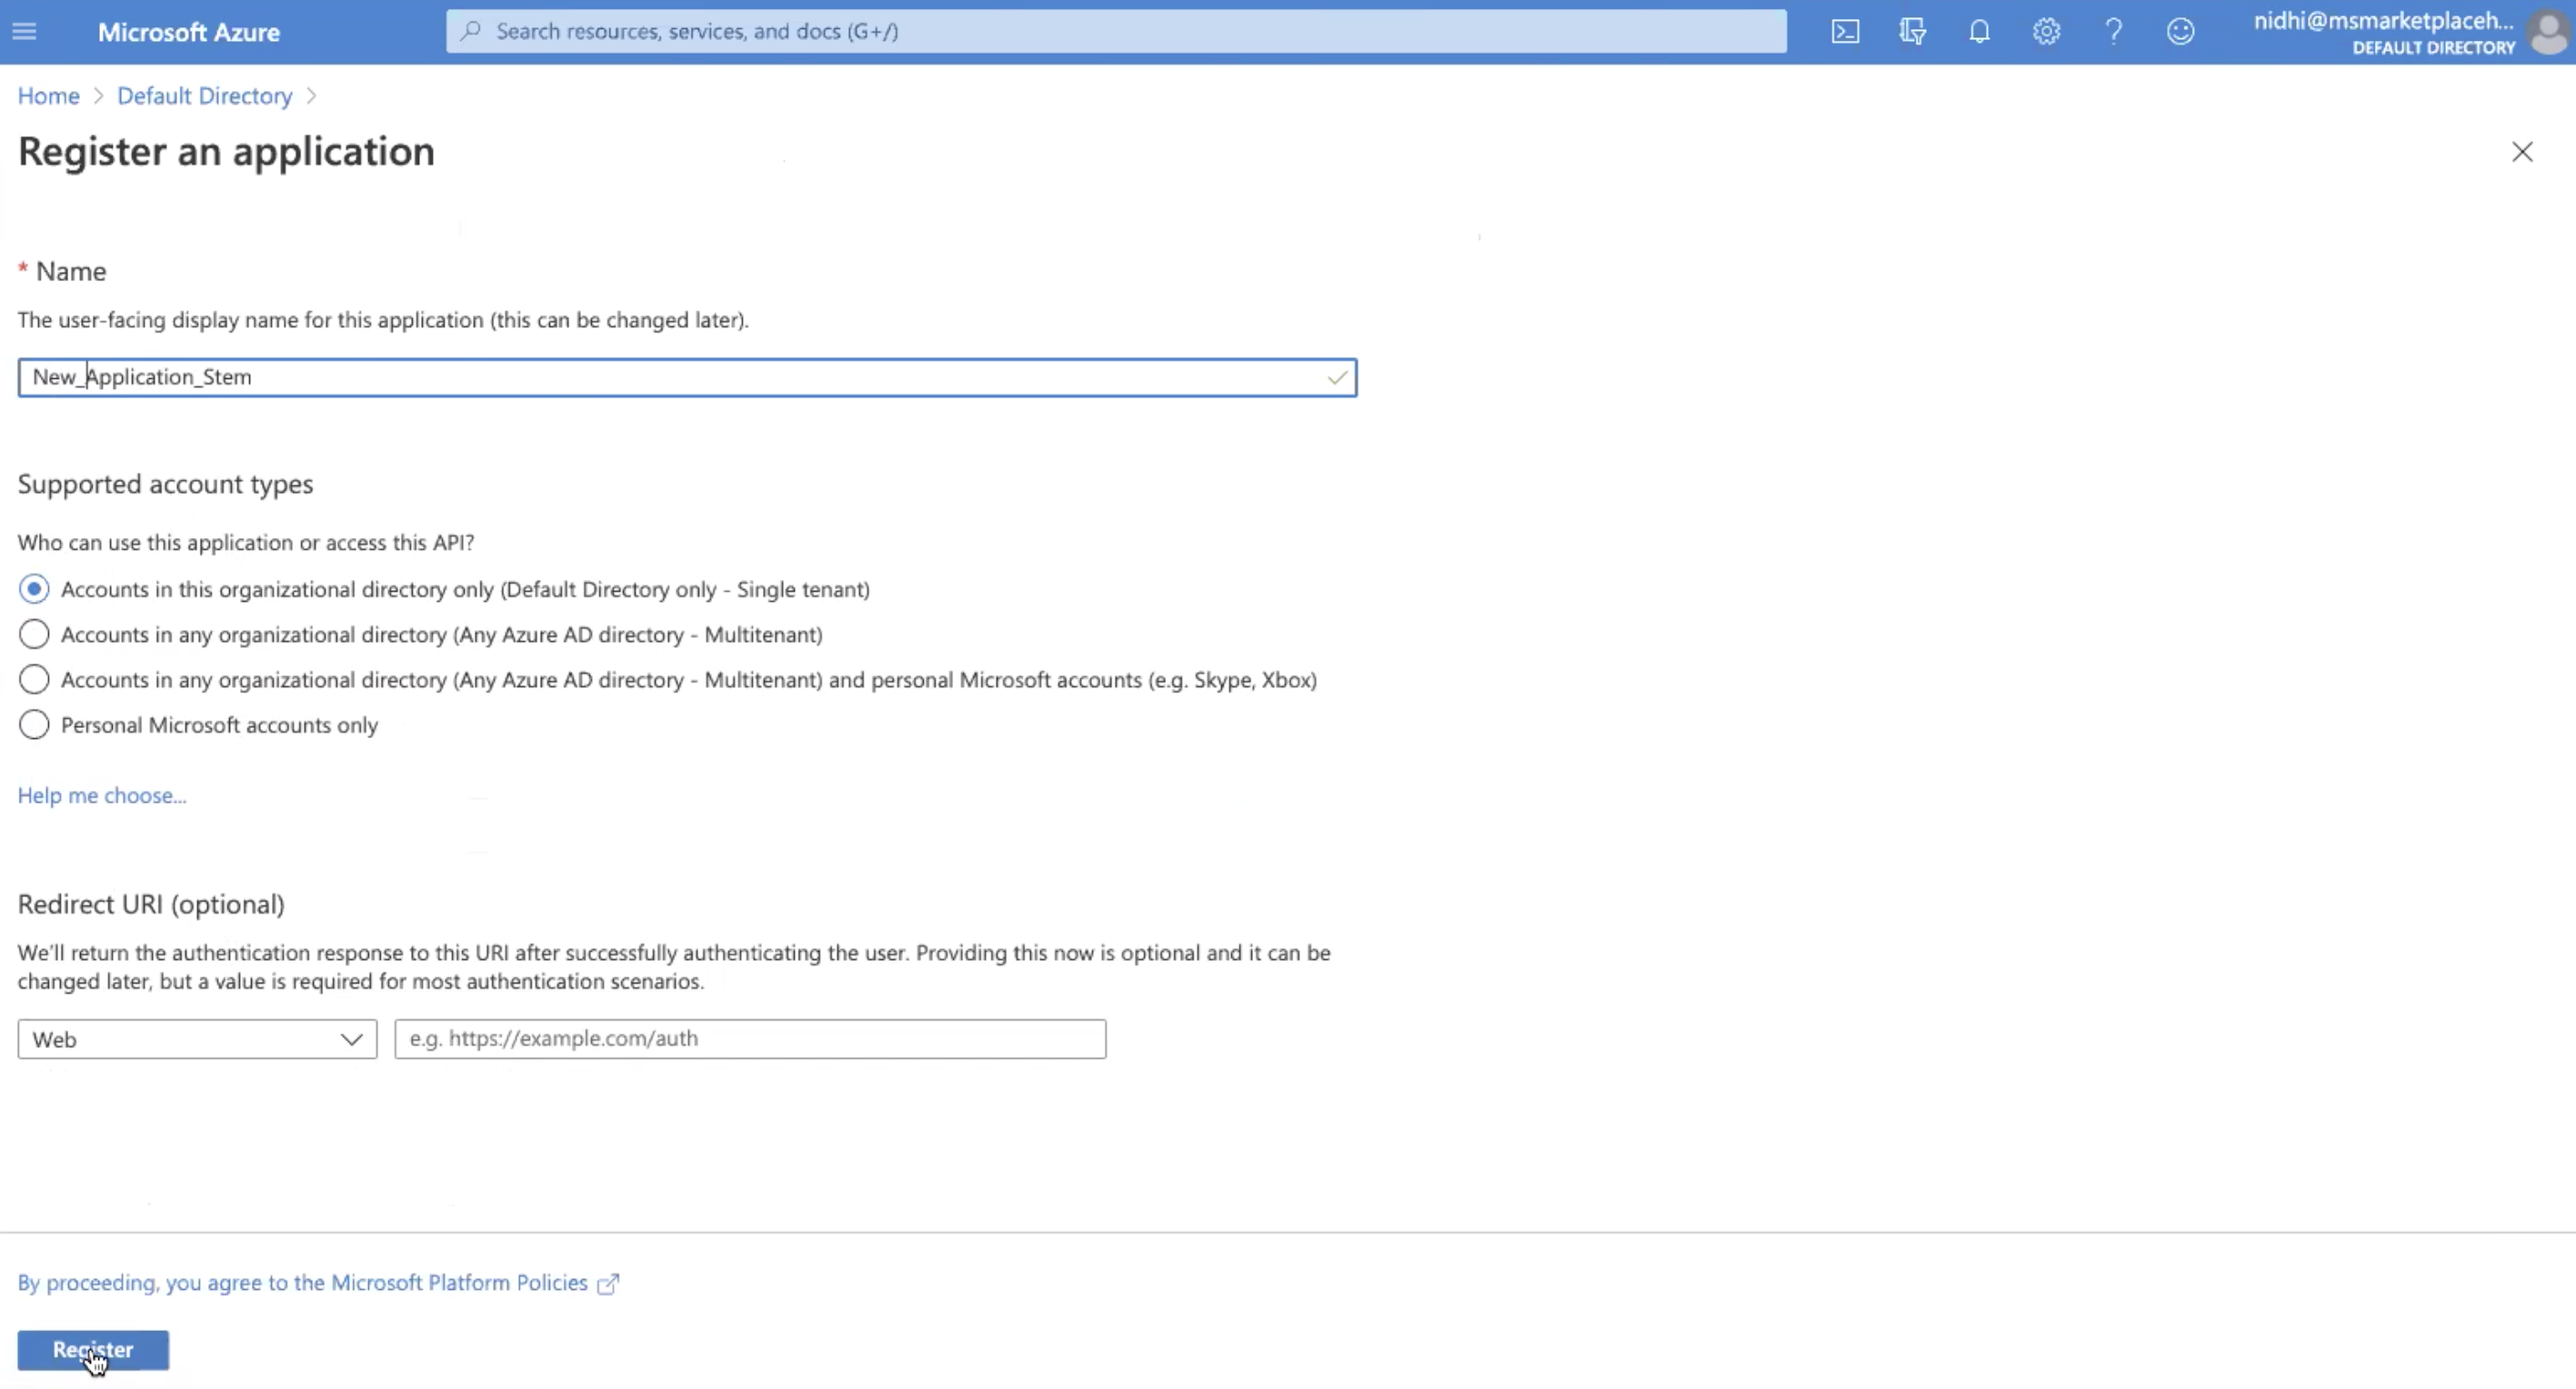
Click App registrations, and then click New registration to create a new registration for H2O MLOps as a new OpenID client. Enter a user-facing display name for the application and click the Register button.
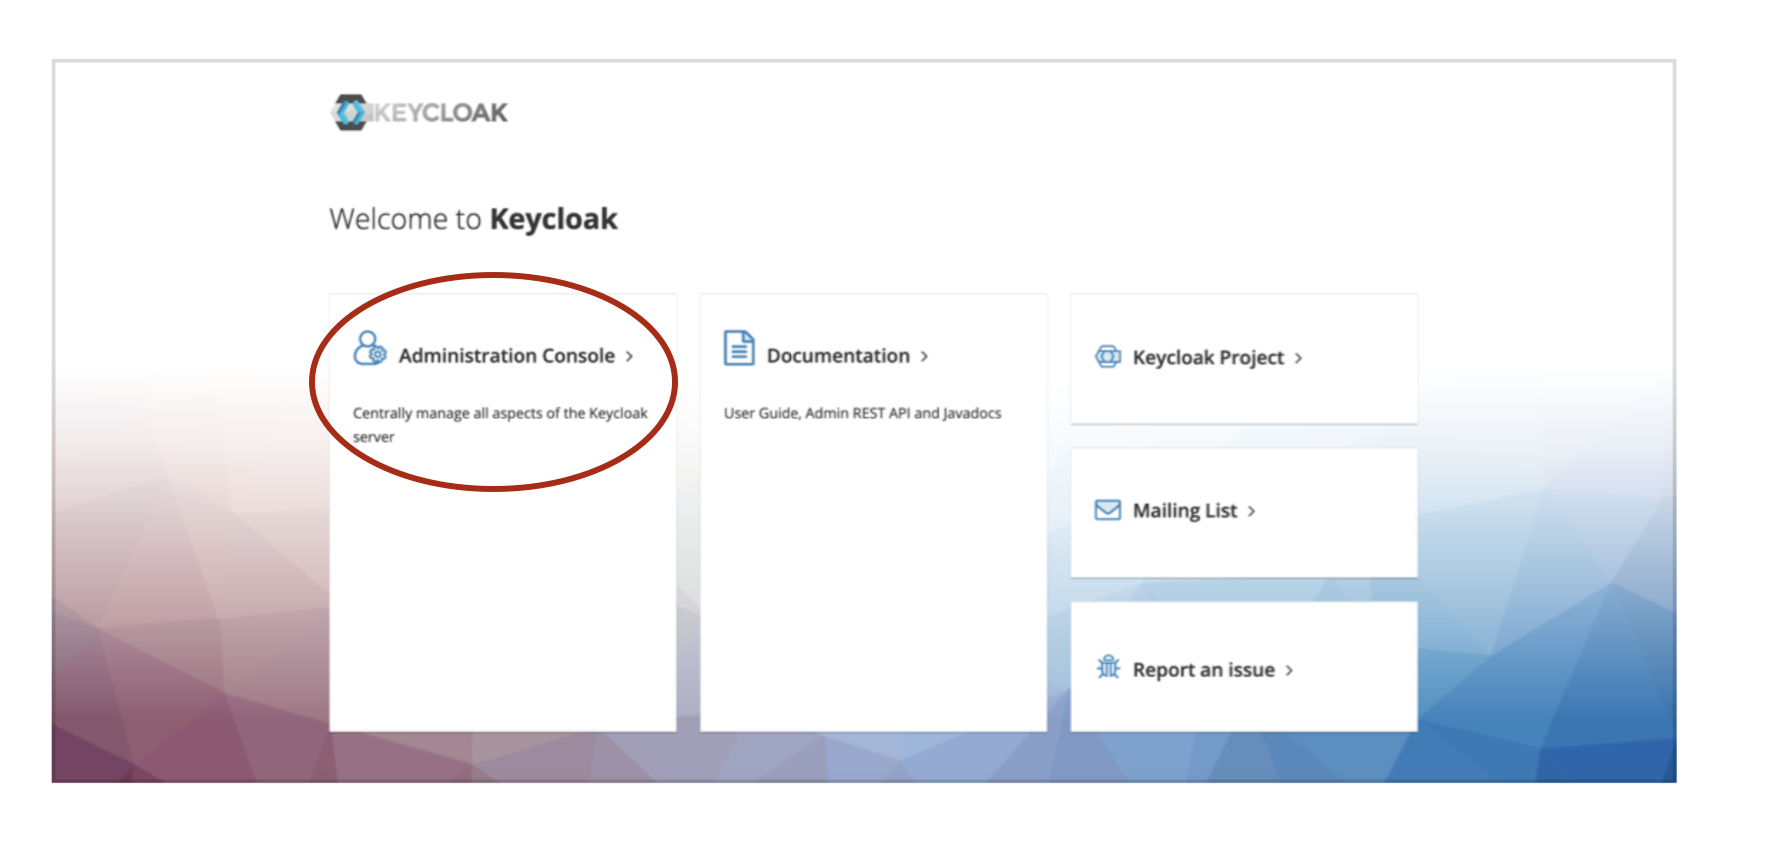
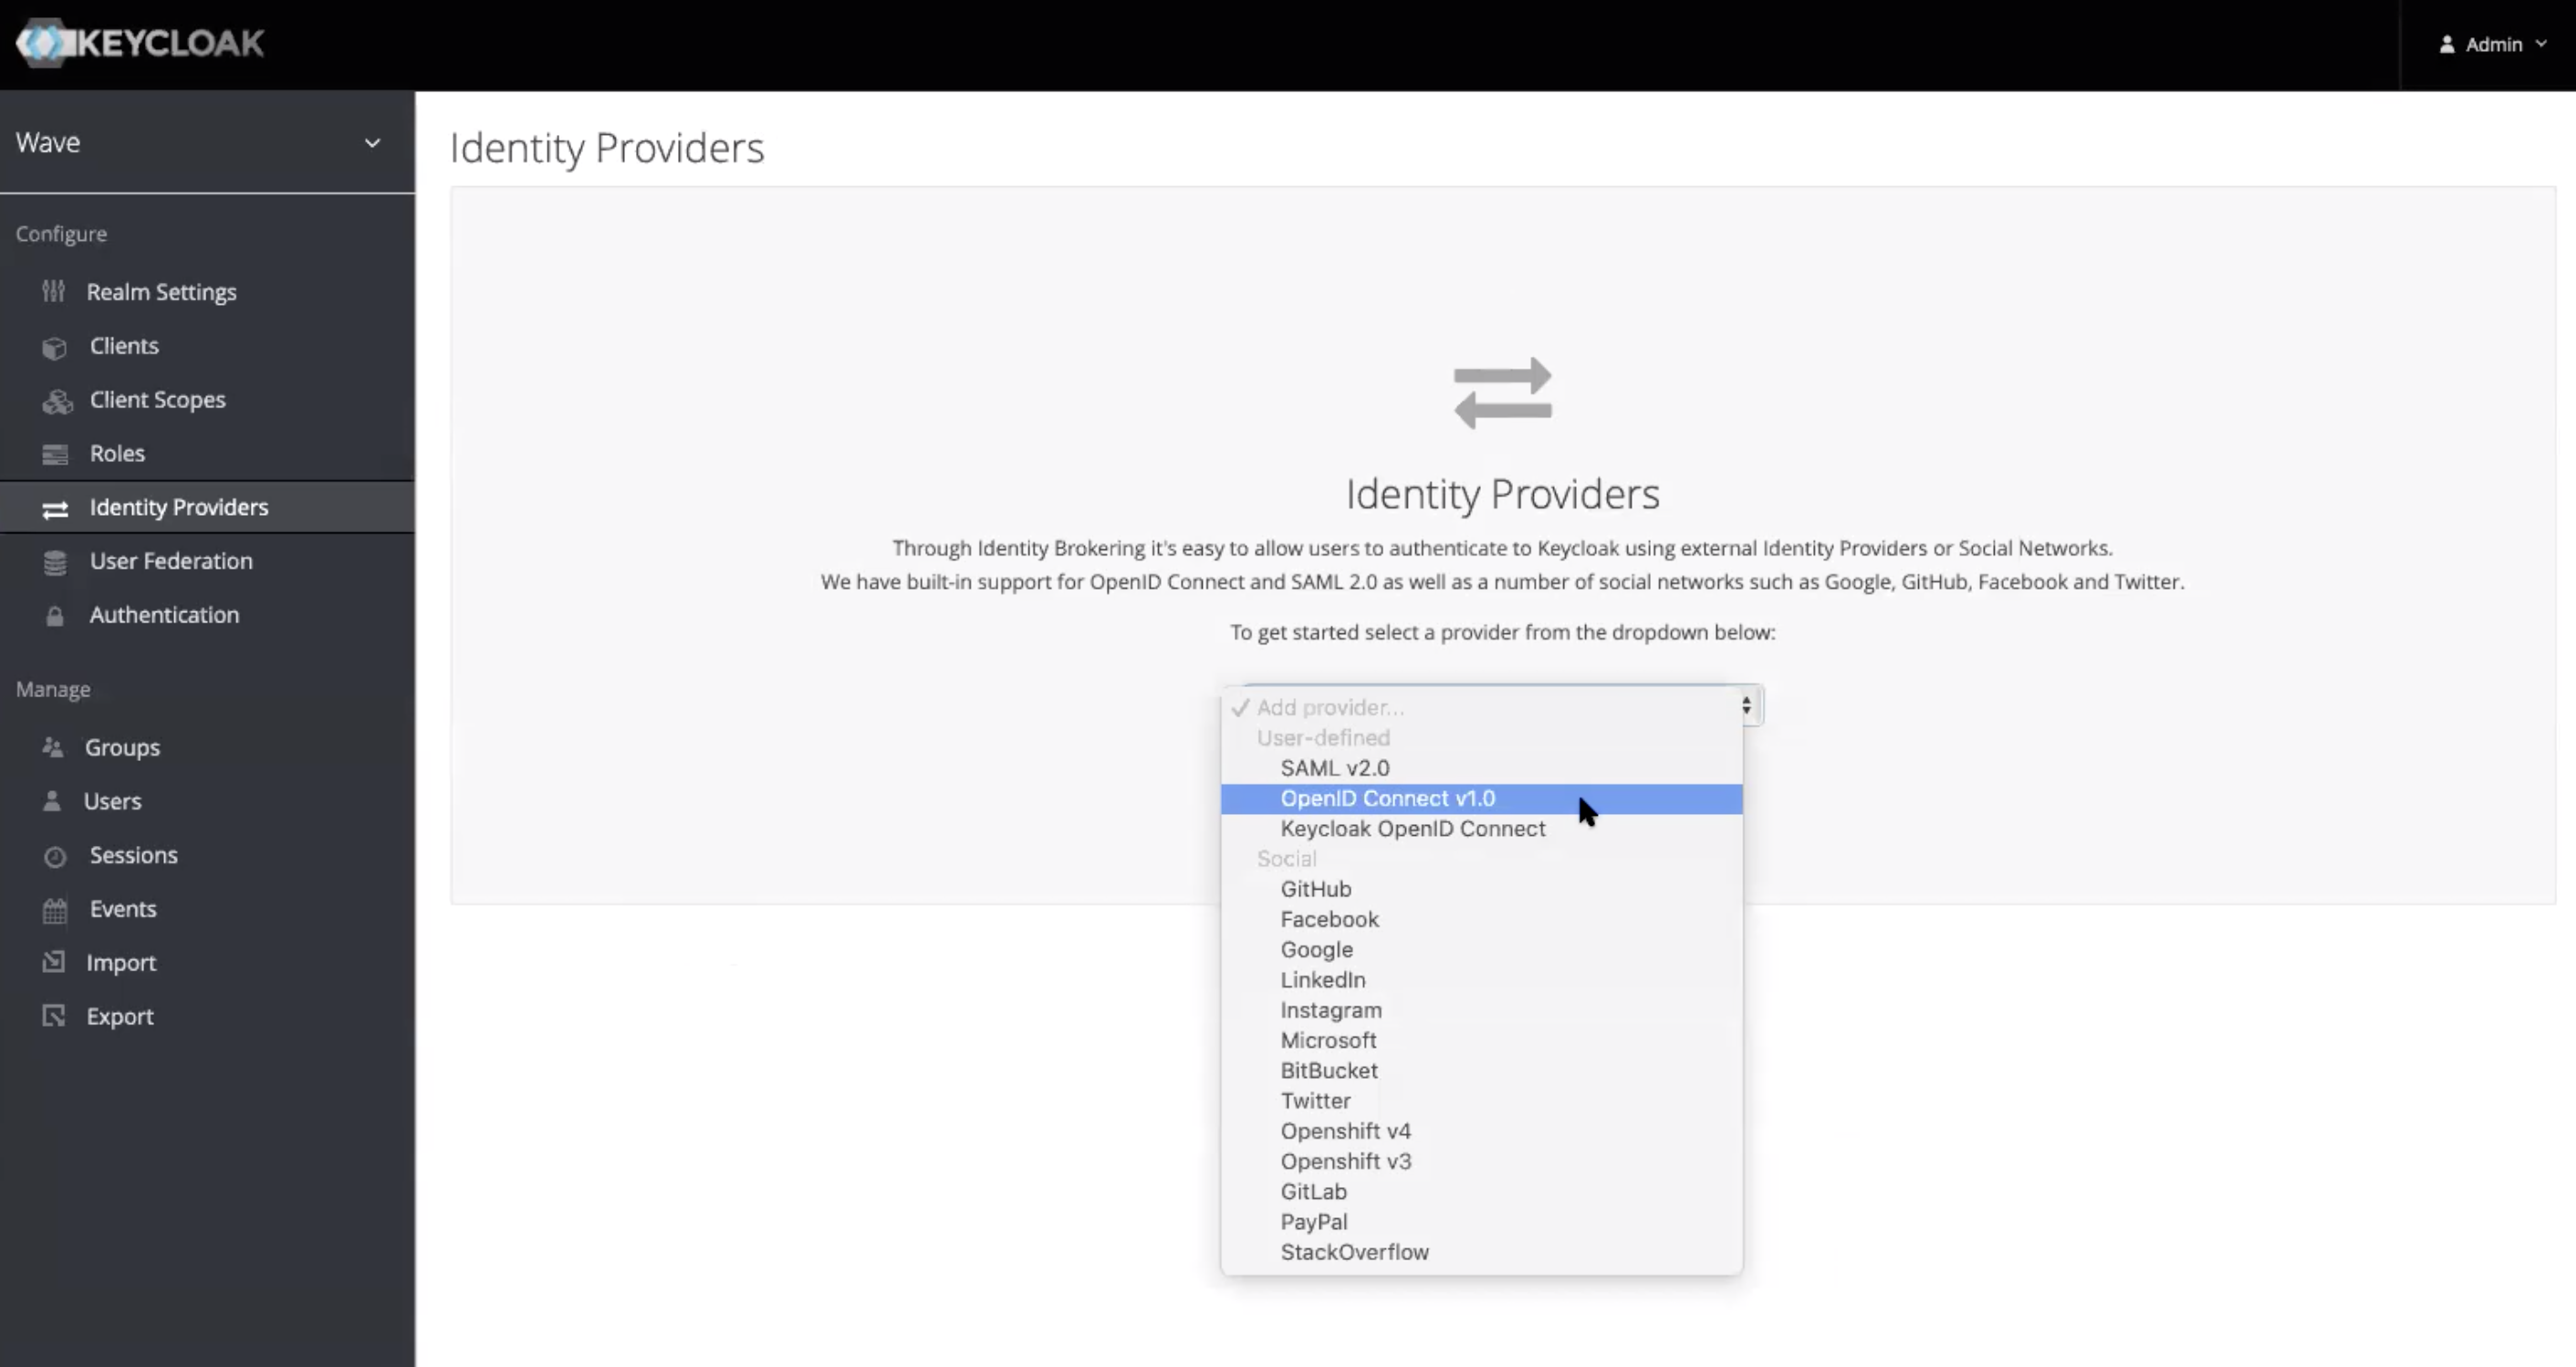
Log in to the Keycloak Administration Console. Click Identity Providers and use the drop-down to select OpenID Connect v1.0 as an identity provider.
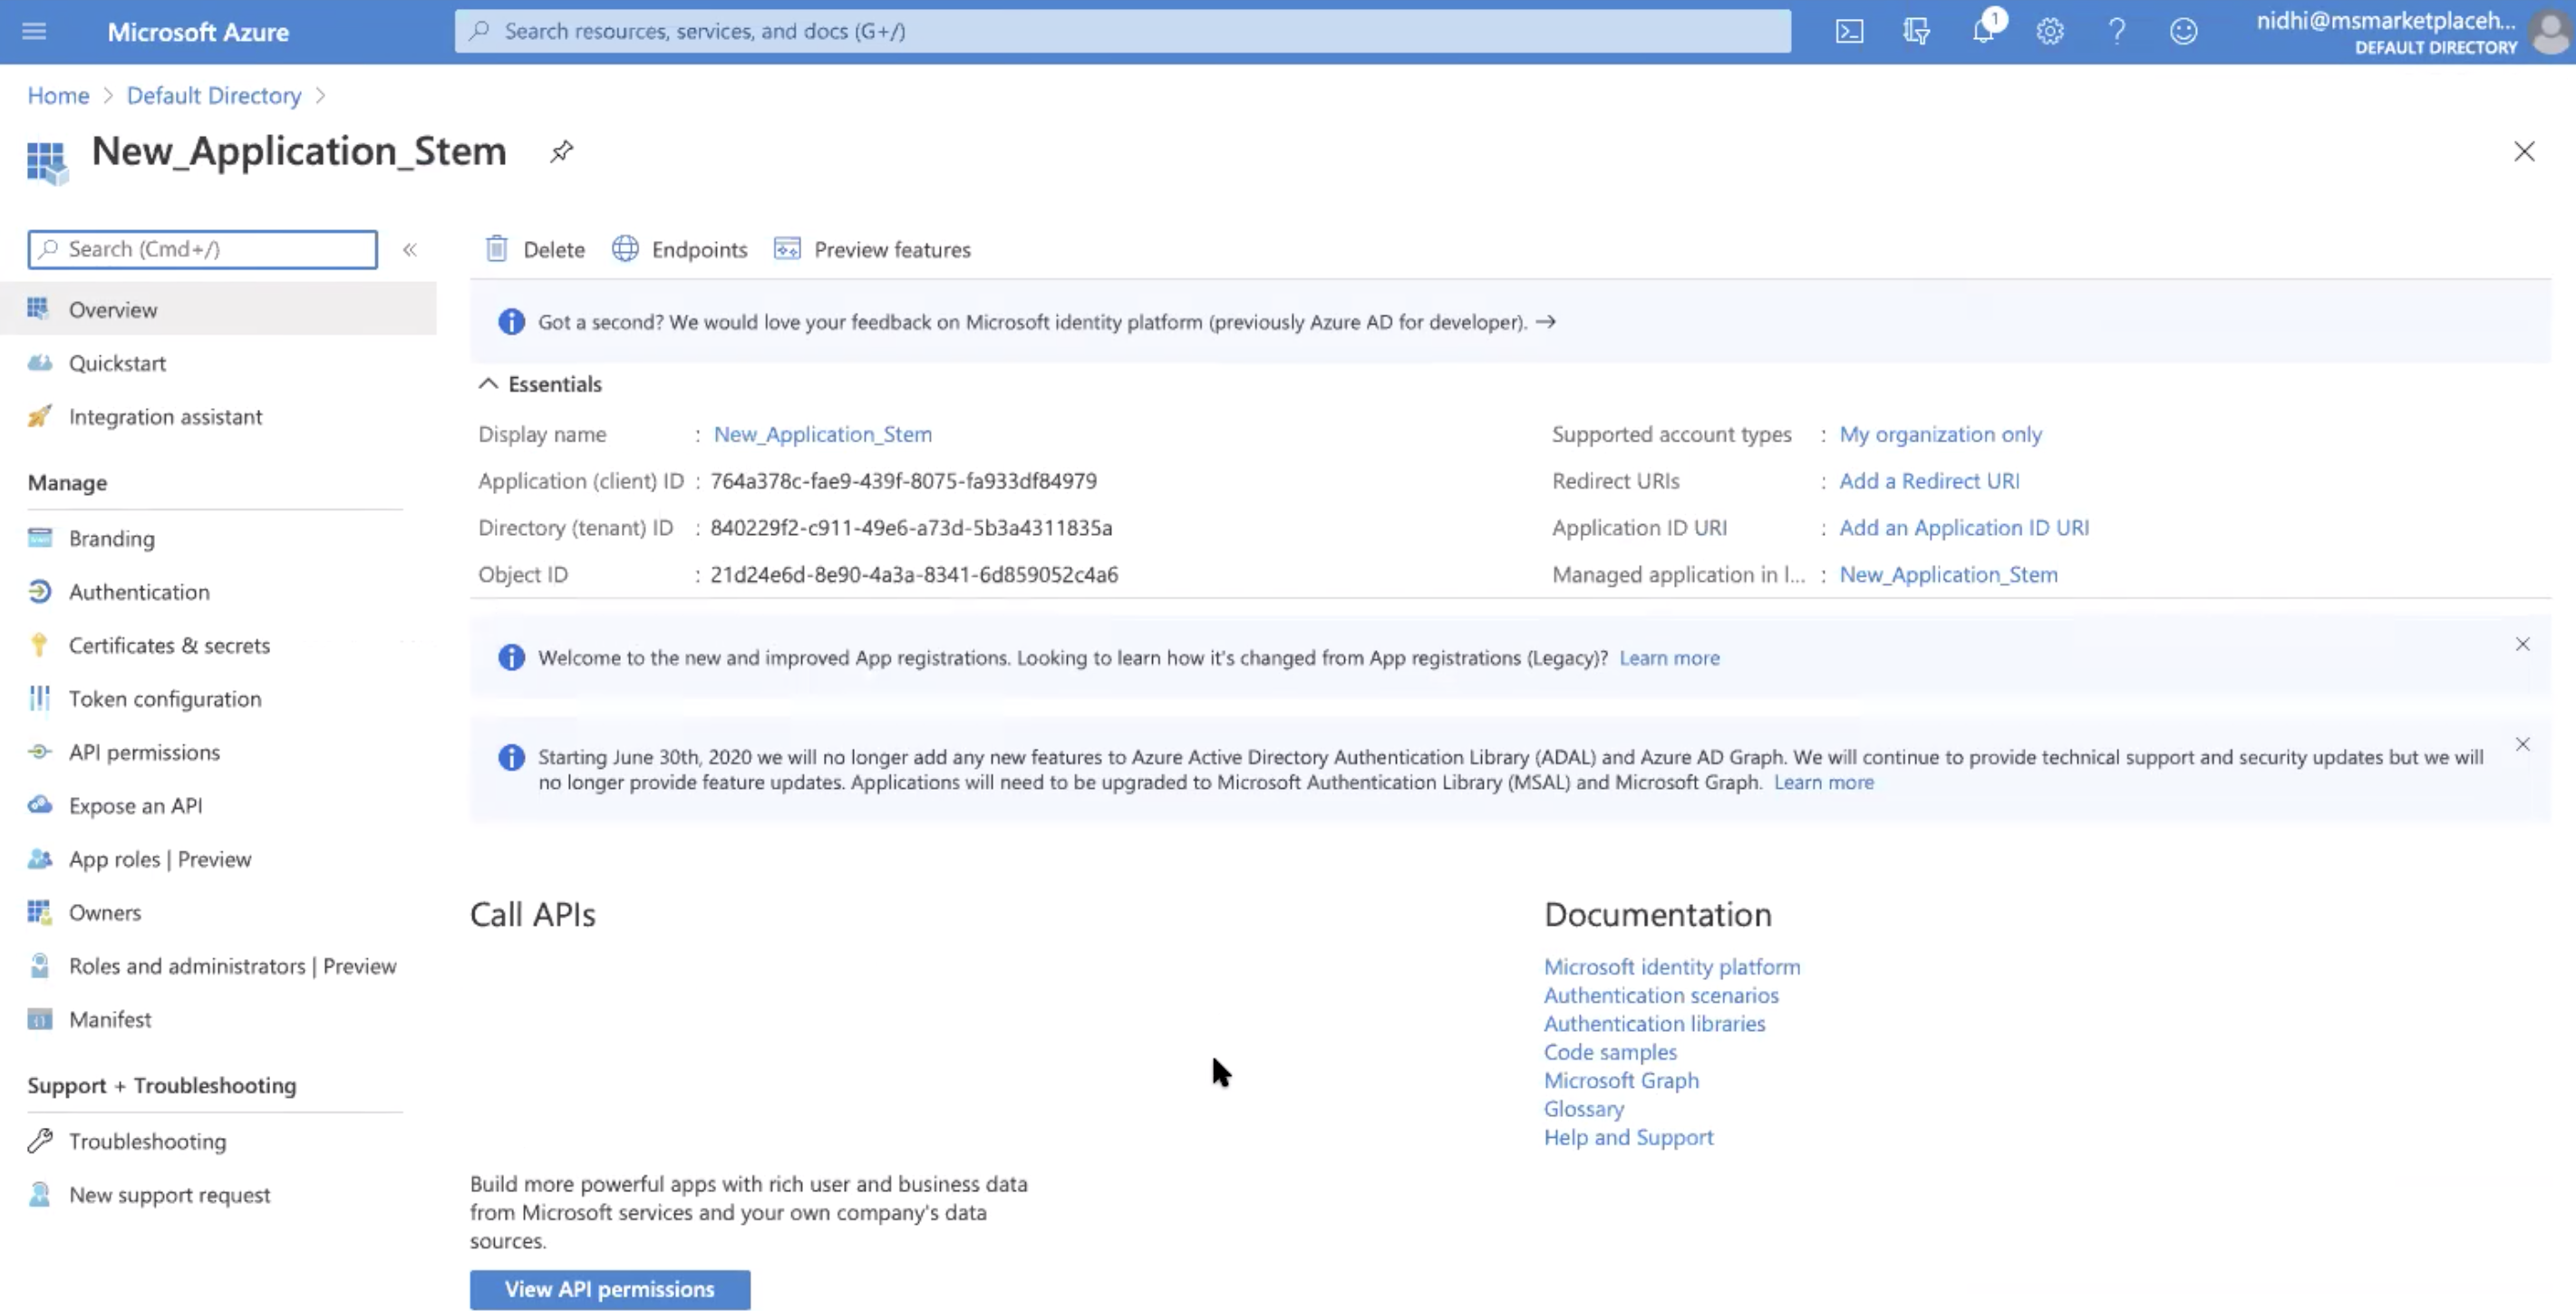
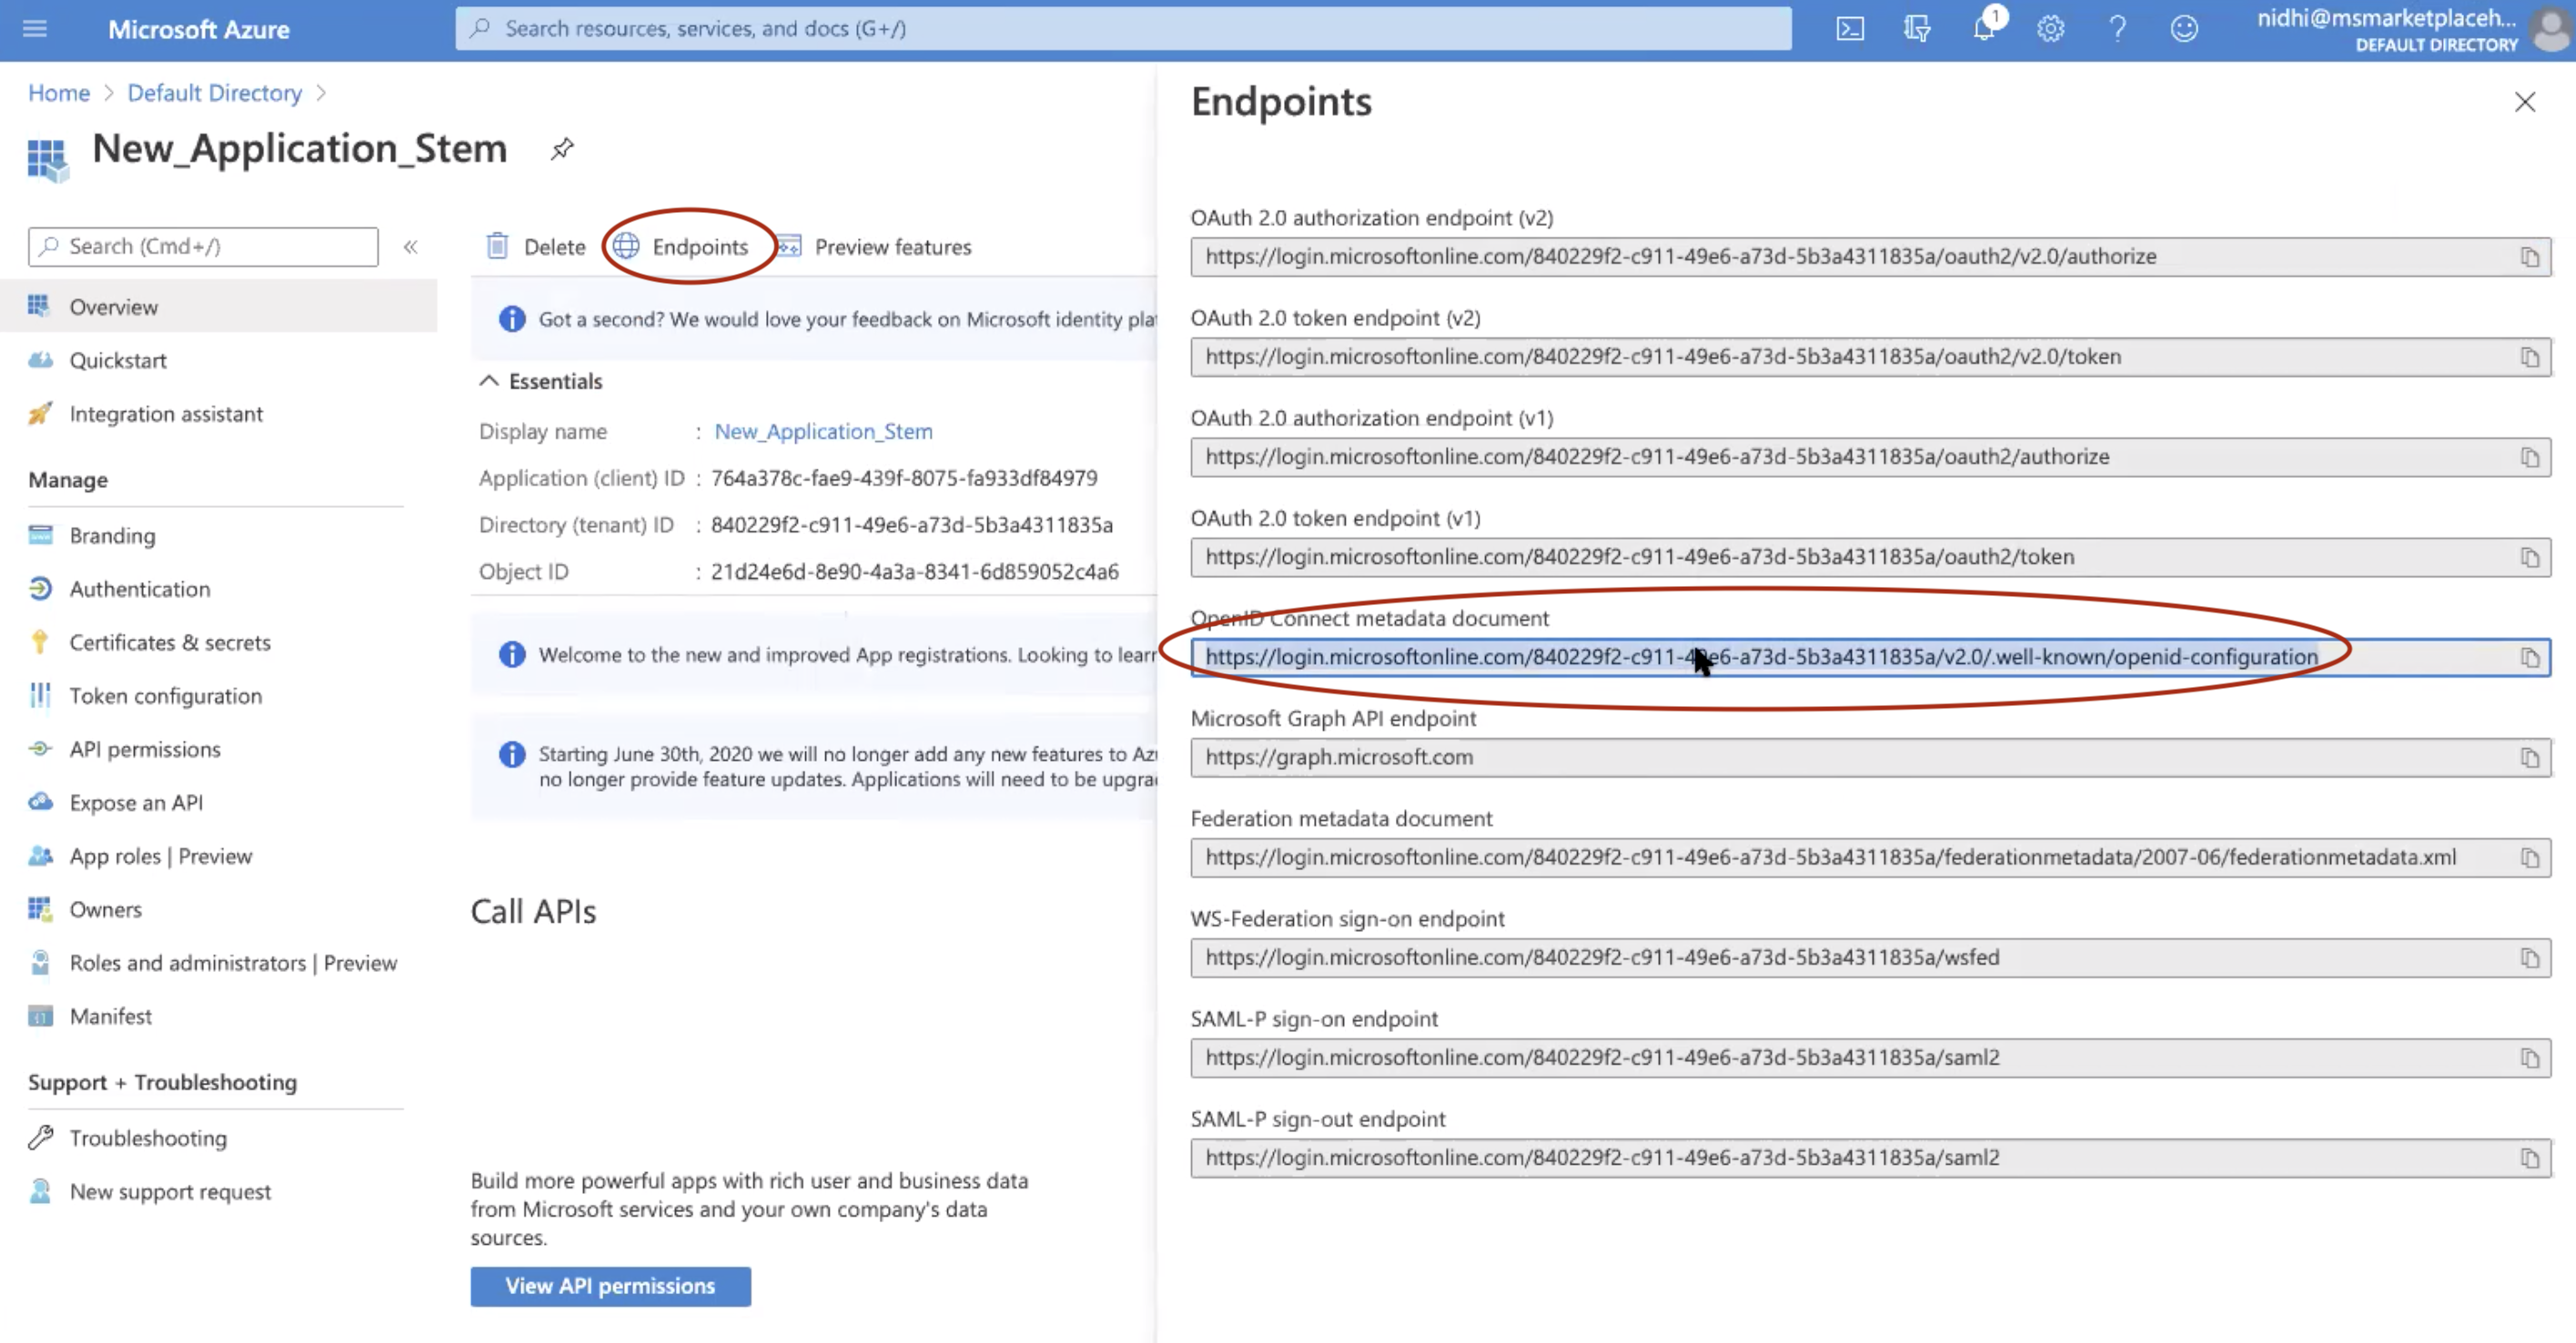
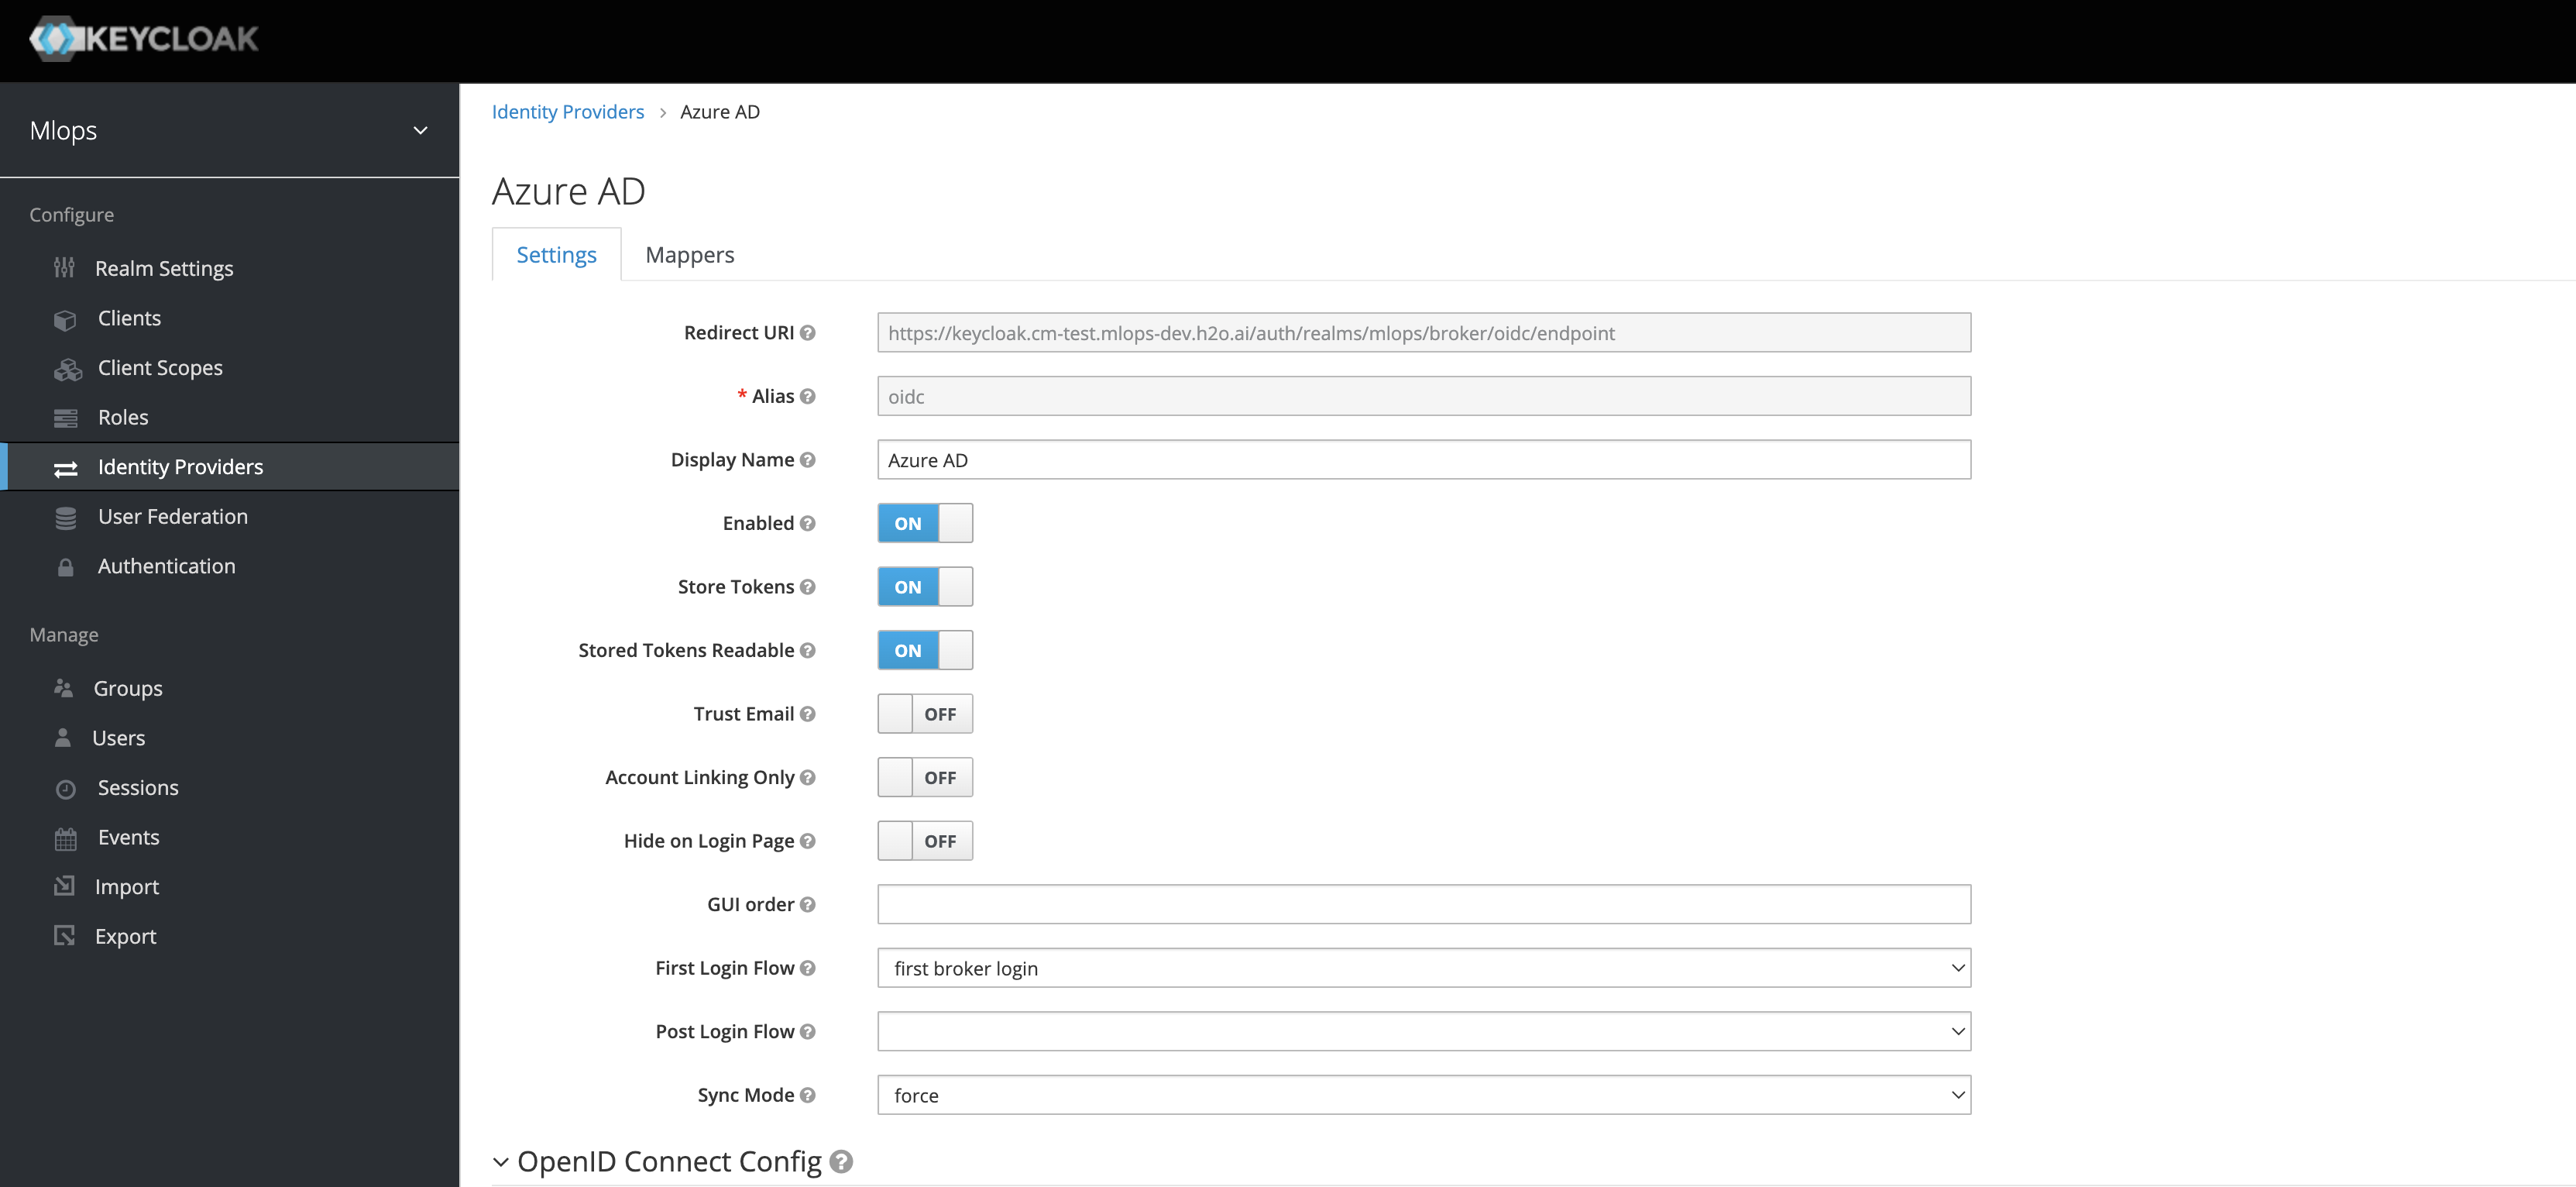
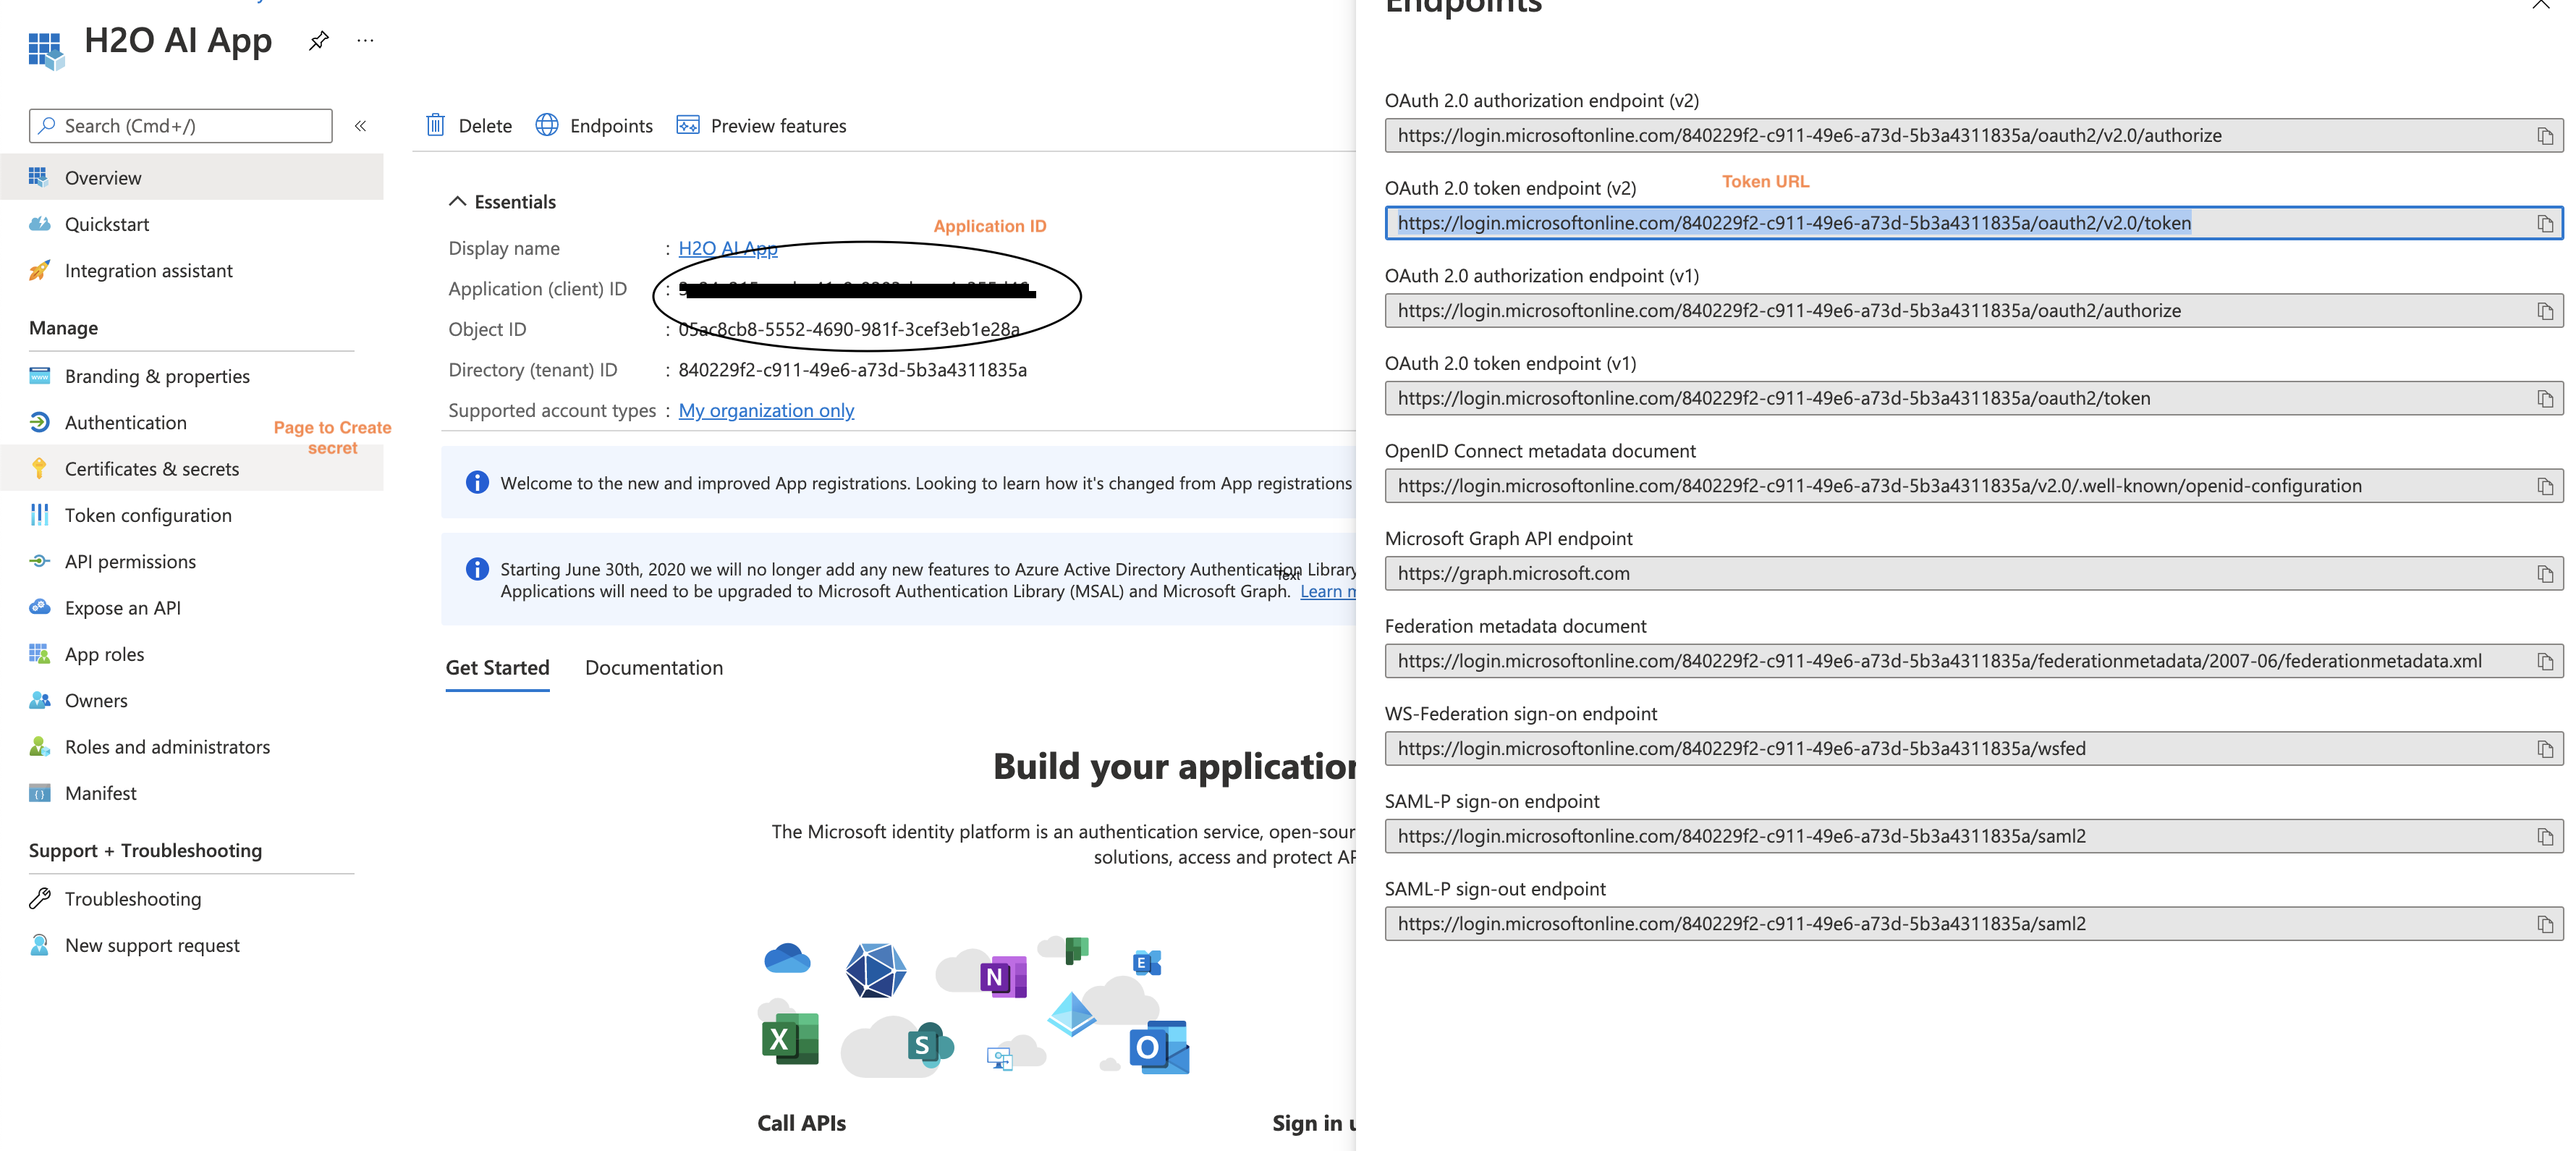
In Keycloak, go to Identity Providers > Azure AD > Settings to view the OpenID Connect Config section. Enter the OpenID Connect metadata document URL in the Import from URL field, and then click the Import button to import the H2O MLOps application settings from Azure. You can view the OpenID Connect metadata document URL by clicking Endpoints on the registered application page for H2O MLOps in Azure AD.
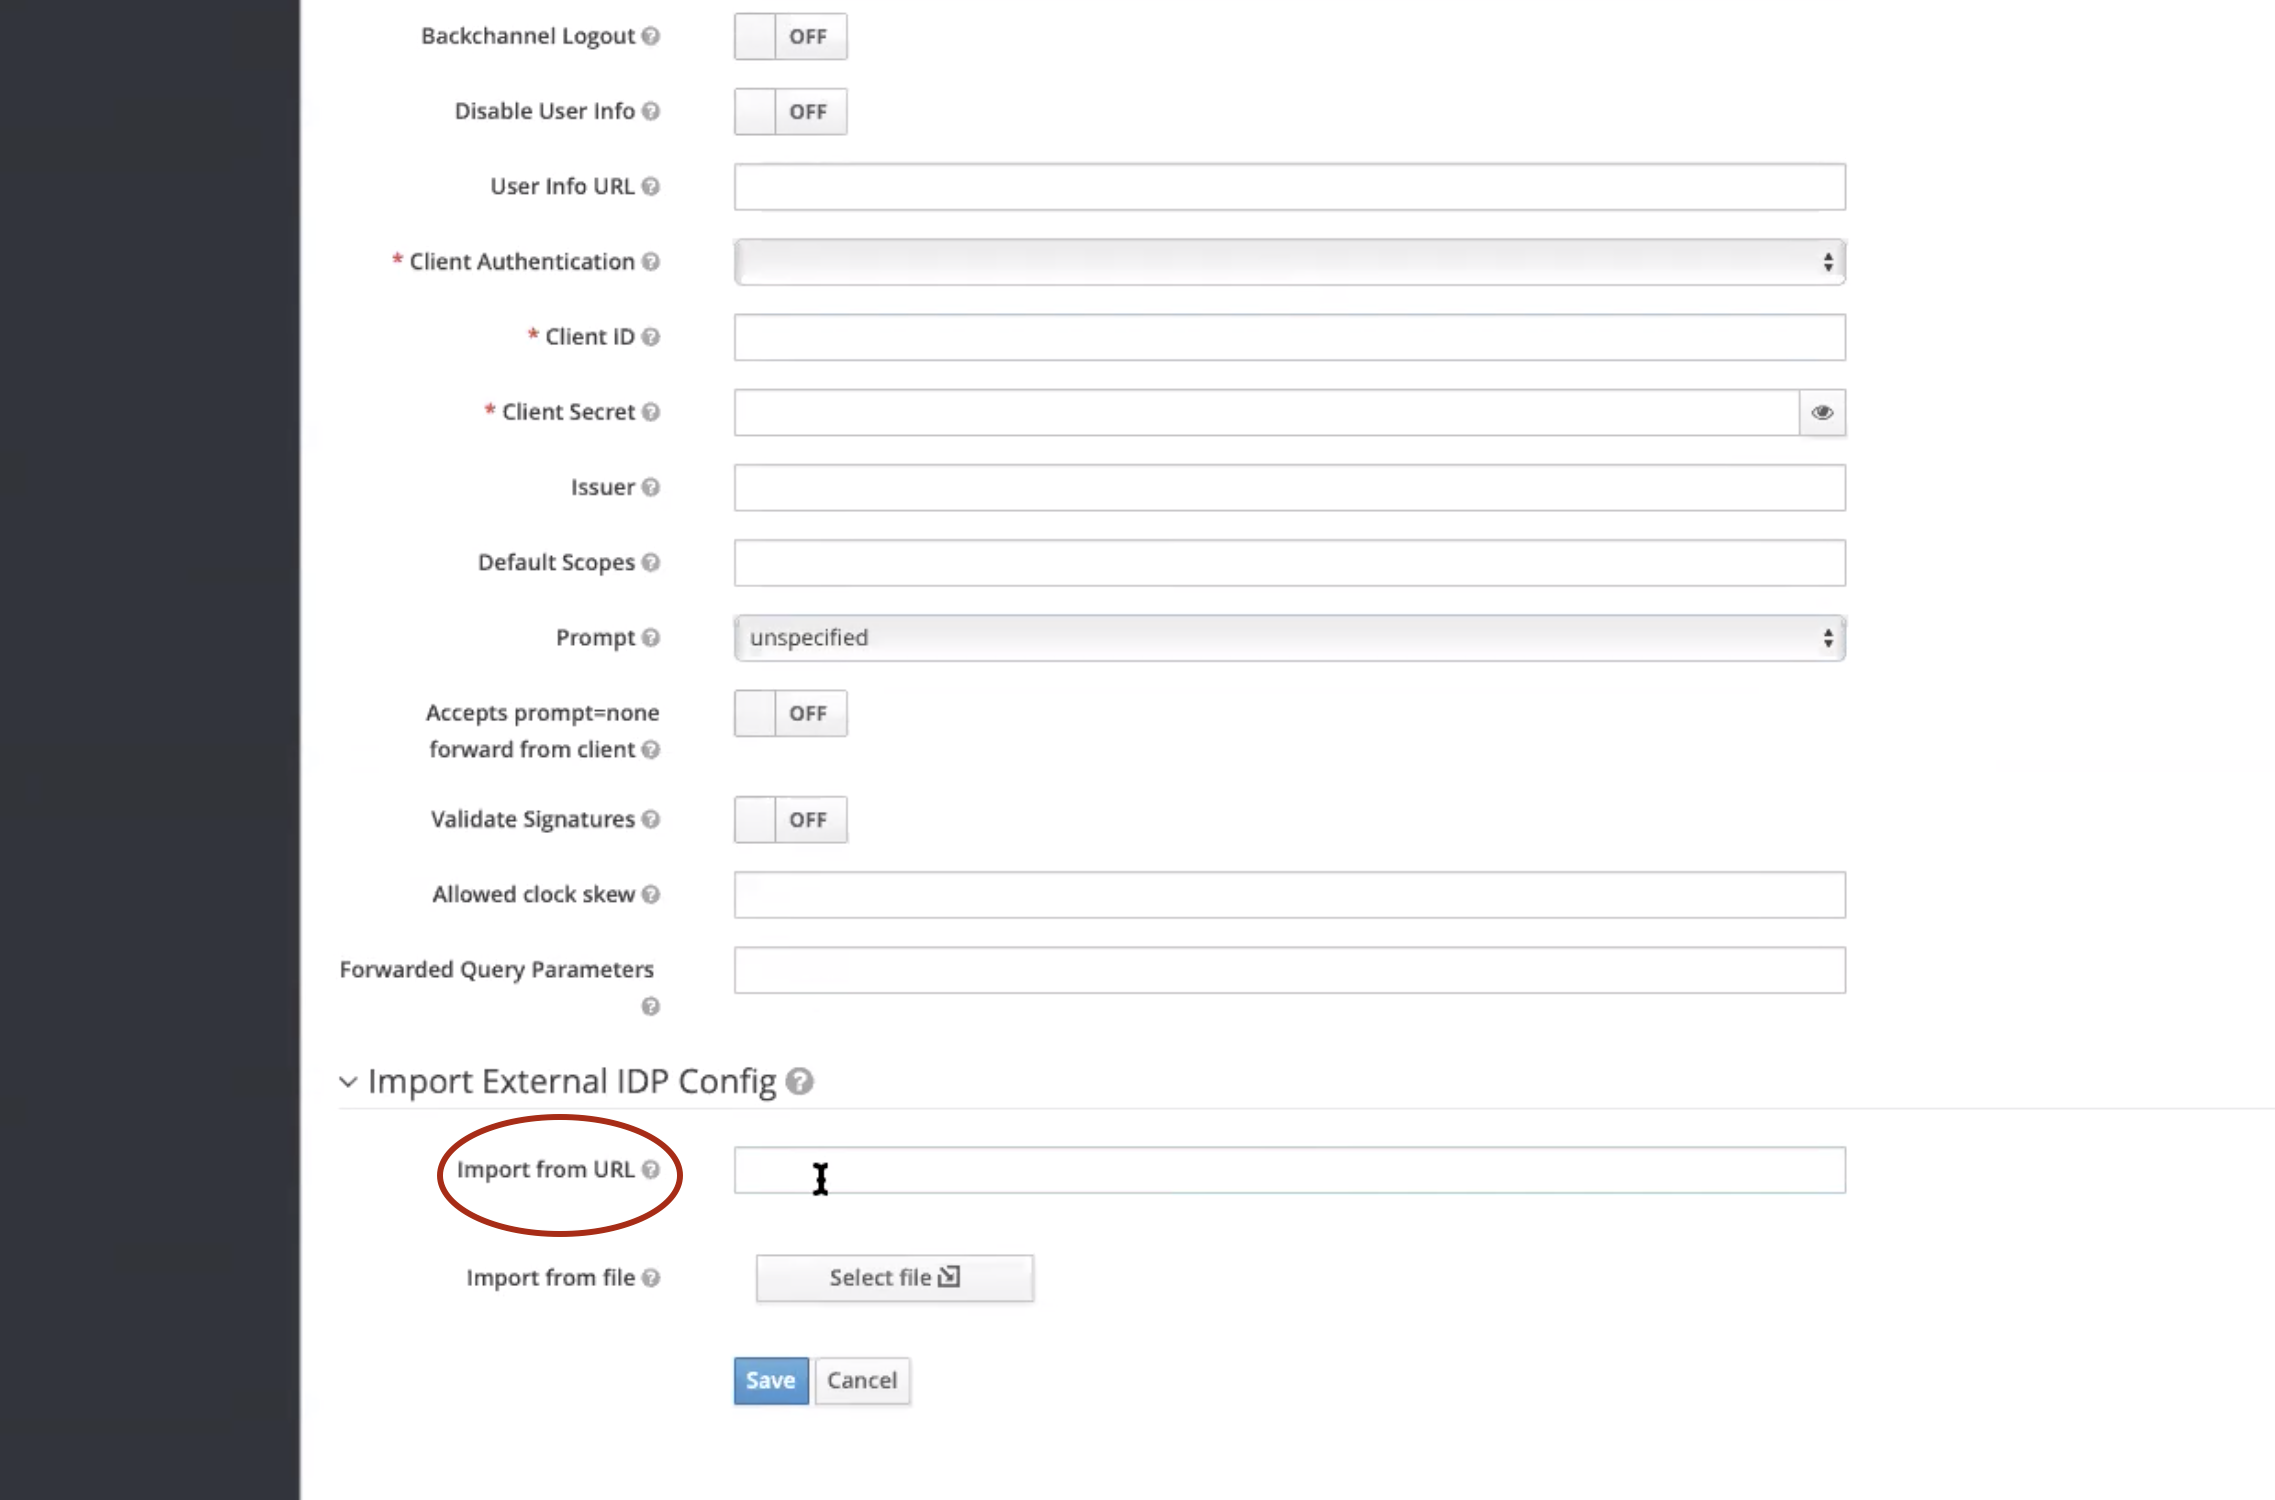
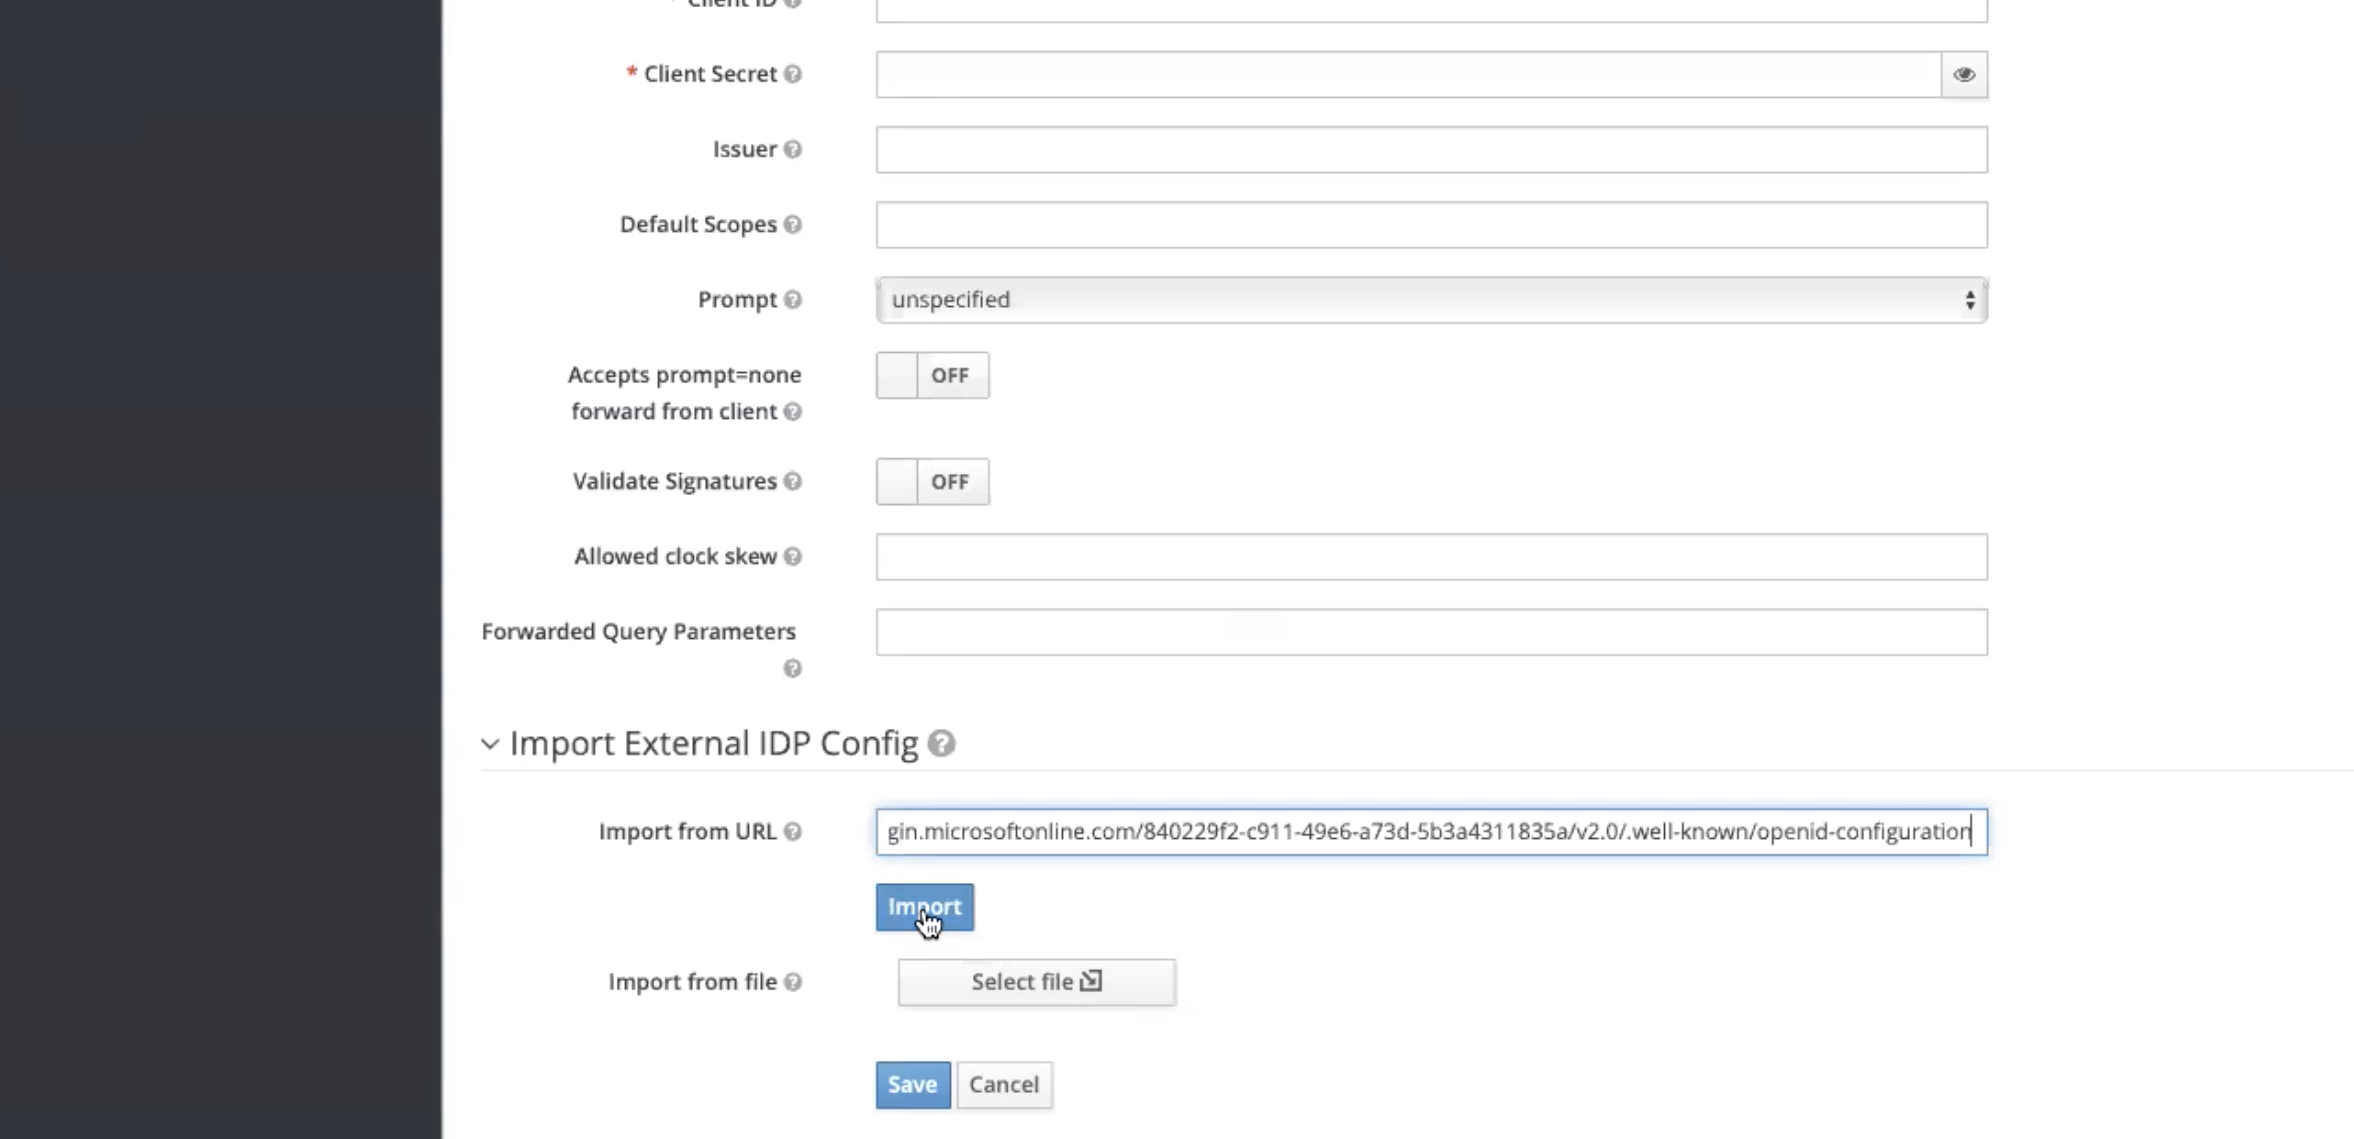
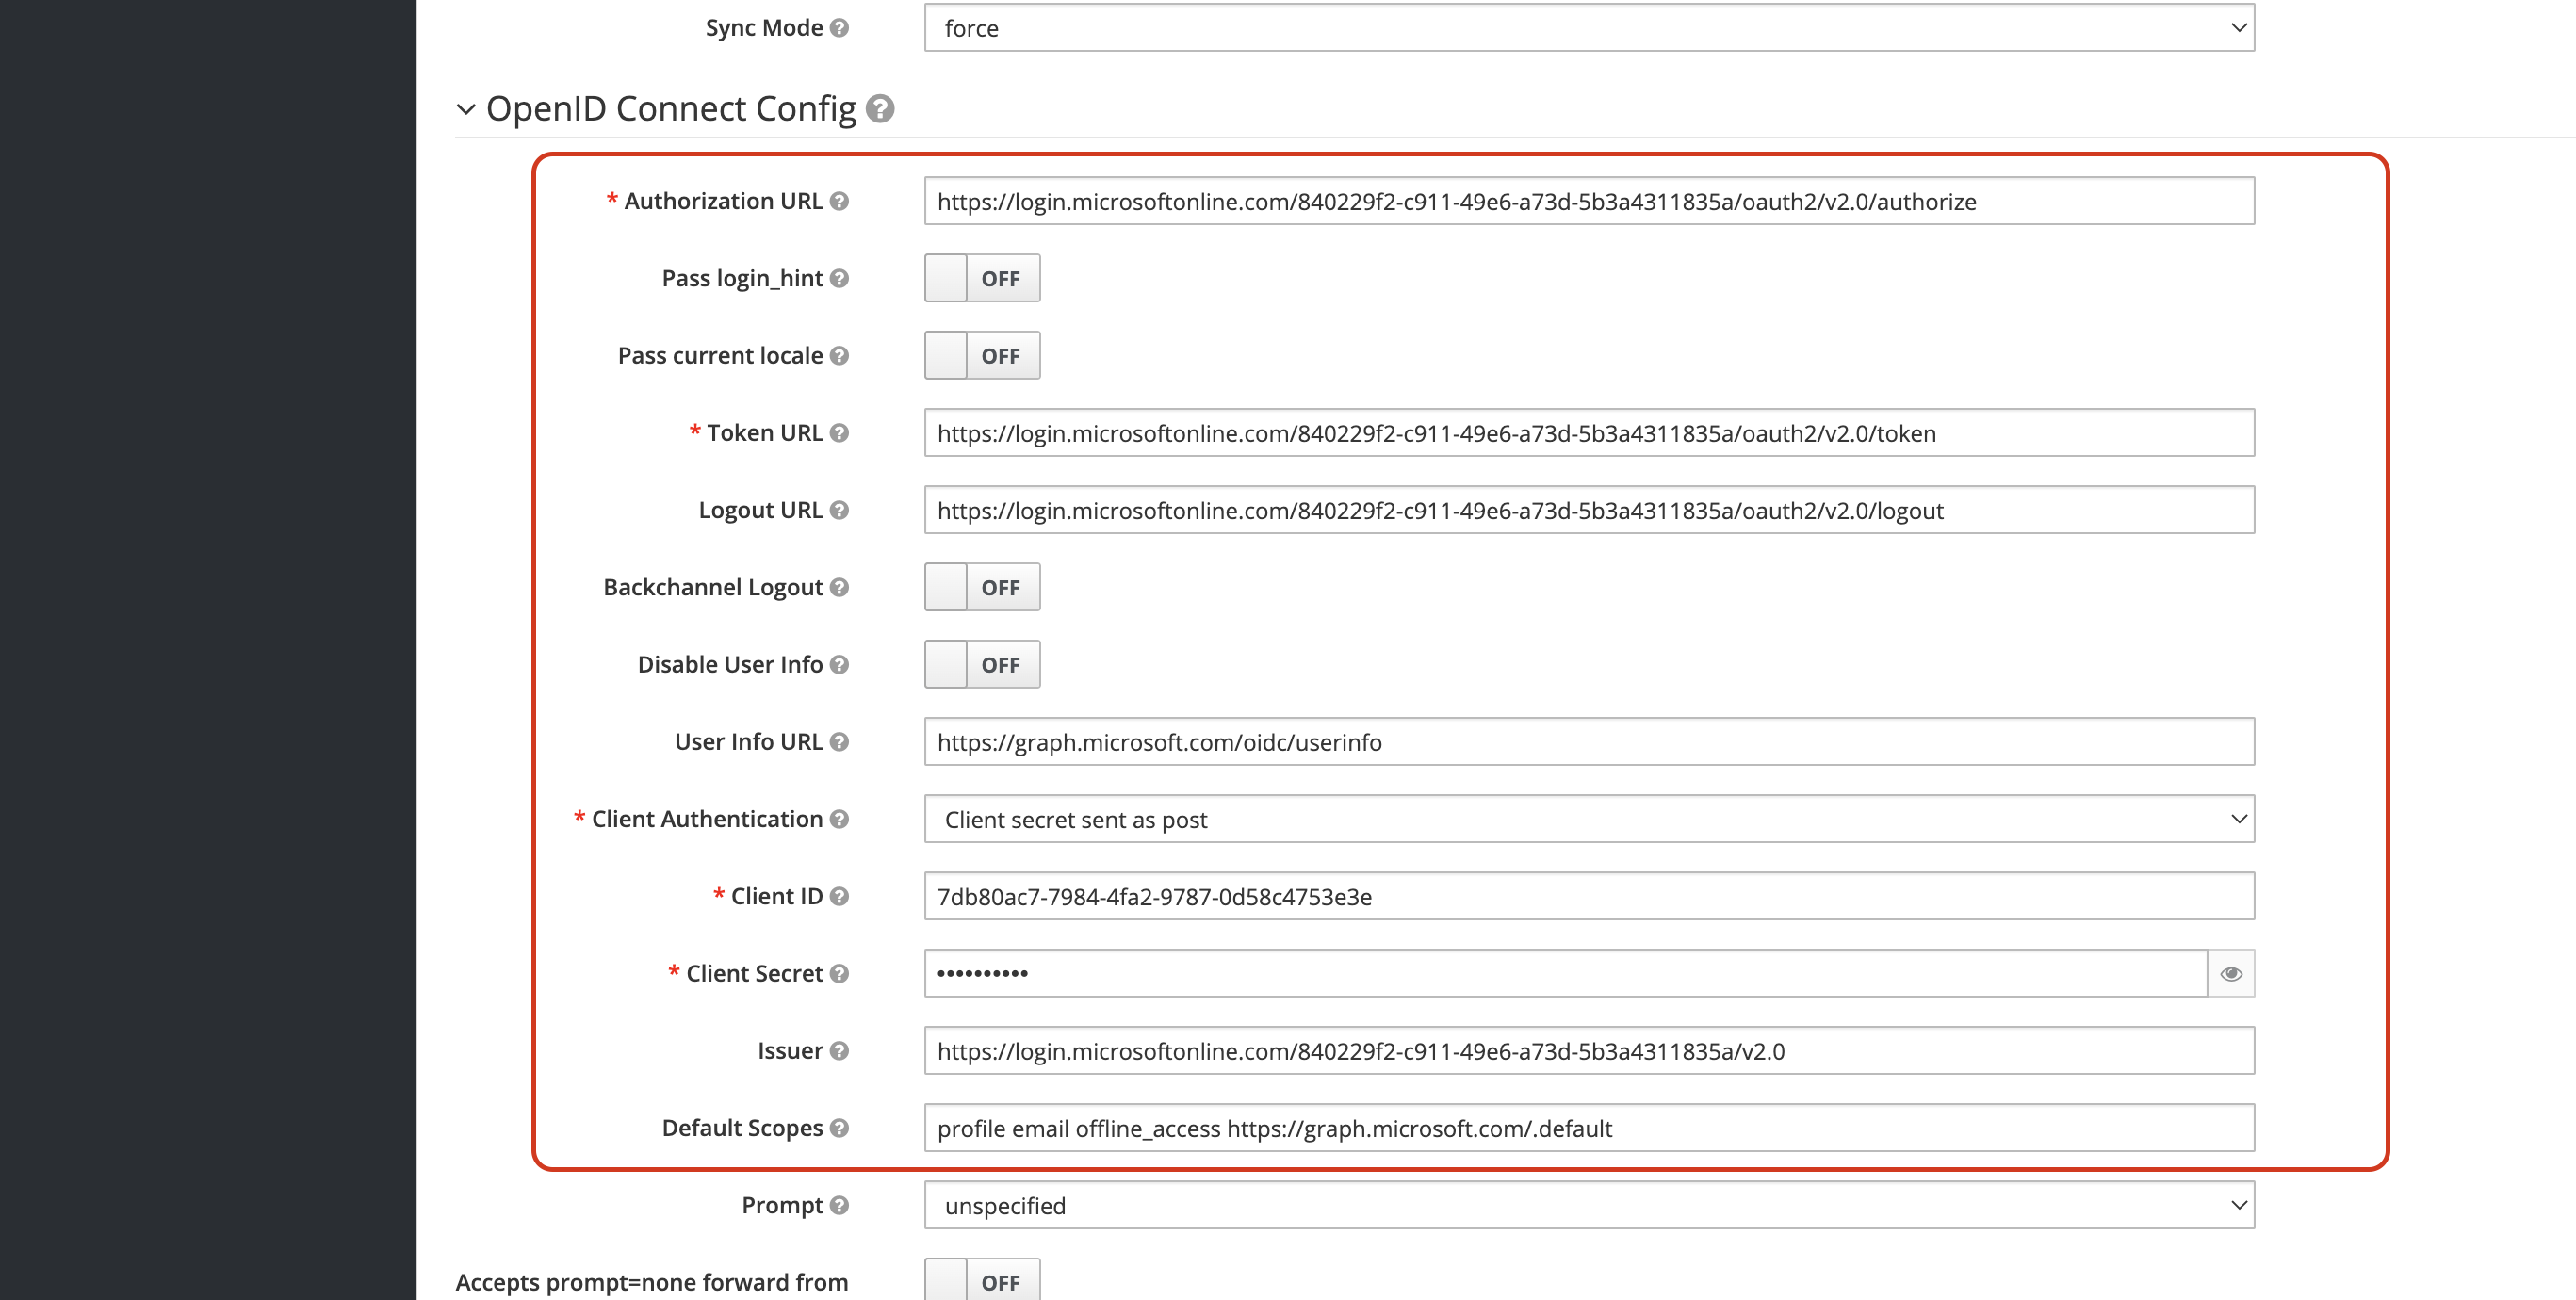
Set the remaining OpenID Connect configuration values as follows:
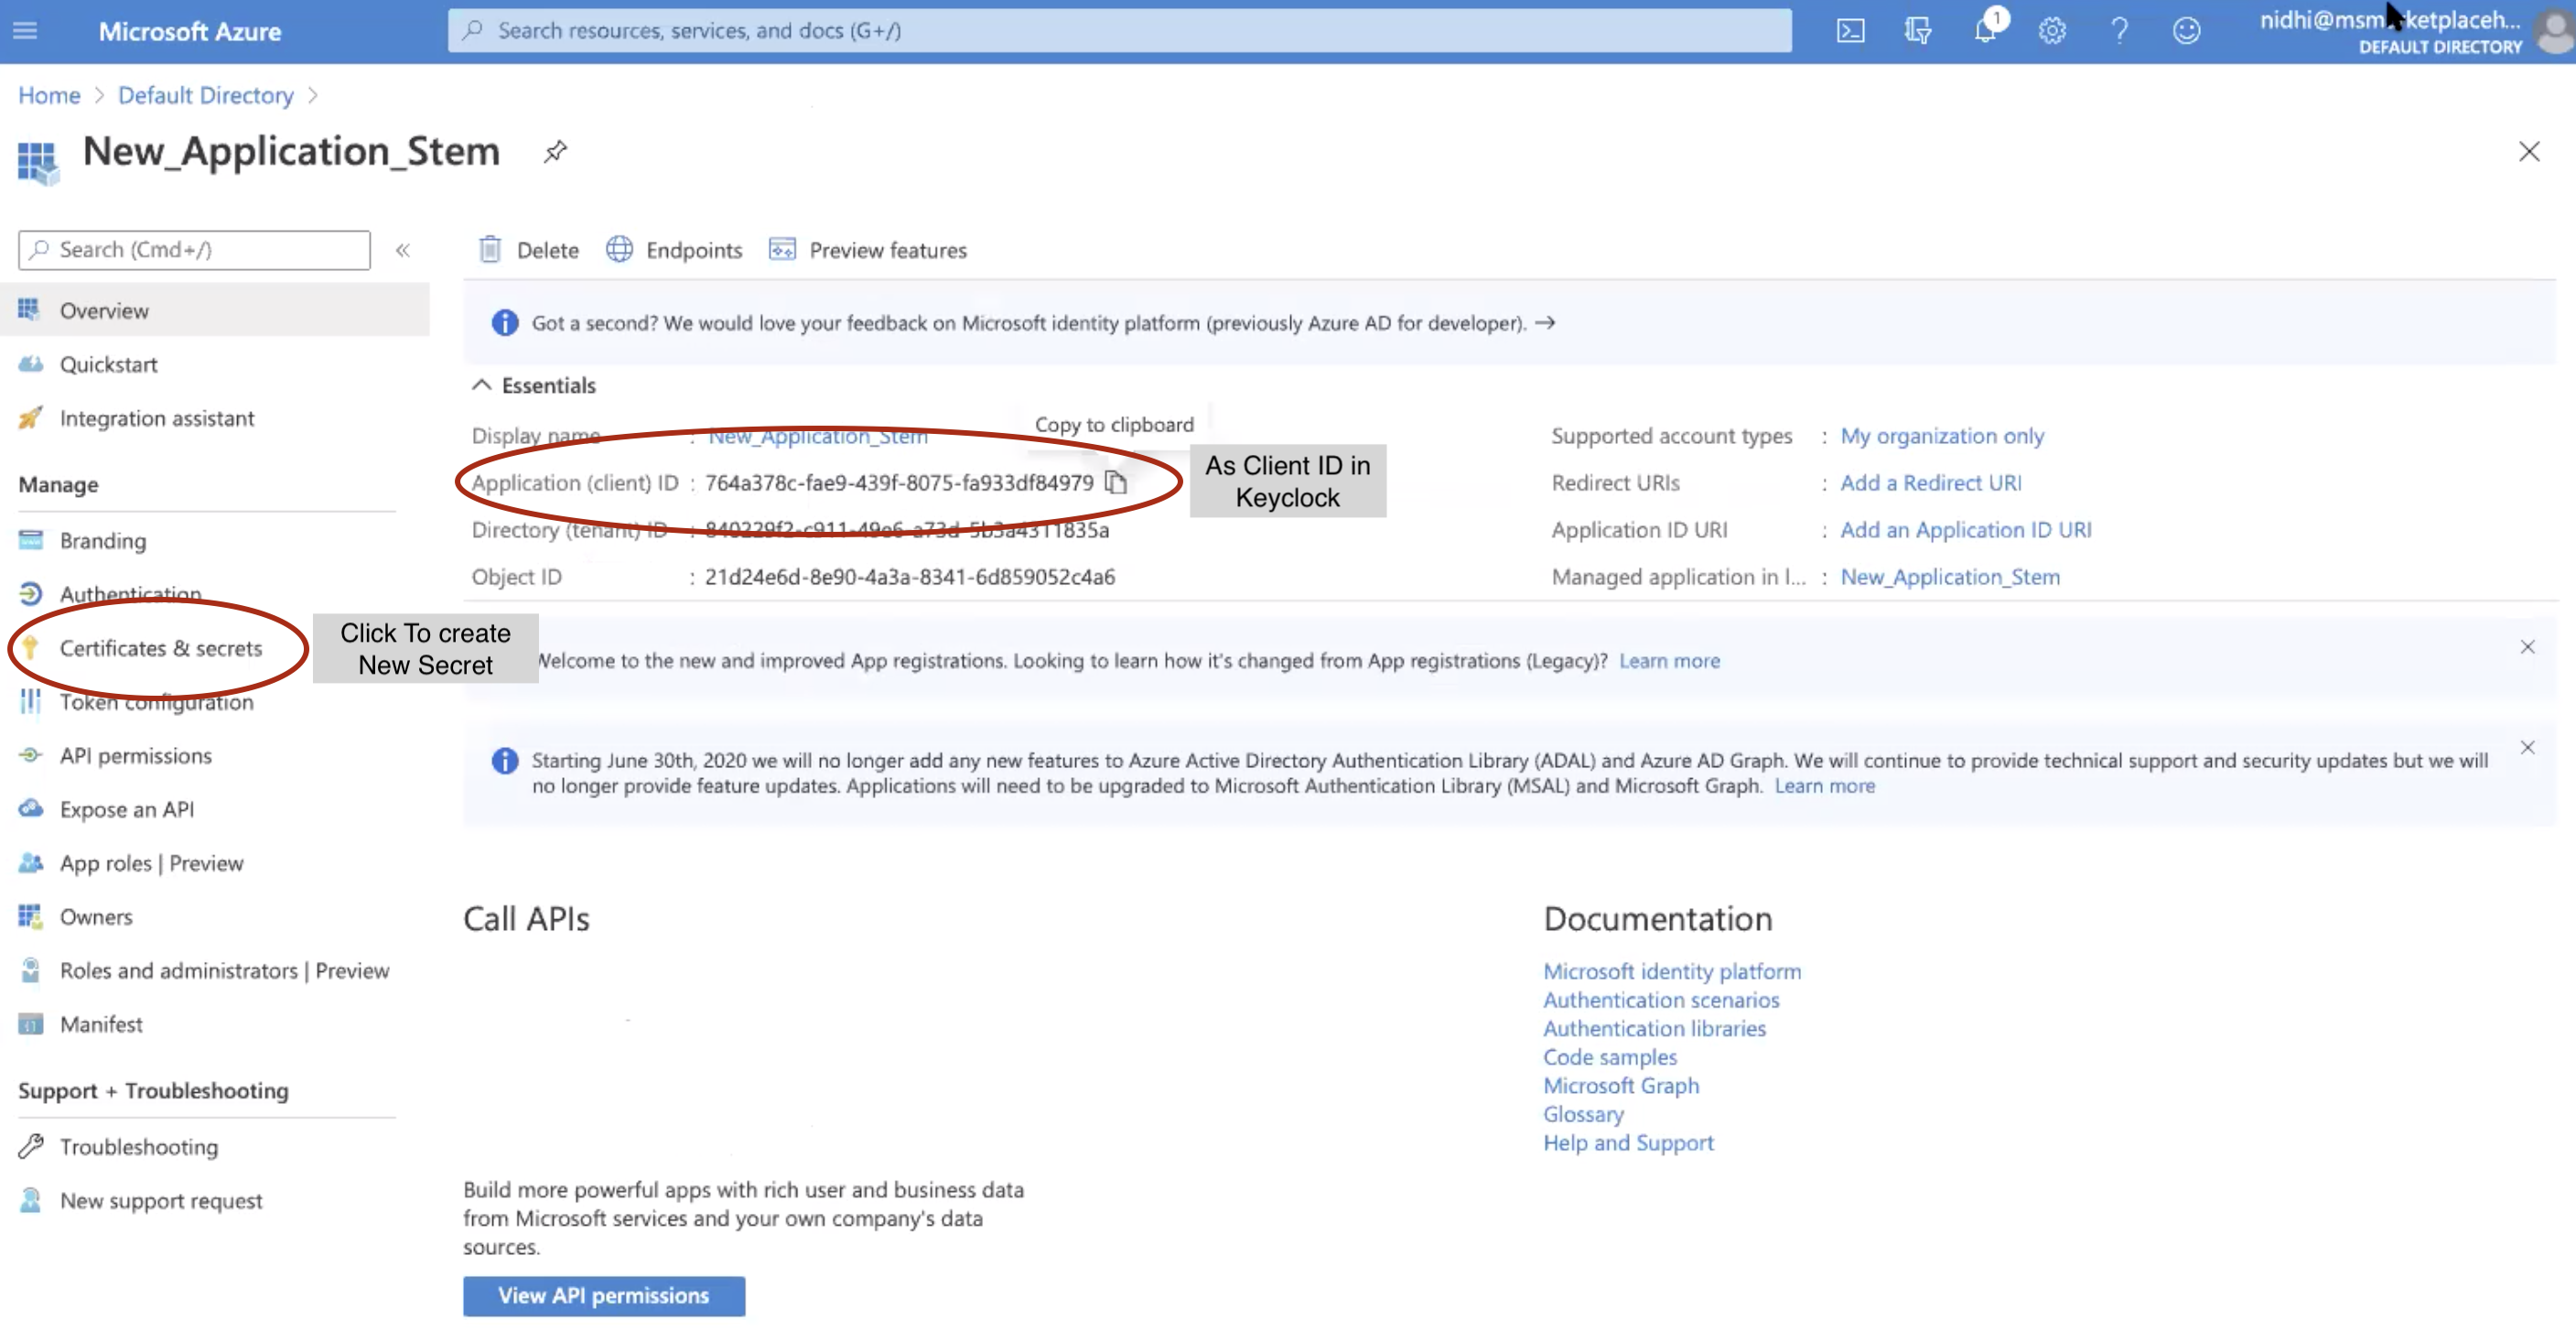
- Set Client ID as the Application ID from the H2O MLOps Azure application.
- Set Client Authentication to
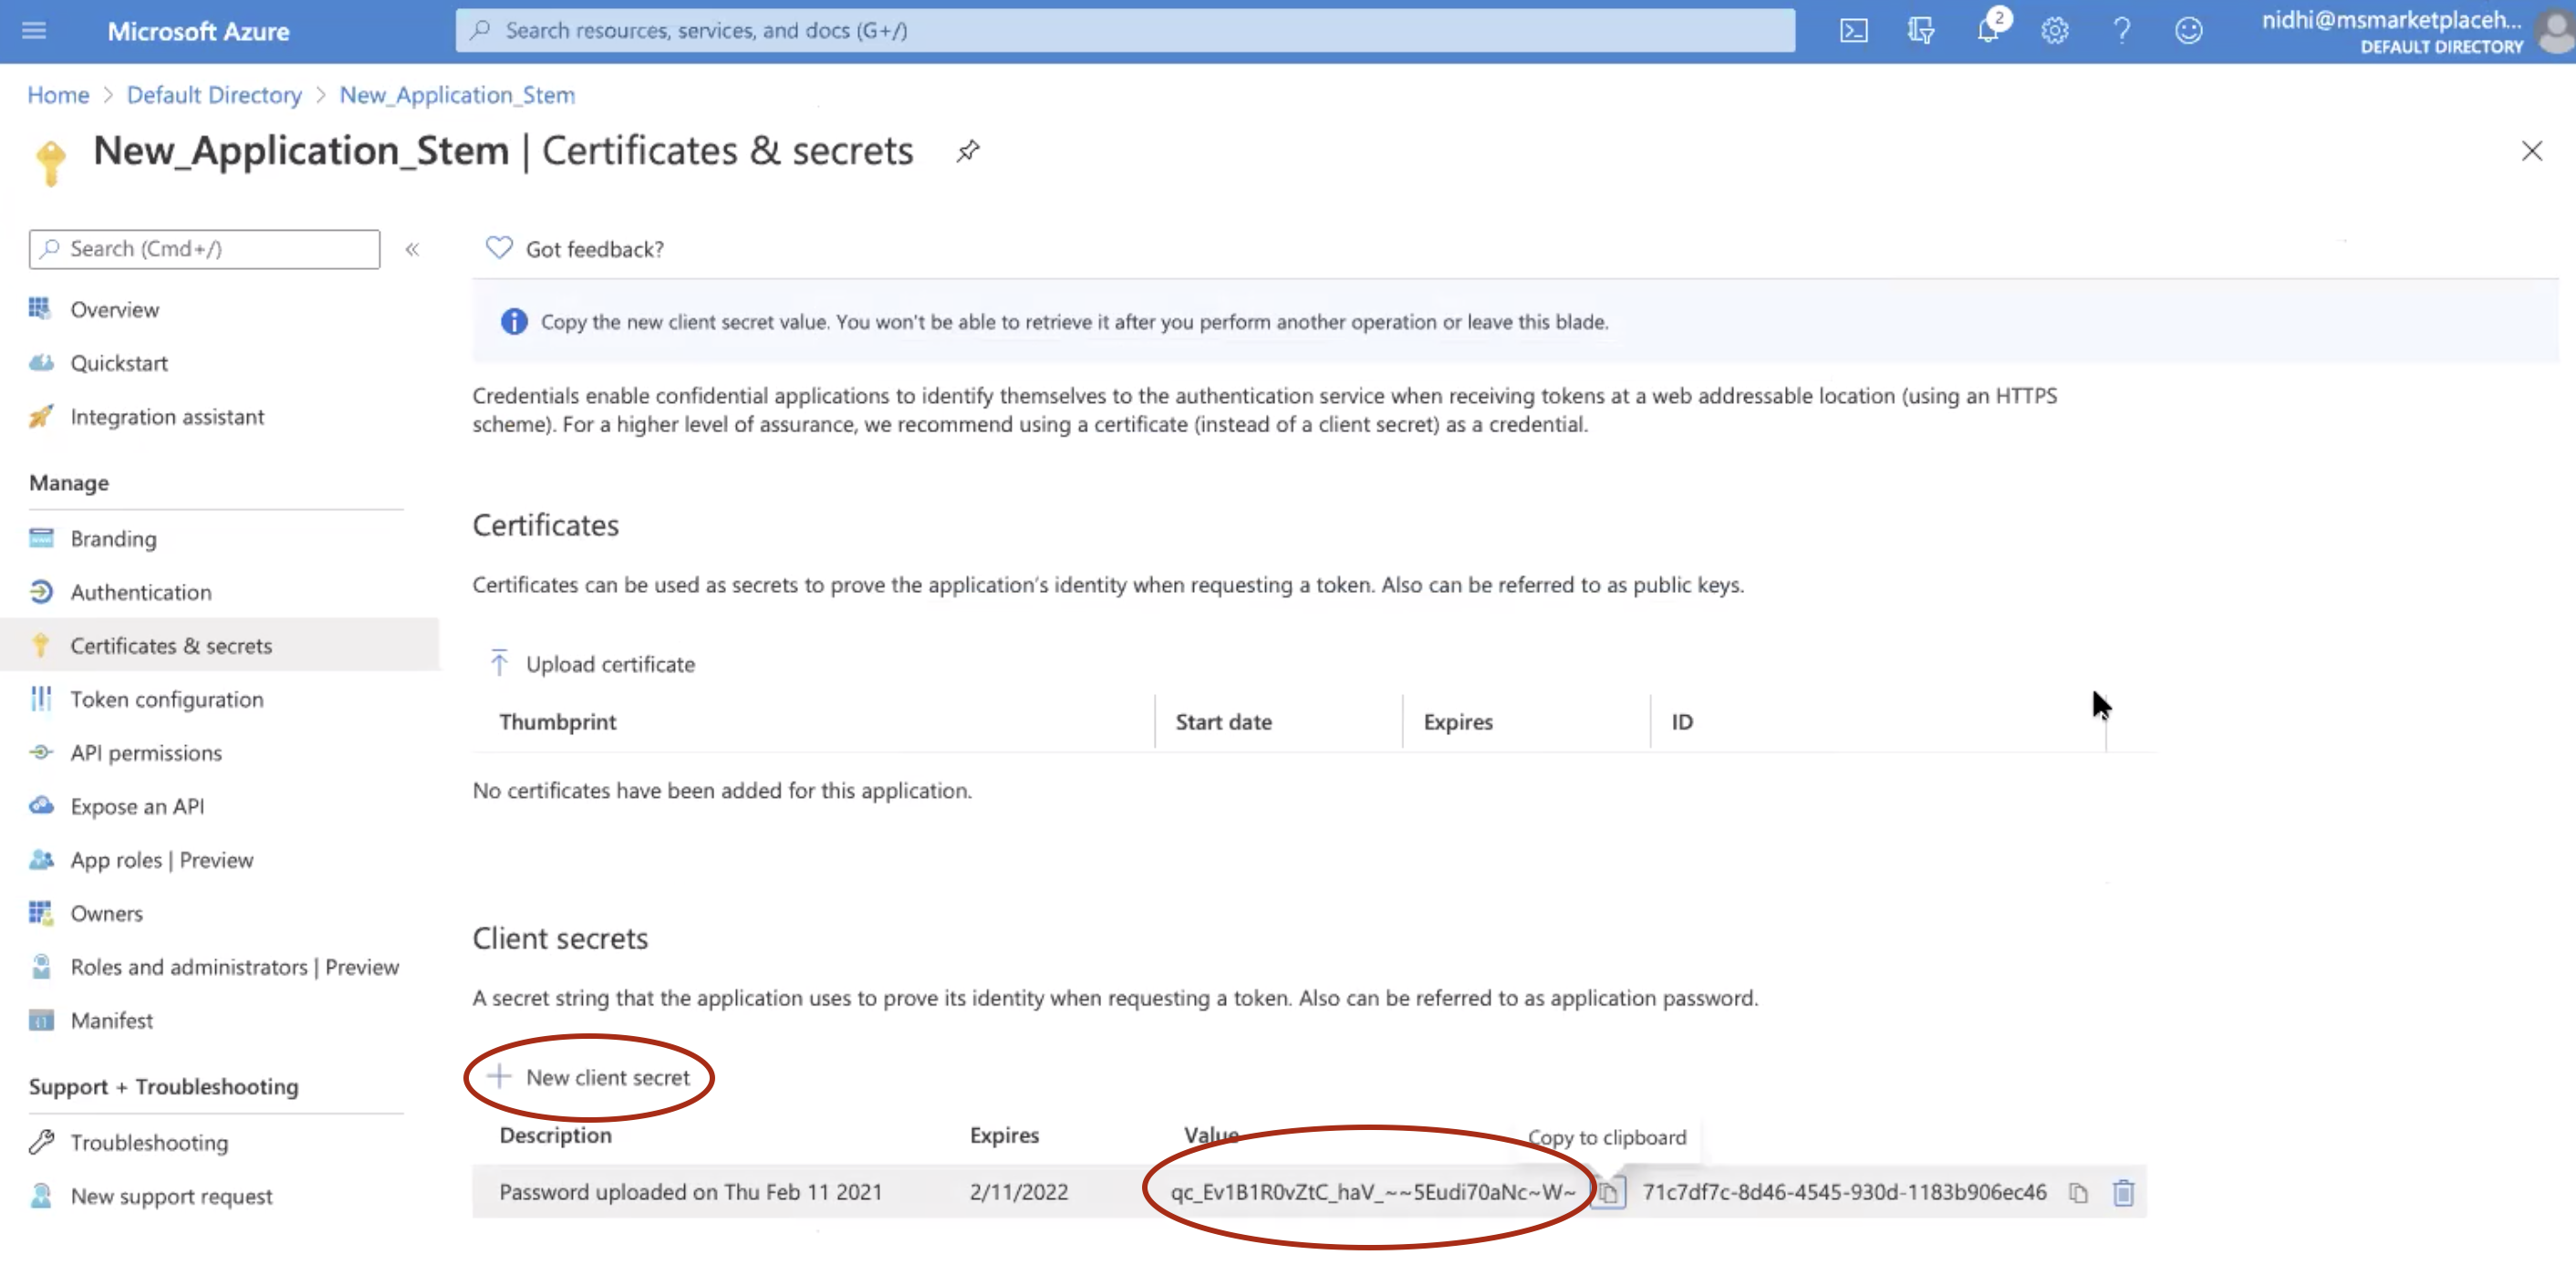
client secret sent as post. - In Azure AD, click Certificates and secrets > New client secret. In the Keycloak OpenID Connect Config page, enter the secret string value from Azure AD in the Client Secret field.
- Set Default Scopes to
profile email offline_access https://graph.microsoft.com/.default. - Set Sync Mode to force.
- (Optional) Provide an alias name. Please ensure that the alias name does not include special characters(spaces, !, @, # etc)
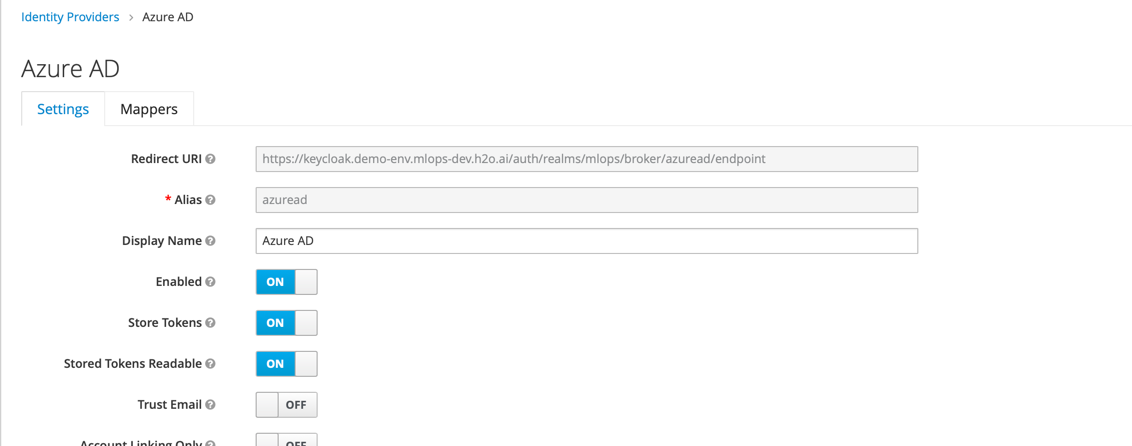
In Keycloak, go to Identity Providers > <Newly Created ID Provider> > Settings and enable the Store Tokens and Stored Tokens Readable settings. Save the configuration.
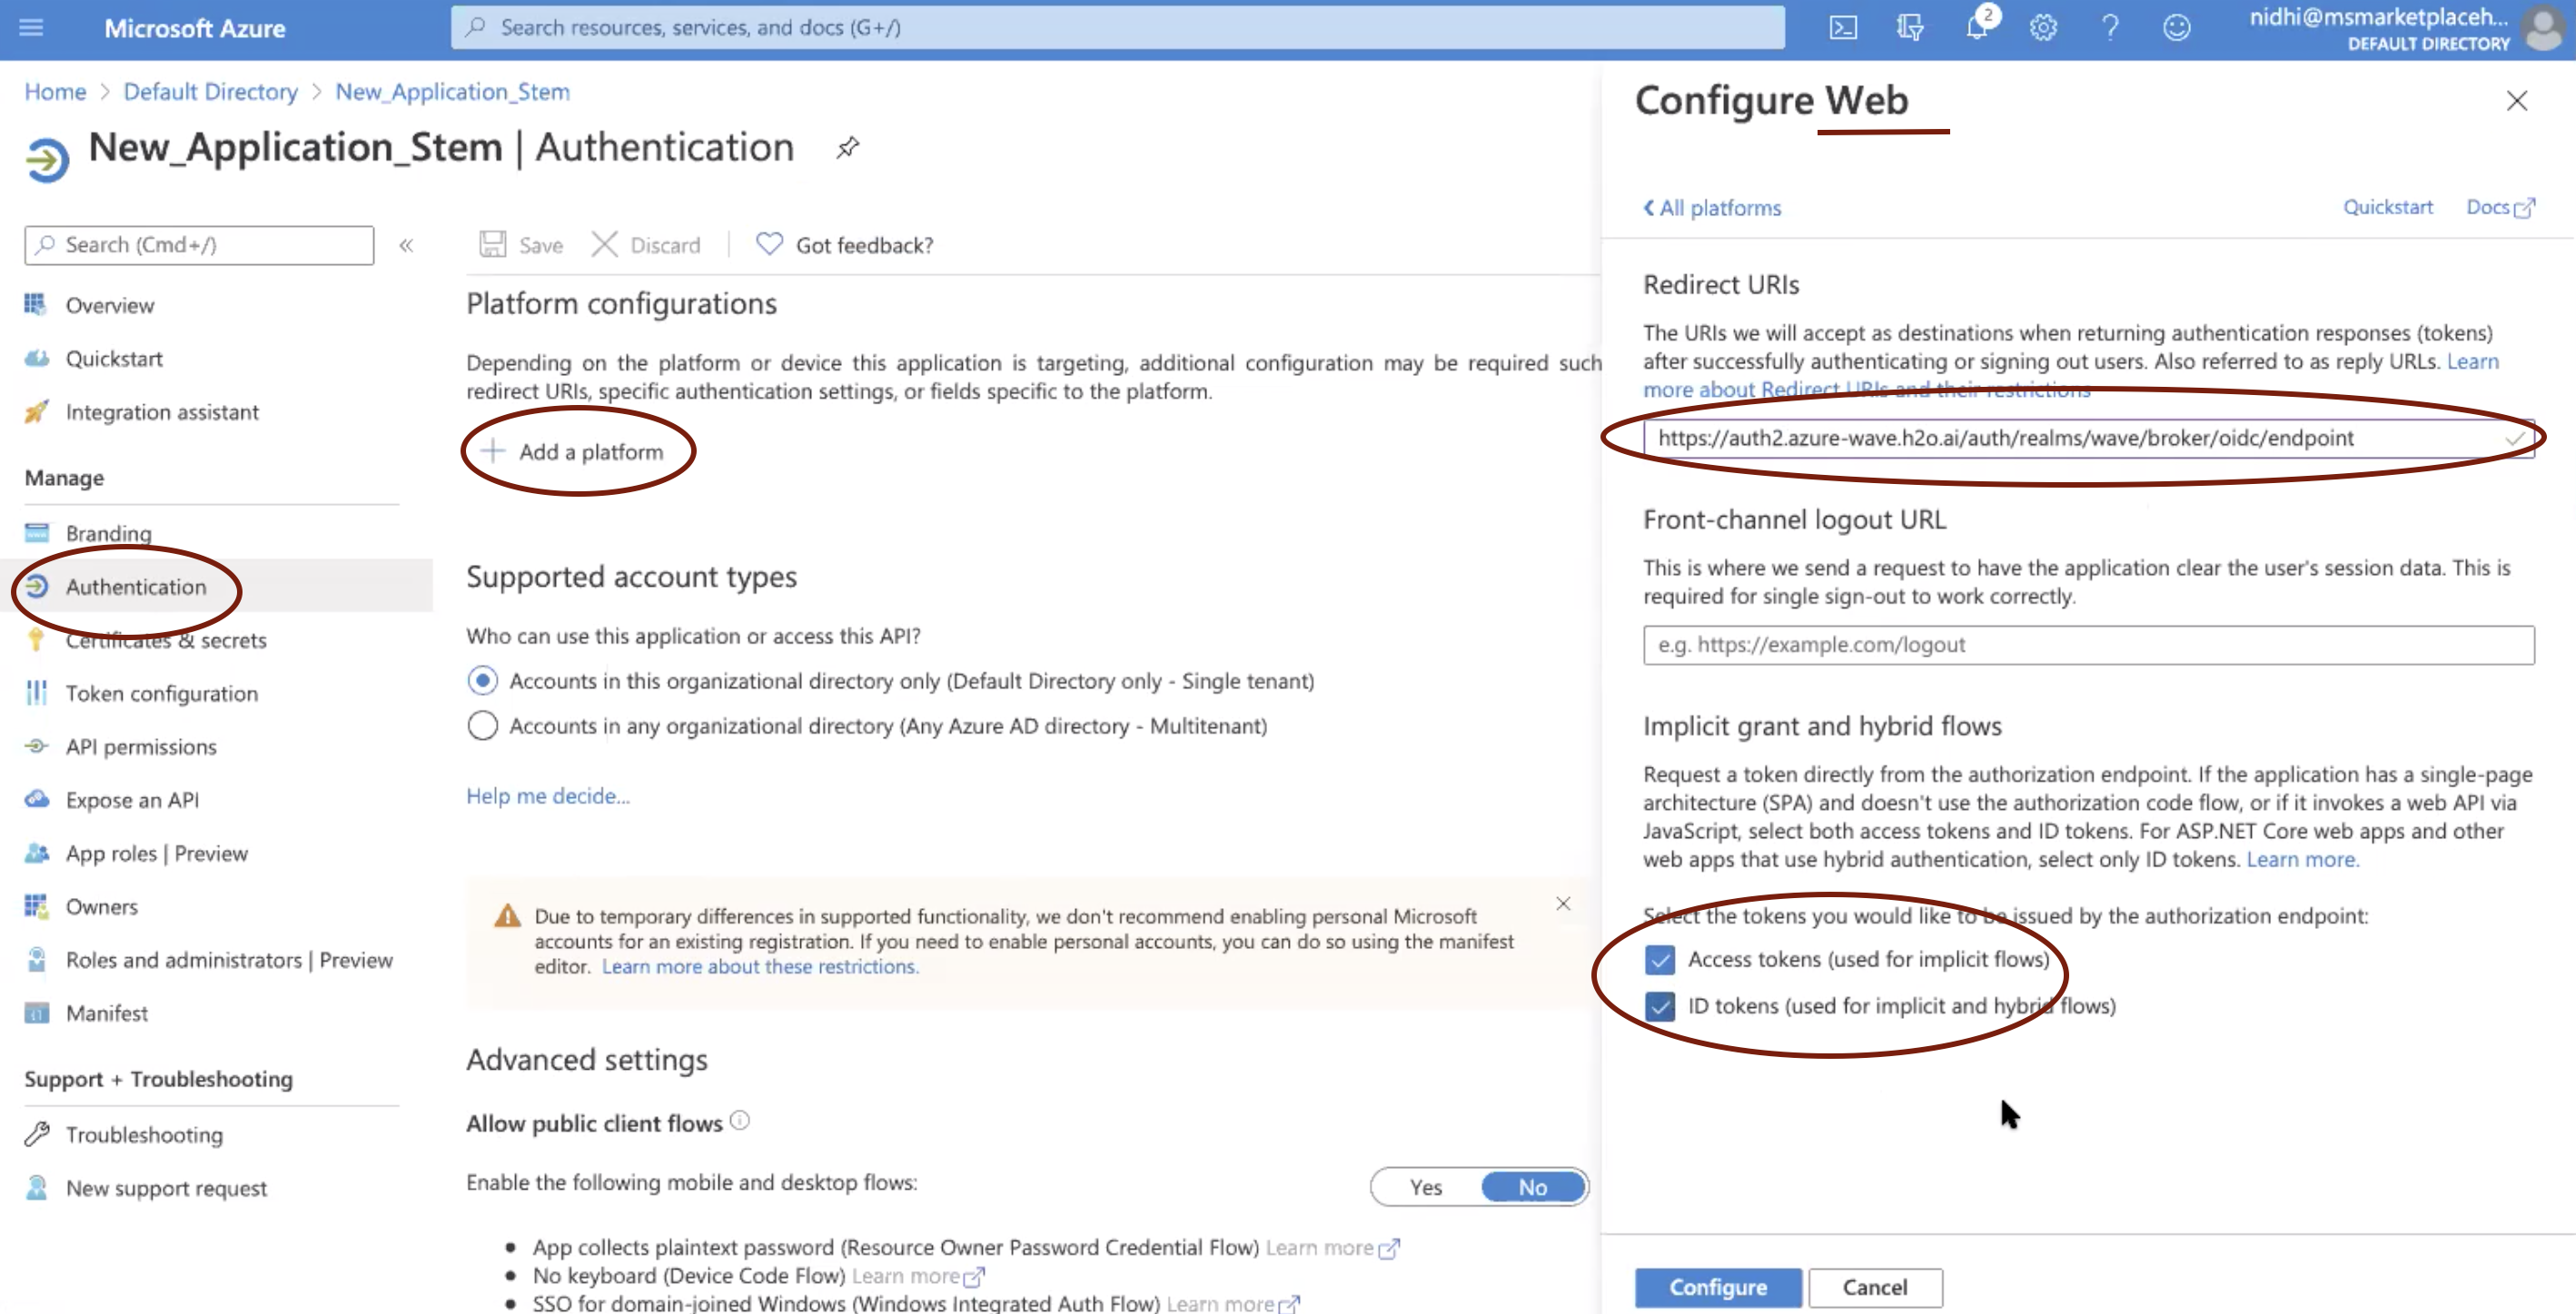
Copy the Redirect URI from KeyCloak.
In the Azure AD H2O MLOps application page, click Authentication > Add a platform > Web. Enter the Redirect URI from the Keycloak. Select the Access tokens (used for implicit flows) and ID tokens (used for implicit and hybrid flows) checkboxes, and then click the Configure button.
In Keycloak, Click Roles > Realm Roles > Add Role to create a new role named
read-token.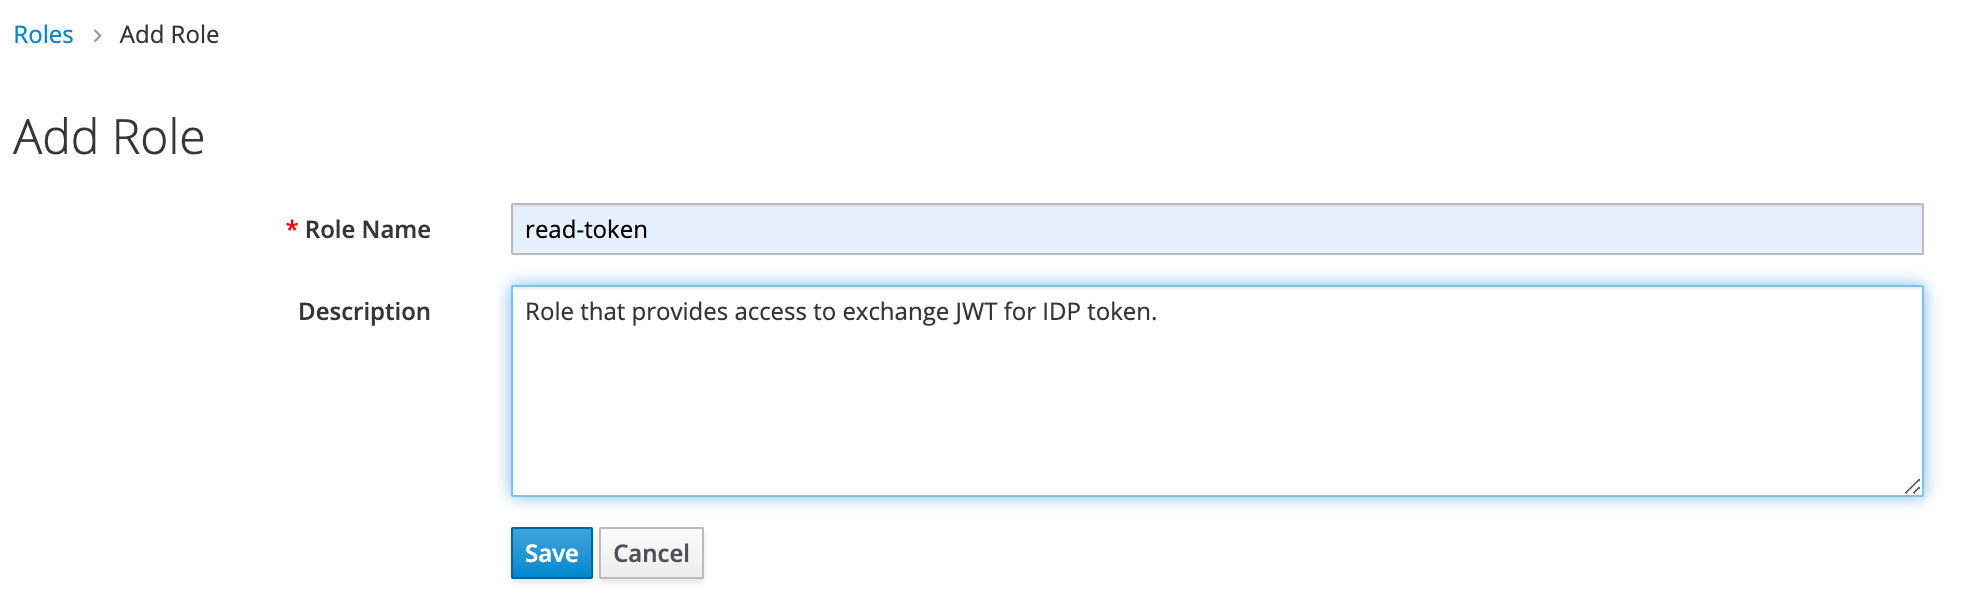
After creating the
read-tokenrole, click Roles> Default Roles and move theread-tokenrole to the Realm Default Roles category.
In Keycloak, click Client Scopes > Create to create a new scope called
read-token. In the Default Client Scopes tab, add the scope to the Assigned Default Client Scopes category.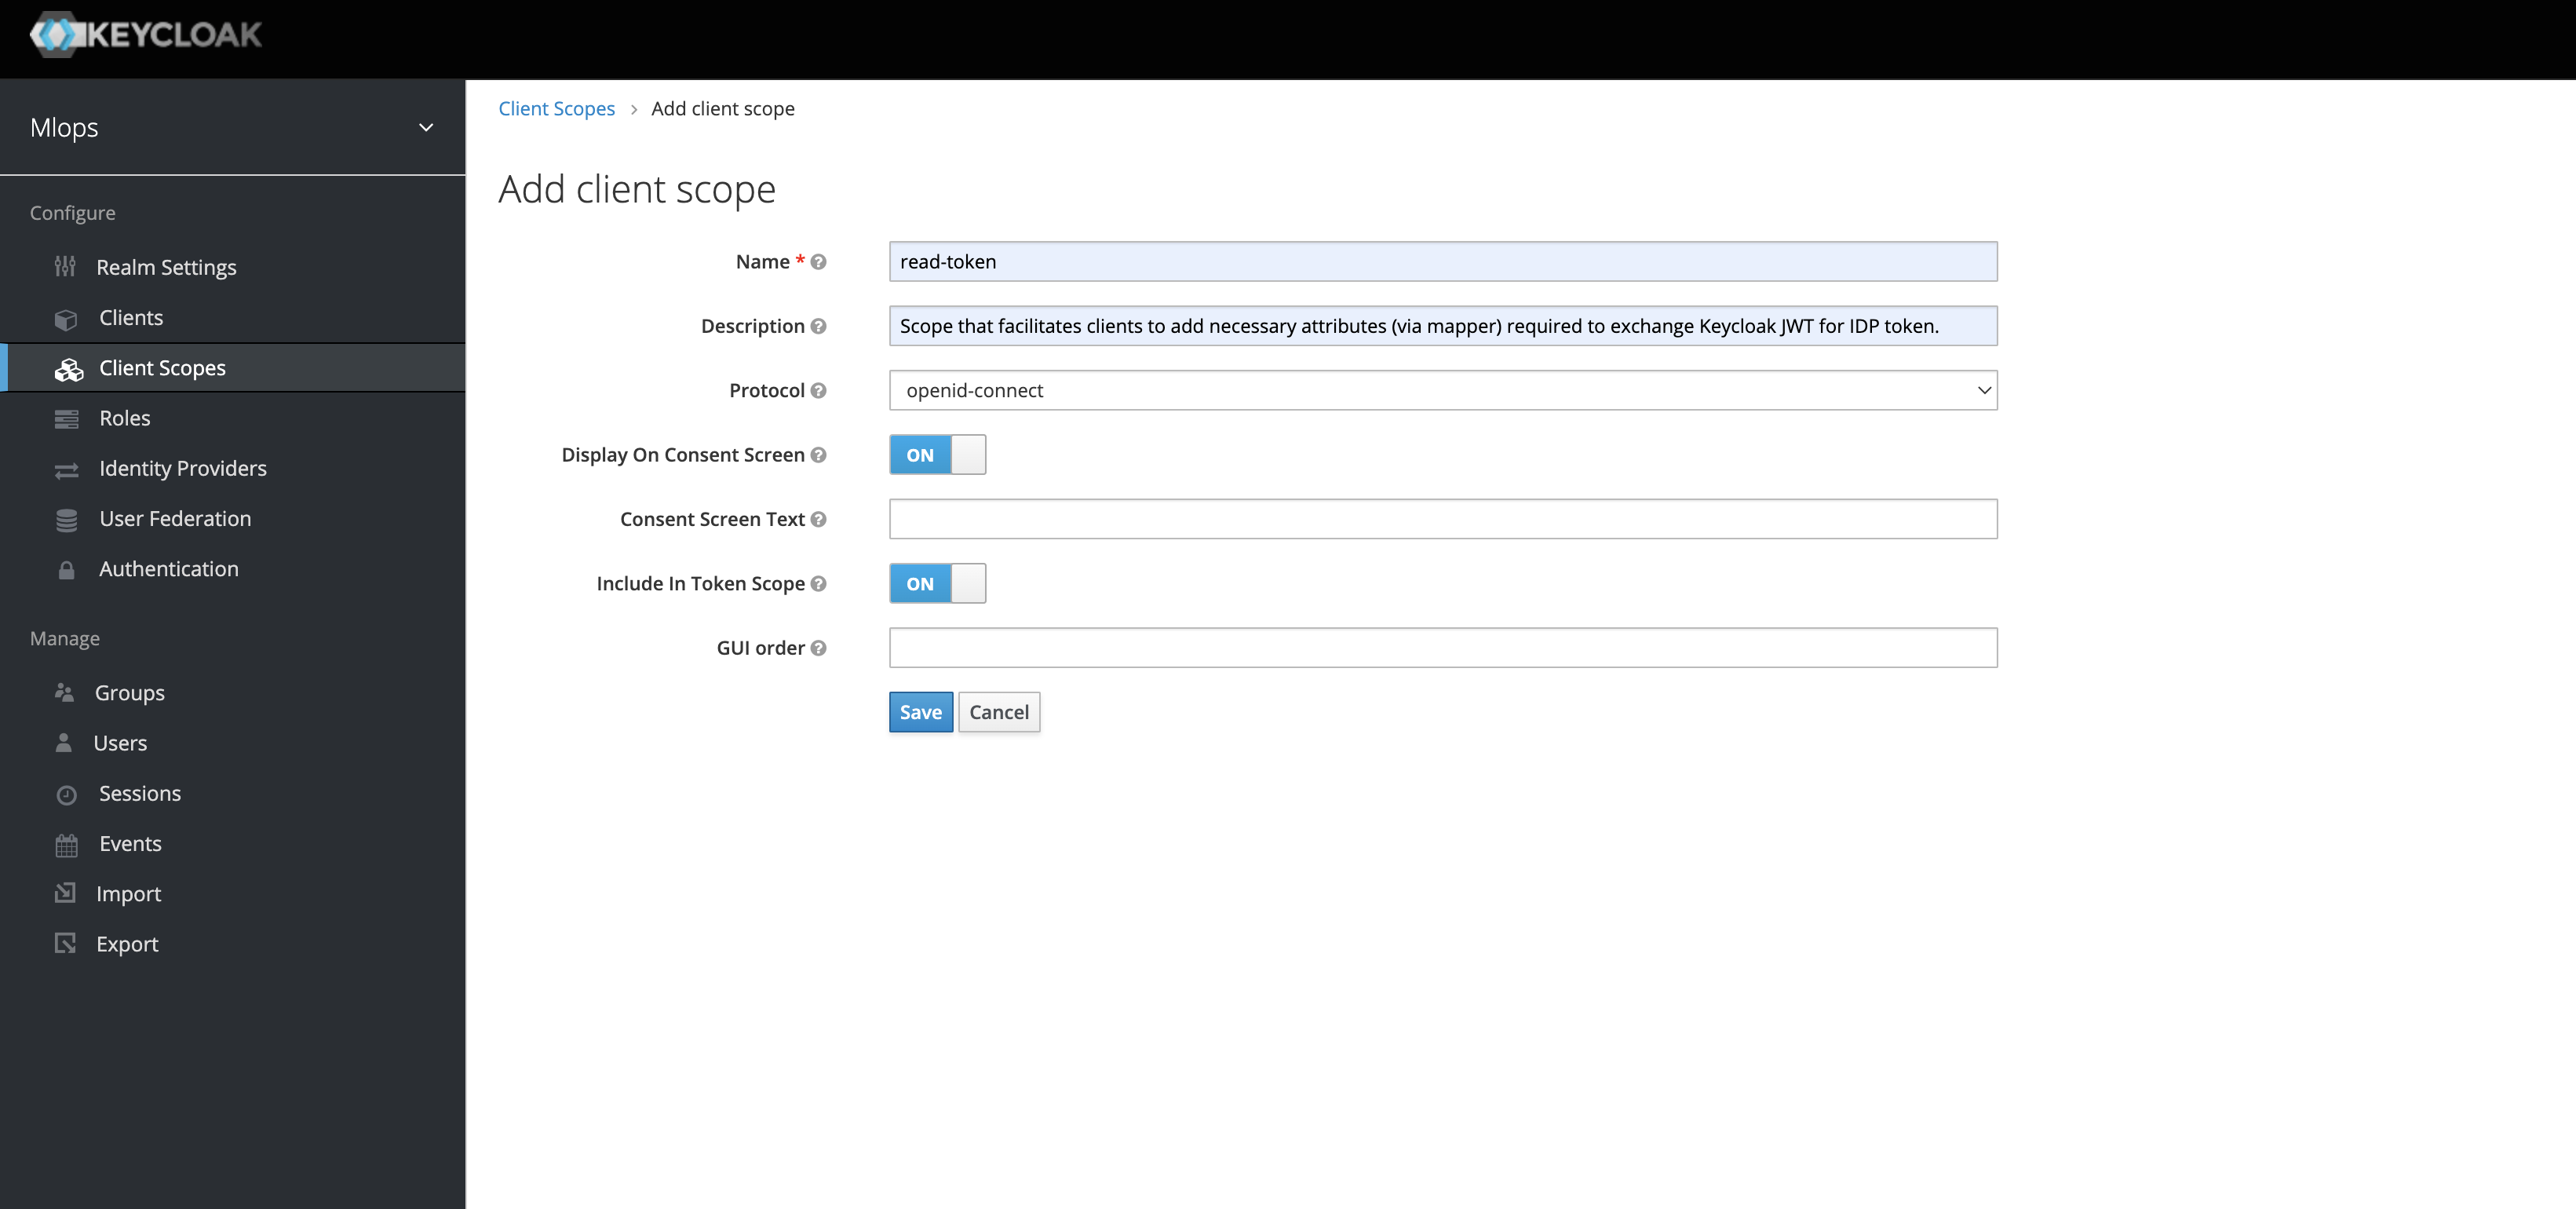

Go to Client Scopes > read-token > Mappers and click Add Built In. Select the type realm roles. Once created, edit the token claim name to
resource_access.broker.roles.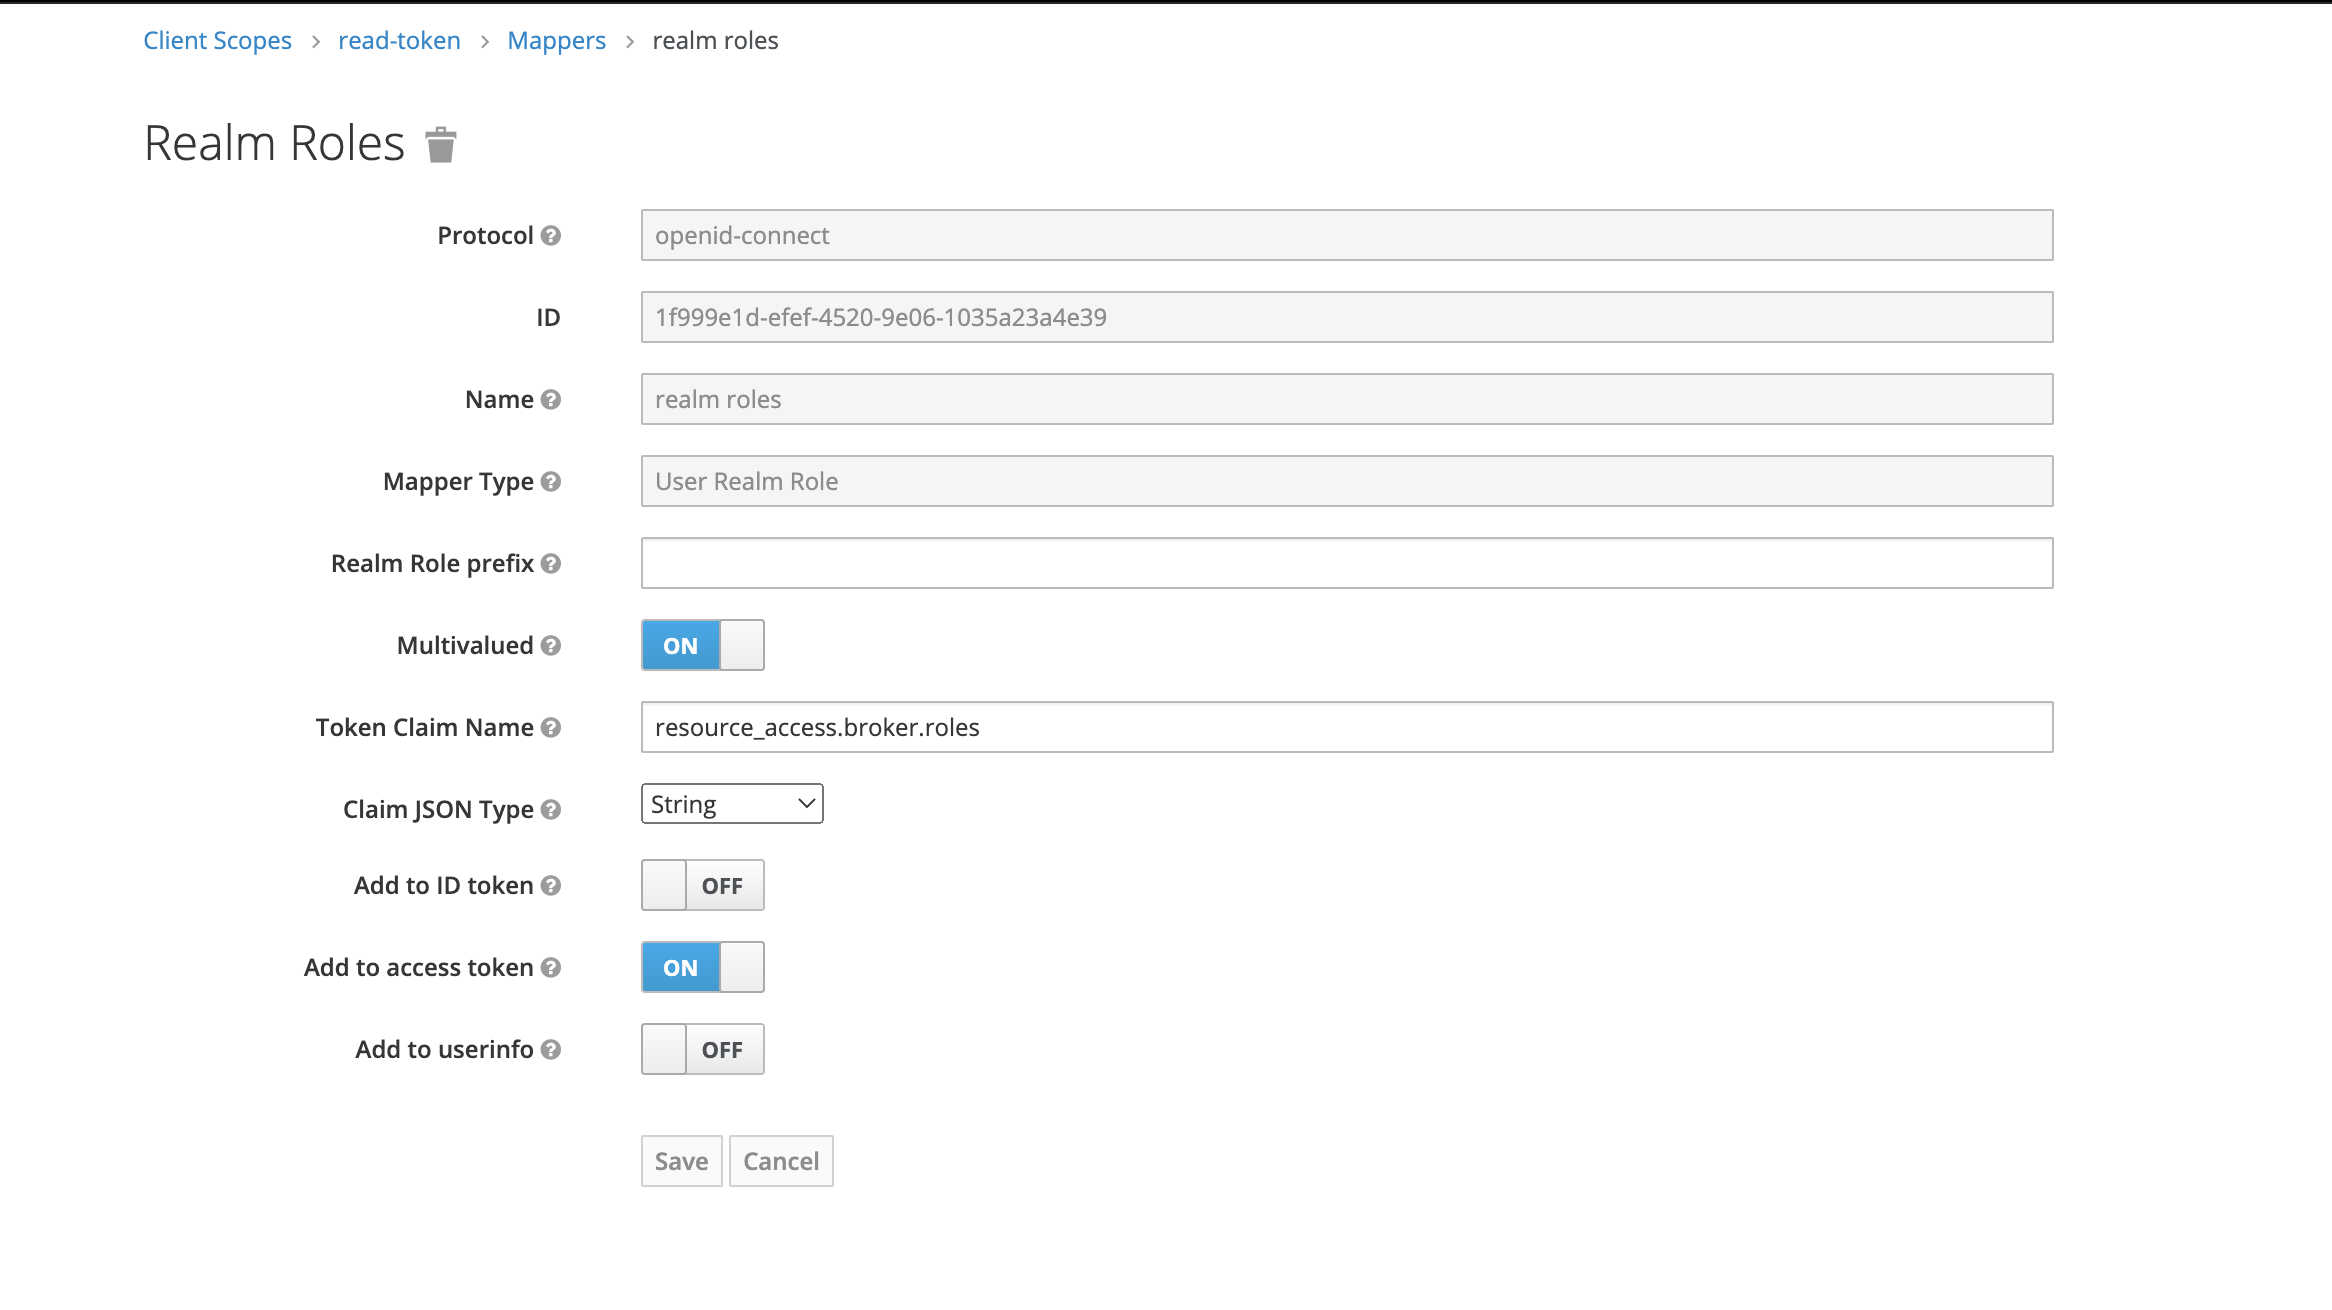
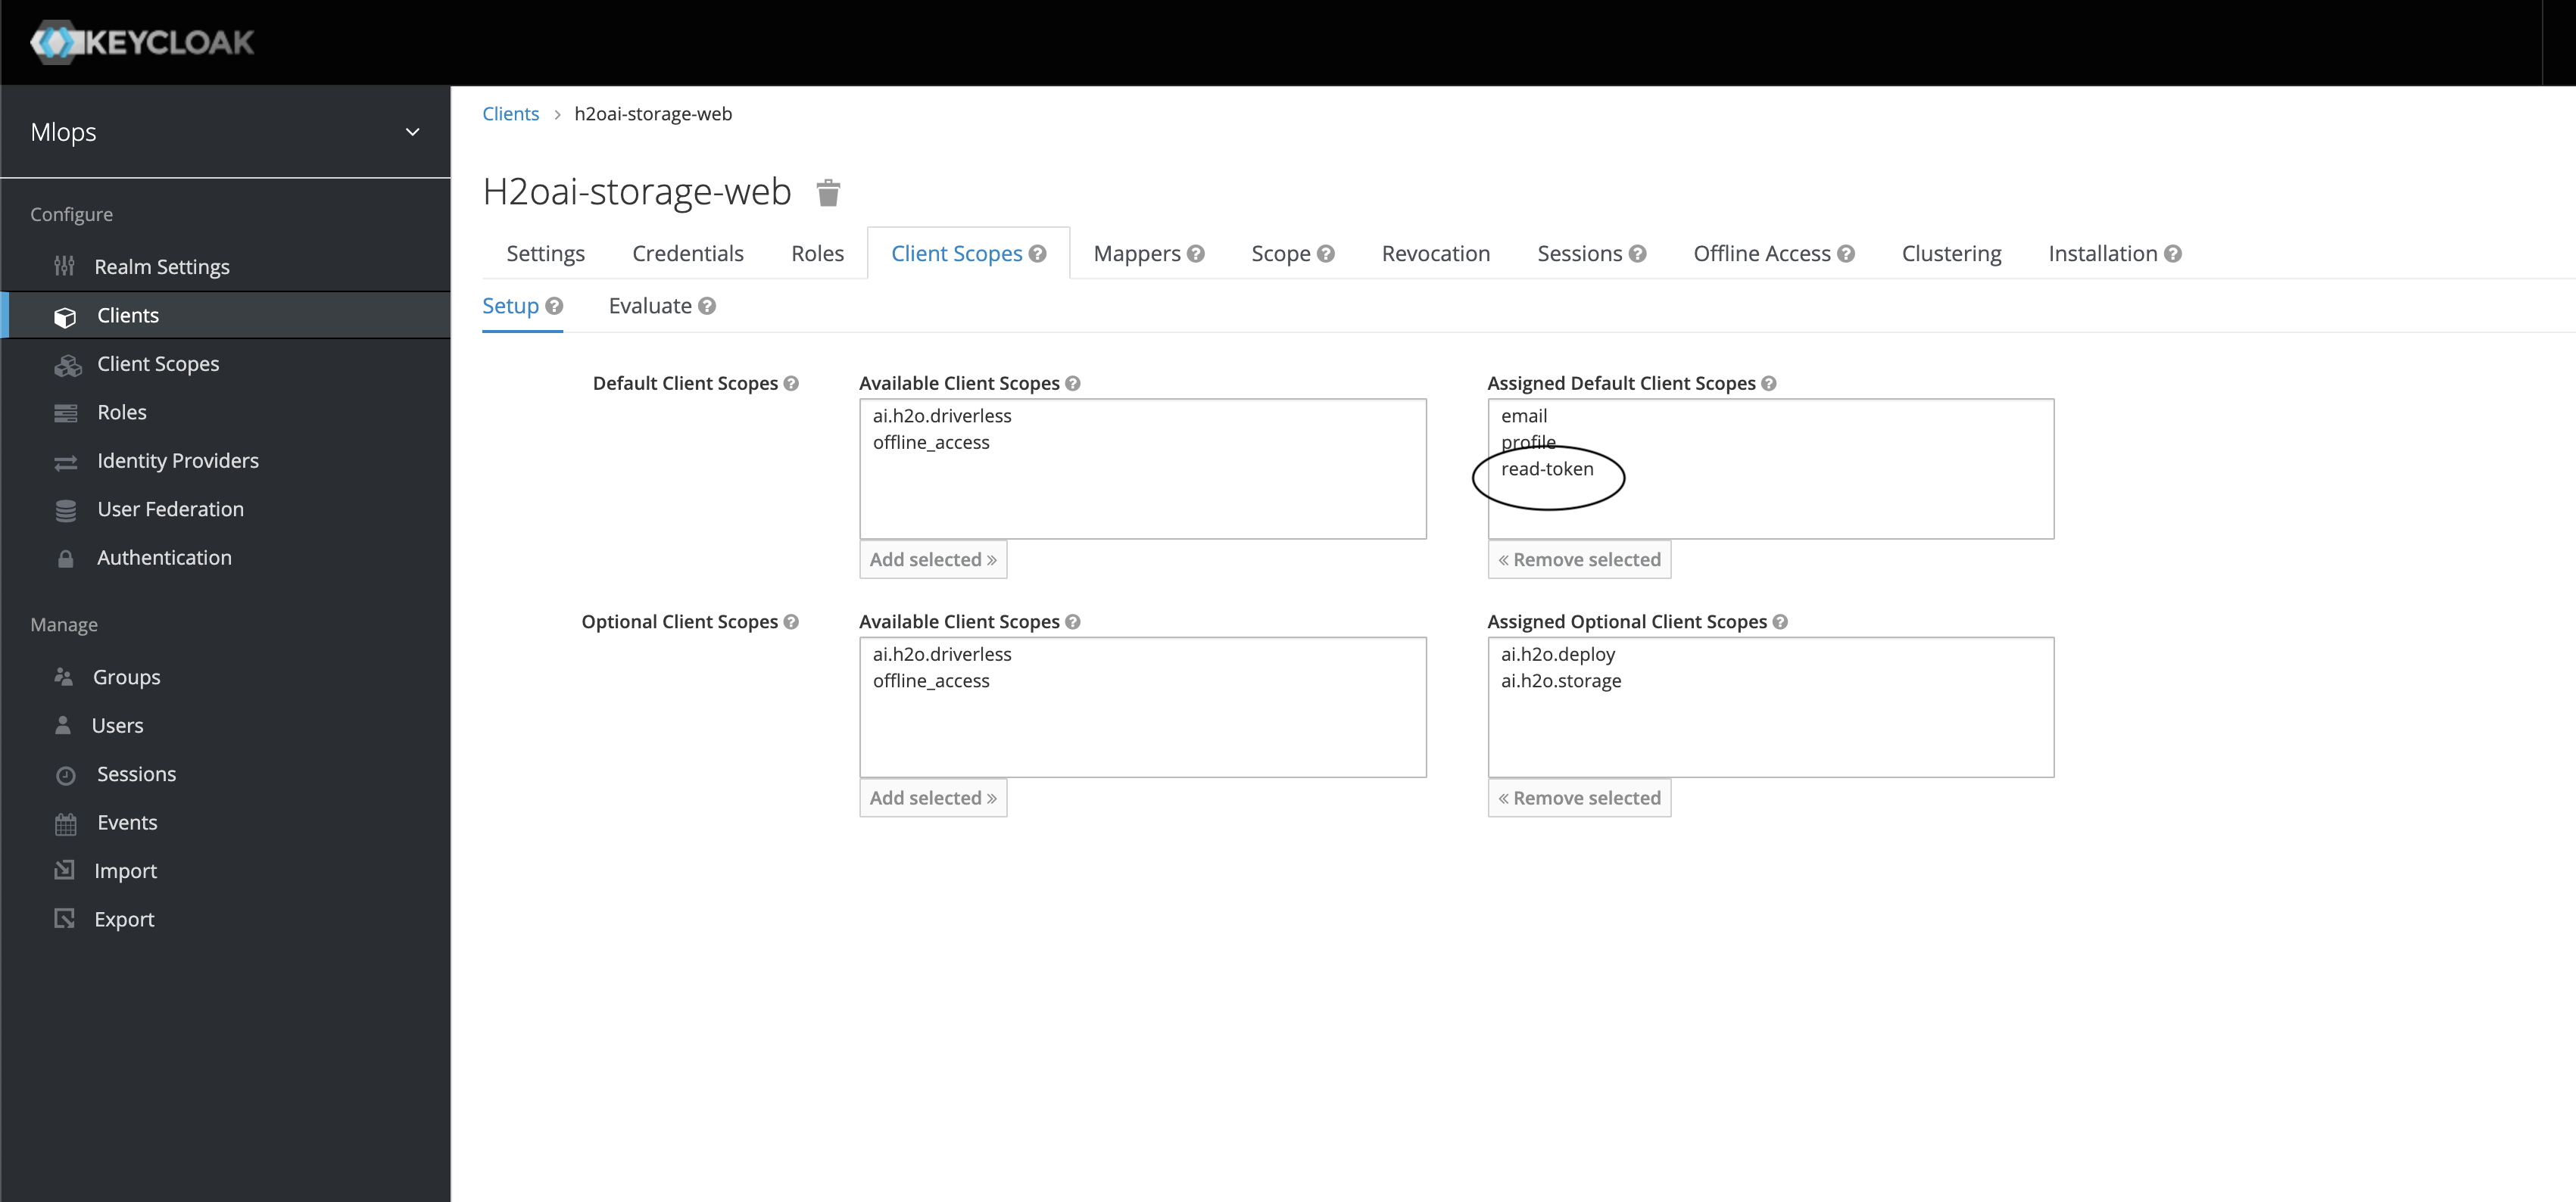
For the client h2oai-storage, h2oai-storage-web under Client Scopes, add the scope as default available Assigned Default Client Scopes. Add the scopes to any other configures *-wave clients as well.
Under the identity provider that we have created, go to the mappers tab and add a new mapper with Template value as
${CLAIM.preferred_username}and target as LOCAL. SpecifyMapper TypeasUsername Template Importer.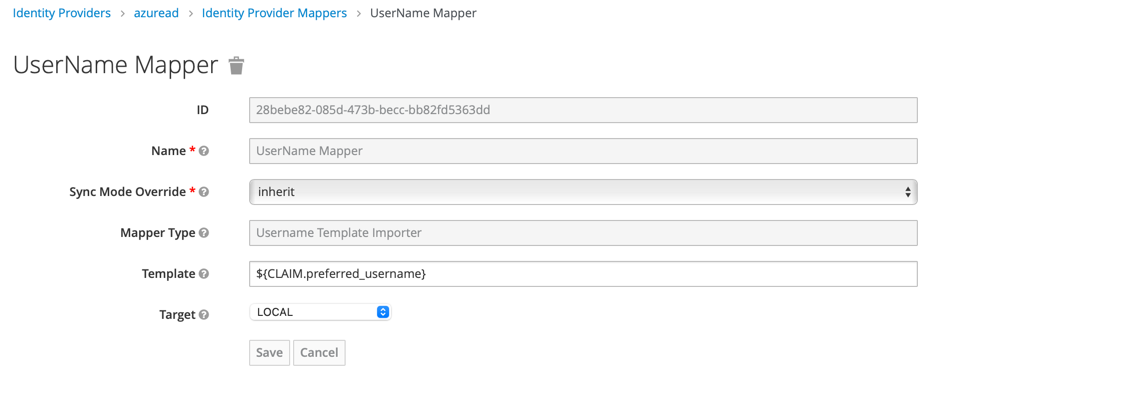
In Keycloak, click Authentication.
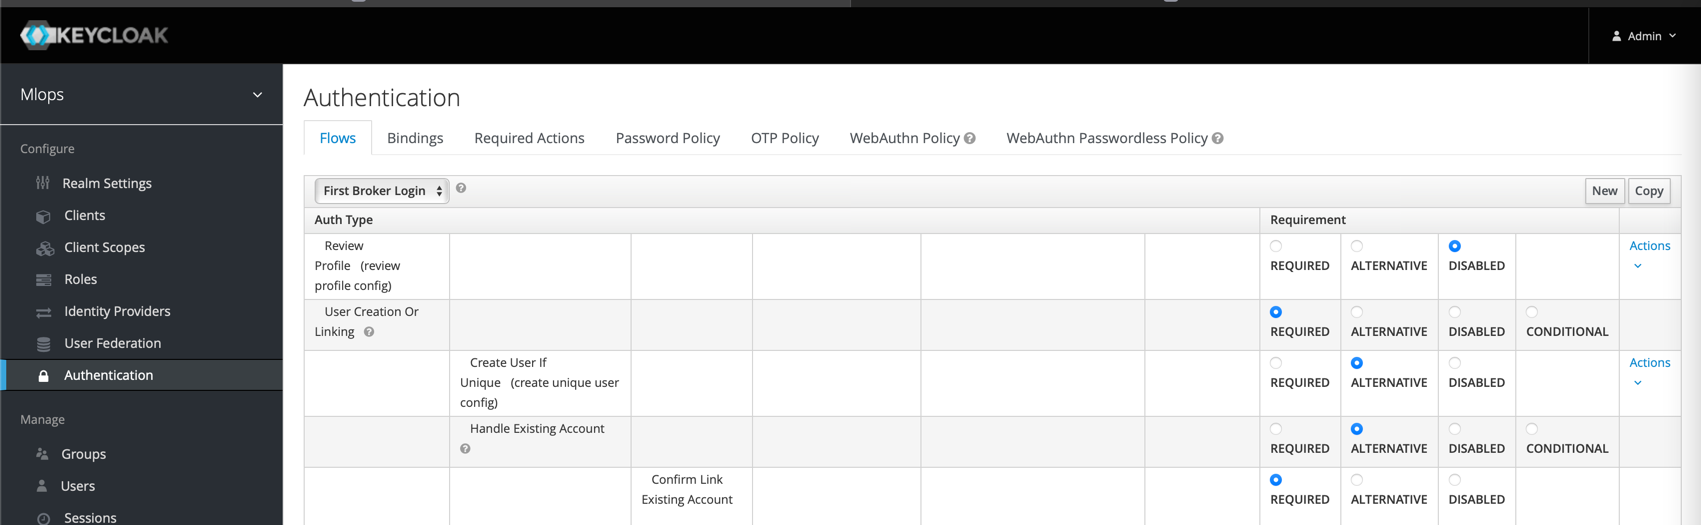
Select First Broken Login from the drop-down.
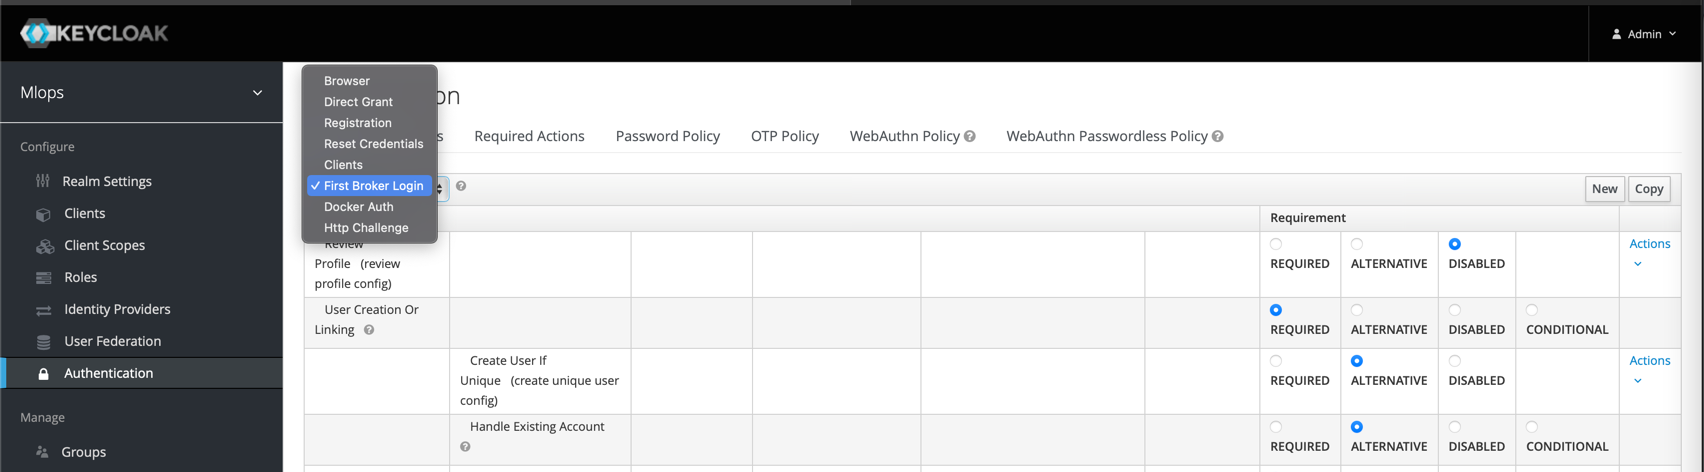
Under Review Profile (review profile config), select DISABLED. The configuration is automatically saved.

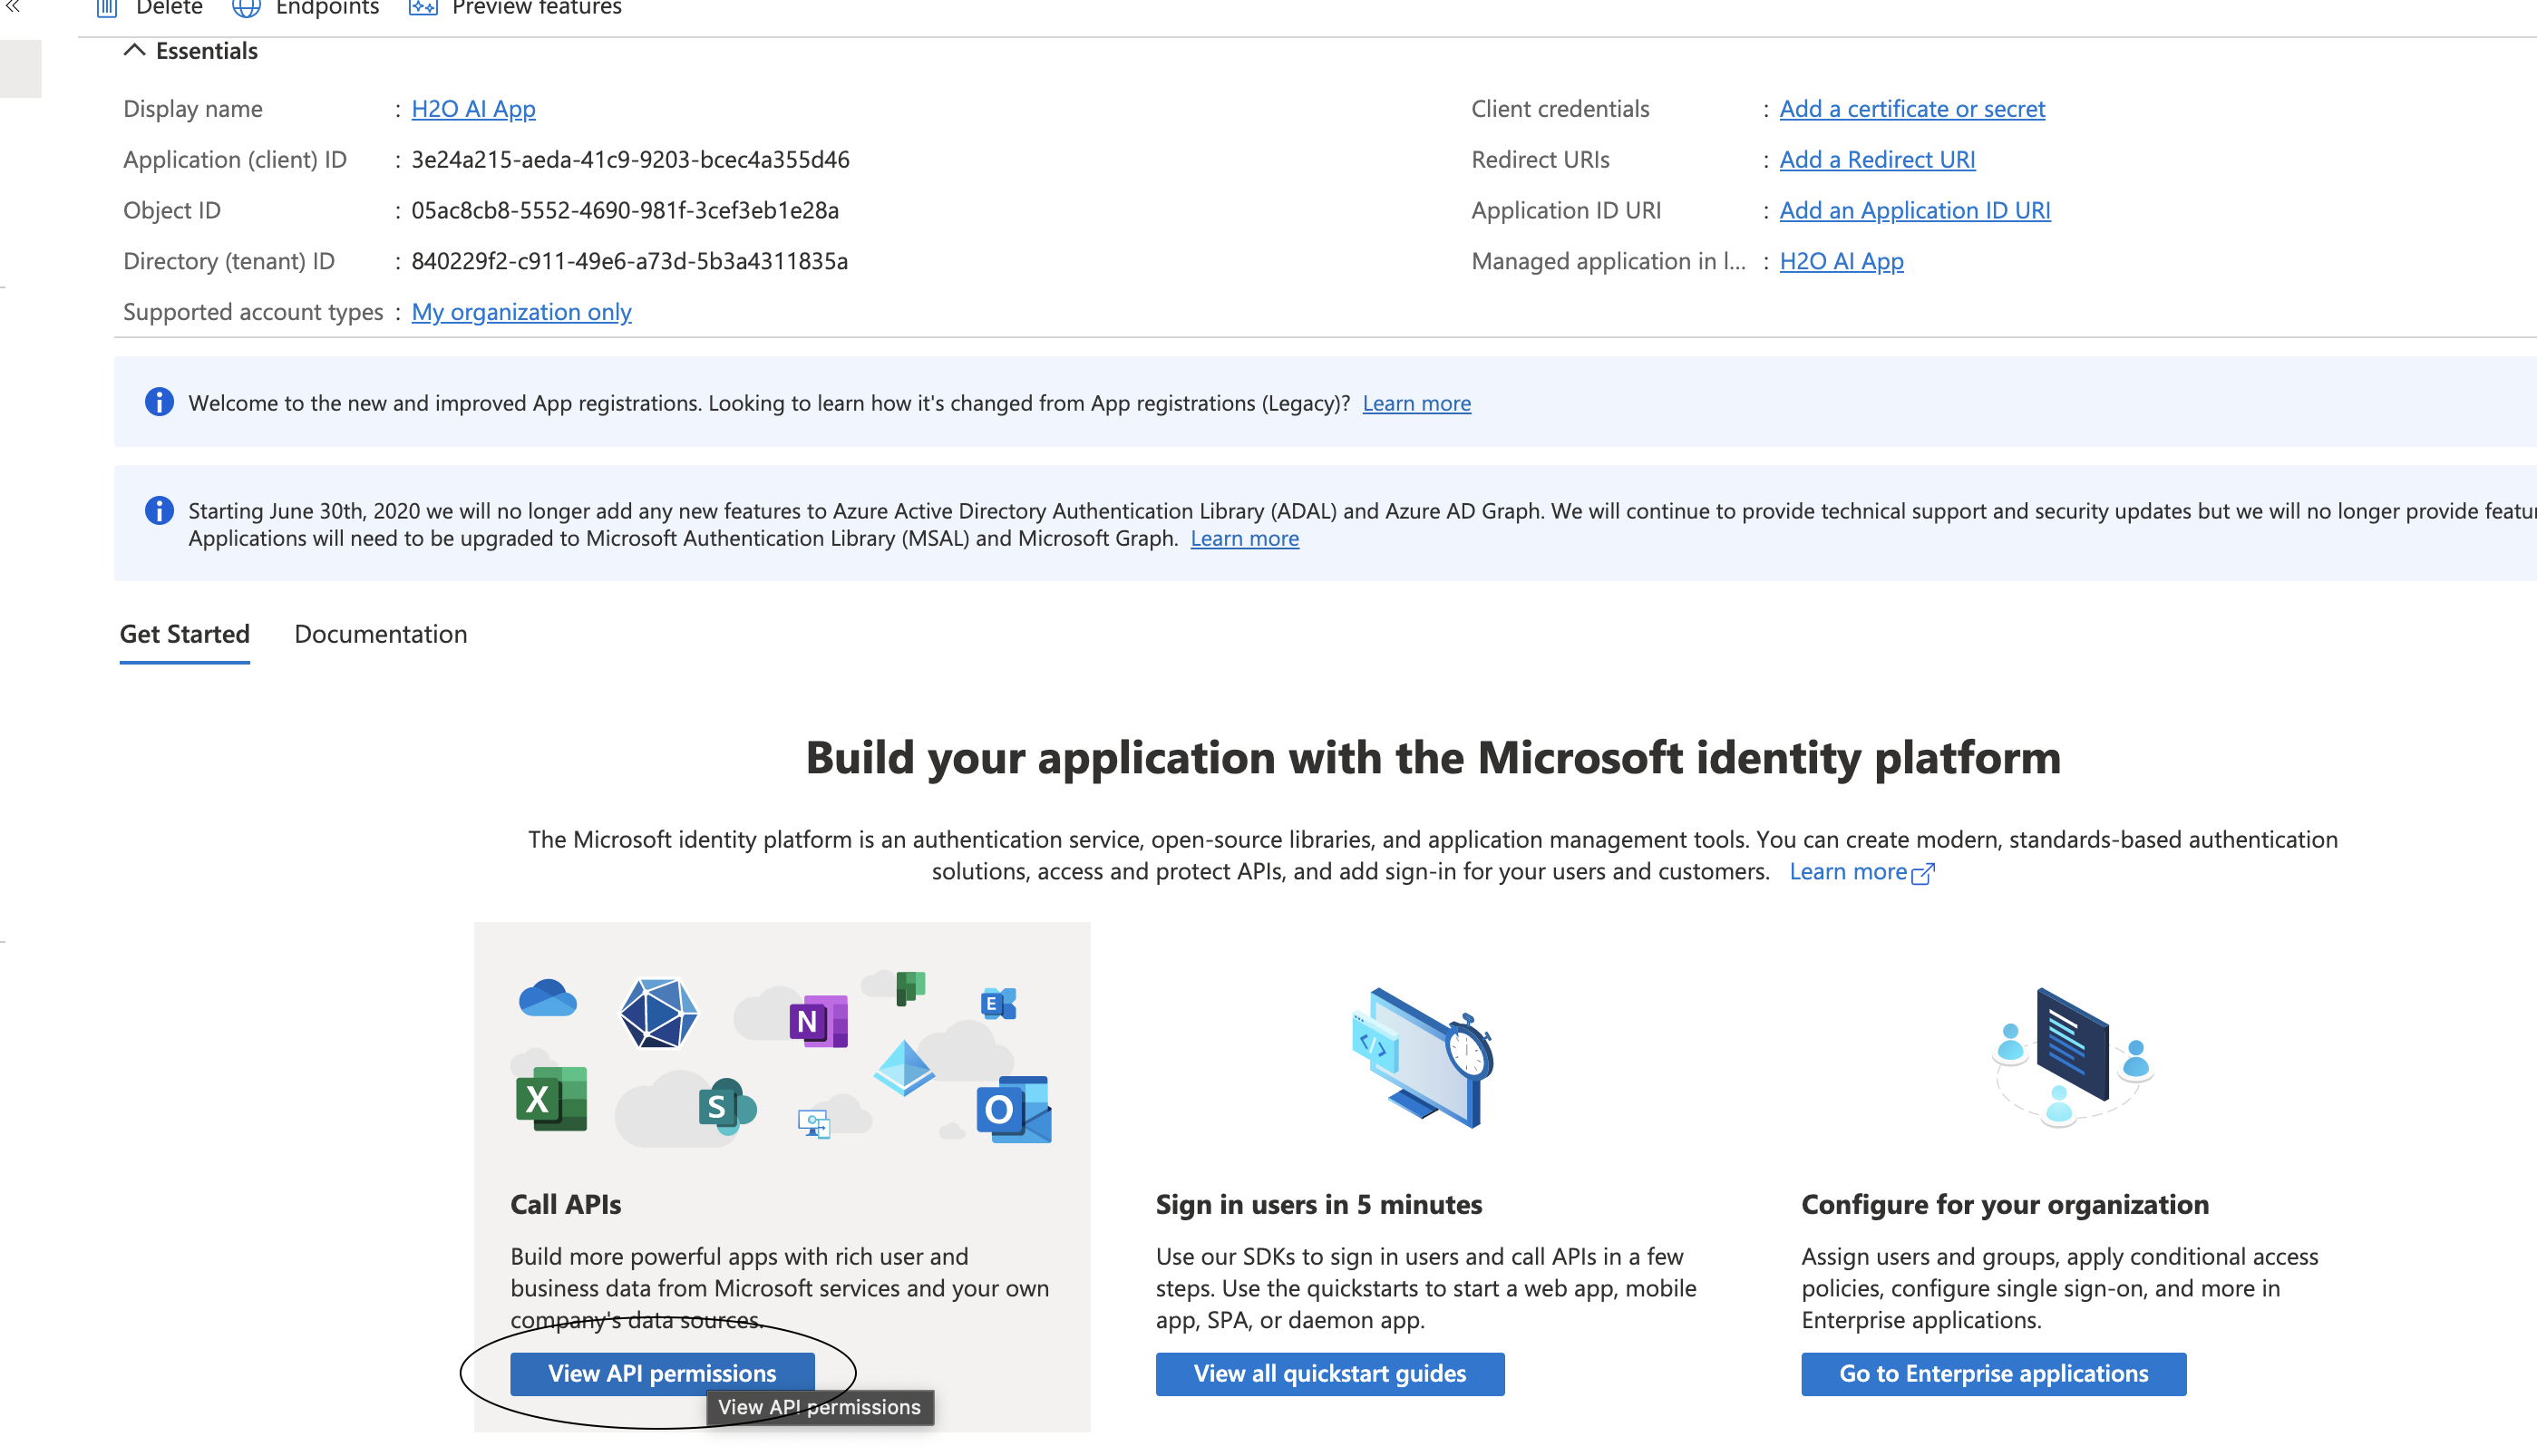
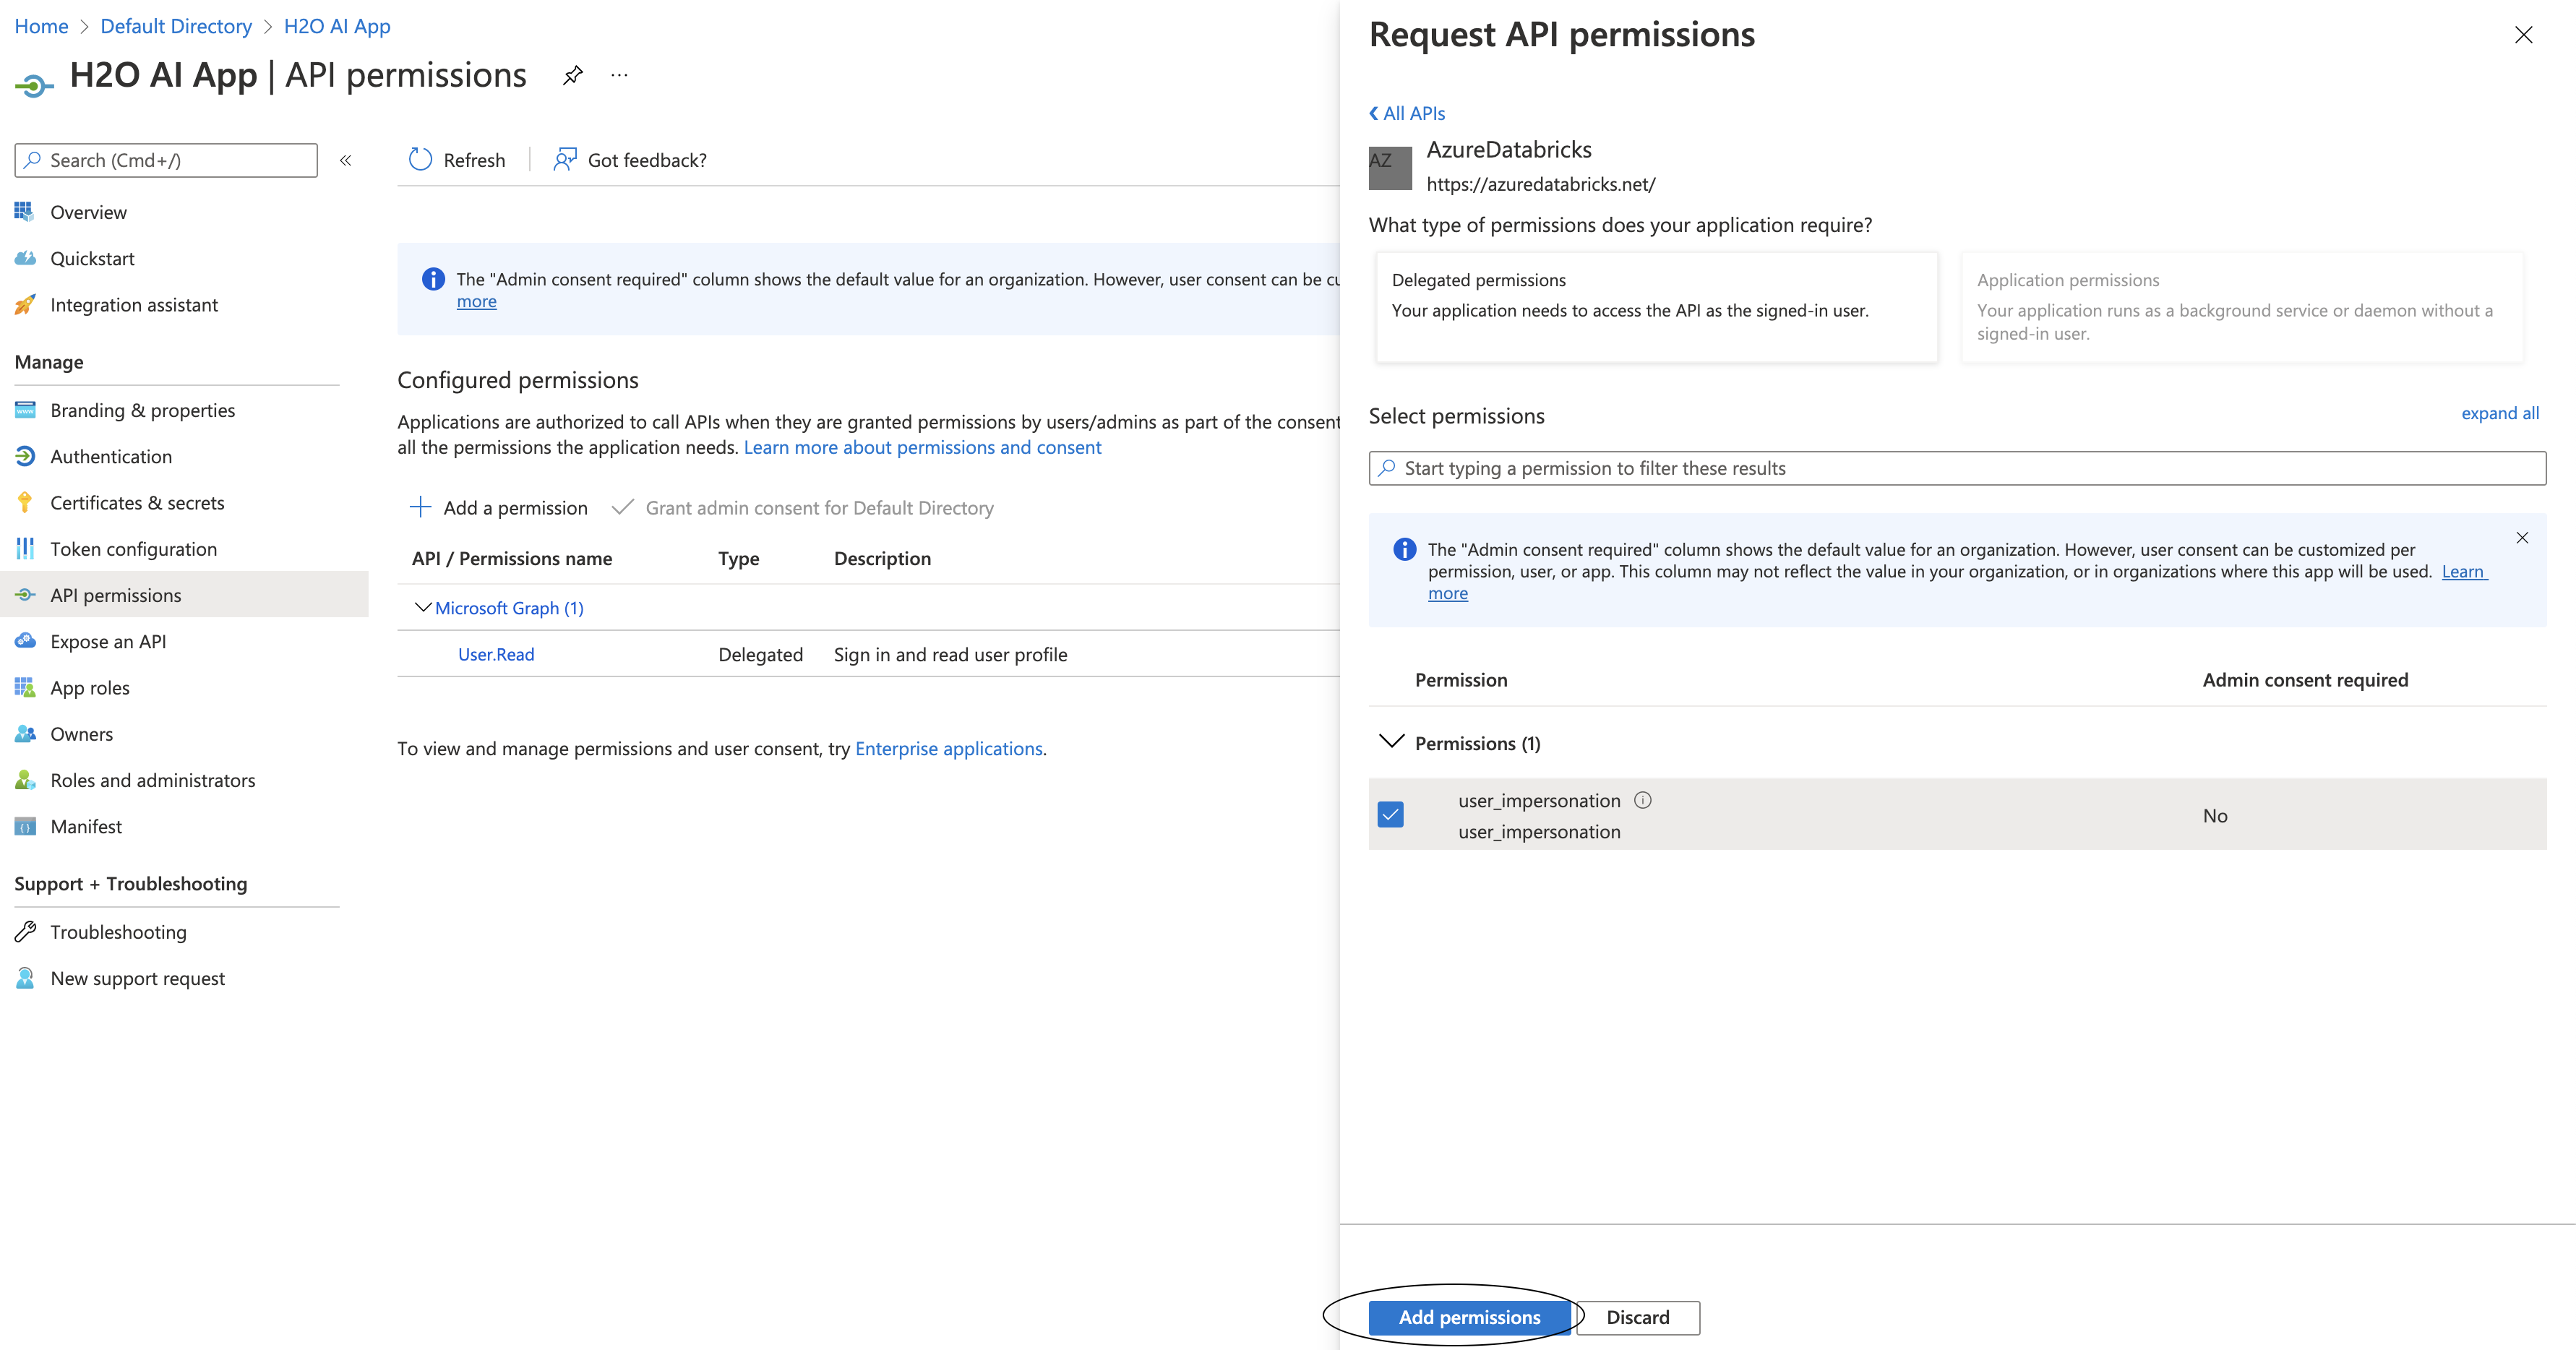
Adding the user_impersonation required permission
In the Azure AD H2O MLOps application page, click the View API permissions button.
In the Request API permissions window, click the APIs my organization uses tab and enter
AzureDatabricksin the search field.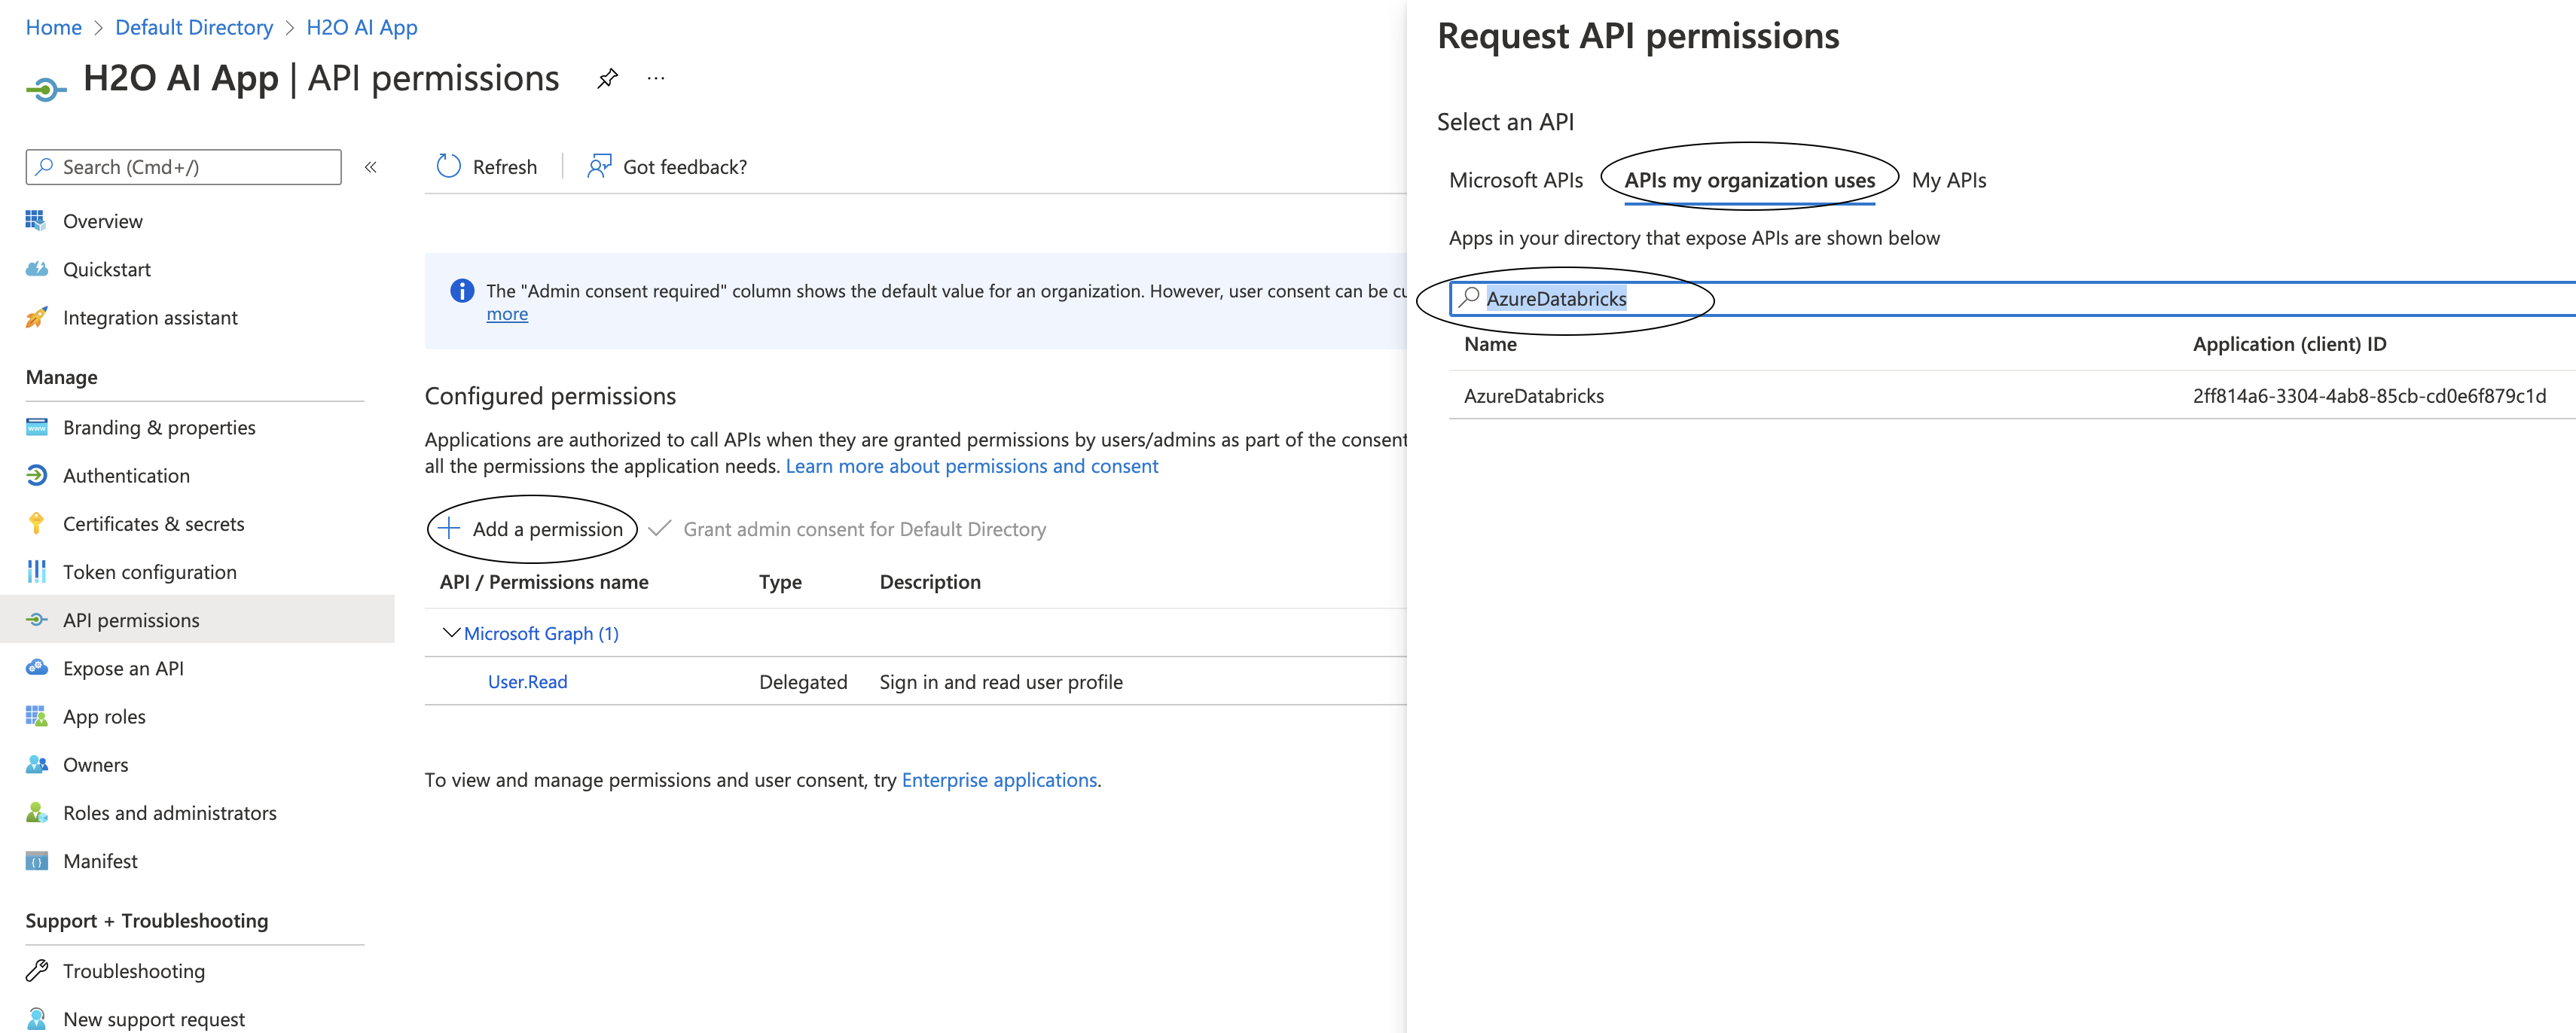
Select the
user_impersonationpermission, then click the Add permissions button to confirm.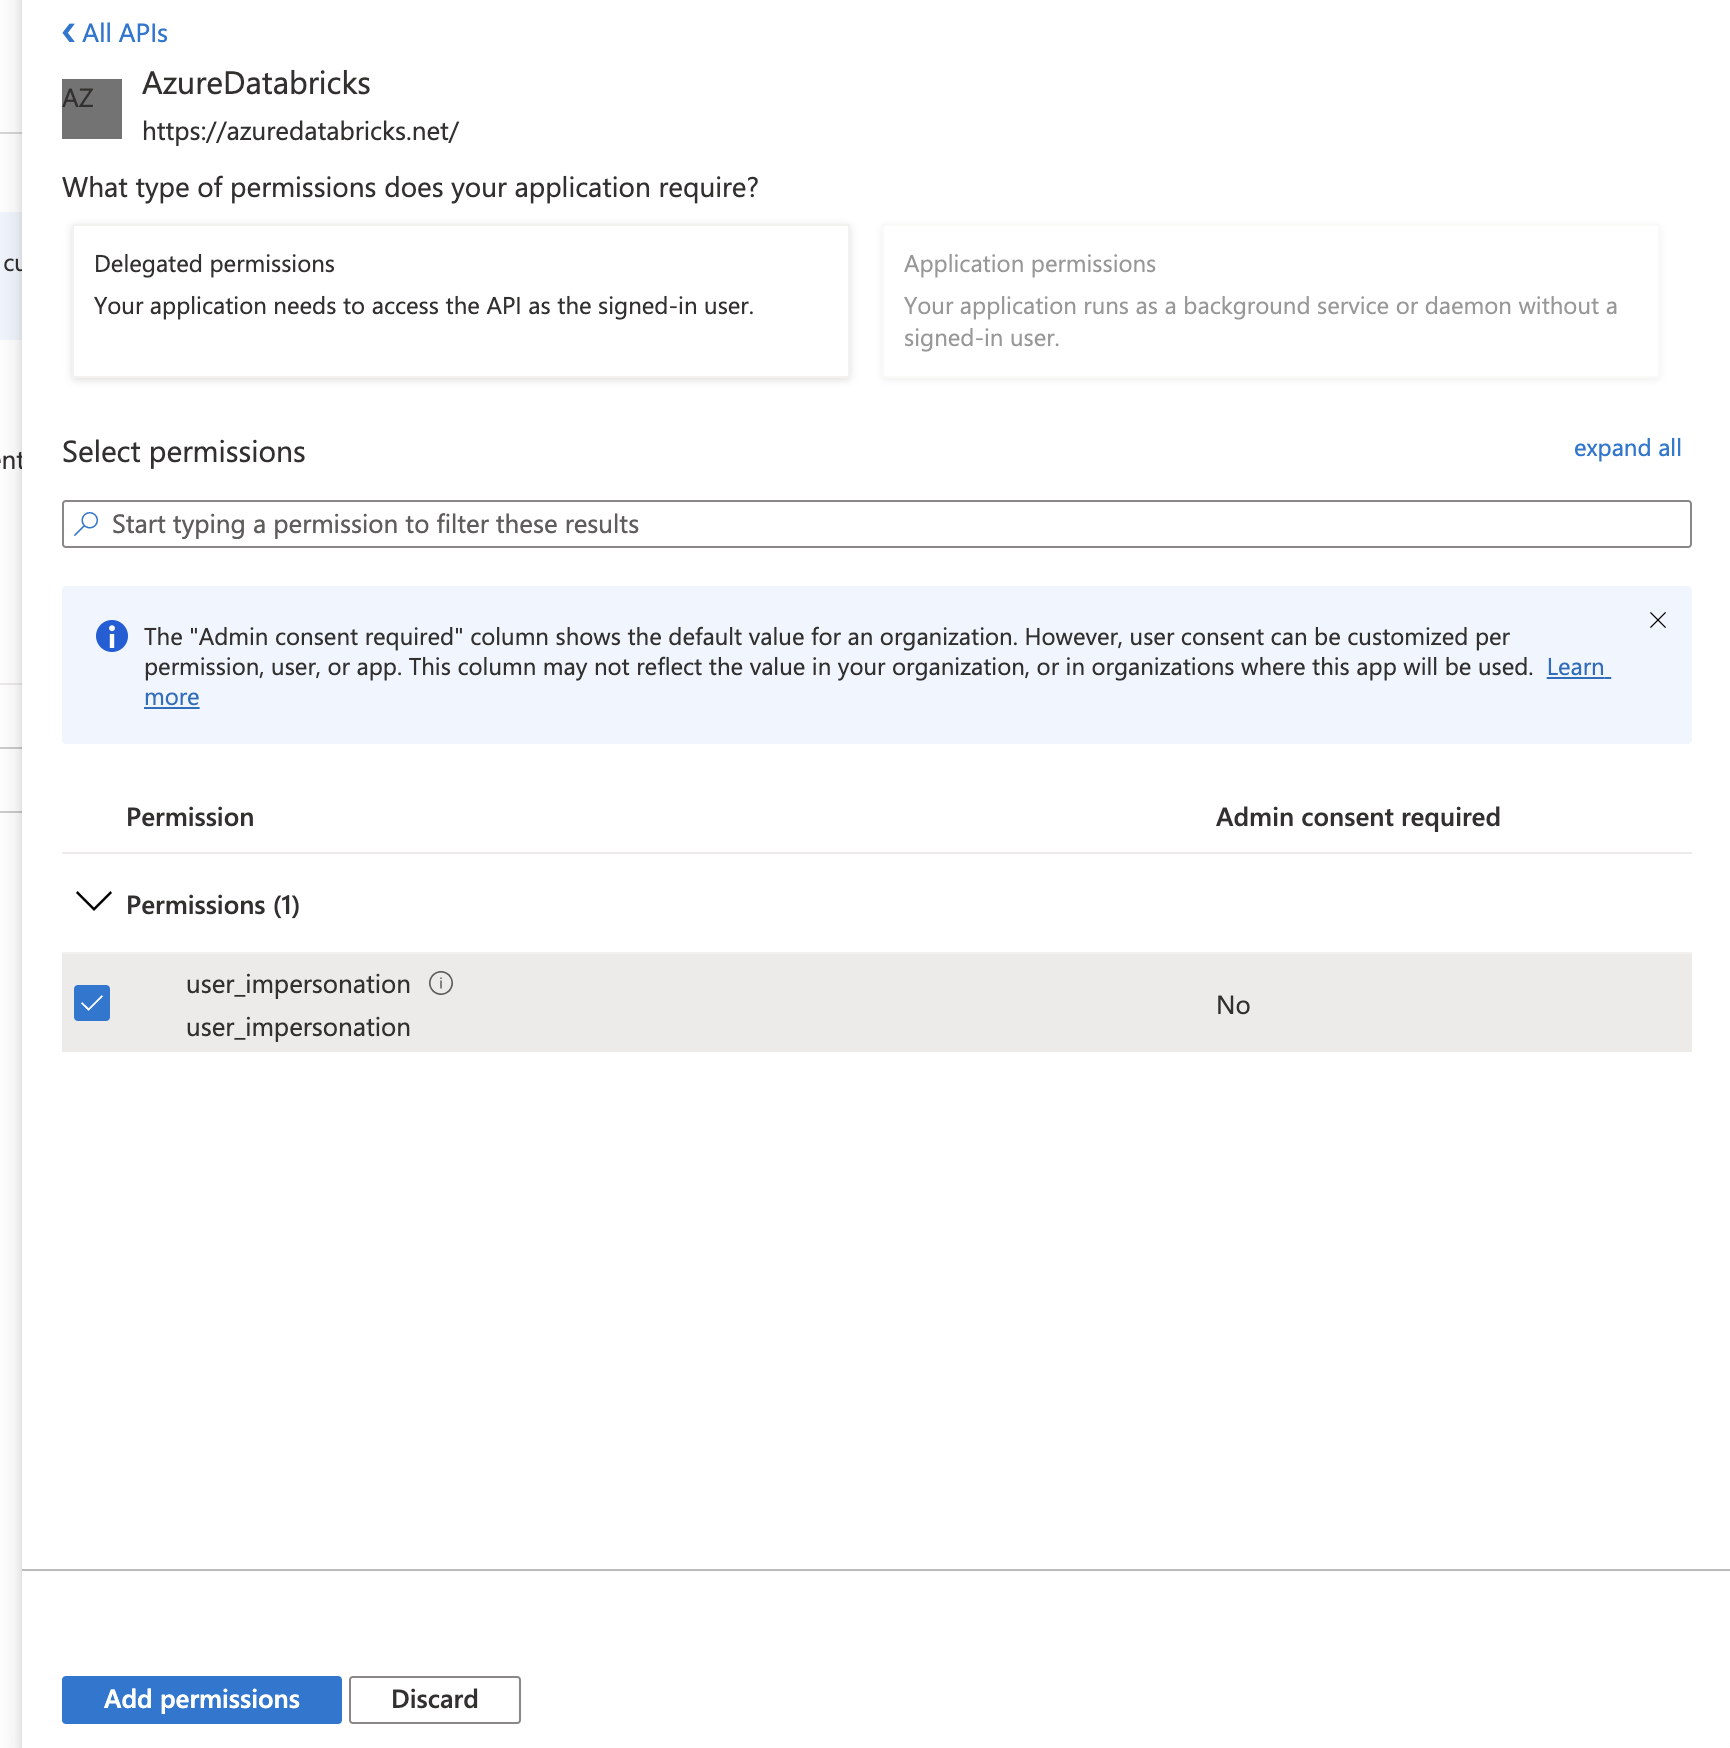
After the
user_impersonationpermission has been added, select Grant admin consent for Default Directory so that each user is prompted for consent when logging in.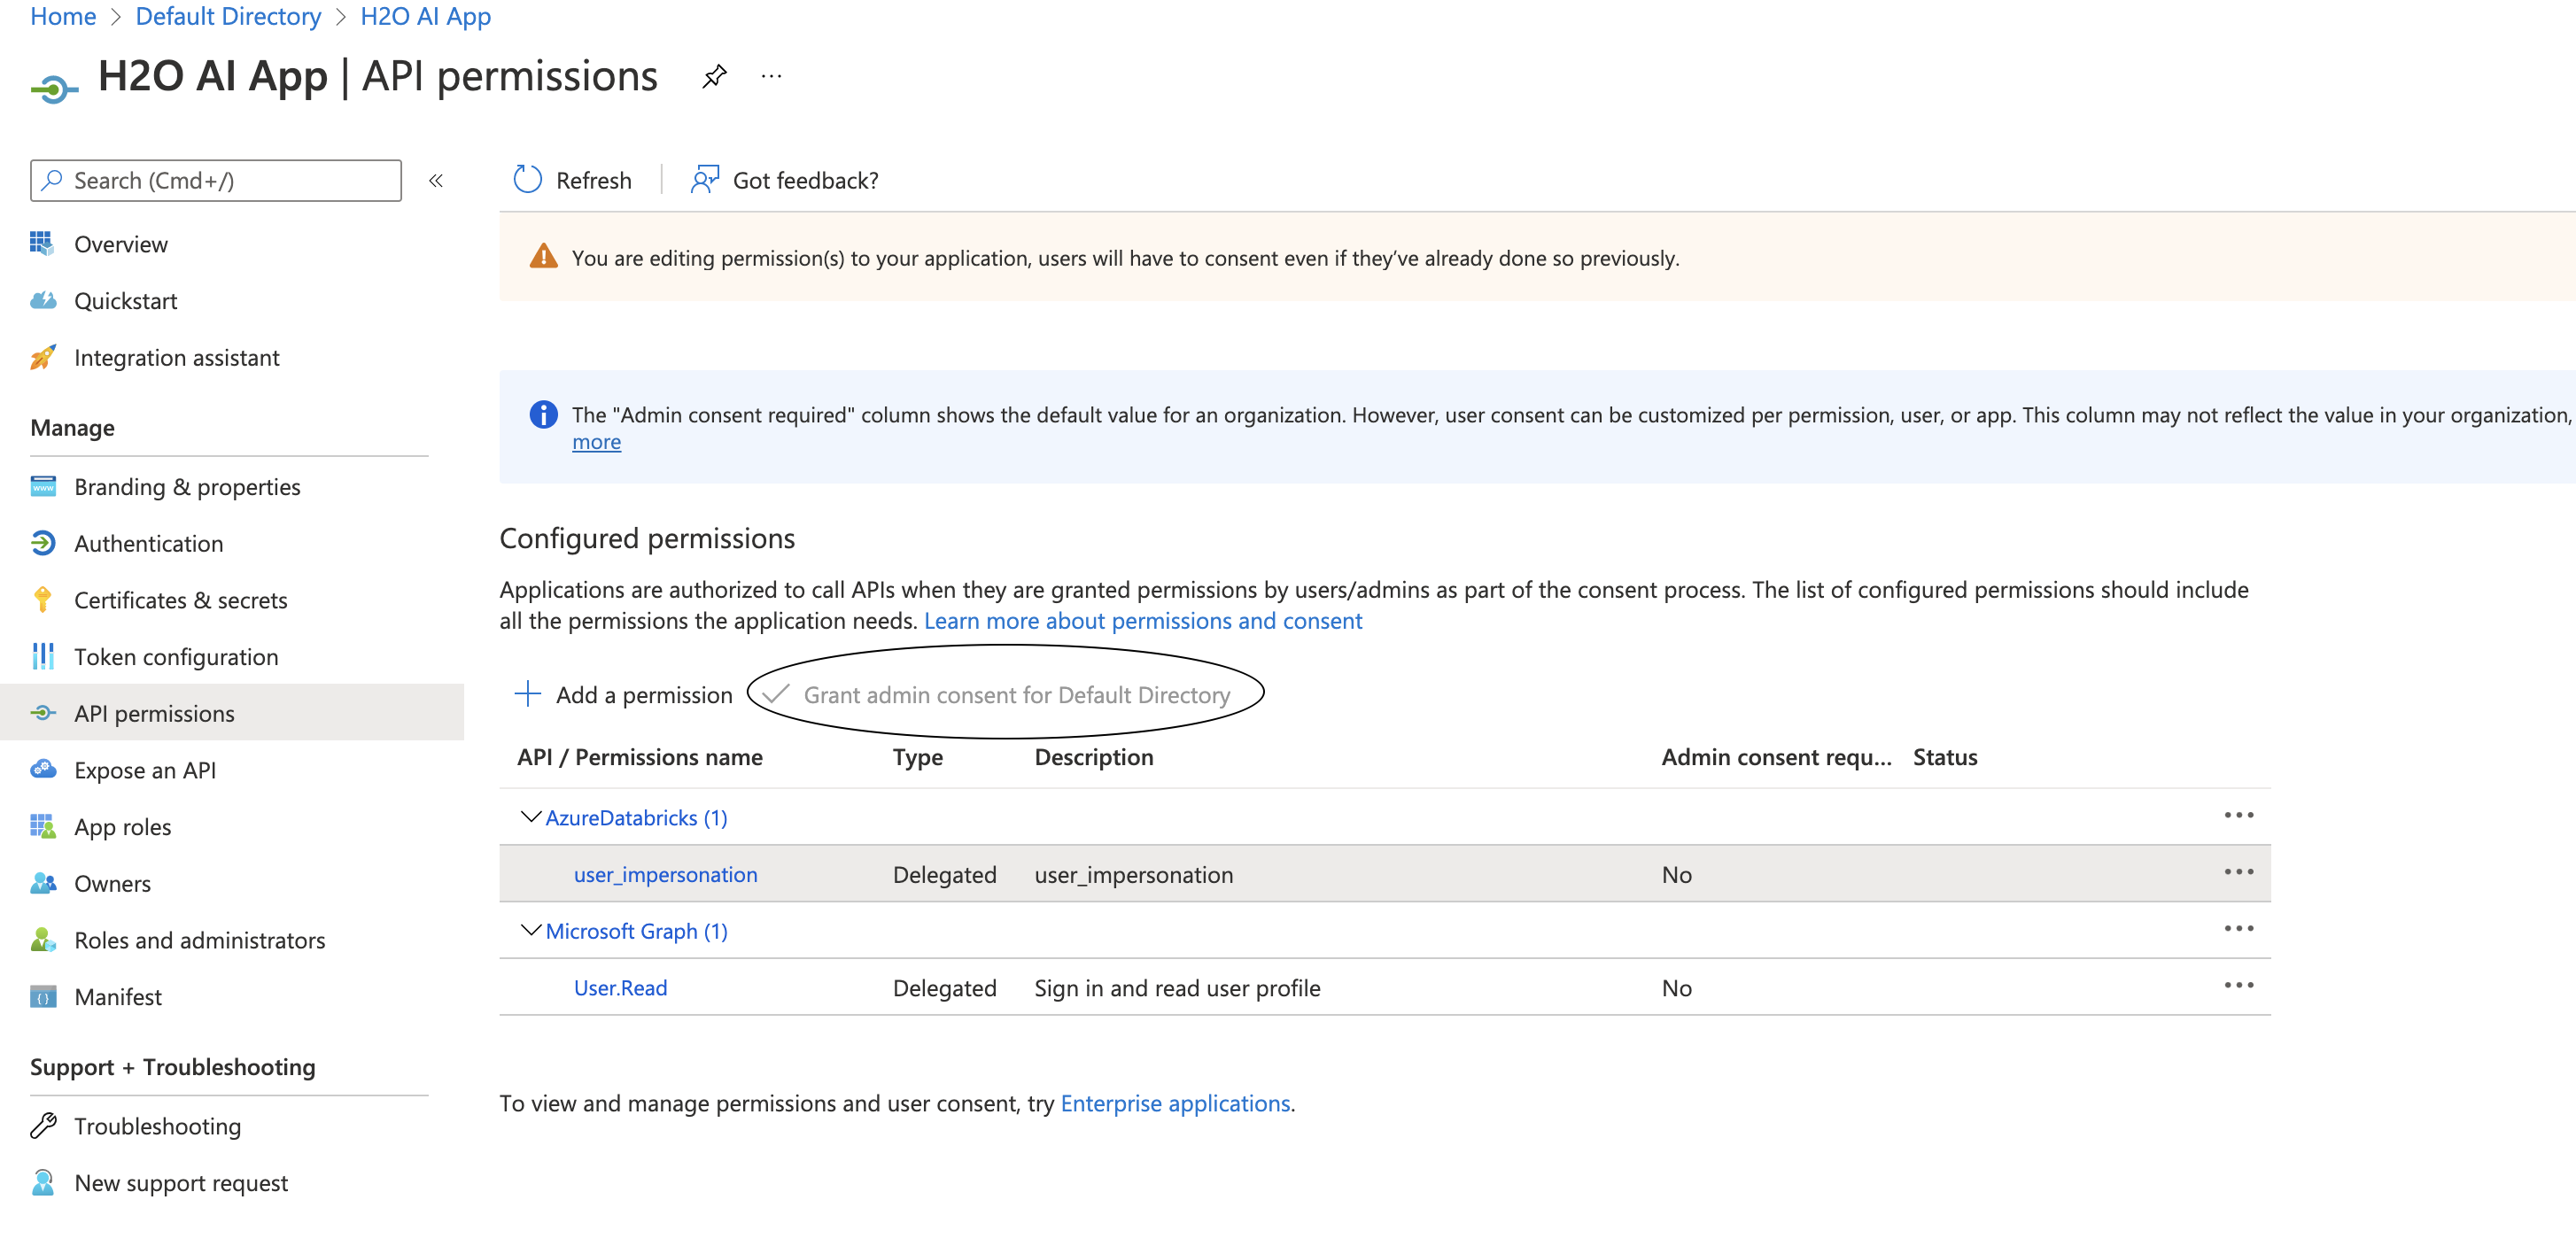
Create a new client in Keycloak
In Keycloak, ensure that the right realm is selected, and then click Clients.
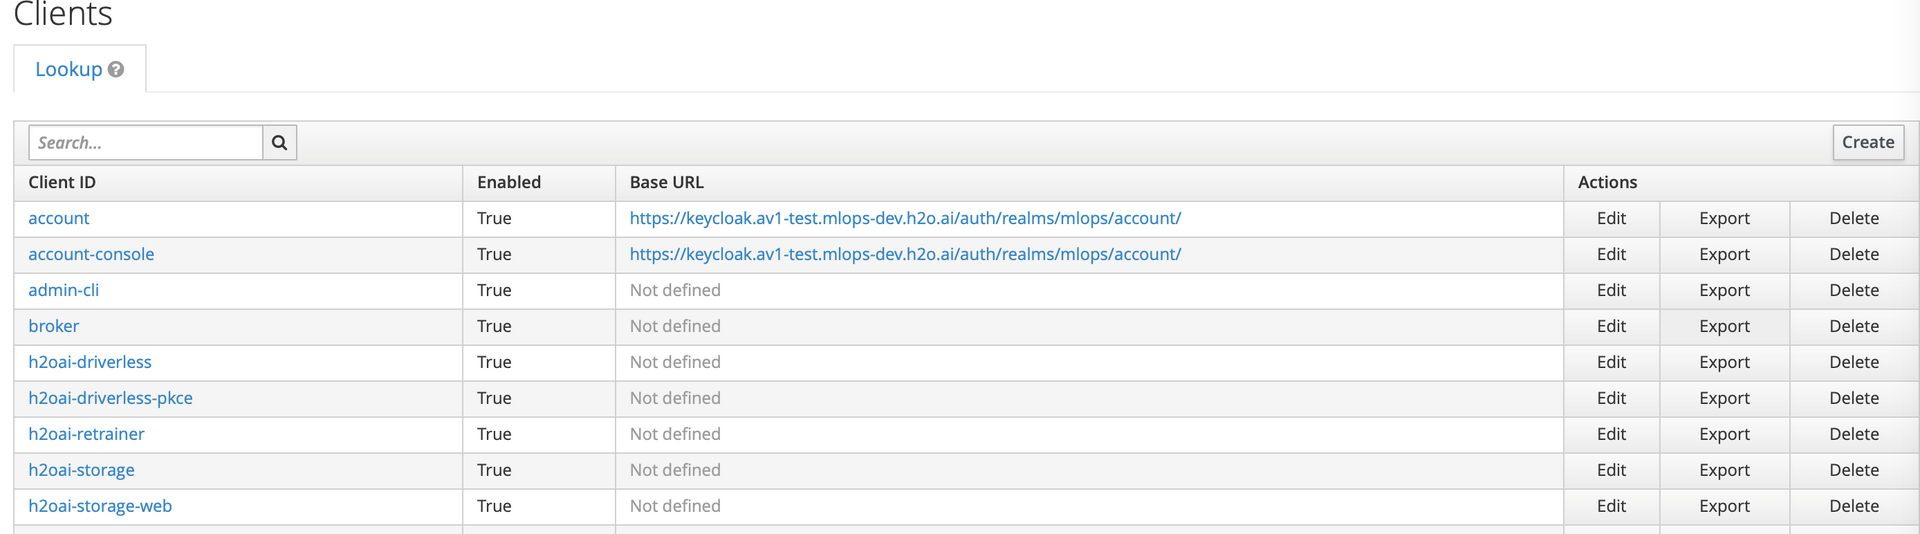
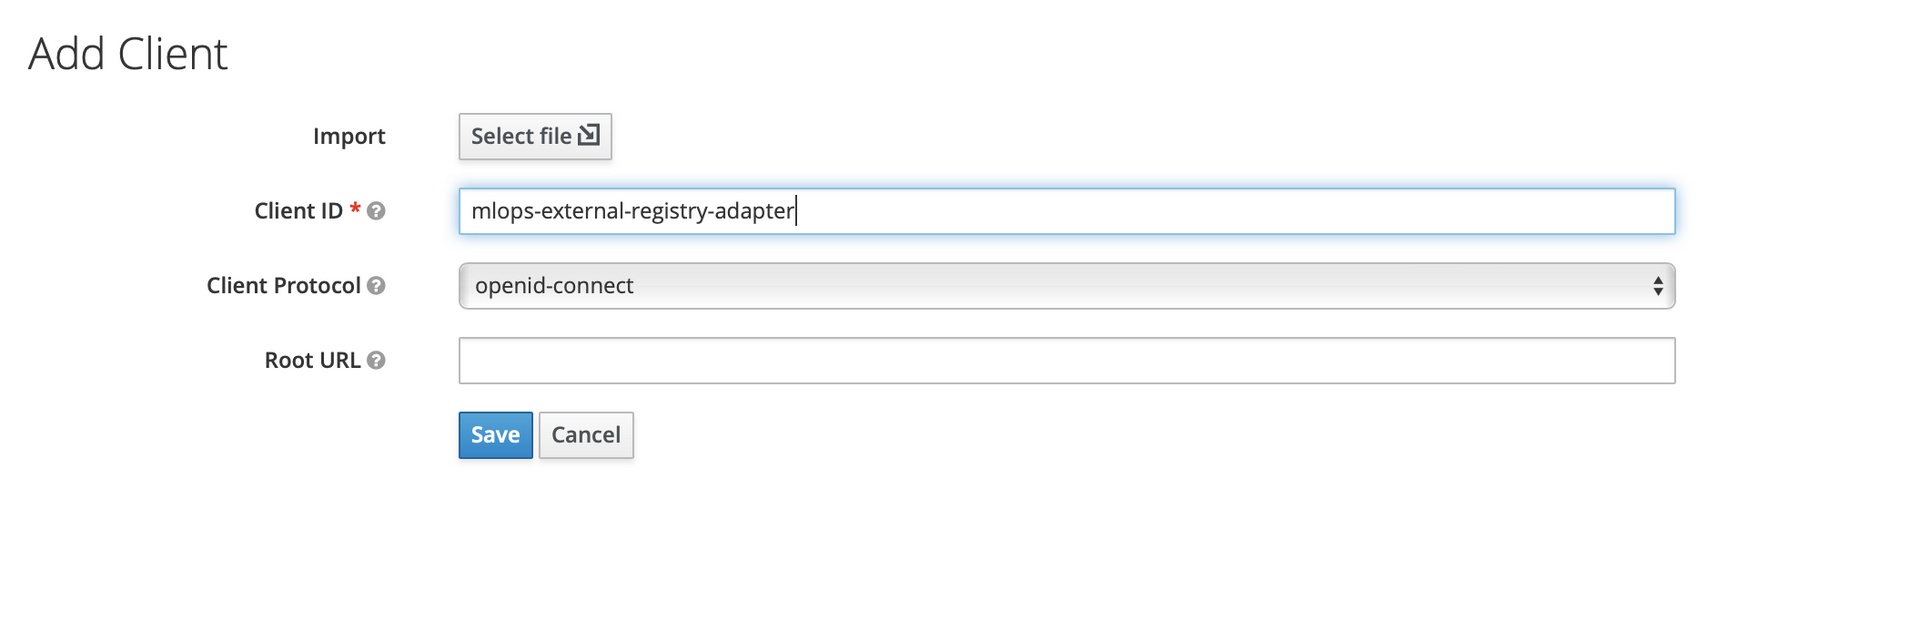
Click Create to create a new client. Provide the clientId as mlops-external-adapter-registry, and then click the Save button.
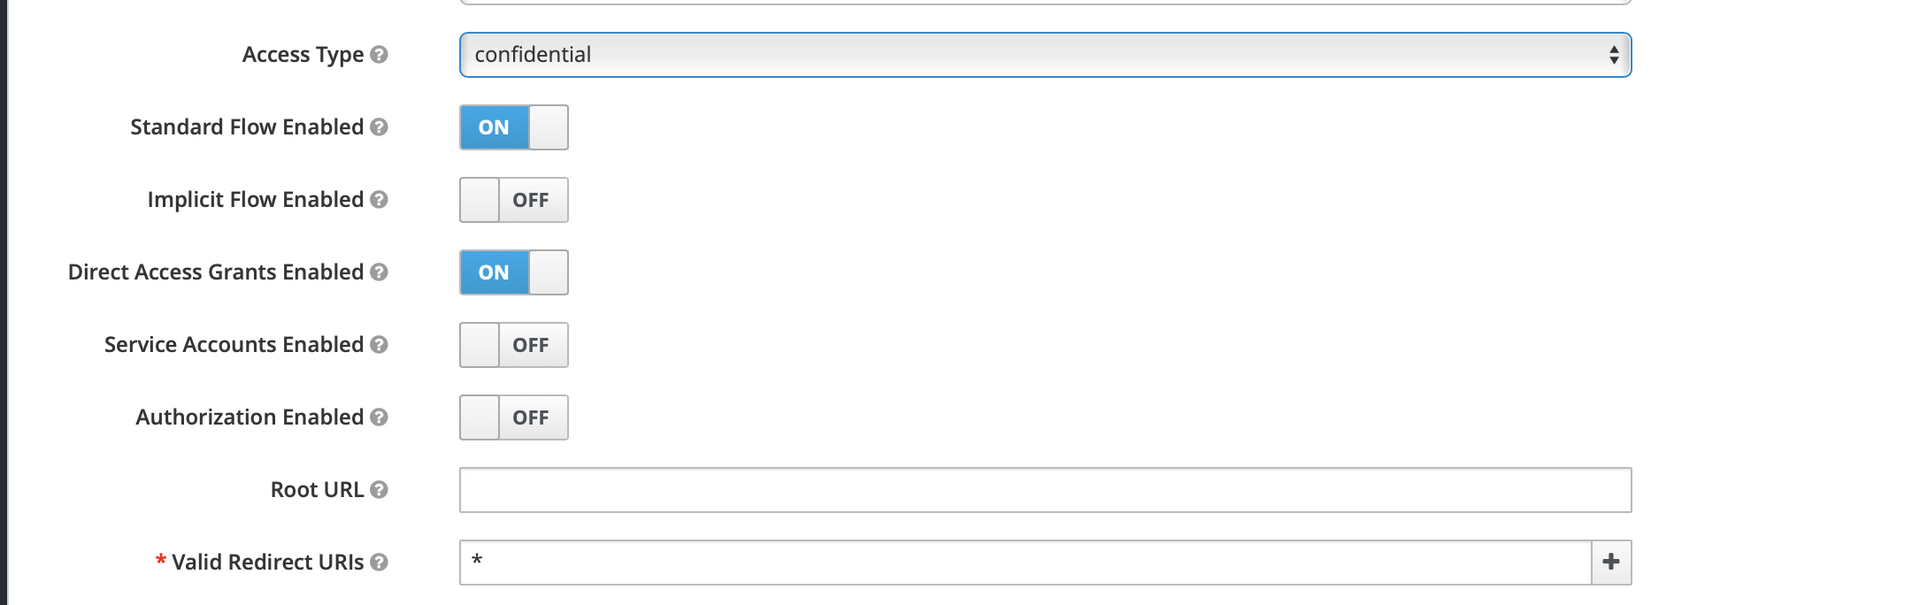
In the new screen, select confidential for the Access Type field, and then provide a valid redirect URL for the Valid Redirect URLs field. Click on the Save button to confirm your changes.
Under Client Scopes tab, add the scopes read_token, ai.h2o.storage scopes are available under Default Client Scopes.
Open the Credentials tab, which contains the Secret value.
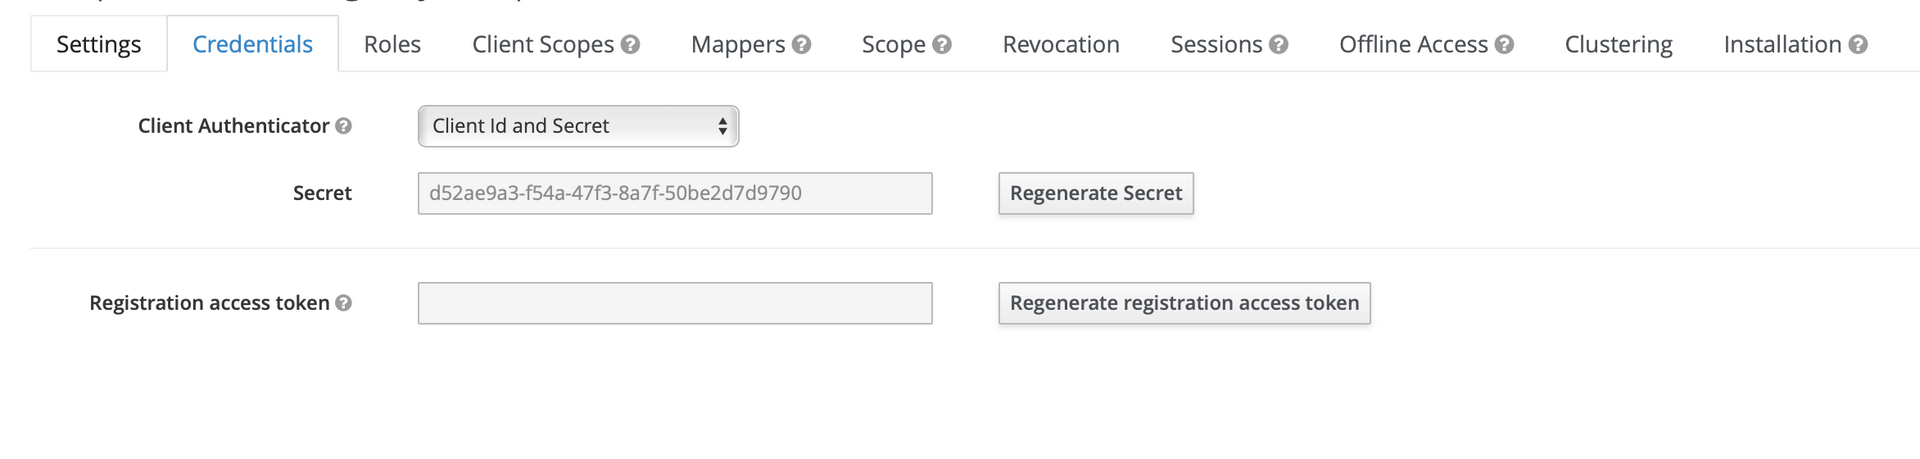
Please copy the Client Secret Value This is required as part of Terraform Setup.
Set up MLOps component with Azure AD details
In the Azure AD application page, click Certificates and secrets > New client secret. Create secret with duration as required.
The secret, client ID (application ID), and token URL endpoint along with KeyCloak Client ID and KeyCloak Client Secret (from step) for the application are needed in the Terraform configuration to enable third-party model management integration. This needs to be provided as part of the Terraform setup file.
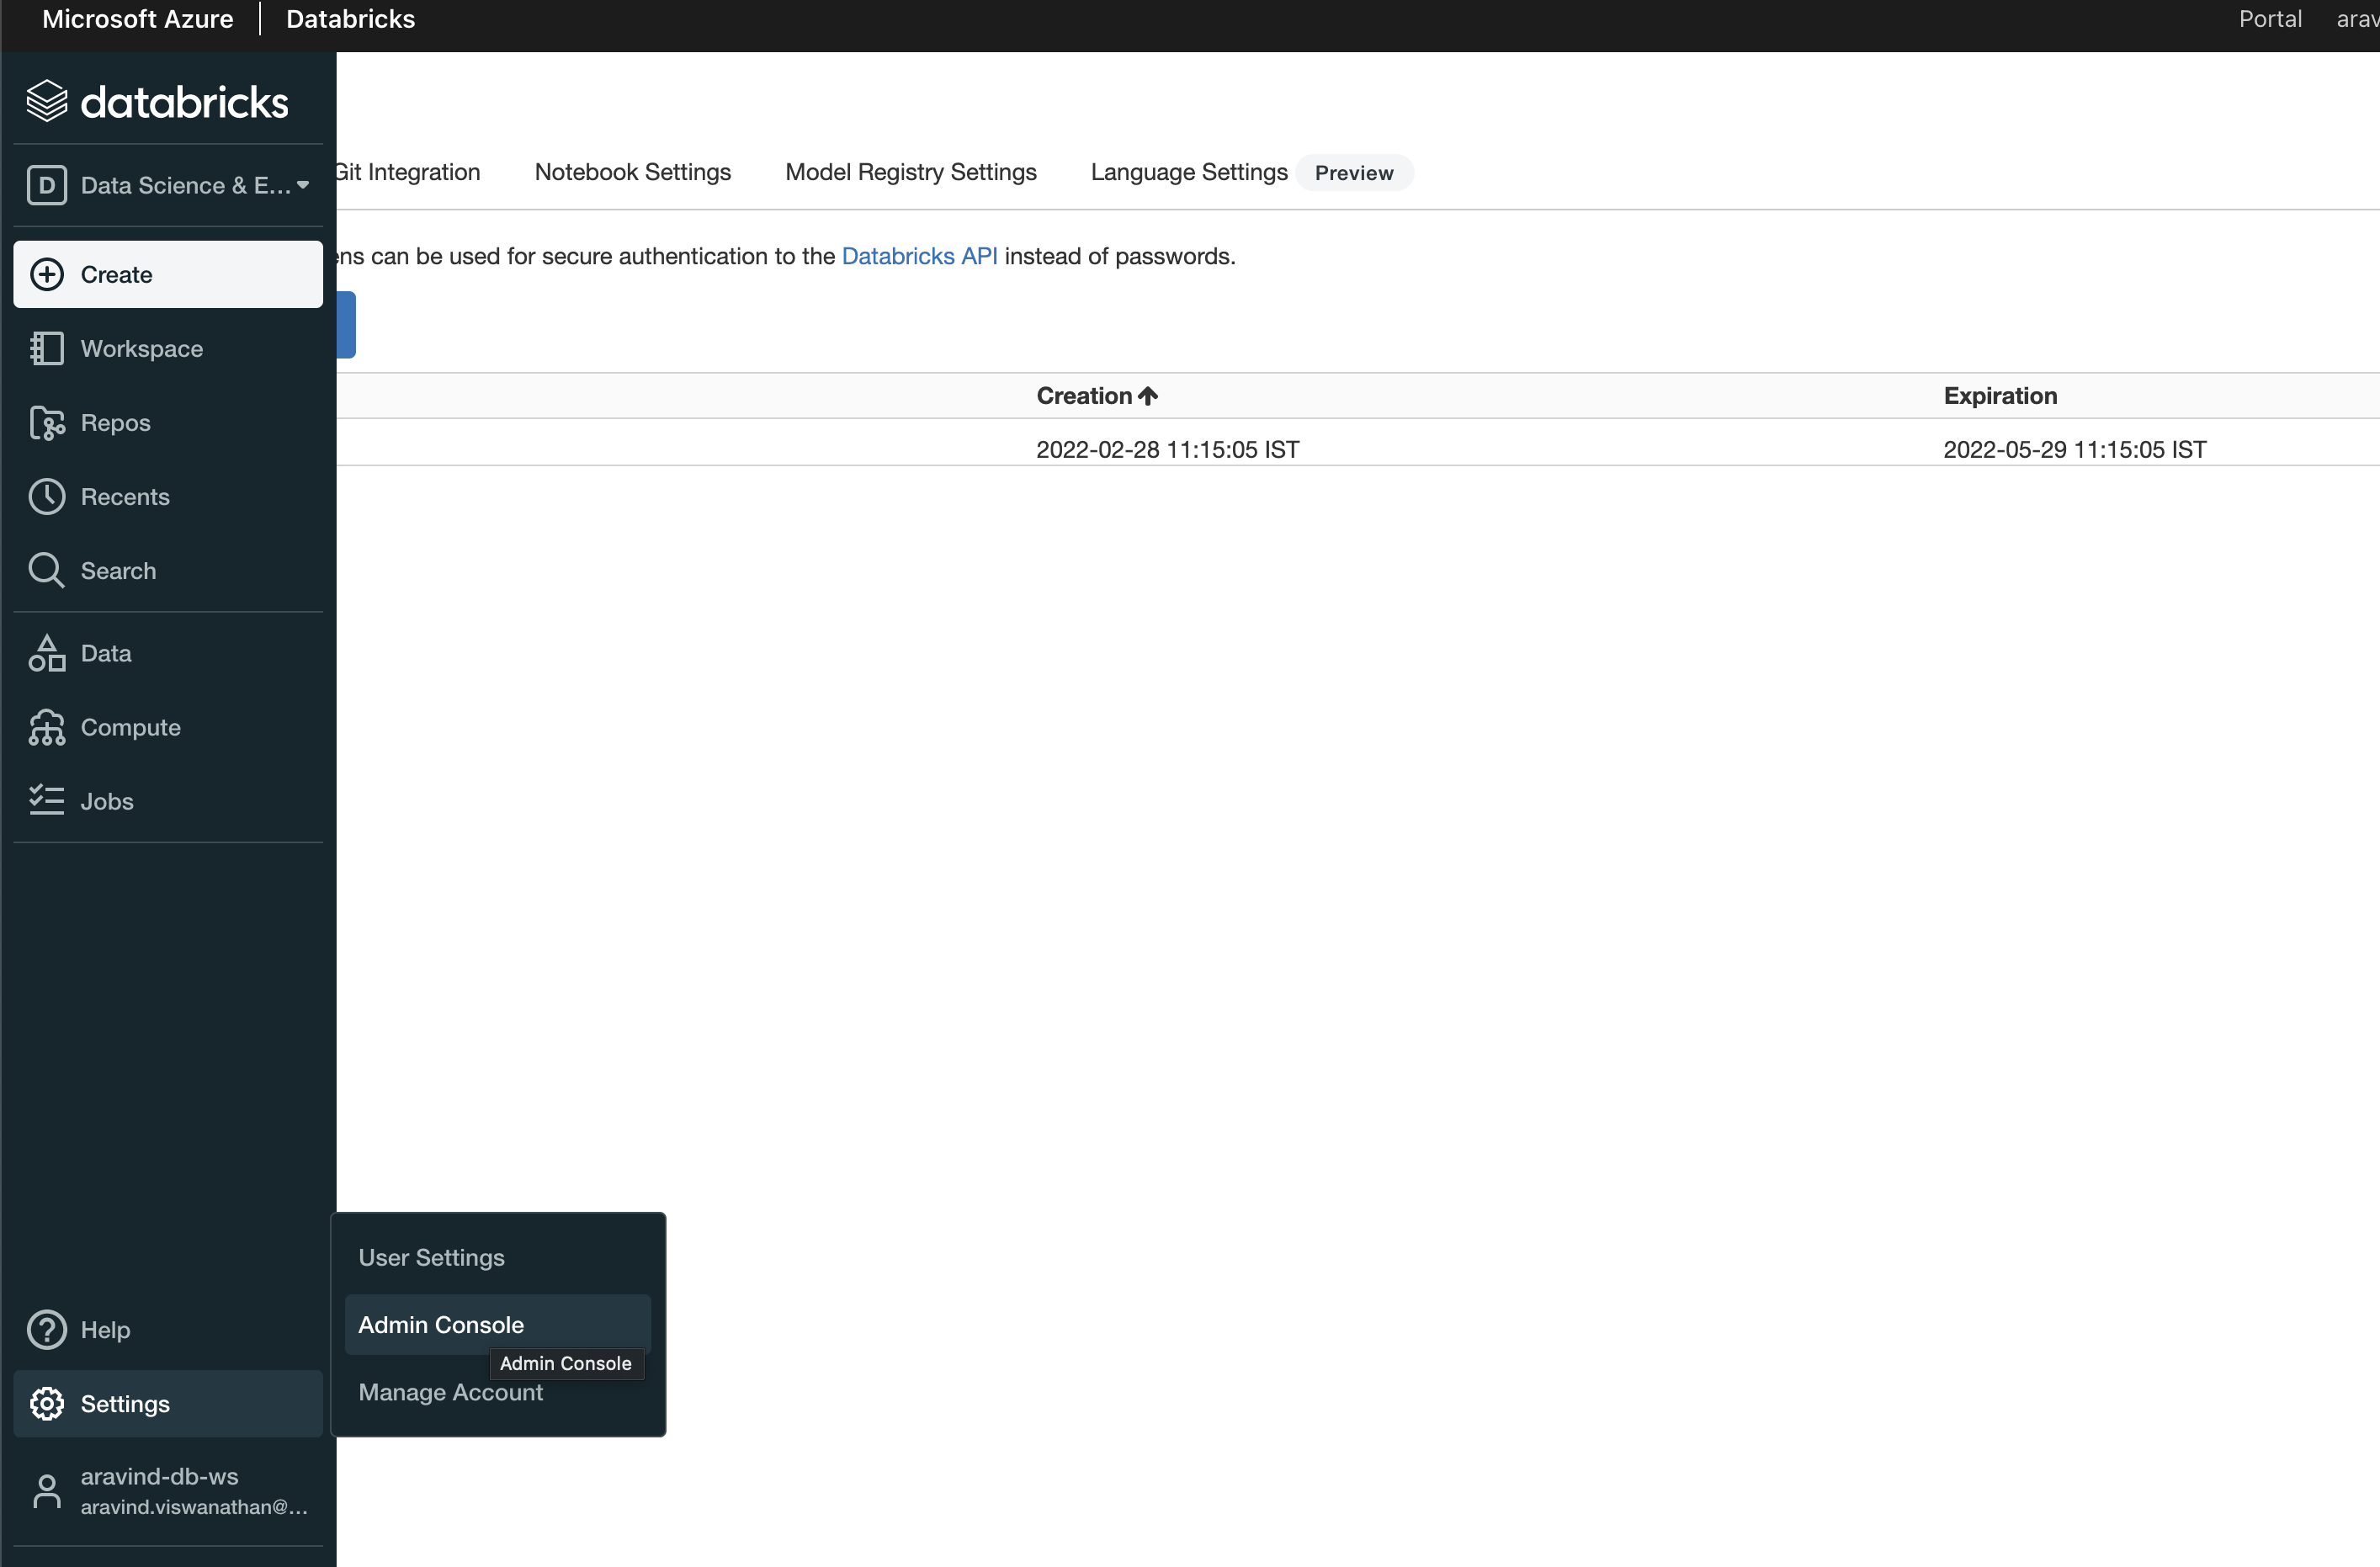
Add users to Azure Databricks
Ensure that users of H2O MLOps in your organization have been added as users in Databricks. For information on adding users to Databricks, see the official Databricks documentation on managing users.
- Submit and view feedback for this page
- Send feedback about H2O MLOps to cloud-feedback@h2o.ai