View projects
To view the list of available projects, click Projects in the main navigation. When viewing projects in H2O MLOps, you can choose between the list and grid views:
-
List view (default): Projects are displayed in a table-based list that includes the following details:
- Project ID
- Number of experiments
- Number of registered model versions (RMV)
- Number of deployed model versions (DMV)
- Number of deployments
- Date of creation
- Last modification date
- Owner name
This view lets you sort projects based on either their time of creation or last modification date. You can also use the search box to locate specific projects by project name. To view a specific project when using the list view, click the name of the project, which appears as a link in the Project Name column. You can also view, share, and delete projects from this view. For more information, see List view actions.
- Grid view: Projects are displayed in a grid-based format. To view a specific project when using grid view, click View Project.
List view actions
This section describes the actions available from the list view.
-
View: View the project.
-
Share: Opens a window from which you can select a specific user and their role before adding them to the list of users your project is shared with. Select one of the following roles:
-
Default: This role is equivalent to granting write access to a user. Users with this role can make any modification to the shared project, including renaming the project, adding datasets, adding experiments, adding a note, and rerunning experiments. Users that are granted this role can perform any action that they are able to perform on projects they create and own. (Note: Users with the Default role can delete projects that have been shared with them. If a user with the Default role deletes a project, it is also deleted for both the original owner and other shared users.)
-
Reader: This role is equivalent to granting read-only access to a user. Users with this role can view the project and import datasets or experiments from it, but cannot make modifications to the project such as adding or deleting datasets or experiments.
-
After selecting a user and their role, click the Share button to confirm your selection and add them to the list of users your project is shared with. To edit a user's role after adding them to the list, update the selected role and click the Save Changes button. You can also remove users from the list by clicking Remove.
- Delete: Delete the project. You are prompted to confirm the deletion.

Understand the project page
After selecting a specific project to view, the main Projects page is displayed. This page contains an overview and details for the objects within the Project. The dashboard at the top provides information on the following:
-
Project description
-
Project ID
-
Experiments: The total number of experiments that have been added to the Project.
-
Deployments: The total number of deployments that are currently running across all environments.
-
Registered Model Versions: The total number of experiments that have been registered as a model or model version.
-
Deployed Model Versions: The total number of models that have been deployed, including multiple models in a single deployment (that is, A/B Test or Champion/Challenger).
-
Project owner
-
Project creation date
-
Last modification date

Project page tabs
In addition to the preceding information, the project page also contains five tabs from which you can take further actions:

-
Deployments: View a list of deployments associated with the project and create new deployments.
-
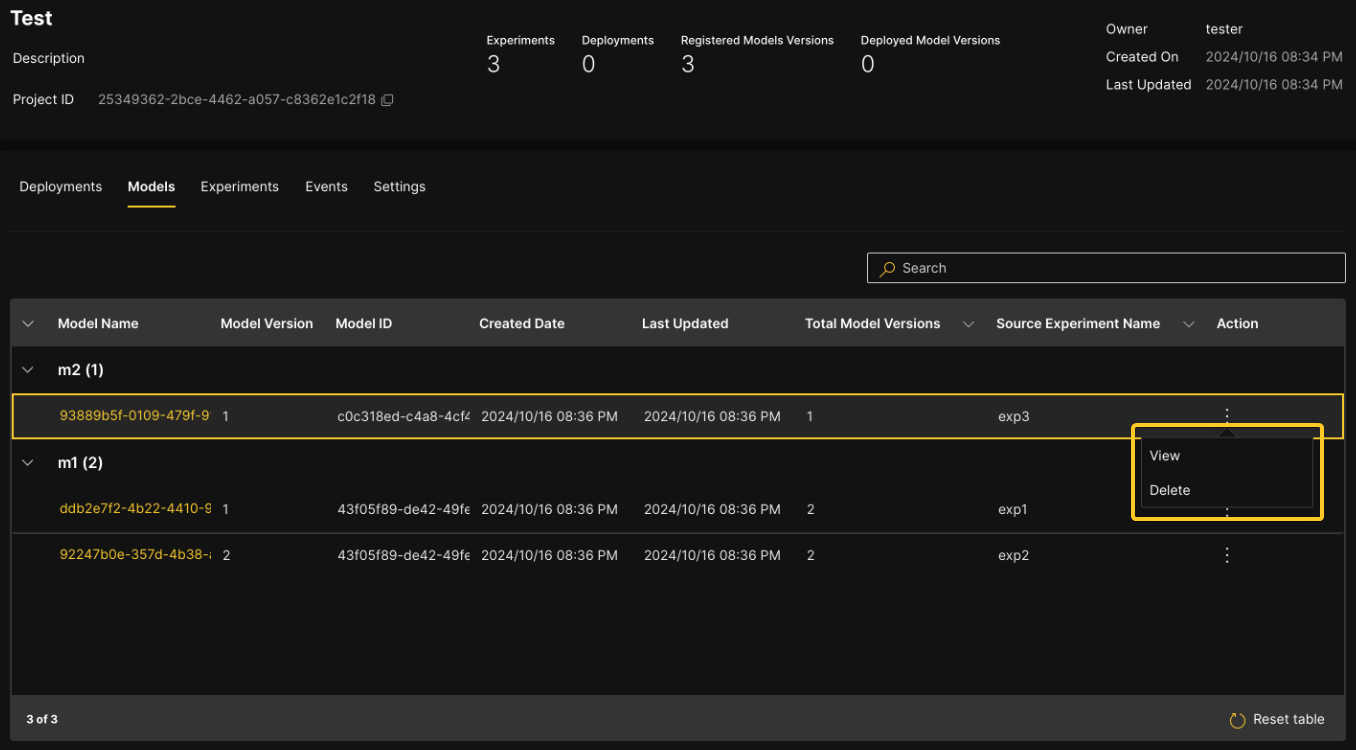
Models: View a table-based list of models and their associated model versions within the project. You can also delete models and model versions from this tab.
The following actions are available from the Models table:
-
View: Open a panel that displays details about a specific model version. You can delete the model version from this panel by clicking the Delete Model Version button. To delete the model and all its versions, click the Delete Model (All its versions will be deleted) button. You are prompted to confirm this action before the deletion is performed.
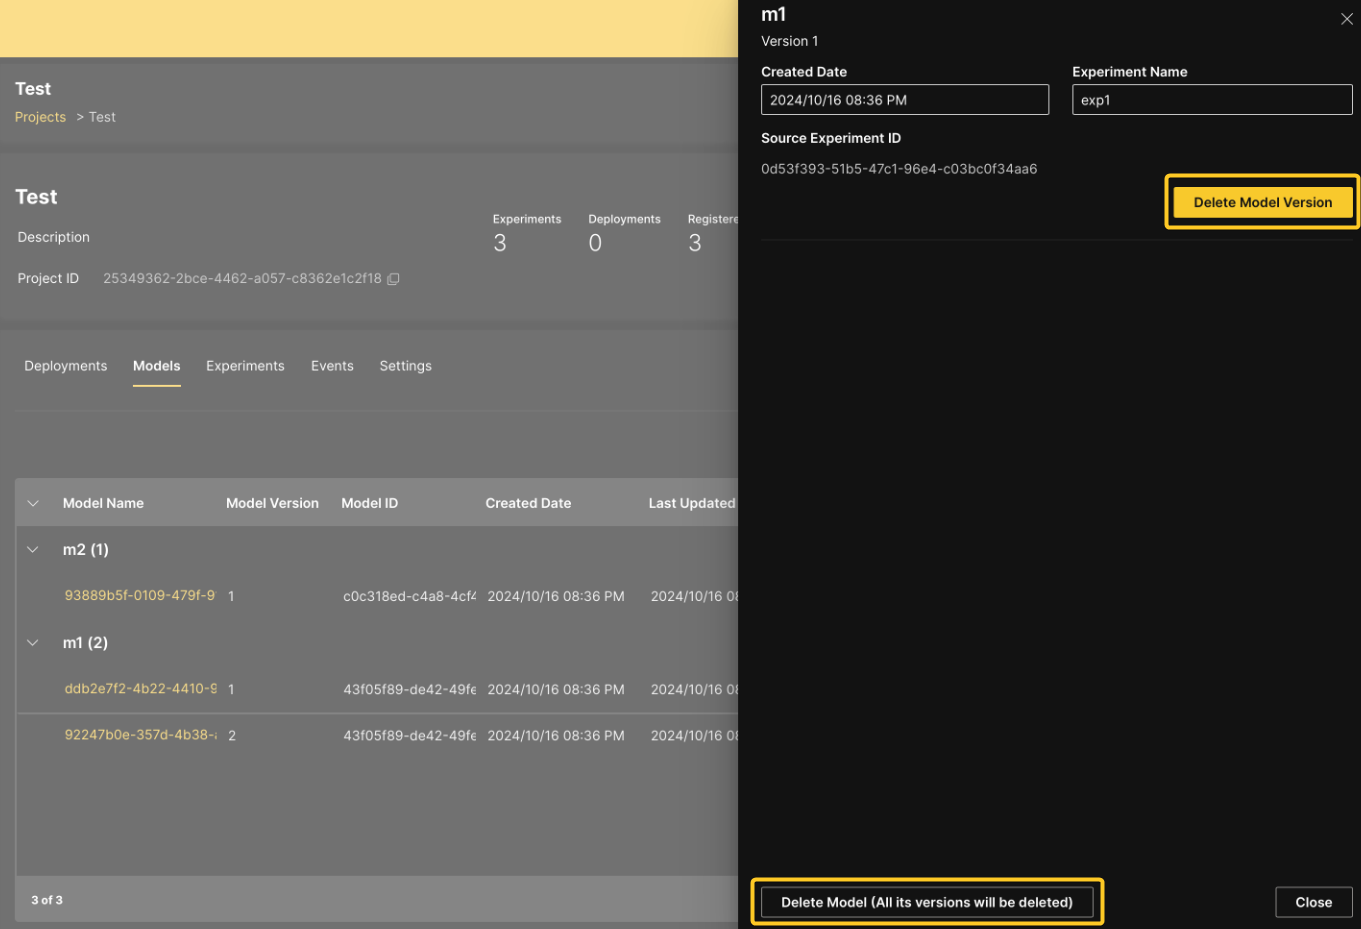
-
Delete: Delete a specific model version. You are prompted to confirm this action before the deletion is performed.
-
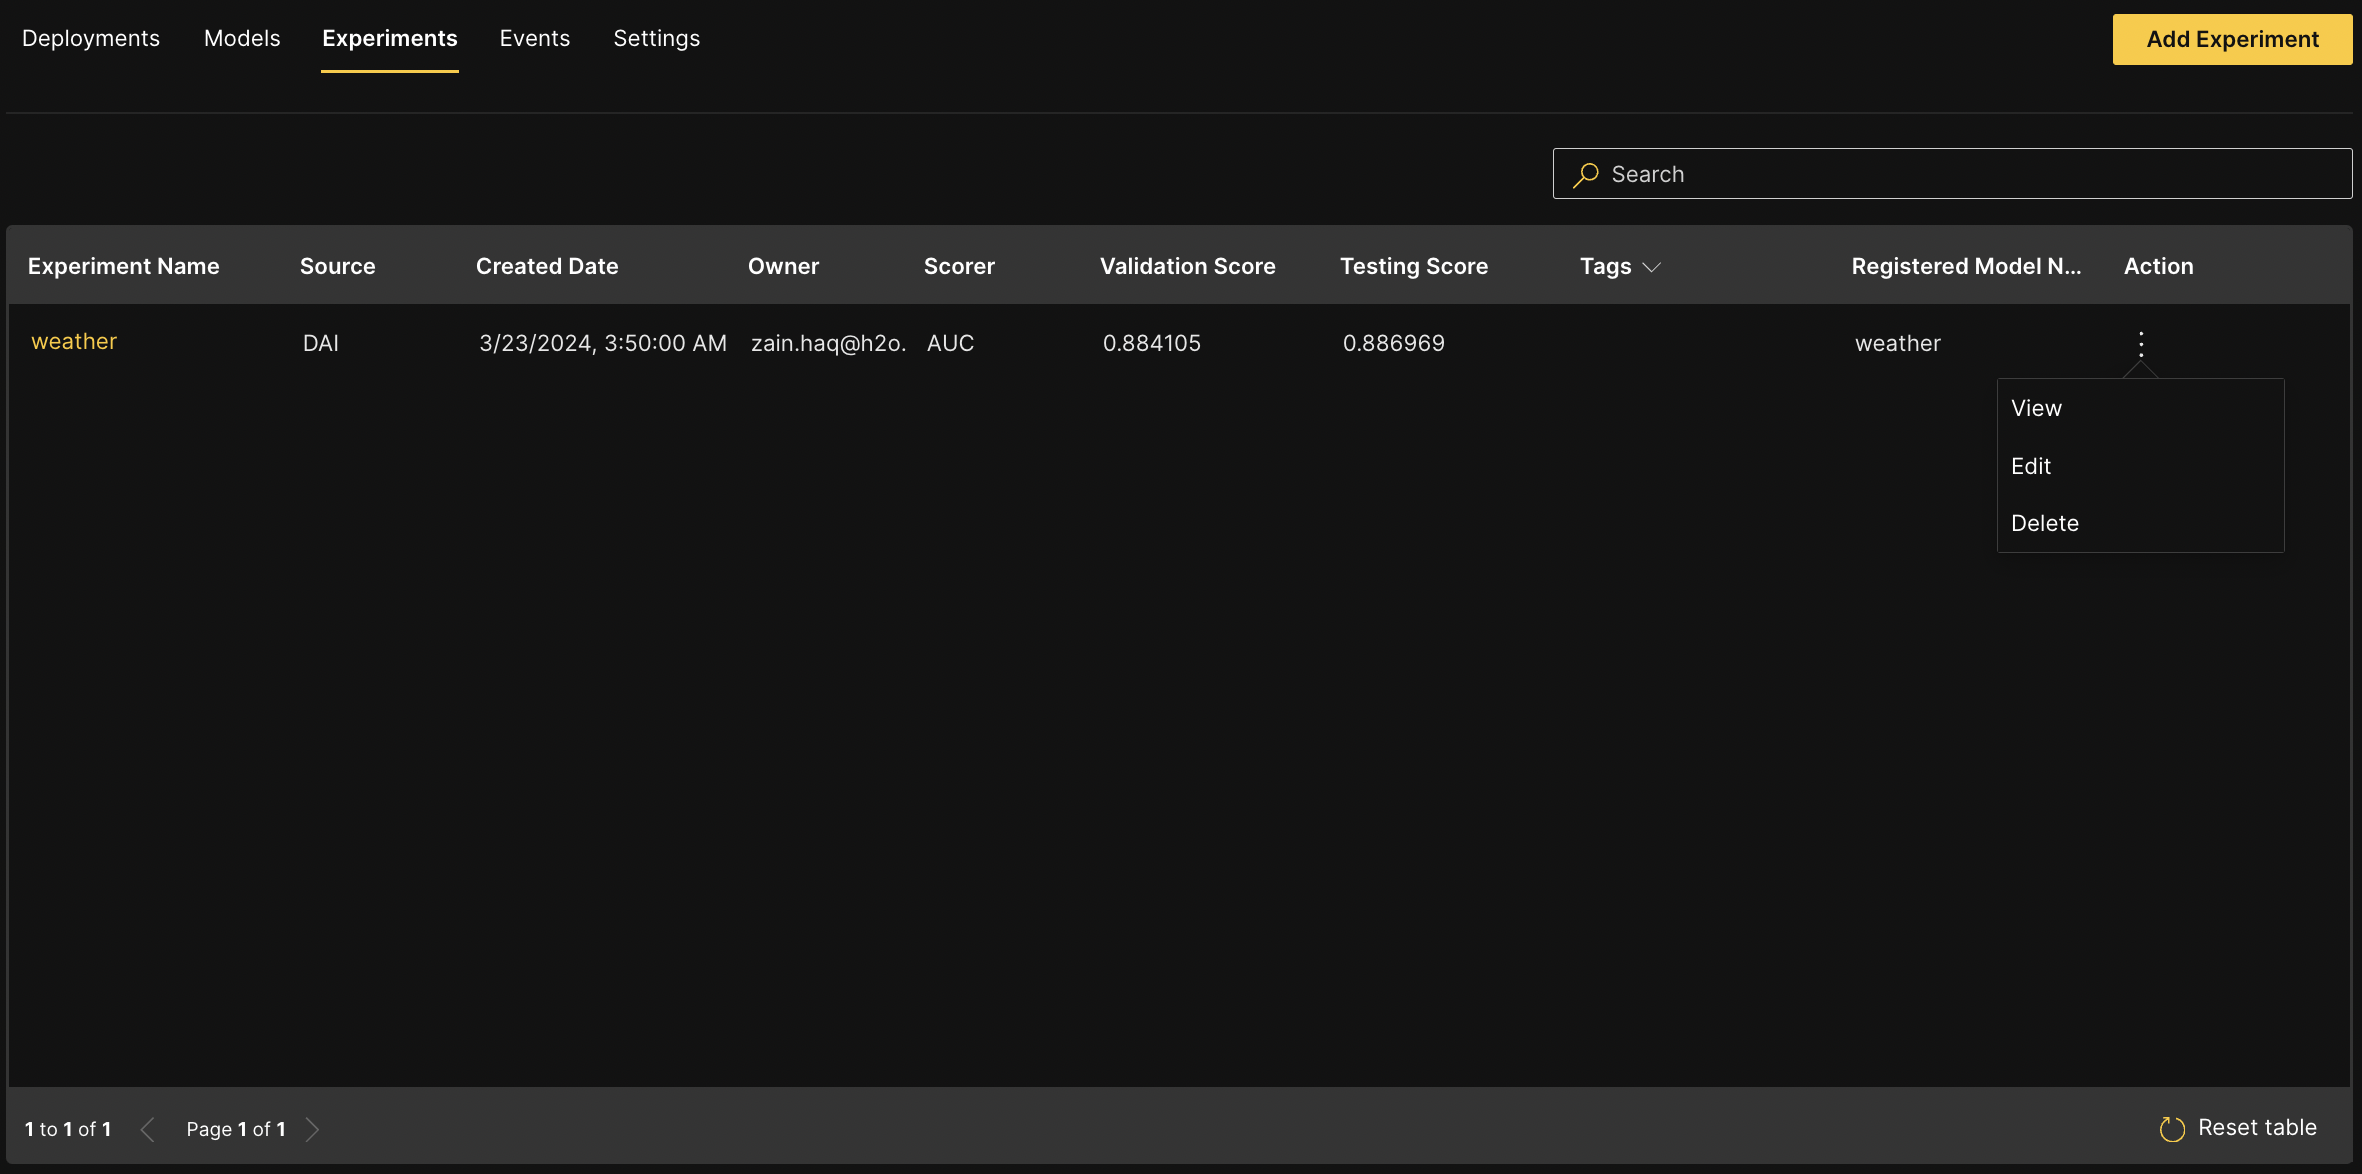
Experiments: This tab displays a table-based list of experiments associated with the project along with the following details about each experiment:
- Experiment name
- Source of the experiment
- Date of creation
- Owner name
- Scorer
- Validation score
- Testing score
- Tags that have been added to the experiment (Note that you can filter the Experiments table by the tags column so that only experiments with the selected tags are displayed.)
The following actions are available from the Experiments table:
- View: View the experiment.
- Edit: Edit the experiment name and the tags that have been added to the experiment. To confirm your changes, click the Save Changes button.
- Delete: Delete the experiment. A dialog is displayed to confirm the deletion. To proceed, click the Yes, Delete Experiment button.
You can also add experiments to an MLOps project from this tab. For more information on experiments in MLOps, see Understand experiments in MLOps.
-
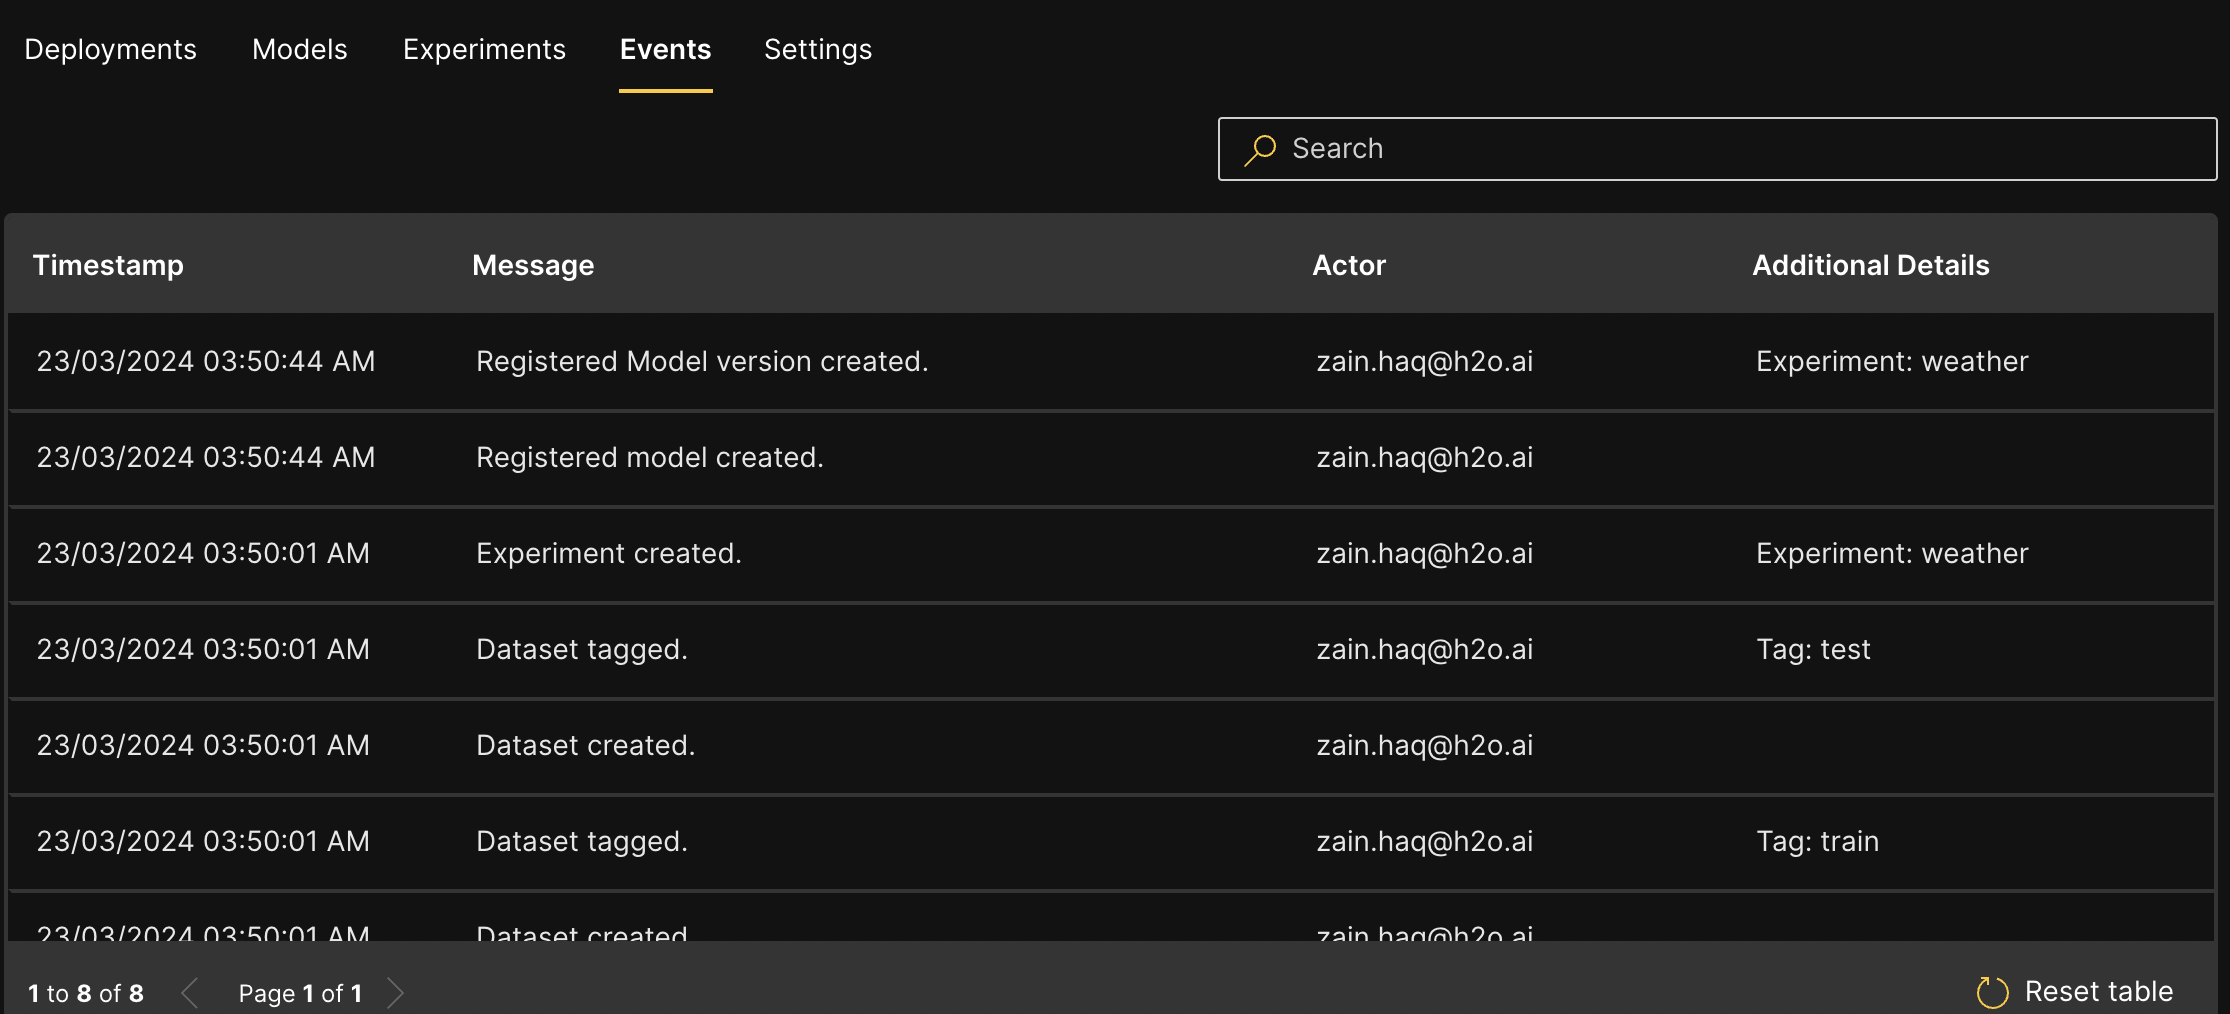
Events: Click the Events tab to view a table that displays all user-related events within the project. A timestamp and description message are provided for each event in the table, along with the actor (that is, user) and any additional details associated with the event. The Events table features pagination, search, and sorting capabilities. To reset the table, click Reset table.
-
Settings: Create experiment tags to use within the project by entering the tag name and clicking the Add tag button. Note that for Projects in H2O AI Cloud, tags can be viewed on experiments linked between H2O Driverless AI (version 1.10.6 and later) and H2O MLOps.
- Submit and view feedback for this page
- Send feedback about H2O MLOps to cloud-feedback@h2o.ai