Using H2O Document AI - Viewer
H2O Document AI - Viewer is an H2O AI Cloud (HAIC) application that lets you process documents. Your documents are processed using pipelines that are built and published in H2O Document AI - Publisher. Your H2O Document AI - Publisher and H2O Document AI - Viewer applications are intrinsically linked together.
Understanding the dashboard
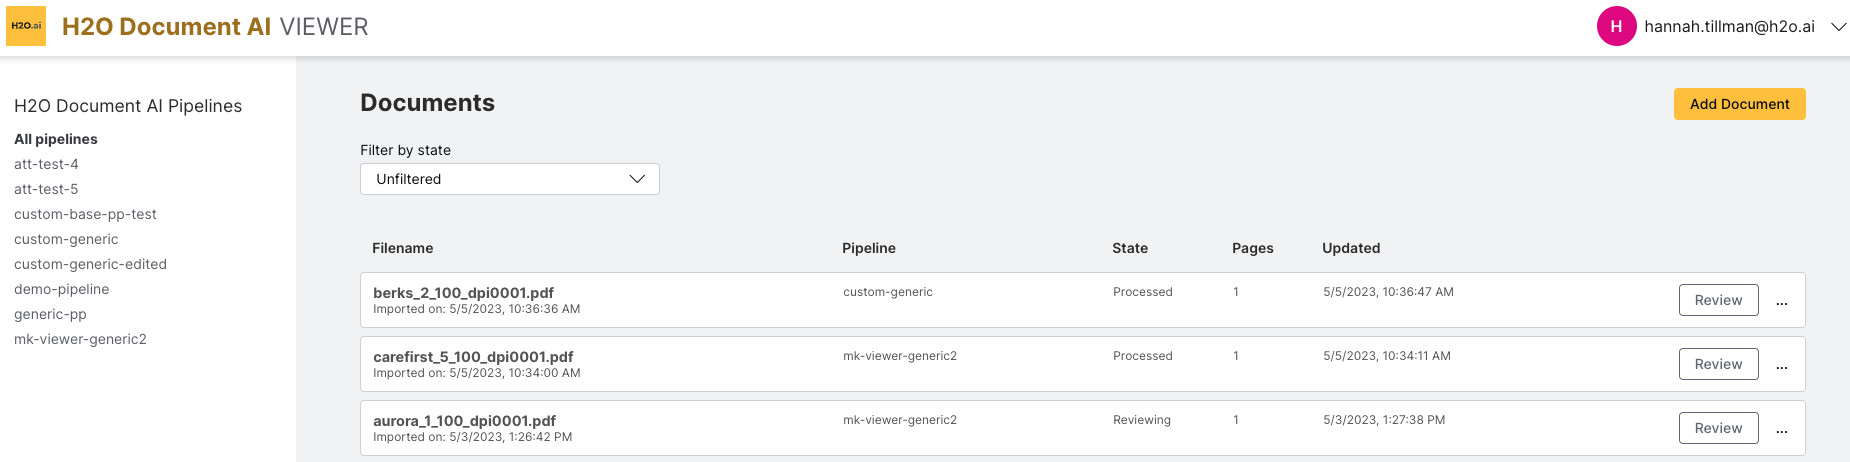
The H2O Document AI - Viewer dashboard shows your available pipelines as well as your processed documents and their information. From this dashboard you can add more documents to be scored by an available pipeline.
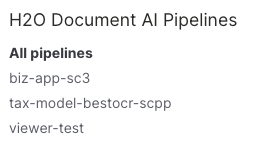
Pipelines
The dashboard shows the scored documents of all pipelines by default. You can select to see the results of individual pipelines by clicking the pipeline name on the H2O Document AI Pipelines column.
Documents
The documents you have already processed are available in the order they were added to H2O Document AI - Viewer. You can see your added document after it has finished processing.

Each document row has the following information:
- Filename: The name of the document you added (multiple documents with the same filename can be added)
- Pipeline: The pipeline you used to process the document
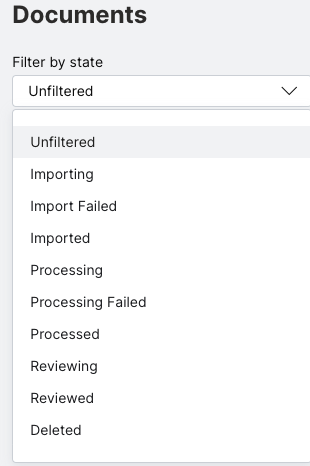
- State: The current status of your document; one of:
- Importing : This document is currently importing
- Import Failed : This document failed to import and can only be deleted
- Imported : This document has been imported but not processed
- Processing : This document is currently processing
- Process Failed : This document failed to process and can only be deleted
- Processed : This document has successfully been processed and is ready to be reviewed
- Reviewing : This document is in the process of being reviewed
- Reviewed : This document has been reviewed
- Deleted : This document has been deleted and cannot be interacted with any longer
- Pages: The number of pages the document has
- Updated: The last time your document was updated
You can review your document any time after it has successfully processed. Reviewing your document allows you to access your Labels and values.
Filtering by state
You can filter through your documents by their state.
Deleting a document
You can delete a document from the dashboard.
- Click the meatball menu at the end of your document row.
- Click Delete.

Workflow: Using H2O Document AI - Viewer
The following steps describe the workflow for H2O Document AI - Viewer.
- Step 1: Add a document to be processed by an available pipeline.
- Step 2: Access the processed document and review it for inconsistencies and inaccuracies.
- Step 3: Export the values of the document to your local computer.
Step 1: Add a document to be processed by an available pipeline
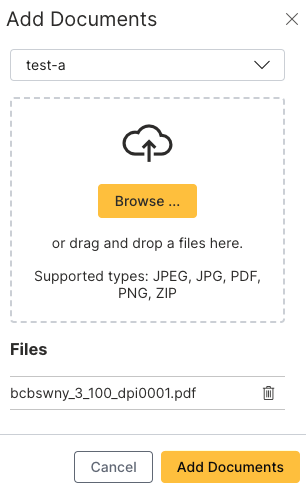
Start by adding a new document to be scored by H2O Document AI - Viewer.
- Click Add document
 to add a new document.
 - Select which pipeline you want to use to score your document.
- Select the file you want to process (you can only add one document at a time, but your document can have multiple pages).
- Click Add Document to process the document.
H2O Document AI - Viewer only accepts the following file types:
- A PDF file
- A JPEG file
- A JPG file
- A PNG file
- A ZIP file
Your chosen pipeline then processes your file. A processing bar will show that the file is actively processing. You will be able to interact with your document after it has finished processing.
Processing a new file will take at least a few seconds (possibly longer) depending on the number of pages in the document and the number of predicted values.
When your document has finished processing you will be able to click Review ![]() at the end of the document row to access the document results page.
at the end of the document row to access the document results page.
Step 2: Access the processed document and review it for inconsistencies and inaccuracies
You review your document from the document results page. The document results page is split into the information panel on the left-side of the screen and the marked document on the right.
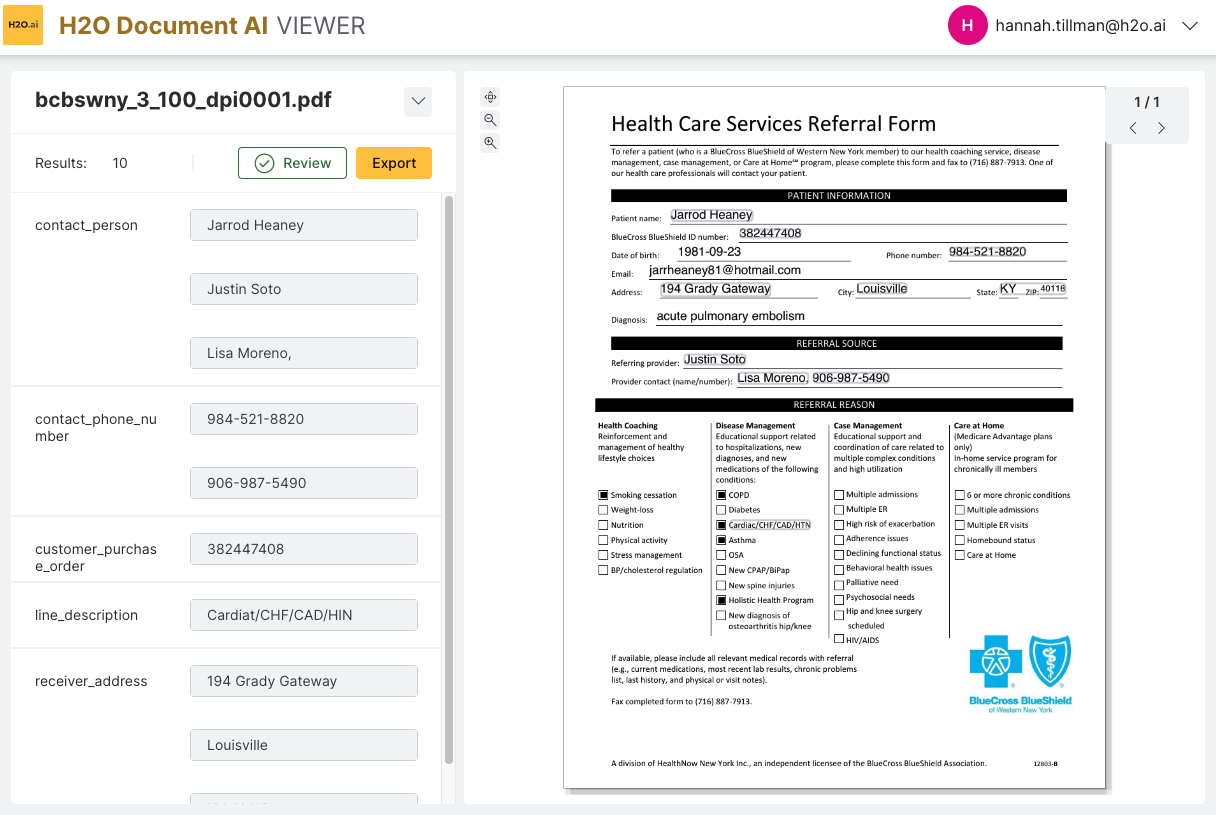
Information panel
The top of the information panel displays:
- The name of your document
- The number of values (e.g. Results: 10)
- The Review button
- The Export button
If you click the drop-down arrow next to your document's name, you can access additional information:
- The pipeline used to process your document
- The state of your document (either Reviewing or Reviewed)
- When your document was processed
- The most recent export time

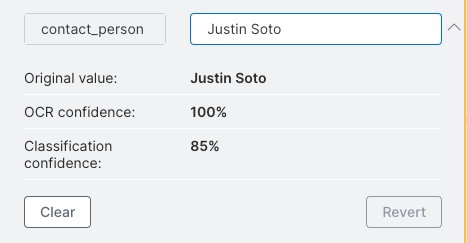
The information panel also shows the breakdown of your Labels and values. You can interact with the values predicted by your selected pipeline. When you select a value, it will point to that value's location on the marked document.
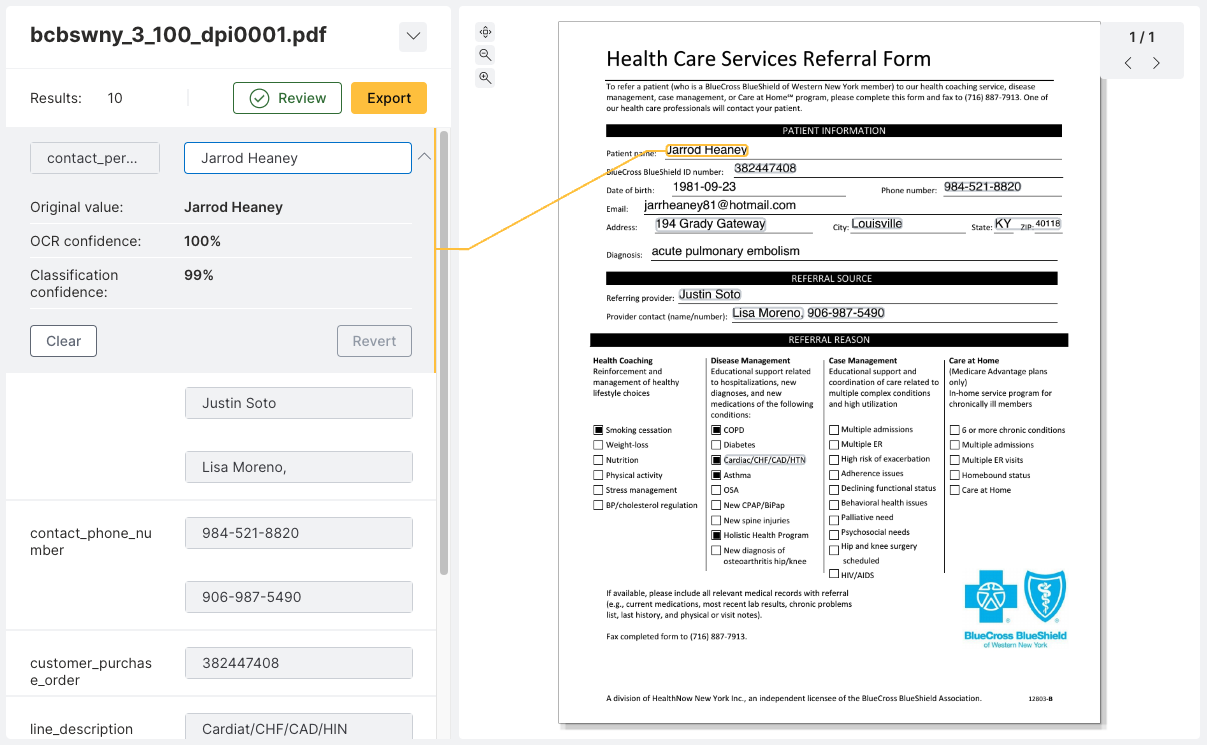
The information about that value will also be displayed when you click the value. The original value predicted by your pipeline is displayed along with the OCR confidence percentage and token classification percentage.
Interacting with values
You can review your predicted values. Go through each predicted value and check that the pipeline correctly processed the information from the document.
For any incorrect predictions, change the content of the value:
- Click the pencil icon
 that appears when you hover over your value. This lets you edit your value.
 - Correct the predicted value by typing your correction in the value box. Your changes will automatically save.
After you have updated the value, your value box will be marked with a gold dot to show that you have changed the value.
If you want to change your value back to the original value, you can revert your changes by clicking Revert. You can also clear out the contents of the value box by clicking Clear.
After you have finished reviewing all of your document's values, Click the Review button ![]() to mark your document as Reviewed.
to mark your document as Reviewed.
Current workaround
Using a published pipeline that was built using a model that was trained using a single document in H2O Document AI - Viewer might result in that document having zero results. This is highly dependent on the quality of the model that was trained. If you try to score with the same file used for training, then it will probably, though not guaranteed, find at least one entity. Additionally, it is dependent on the quality and size of the bounding box created during edit in page view in H2O Document AI - Publisher.
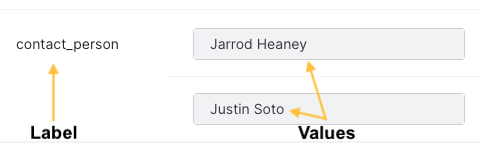
Labels and values
Labels are created in H2O Document AI Publisher and assign regions of a document with different meanings. For example, you can label a region on a document as contact_name. When that region has tokens in it, those tokens are assigned the label contact_name. Each label can have multiple values.
Values are the tokens within labeled regions. They are the text predicted and post-processed by the pipeline. For example, if the tokens JOHN and SMITH are in the labeled region for contact_name, then the predicted value for the labeled region contact_name is JOHN SMITH.
Step 3: Export the values of the document to your local computer
You can export your values to your local computer.
- Click Export
 on the document results page. This will export a JSON file of your correct values.
 - Access your JSON file from your Downloads folder on your local computer.
Returning to the dashboard
After you have finished reviewing your document and exporting your values, you can return to the H2O Document AI - Viewer's dashboard by clicking the product name in the upper left corner.

- Submit and view feedback for this page
- Send feedback about H2O Document AI to cloud-feedback@h2o.ai