Task 8: Deploy model with H2O MLOps
Create Project
To deploy the built H2O Driverless AI model to H2O MLOps, you must first create an H2O Driverless AI Project.
Projects are a way to organize and manage multiple related experiments and datasets within a single workspace. Projects help users streamline their workflow by grouping all components necessary for a specific machine-learning task or analysis. Additionally, Projects facilitate collaboration among team members by providing a centralized location where all project-related experiments and data are stored, making it easier for teams to work together efficiently and consistently. All Projects are automatically registered in H2O MLOps for deployment.
- In the H2O Driverless AI navigation menu, click PROJECTS.
- Click + NEW PROJECT.
- In the Name box, enter the following name for the Project:
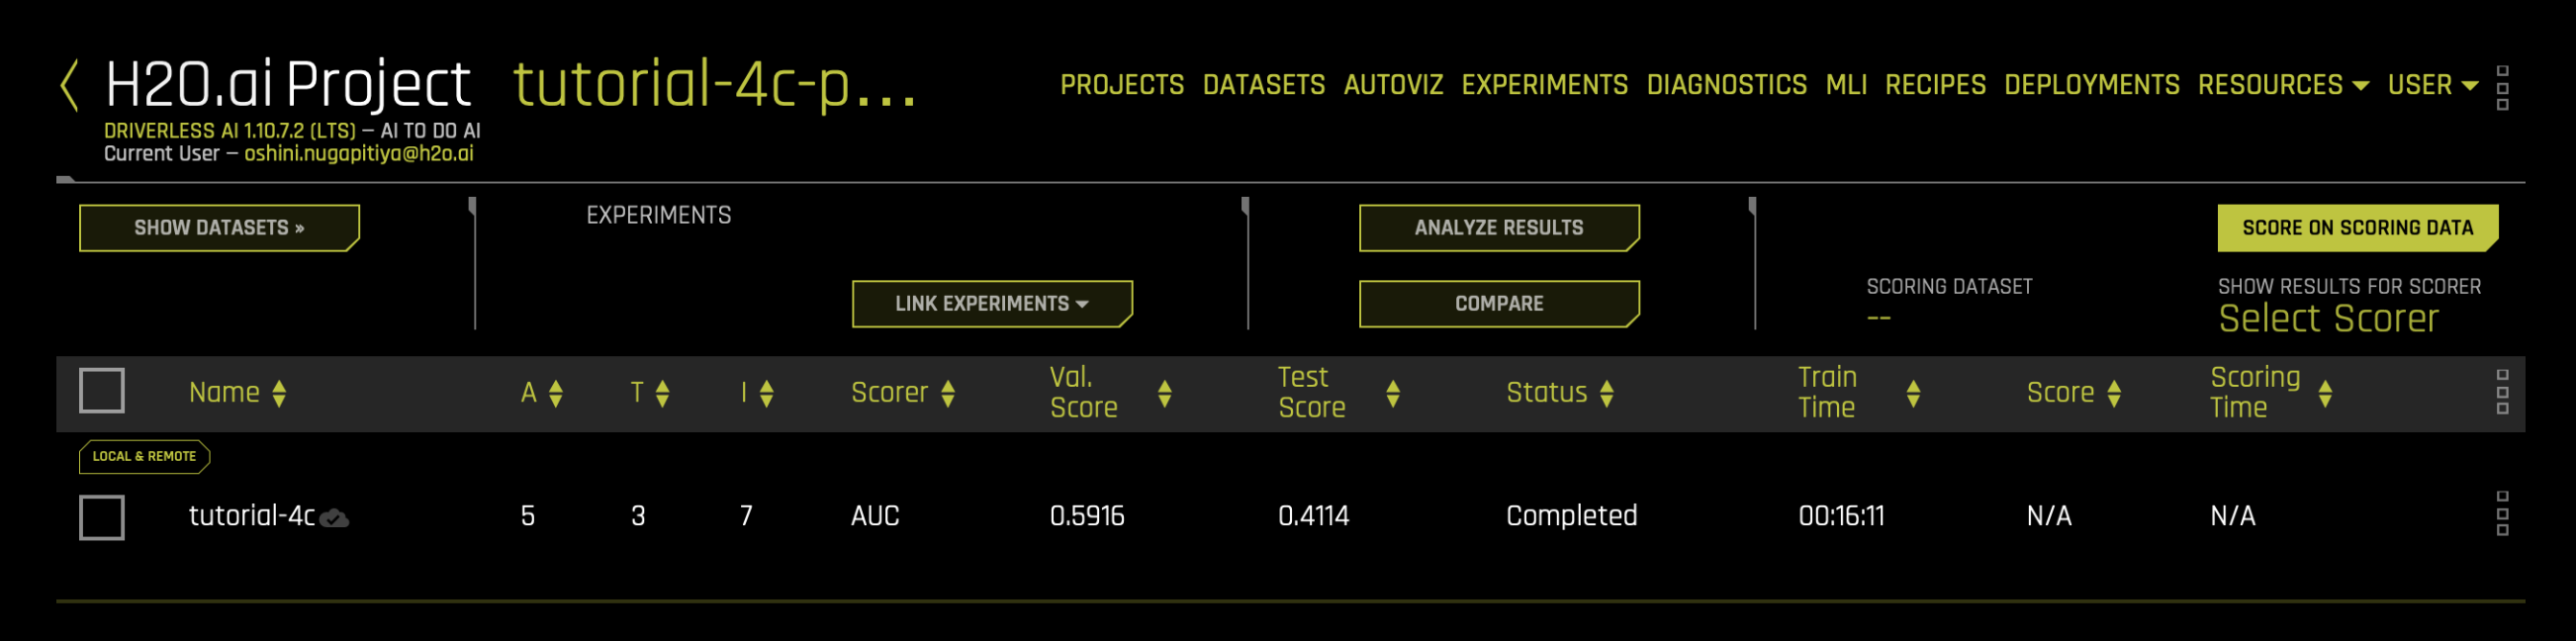
tutorial-4c-project - Click CREATE A NEW PROJECT.
- Click LINK EXPERIMENTS.
- In the LINK EXPERIMENTS list, select BY SELECTING EXPERIMENTS.
- Select the experiment you created in task 3, tutorial-4c.
 note
noteLinking an experiment to a Project also links the experiment's dataset(s).
- Click DONE.
Register model
Now that we have shared an H2O Driverless AI Project with H2O MLOps, the model is only available in H2O MLOps for further use, such as for deployment. Before being able to deploy a model in H2O MLOps, we need to register it as a model. Let's register the model in H2O MLOps.
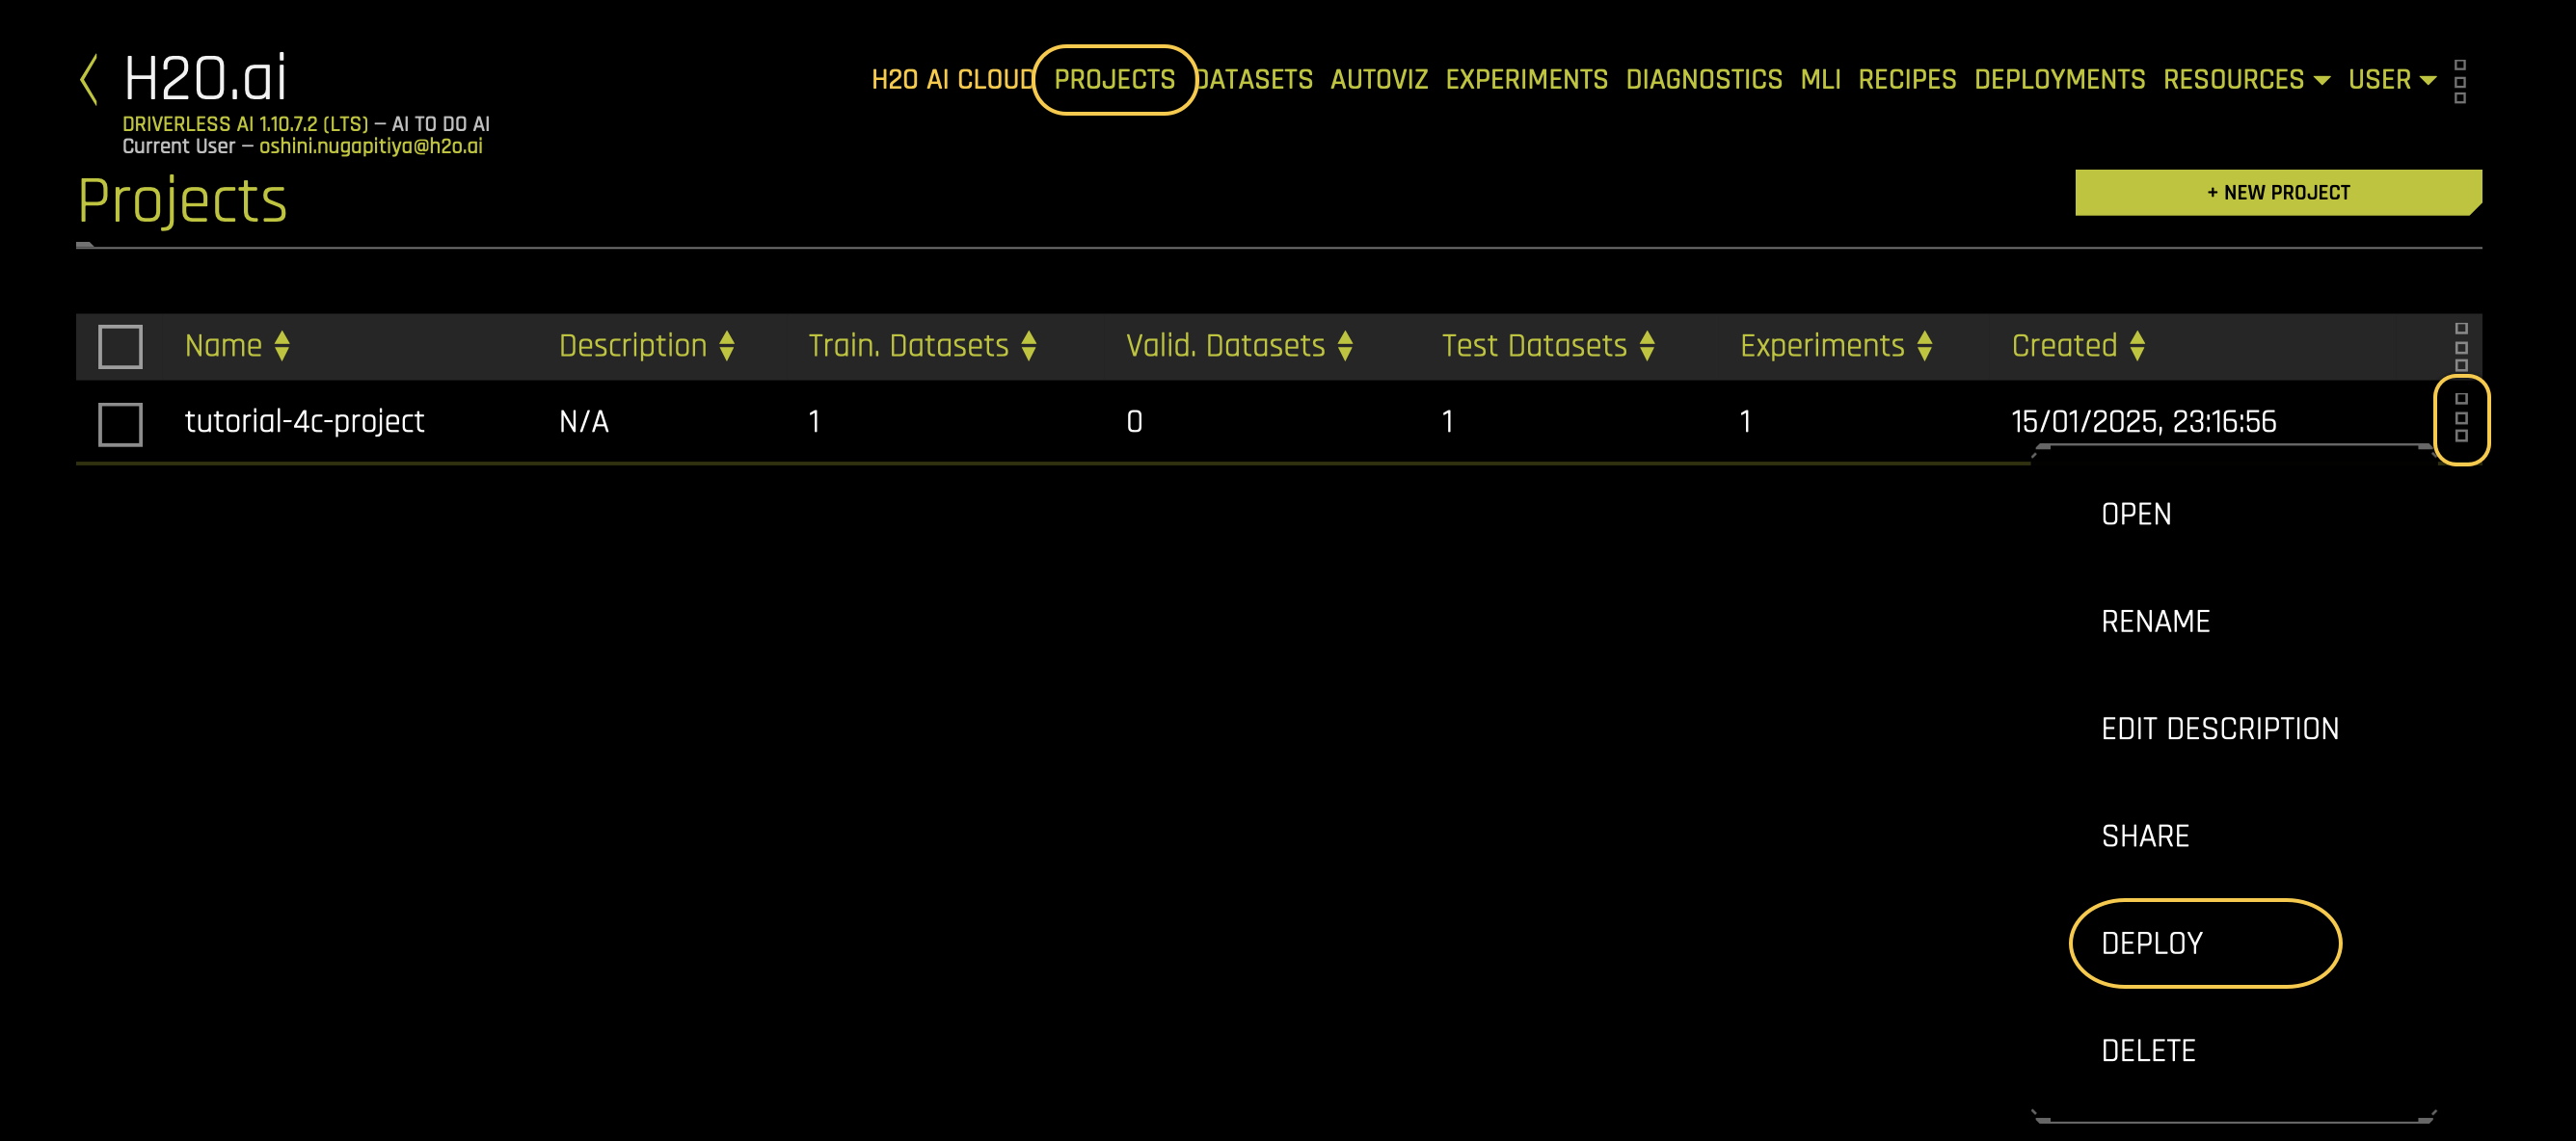
- In the H2O Driverless AI navigation menu, click PROJECTS.
- In the PROJECTS table, locate the row for the new project named
tutorial-4c-project, and click the three dots in that row. - From the dropdown menu, select Deploy. This will take you to the H2O MLOps dashboard.
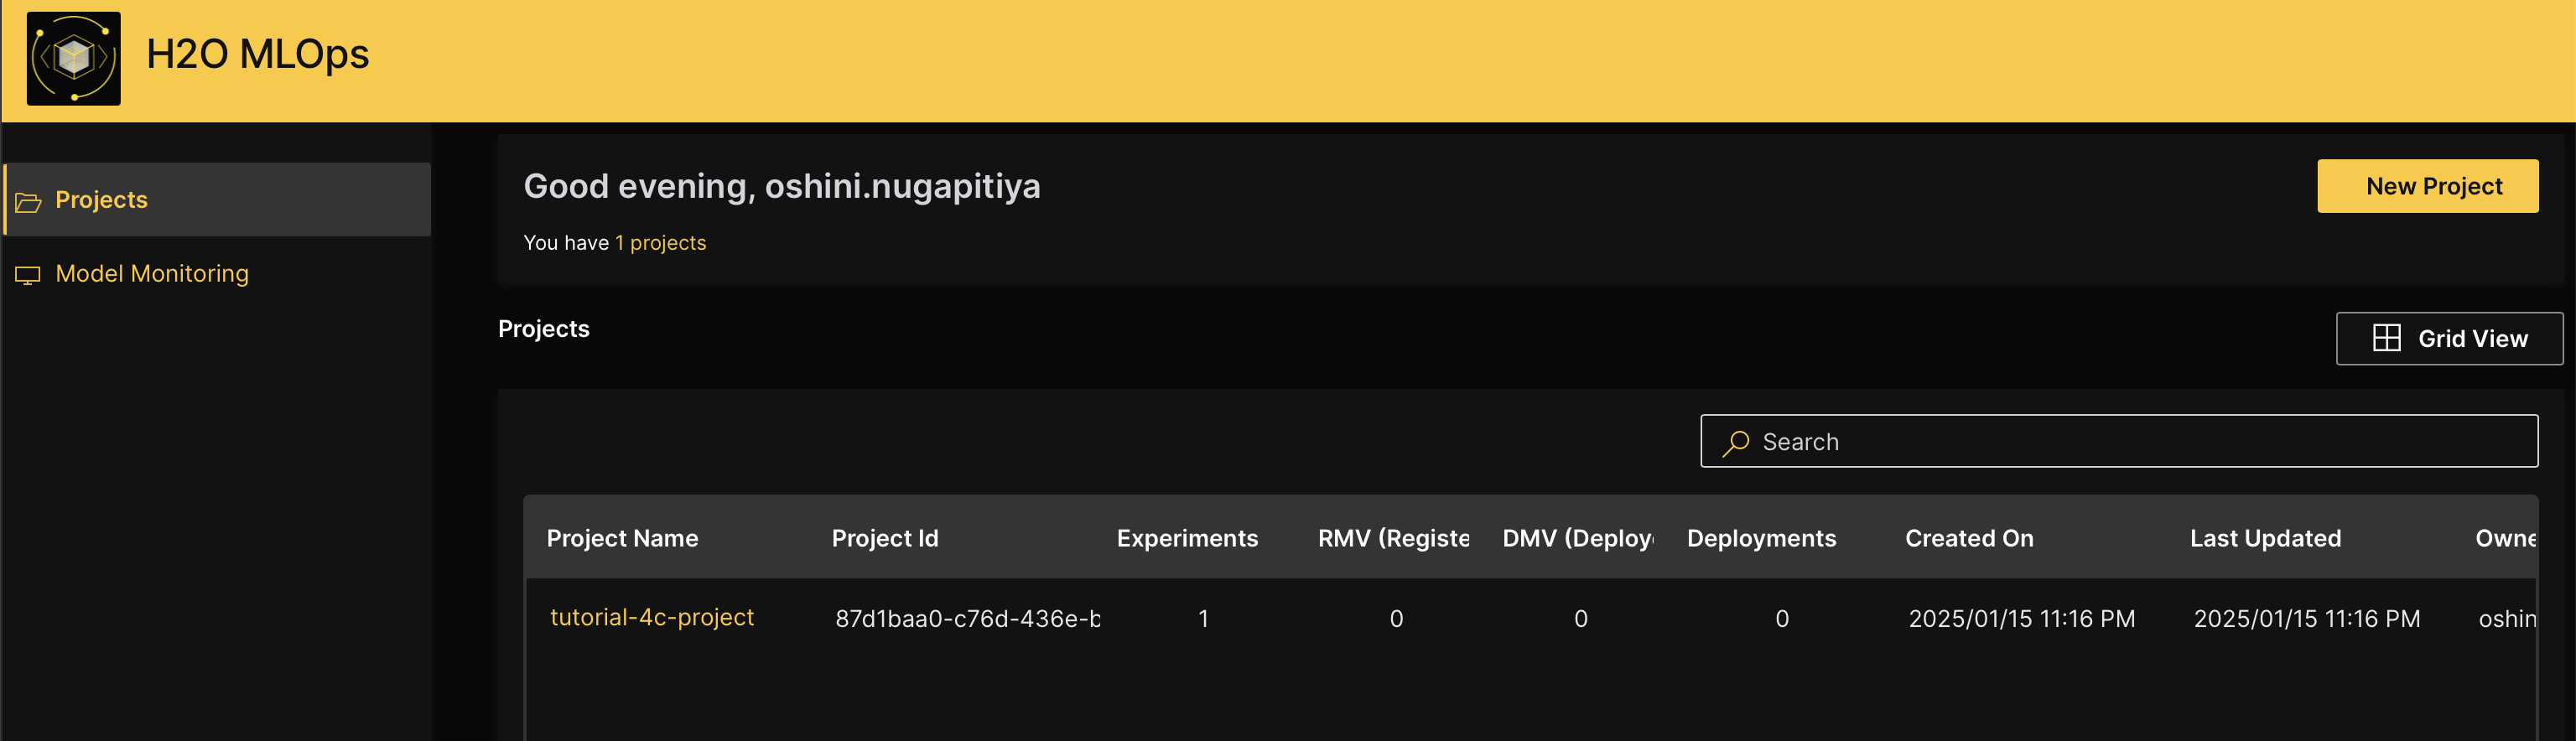
- In the Projects table of H2O MLOps, click tutorial-4c-project.
- Click the Experiments tab.
- In the Experiments table, click tutorial-4c.
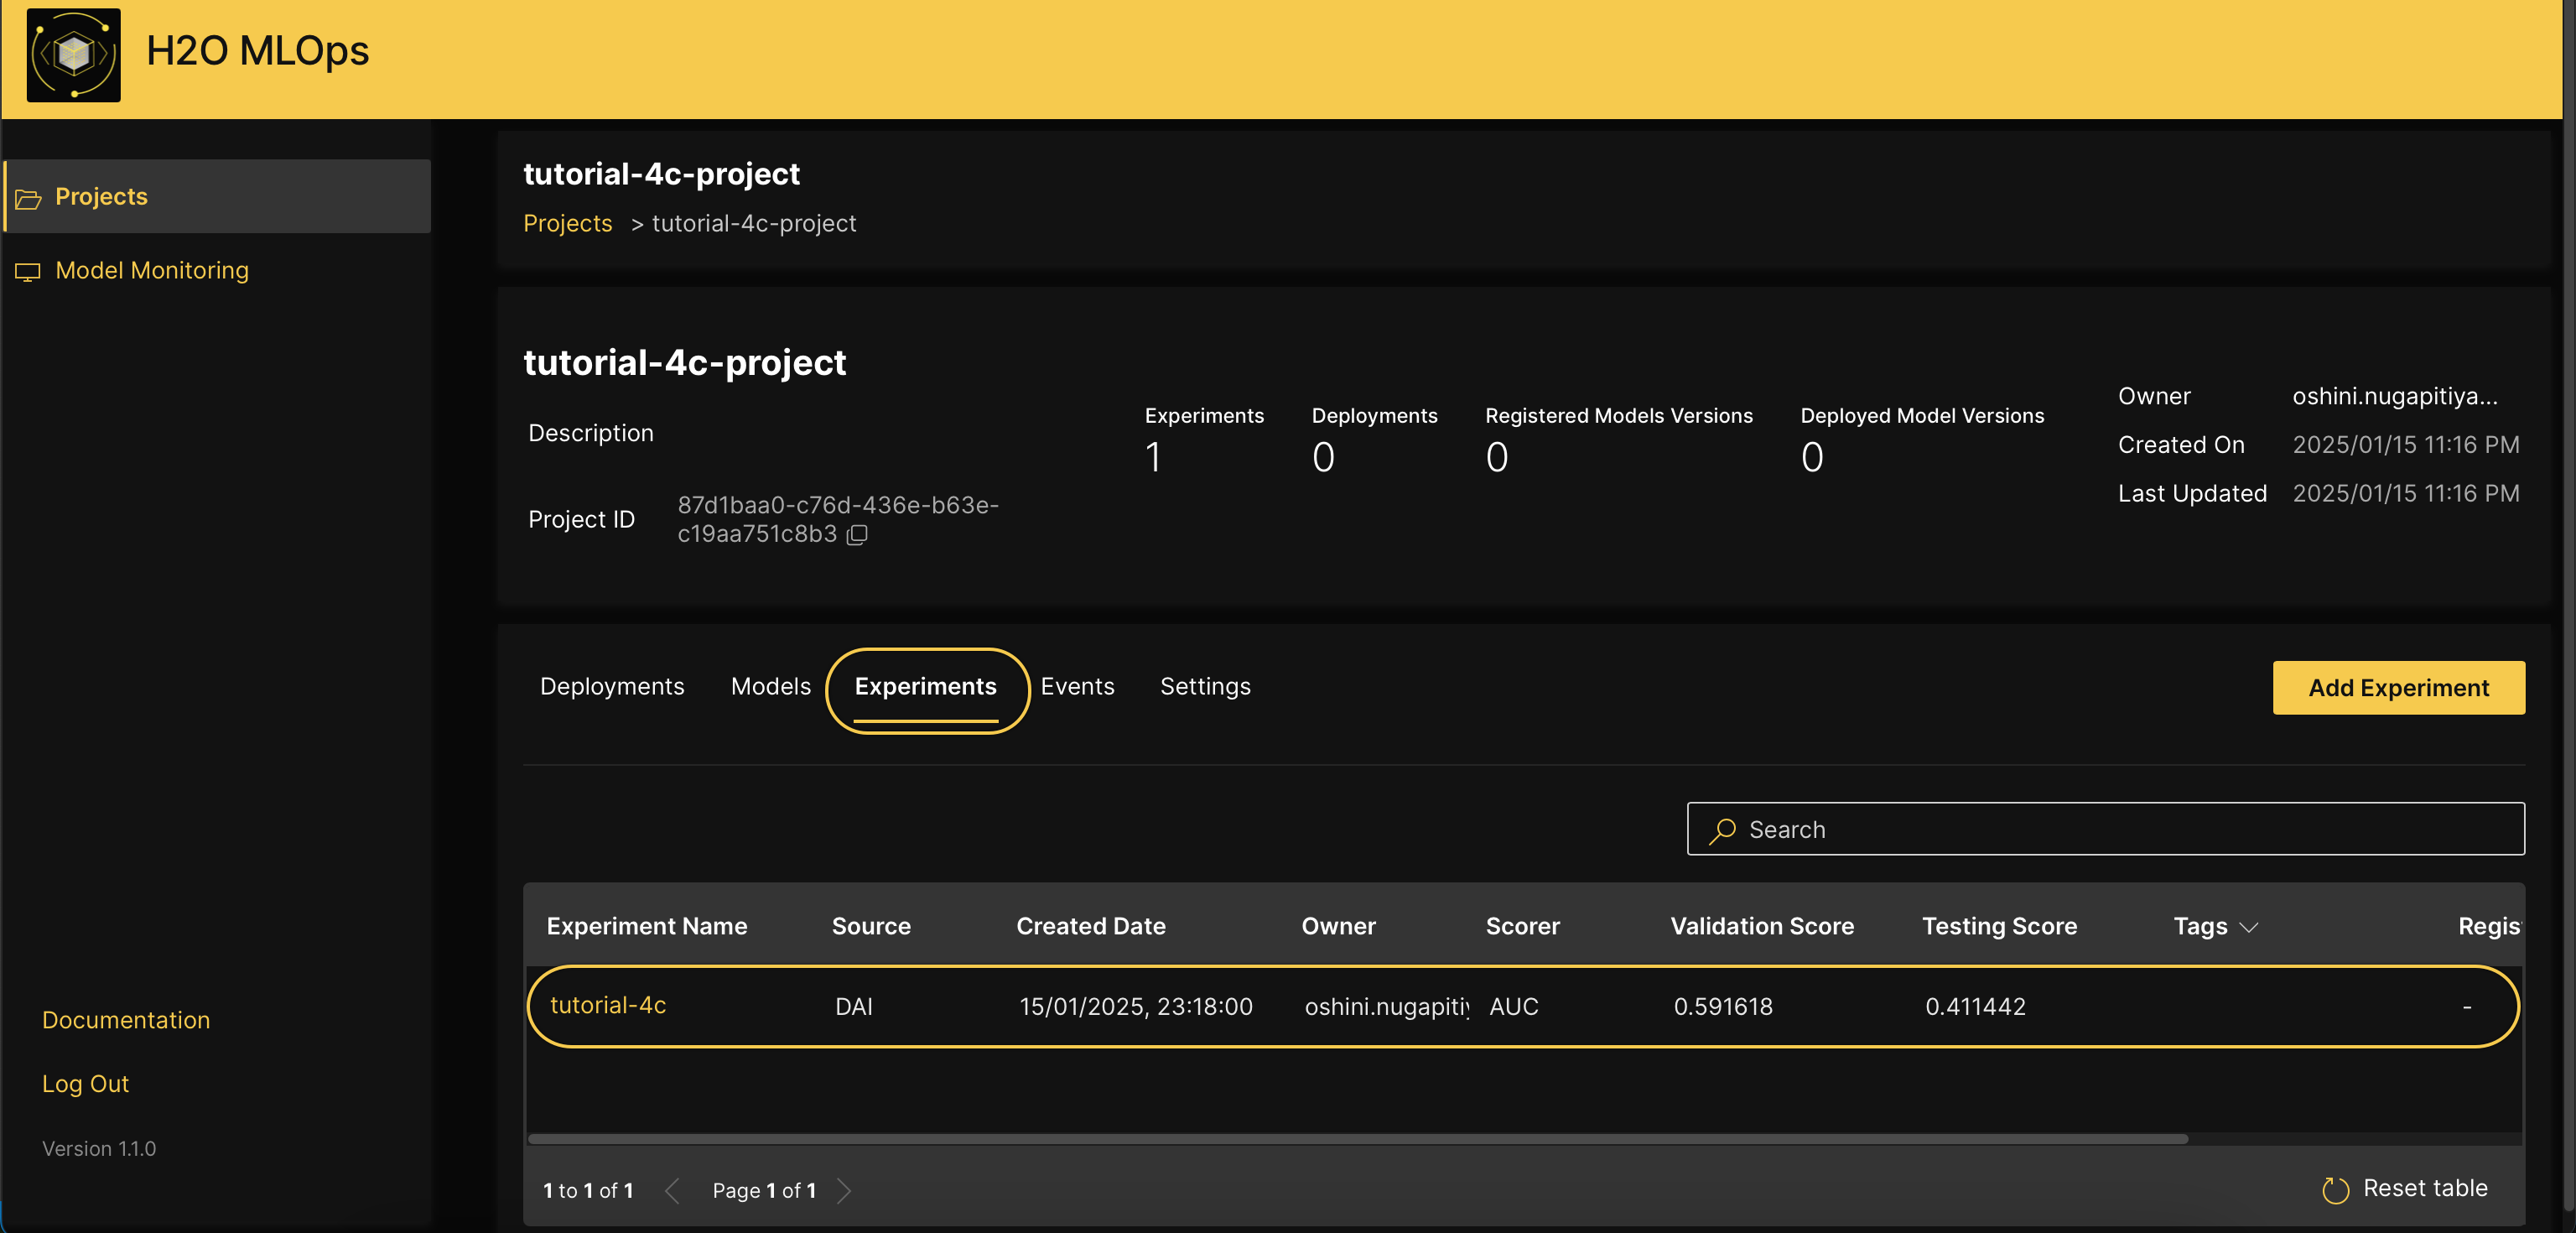
- Click Register as Model.
- Select Register As A New Model.
- In the Model Name box, enter the following:
tutorial-4c-model - Click Register.
Deploy model
After registering the model, you can deploy the model in H2O MLOps.
Click the Deployments tab.
Click Create Deployment.
For this tutorial, we will use the following selected deployment type: Real Time.
You can choose to deploy a model to score requests in either real time with a REST endpoint or in batches.- Real time: Models are served as REST endpoints, allowing for immediate predictions upon request. This can be configured for synchronous (instant response) or asynchronous (response after some processing time) operations.
- Batch: Models process a collection of data points simultaneously at one-time or scheduled intervals. The batch deployments are currently available through H2O eScorer for MOJO artifacts only.
In the Deployment Name box, enter the following:
tutorial4cDeploymentFrom the Deployment mode drop-down menu, select Single model.
By selecting Single model, you select one model/model version for the deployment.
The other available deployment modes are,- A/B test: A/B testing in H2O MLOps lets you compare the performance of two or more models. When requests are sent to an A/B deployment, they are directed to the selected models at a specified ratio known as the traffic percentage.
- Champion/challenger: This deployment mode lets you continuously compare your chosen best model (Champion) to a Challenger model.
Click Select Model.
Select tutorial-4c-model.
For this tutorial, we will use the following selected deployment environment: PROD.
Models can be deployed to Dev or Production environments. The Dev environment is used for testing and refining models before they are moved to production. Once models have been thoroughly tested and validated in the Dev environment, they can be promoted to the Production environment.
In the Artifact Type list, select DAI MOJO Pipeline.
Each entry in the Artifact Type drop-down represents an artifact that is linked to the selected experiment and is deployable by H2O MLOps. The available artifact types are,- DAI Python Pipeline: A standalone Python Scoring Pipeline that is available for experiments and interpreted models. This is implemented as a Python whl file. While this allows for a single process scoring engine, the scoring service is generally implemented as a client/server architecture and supports interfaces for TCP and HTTP.
- DAI MOJO Pipeline: The MOJO (Model Object, Optimized) Scoring Pipeline provides a standalone scoring pipeline that converts experiments to MOJOs, which can be scored in real time. The MOJO Scoring Pipeline is a scoring engine that can be deployed in any Java environment (Java Runtime) or in Python or R environment (C++ runtime) for scoring in real time or batch.
In the Runtime list, select DAI MOJO Scorer.
The selection of available runtimes is determined by the artifact type that you specify. The following runtimes are available for DAI MOJO Pipeline:- DAI MOJO Scorer
- DAI MOJO Scorer (Shapley transformed only)
- DAI MOJO Scorer (Shapley all)
- DAI MOJO Scorer (C++ Runtime)
- DAI MOJO Scorer (Shapley original only)
- DAI MOJO Scorer (C++ Runtime in subprocess mode)
For more information about scoring runtimes, see Scoring runtimes.
updateFor H2O Driverless AI models v1.10.5 or later, it is highly recommended to prioritize using one of the following C++ MOJO Scorer runtimes due to their speed and minimal vulnerabilities:
- DAI MOJO Scorer (C++ Runtime)
- DAI MOJO Scorer (C++ Runtime in subprocess mode) As a last resort, you can use the following runtime:
The runtime available for DAI Python Pipeline artifact type is,
- Python Pipeline Scorer [DAI 1.10.x]
Click the Enable Monitoring toggle to the On position.
By default, the model monitoring option is turned off. If model monitoring is enabled, scoring data is saved.
Select the Drift Calculation checkbox.
If you enable the Drift Calculation option, your raw input data is stored for drift calculation.
Click Create Deployment.
The model is ready for scoring once its deployment status reaches a Healthy state.
- Submit and view feedback for this page
- Send feedback about H2O Driverless AI | Tutorials to cloud-feedback@h2o.ai