Member management
This guide shows you how to manage members (users and admins) in the Admin Center. All members are displayed in a single unified table with sortable columns and inline group management.
Click Member management on the left-navigation bar to open the Member management page.
- When a user is sourced from an Identity Provider (IdP), the Status column displays the suffix '- IdP' alongside the user status to indicate the user's source.
Example:
If the user 'h2o-tester-admin@h2o.ai' is sourced from an IdP and the status is 'Suspended', the Status column for that user will be
Suspended - IdP. - The Source column shows each user's profile source.
- To organize users into groups and manage group-based permissions, see the Custom Groups page.
Member table
The Member management page displays all members in a single table.
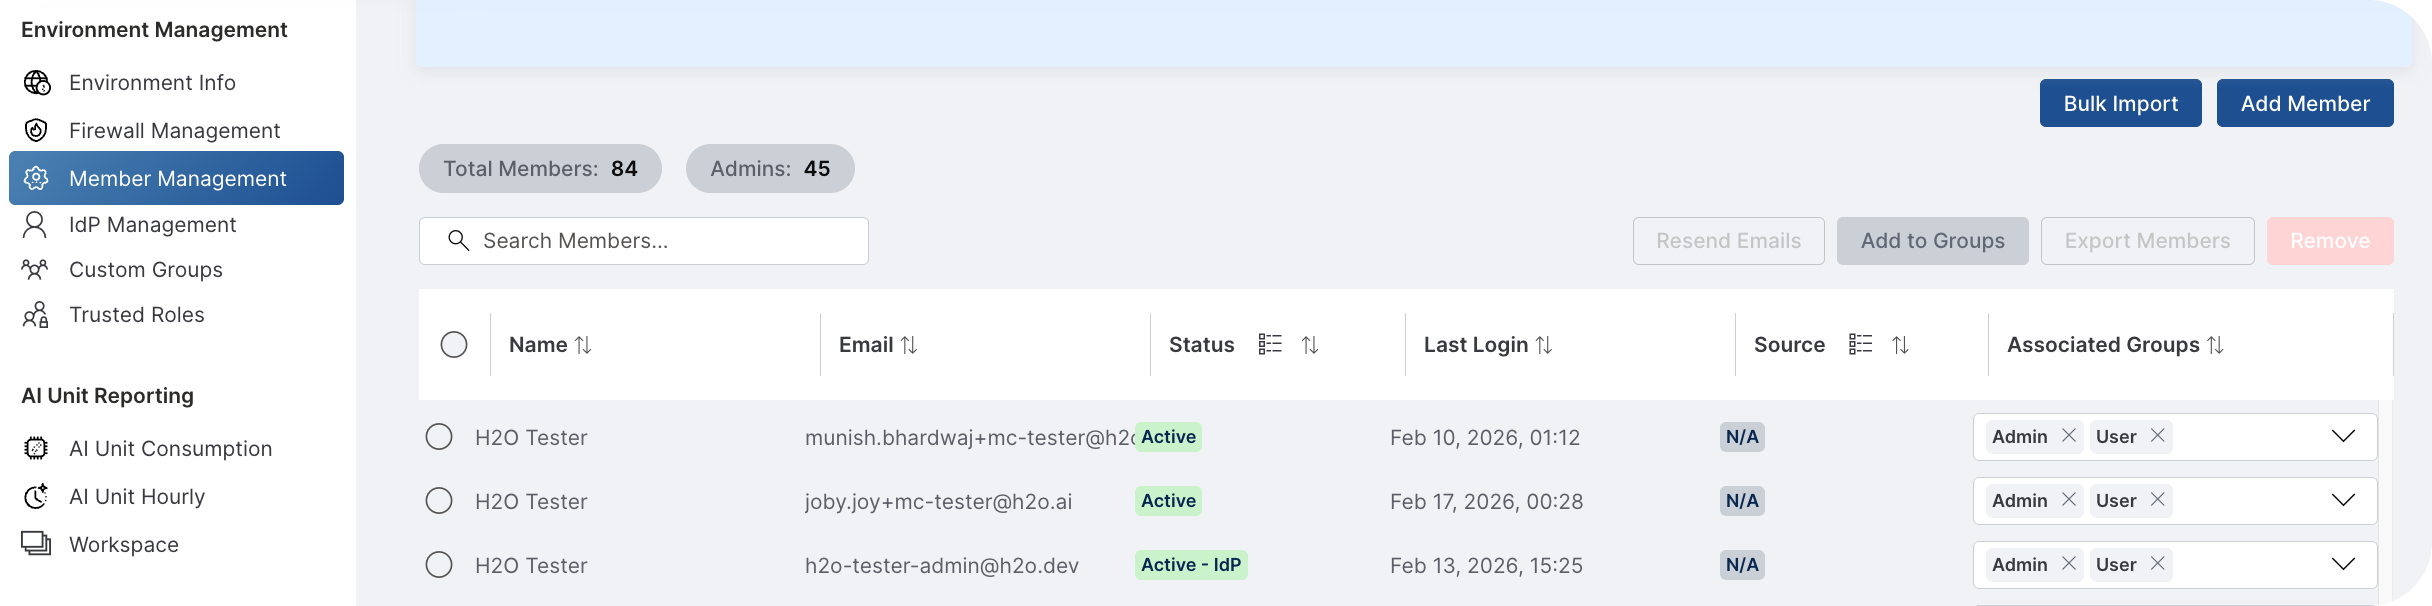
The table contains the following columns:
| Column | Description |
|---|---|
| Name | The member's first and last name. |
| The member's email address. | |
| Status | The member's account status (for example, Active, Deactivated, etc.). Displays the -IdP suffix for users sourced from an Identity Provider. |
| Last Login | The last time the member logged in to the environment. |
| Source | The member's profile source (Identity Provider). |
| Associated Groups | The group(s) the member belongs to. This column is editable. See Edit associated groups. |
Sort and group
The table is sortable by all columns. Click a column header to sort by that column.
You can also group table rows by the Status and Source columns.
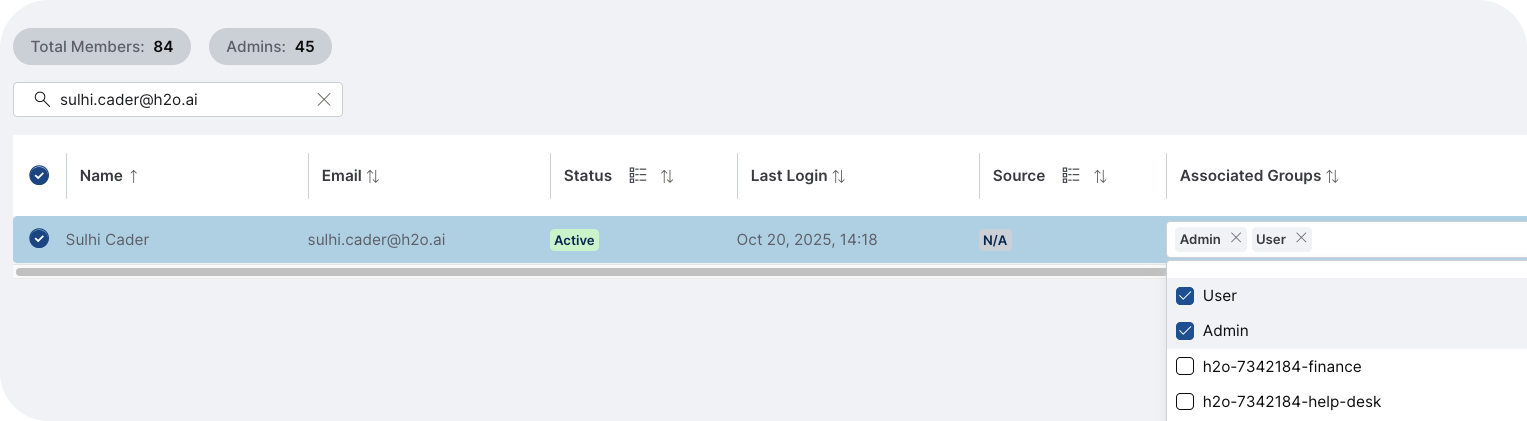
Edit associated groups
To add or remove a user from groups individually:
- Click the Associated Groups cell for the target user in the table.
- In the inline dropdown that appears, review the available groups.
- Select a group to add the user to it, or deselect a group to remove the user from it.
- Changes are applied one group at a time.
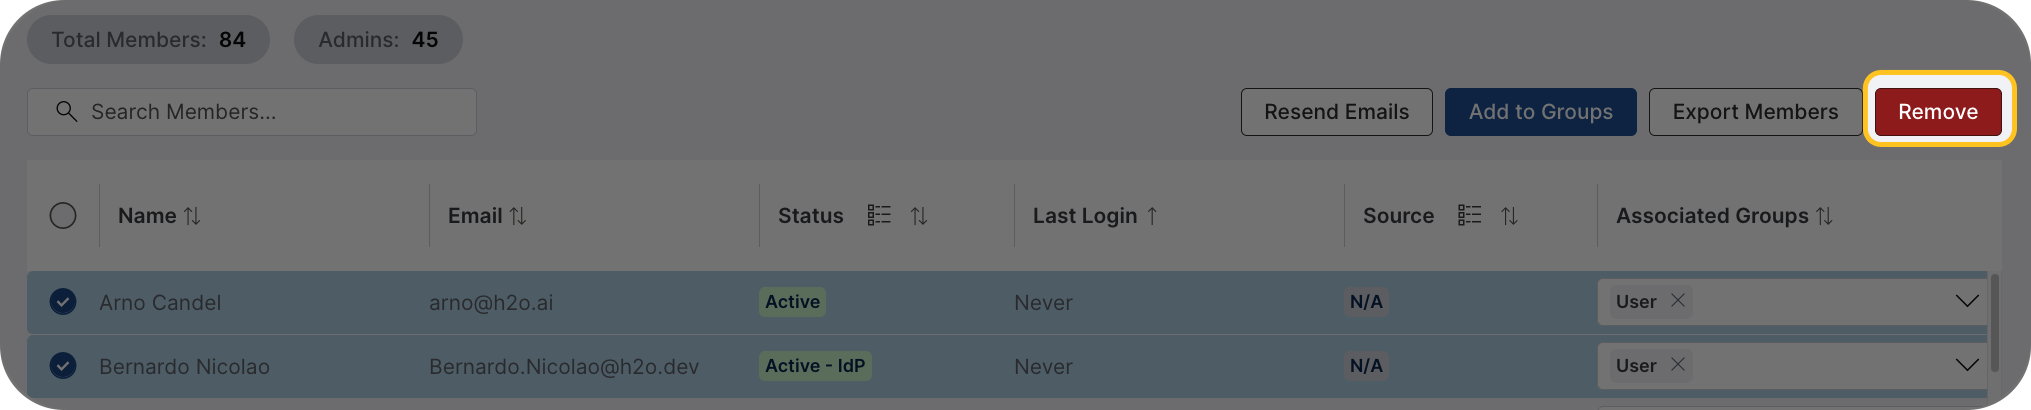
Remove users from groups
To remove multiple users from groups in bulk:
- Select one or more users from the table.
- Click Remove.
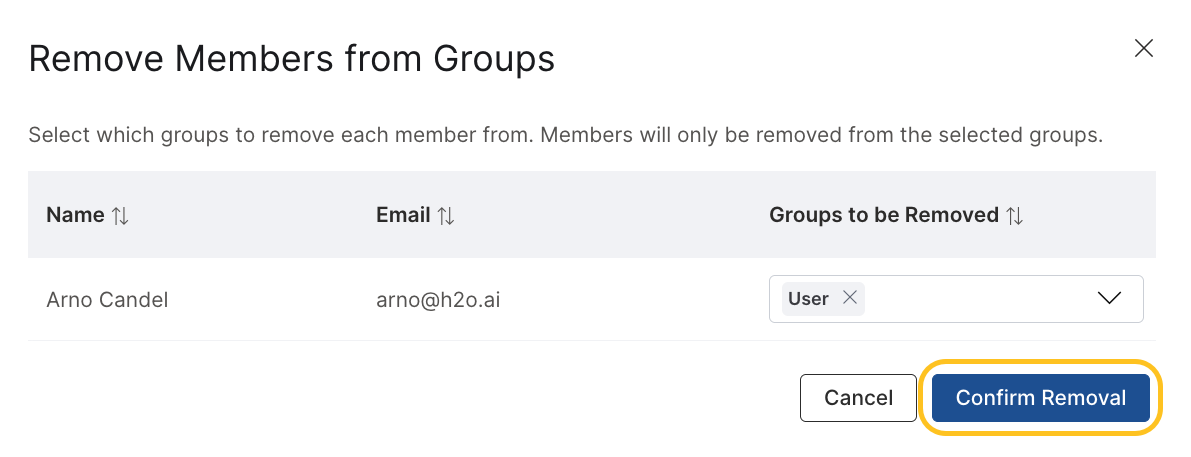
- In the dialog that opens, review each selected user and their associated group checkboxes.
- For each user, select the group(s) to remove them from.
- Click Confirm to apply the removal.
Add users to groups
To add multiple users to groups, select one or more users from the table and click Add to Groups. This opens a dialog where you can assign the selected users to one or more groups.
Add a new user
To add a member to the user role, follow these steps:
- Click Add member in the top-right corner.
 The Add member side panel opens.
 - In the First name field, enter the member's first name.
- In the Last name field, enter the member's last name.
- In the Email field, enter the member's email address.
- In the Groups drop-down, select User.
- Click Add member.
The member appears in the table in your HAMC environment.
Resend emails
When a new user is added, they appear in the table with a status of either Staged or Pending user action.
An activation email is automatically sent to the user, notifying them to activate their account by providing the email and password. This activation email expires within 24 hours.
You can resend password reset emails to users who have activated their accounts (Active) or whose passwords have expired (Password Expired).
To resend an activation or password reset email:
- Select the user(s) from the table.
- Click Resend emails.
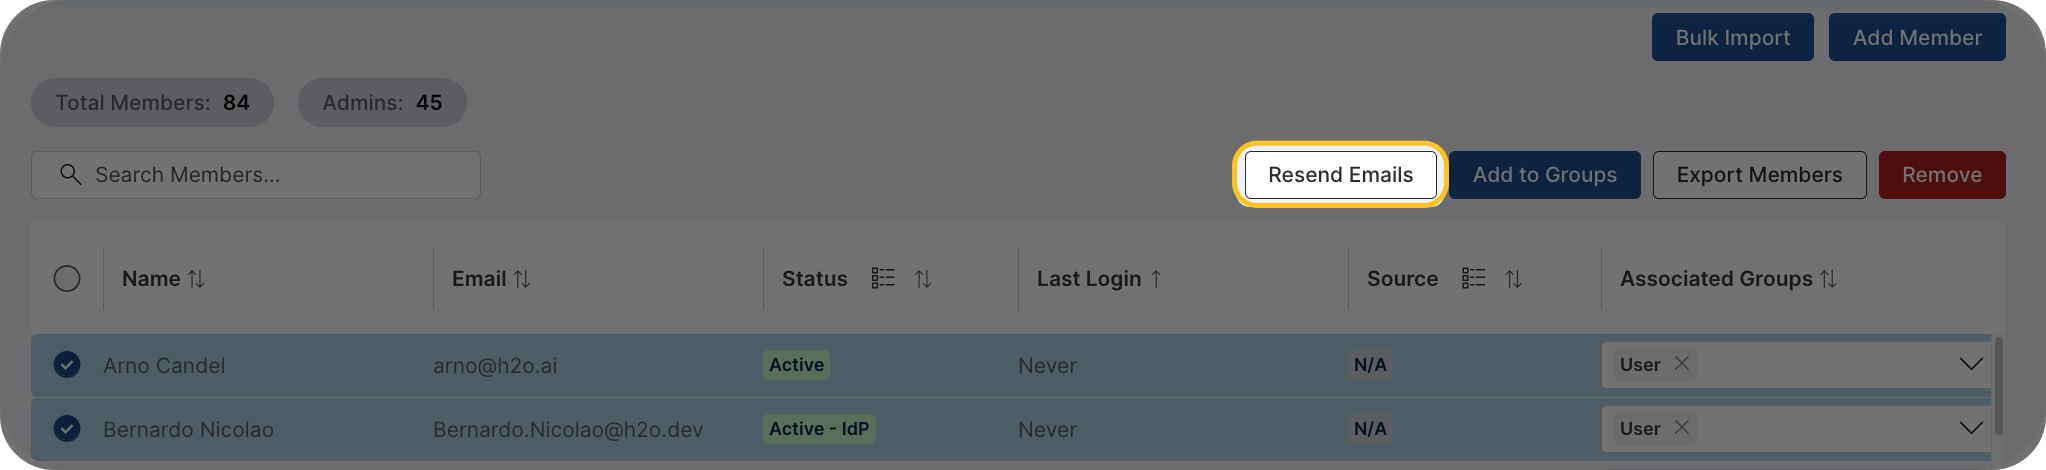
- Click Okay to confirm.
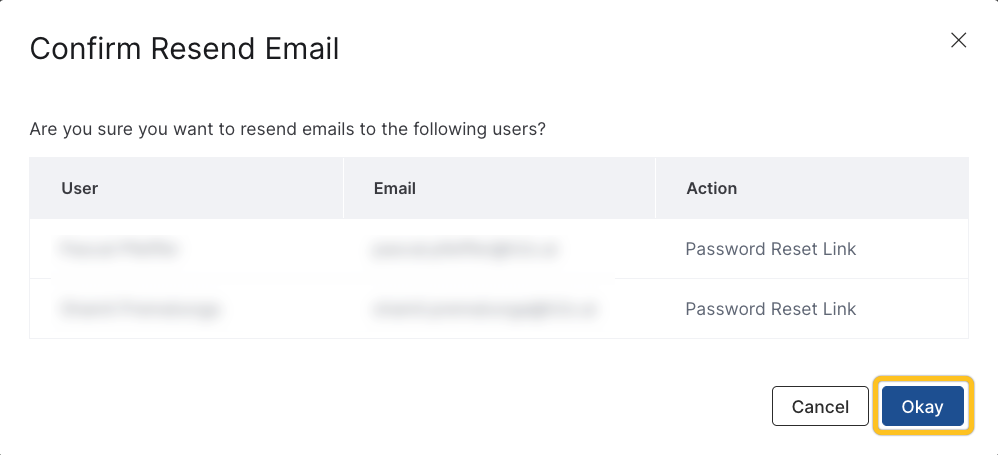
The appropriate email is sent based on each user's status.
- To resend an activation email, the user's status must be either Staged or Pending user action.
- To send a password reset email, the user's status must be Active or Password Expired.
Grant admin permissions to a user
To grant admin permissions to users, follow these steps:
- In the table, locate the user to grant admin permissions.
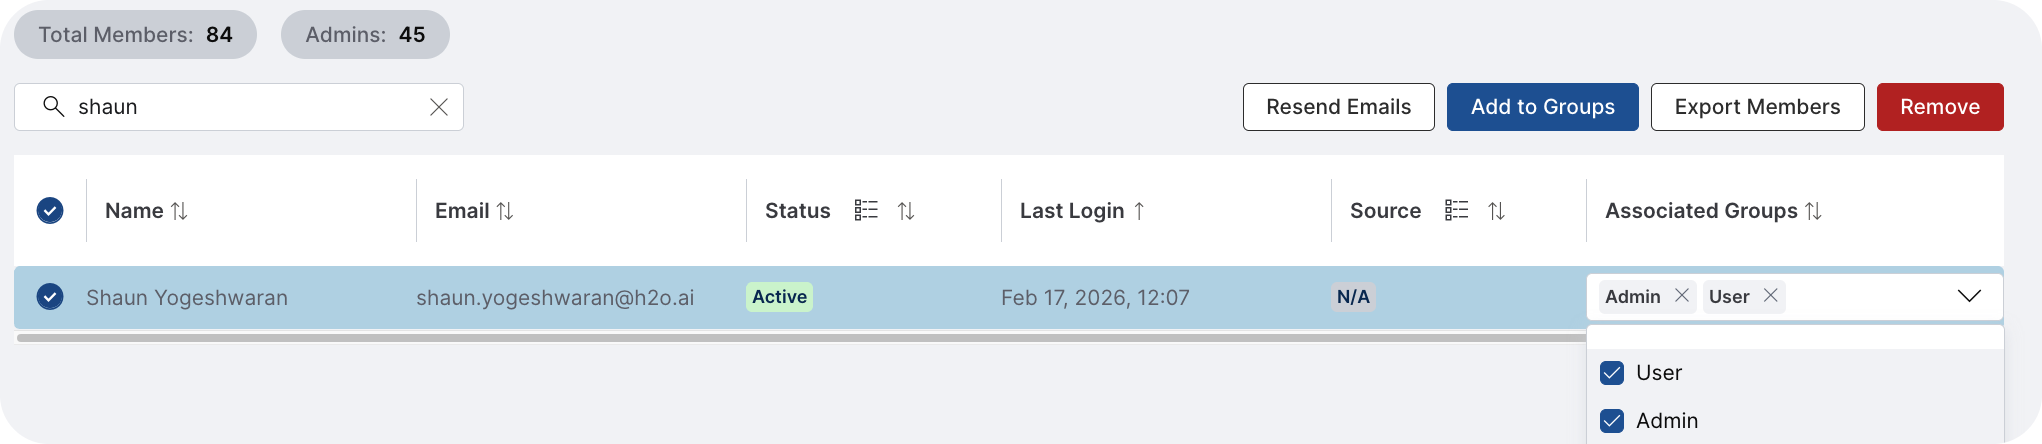
- Click on the drop down under Associated Groups.
- In the dropdown, select Admin to add the user to the admin group.
Add an admin user
- To gain full access to Managed Cloud, admins must also be granted user permissions. With these permissions, admins can control the H2O AI Managed Cloud environment.
- If you have admin access but do not have user permissions, please reach out to the other admins to request the appropriate usage permissions.
To add a member to the admin role, follow these steps:
- Click Add member in the top-right corner.
The Add member side panel opens.
- In the First name field, enter the member's first name.
- In the Last name field, enter the member's last name.
- In the Email field, enter the member's email address.
- In the Groups drop-down, select Admin.
- Click Add member.
The member appears in the table with admin permissions in your HAMC environment.
Import members in bulk
You can also import members in bulk:
- Click Bulk import.

- From the Role drop-down, select User, Admin, or both to assign roles to the members.
- Under Upload CSV, upload a CSV file containing the members' email addresses, first names, and last names.
note
When importing a dataset, upload it as a CSV file formatted as follows:
- The file must contain three columns in the specified order: Email, First Name, Last Name.
- Ensure there are no additional columns or headers in the CSV file.
- Click Add members.
note
When importing users into a User group, activation links are sent to each user and will expire after 24 hours. If a user does not activate their account within this 24-hour period, you can resend the activation email.
The newly added members are listed in the table in your HAMC environment.
Export members
To download a list of users and admins as a text file, click Export Members.
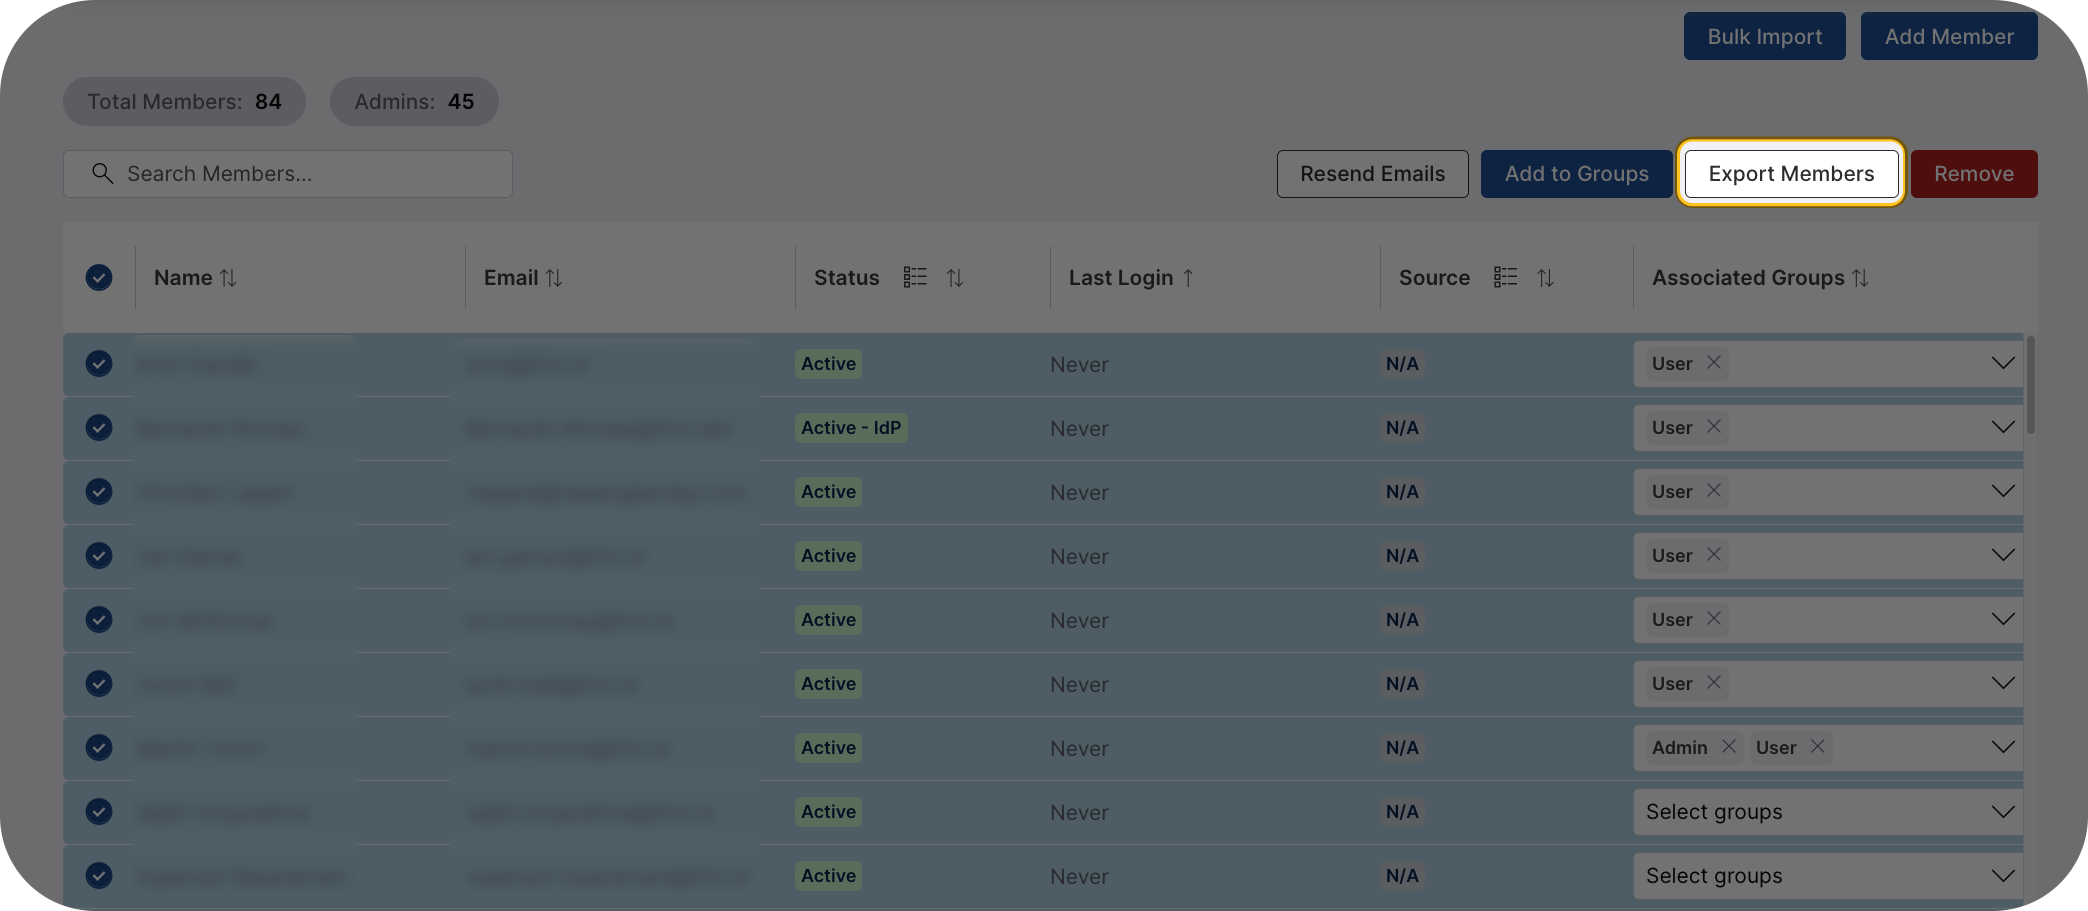 The
The .txt file contains email addresses, full names, and user status (active/inactive) of all users and admins.
You need to have administrator privileges to be able to export users.
- Submit and view feedback for this page
- Send feedback about H2O Admin Center to cloud-feedback@h2o.ai