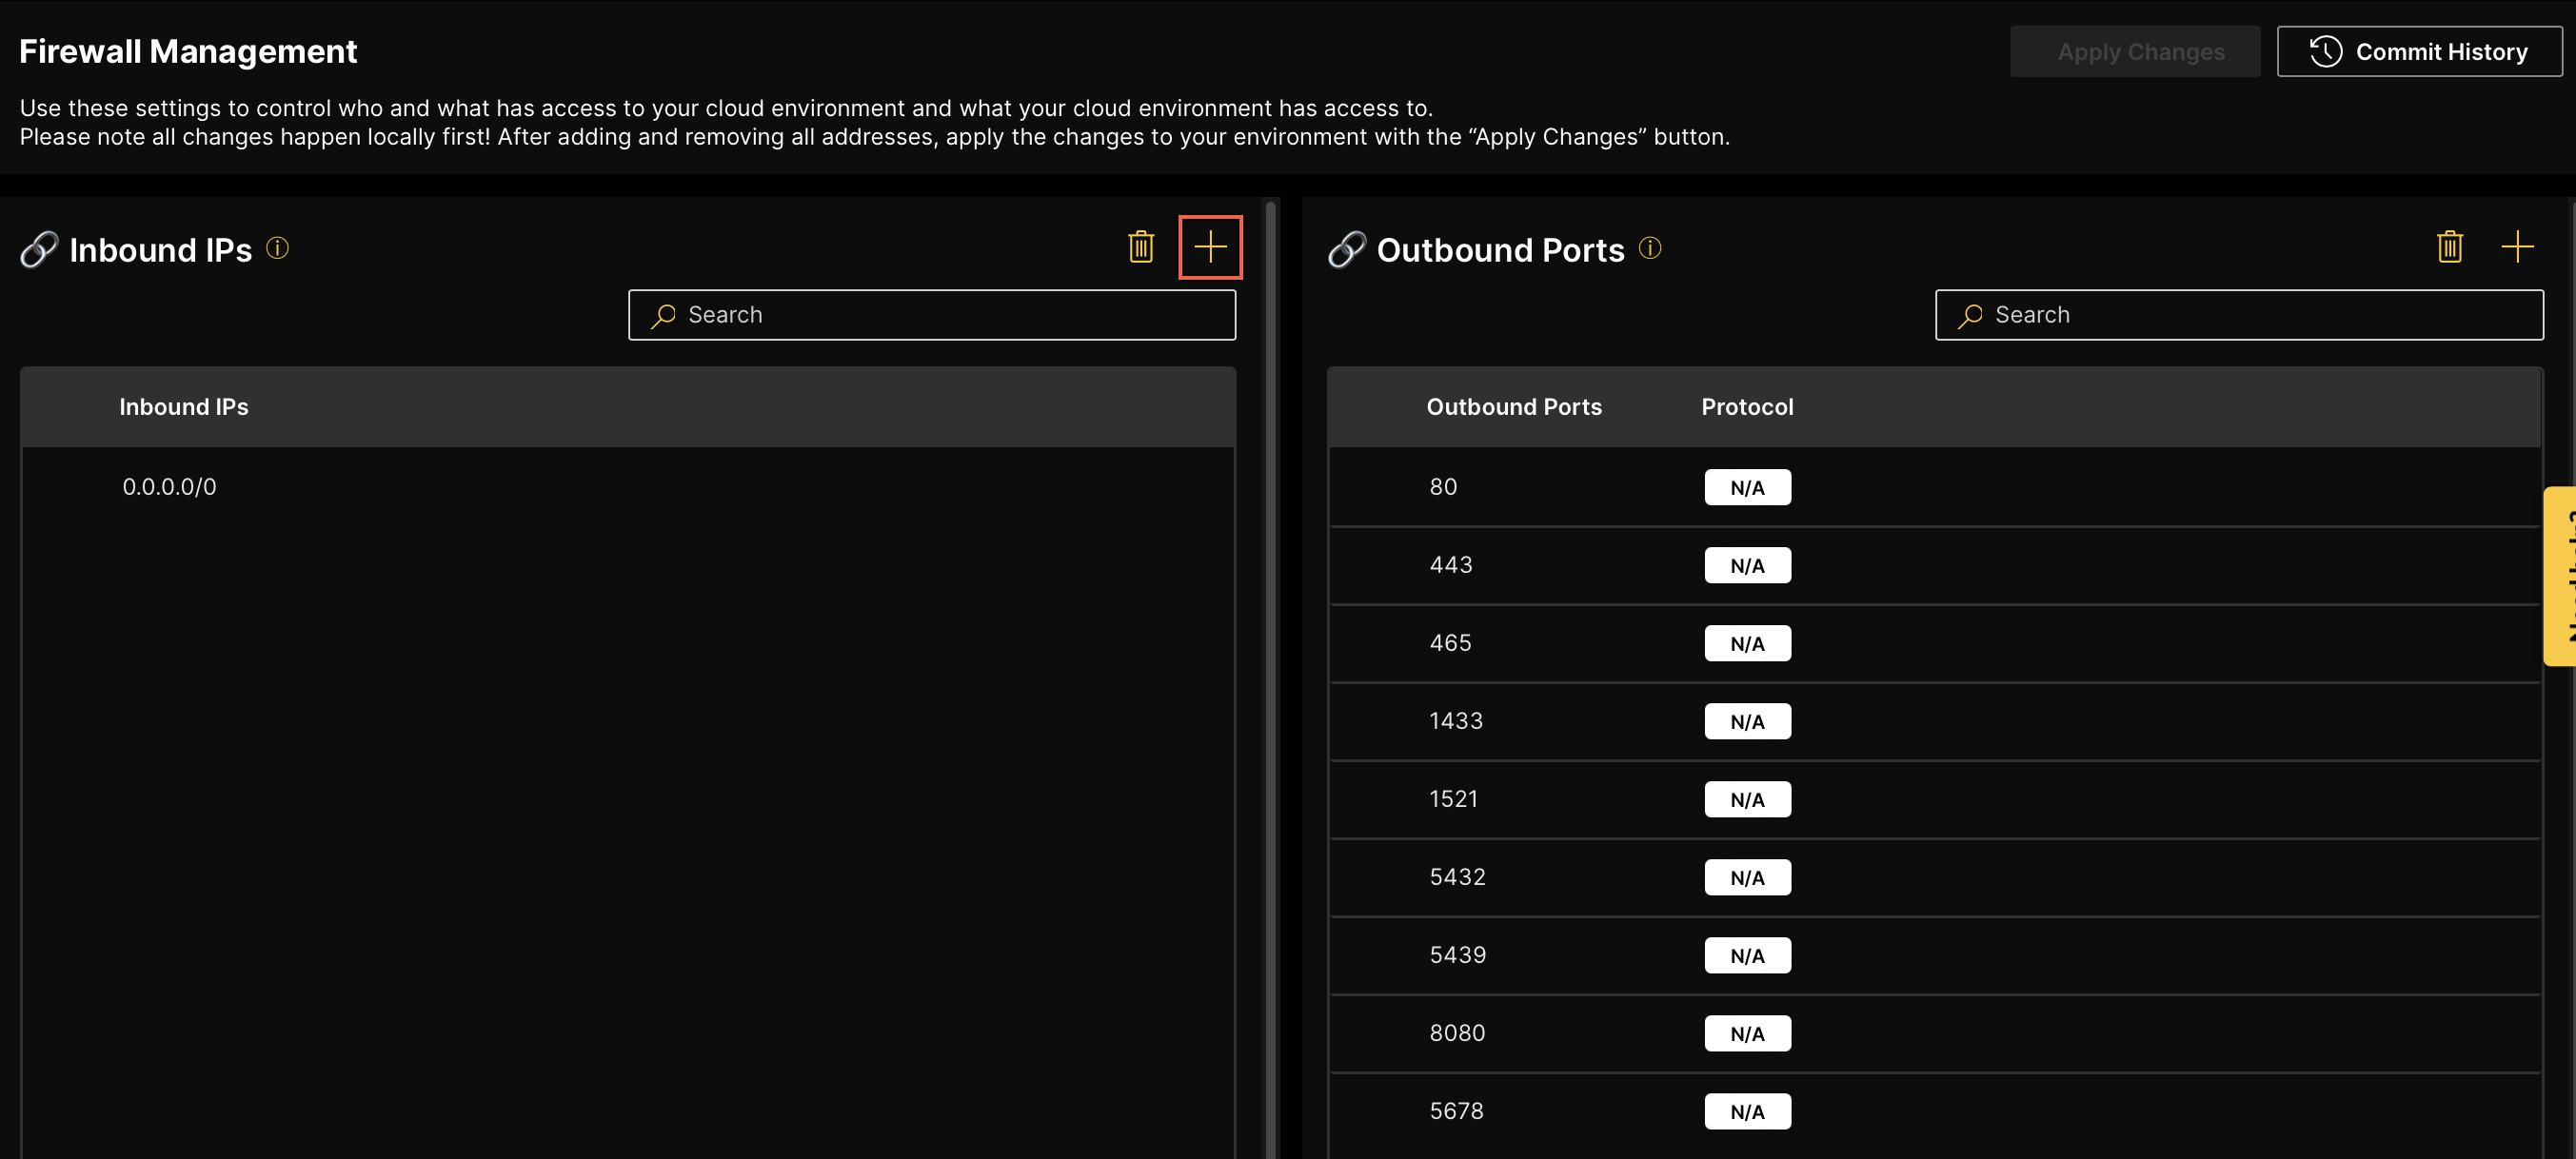
Firewall management
The Firewall management section includes two lists on a single page that will present the context of each file stored. This tutorial will show you how to add inbound IP addresses and outbound ports to incorporate changes to the H2O AI Managed Cloud (HAMC) environment.
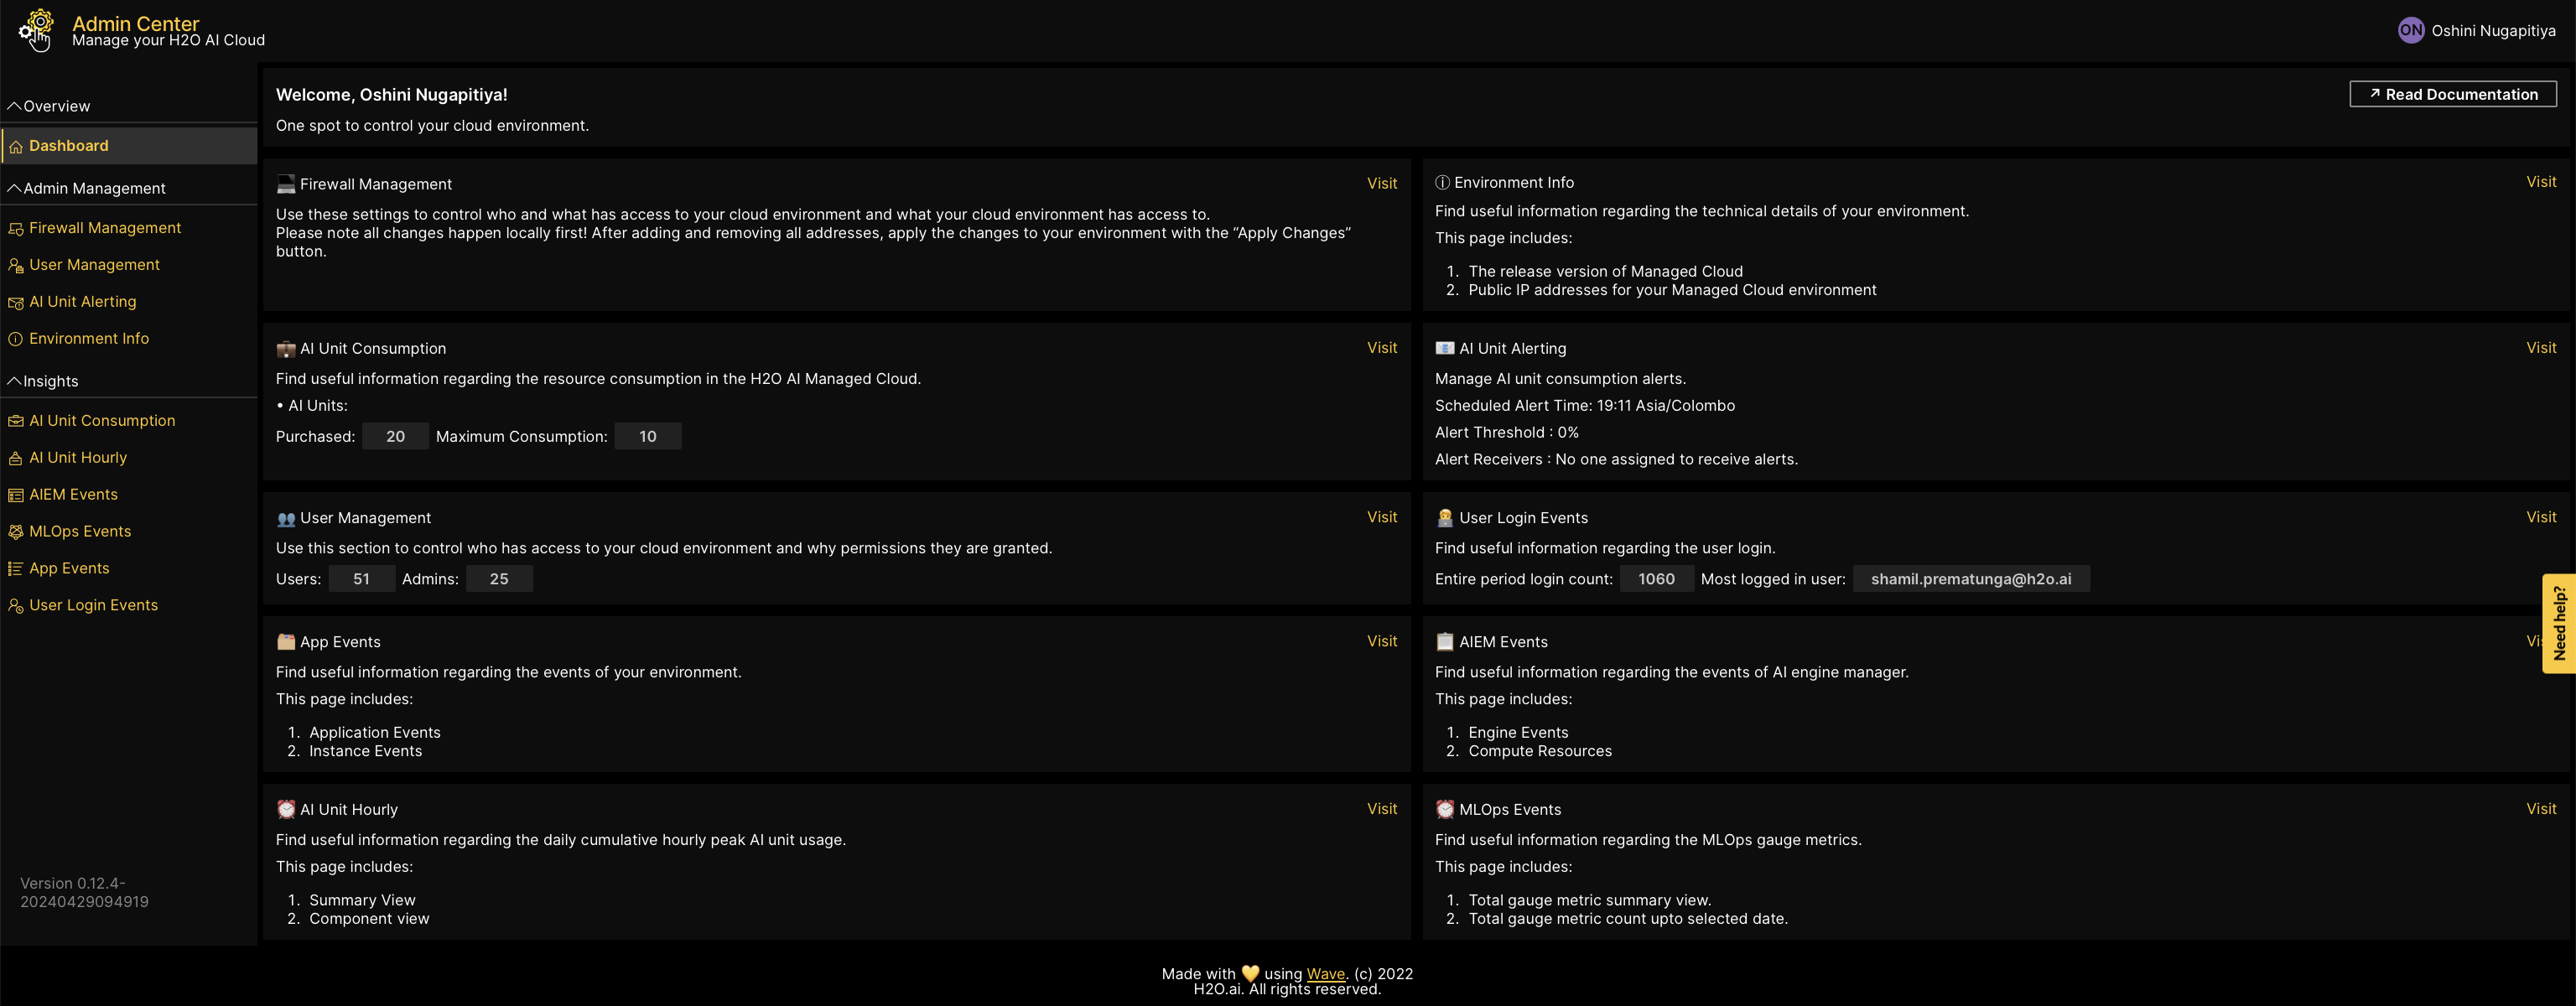
Click Firewall management on the left-navigation bar or click Visit on your Dashboard, to access the subsection.
The main features of this subsection are:
- Click the info icons in the firewall management section to access the user guide, which clearly explains how to add or delete inbound IP addresses and outbound ports.
![]()
-
When one user adds or deletes an inbound IP or outbound port through the Admin Center UI, the change will be auto-updated and reflected on the UI instances of all other users who are logged into the same instance of Admin Center in HAMC.
-
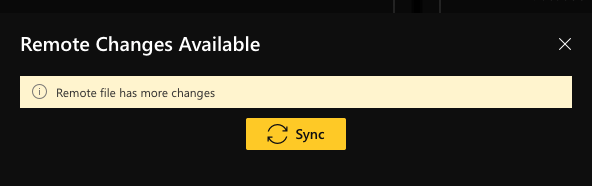
If one user adds or deletes an inbound IP or outbound port remotely instead of via the Admin Center UI, other users will be prompted to sync the change at the point at which they are applying their local changes to the remote instance. They can do this by clicking Sync when prompted, as seen below.
Adding inbound IPs
The H2O AI Managed Cloud Admin Center enables you to add a list of specific inbound IPs to allow inbound traffic to your HAMC. By configuring inbound IPs, you can control who and what has access to your cloud environment and reduce the risk of unauthorized access.
For example, if you want to grant access to a specific partner or vendor, you can add their IP address to the list of inbound IPs. It ensures that only traffic generated from the specified IP address is allowed to enter your HAMC environment and interact with your resources. The default configuration of inbound IPs in firewall management is 0.0.0.0/0, which allows access from any IP address.
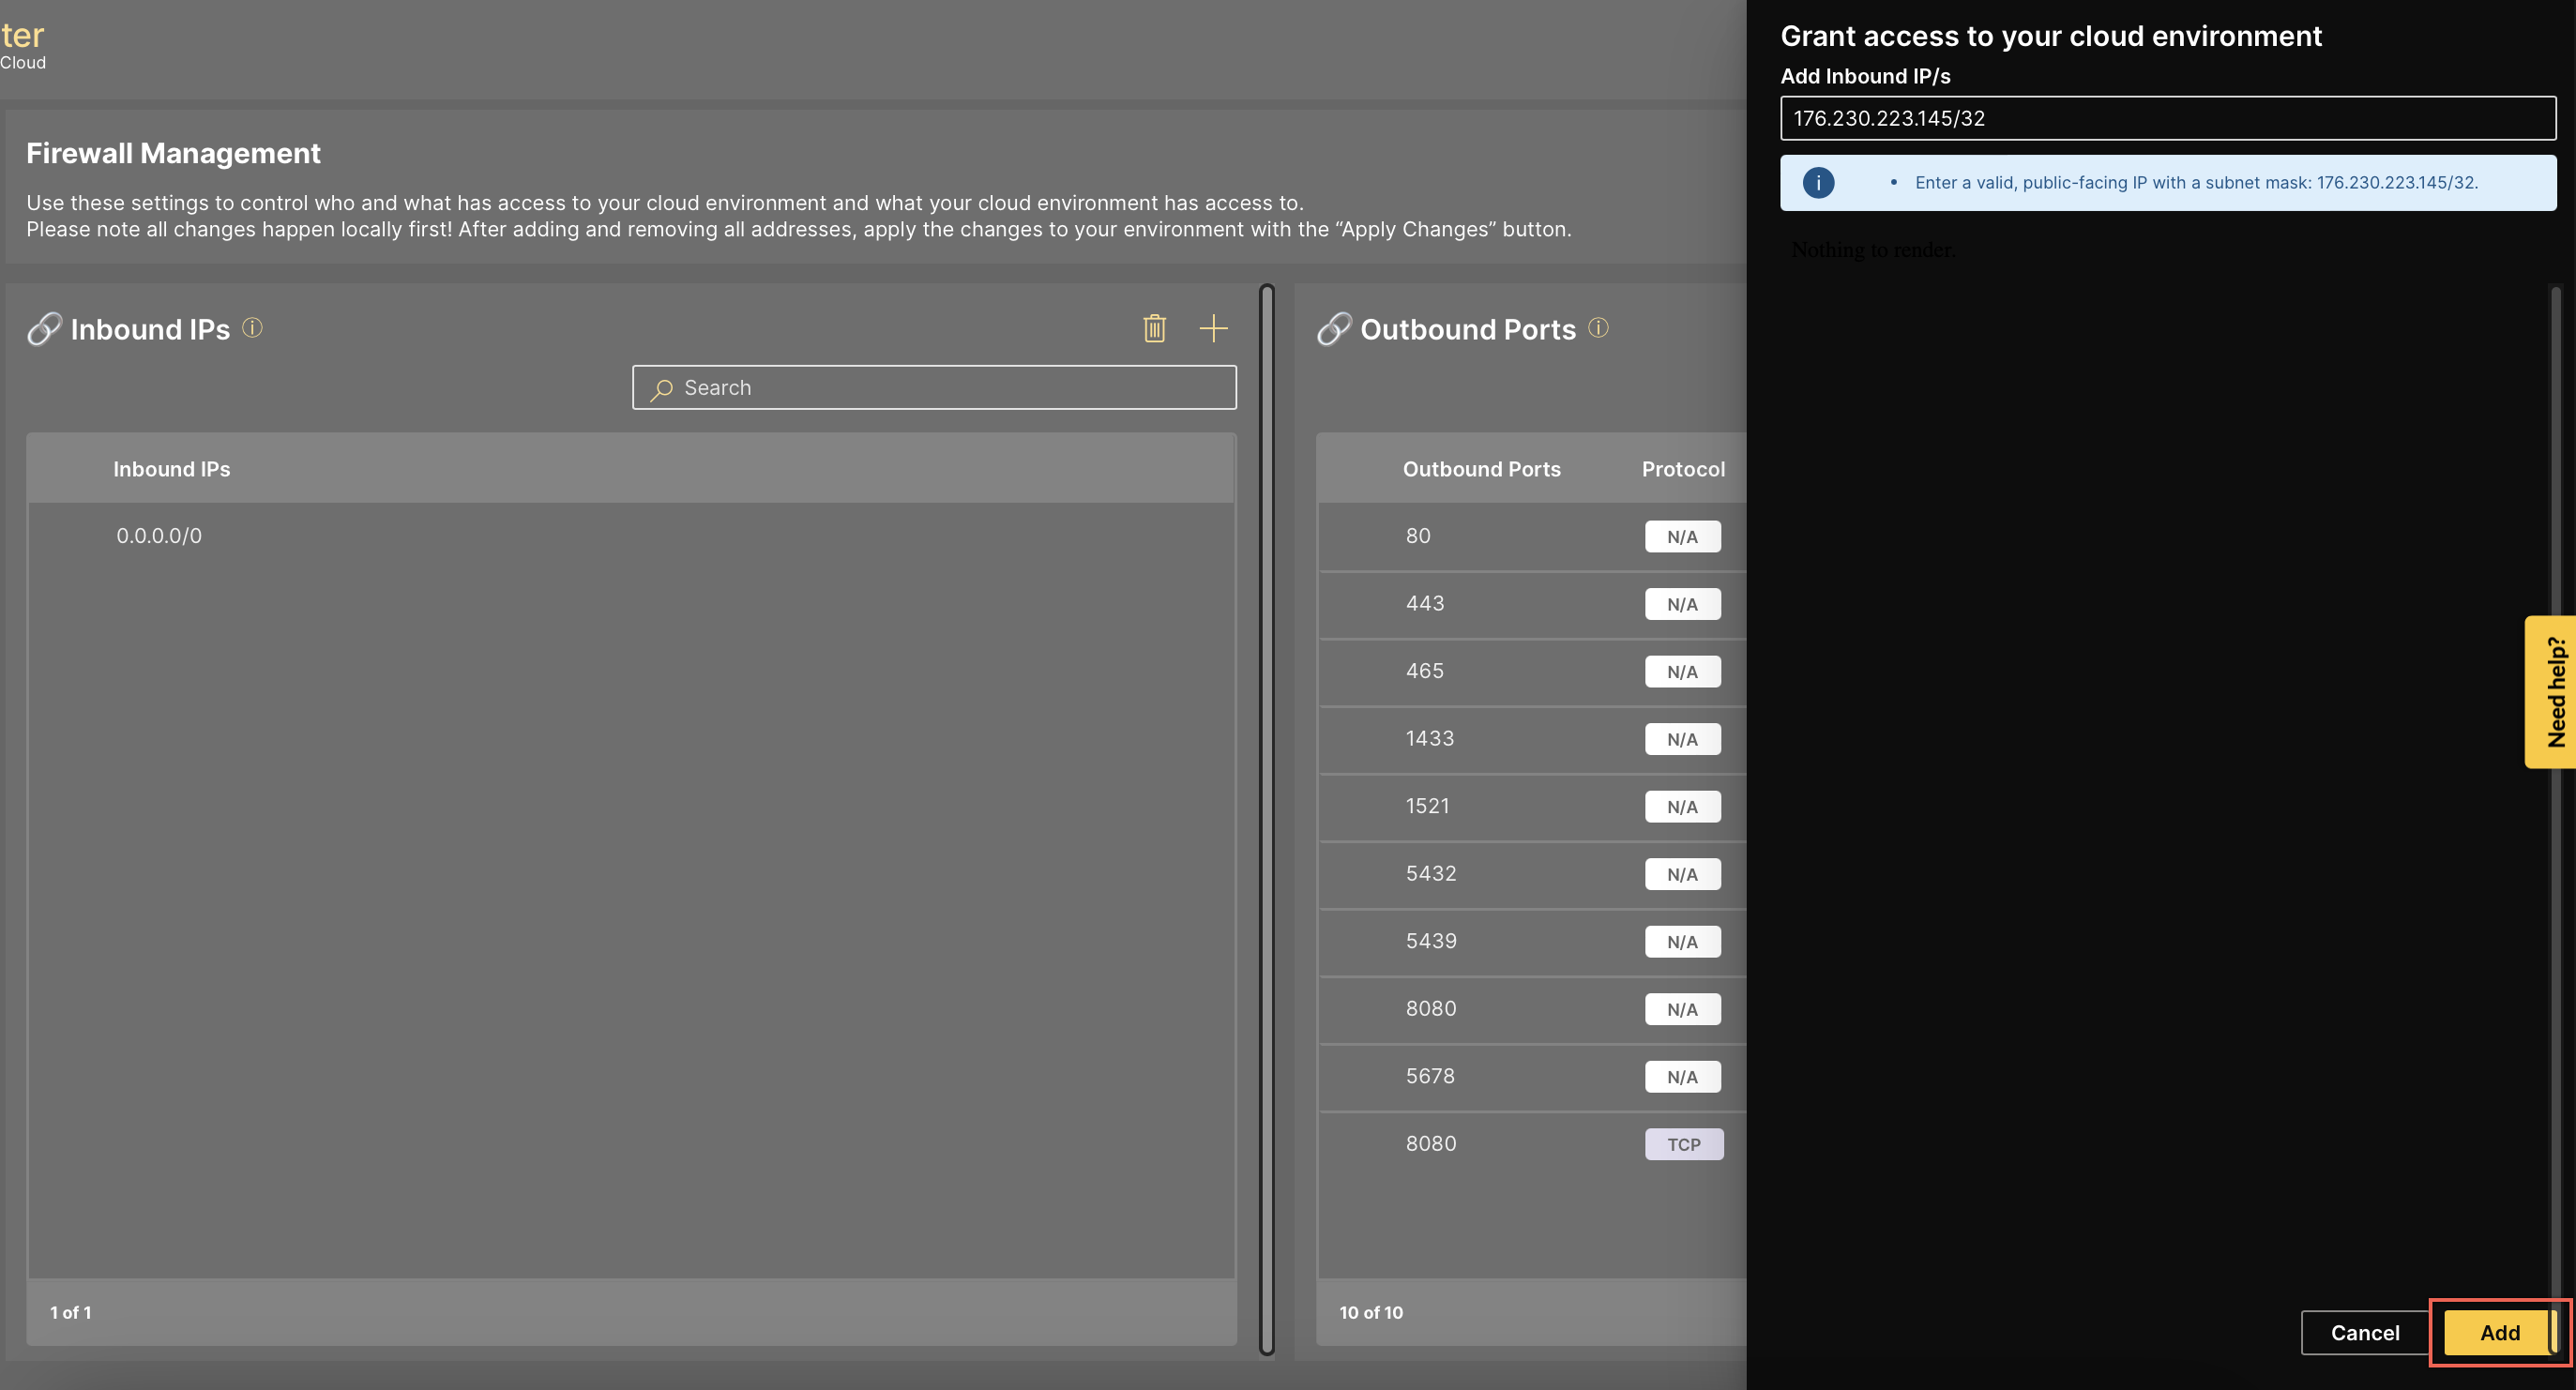
Step one: Add inbound IPs
-
Click Add on the inbound IP section.
A side panel will appear on your screen.
-
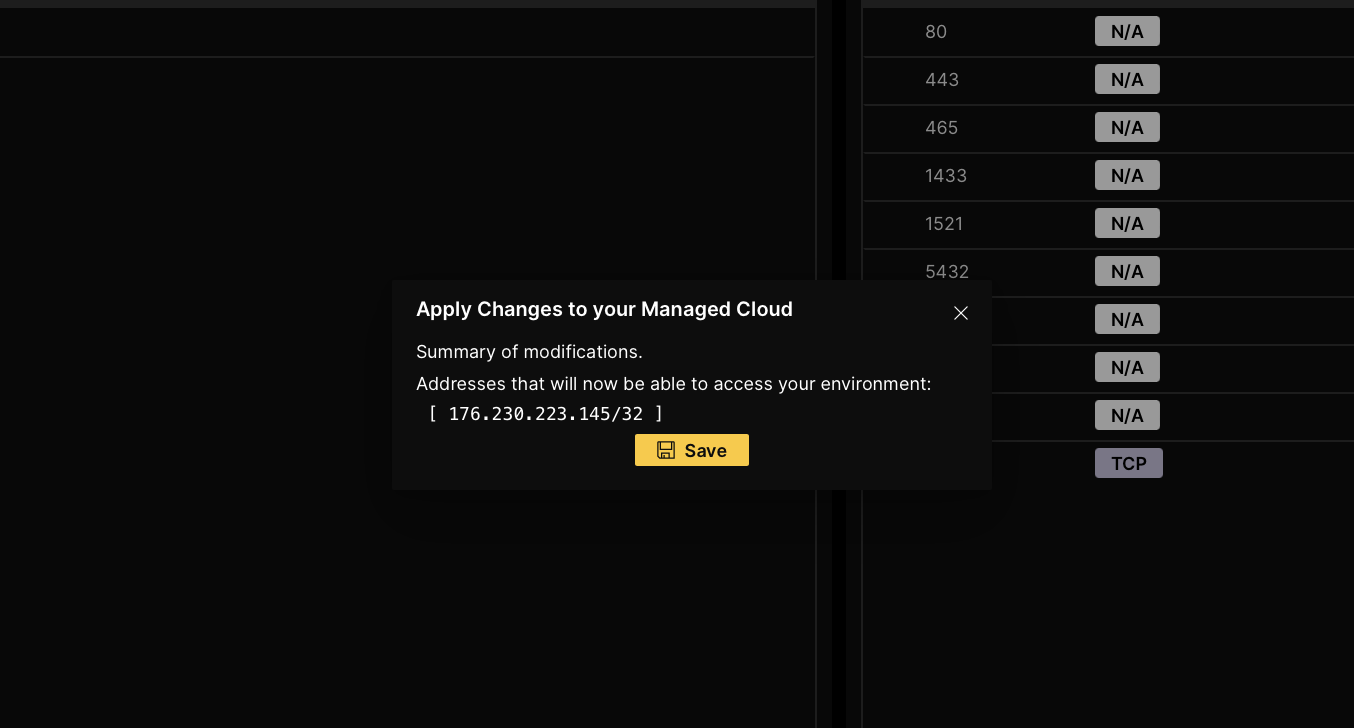
Type your inbound IP address under Add inbound IP/s. E.g.:
176.230.223.145/32.NoteEnter a valid public facing IP with a subnet mask.
Click Add.
-
Click Save, which will appear on the small pop up window.

You will now see the IP address/es added to the list of inbound IPs.
Step two: Apply changes
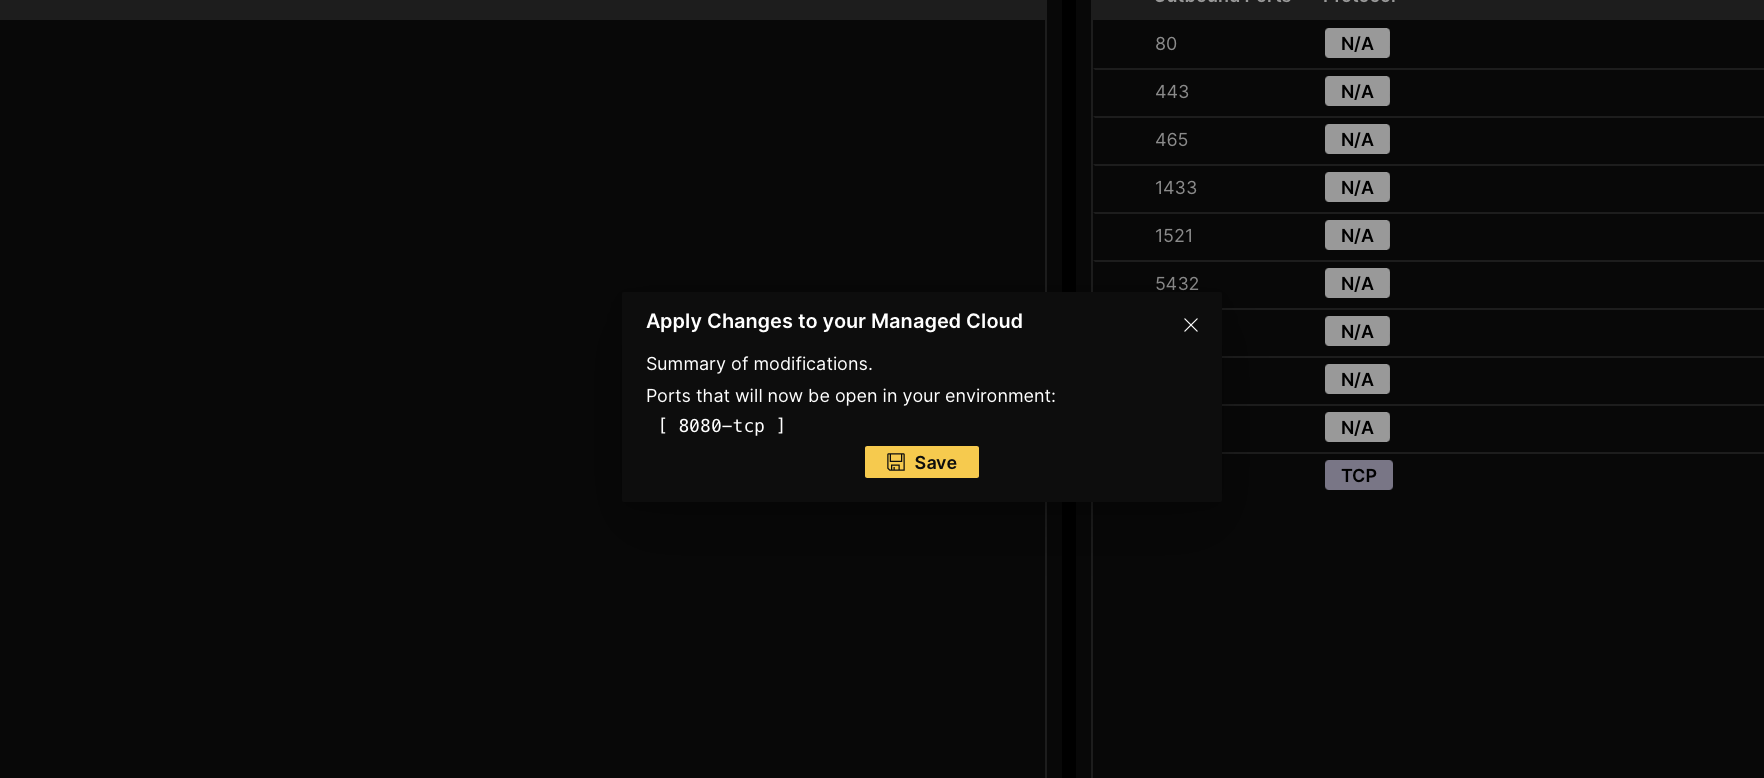
- Click Apply Changes, on the top right corner.
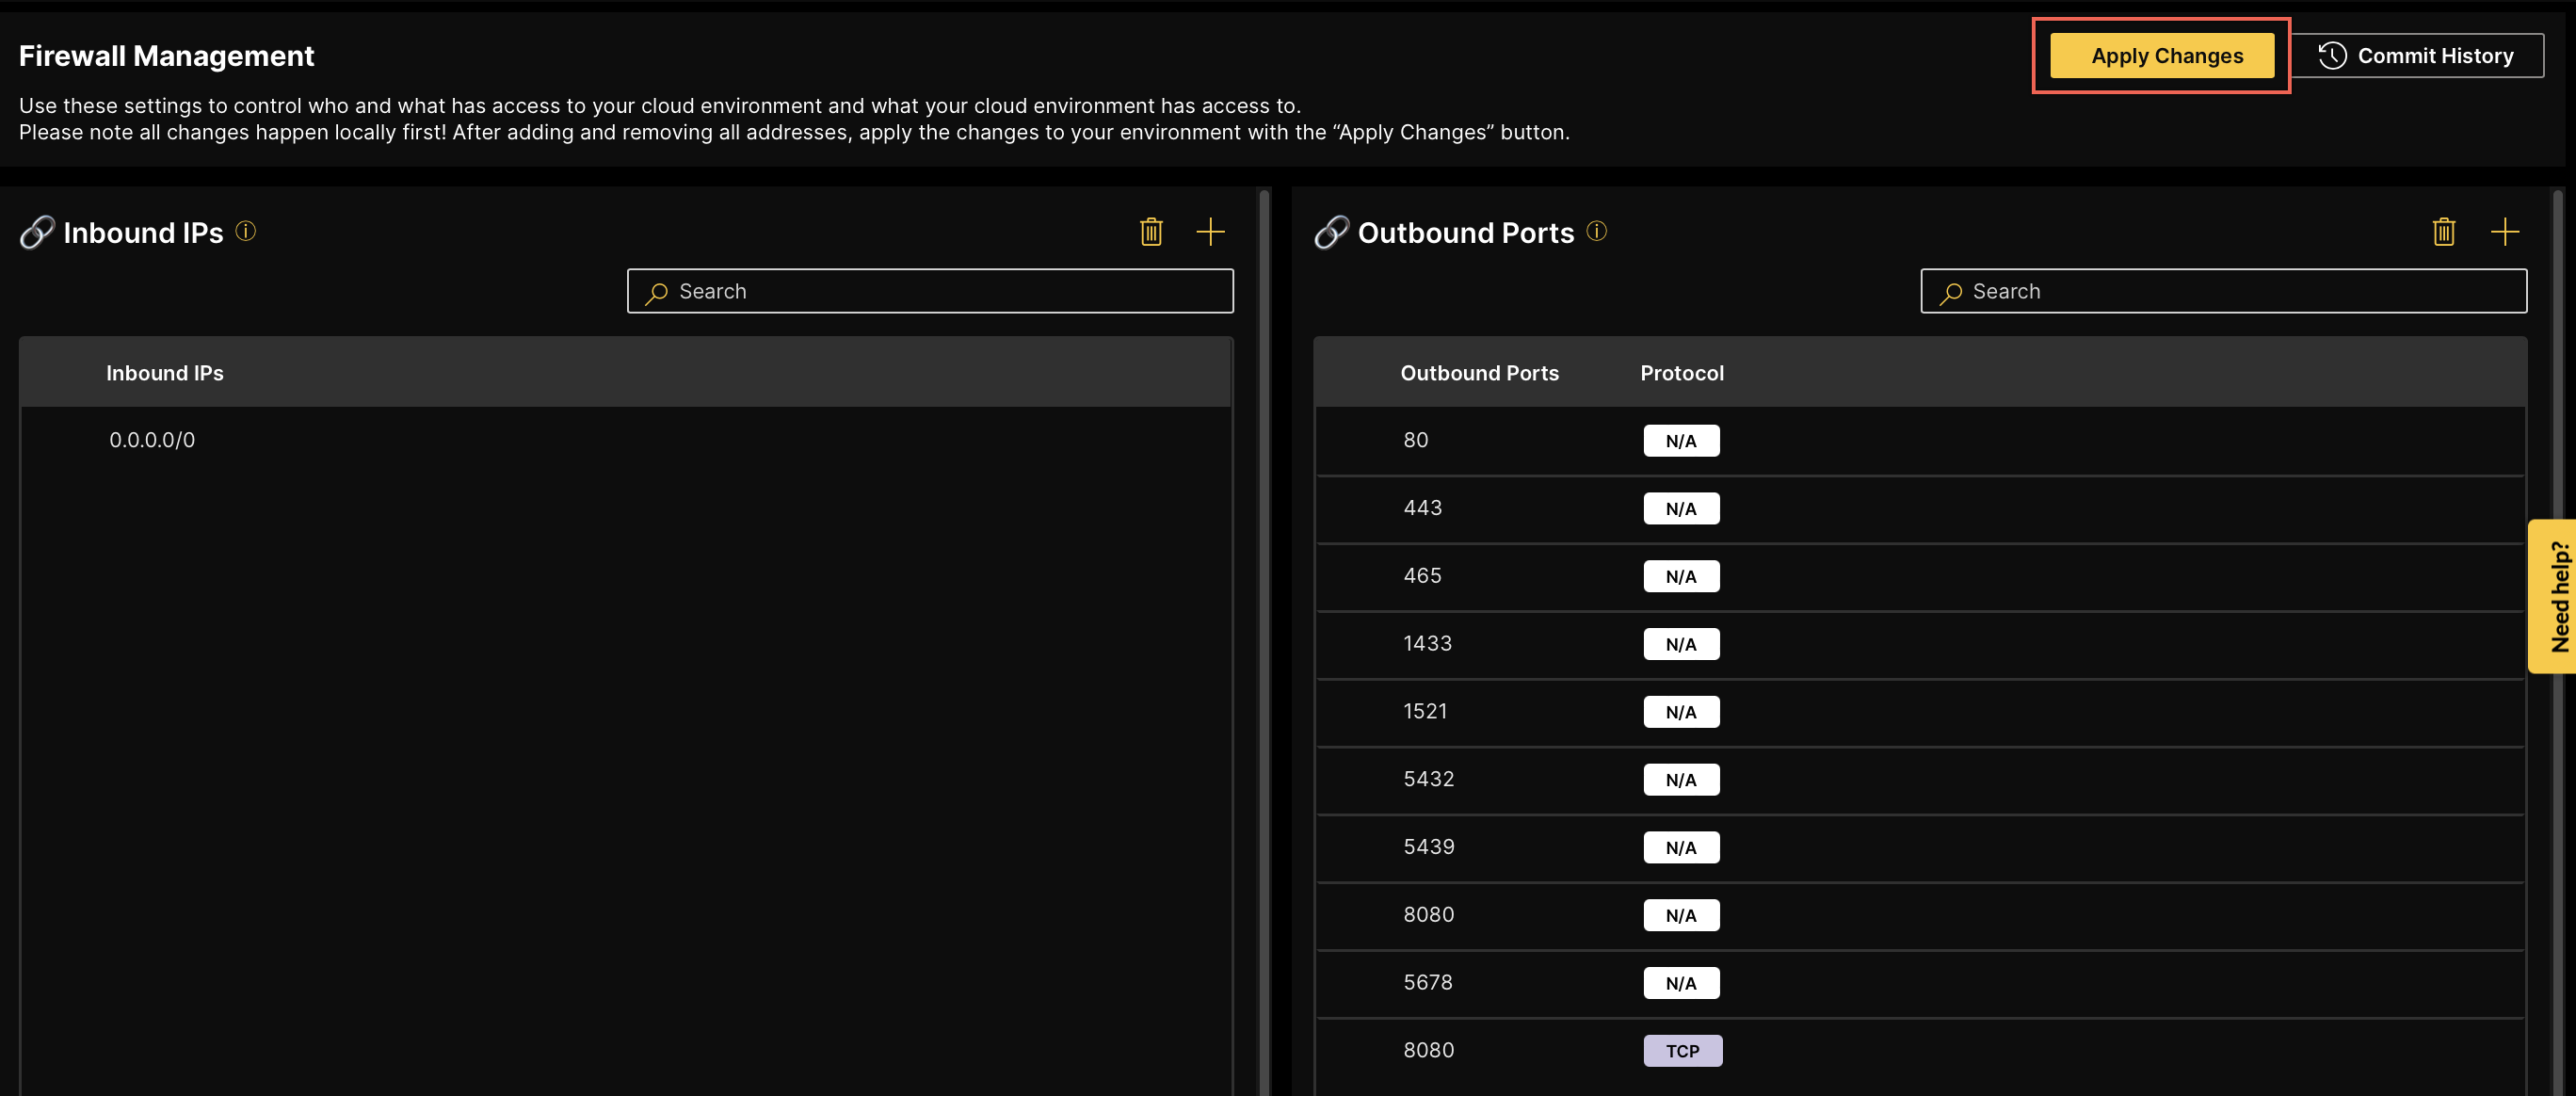
A pop up window will summarize the changes made on HAMC environment.
- Click Save.
Deleting inbound IPs
-
Select the row with the Inbound IPs.
-
Click
Binicon on top of the list.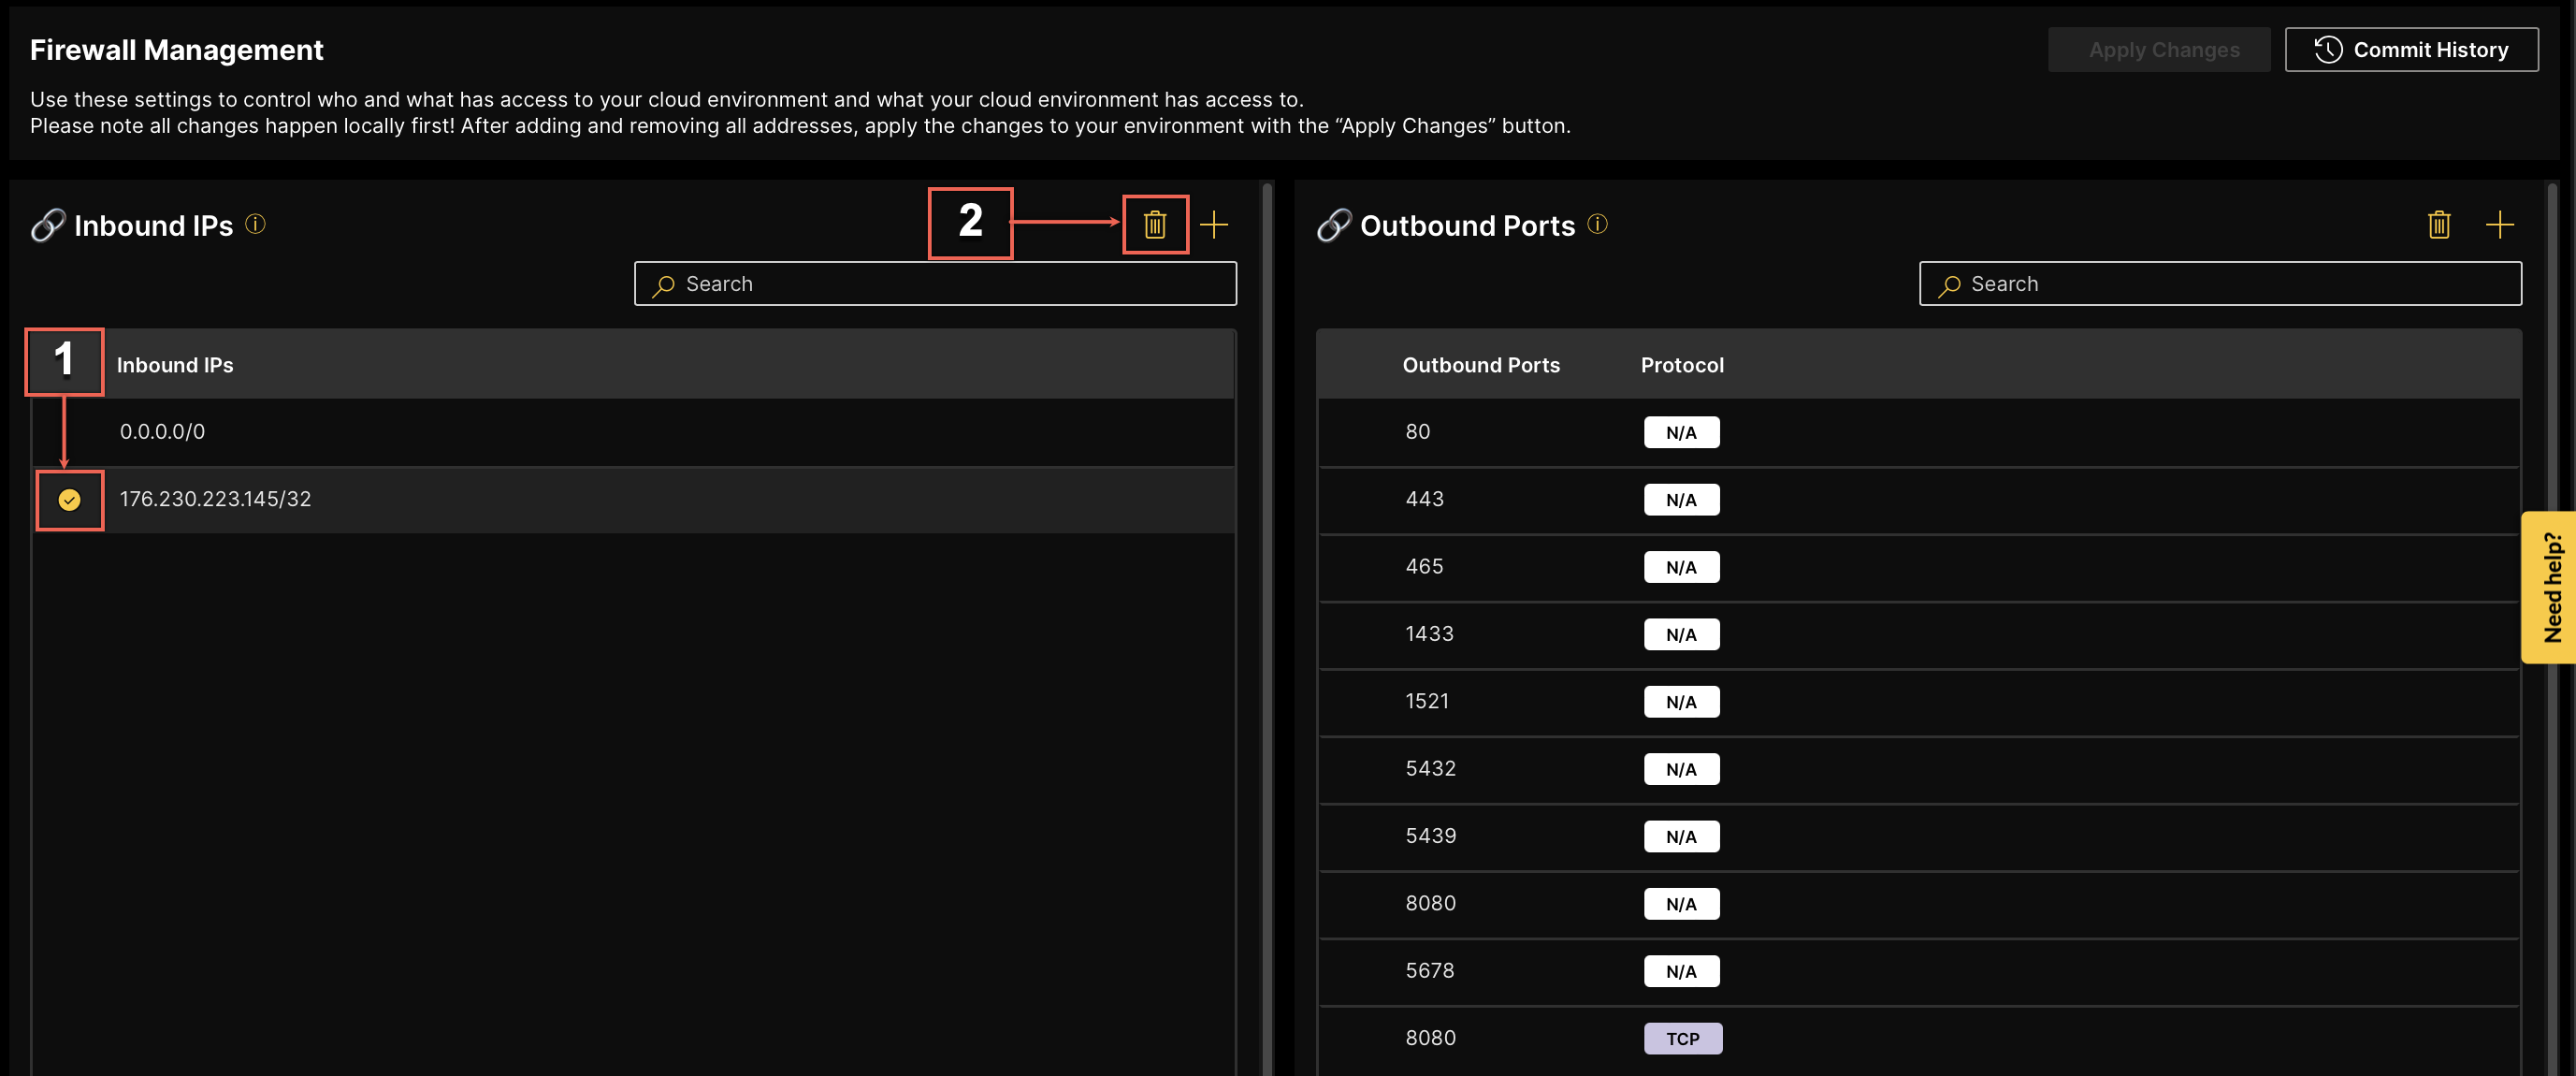
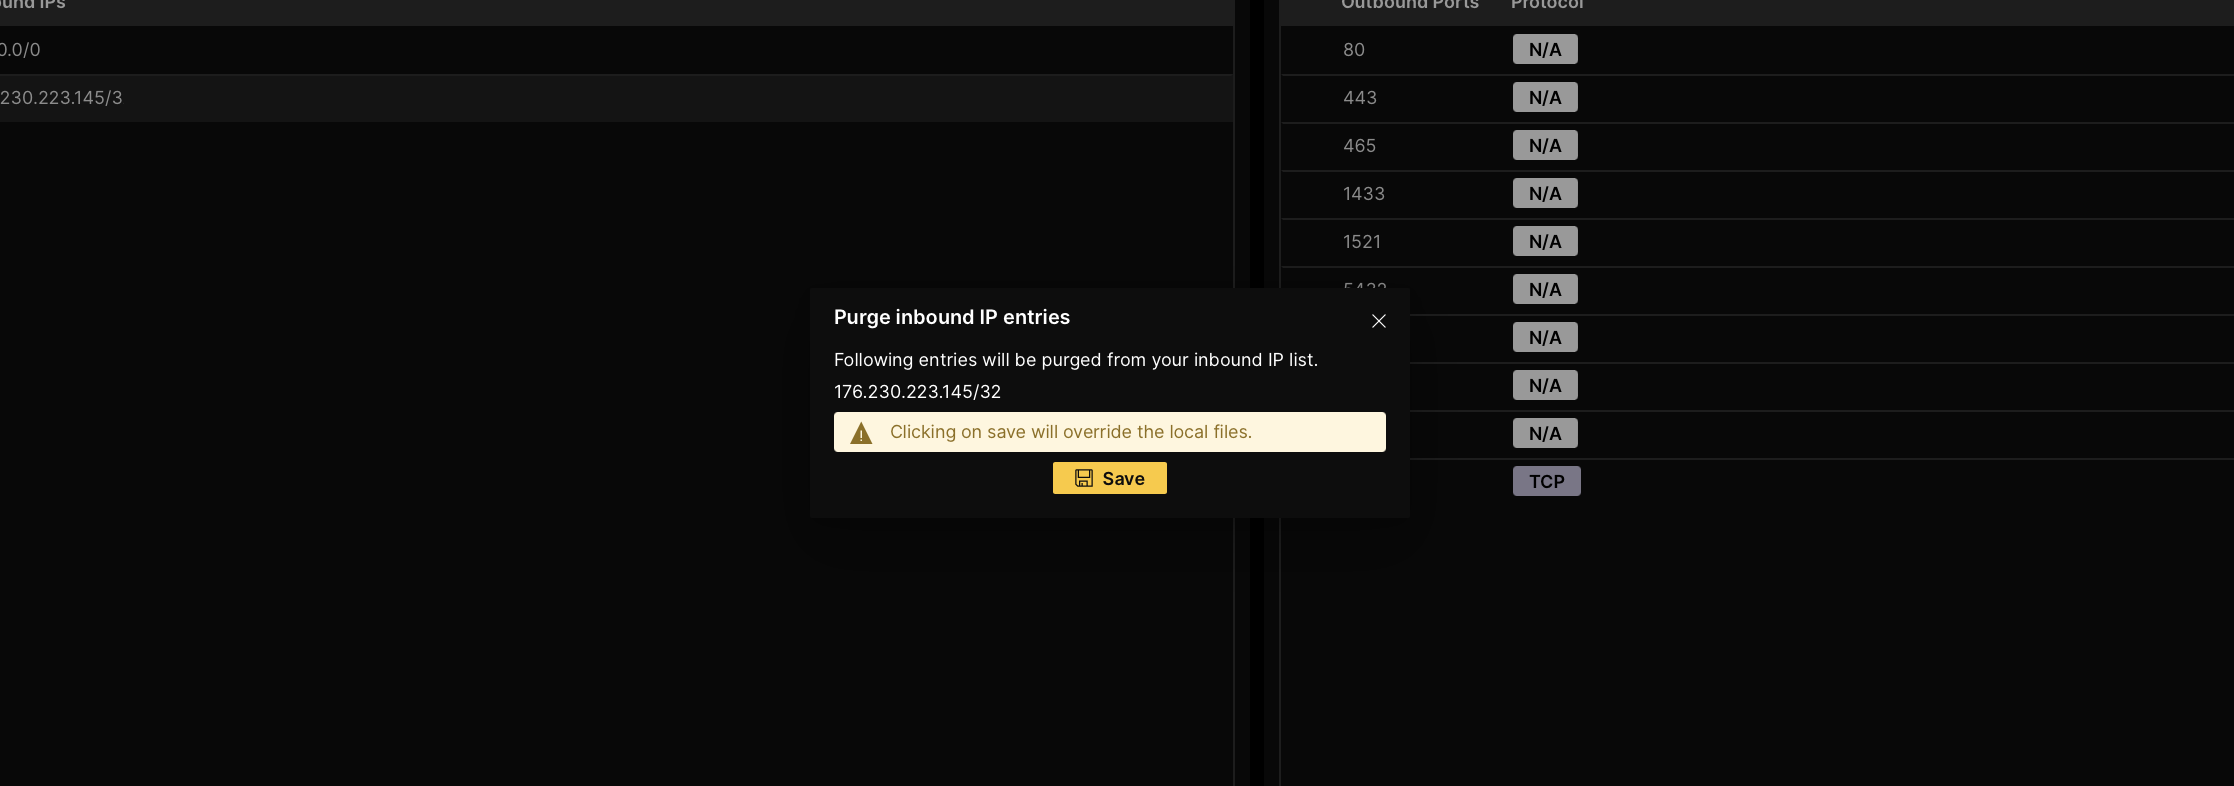
-
A pop-up window which say Purge Ingress entries will appear.
Click Save.
Adding outbound ports
The H2O AI Managed Cloud Admin Center allows you to select a protocol and add a list of specific outbound ports to enable outbound traffic from your HAMC. Configuring outbound ports provides additional security to your HAMC environment by limiting the outbound traffic only to the necessary ports and ensuring your cloud environment communicates with authorized services only.
For example, if you want to pull data from a SQL Server database into HAMC, you need to enable outbound traffic on port 1433.
The following ports are open by default:
- Port 1433 for SQL Server
- Port 1521 for Oracle Database
- Port 80 for HTTP protocol
- Port 443 for HTTPS protocol
- Port 5432 for PostgreSQL
- Port 5439 for Amazon Redshift
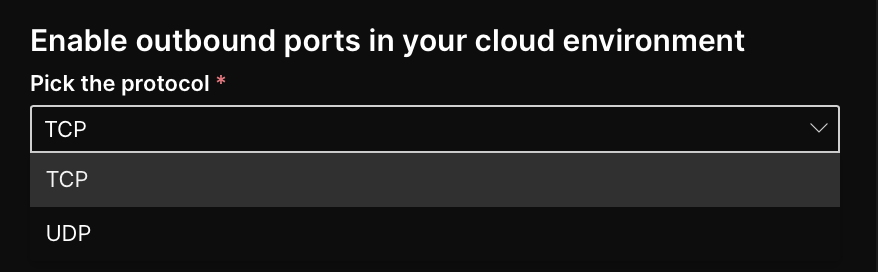
Step one: Add outbound port
-
Click
addon the top-right of the outbound port section.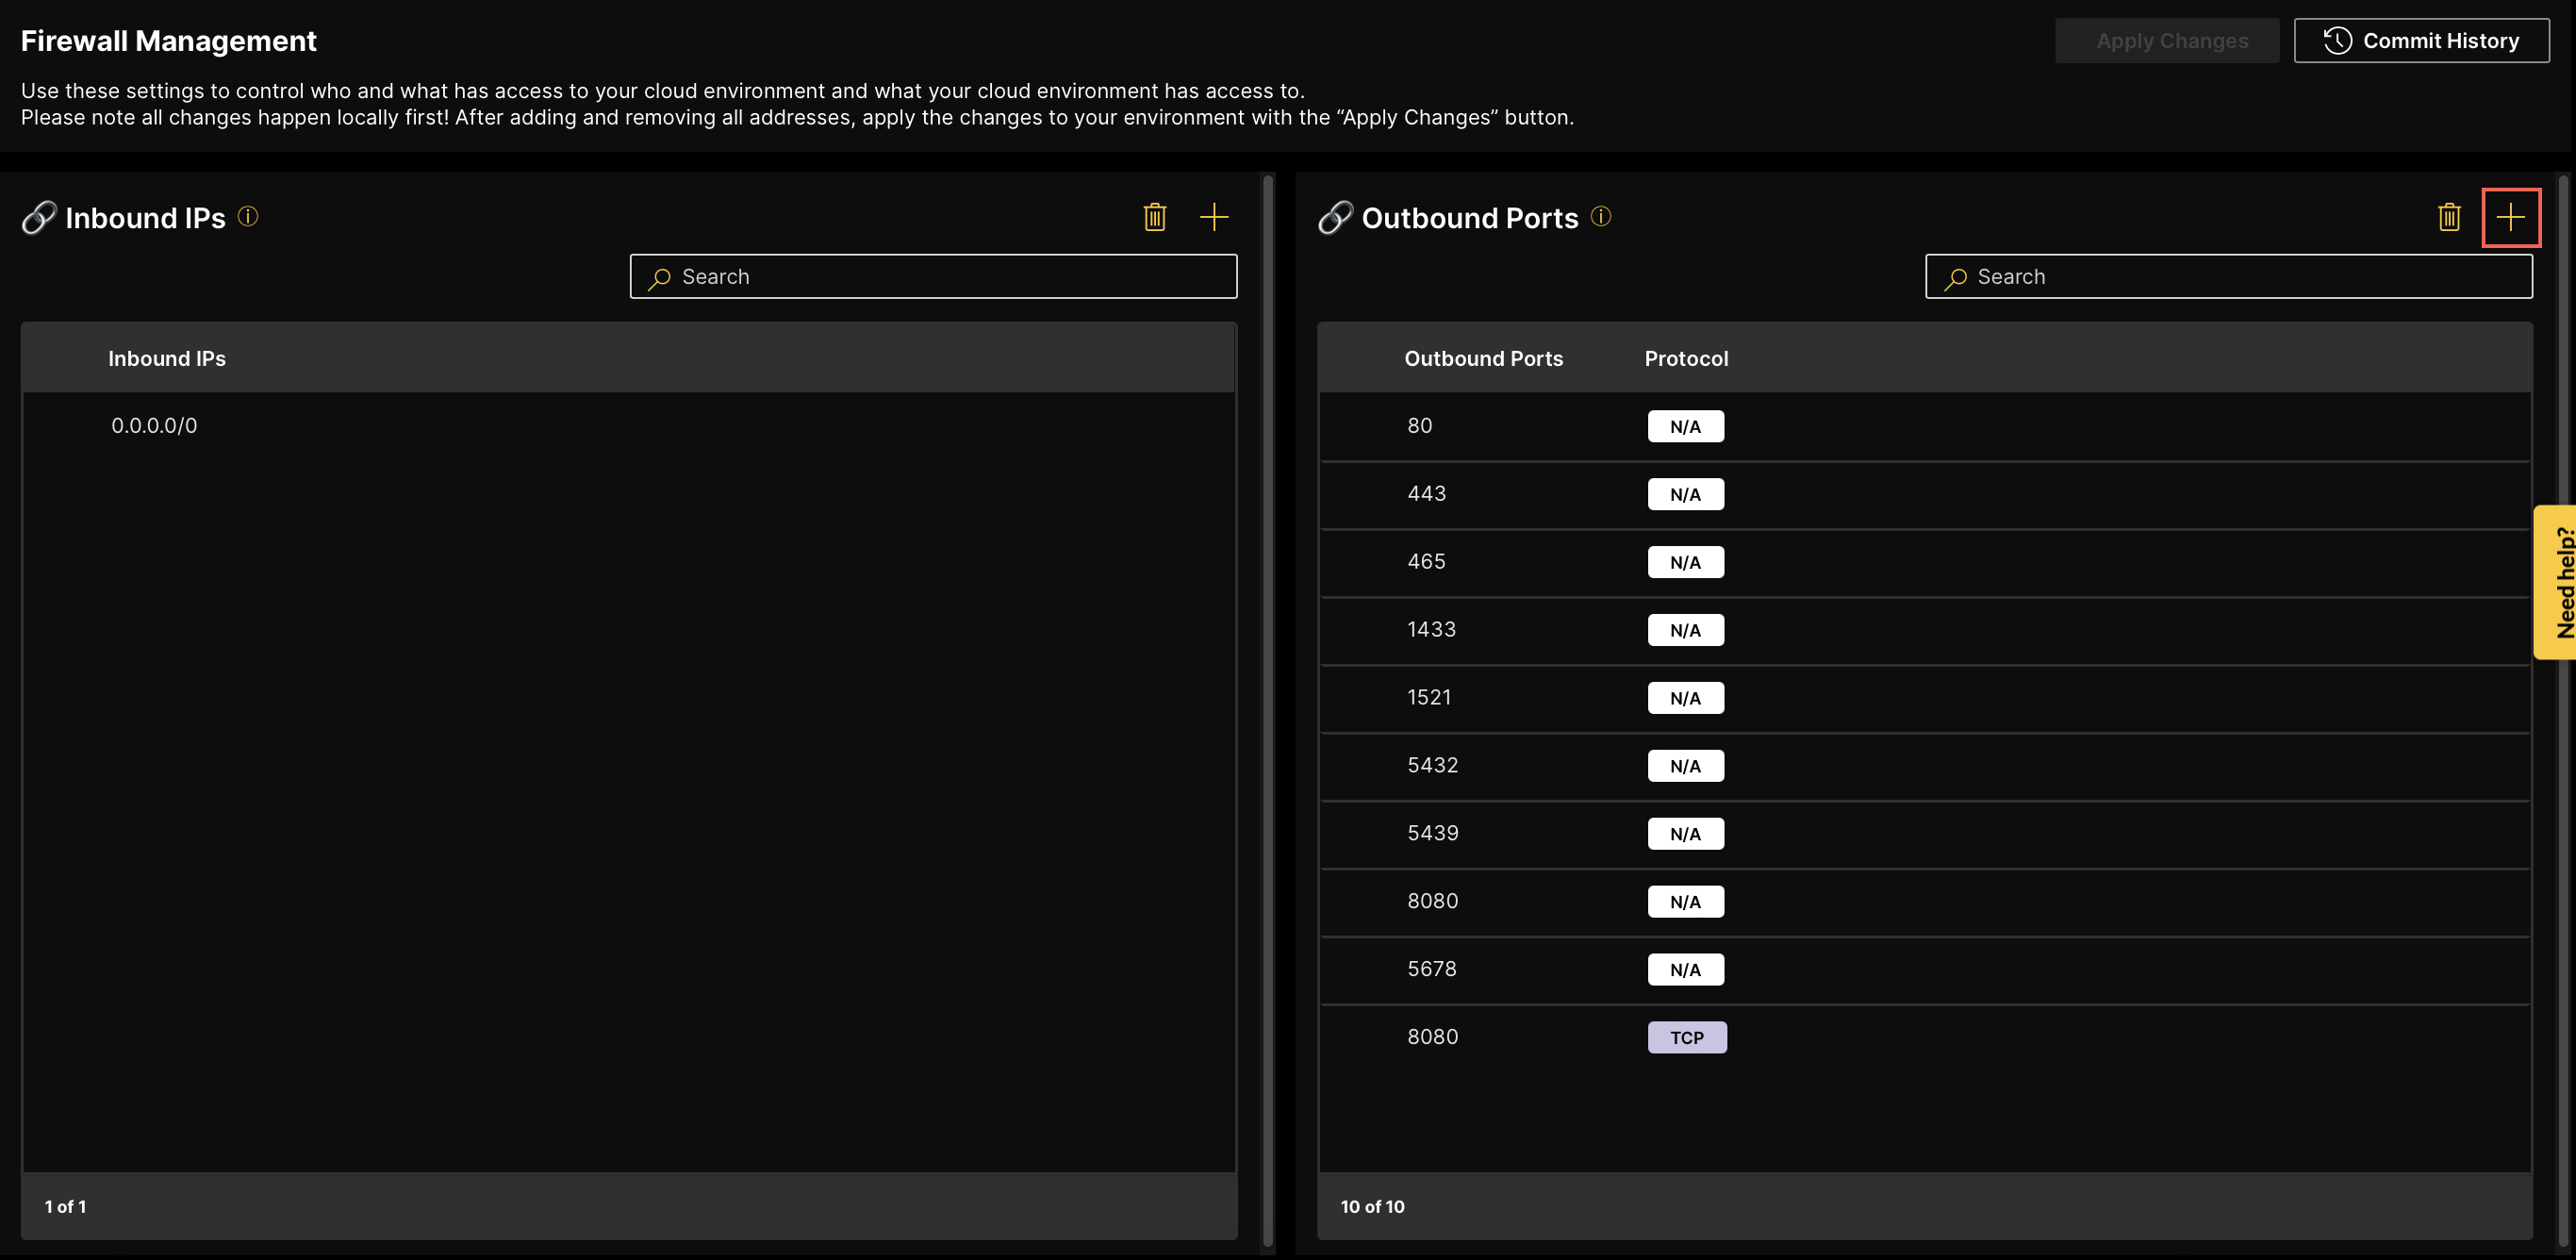
A side panel will appear on the right side of your screen.
-
Select a protocol from the Pick the protocol drop-down menu.
note- The default protocol is set to TCP.
-
Enter your outbound port(s) used by the selected protocol under Add outbound port.
Note- Enter a valid port.
- Ports should be in the range of 1-49151.
- You can add multiple ports used by the selected protocol as a comma-separated list.
Click Add.
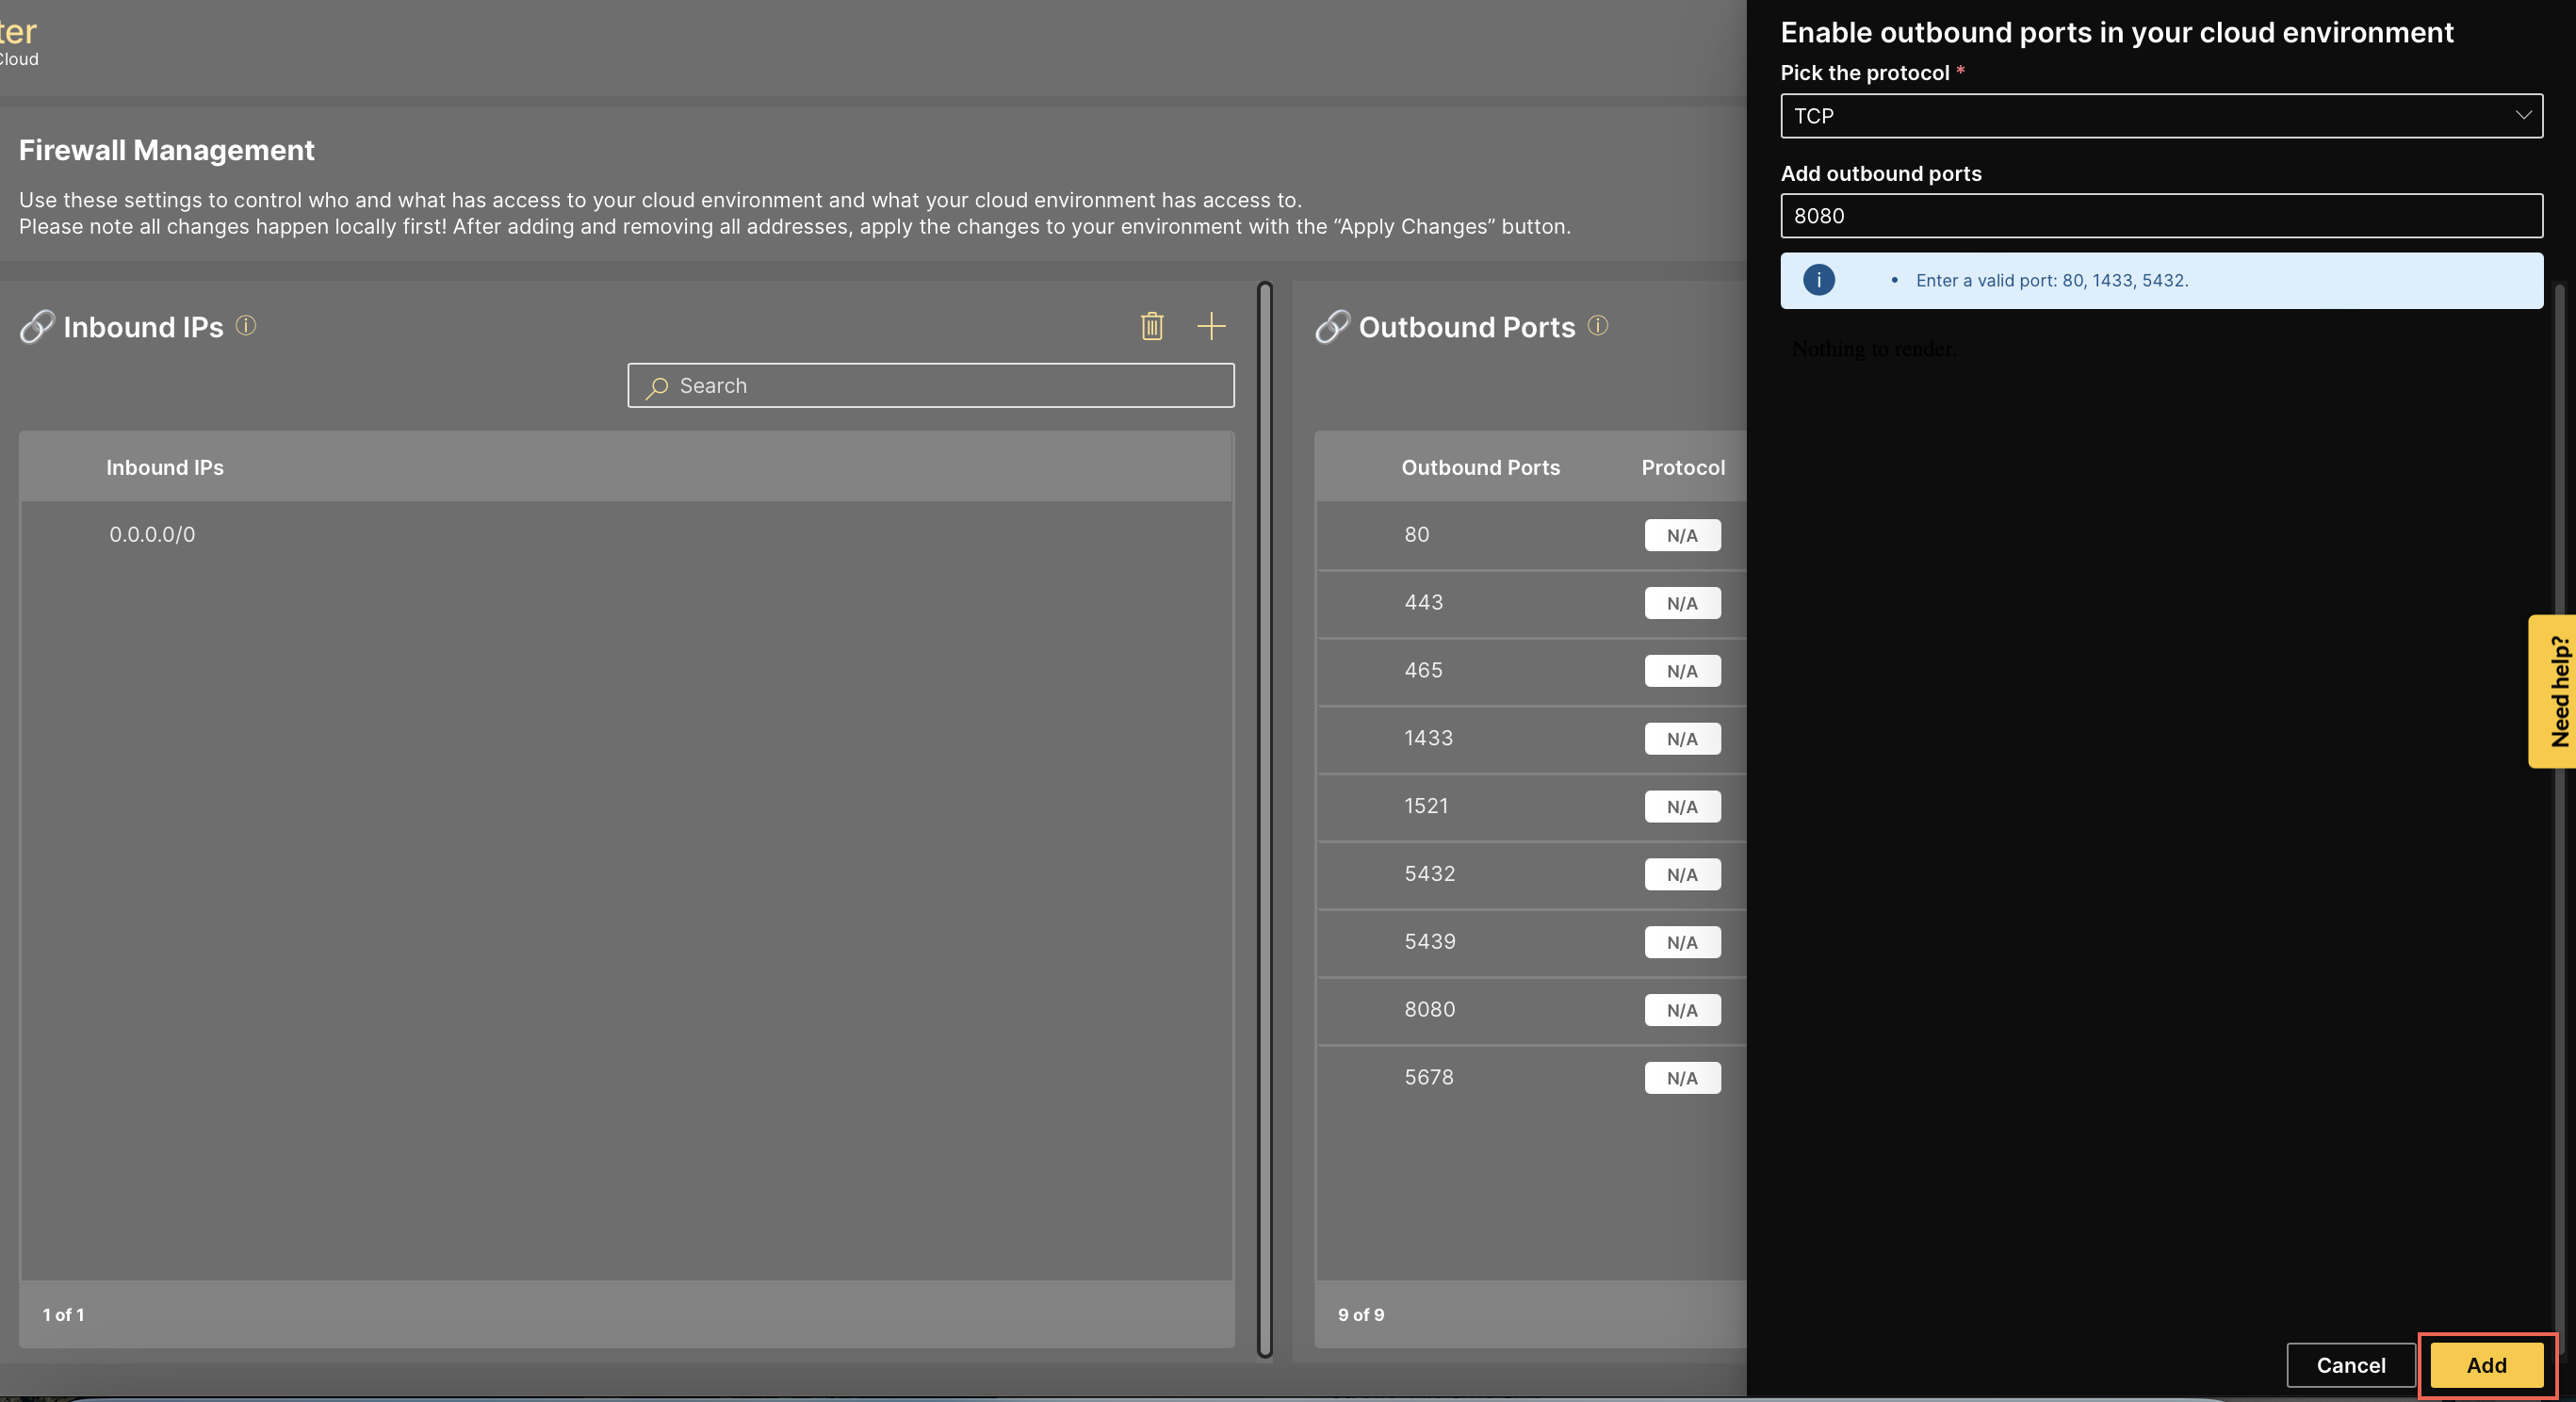
-
Click Save on the small pop-up window that appears, to save the changes.
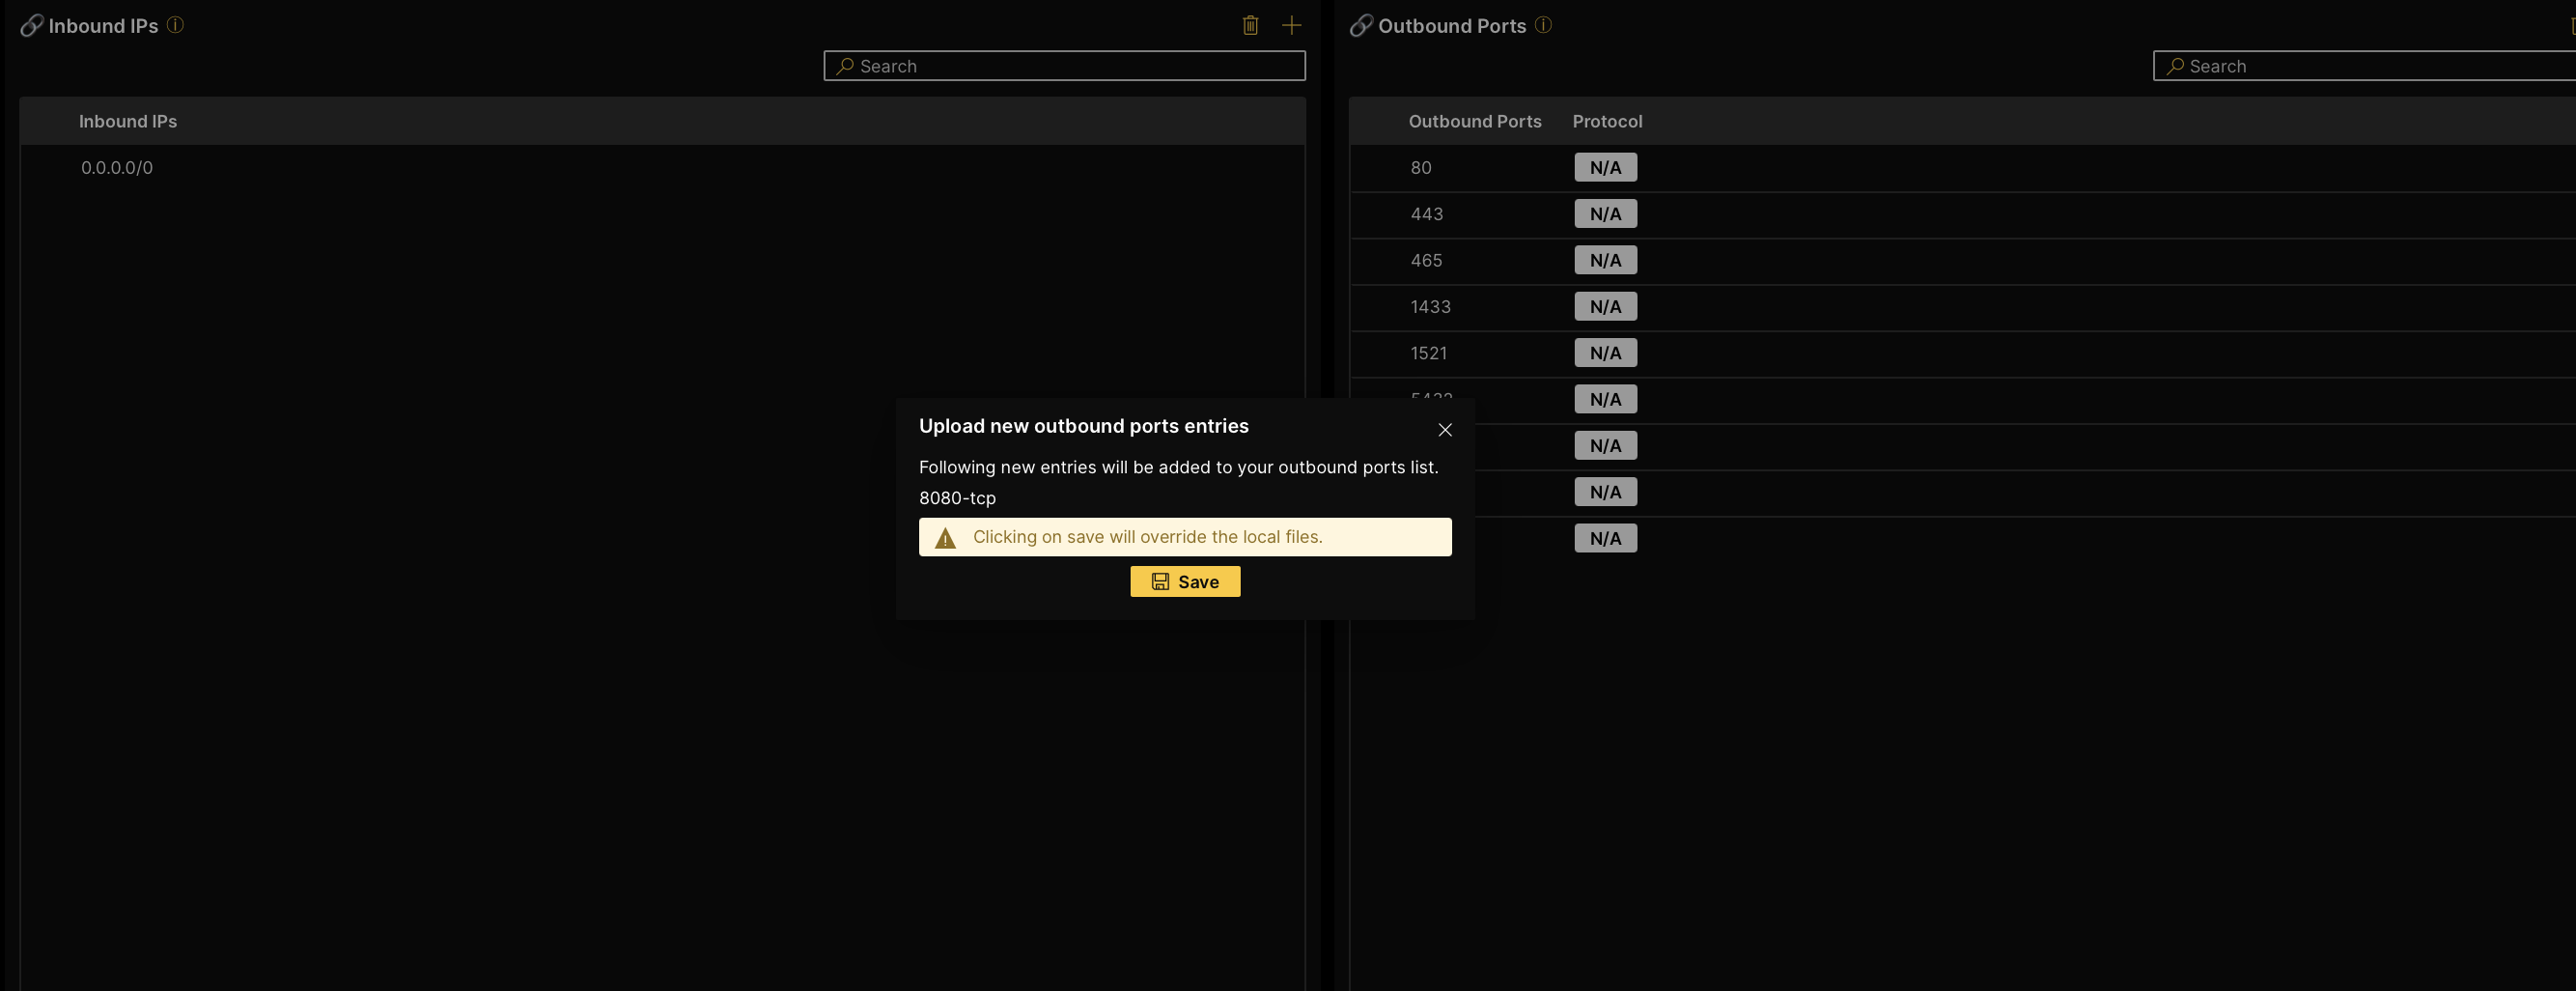
You will now see the port added to the list of outbound ports.
Step two: Apply changes
-
Click Apply changes to apply the changes to your HAMC environment.
A pop-up window will summarize the changes made on HAMC.
-
Click Save.
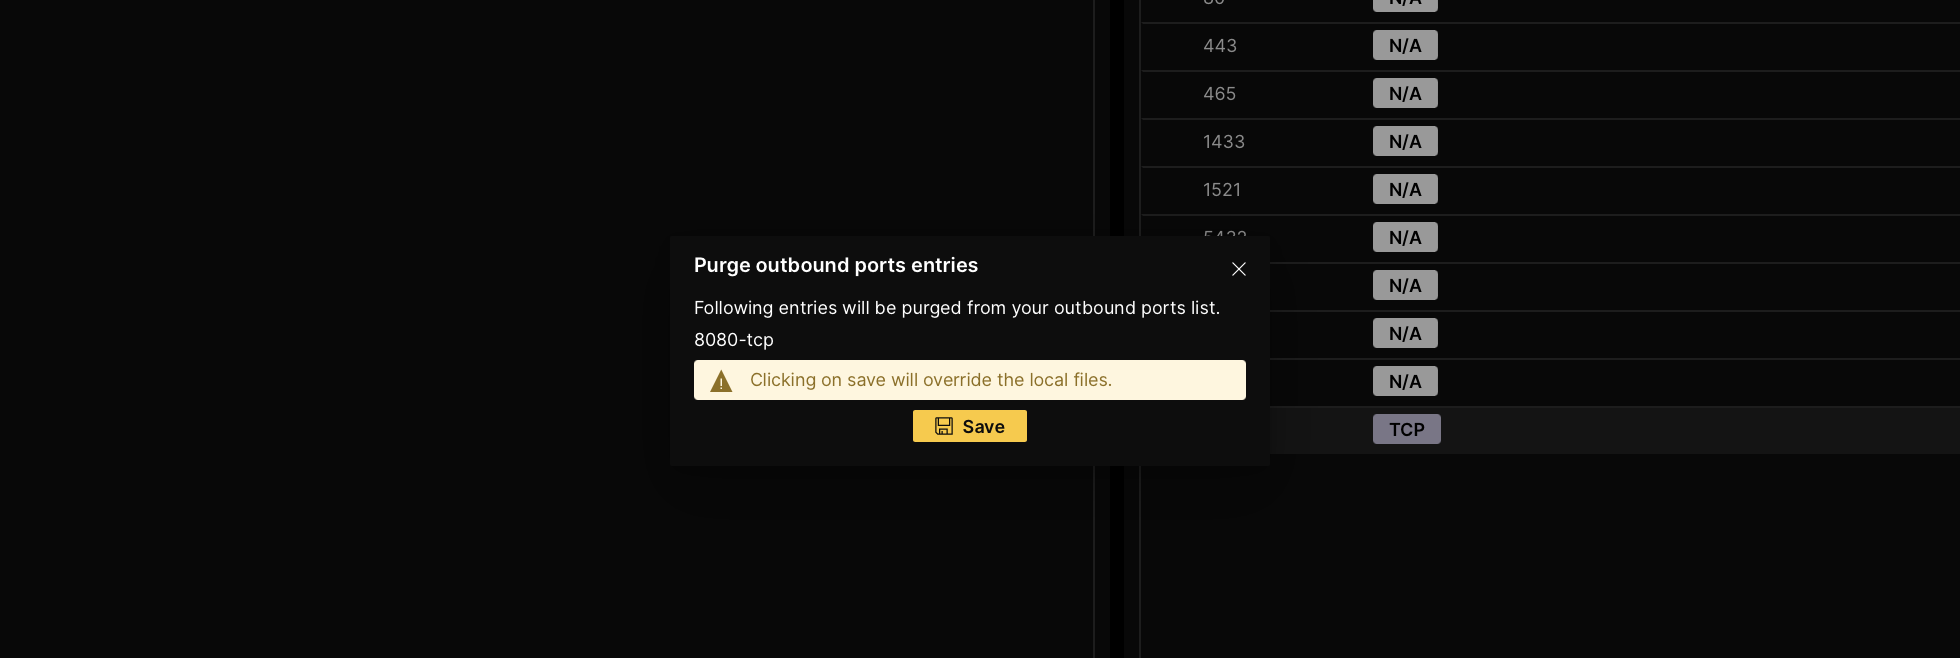
Deleting outbound ports
-
Select the outbound port(s) you want to remove.
-
Click
binon top of the list. A pop-up window titled Purge ports entries will appear.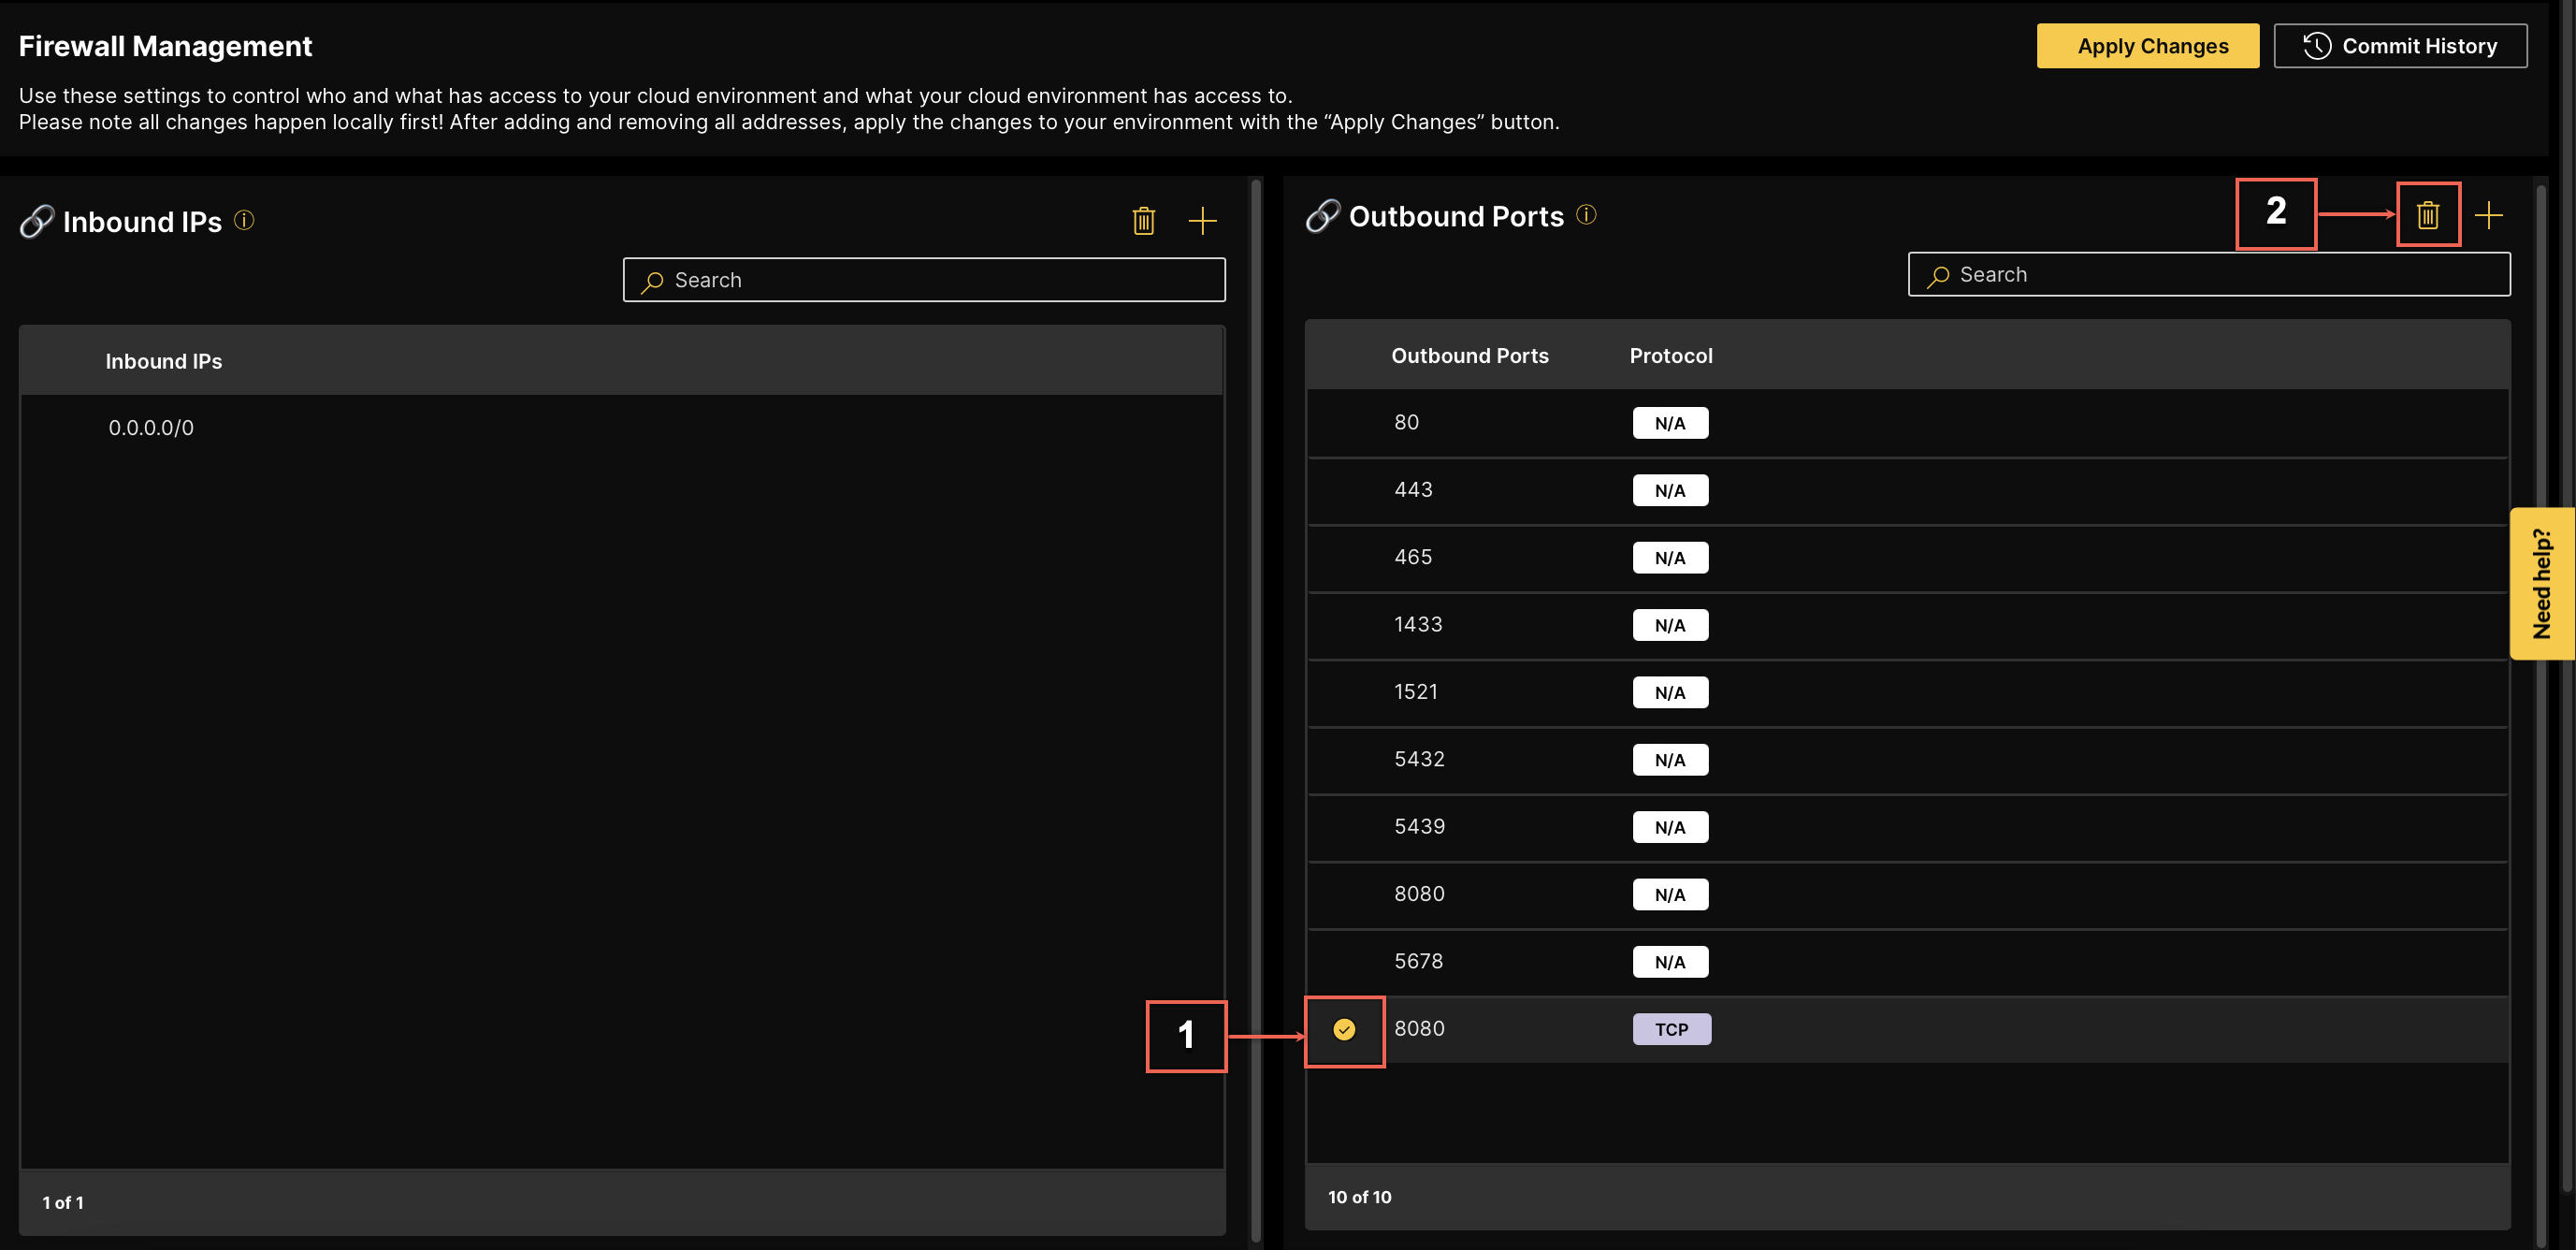
-
Click Save.
Click Commit history to follow up on recent changes that have been made to the inbound IPs and outbound ports on the platform.

Summary
In this tutorial we learnt how to use H2O Admin Center, by adding inbound IP addresses and outbound ports to HAMC environment.
- Submit and view feedback for this page
- Send feedback about H2O Admin Center to cloud-feedback@h2o.ai