Tutorial 1B: Creating an evaluation model in H2O Document AI - Publisher
This tutorial will walk you through how to create a model using an evaluation annotation set so that you can access accuracy metrics from a trained model.
Prerequisites
- A copy of this zip file containing medical referral documents that you will be using in this tutorial
- Completion of the previous tutorial for a basic understanding of H2O Document AI - Publisher
Step 1: Create your project, run OCR, and annotate your files
You will be using the same set-up as the introduction tutorial. There are two ways to begin:
- Continue using the same project from Tutorial 1A: Introduction to H2O Document AI - Publisher (continue to Step 2)
- Perform the following three steps if you want to make a new project:
Creating the project
From the landing page, create a new project.
- Click Create a new project
- Provide
Eval_Tutorialas the project name - Add the zip file
5pdfs_clean_documents.zipof medical referral documents - Click Create project
Running OCR
Navigate to your Document sets page.
- Select the 5pdfs_clean_documents row
- Click OCR on the upper navigation bar
- Select the
bestOCR method - Provide the name
Tutorial_OCR - Click OCR
This will provide the text label and tokens you need for the apply labels step.
Annotating your files
Navigate to your Annotation sets page. You will now annotate your blank annotation set. Refer to the previous tutorial for an in-depth walkthrough of annotation.
- Open 5pdfs_clean_documents Labels in Edit in Page View
- Create your regional attributes following the outline of the previous tutorial
- Apply your bounding boxes on each document and select the appropriate label for each box
- Save your progress
- Exit Page View and return to the Annotation sets page
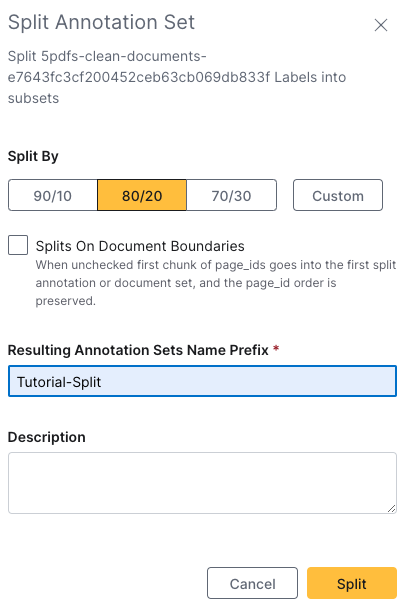
Step 2: Splitting your labels annotation set
Since you are training a model with evaluation, you first need to create a training set and an evalution set. You have to split 5pdfs_clean_documents Labels to do this.

- Click the drop-down arrow at the end of
5pdfs_clean_documents Labels - Click Split
- Select 80/20 for your split
- Provide the name prefix
Tutorial-Split - Click Split
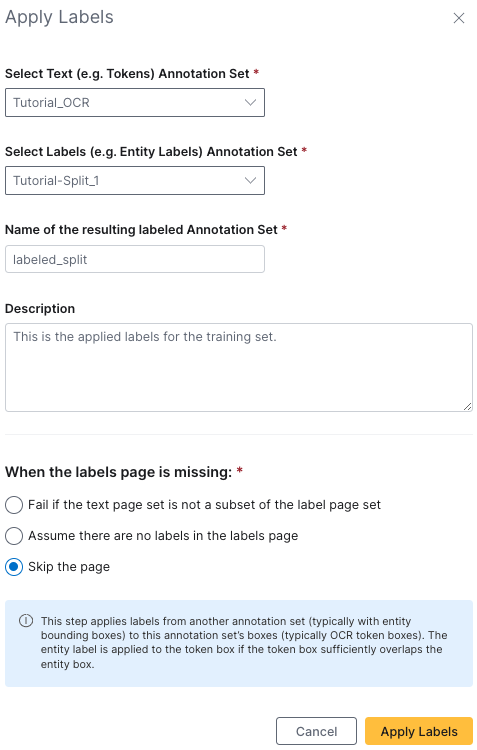
Step 3: Applying labels to your split annotation sets
You will now apply labels to each of your split annotation sets (so to Tutorial-Split_1 and Tutorial-Split_2).
- Click Apply Labels from the upper navigation bar of the Annotation sets page
- Select
Tutorial_OCRfor your text annotation set - Select
Tutorial-Split_1for your labels annotation set - Provide the resulting labeled annotation set the name
labeled-split1 - (Optional) Provide the description:
"This is the applied labels for the training set." - Select Skip the page for what to do when the labels page is missing
- Click Apply Labels to create your training applied labels annotation set
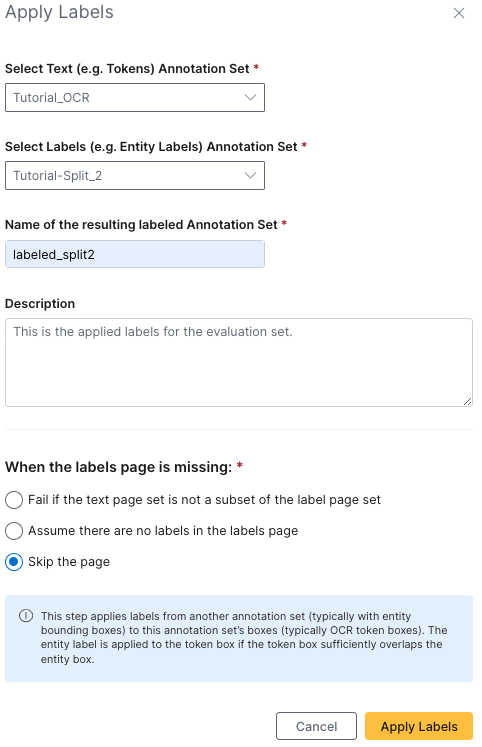
- Repeat 1-7 for
Tutorial-Split_2to create your evaluation applied labels annotation set
| Training labels | Evaluation labels |
|---|---|
 |  |
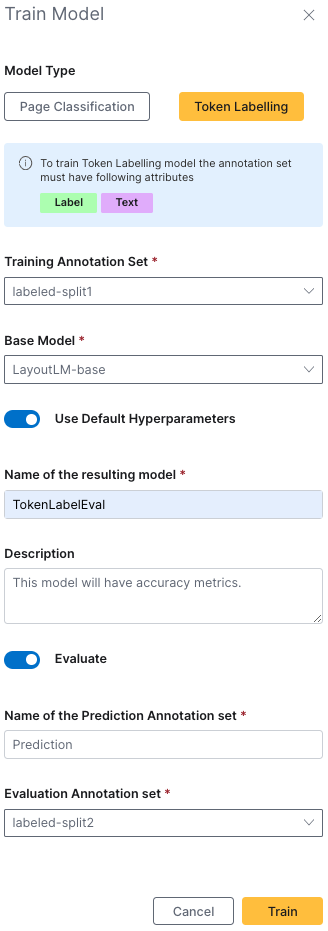
Step 4: Training your evaluation model
Now that you have your training and evaluation split annotation sets, you can build an evaluation model. From the Annotation sets page, click Train Model on the upper navigation bar.
- Switch the model type to Token Labelling
- Select
labeled-split1as your training annotation set - Name your resulting model
TokenLabelEval - (Optional) Provide
This model will have accuracy metrics.as the description - Name your prediction annotation set
Prediction - Select
labeled-split2as your evaluation annotation set - Click Train
Your trained model can be found on the Models page. You prediction annotation which has your accuracy metrics can be found on the Annotation sets page with a quality score. Your quality score is the f1-score of the model that was applied to the dataset.
Step 5: Accessing your accuracy metrics
Stay on the Annotation sets page. Your Prediction evaluation annotation set should be at the top. Click Info at the end of the row to bring up the information of Prediction.

This brings you to the information panel. Here you can update the name or description of your evaluation set. You can also access the logs and accuracy information. Click Accuracy to access the accuracy information.
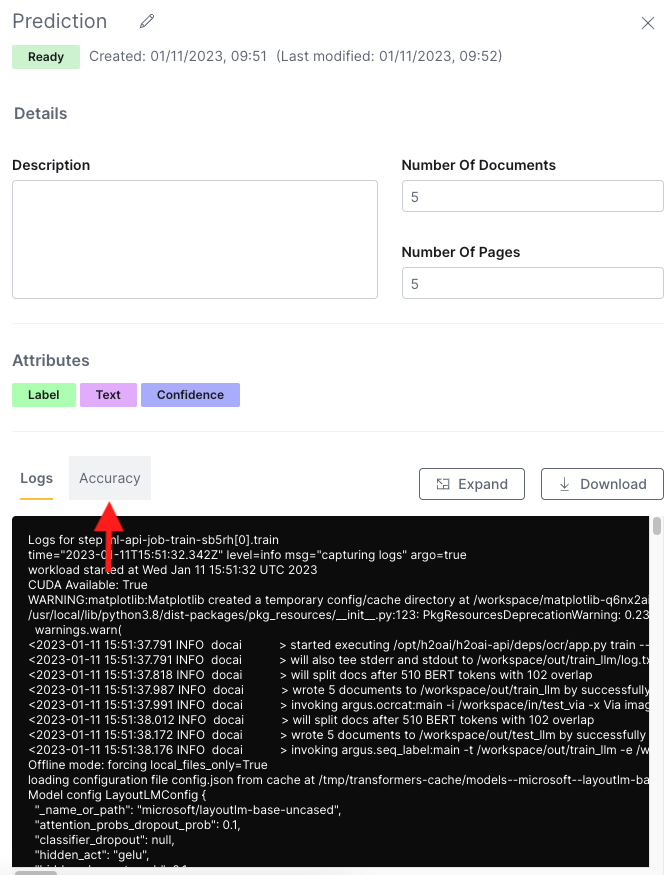
On the accuracy panel, you can scroll through the information on the side bar, you can expand the information into a pop-out screen by clicking Expand, or you can download a JSON of your accuracy information by clicking Download. For this tutorial, click Expand to bring your information up in an easier-to-read pop-out screen.
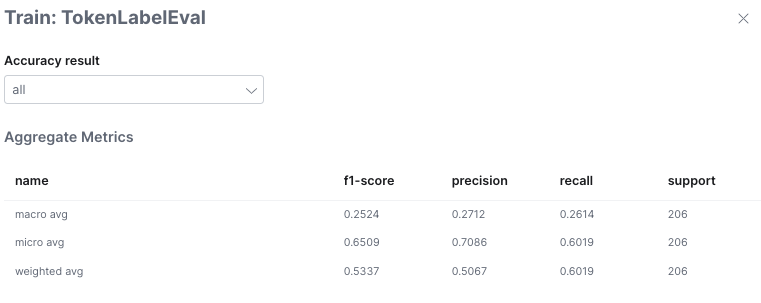
Your accuracy information is broken down into three tables: aggregate metrics, per class metrics, and a class confusion matrix.
Aggregate metrics
The aggregate metrics measure the accuracy of the entire dataset.
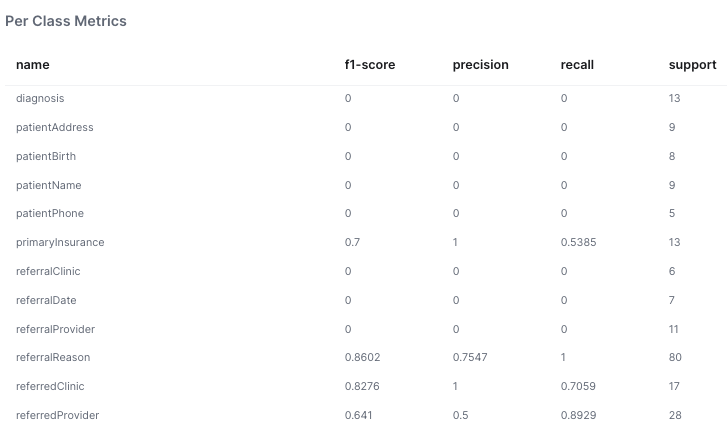
Per class metrics
The per class metrics measure the accuracy of one class versus the rest of the datapoints in the dataset.
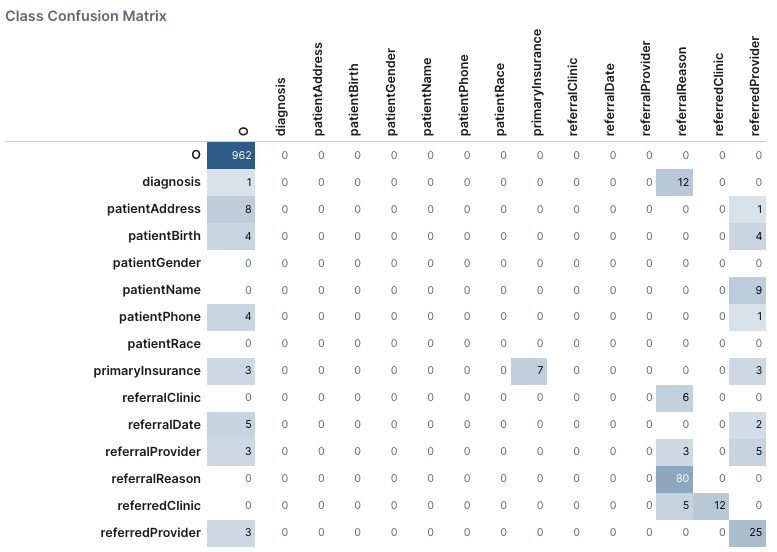
Class confusion matrix
The class confusion matrix provides a tabular visualization of the model predictions versus the actual values for all classes.
Summary
In this tutorial, you learned how to train a model with evaluation allowing you to access accuracy metrics. You split your labels annotation set and applied labels to each split. Then, you built a model using those two labeled splits. Finally, you learned how to navigate the accuracy panel.
- Submit and view feedback for this page
- Send feedback about H2O Document AI to cloud-feedback@h2o.ai