Tutorial 2A: Model tuning with grid search
Overview
This tutorial aims to demonstrate the benefits of using grid search in H2O Hydrogen Torch to improve a pre-existing model. Specifically, we will focus on building and refining an image metric learning model that can effectively determine the similarity or dissimilarity between bicycle images.
By following this tutorial, you will gain a deeper understanding of how grid search can:
- Fine-tune and enhance models created in H2O Hydrogen Torch.
- Streamline and eliminate the repetitive process of creating multiple models with varying hyperparameter values.
- Elevate your built models in H2O Hydrogen Torch from being merely good to state-of-the-art.
Objectives
- Understand the benefits of using grid search in H2O Hydrogen Torch to improve a pre-existing model.
- Learn how to streamline the process of creating multiple models with varying hyperparameter values using grid search.
Prerequisites
- Access to H2O Hydrogen Torch v1.4.0
- Basic knowledge about neural network training
- Complete Tutorial 1A: Default hyperparameter values (start your first experiment)
Step 1: Import and explore dataset
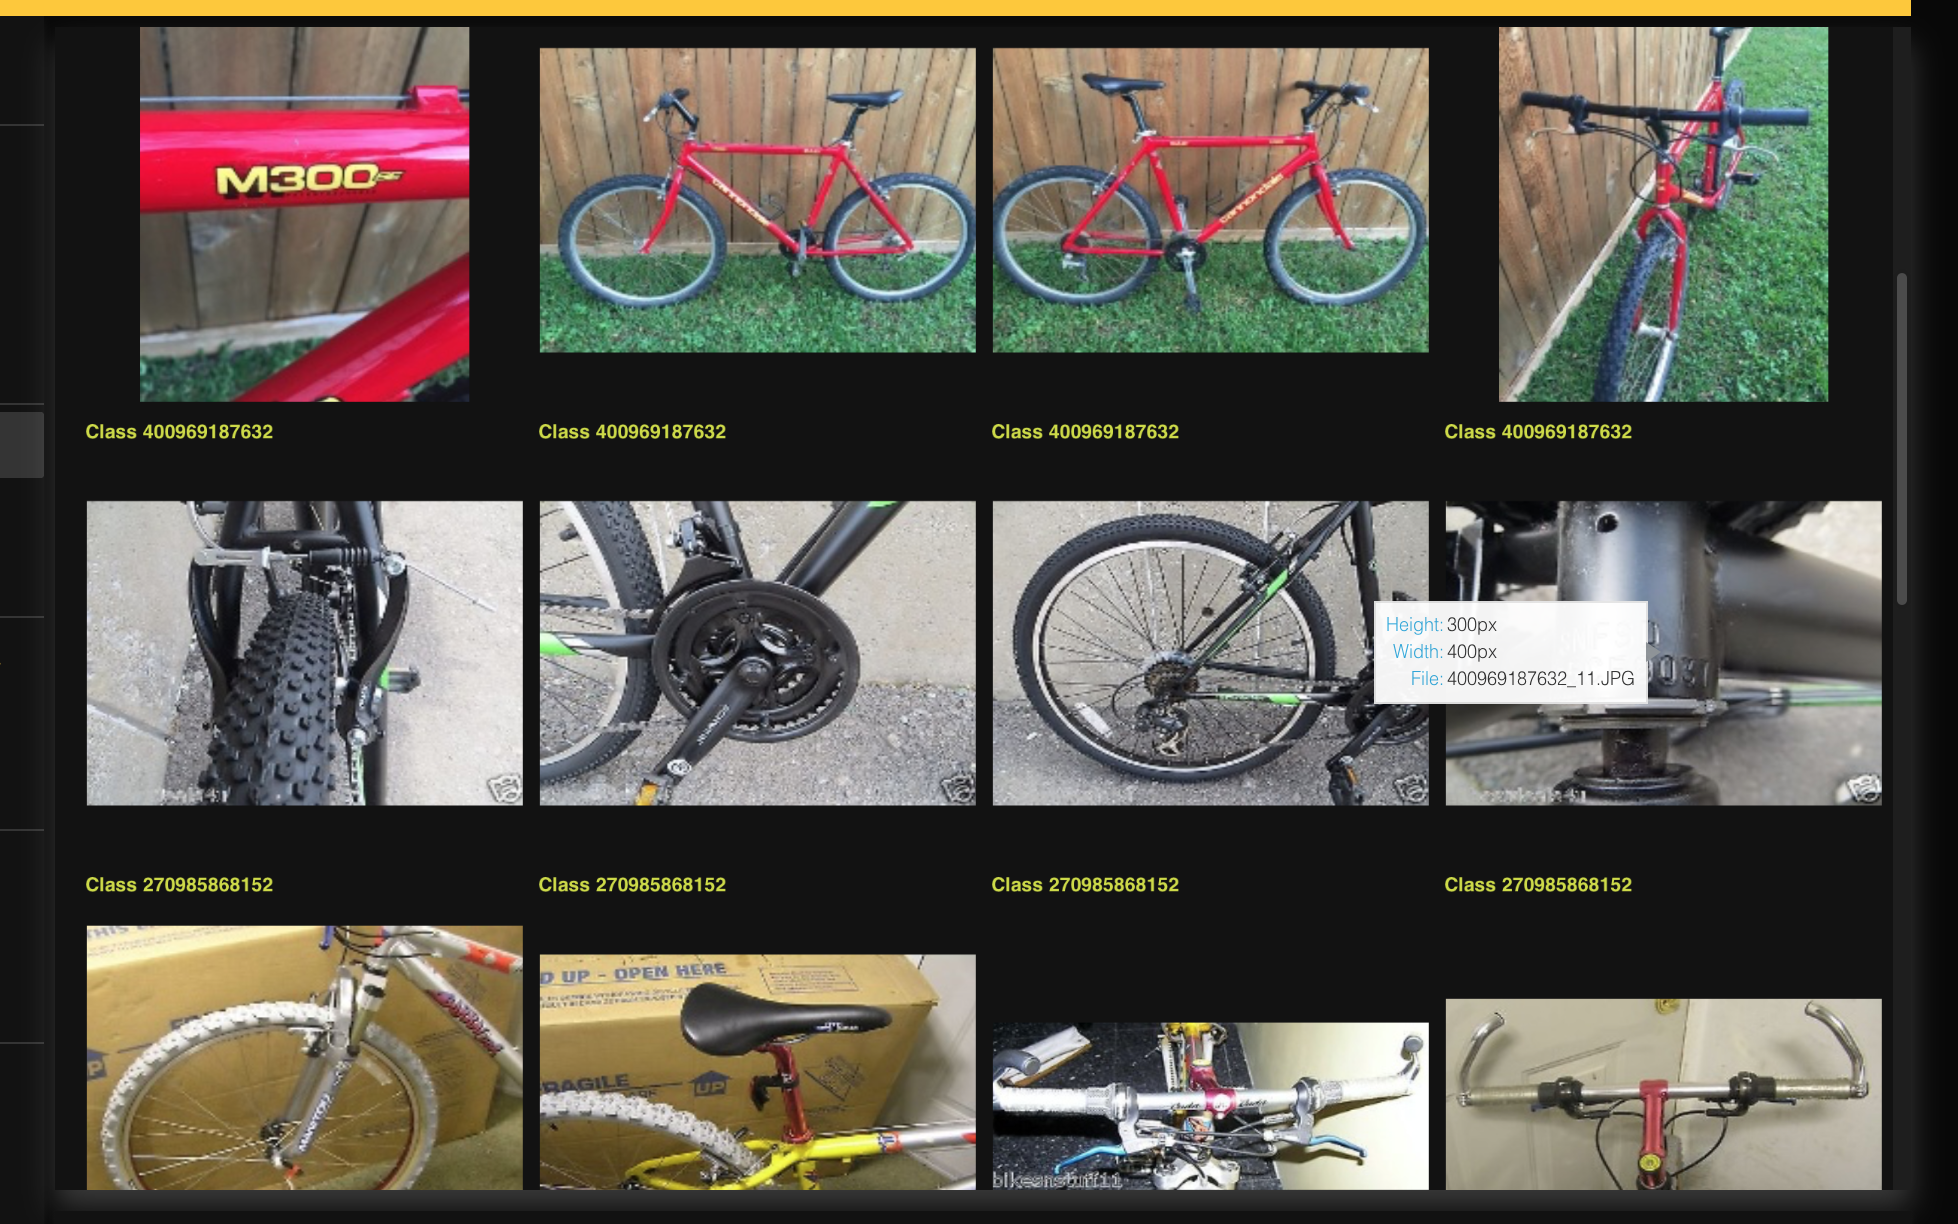
For this tutorial, let's utilize the demo out-of-the-box preprocessed bicycle_image_metric_learning.zip dataset for this tutorial. The dataset contains 8,313 images of bicycles marked with their class ID. Let's import and explore the preprocessed dataset.
- In the H2O Hydrogen Torch navigation menu, click Import dataset.
- In the File name list, select bicycle_image_metric_learning.zip.
- Click Continue.
- Click Continue.
- Click Continue.
Now that the dataset has been imported, let's quickly explore the dataset.
- In the Datasets table, click bicycle_image_metric_learning.
Step 2: Build model
Now, let's build the image metric learning model utilizing default hyperparameter values.
- Click Create experiment.
- In the Experiment name box, enter
tutorial-2a. - Click Run experiment.
Note
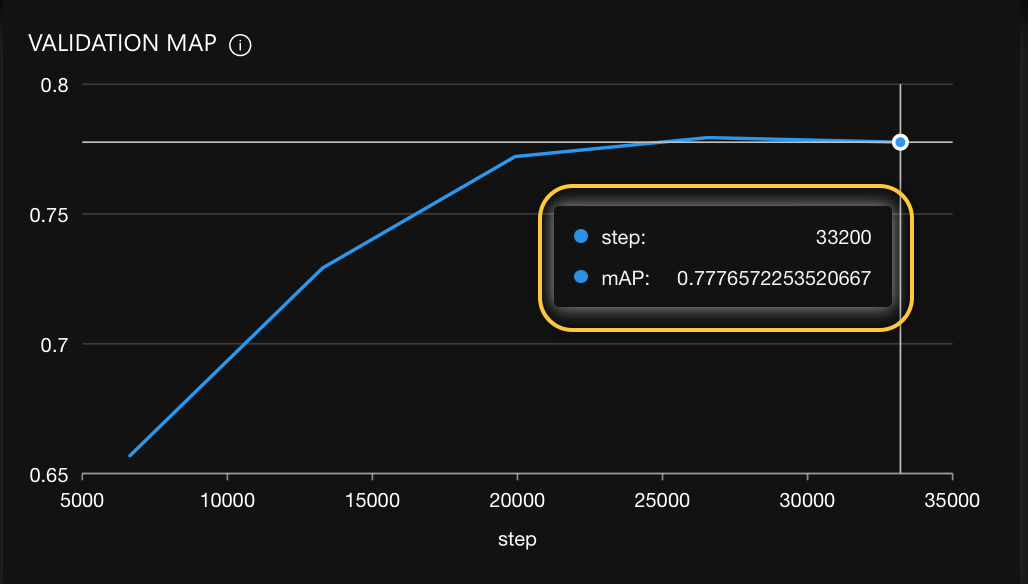
The default model scorer is the Mean Average Precision (mAP). For our model purposes, we want a validation metric value closer to 1 (indicating a perfect ability of the model to establish similarity and dissimilarity between bicycle images).
The prediction metrics in the charts from your model might differ from those discussed from this point on as a result of how training data is utilized at the start and during the model's training process.
After a few minutes, you can observed the trained model.
- In the Experiments table, click tutorial-2a.
After running the model with default hyperparameter values, we obtained the following final mAP score: 0.777.
Now that we have discovered the impact of default hyperparameter values, let's explore specific values we can tune to improve our model's mAP and transform our build model from a good to a state-of-the-art model.
Step 3: Identify hyperparameters to tune
When aiming to optimize a machine learning model's performance, hyperparameter tuning is a crucial step. However, there is no universally accepted sequence for tuning hyperparameters. A common approach among practitioners is to begin with the most significant hyperparameters, such as the backbone of the model. The backbone determines the pre-trained models utilized and can significantly impact the model's performance.
It is also advantageous to tune other hyperparameters in conjunction with the primary one being adjusted. For instance, when tuning the backbone, it is often beneficial to tune the learning rate simultaneously. This is because different backbones may perform optimally with varying learning rates.
Before proceeding with hyperparameter tuning on our model, let's briefly review grid search, a widely used technique for this purpose. Grid search involves systematically iterating over a range of hyperparameter values to identify the combination that yields the best model performance.
Step 4: Grid search
To improve a model, you can create and train multiple models with varying hyperparameters in order to find the best state-of-the-art model.
H2O Hydrogen Torch allows you to quickly initiate multiple models using grid search, a feature that enables you to specify a range of values for certain hyperparameters (also known as grid search hyperparameters).
When you start an experiment with grid search, it will run multiple experiments in parallel, each with a different combination of the selected grid search hyperparameter values. Once all the grid search experiments have completed, you can compare the results and identify the ideal hyperparameter values for your model.
Step 5: Improve model
Based on our built model and the discussions in step 3 and 4, we will now improve the model by tuning the backbone (architecture) as the first step. We will select several embedding sizes and backbones, as well as learning rates, to explore various combinations and determine which works best. It's common for different architectures to perform differently with varying learning rates, so we'll select multiple learning rates to examine their impact on performance. Our goal is to compare and contrast various backbone architectures, embedding sizes, and learning rates to identify the optimal combination for our model.
- In the H2O Hydrogen Torch navigation menu, click Create experiment.
- In the Problem category list, select From experiment.
- In the Experiment list, select tutorial-2a.
Before assigning multiple values to specific grid search hyperparameters, we need to enable grid search.
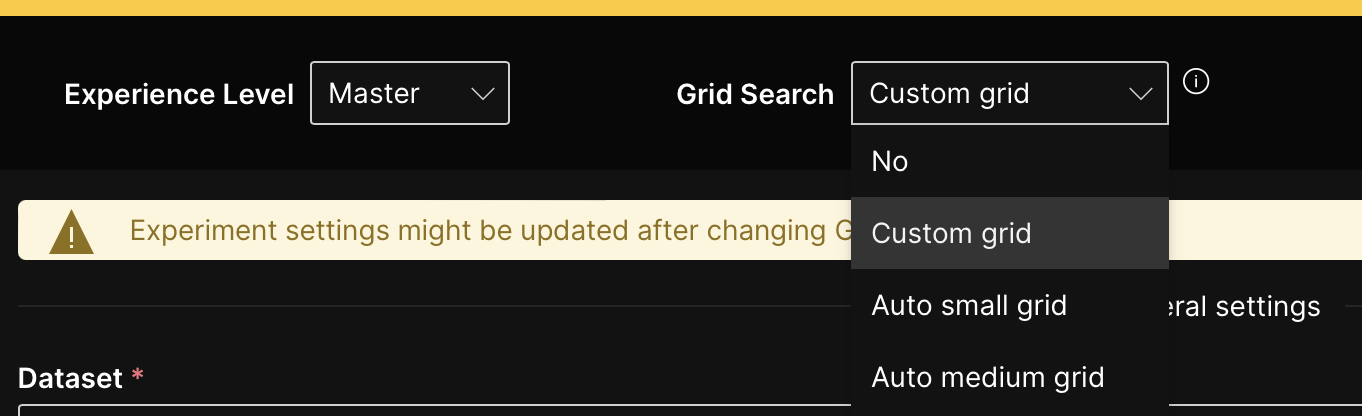
- In the Grid search list, select Custom grid.
 Note
NoteCustom grid: This option enables you to explore various combinations of hyperparameter values to fine-tune your models and discover the optimal configuration that yields the best performance. With the custom grid option, you have greater control over the hyperparameter search process, enhancing the accuracy and effectiveness of your models.
Now, let's assign multiple values to specific grid search hyperparameters.
- In the Embedding size (grid search) list, only select 256 and 1024 (deselect other options).
Note
We selected values between the already selected value to amplify our discovery process for the appropriate embedding size for this model.
- In the Backbone (grid search) list, enter
tf_efficientnet_b5.ns_jft_in1kandresnet18(deselect other options).NoteThe intuition here is that larger backbone architectures can improve the model; to validate such intuition, we selected larger backbone architectures from the one used in the built experiment (model).
- In the Learning rate (grid search) list, also select 0.0005 and 0.01 (deselect other options).
Note
We selected values between the already selected value to amplify our discovery process for the appropriate learning rate for the image metric learning model.
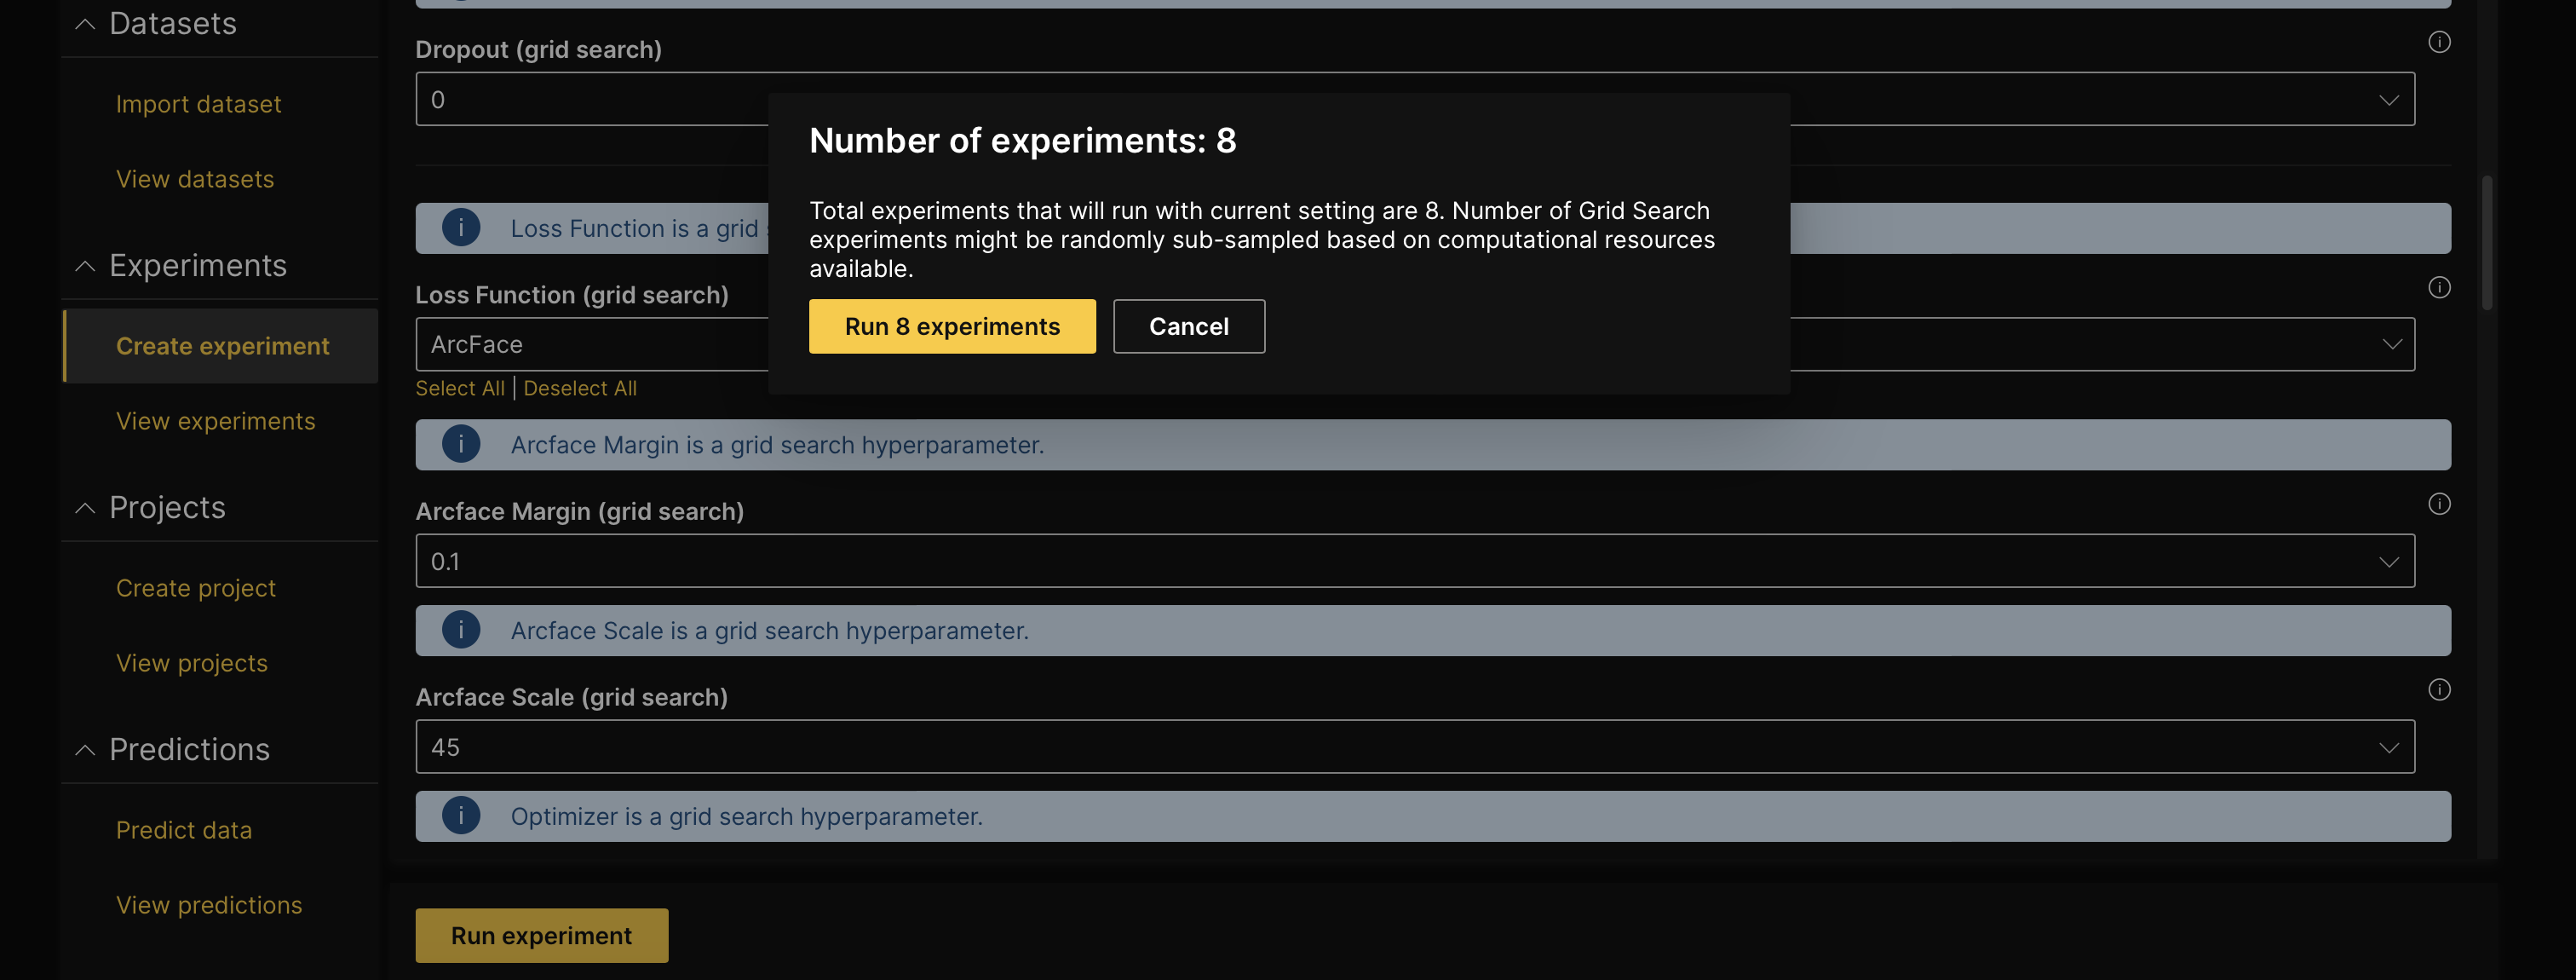
- Click Run experiment.
- Click Run 8 experiments.
- H2O Hydrogen Torch starts several experiments (models). If you don't want to wait, proceed with this tutorial. If you decide to run all experiments, note that your model metrics might differ from those discussed in this tutorial.
- An instance of H2O Hydrogen Torch runs with 1 GPU by default unless configured differently by your admin: contact your admin if you need more resources. Further GPUs (resources) can decrease the time you wait for experiments to complete (multi GPU training).
Step 6. Explore new improved model
After generating the new models with grid search, H2O Hydrogen Torch groups the experiments into a single project you can access in the View projects card. Projects enable you to organize experiments into groups related to a specific business problem or use case. In addition, projects in H2O Hydrogen Torch enable you to view and manage a group of experiments stemming from the same grid search experiment.
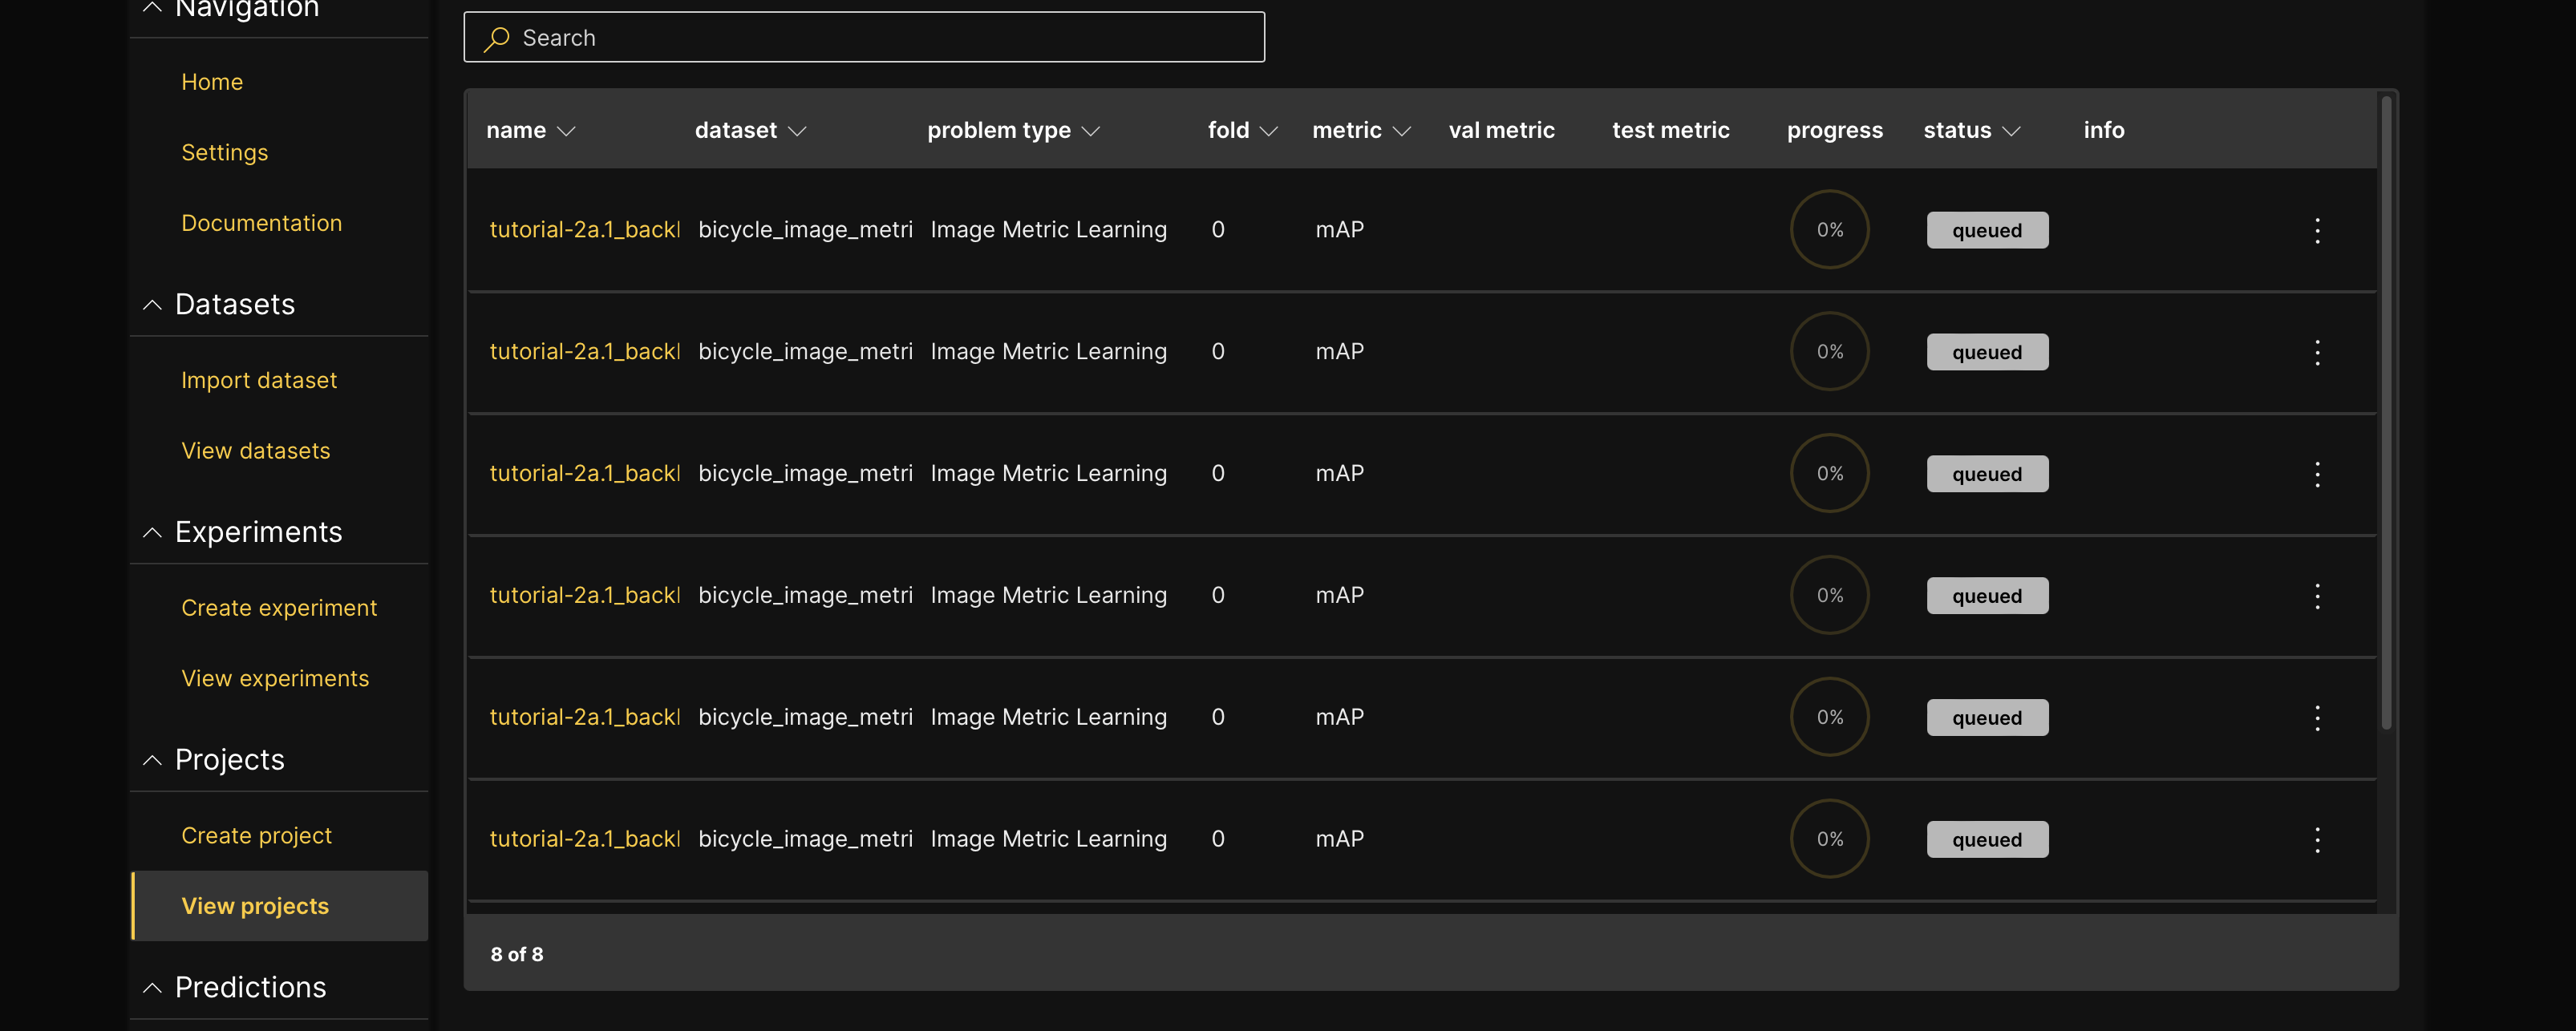
After a few moments, you can evaluate the new, improved model irritations of the first-built model. By observing the completed experiments, we can conclude that the following experiment obtained the best mAP compared to the other experiments:
tutorial-2a.1_backbone_tf_efficientnet_b5.ns_jft_in1k_embedding_size_1024_learning_rate_0.0005.
Our original model obtained an mAP value of 0.7777 while the new best-rebuilt model obtained a 0.8083 mAP.


By reading the experiment name or by looking at the Config tab of the new best model, we can discover that the experiment used:
- Backbone: tf_efficientnet_b5.ns_jft_in1k
- Embedding size: 1024
- Learning rate: 0.0005
Config tab: To learn how to access the Config tab of an experiment, see Access an experiment's tabs.
In consideration of the above, we can assume/conclude the following:
- A bigger backbone architecture and embedding size improves the model.
- A higher learning rate improves the model.
Summary
In this tutorial, we explored the process of enhancing a pre-existing model using grid search in H2O Hydrogen Torch. Specifically, we focused on constructing an image metric learning model to determine the similarity or dissimilarity between bicycle images effectively. Throughout the tutorial, we found that the default hyperparameter values provided by H2O Hydrogen Torch can produce high-quality models and serve as an excellent foundation for achieving cutting-edge results.
Toward the tutorial's conclusion, we delved into the significance of grid search in identifying optimal hyperparameter values tailored to a particular model.
Next
Once you have trained or improved your model, you can deploy the model into production. H2O Hydrogen Torch supports multiple ways to deploy a built model. Consider the following tutorials to learn more:
- Tutorial 1B: Model deployment in the H2O Hydrogen Torch UI
- Tutorial 2B: Model deployment with a model's H2O MLOps pipeline
- Tutorial 3B: Model deployment with a model's Python scoring pipeline
- Tutorial 4B: Model deployment to H2O MLOps through the H2O Hydrogen Torch UI
- Submit and view feedback for this page
- Send feedback about H2O Hydrogen Torch to cloud-feedback@h2o.ai