Tutorial 1A: Text classification annotation task
Overview
This tutorial describes the process of creating a text classification annotation task, including specifying an annotation task rubric for it. To highlight the process, we will annotate a dataset containing user reviews (in text format) and ratings (from 0 to 5) of Amazon products.
Step 1: Explore dataset
We are going to use the preloaded Amazon reviews demo dataset for this tutorial. The dataset contains 180 samples (text), each containing a review of an Amazon product. Let's quickly explore the dataset.
- On the H2O Label Genie navigation menu, click Datasets.
- In the Datasets table, click amazon-reviews-demo.
Step 2: Create an annotation task
Now that we have seen the dataset let's create an annotation task that enables you to annotate the dataset. For this tutorial, the annotation task refers to a text classification annotation task assigning one or more categorical target labels to an input text.
- Click New annotation task.
- In the Task name box, enter
tutorial-1a. - In the Task description box, enter
Annotate a dataset containing reviews from Amazon products. - In the Select task list, select Classification.
- In the Select text column box, select comment.
- Click Create task.
Step 3: Specify an annotation task rubric
Before annotating the dataset, we need to specify an annotation task rubric. An annotation task rubric refers to the labels (for example, object classes) you want to use when annotating your dataset. For the dataset, let's utilize the comment column to label if a product review follows under a happy or unhappy customer.
- In the New class name box, enter
happy. - Click Add.
- Click Add class.
- In the New class name box, enter
unhappy. - Click Add.
- Click Continue to annotate.
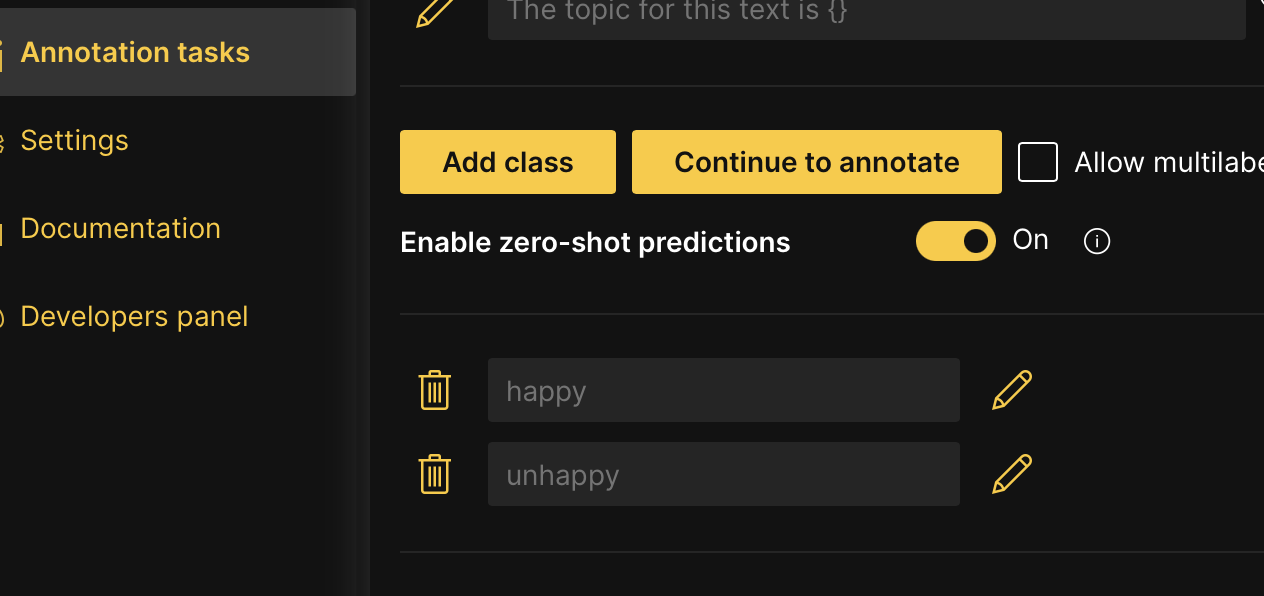
H2O Label Genie supports multi-label text classification annotation tasks.
Step 4: Annotate dataset
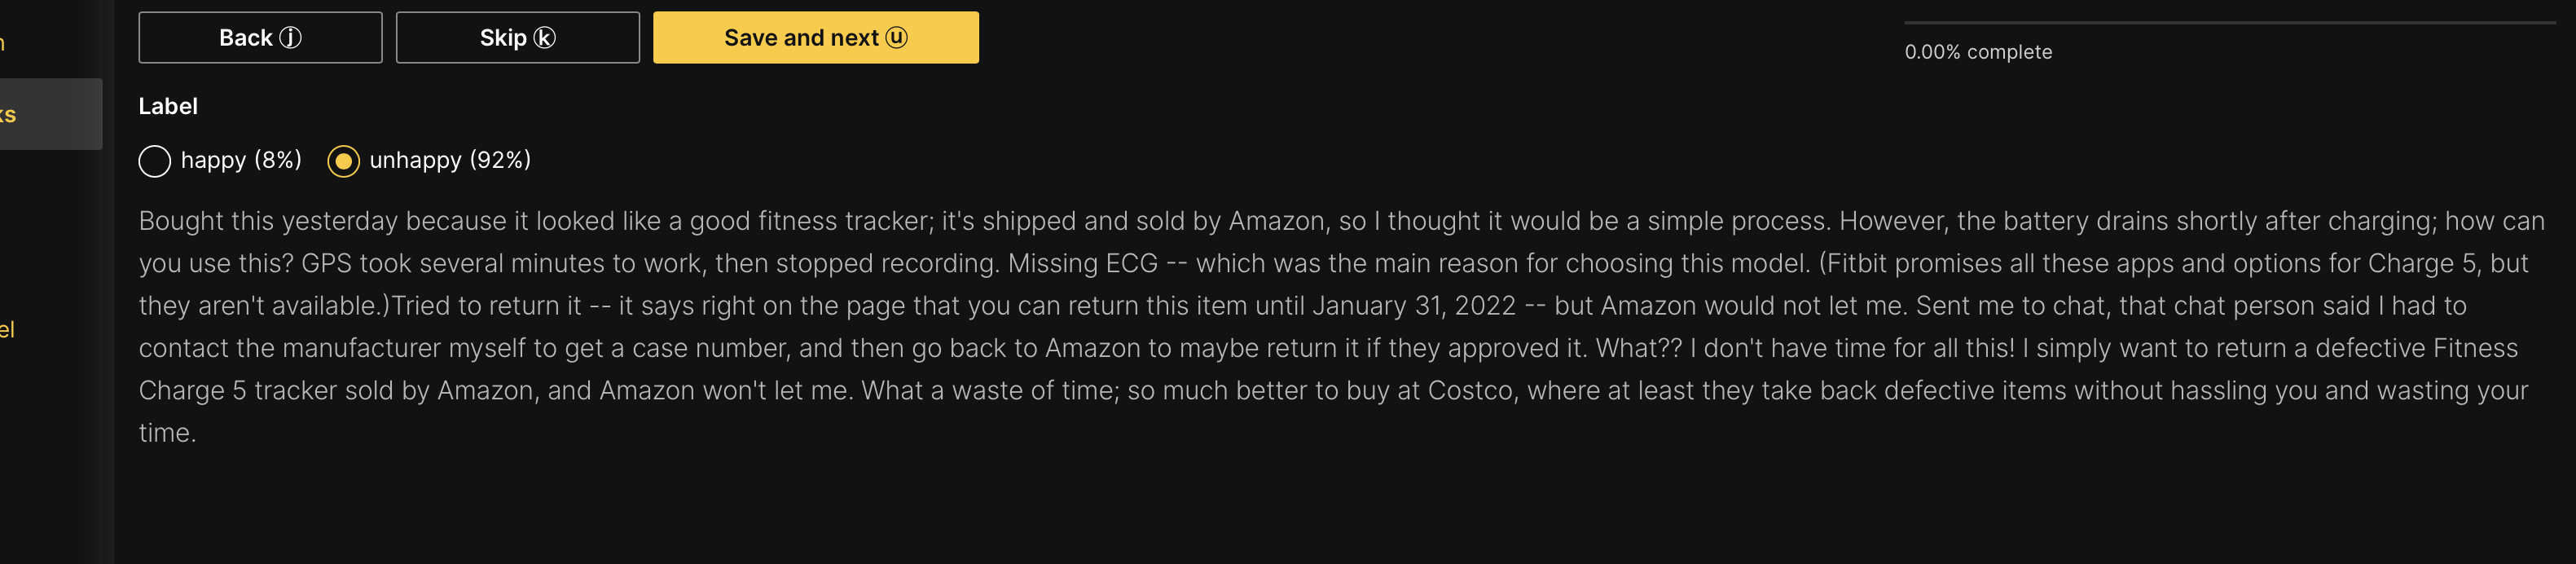
In the Annotate tab, you can individually annotate each review (text) in the dataset. Let's annotate the first review.
-
Click unhappy (a random label for purposes of this tutorial).
note- A zero-shot learning model is on by default when you annotate a text classification annotation task. The model accelerates the annotation (labeling) process by providing the percentage probability of a text (in this case, a review) belonging to a certain label (one of the labels created in the Rubric tab). You can immediately start annotating in the Annotate tab or wait until the zero-shot model is ready to provide annotation suggestions. H2O Label Genie notifies you to Refresh the instance when zero-shot predictions (suggestions) are available.
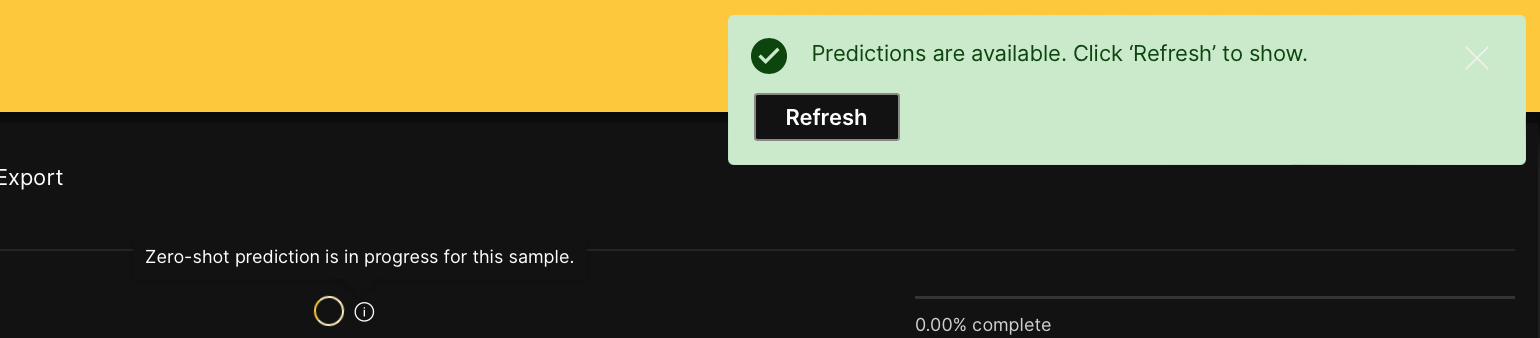
- During the annotation process of a text classification dataset, you can download generated zero-shot predictions (probabilities) in the Export tab. To learn more, see Download a dataset's zero-shot predictions.
- For example, after refreshing the instance, the model provides probabilities for each label.
- To learn about the utilized model for a text classification annotation task, see Zero-shot learning models: Text classification.
- A zero-shot learning model is on by default when you annotate a text classification annotation task. The model accelerates the annotation (labeling) process by providing the percentage probability of a text (in this case, a review) belonging to a certain label (one of the labels created in the Rubric tab). You can immediately start annotating in the Annotate tab or wait until the zero-shot model is ready to provide annotation suggestions. H2O Label Genie notifies you to Refresh the instance when zero-shot predictions (suggestions) are available.
-
Click Save and next.
Note- Save and next saves the annotated review (sample)
- To skip a review to annotate later: Click Skip.
- Skipped reviews (samples) reappear after all non-skipped reviews are annotated
-
Annotate all dataset samples.
noteAt any point in an annotation task, you can download the already approved annotated samples. You do not need to fully annotate a dataset to download already annotated samples (approved samples). To learn more, see Download an annotated dataset
Summary
In this tutorial, we learned how to annotate and specify an annotation task rubric for a text classification task.
Next
To learn the process of annotating and specifying an annotation task rubric for other various annotation tasks in computer vision (CV), natural language processing (NLP), and audio, see Tutorials.
- Submit and view feedback for this page
- Send feedback about H2O Label Genie to cloud-feedback@h2o.ai