Getting started tutorial
This tutorial gives you a quick end-to-end walkthrough of H2O AI Cloud and runs you through the core use cases and capabilities of the product.
Before you begin
- Request a demo of H2O AI Cloud
- Download sample Kaggle dataset
Launch an instance
Let's begin by launching a Driverless AI instance to build a data model and run a data experiment.
Navigate to H2O AI Cloud on your browser and log in.
To start creating a new AI engine, click MY AI ENGINES. This opens up the H2O Enterprise Steam home page.
Click Driverless AI on the left side panel, and then click Launch Instance.
Select the
default-driverless-kubernetesprofile and enter the following details to create your new instance of Driverless AI:- Instance Name: Enter a suitable name for your new Driverless AI instance.
- Version: Select the latest version that is available.
You can leave the default values as they are for the rest of the fields for this tutorial. For more information about these configurations, click the ? icon at the end of each row to view details about that field or see Launching instance in the Enterprise Steam documentation.
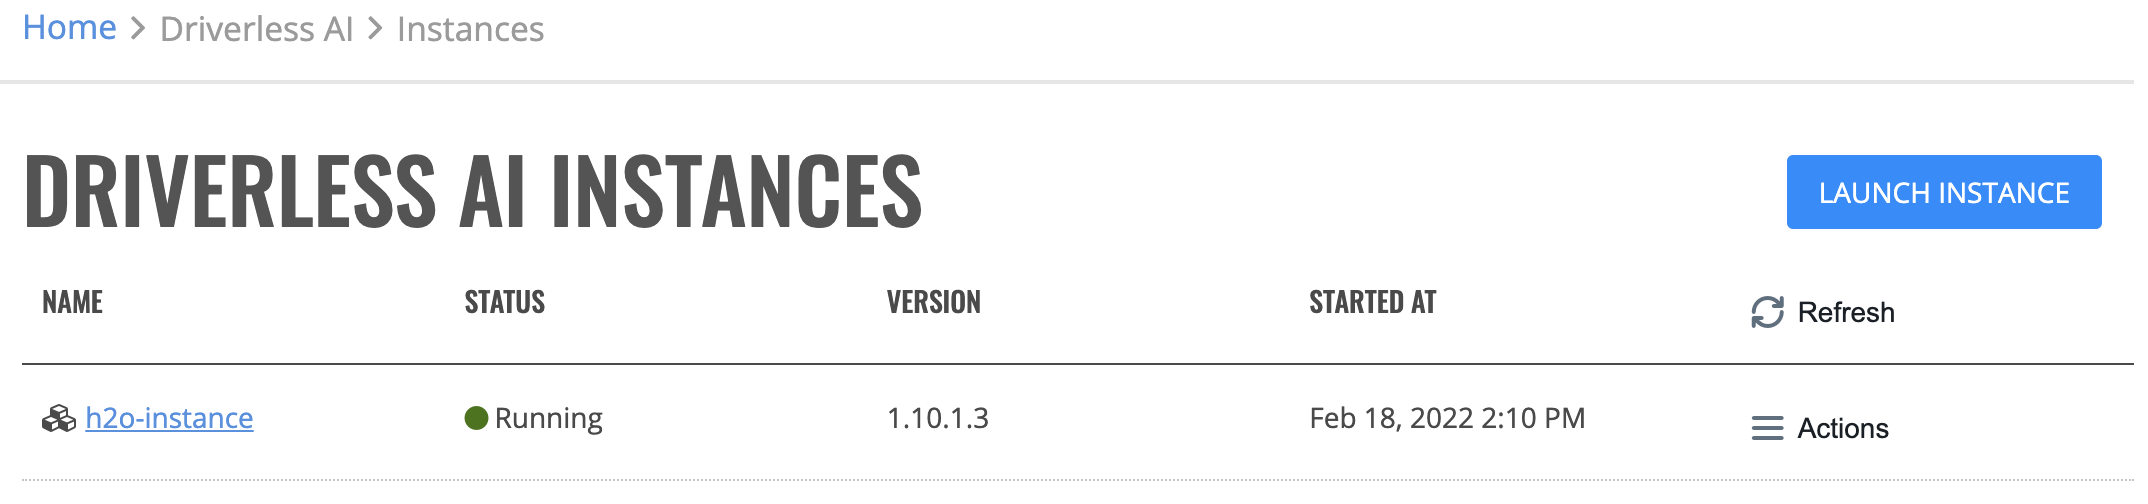
Click Launch Instance. The instance takes a few minutes to start up.
Once it has started up, the instance is listed on the page with the status indicating that the instance is Running.
Build a model
Now that you have successfully created an instance of H2O Driverless AI, let's build a simple model.
Select an instance to build a model in by clicking the name of the instance on the Driverless AI Instances page. The Driverless AI home page is displayed.
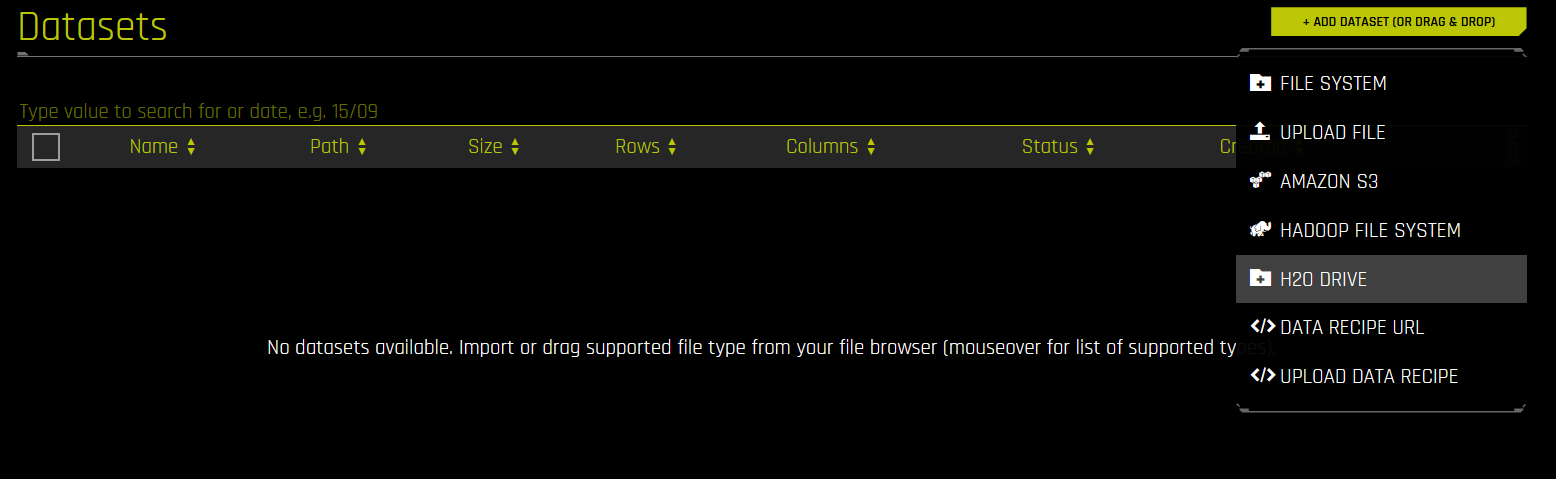
Click Add Dataset found on top-left corner of the screen.
Click Upload File and select the dataset file that you downloaded in the Before you begin section at the start of this tutorial.
Alternatively, you can upload dataset files from your H2O Drive.
infoFor the time being, this feature is only available in H2O AI Managed Cloud.
H2O Drive is your personal H2O AI Cloud-based storage that allows you to store and access files online and use them within many other H2O products.
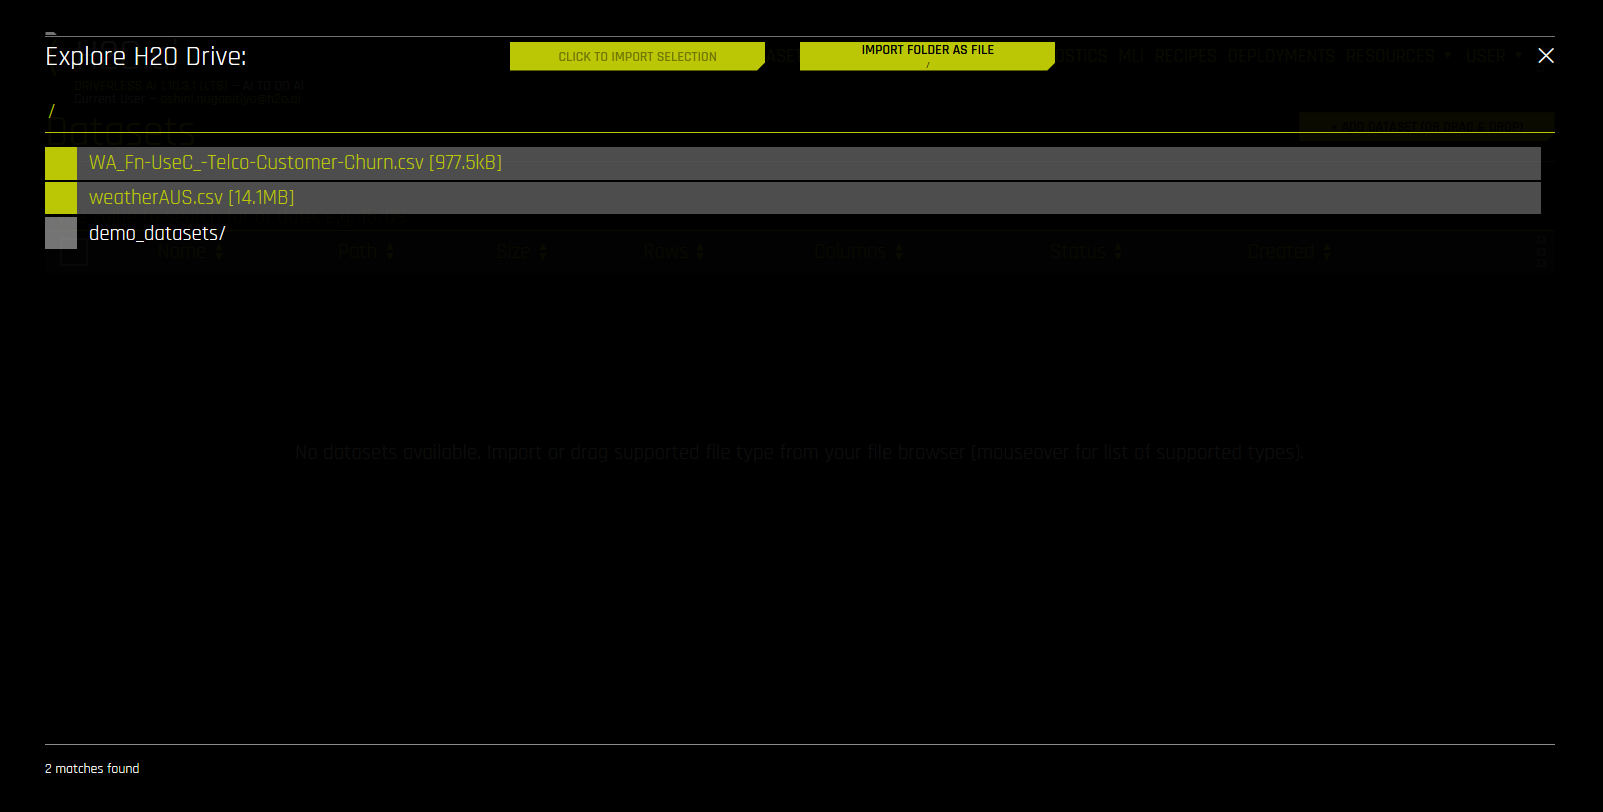
Click H2O Drive and select the dataset(s) you want to add to the H2O Driverless AI.
Once you have selected the dataset(s) click CLICK TO IMPORT SELECTION to add the dataset to the H2O Driverless AI.
Once it has finished uploading, you can view the dataset on the datasets page. Click the dataset name and select SPLIT.
Let's split the dataset into two to create a training dataset and a testing dataset.
Enter the value "Testing" as OUTPUT NAME 1 and enter "Training" as OUTPUT NAME 2.
Select "RainTomorrow" as the CLASSIFICATION TARGET COLUMN and drag the SPLIT RATIO slider to select a 20% split. This indicates that 20% of the dataset is partitioned as the "Testing" data set and the remaining 80% is partitioned as the "Training" dataset.
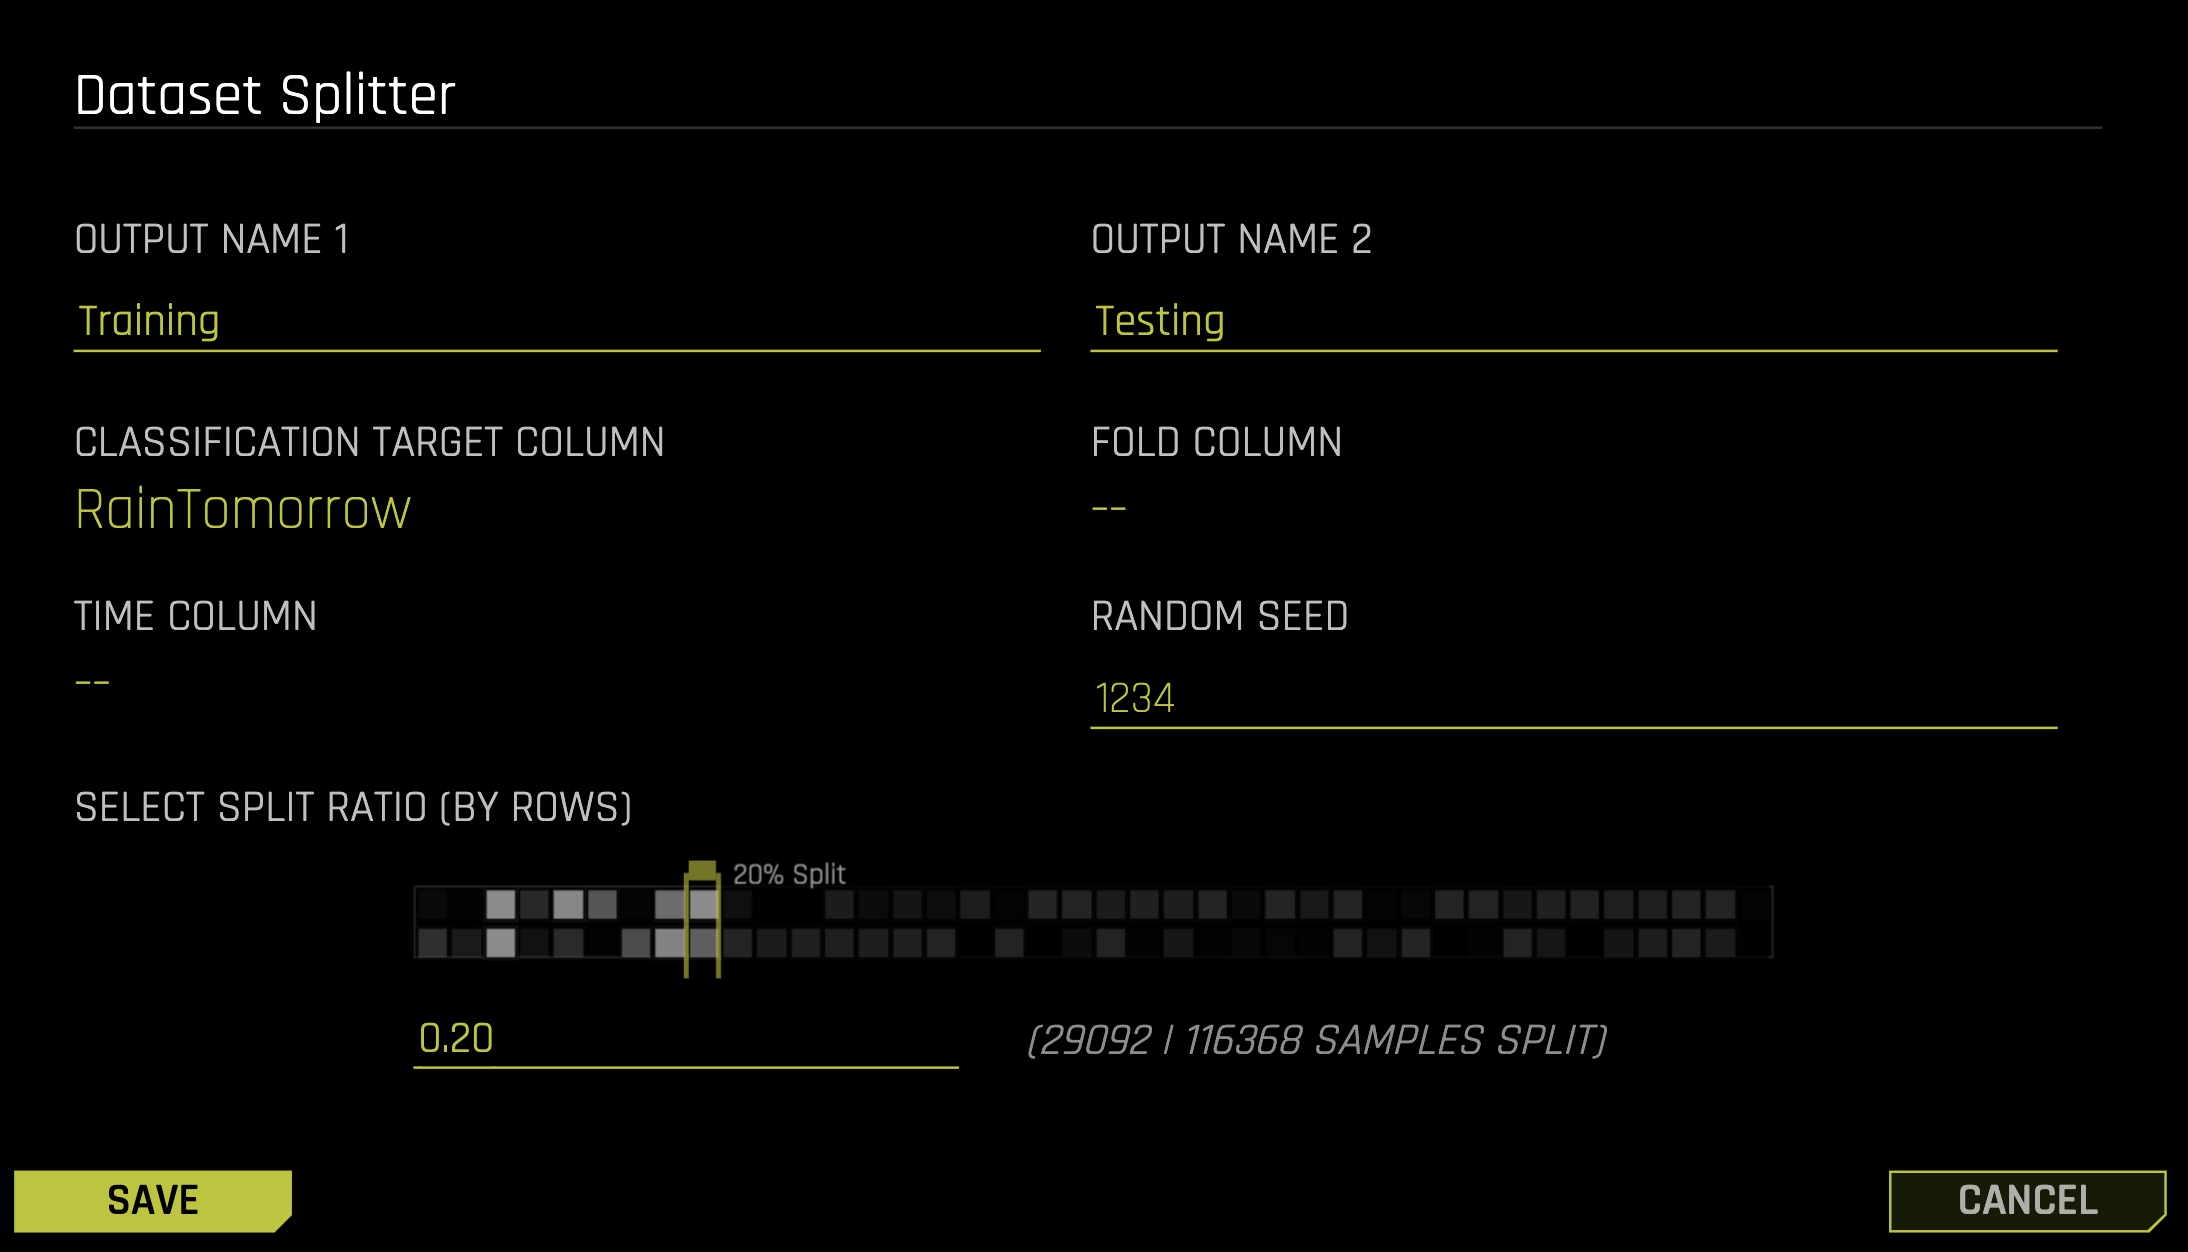
Click Save.
The resulting Testing and Training datasets are listed on the main page. This experiment is set up to predict the probability of rainfall tomorrow based on the Australia weather dataset.
Click on the Training dataset and select PREDICT.
You are prompted to take a quick tour to set up the parameters of the experiment. If you are first-time user, click Yes and follow the guided tour to set up your experiment.
infoFor more information about these parameters, see Experiment settings in the Driverless AI documentation.
Click Launch Experiment. The loading spinner on the center of the screen displays the progress of the experiment.
Once the experiment is complete, the summary is displayed on the bottom-right side of the screen. You can also download predictions, interpret the model, check which variables are important to the experiment, or change the experiment settings and run it again.
Next, create a Driverless AI project and link the experiment. Click Projects on the top navigation pane, and then click New Project.
Enter a suitable name for the Project and click Create a New Project.
Click Link Experiments and select the experiment you just created.
You have now successfully created a DAI project with a split dataset and an experiment. For the purpose of this tutorial, let's assume our simple model is now ready. This project and all the experiments within it are now available to productionalize and monitor using MLOps.
Monitor and productionalize model
Using MLOps, you can deploy your model and gain insights about model usage such as how often it is being used, or what the data being sent to the model looks like.
Click MY MODELS on the HAIC home page to view the project in MLOps. You can view the project you created in DAI listed on the page.
Click on Actions. You can view options to deploy your model to the
DEVor toPRODenvironment.See Deploying a Model in the MLOps documentation for specific instructions.
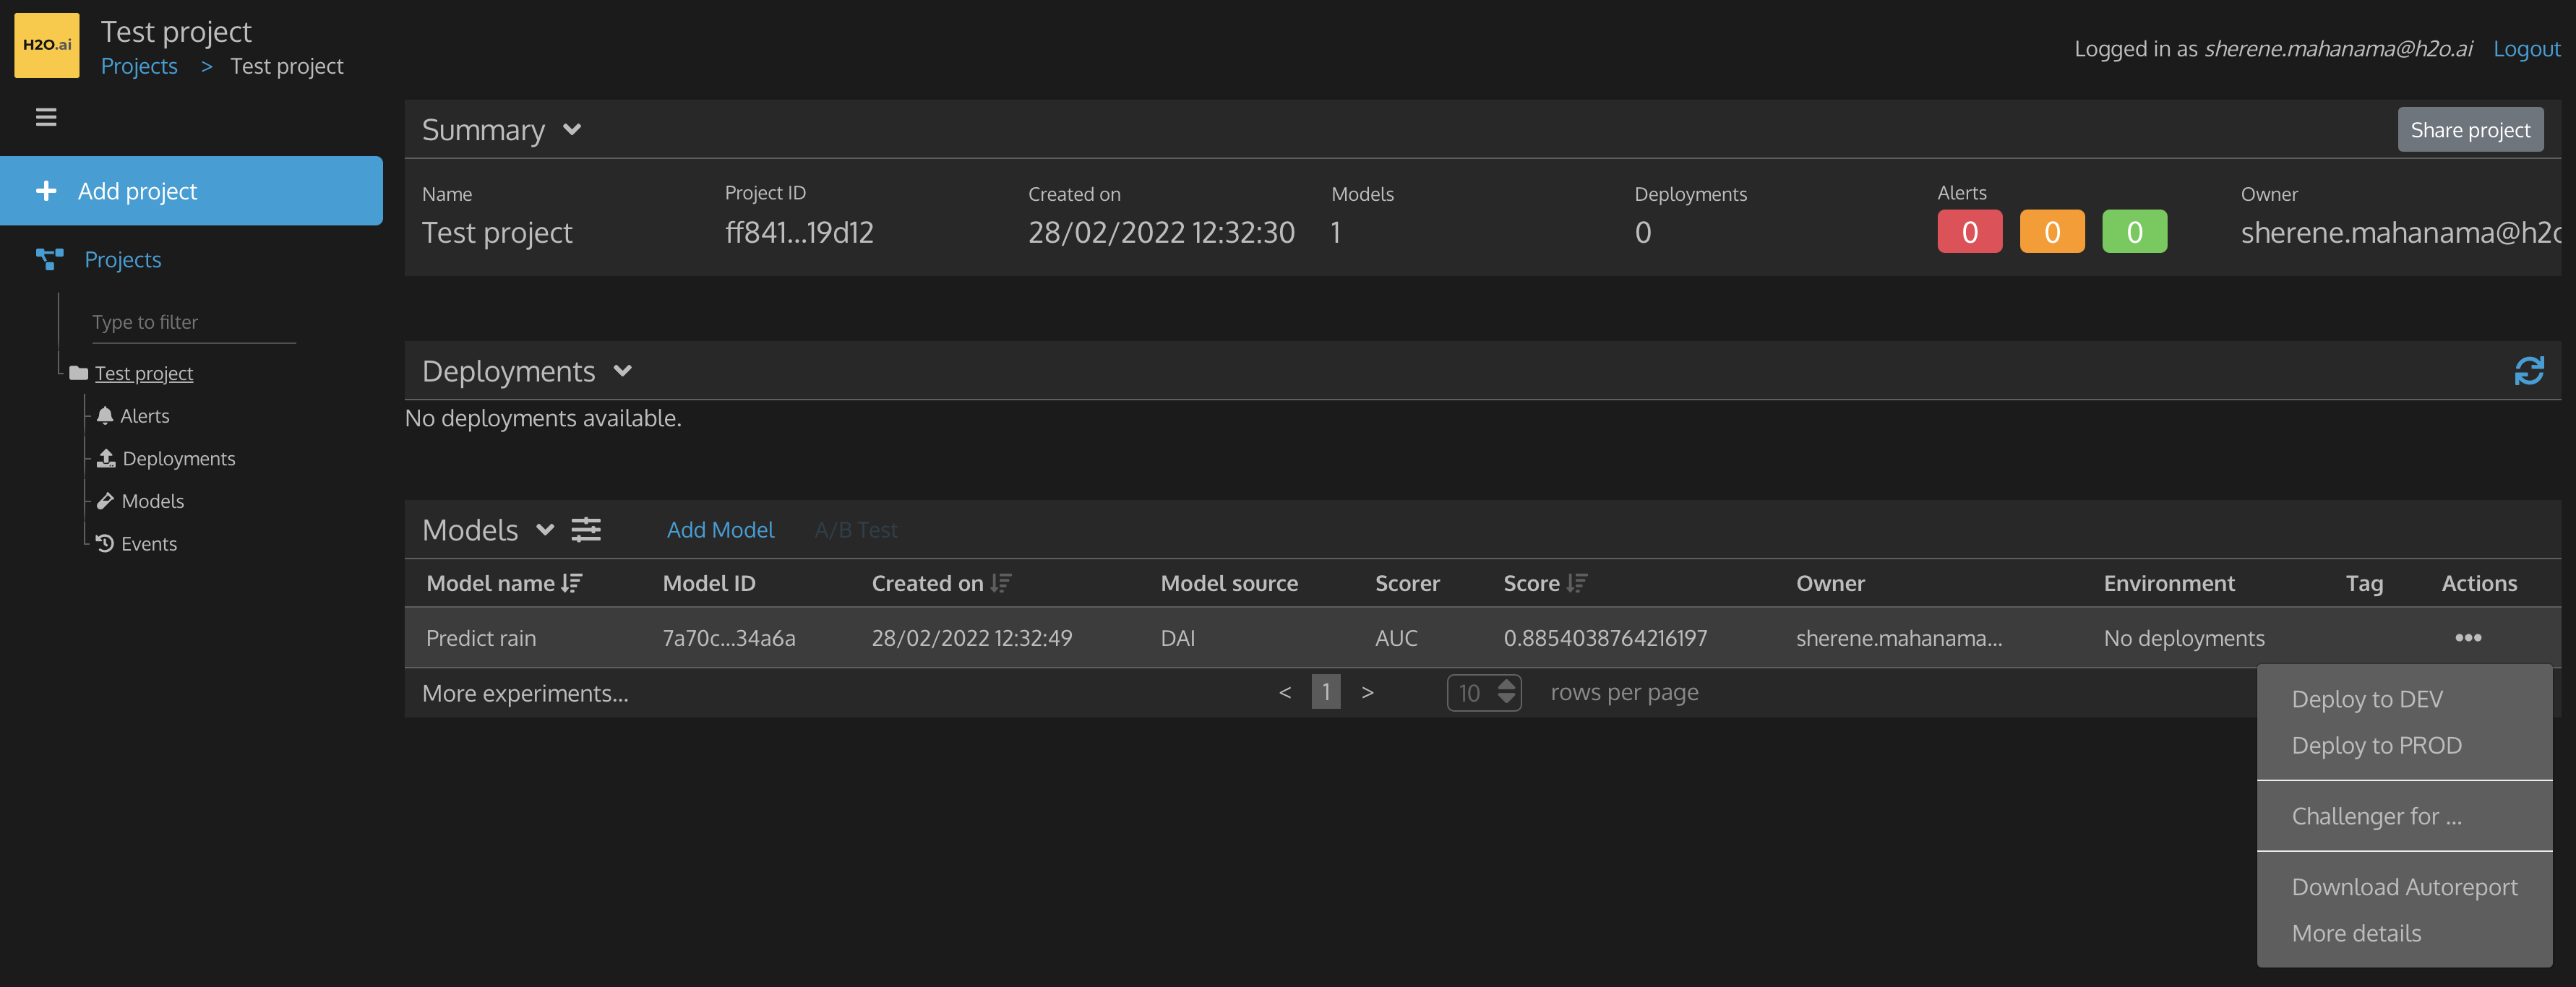
Select Deploy to DEV to deploy your model to the development environment.
In the popup modal, you have to specify the following and click Confirm:
-
Select No security option from the level of security drop-down menu.
-
Next, select DAI Python Pipeline as the Artifact Type and the latest H2O.ai Python Scorer for DAI pipelines as the Runtime.
-
Under Kubernetes options, specify the number of static replicas of the model you want to create. Let's select only one replica.
-
Leave the Requests/Limits entry as default.
-
Affinity and Toleration fields are optional. Select None for both.
-
Click Confirm to deploy the model.

-
Under Deployments tab, you can view your model deployment.
By clicking on Actions you can view options for more details, model monitoring, model sample curl request and the endpoint URL.
Click Show sample request and copy the model sample curl request.
Open a terminal window and paste the sample curl request to view the model scoring information.
Create an app
Using the Wave software development kit, you can build a simple Python business application to analyze the data and present predictions from your model in a user-friendly format.
Use the following sample code to create a new Wave app where users can choose one of the predictive columns to see a visual showing them the historic trends of this feature based on the target column (i.e., RainTomorrow).
from h2o_wave import main, app, Q, ui, dataimport pandas as pd@app('/')async def serve(q: Q):if not q.client.initialized:q.client.df = pd.read_csv("weather_data.csv")q.client.target_column = "RainTomorrow"q.client.selected_column = q.client.df.columns.tolist()[0]q.page["header"] = ui.header_card(box="1 1 -1 1",title="Exploring Weather Data",subtitle="Visually exploring how weather today impacts rain tomorrow",items=[ui.dropdown(name="column_selector",label="Choose a Column",choices=[ui.choice(name=col, label=col) for col in q.client.df.columns],value=q.client.selected_column,width="300px",trigger=True),])q.client.initialized = Trueif q.args.column_selector is not None:q.client.selected_column = q.args.column_selectorq.page["header"].items[0].dropdown.value = q.client.selected_columnagg = q.client.df.groupby([q.client.selected_column, q.client.target_column]).size().reset_index(name="Count")q.page['plot'] = ui.plot_card(box='1 2 -1 -1',title='Distribution by Rainfall Tomorrow',data=data(fields=agg.columns.tolist(),rows=agg.values.tolist(),),plot=ui.plot(marks=[ui.mark(type='interval',x=f'={q.client.selected_column}', x_title=q.client.selected_column,y='=Count', y_title='Count',color=f"={q.client.target_column}")]))await q.page.save()Check out the guide on Importing a Wave app for more information and instructions on building your app and importing it to the App Store.
This tutorial was mostly just a walkthrough of the HAIC basics, but there is so much more you can do with the product! For deeper links and more complex use cases, our landing page will help you navigate through the inner workings and complex capabilities of this product.
- Submit and view feedback for this page
- Send feedback about H2O AI Cloud | Docs to cloud-feedback@h2o.ai