Authenticate to H2O Managed Cloud using Okta
This tutorial guides you through the process of configuring Okta as an identity provider (IdP) for your H2O Managed Cloud environment. This enables your users to log in to H2O Managed Cloud through Okta.
Create a new SAML application
Log in to your Okta admin console.
Expand the Applications section on the left-navigation pane and select Applications.
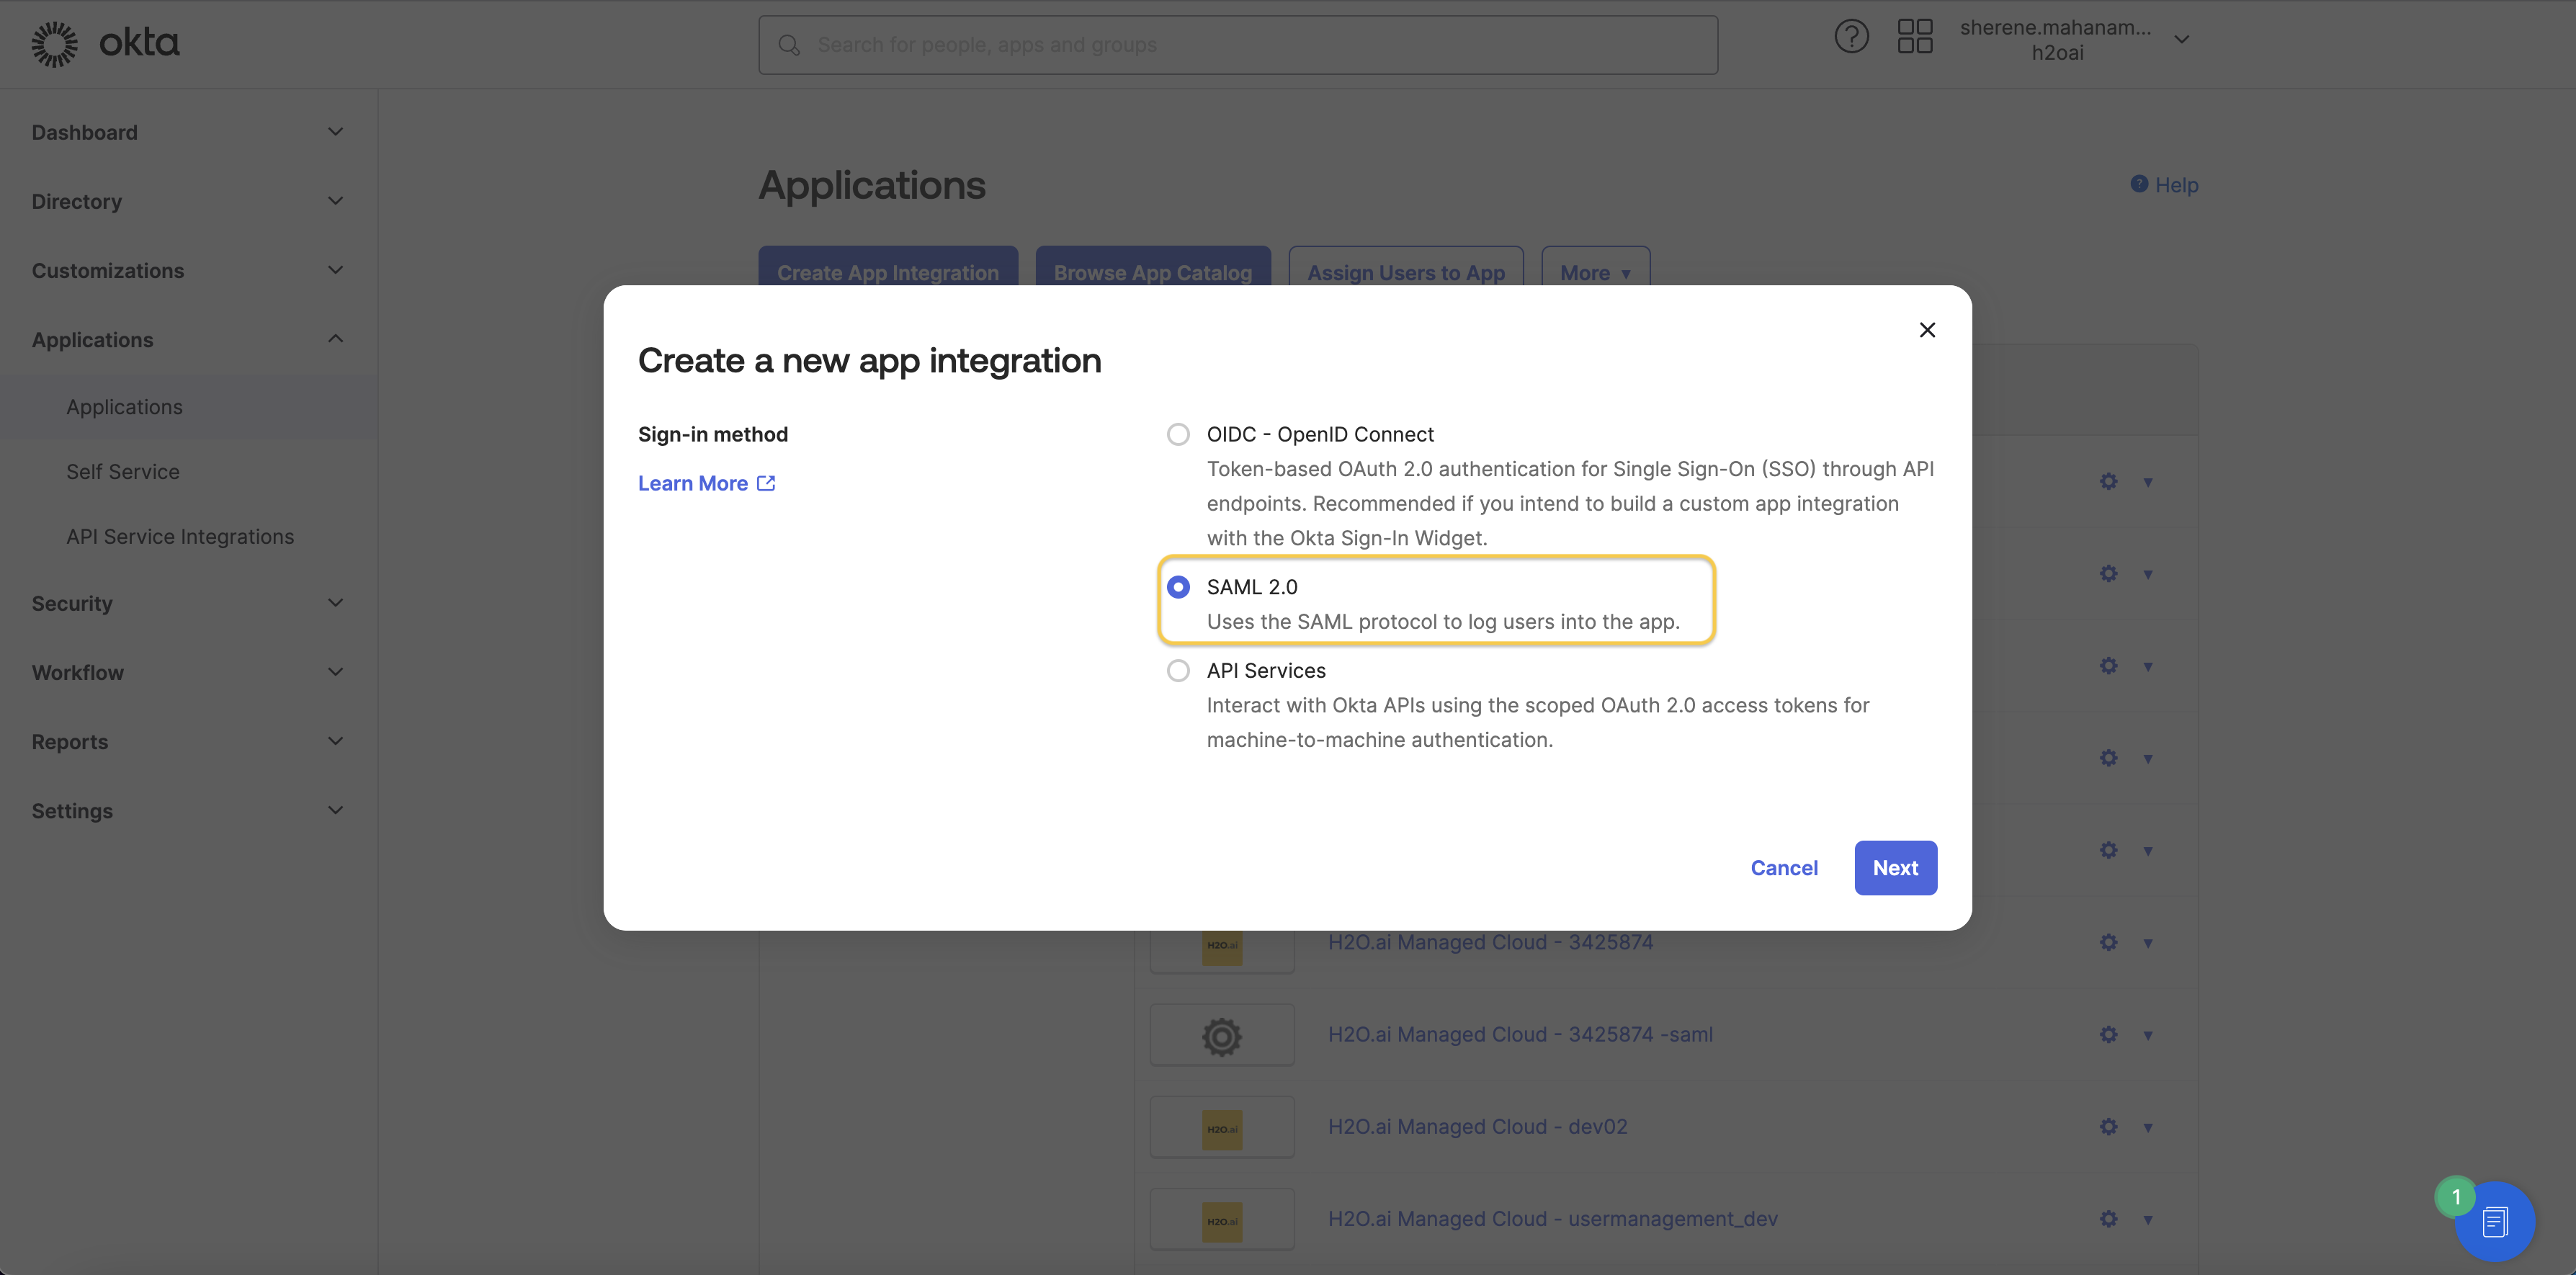
Click Create App Integration and select SAML 2.0. Then, click Next.
Under General Settings, enter a suitable name for your application as the App Name. Then, click Next. Optionally, you can also fill in the other settings here like your application logo and visibility.
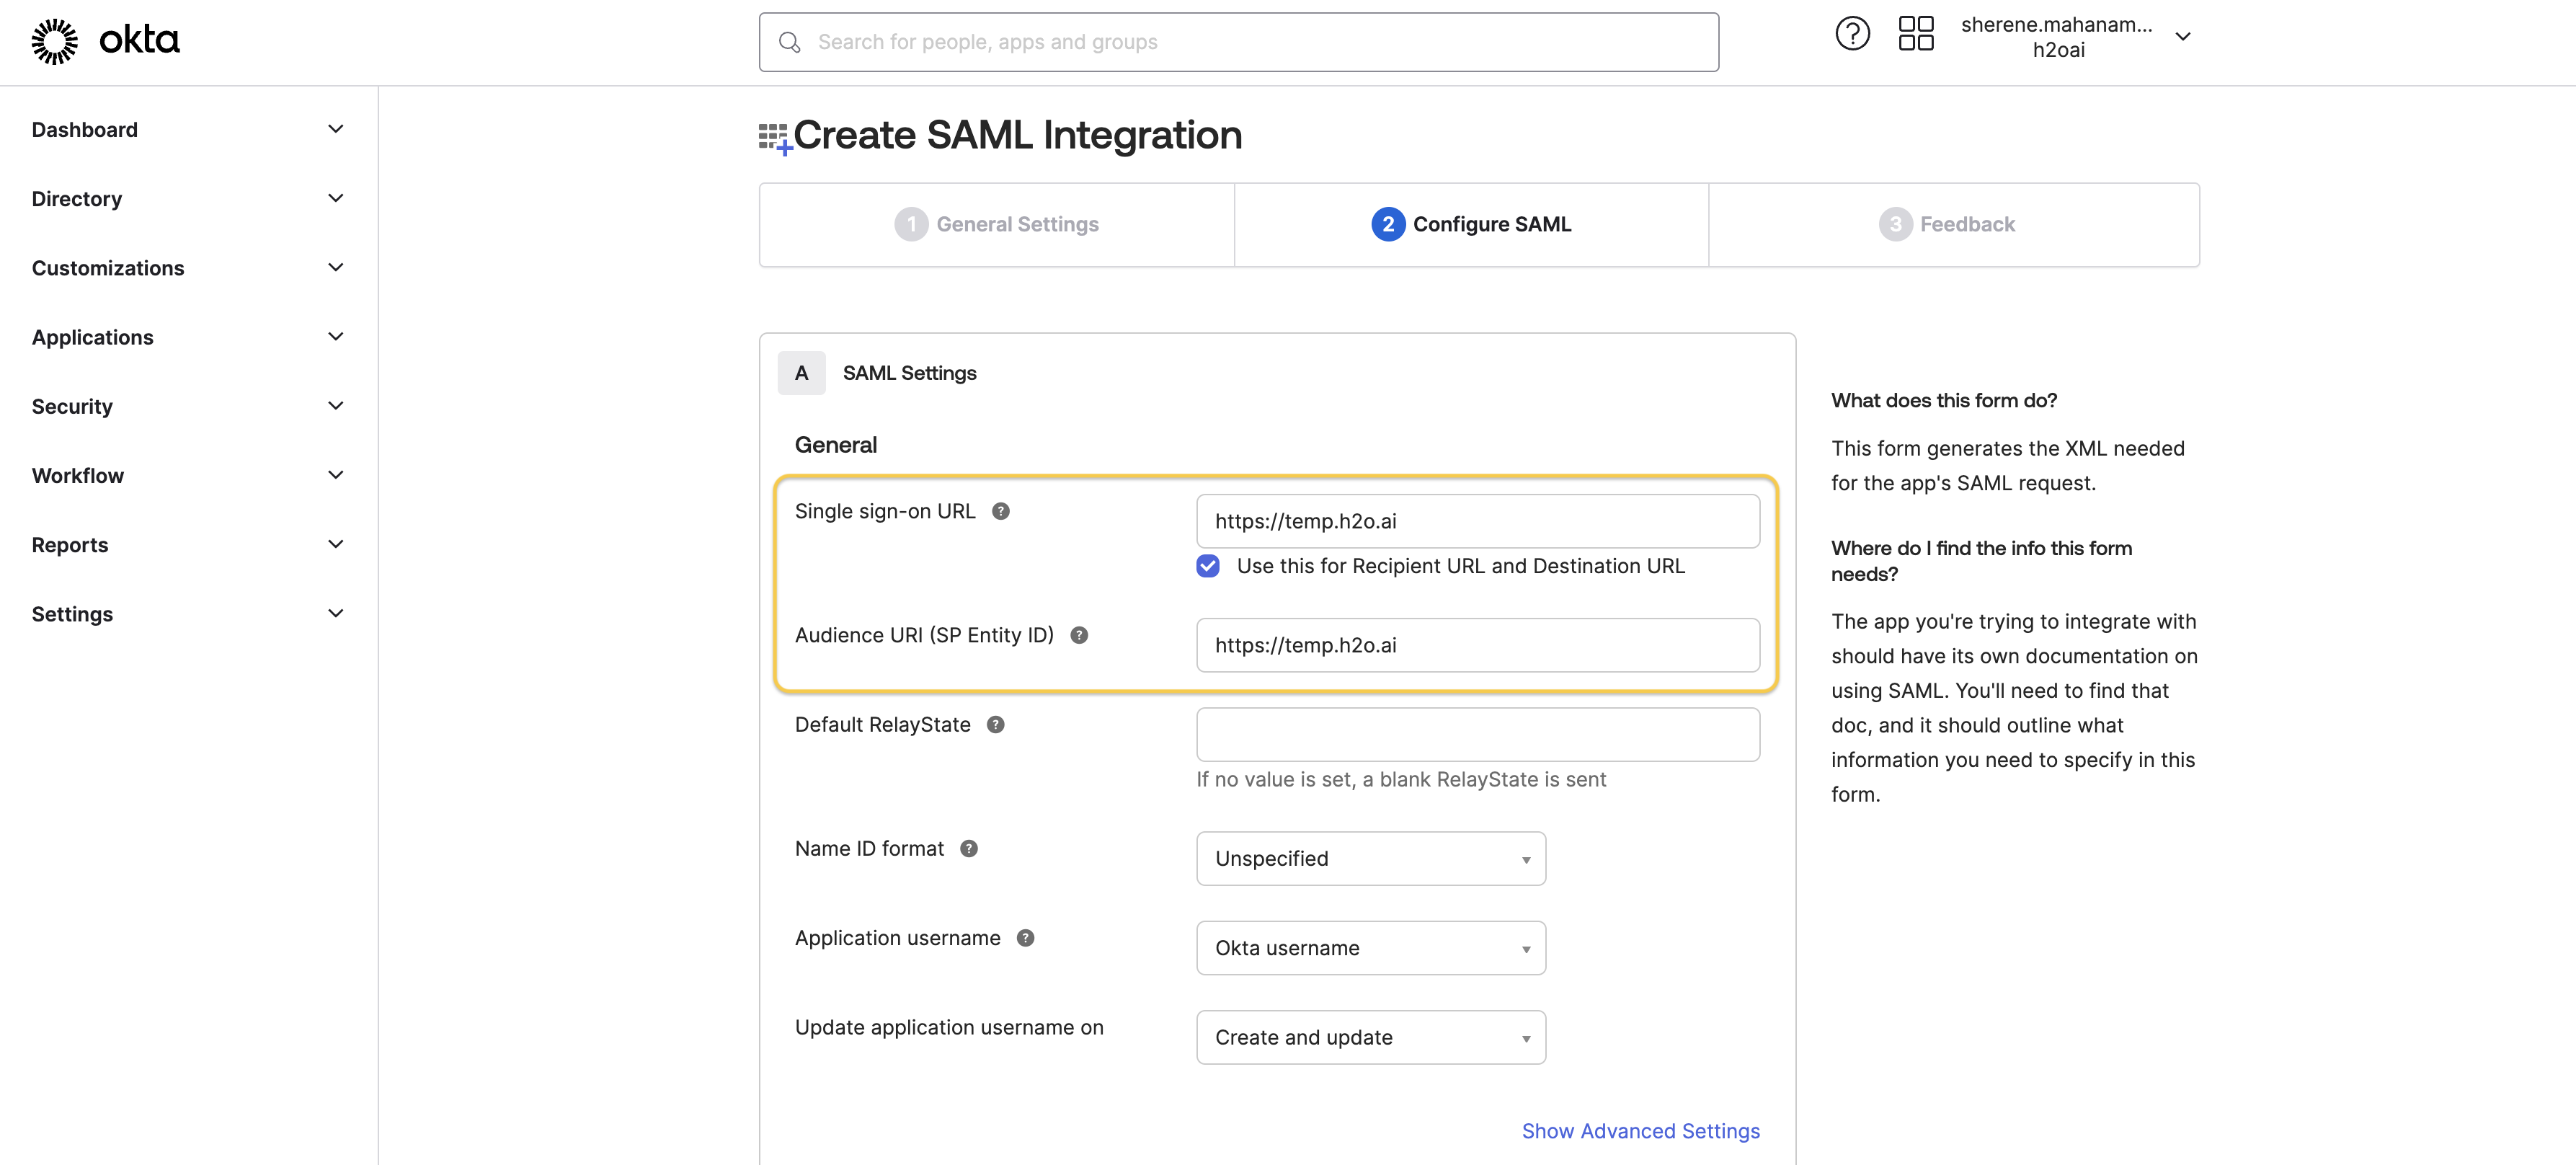
Enter the following SAML settings.
- Single sign-on URL: https://temp.h2o.ai
- Audience URI (SP Entity ID): https://temp.h2o.ai
Add the following attribute mappings under Attribute Statements and click Next.
Name Name Format Value firstName Unspecified user.firstName lastName Unspecified user.lastName email Unspecified user.email 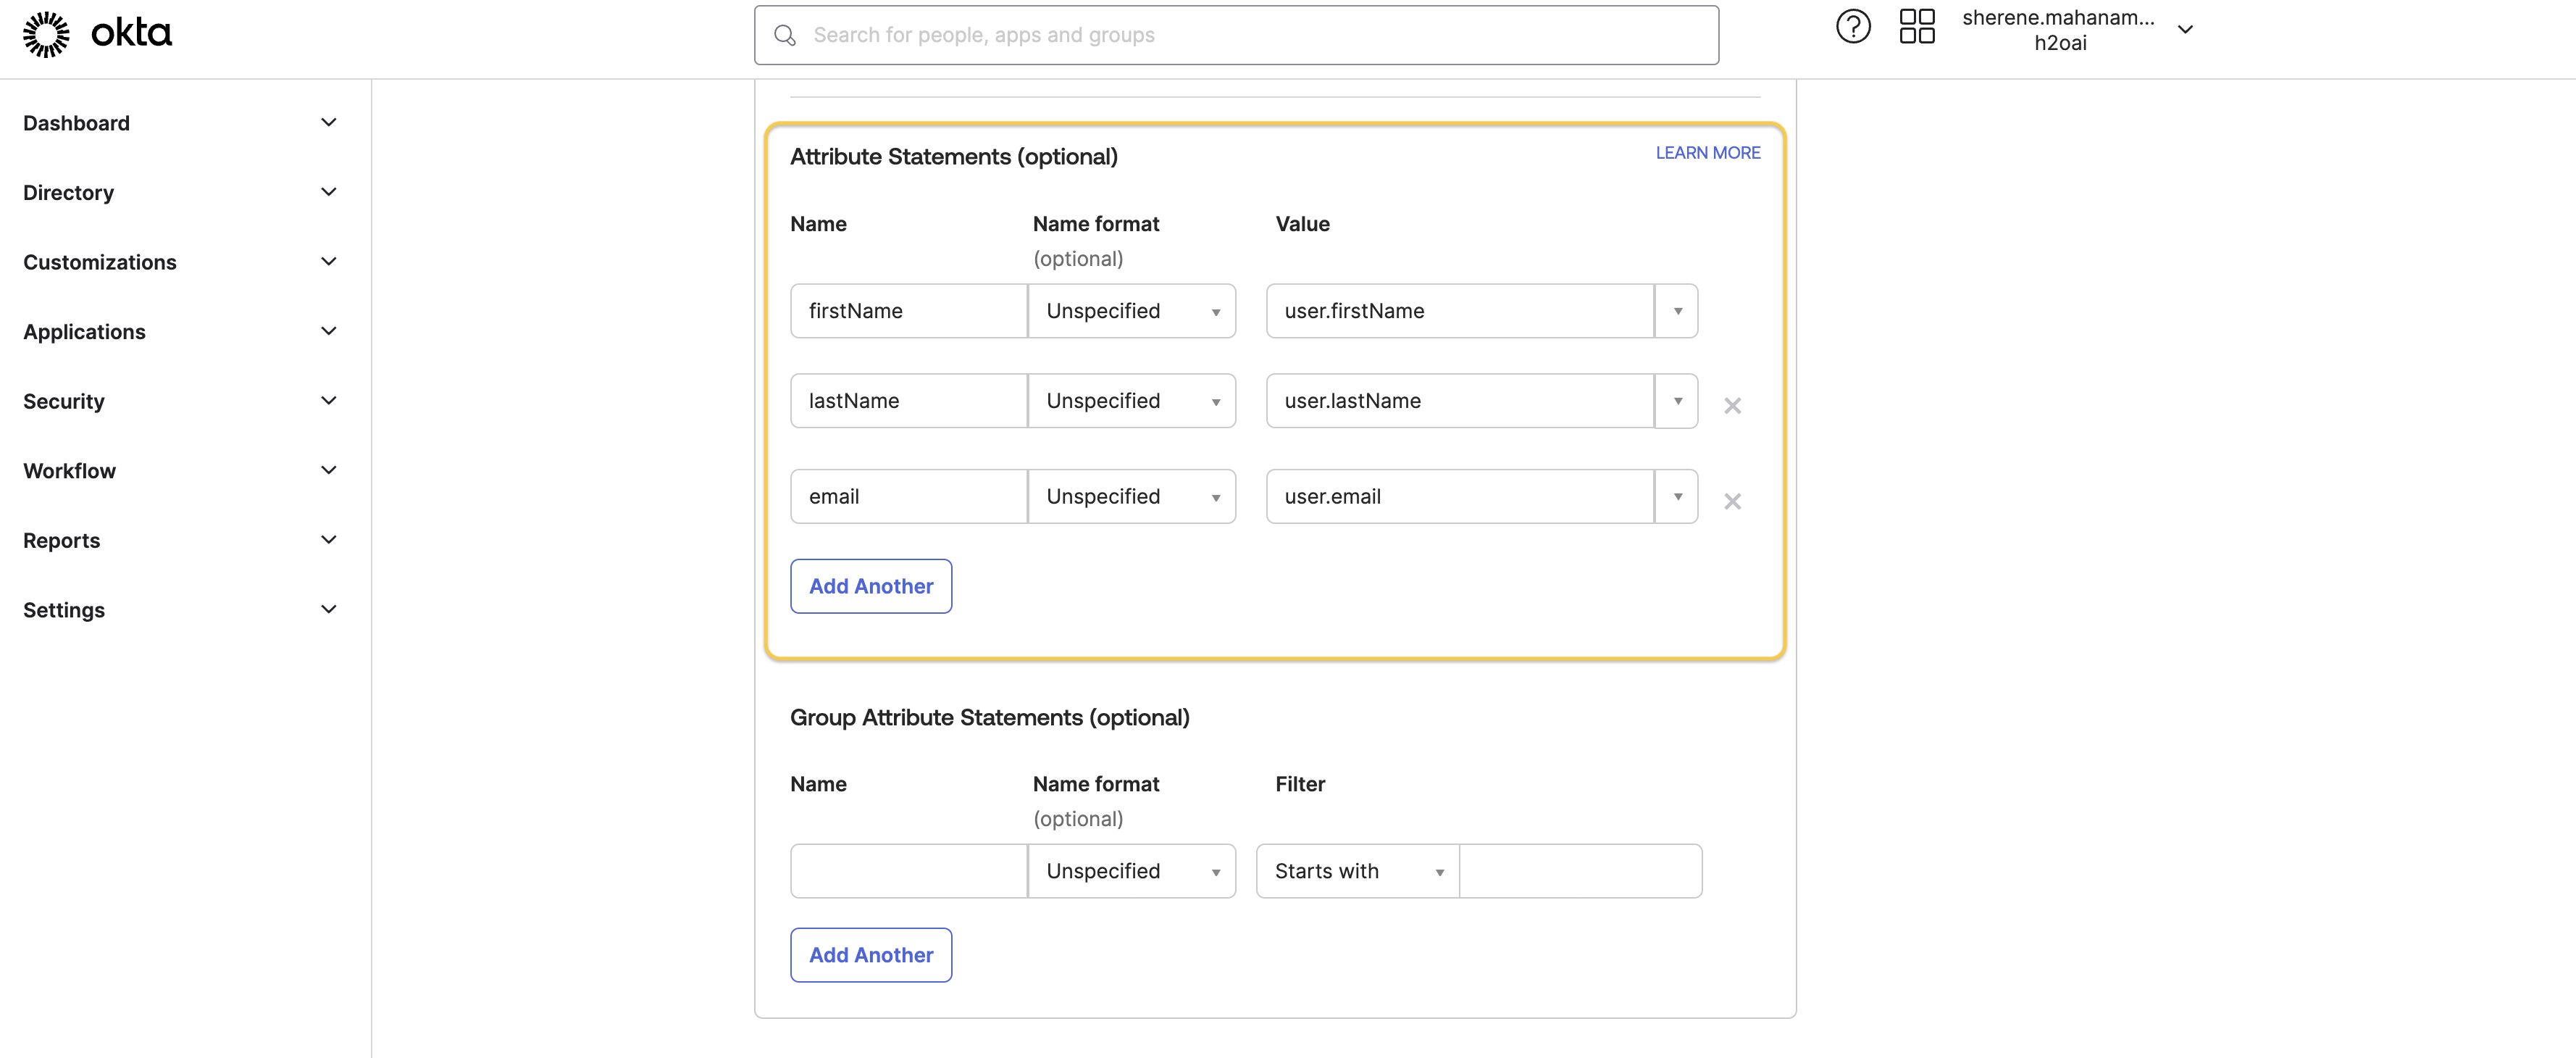
Select I'm an Okta customer adding an internal app and click Finish.
Get the SAML setup details
On the Sign On tab of your application, click the View SAML setup instructions button found on the right side of the screen.
You will be redirected to a screen with setup instructions. Make a note of the Identity Provider Single Sign-On URL and the Identity Provider Issuer. You will be needing these values later.
Click the Download Certificate button found under the third step.
Convert the certificate to a
.pemfile by navigating to the.certlocation on your machine and running the following command.openssl x509 -in okta.cert -out example.pem -outform PEM.Send the Identity Provider Single Sign-On URL value, Identity Provider Issuer value, and the
.pemfile to H2O. You will then recieve information and a certificate from H2O.
Set up SAML authentication
Expand the Applications section on the left-navigation pane of the Okta admin console, and select Applications.
Find and click on the SAML application you created previously.
Navigate to the General tab and click Edit under SAML Settings.
Click Next to move to the Configure SAML tab and enter the Single sign-on URL and Audience URI (SP Entity ID) values you recieved from H2O.
Click Show Advanced Settings.
Locate the Signature Certificate field and click Browse Files. Upload the certificate you recieved from H2O.

Click Next, and then click Finish.
You have now configured H2O Managed Cloud to trust Okta as an IdP. You can navigate to the Assignments tab of your SAML application on Okta, and assign users to the application. This will enable the assigned users to log in to H2O Managed Cloud using their Okta credentials.
- Submit and view feedback for this page
- Send feedback about H2O AI Cloud | Docs to cloud-feedback@h2o.ai