Extractors
Overview
Extractors convert unstructured document content into structured JSON data. Define a JSON schema that specifies the fields and data types you want to capture, then apply the extractor to documents such as CVs, invoices, Form 10-Ks, or scanned images to retrieve the information in a consistent format.
Access the Extractors page
To access the Extractors page, in the Enterprise h2oGPTe navigation menu, click Extractors.
The Extractors page provides a centralized location to create, view, and manage all extractors. The following numbered elements are available on the page:
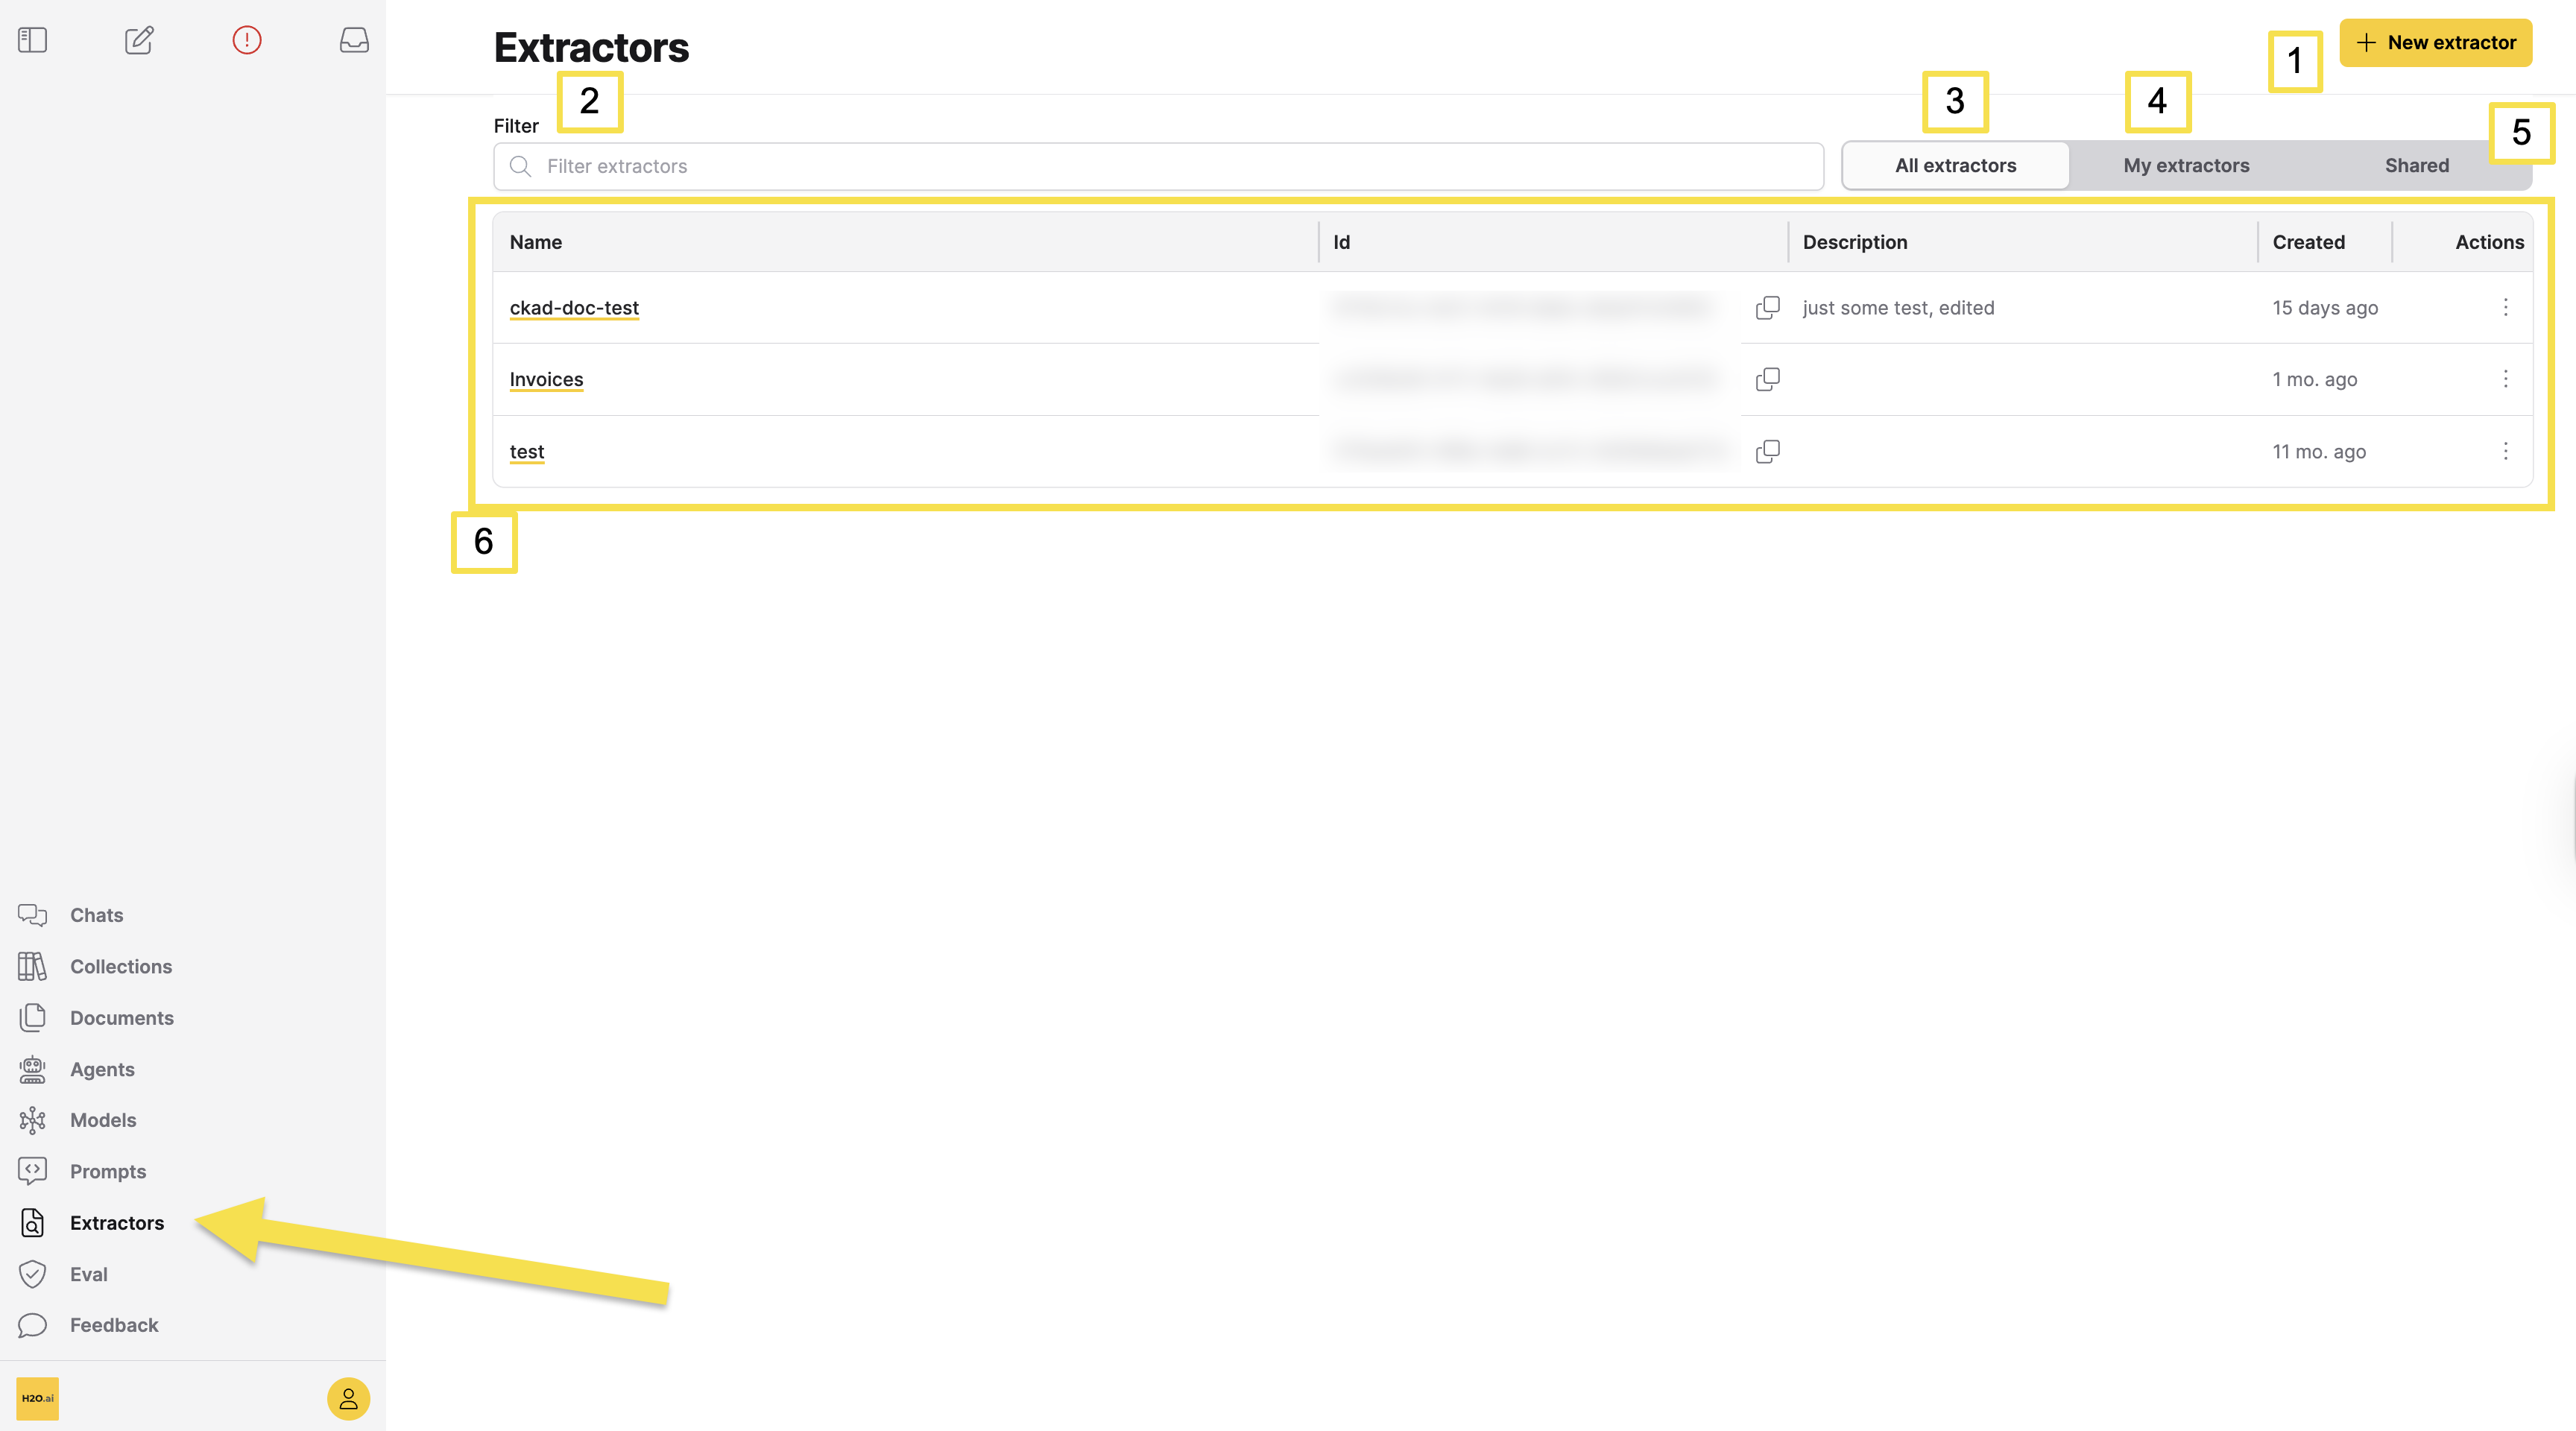
| Element | Description |
|---|---|
| [1] + New extractor | Opens the extractor creation form. |
| [2] Filter extractors | Search extractors by name or description. |
| [3] All extractors | Shows all extractors visible to you, including ones you created and ones shared with you. |
| [4] My extractors | Shows only extractors you created. |
| [5] Shared | Shows extractors shared with you. |
| [6] Extractors table | Lists extractors for the selected tab. Columns: Name (click to view details), Id (click the copy icon to copy), Description, Created, Actions. |
Create an extractor
To create an extractor:
-
Access the Extractors page. For more information, see Access the Extractors page.
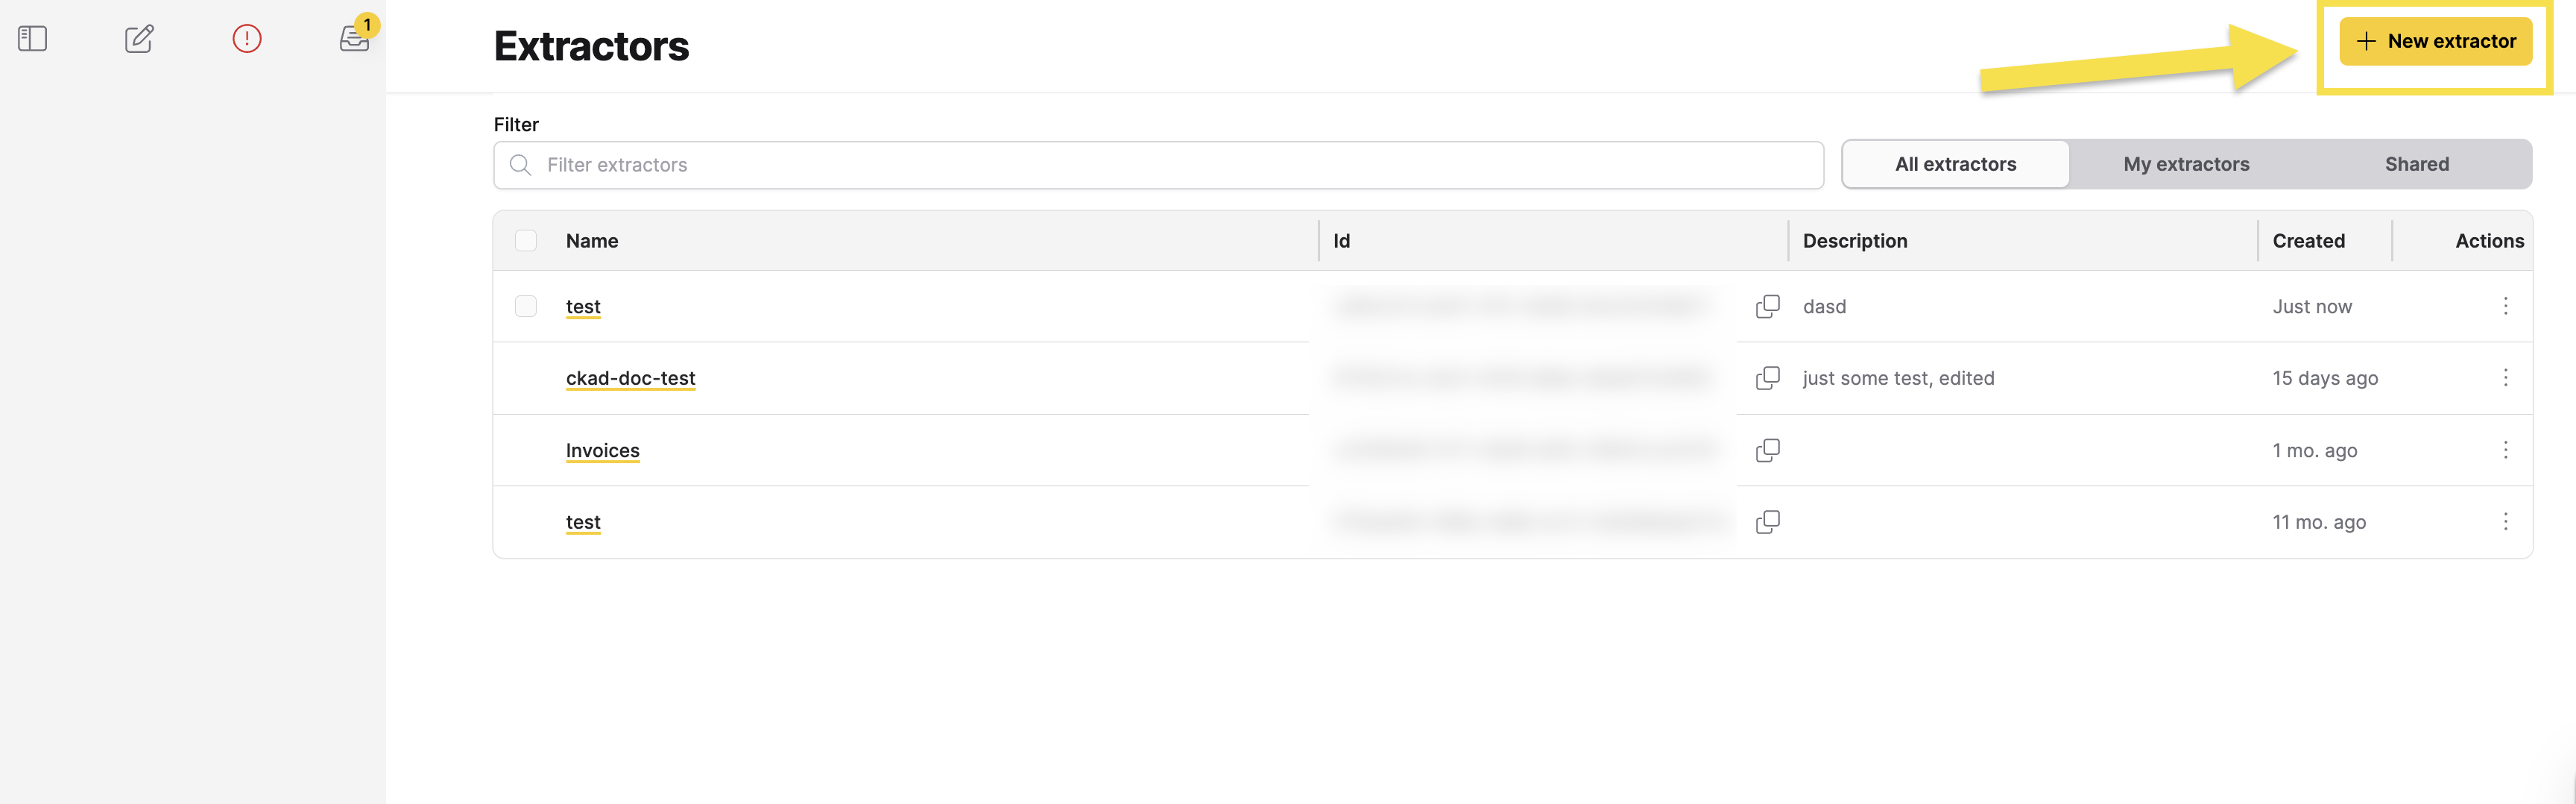
-
Click + New extractor (1).
-
In the Extractor name field, enter a name for the extractor.
-
(Optional) In the Description field, enter a description for the extractor.
-
In the LLM list, select a large language model (LLM) for the extraction task. The list displays model names with estimated processing costs.
-
(Optional) Configure additional extractor settings such as vision, prompts, chunk limits, and guardrails. For details, see Extractor settings.
-
Define the JSON schema for the extractor with one of the following two options:
noteThe JSON schema does not require exact label names to align perfectly with document fields, as the collection's large language model (LLM) can interpret and infer label purposes based on context. This allows the model to understand and map various label names, even if there are minor differences in terminology, to their intended data points. The LLM uses its interpretive capability to match schema labels with relevant content, even when exact terms differ, similar to how a human deduces what a field captures.
- Option 1 (JSON schema builder)
- Option 2 (JSON schema code)
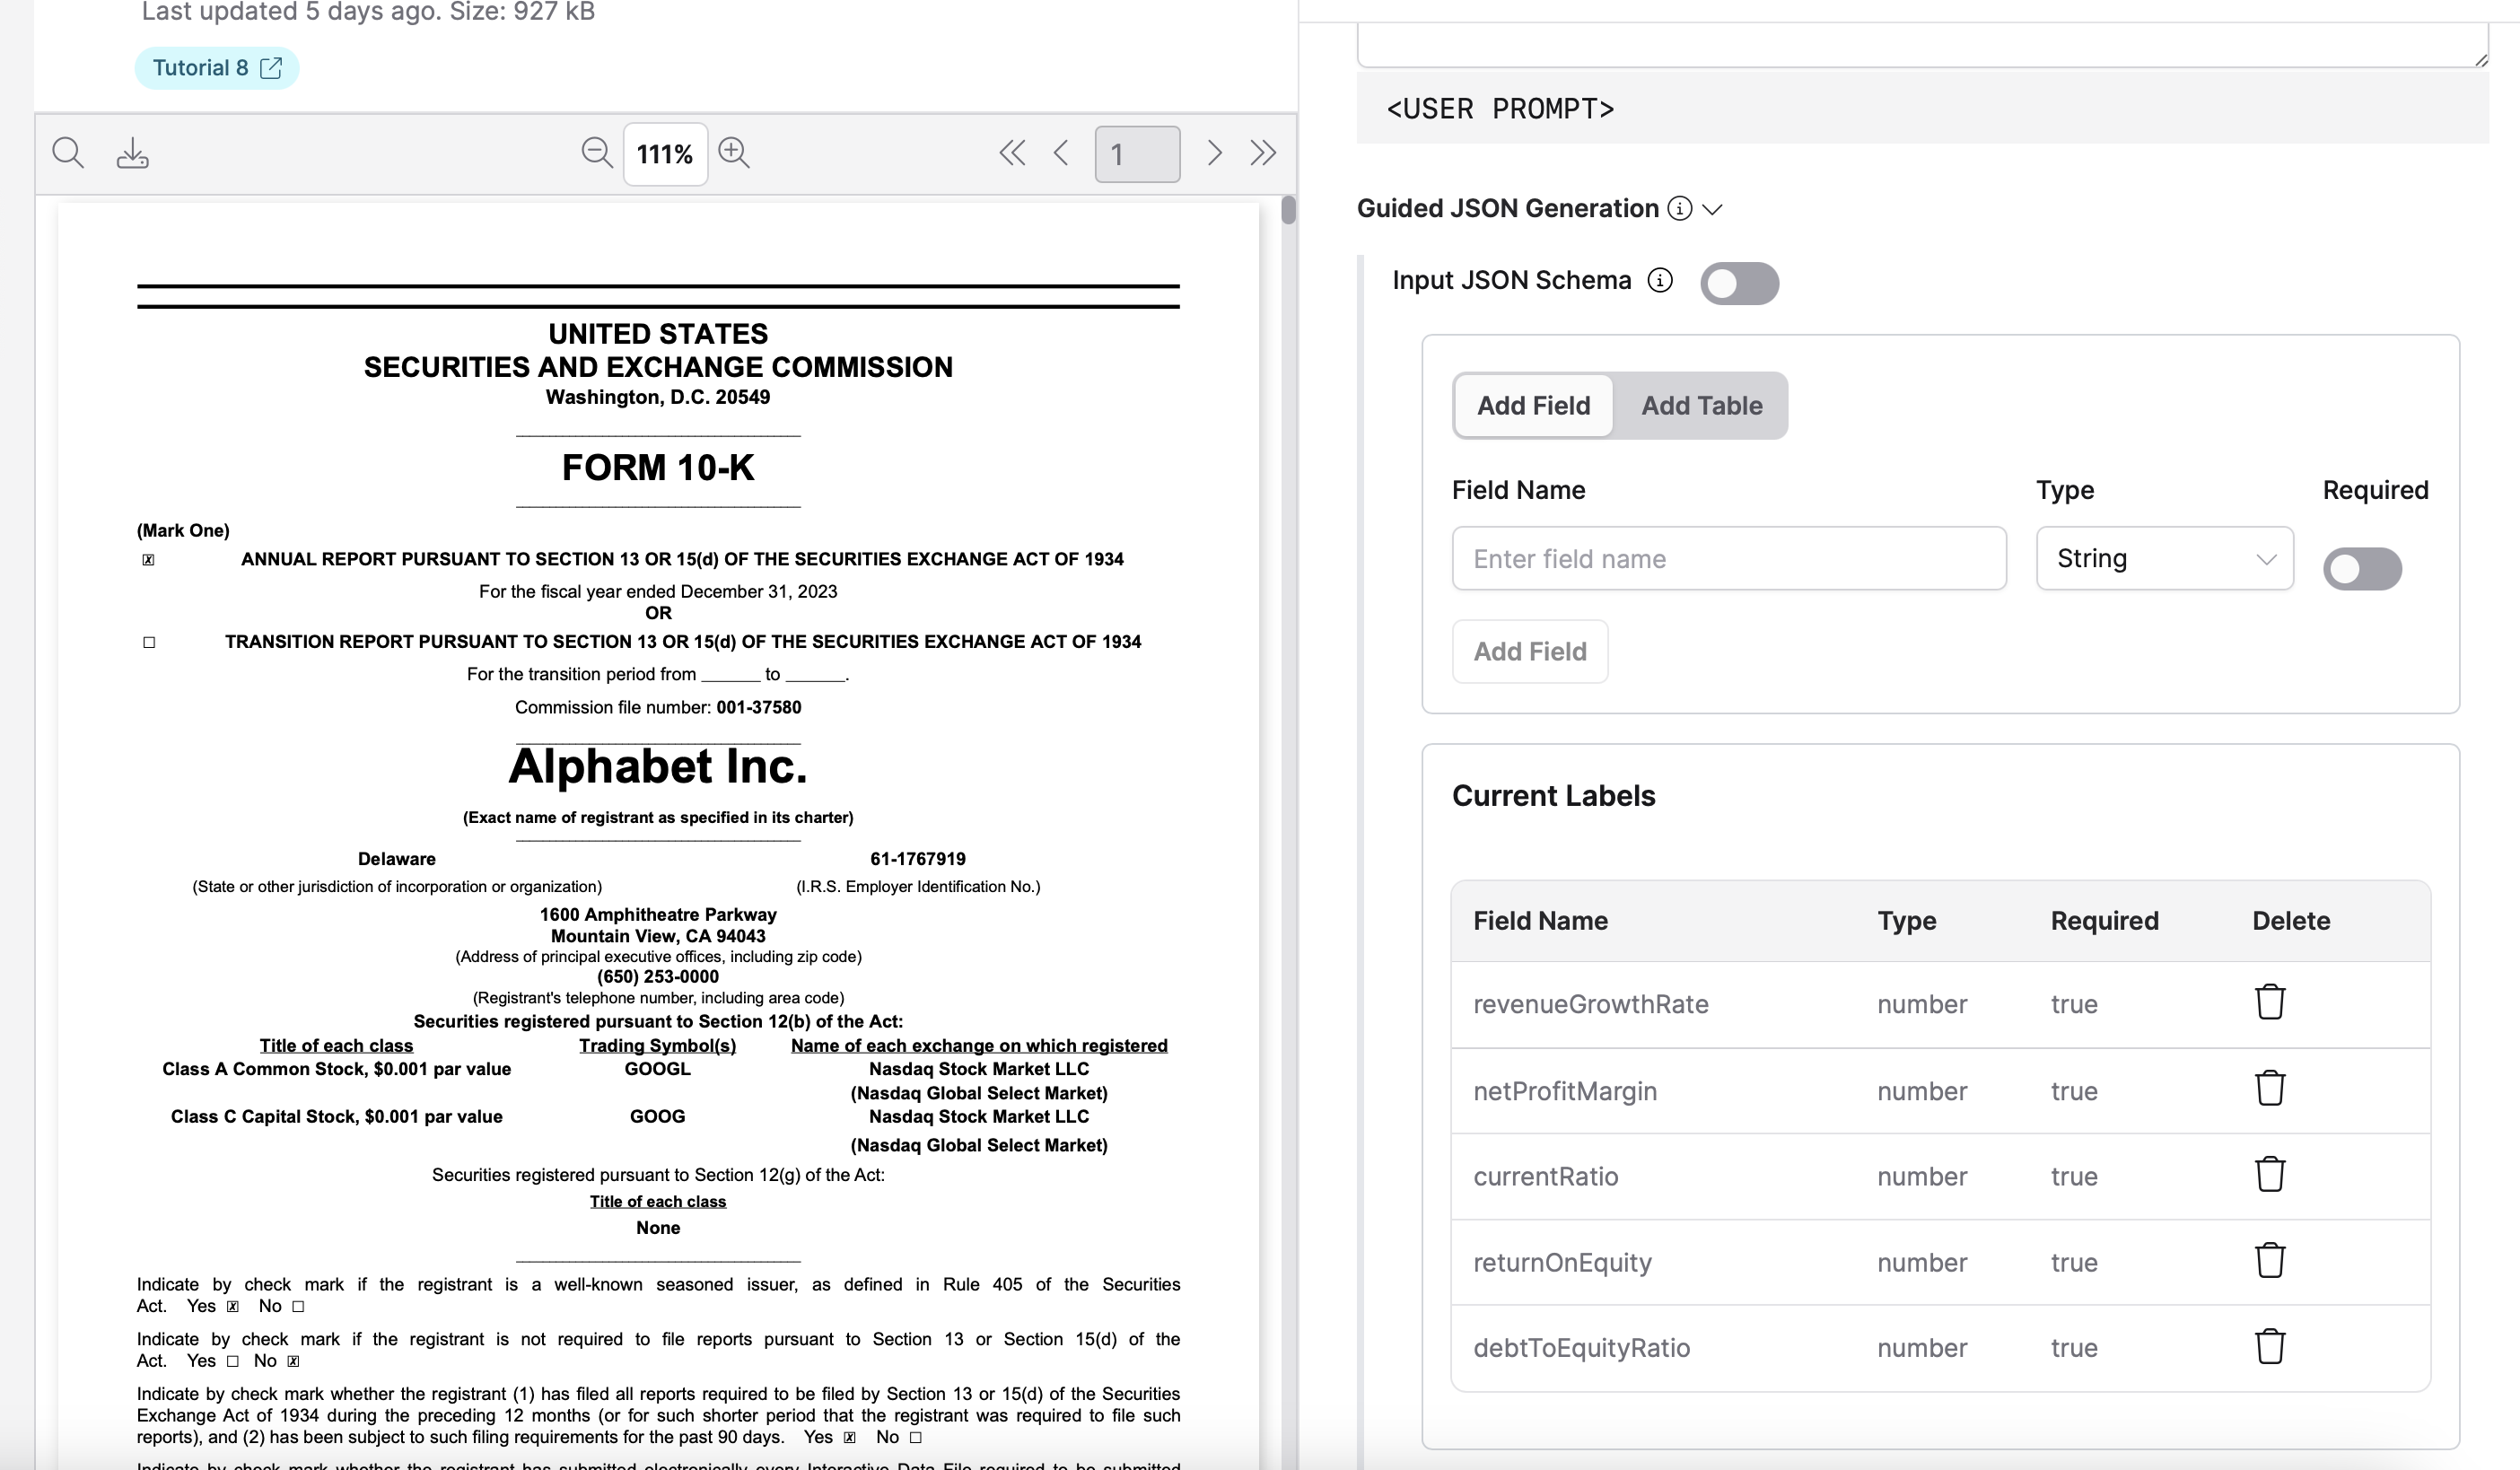
You can build the JSON schema for the extractor using the JSON schema builder.
- In the Input JSON Schema section, ensure the toggle is off (builder mode is active).
- Click Add Field or Add Table to add fields or tables to your schema.
- For each field, define the following:
- Field Name: Enter the name of the field.
- Type: Select the data type (for example, String, Number, Boolean).
- Required: Toggle this option if the field is required.
- Click Add Field to add additional fields as needed.
For example:
You can define the actual JSON schema code for the extractor:
-
In the Input JSON Schema section, click the toggle to enable code mode.
-
In the JSON schema box, enter a valid JSON schema. For example:
{"type": "object","properties": {"revenueGrowthRate": {"type": "number","description": "The growth rate of revenue."},"netProfitMargin": {"type": "number","description": "The company's profit margin."},"currentRatio": {"type": "number","description": "The company's liquidity position."},"returnOnEquity": {"type": "number","description": "The efficiency in generating profit from equity."},"debtToEquityRatio": {"type": "number","description": "The proportion of debt to shareholders' equity."}},"required": ["revenueGrowthRate","netProfitMargin","currentRatio","returnOnEquity","debtToEquityRatio"]}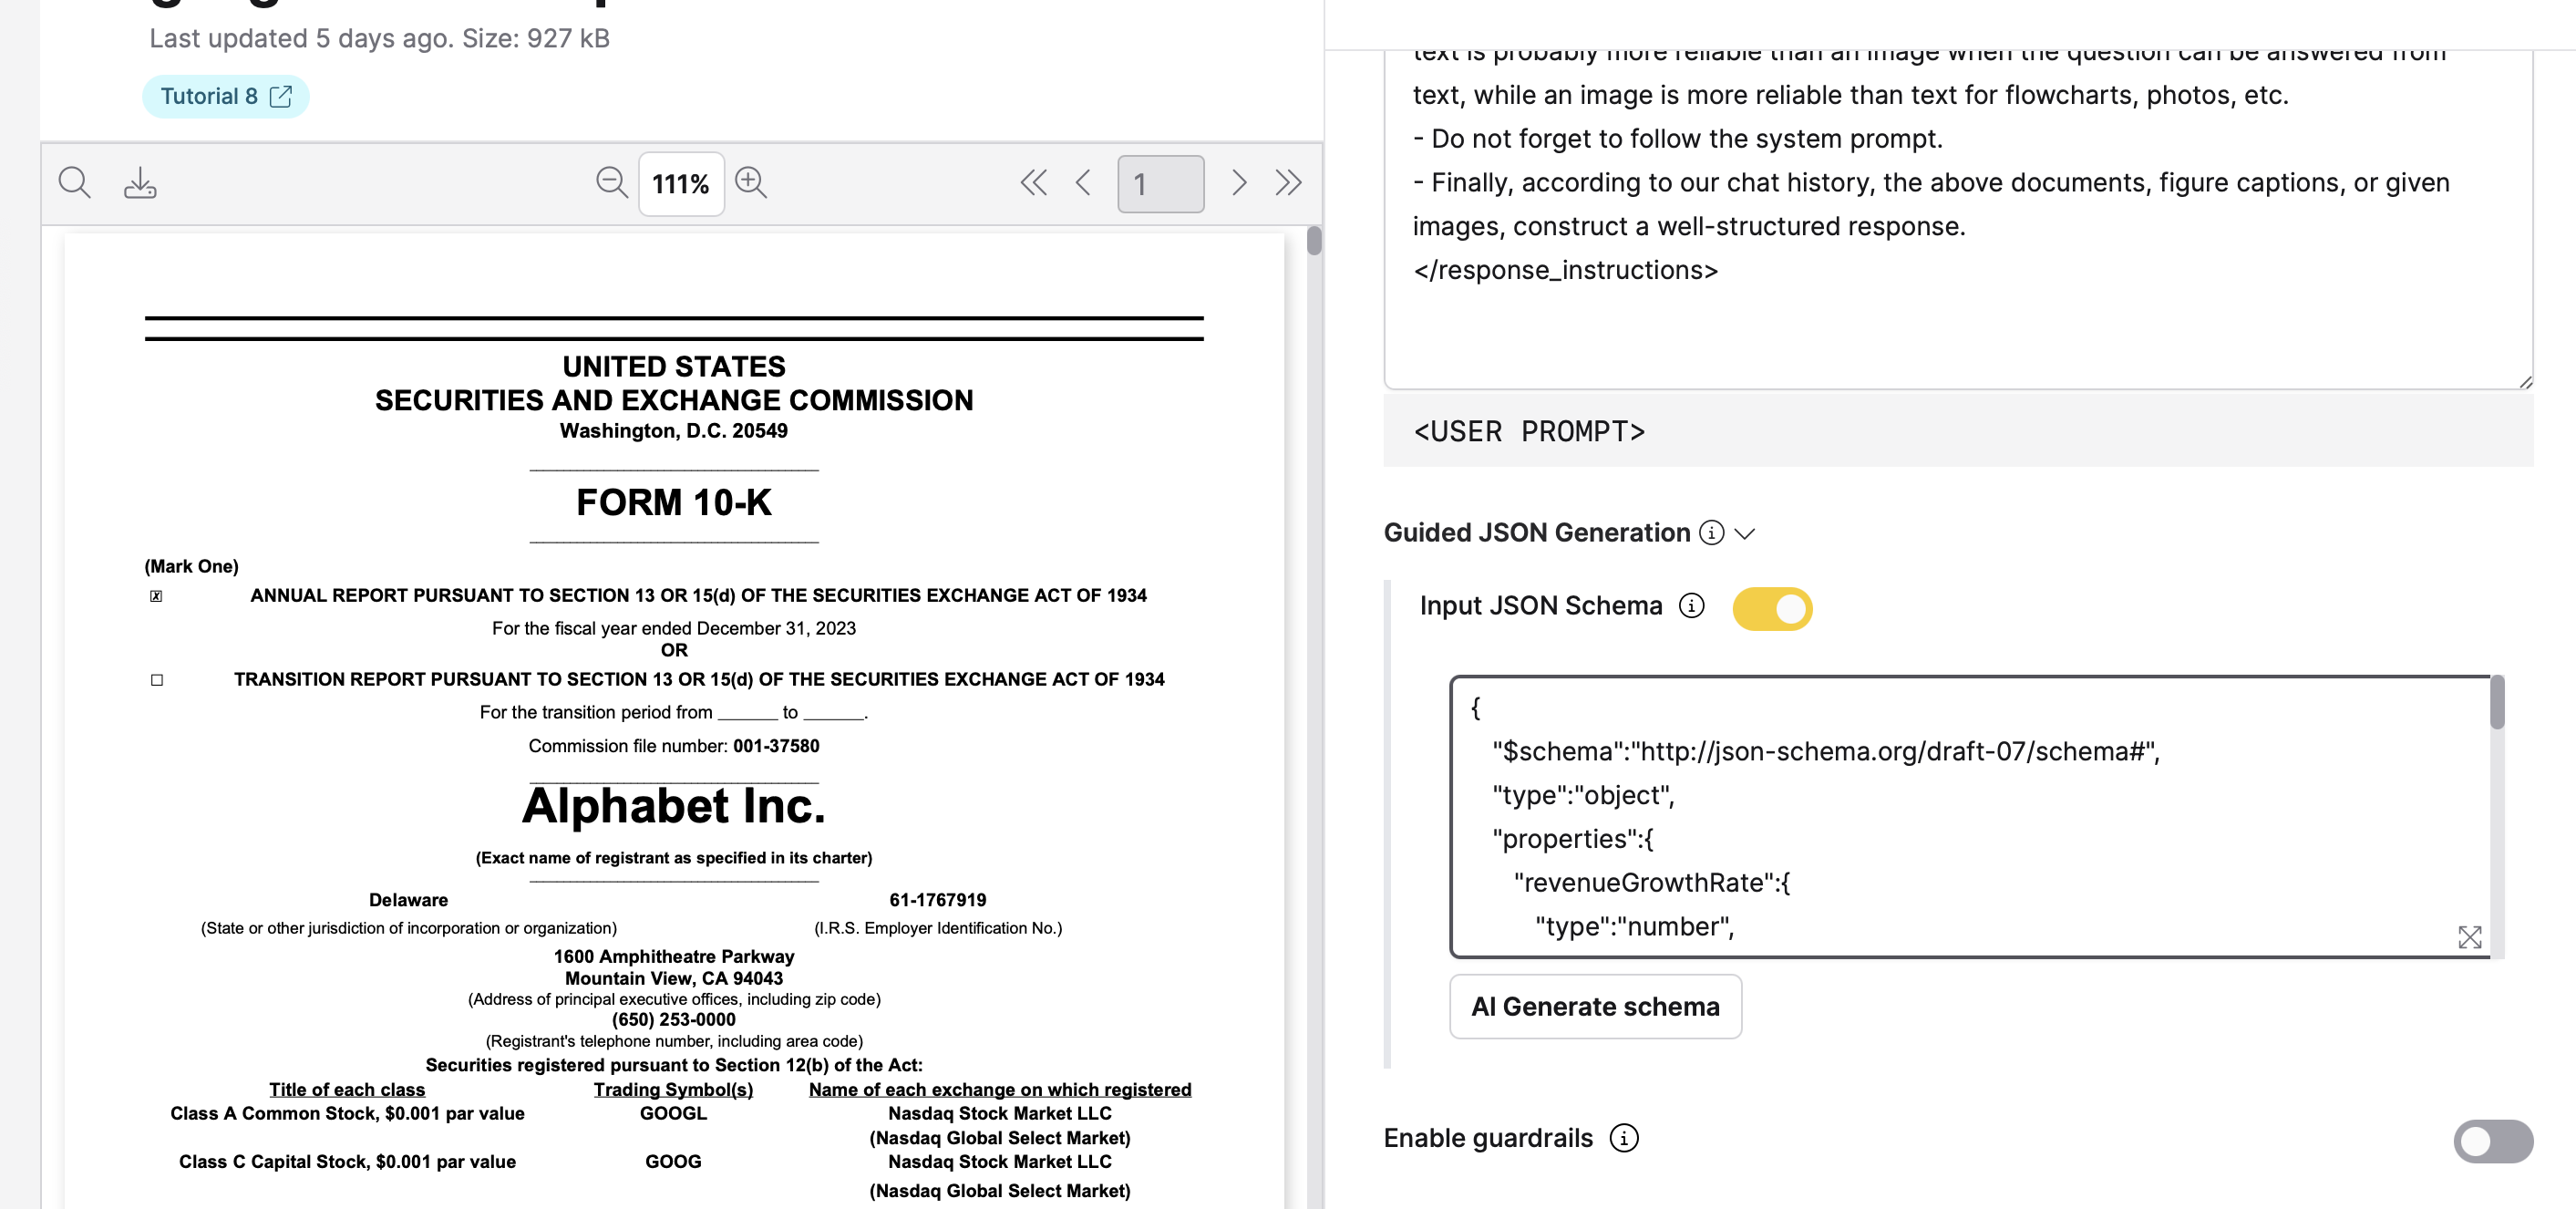
-
(Optional) In the Current Labels section, add labels to organize and categorize the extractor.
-
Click + Create.
Edit and manage extractors
You can manage extractors using the Actions menu in the Extractors table. Click the vertical ellipsis icon (⋮) in the Actions column for any extractor to access the following options:
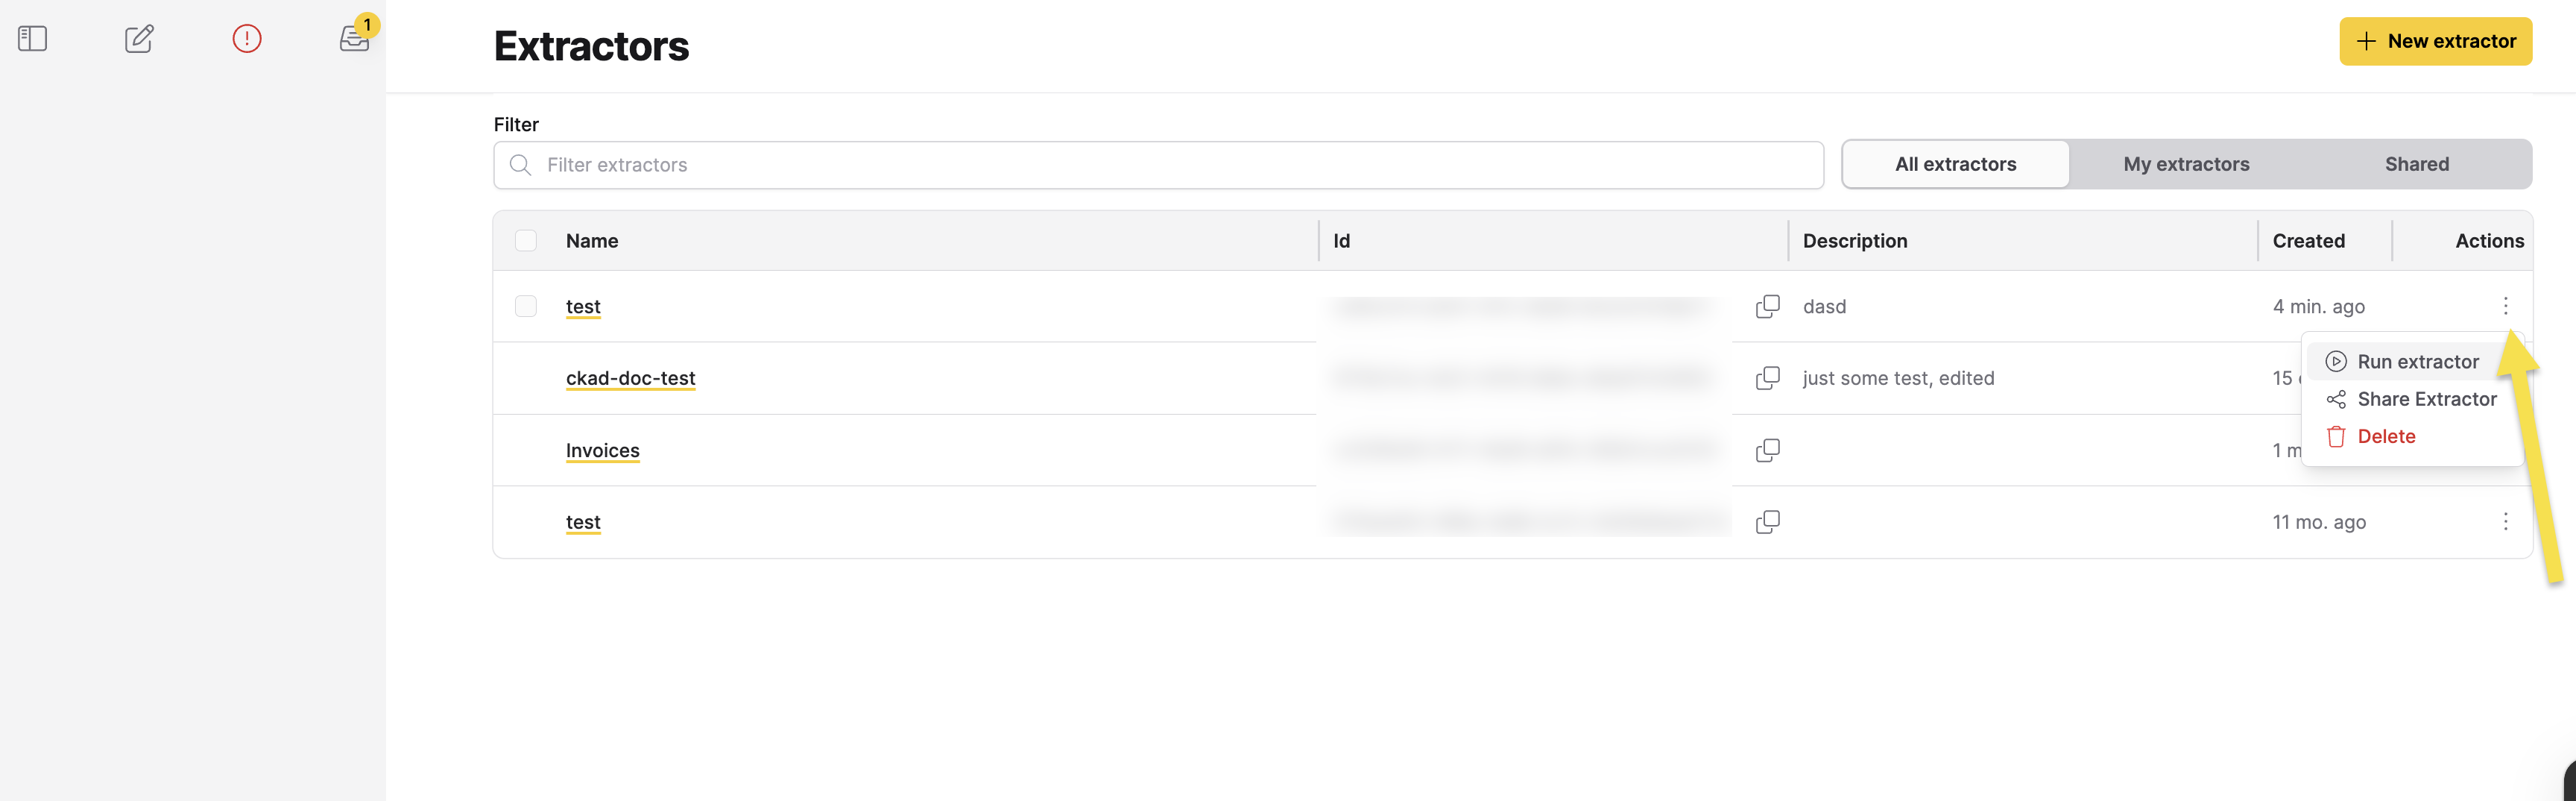
- Run extractor: Execute the extractor on a selected collection.
- Share Extractor: Manage access permissions for the extractor.
- Delete: Permanently remove the extractor.
Run extractor
To run an extractor on a collection:
- In the Extractors table, click the vertical ellipsis icon (⋮) in the Actions column for the extractor you want to run.
- Click Run extractor.
- In the Run dialog, select a collection from the Select a collection dropdown.
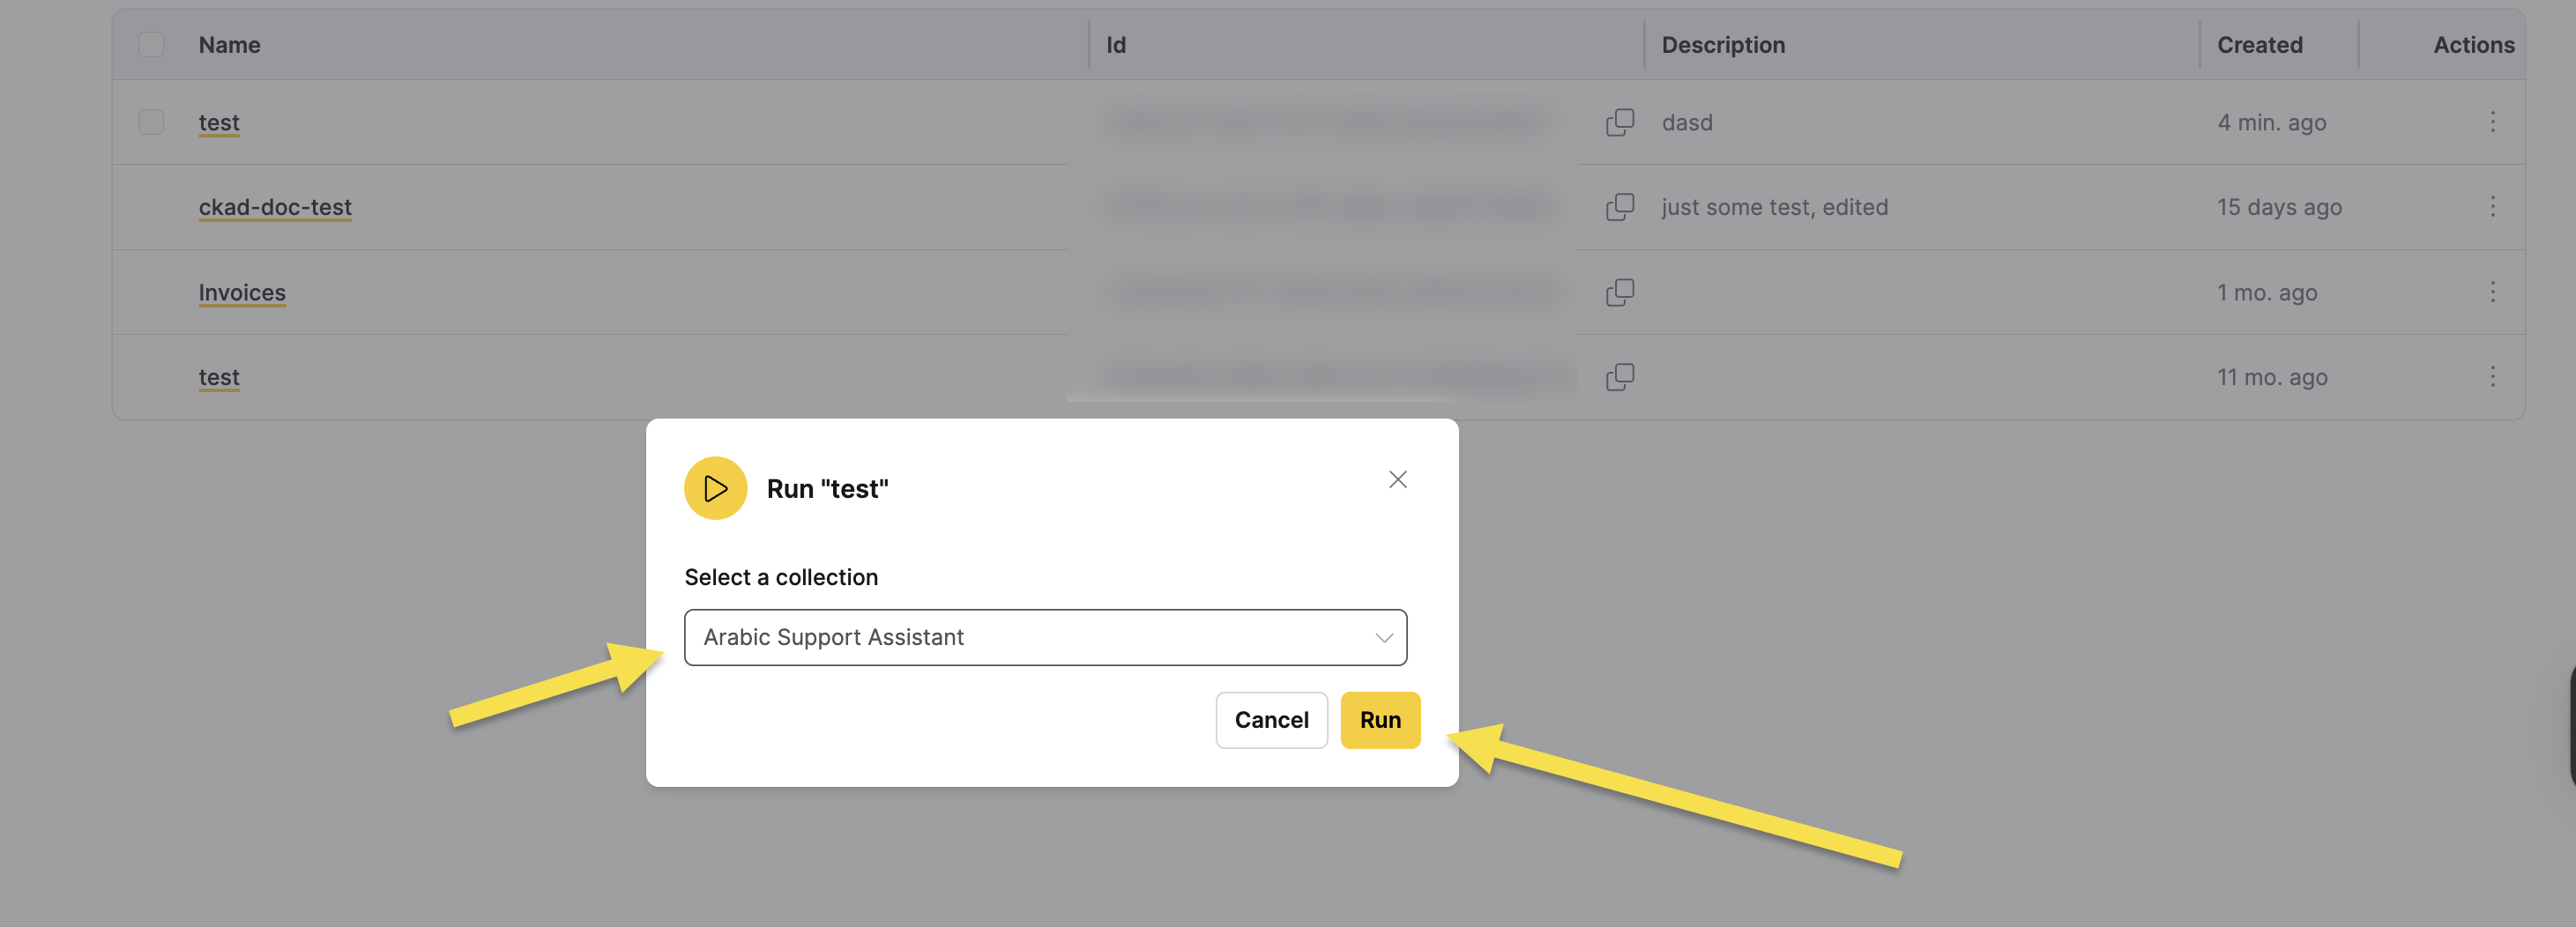
- Click Run to execute the extractor on the selected collection.
Share extractor
To share an extractor and manage access permissions:
- In the Extractors table, click the vertical ellipsis icon (⋮) in the Actions column for the extractor you want to share.
- Click Share Extractor.
- In the Share dialog, manage access permissions using the following tabs:
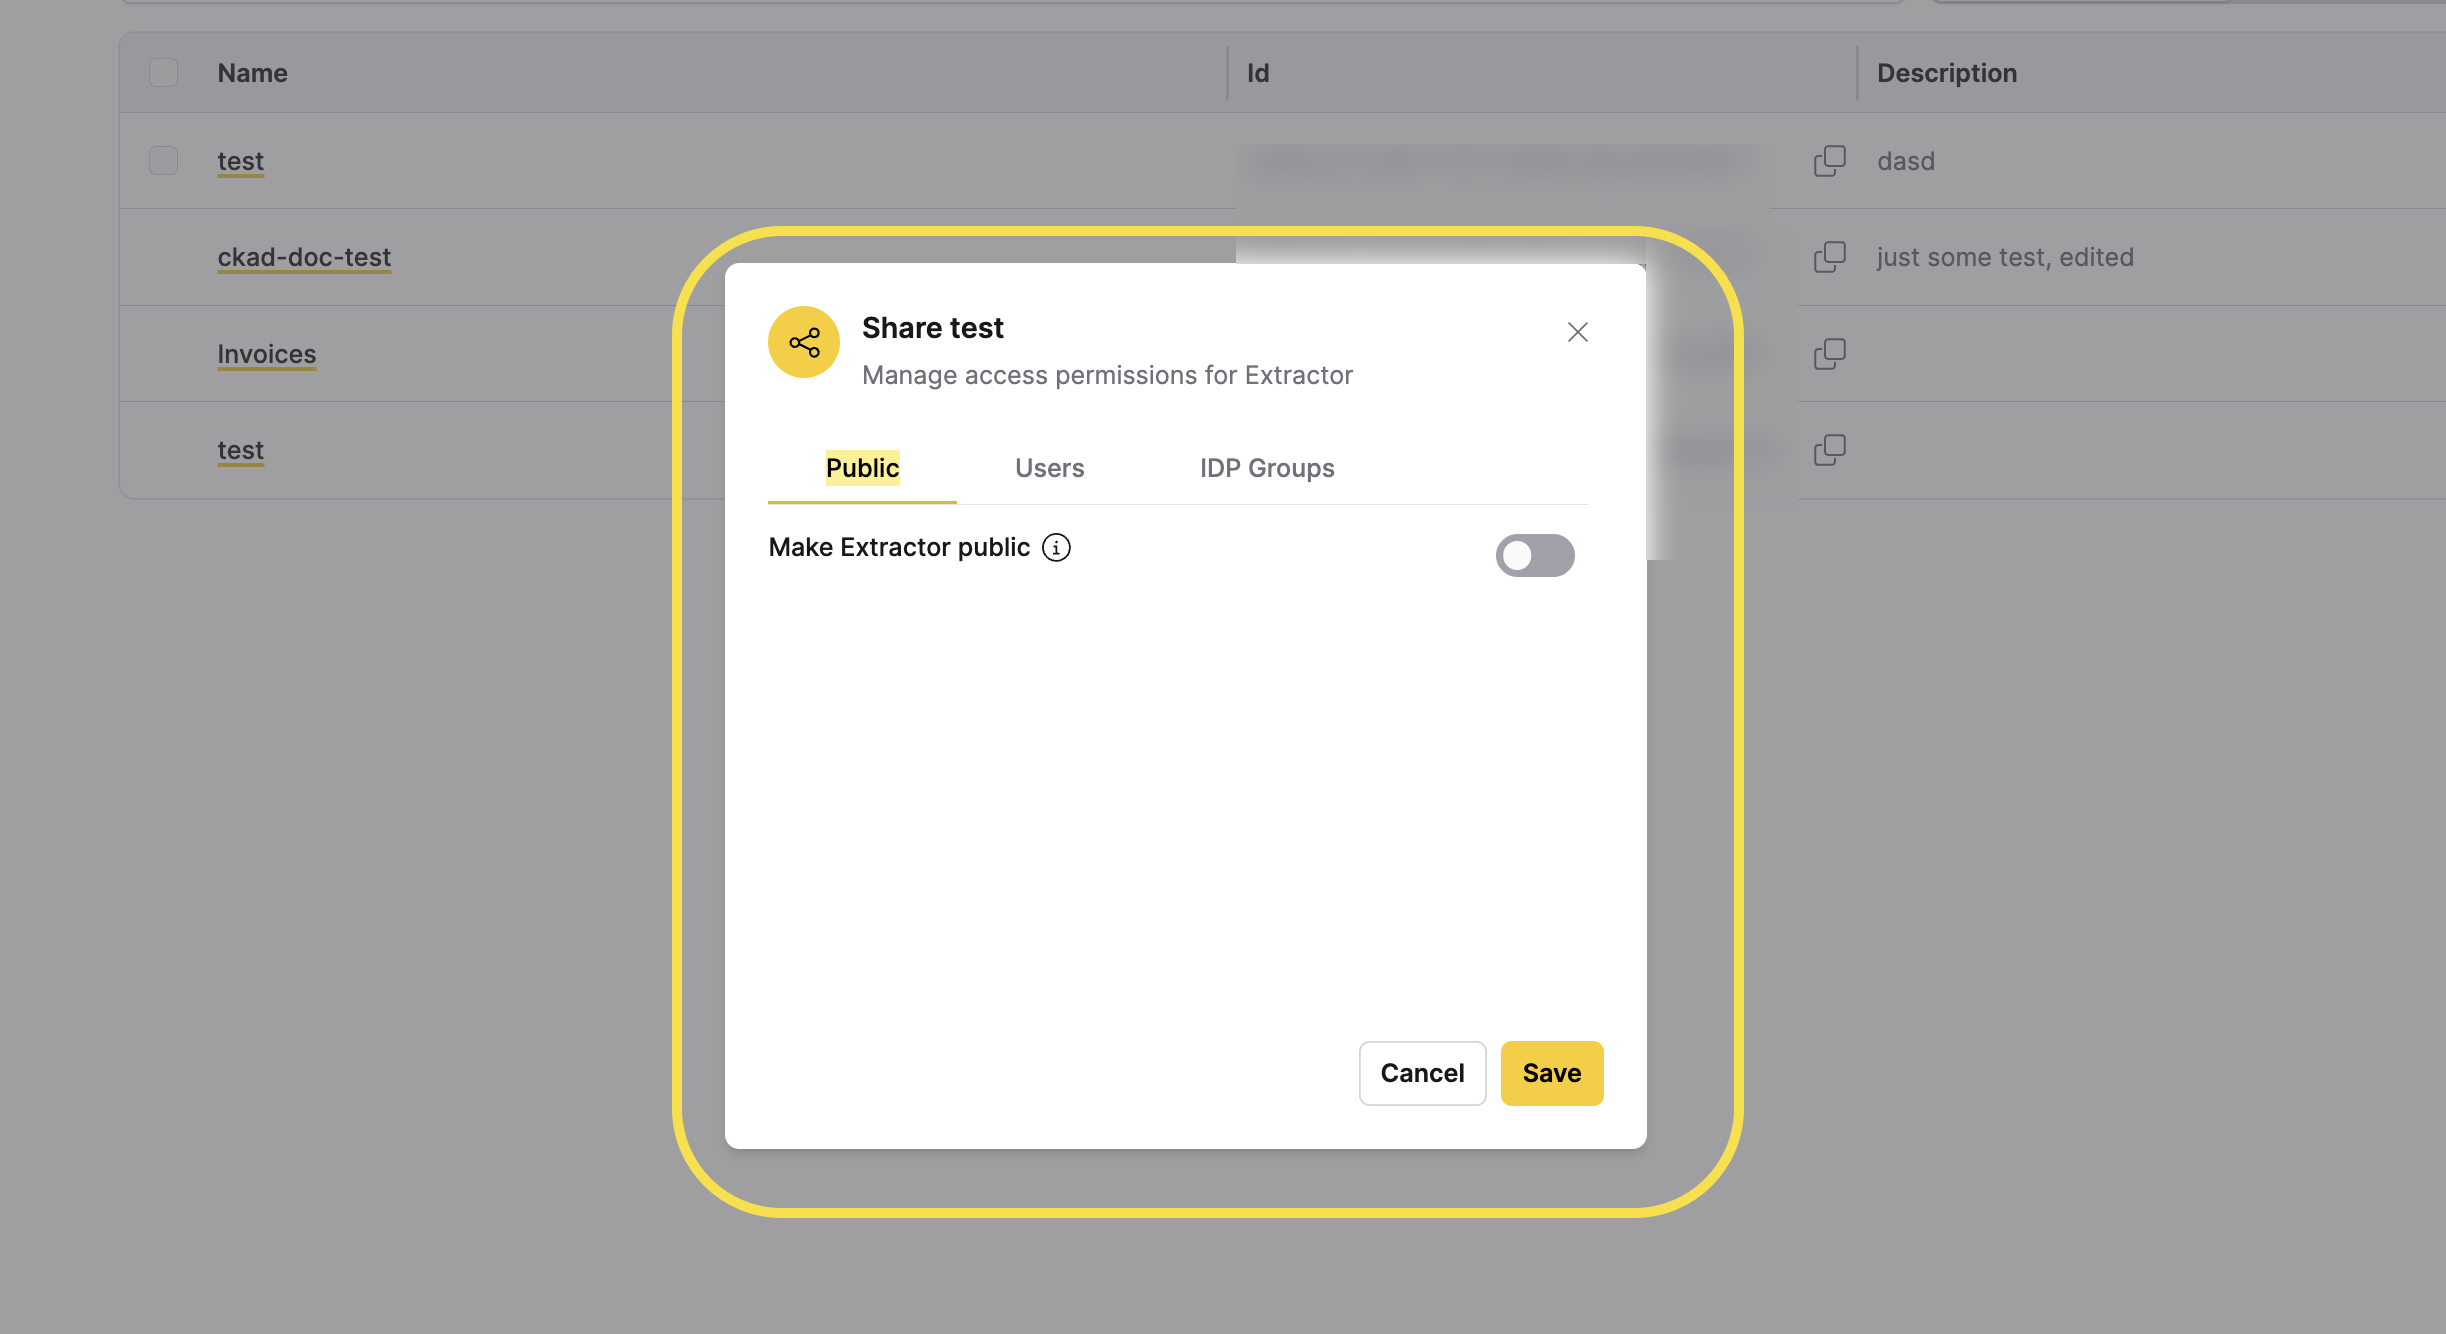
- Public: Make the extractor publicly accessible to all users.
- Toggle Make Extractor public to enable or disable public access.
- Users: Grant specific users access to the extractor.
- IDP Groups: Grant access to identity provider (IDP) groups.
- Public: Make the extractor publicly accessible to all users.
- Click Save to apply your changes, or click Cancel to discard them.
Delete extractor
To delete an extractor:
- In the Extractors table, click the vertical ellipsis icon (⋮) in the Actions column for the extractor you want to delete.
- Click Delete.
- In the confirmation dialog, review the warning message.
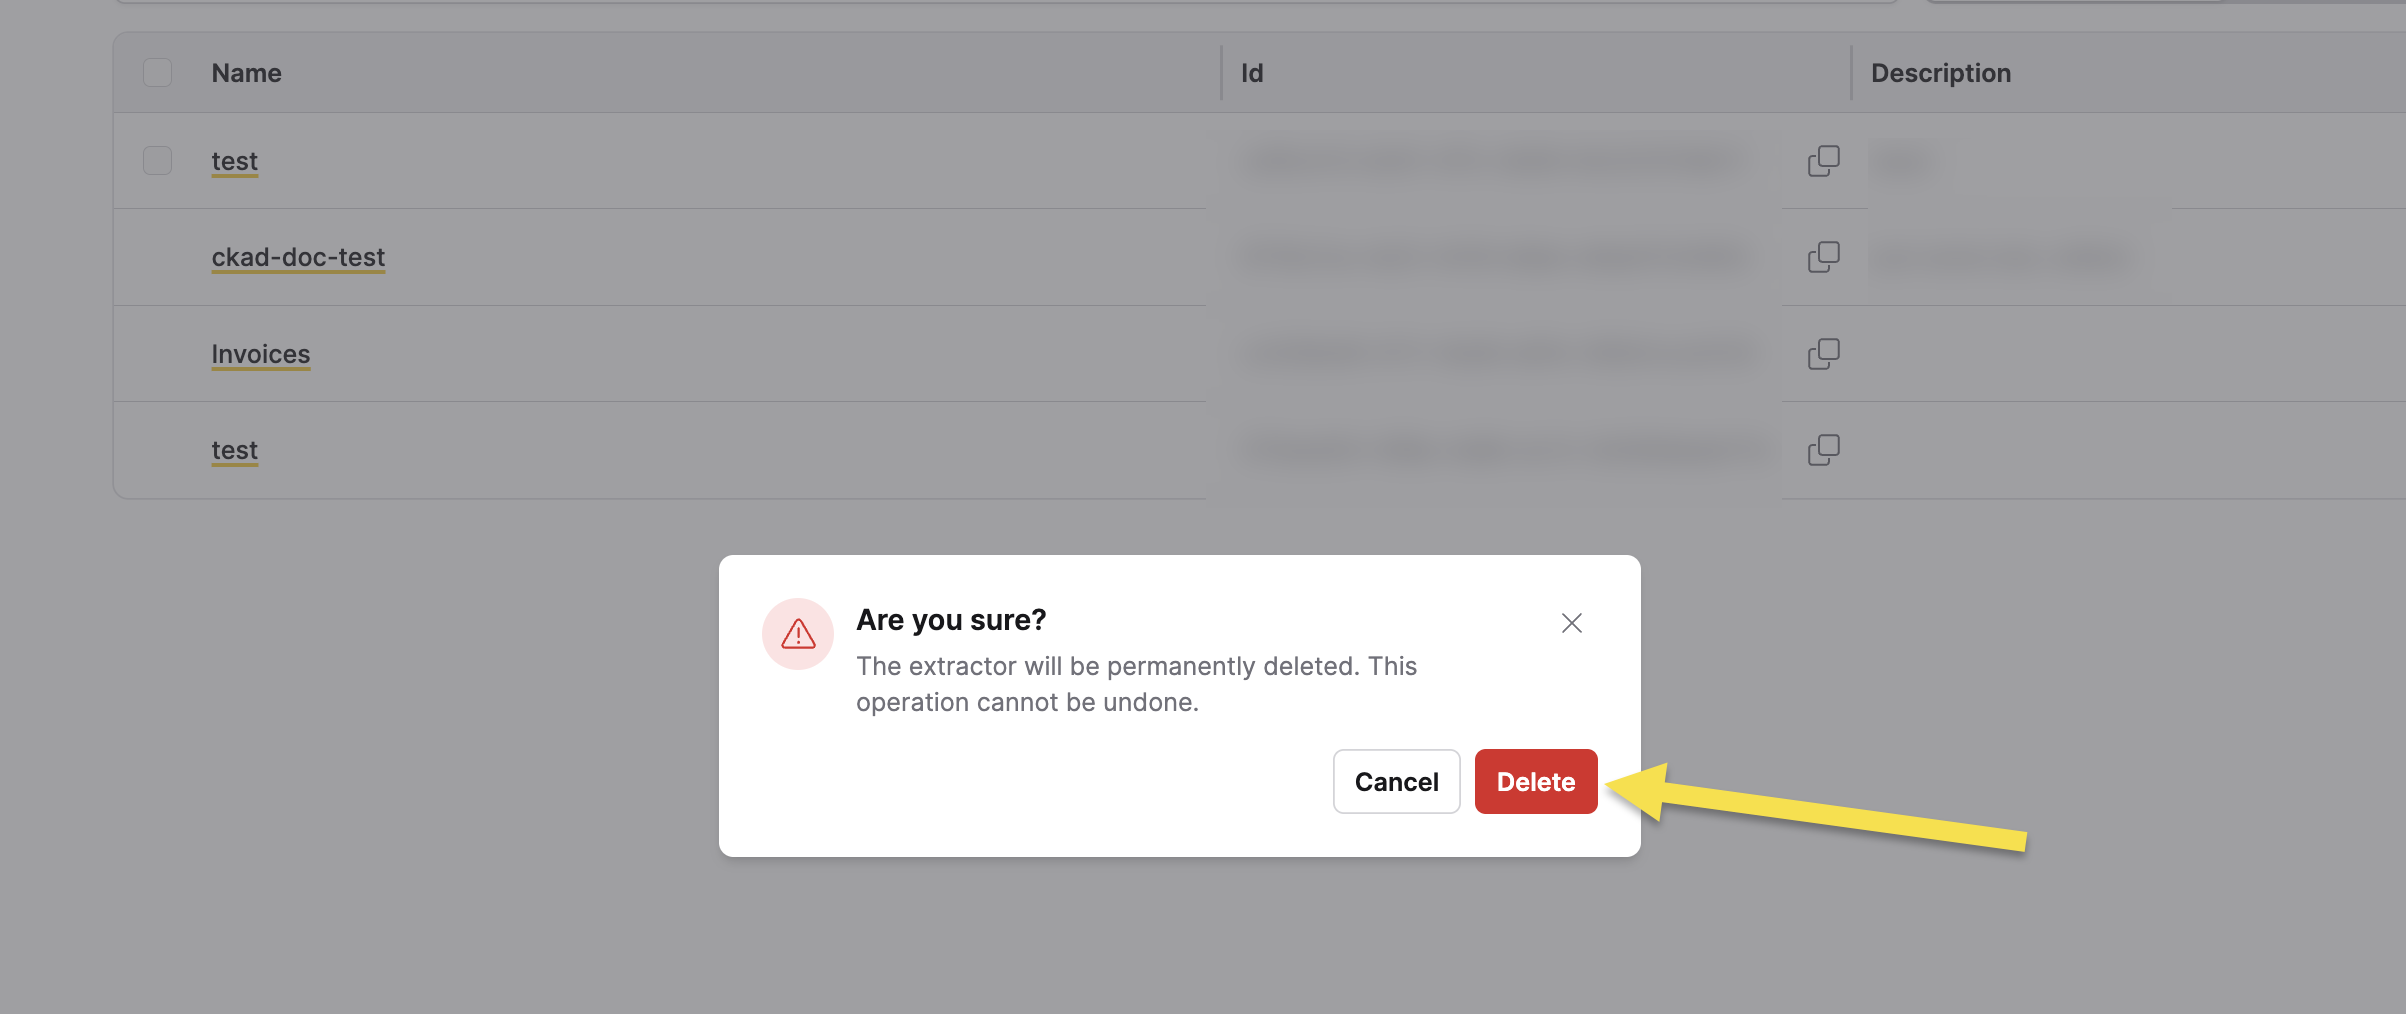 warning
Deleting an extractor is a permanent action that cannot be undone. Ensure you no longer need the extractor before proceeding.
- Click Delete to confirm the deletion, or click Cancel to abort.
- Submit and view feedback for this page
- Send feedback about Enterprise h2oGPTe to cloud-feedback@h2o.ai