System Settings
Overview
The System Settings page provides a centralized location for managing configuration parameters across Enterprise h2oGPTe. Use this page to:
- Control global settings: Manage application-wide configuration parameters
- Map custom config values to users: Override global settings for specific users
- Map custom config values to roles: Override global settings for specific roles
Global settings are configured during Helm deployment and enforce maximum value limits. Many global settings can be overridden at the user or role level. Some settings are read-only and cannot be modified.
All actions on the System Settings page require administrator privileges.
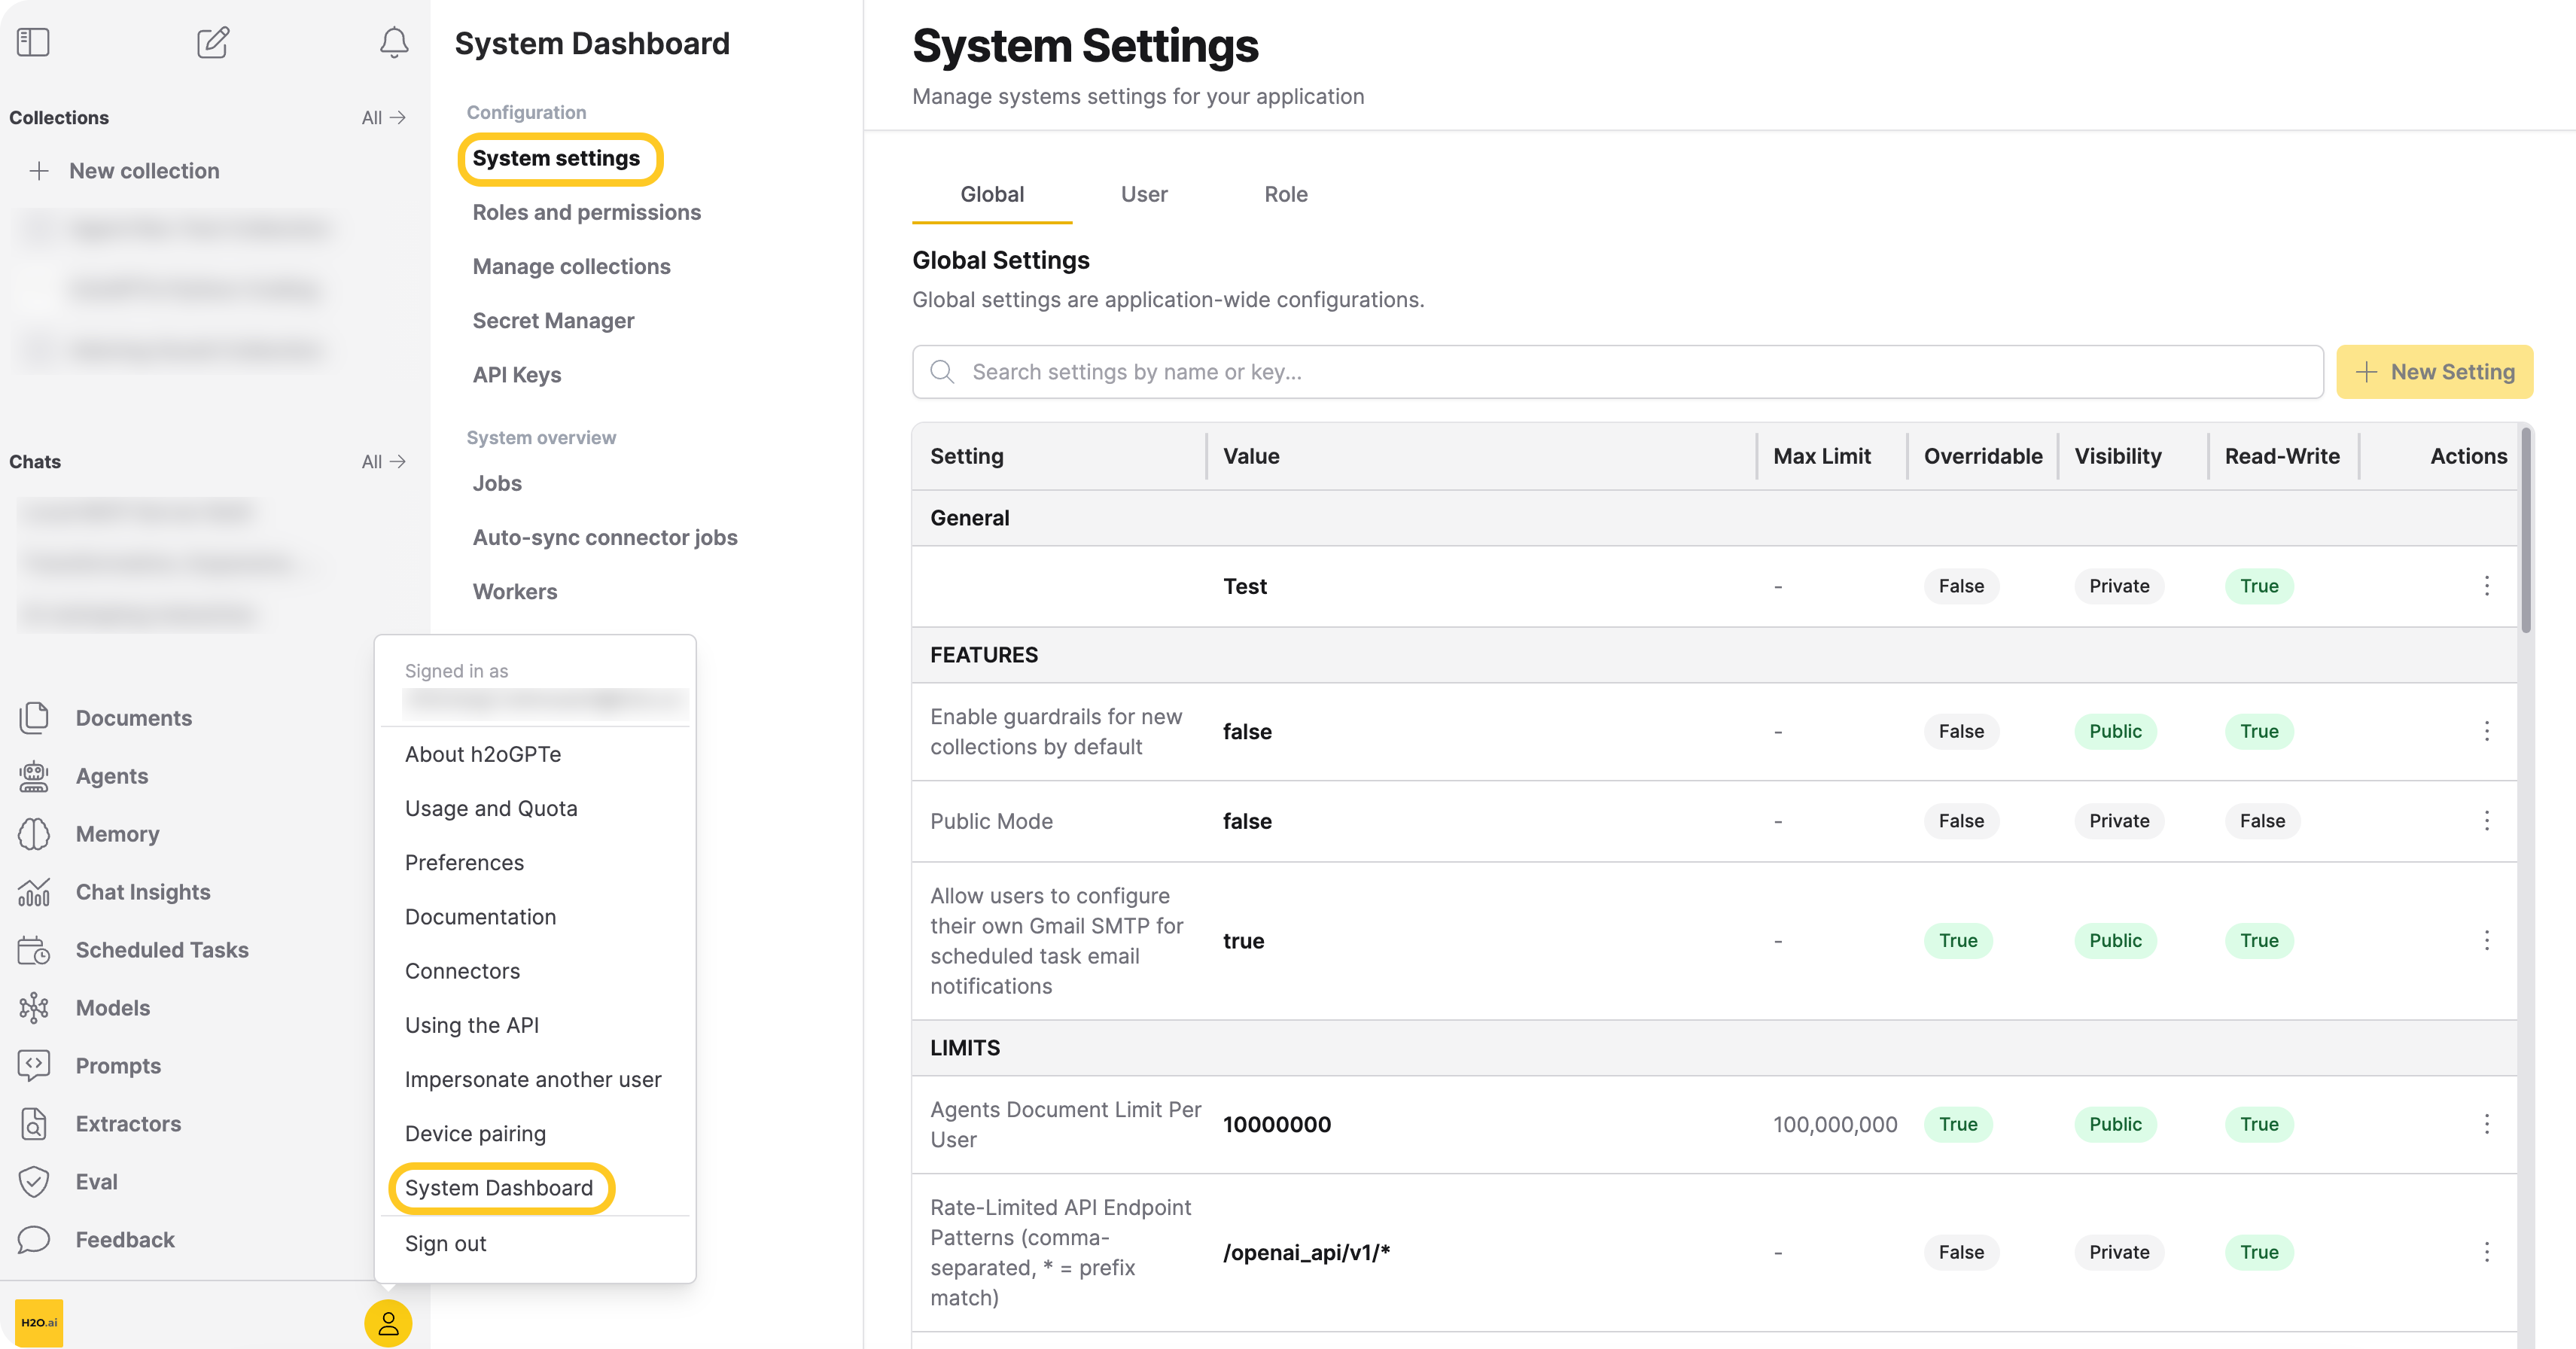
Access the System Settings page
- In Enterprise h2oGPTe, click Account Circle.
- Select System Dashboard.
- In the Configuration section, click System settings.
You can manage your settings across the Global, User, and Role tabs.
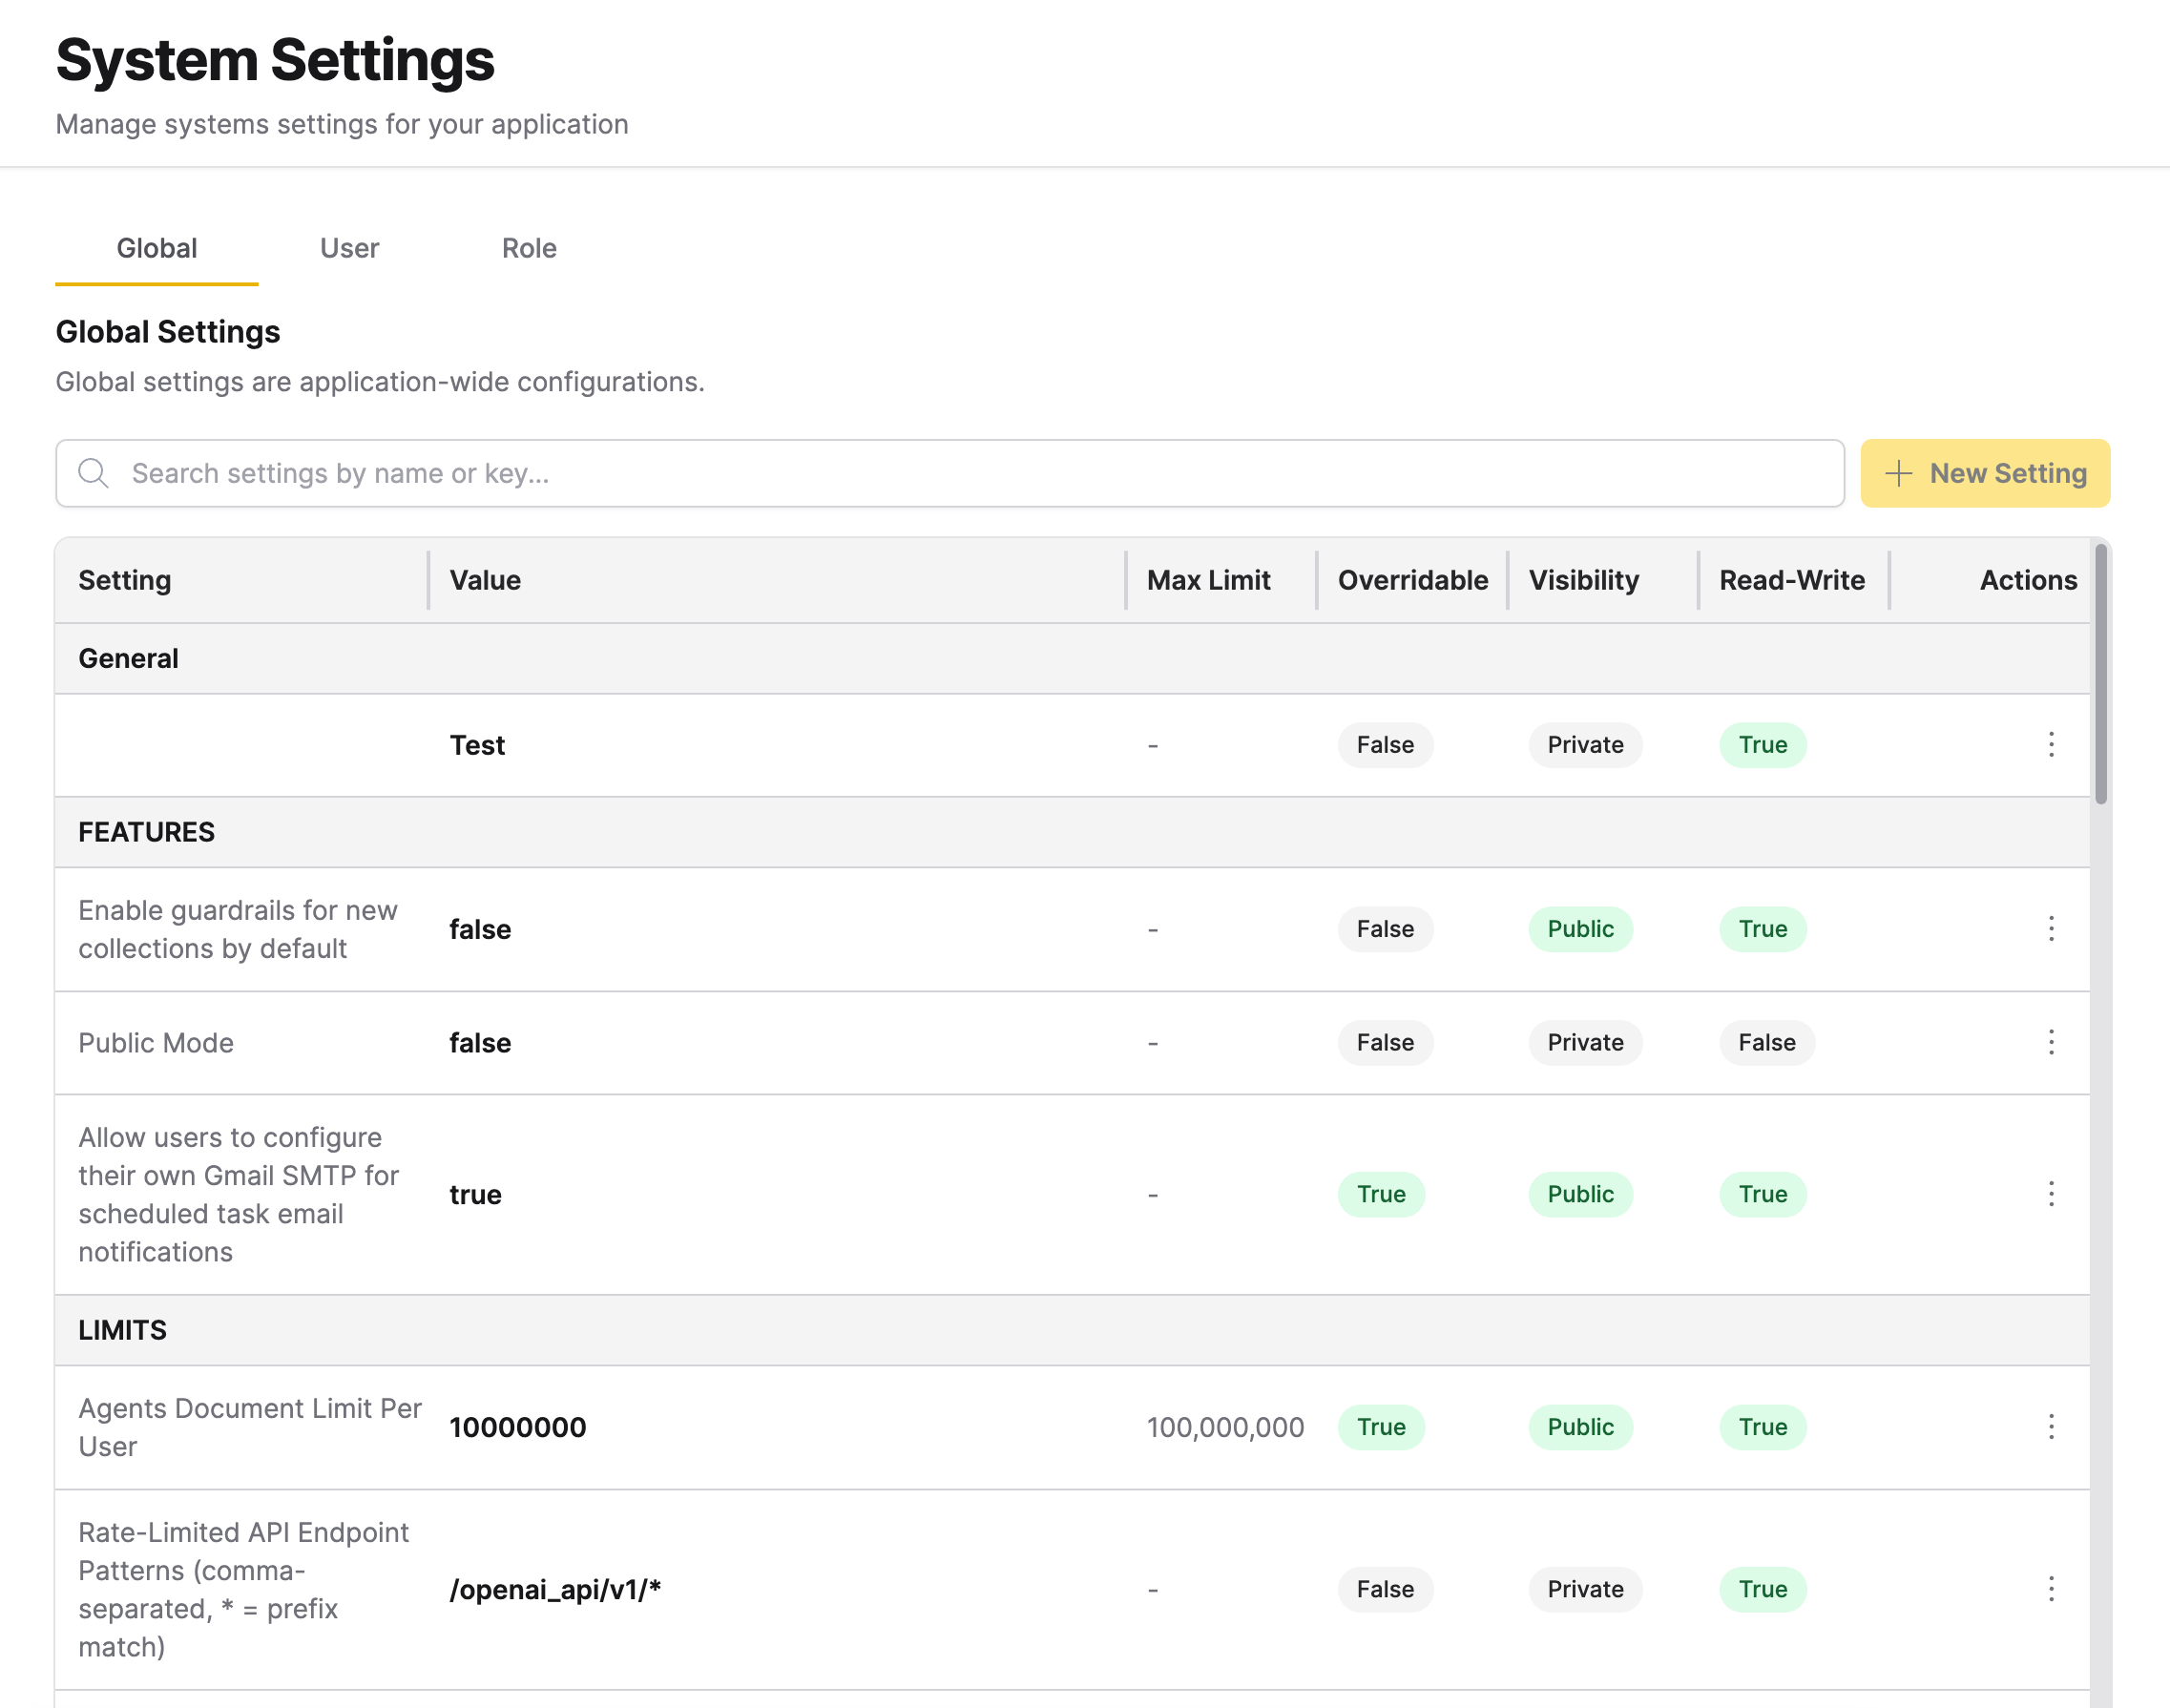
Global Settings
Global settings are application-wide configuration parameters organized by category: FEATURES, LIMITS, OAUTH, SECURITY, and SYSTEM. The search bar lets you filter global settings by name or key. These settings are shown in a table format, organized by the following columns:
- Setting: The configuration name
- Value: The current setting value
- Max Limit: The maximum allowed value (if applicable)
- Overridable: Whether the setting can be overridden by users or roles (overridable means the setting can be customized at the user or role level)
- Visibility: Whether the setting is Public or Private
- Read-Write: Whether the setting can be modified
Runtime settings
Many Global Settings take effect at runtime. When you save a change, running services pick it up within a few seconds, with no restart or redeploy required. This lets you adjust chat defaults, feature toggles, PII and compliance actions, and agent tuning without interrupting the deployment.
Settings configured only as environment variables at deployment time are not part of the runtime registry and require a redeploy to take effect.
For a complete list of settings and their categories, see All settings and configurations.
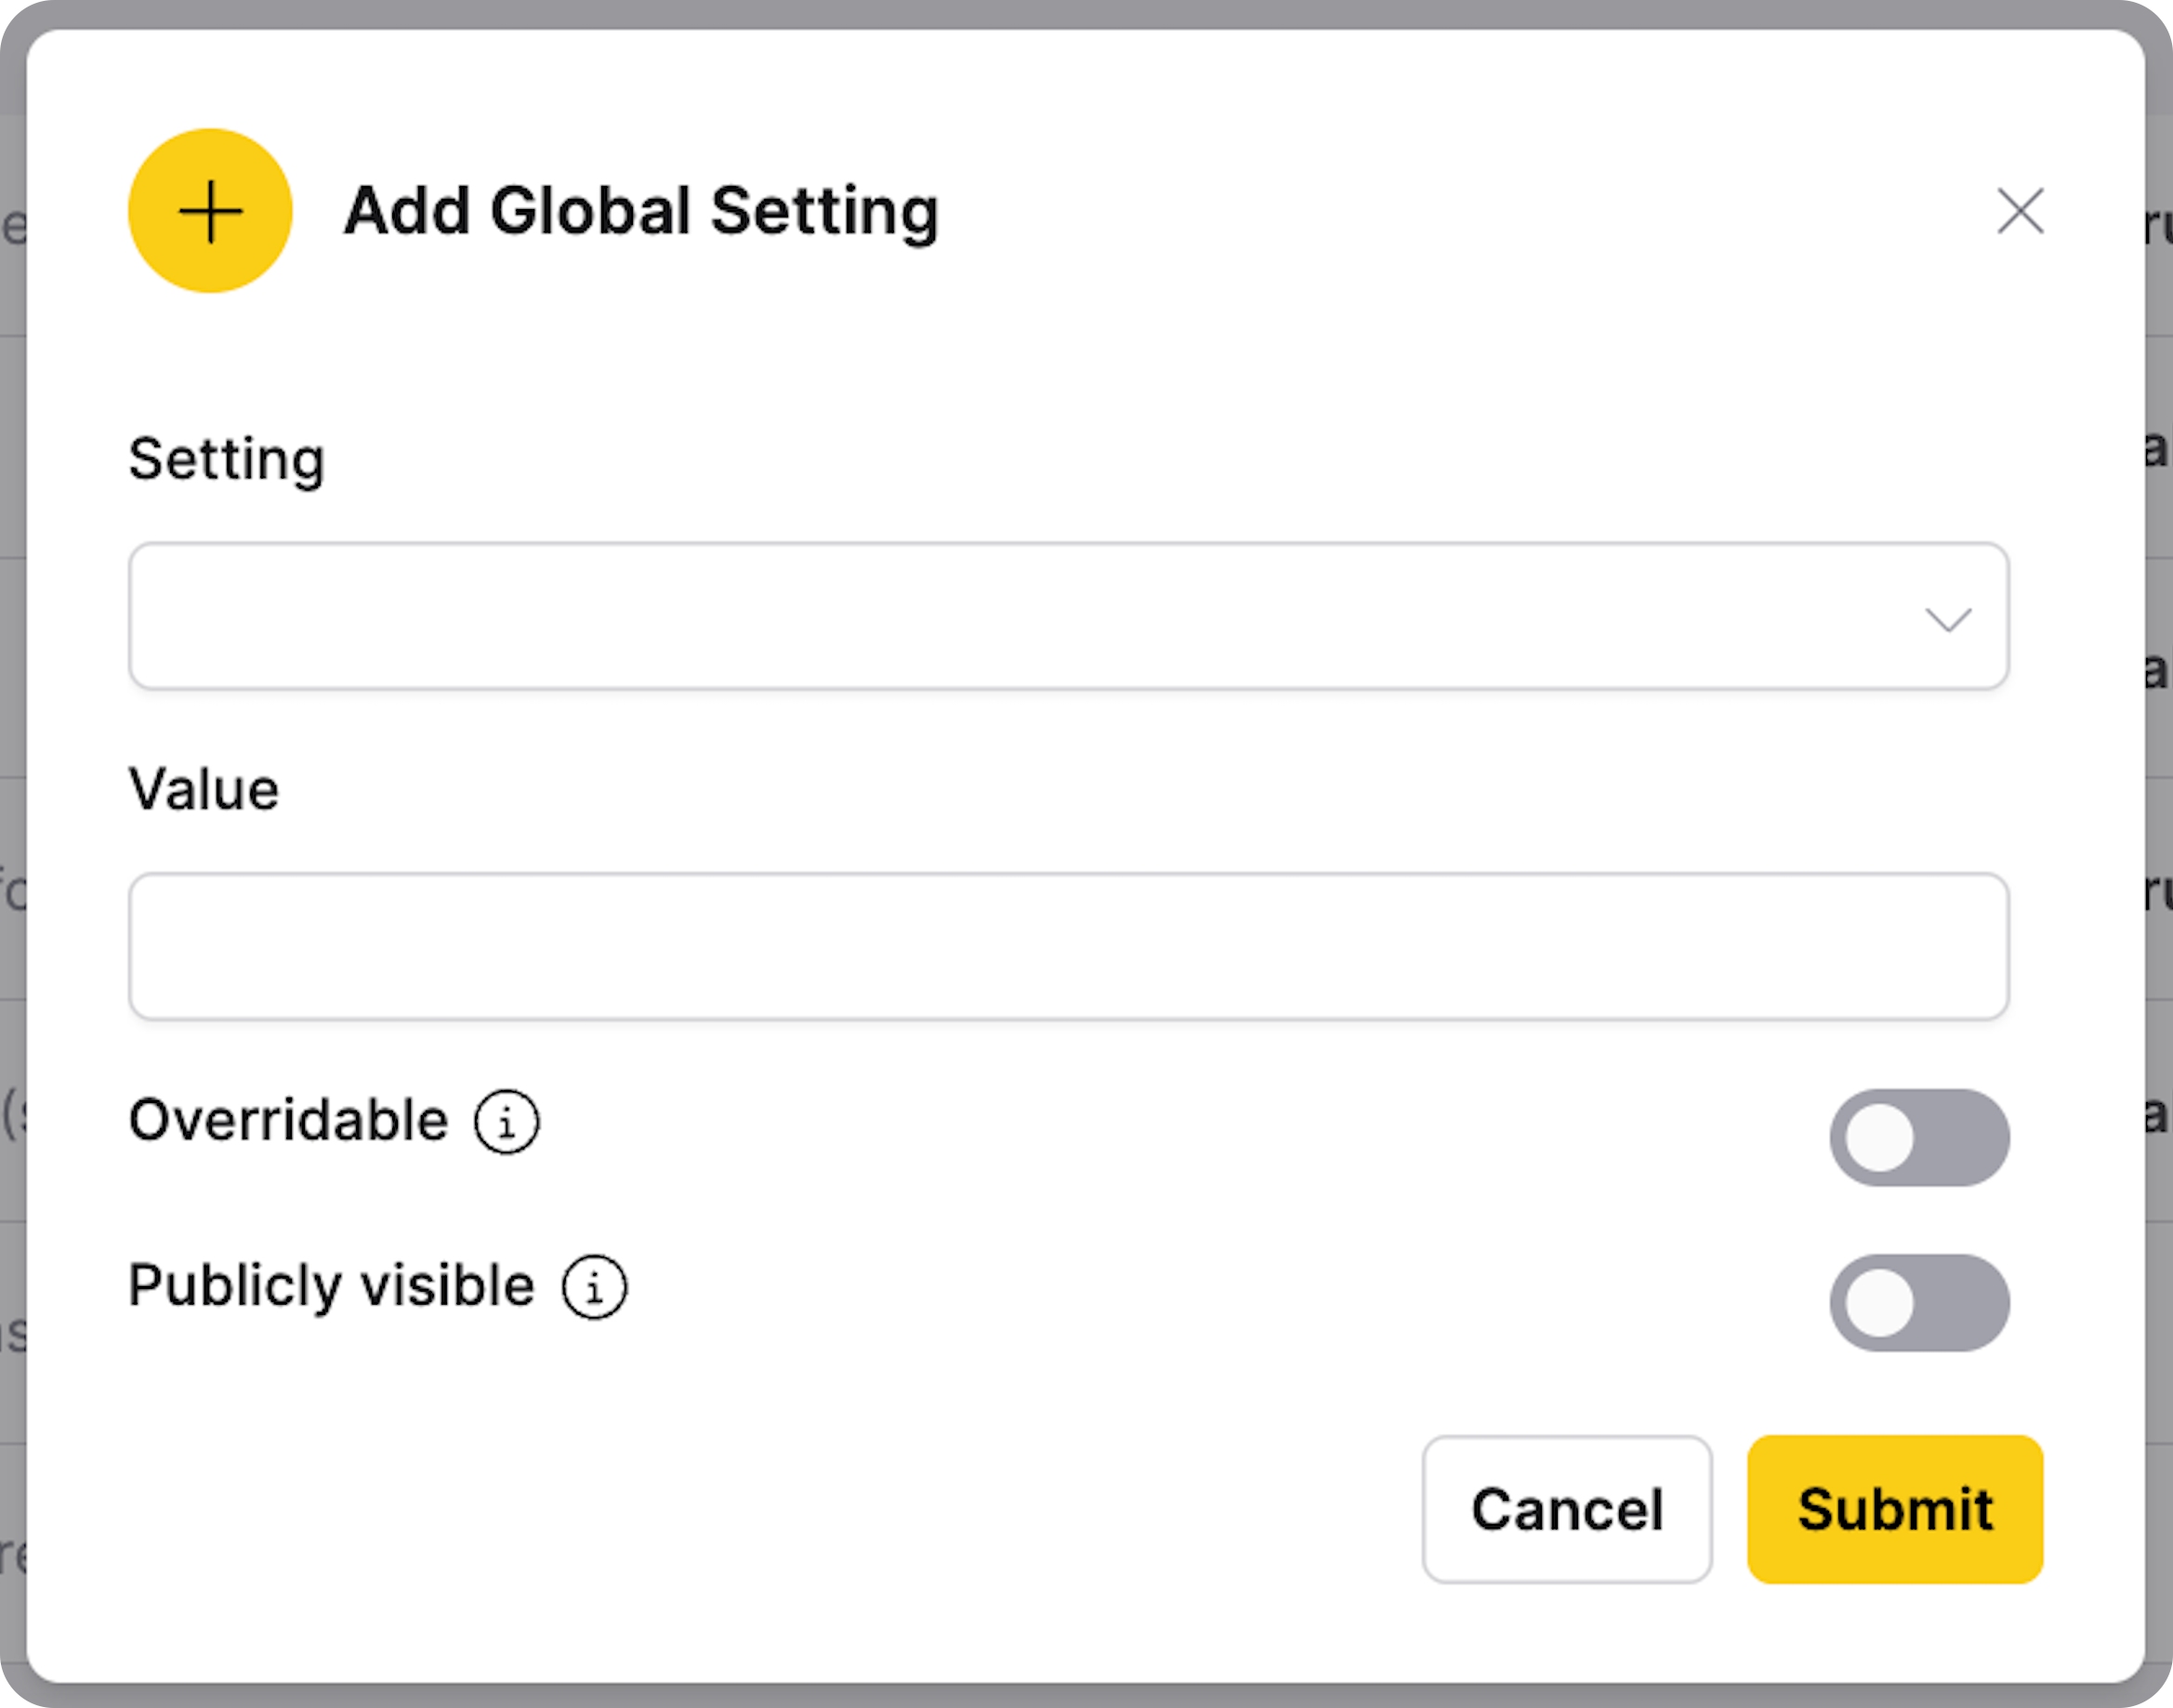
Add a global setting
Only administrators can add global settings. Only settings that are overridable and not read-only can be added as new global settings.
- In the Global Settings tab, click + New Setting.
- Select a setting from the dropdown.
- Enter a value for the setting. The value must not exceed the maximum limit specified for the setting.
- If applicable, configure overridable and visibility options.
- Click Submit.
If all available global settings have been configured, the + New Setting button is disabled and displays the message "All available global settings have been configured".
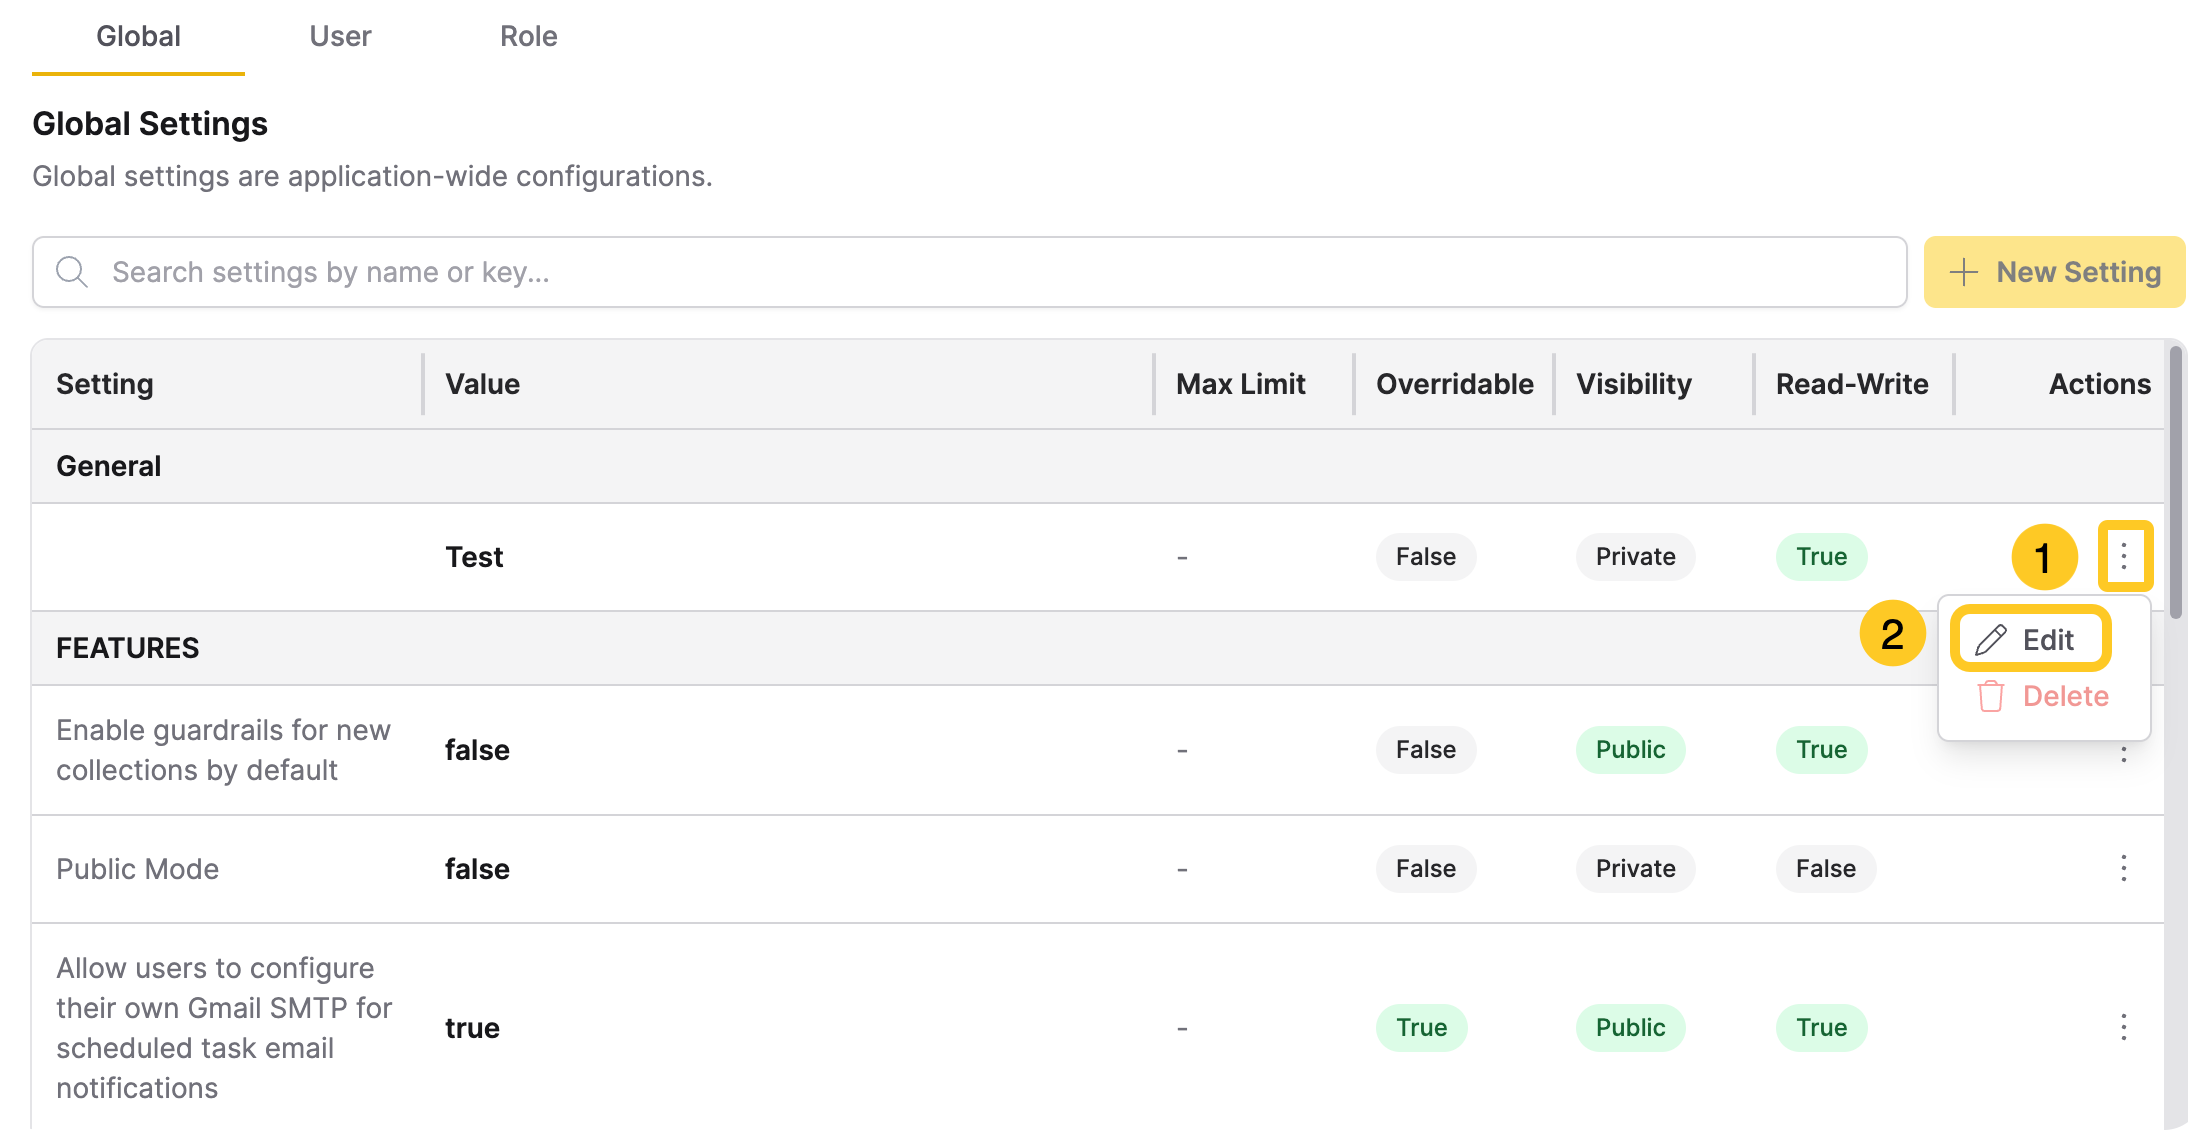
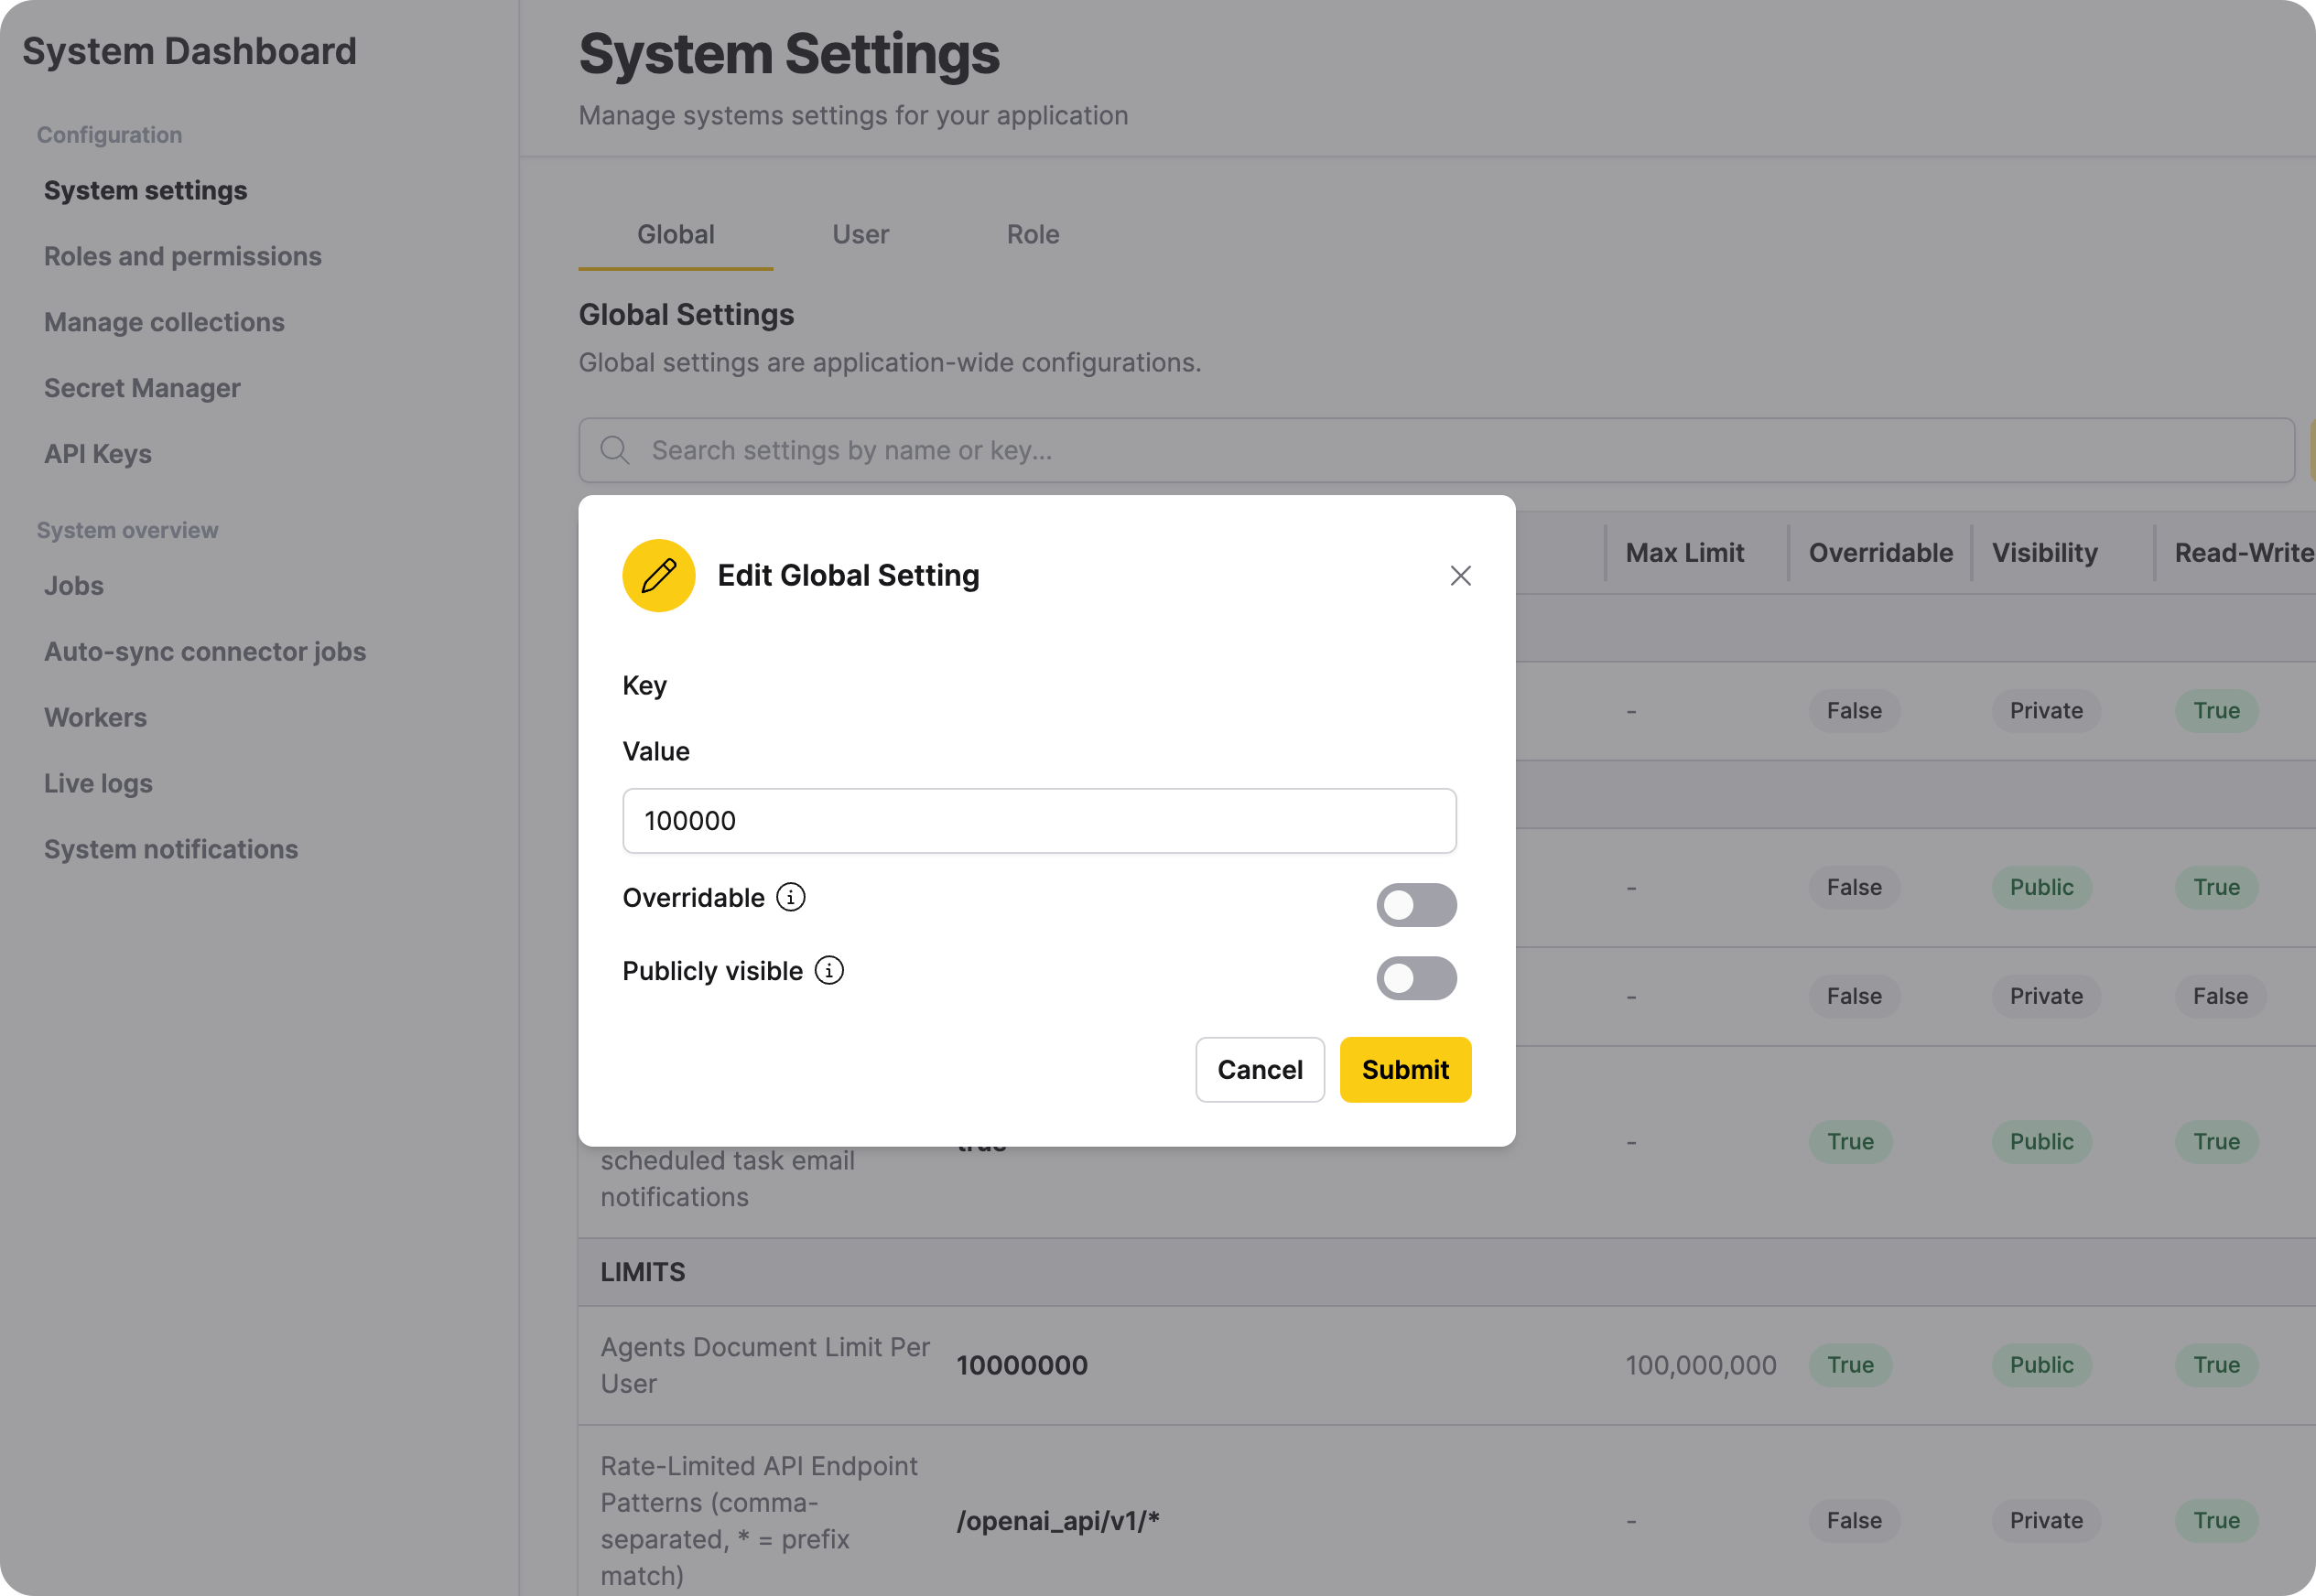
Edit a global setting
Only administrators can edit global settings. Read-only settings cannot be edited.
- In the Global Settings table, locate the setting you want to modify and click for that setting.
- Select Edit.
- This opens the Edit Global Setting dialog box. Update the value without exceeding the maximum limit.
- Enable Overridable to let user settings override this global setting.
- Enable Publicly visible to let users see the value for this global setting.
- Click Submit.
Remove a global setting
Only administrators can remove global settings.
- In the Global Settings table, locate the setting you want to remove.
- Click the Actions menu () for that setting.
- Select Delete.
- Confirm the deletion.
You cannot remove default global settings that are pre-configured by the system. You can only remove settings that were added manually.
Global Guardrails
Administrators can enable guardrails system-wide for new chats and new collections through the System Settings UI or by setting environment variables at deployment time.
Enable guardrails for all new chats by default
Option 1: System Settings UI (Recommended)
- Navigate to System Settings → Features section.
- Toggle Enable guardrails for all new chats by default.
- When enabled, global guardrails are automatically initialized with all standard categories.
- Changes take effect immediately without requiring a restart.
Option 2: Environment Variable (Deployment Time)
Set this environment variable during deployment to pre-enable the setting:
H2OGPTE_MUX_DEFAULT_CHAT_GUARDRAILS_ENABLED=true
The actual guardrails initialization happens when the setting is toggled ON in the UI or when the config is changed via API.
Enable guardrails for new collections by default
When enabled, all newly created collections automatically inherit the global guardrail settings. Users see guardrails pre-enabled when they open the collection configuration page.
- Navigate to System Settings → Features section.
- Toggle Enable guardrails for new collections by default.
- New collections created after this point will have guardrails enabled with the global default categories.
Existing collections are not affected by this setting. Only collections created after the setting is enabled will have guardrails applied by default.
Allow users to remove default guardrails
By default, users can remove the inherited default guardrails from their collections. Administrators can restrict this behavior:
- Navigate to System Settings → Features section.
- Toggle Allow users to remove default guardrails from their collections.
- Enabled (default): Users can freely disable or modify the inherited guardrails on their collections.
- Disabled: Non-admin users cannot turn off or remove the default guardrail categories from collections that inherited them. Users can still add additional guardrail categories beyond the defaults.
Administrators can always modify guardrails on any collection regardless of this setting.
Default guardrail categories
When enabled, the system automatically applies all available guardrail categories to new chats or collections. The specific categories depend on your deployment configuration and may include categories such as:
- Violent Crimes
- Non-Violent Crimes
- Child Sexual Exploitation
- Hate
- Suicide & Self-Harm
- Privacy
Your deployment may include additional categories beyond those listed here.
The actual guardrail categories are determined by your deployment's configuration (guardrails_entities in settings). Deployments can customize which categories are available and may include custom categories specific to your use case.
Hierarchy and Enforcement
The guardrails system uses a merge model to ensure admin-configured guardrails cannot be bypassed:
- Global settings - Admin-configured guardrails that apply system-wide as a minimum baseline
- Collection settings - Additional guardrails added at the collection level (merged with global)
- Chat-specific settings - Additional guardrails added at the chat level (merged with global + collection)
Global guardrails are enforced as a minimum. When an administrator enables global guardrails and disables the option to remove them, users cannot disable or remove those categories at the collection or chat level. Users can only add additional guardrail categories beyond the global baseline.
Example: If an administrator enables Violent Crimes and Hate globally, and a user selects only Child Sexual Exploitation for their collection, the effective guardrails will include all three categories (merged).
When guardrails are enabled for chats or collections by default, the system automatically applies all available guardrail categories configured in your deployment. When streaming is enabled, responses are generated without streaming so that guardrails can validate the full response before displaying it to the user.
Showcase page visibility
The showcase_page_mode setting controls who can access the Showcase page. It is found in the Features category of Global Settings and can be changed at any time without restarting the application.
| Value | Behavior |
|---|---|
disabled (default) | End users get a 404. Managers still see a full admin preview with a warning banner. |
authenticated | Signed-in users see the Showcase; guests and anonymous visitors see a login prompt. |
public | Anyone — including anonymous visitors — can view the Showcase. Tiles from private shared chats are automatically hidden from unauthenticated viewers. |
To change this setting, find showcase_page_mode in the Features category and update its value following the Edit a global setting steps above.
User settings
User settings allow you to override global settings for specific users. Only administrators can manage user settings.
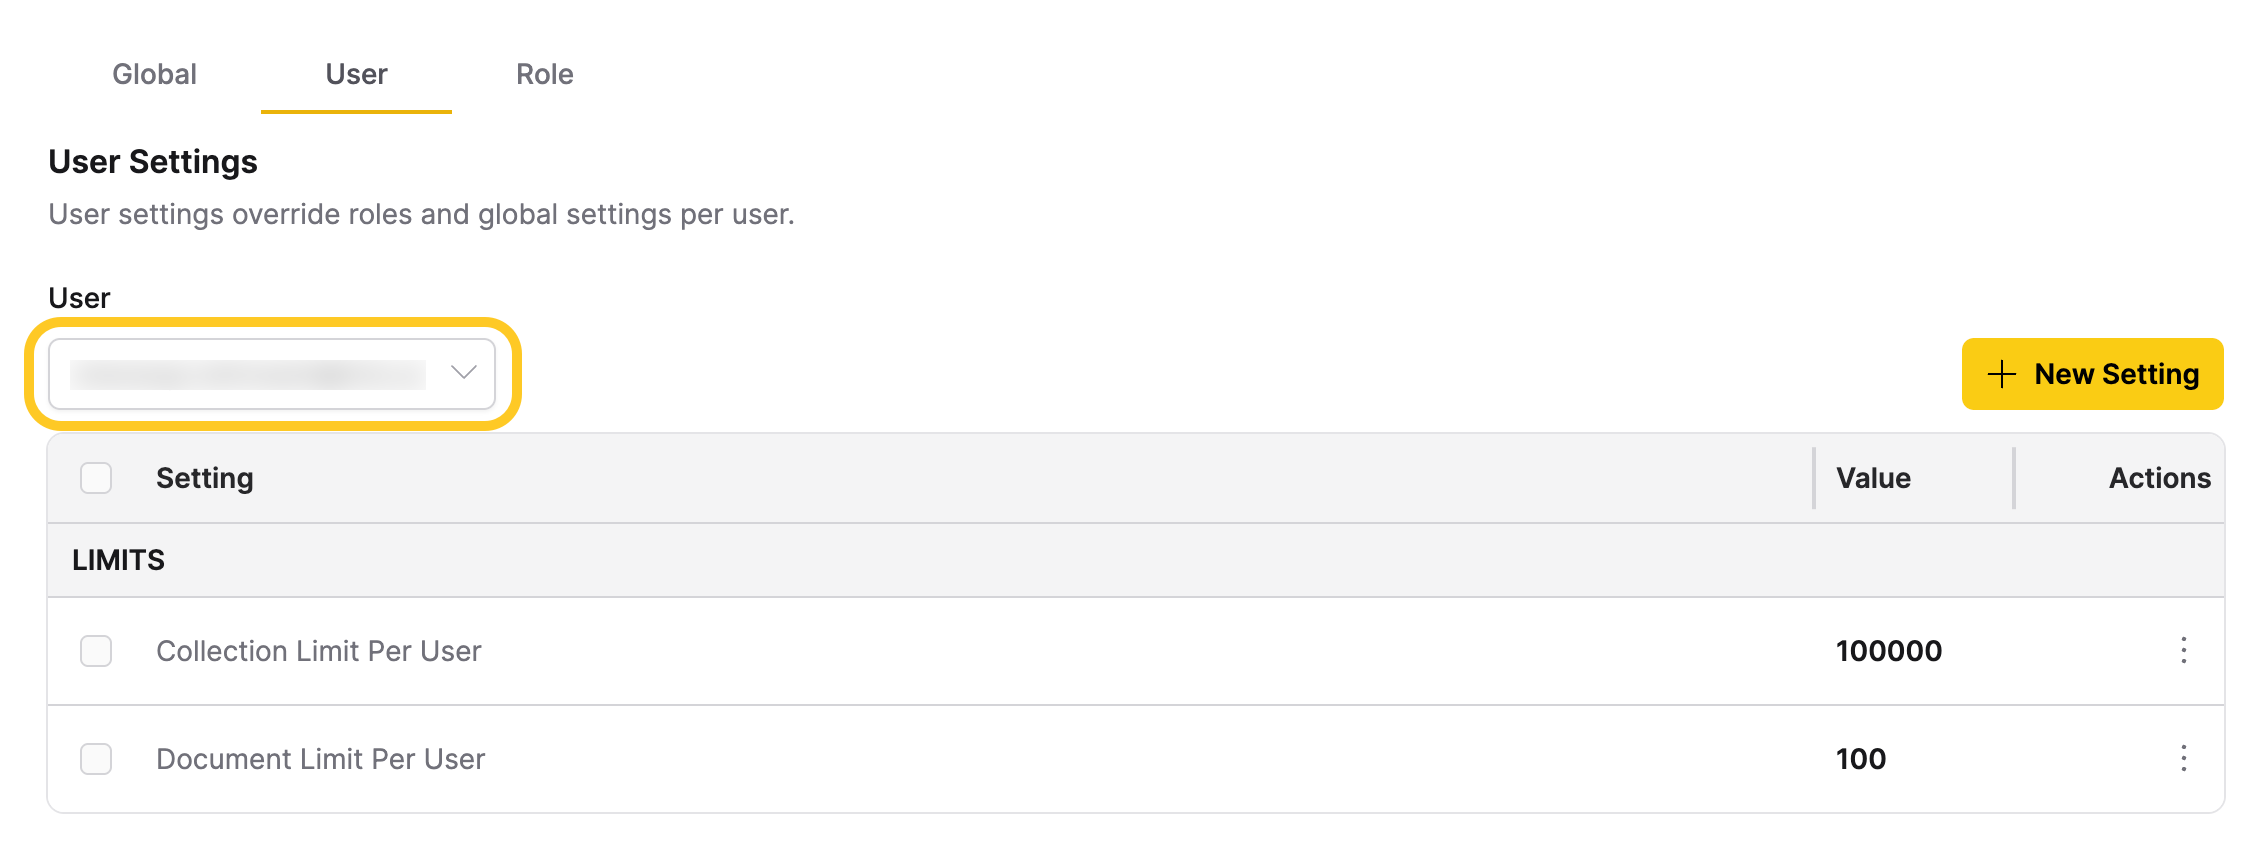
View user settings
- In the User Settings tab, select a user from the User dropdown.
- View the list of settings configured for that user.
If no settings are configured, the message "Selected user has no settings" is displayed.
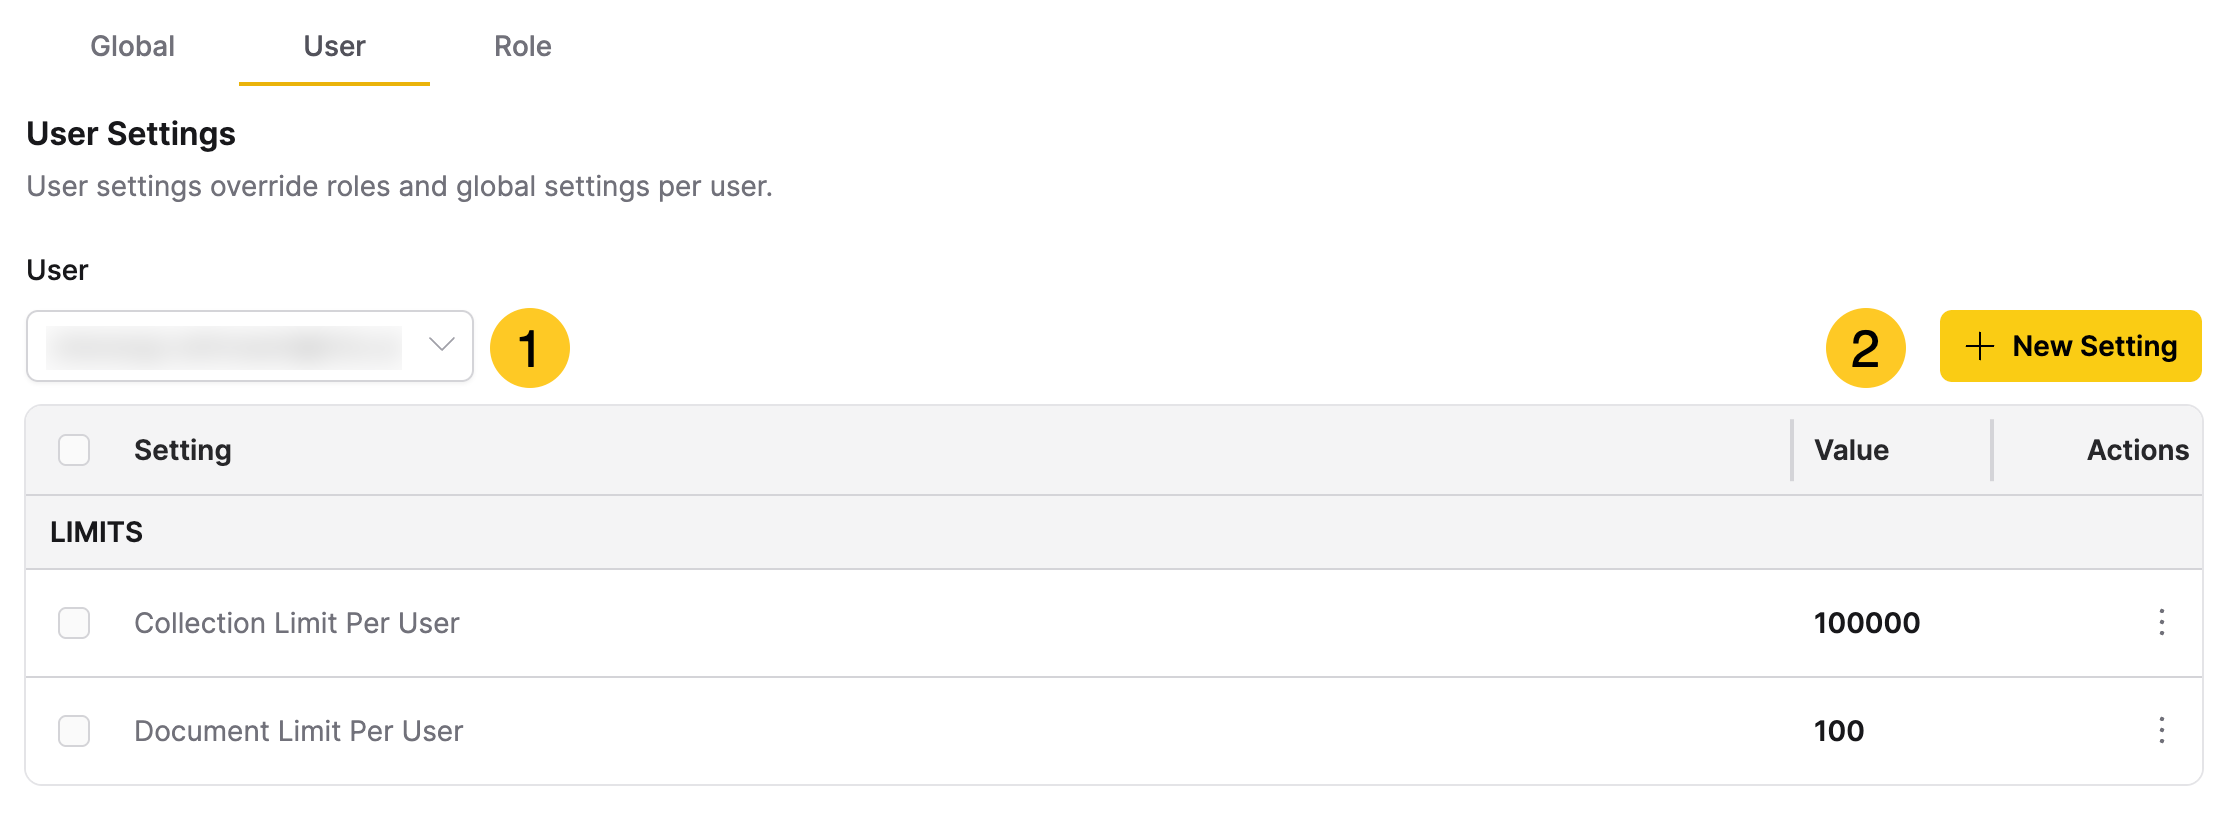
Add a user setting
Only administrators can add user settings. A setting must exist in the global configuration and must be marked as overridable (can_overwrite = true) to be added as a user setting. The setting cannot be read-only.
- In the User Settings tab, select the user from the User dropdown.
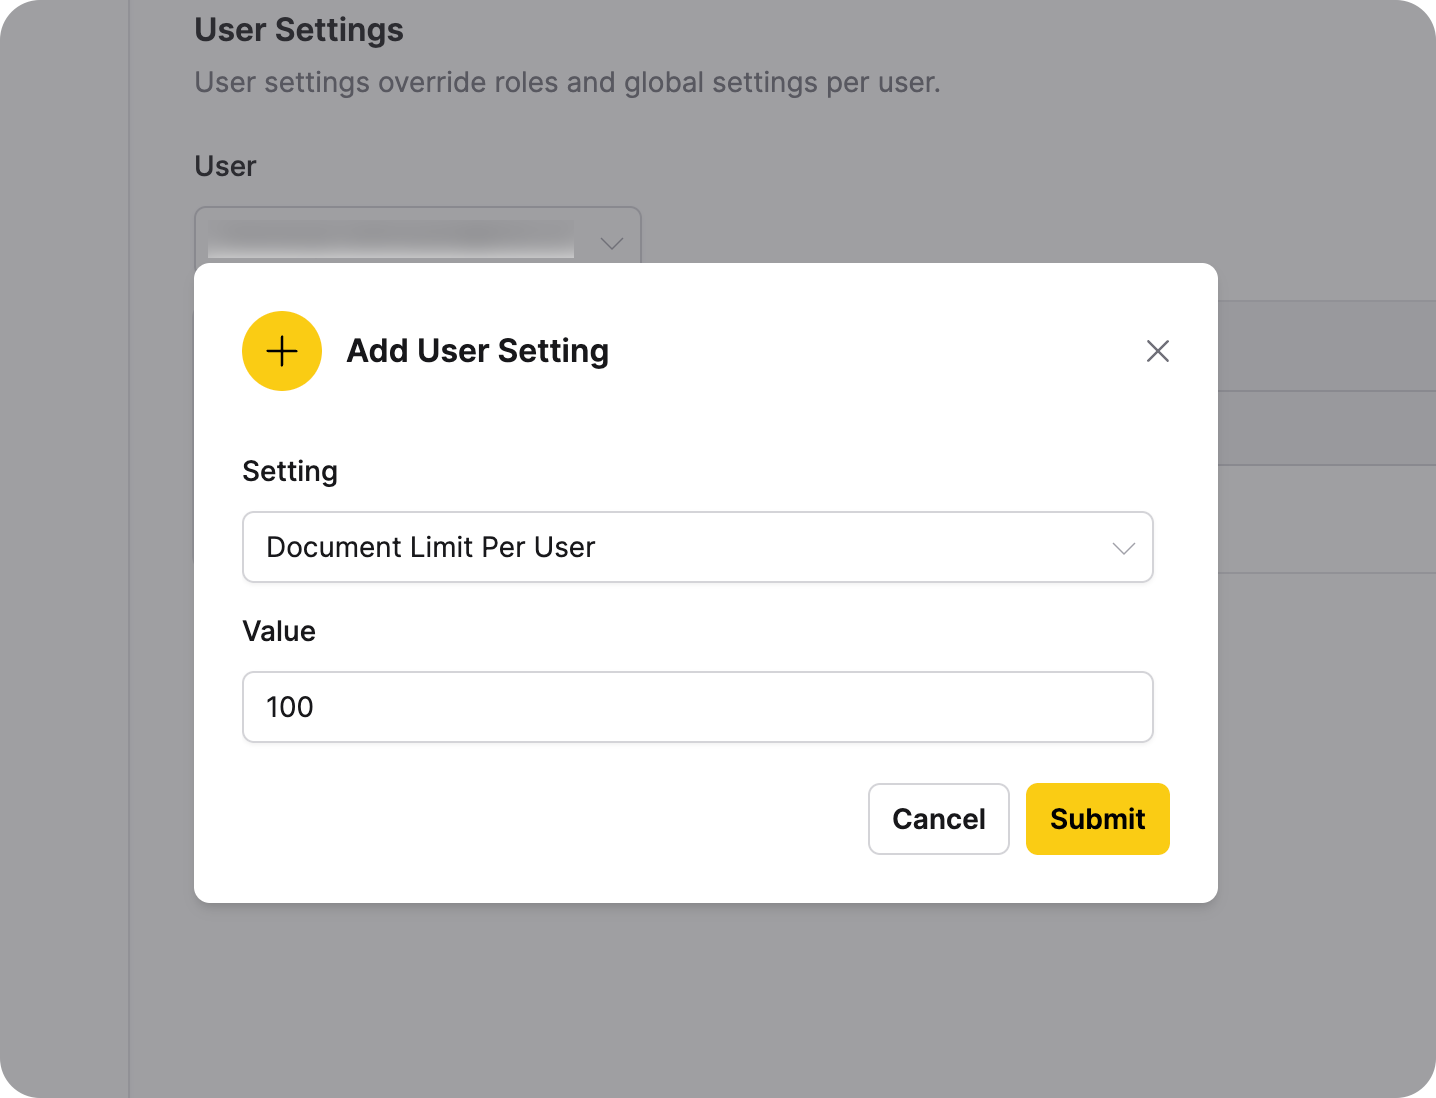
- Click + New Setting.
- Select a setting from the dropdown. Only overridable and non-read-only settings are available. The LLM Configuration setting (
runtime_llms) is not available for user overrides. To configure LLM access per role, use the REST API (see System Settings Reference). - Enter a value for the setting. The value must not exceed the maximum limit specified in the global configuration.
- Click Submit.
Edit a user setting
Only administrators can edit user settings.
- In the User Settings table, locate the setting you want to modify.
- Click the Actions menu () for that setting.
- Select Edit.
- Update the value as needed. Ensure the value does not exceed the maximum limit specified in the global configuration.
- Click Submit.
Remove a user setting
Only administrators can remove user settings.
- In the User Settings table, locate the setting you want to remove.
- Click the Actions menu () for that setting.
- Select Delete.
- Confirm the deletion.
Role Settings
Role settings override global settings for specific roles. Role settings apply to all users assigned to that role. Only administrators can manage role settings.
View role settings
- In the Role Settings tab, select a role from the Role dropdown.
- View the list of settings configured for that role.
If no settings are configured, the message "No role settings found" is displayed.
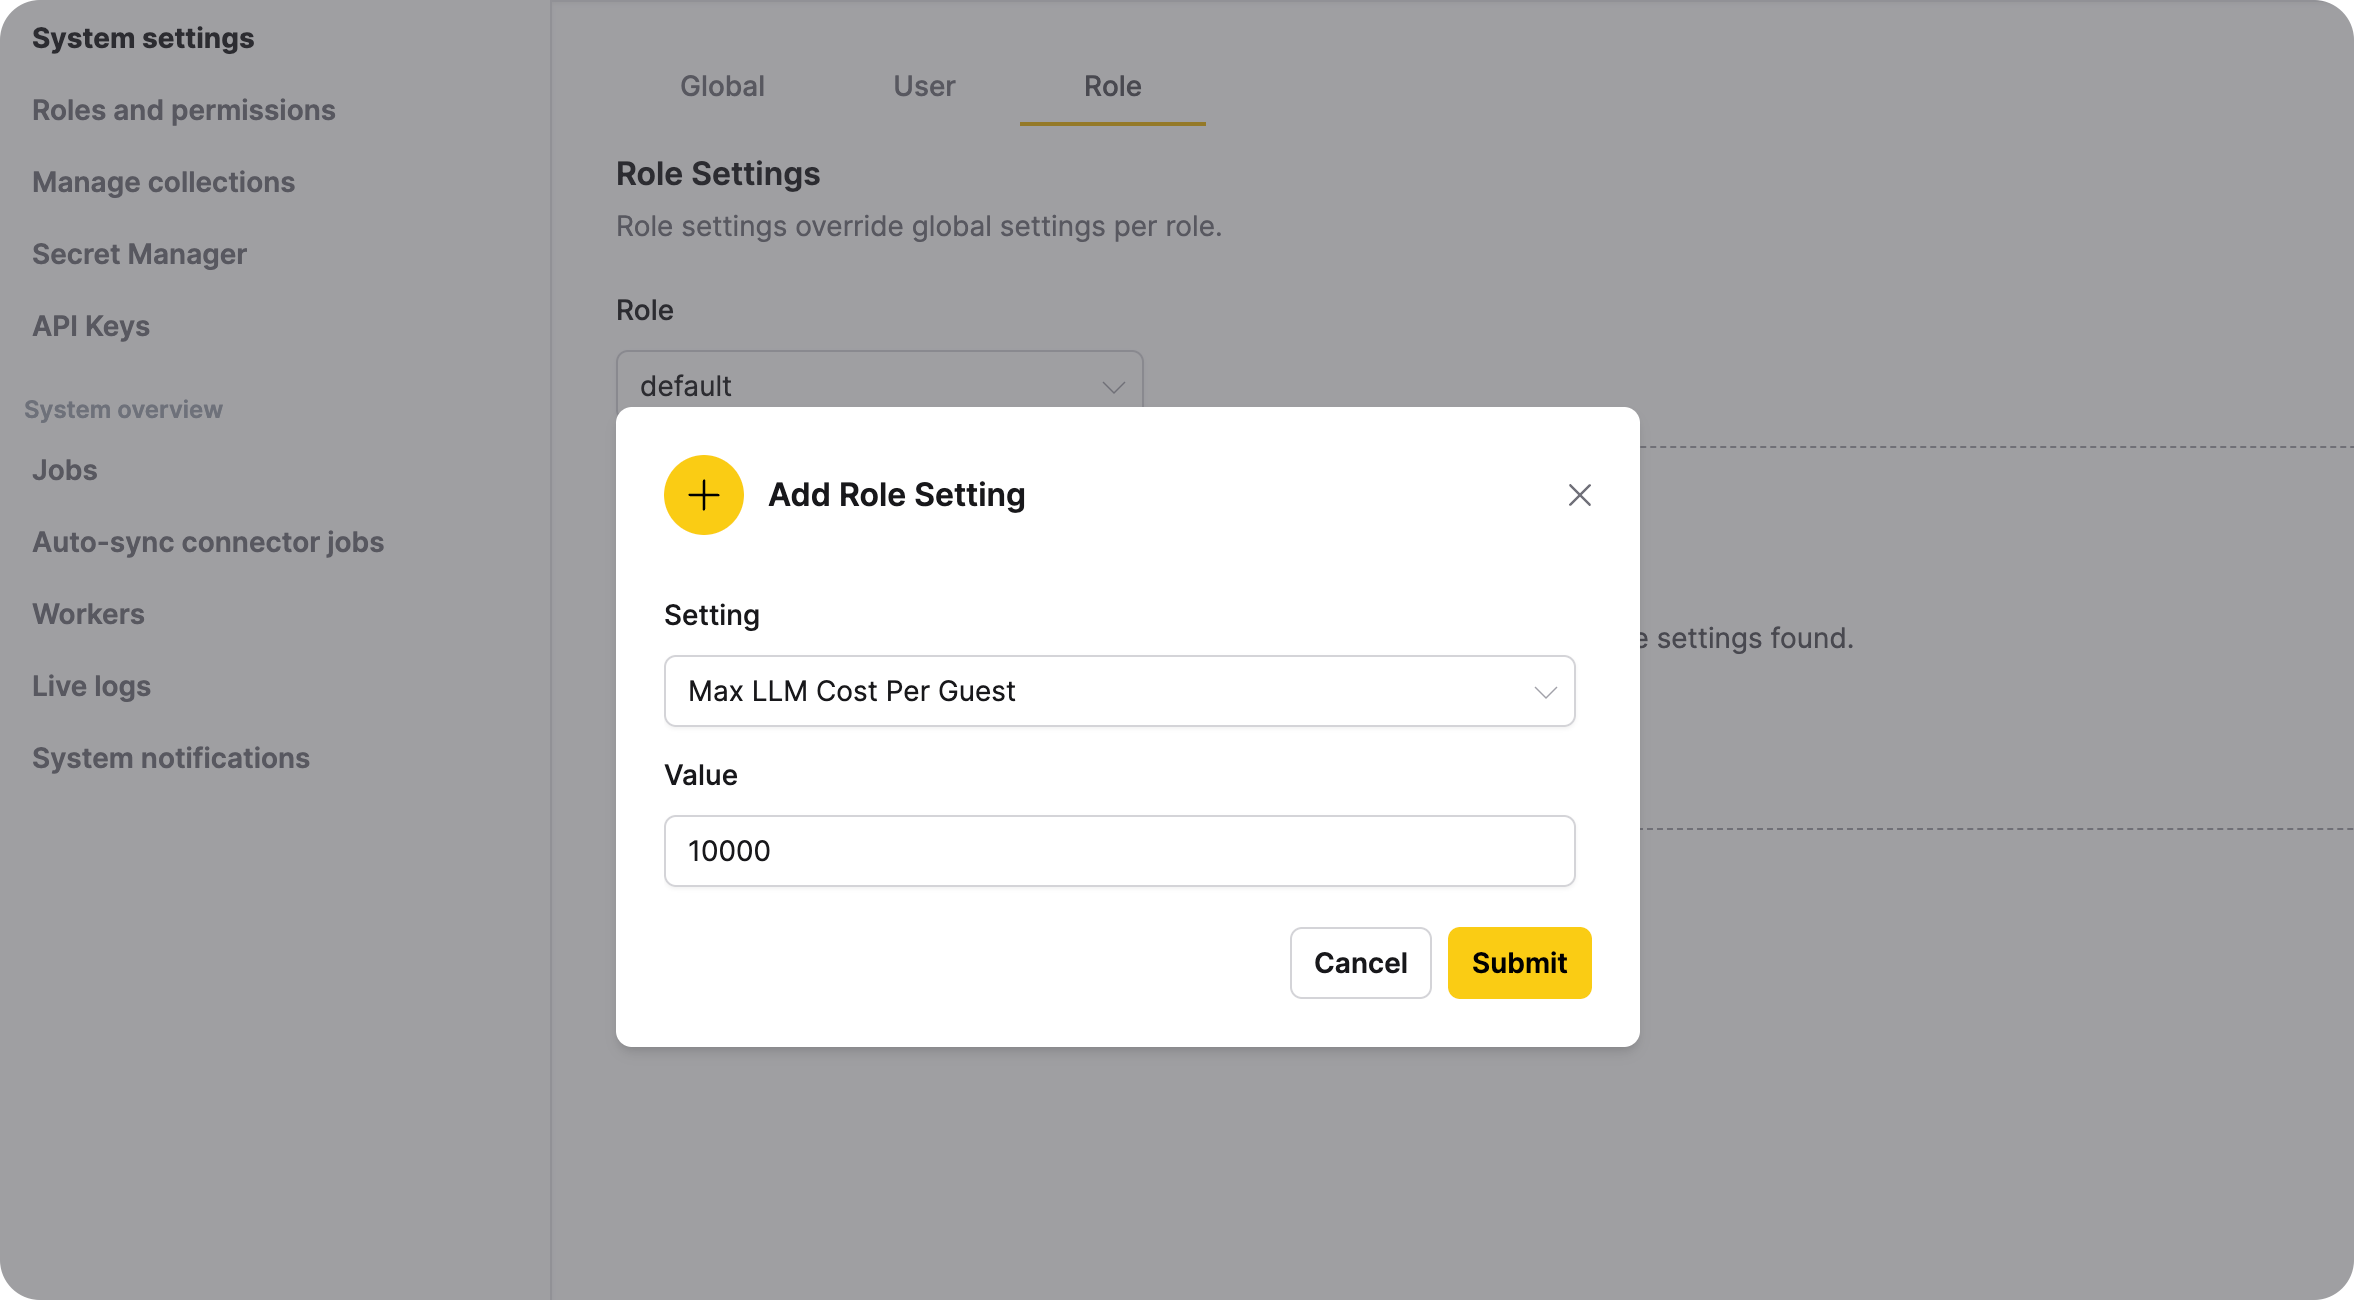
Add a role setting
Only administrators can add role settings. A setting must exist in the global configuration and must be marked as overridable (can_overwrite = true) to be added as a role setting. The setting cannot be read-only.
- In the Role Settings tab, select the role from the Role dropdown.
- Click + New Setting.
- Select a setting from the dropdown. Only overridable, non-read-only settings are available. The LLM Configuration setting (
runtime_llms) is not available for role overrides in the System Dashboard UI. To configure LLM access per role, use the REST API (see System Settings Reference). - Enter a value for the setting. The value must not exceed the maximum limit specified in the global configuration.
- Click Submit.

Edit a role setting
Only administrators can edit role settings. You must select a role before editing its settings.
- In the Role Settings table, locate the setting you want to modify.
- Click the Actions menu () for that setting.
- Select Edit. The LLM Configuration setting (
runtime_llms) cannot be edited from role settings in the System Dashboard. Use the REST API for per-role LLM configuration. - Update the value as needed. Ensure the value does not exceed the maximum limit specified in the global configuration.
- Click Submit.
Remove a role setting
Only administrators can remove role settings. You must select a role before removing its settings.
- In the Role Settings table, locate the setting you want to remove.
- Click the Actions menu () for that setting.
- Select Delete. The LLM Configuration setting (
runtime_llms) cannot be deleted from role settings in the System Dashboard. Use the REST API for per-role LLM configuration. - Confirm the deletion.
Related topics
- System Settings Reference - Complete reference for all administrator-configurable settings, REST API, and recommended production configuration
- Roles and Permissions - Learn how to manage roles and permissions in Enterprise h2oGPTe
- Submit and view feedback for this page
- Send feedback about Enterprise h2oGPTe to cloud-feedback@h2o.ai