Create local MCP tools
This guide walks you through creating a Local MCP tool using Enterprise h2oGPTe's Tool Builder agent, then uploading and using it in your agent conversations.
Overview
Local MCP tools are custom tools that run directly within Enterprise h2oGPTe. You can create them using the Tool Builder agent, which helps generate the necessary code files. Once created, you upload them as a ZIP file and enable them in your agent conversations.
Prerequisites
- Access to Enterprise h2oGPTe with Tool Builder agent enabled
- Basic understanding of MCP (Model Context Protocol). See the Local MCP Servers overview for more details.
Step 1: Create Your Local MCP Tool Using Tool Builder
- Go to h2oGPTe > Chat
- Select Tool Builder agent from the agent selector
- Click the Tool Types dropdown and select Local MCP
- Enter a prompt to create your custom MCP tool (if you don't already have the files)
Example Prompt:
Create a local MCP tool for generating random values. Generate server.py with these functions:
- random_number(min, max) - generates random integer between min and max
- random_string(length) - generates random alphanumeric string
- random_choice(items) - picks random item from comma-separated list
- generate_uuid() - generates a UUID

No environment variables needed. Use Python random and uuid libraries. Include proper error handling and create description.md explaining the tool.
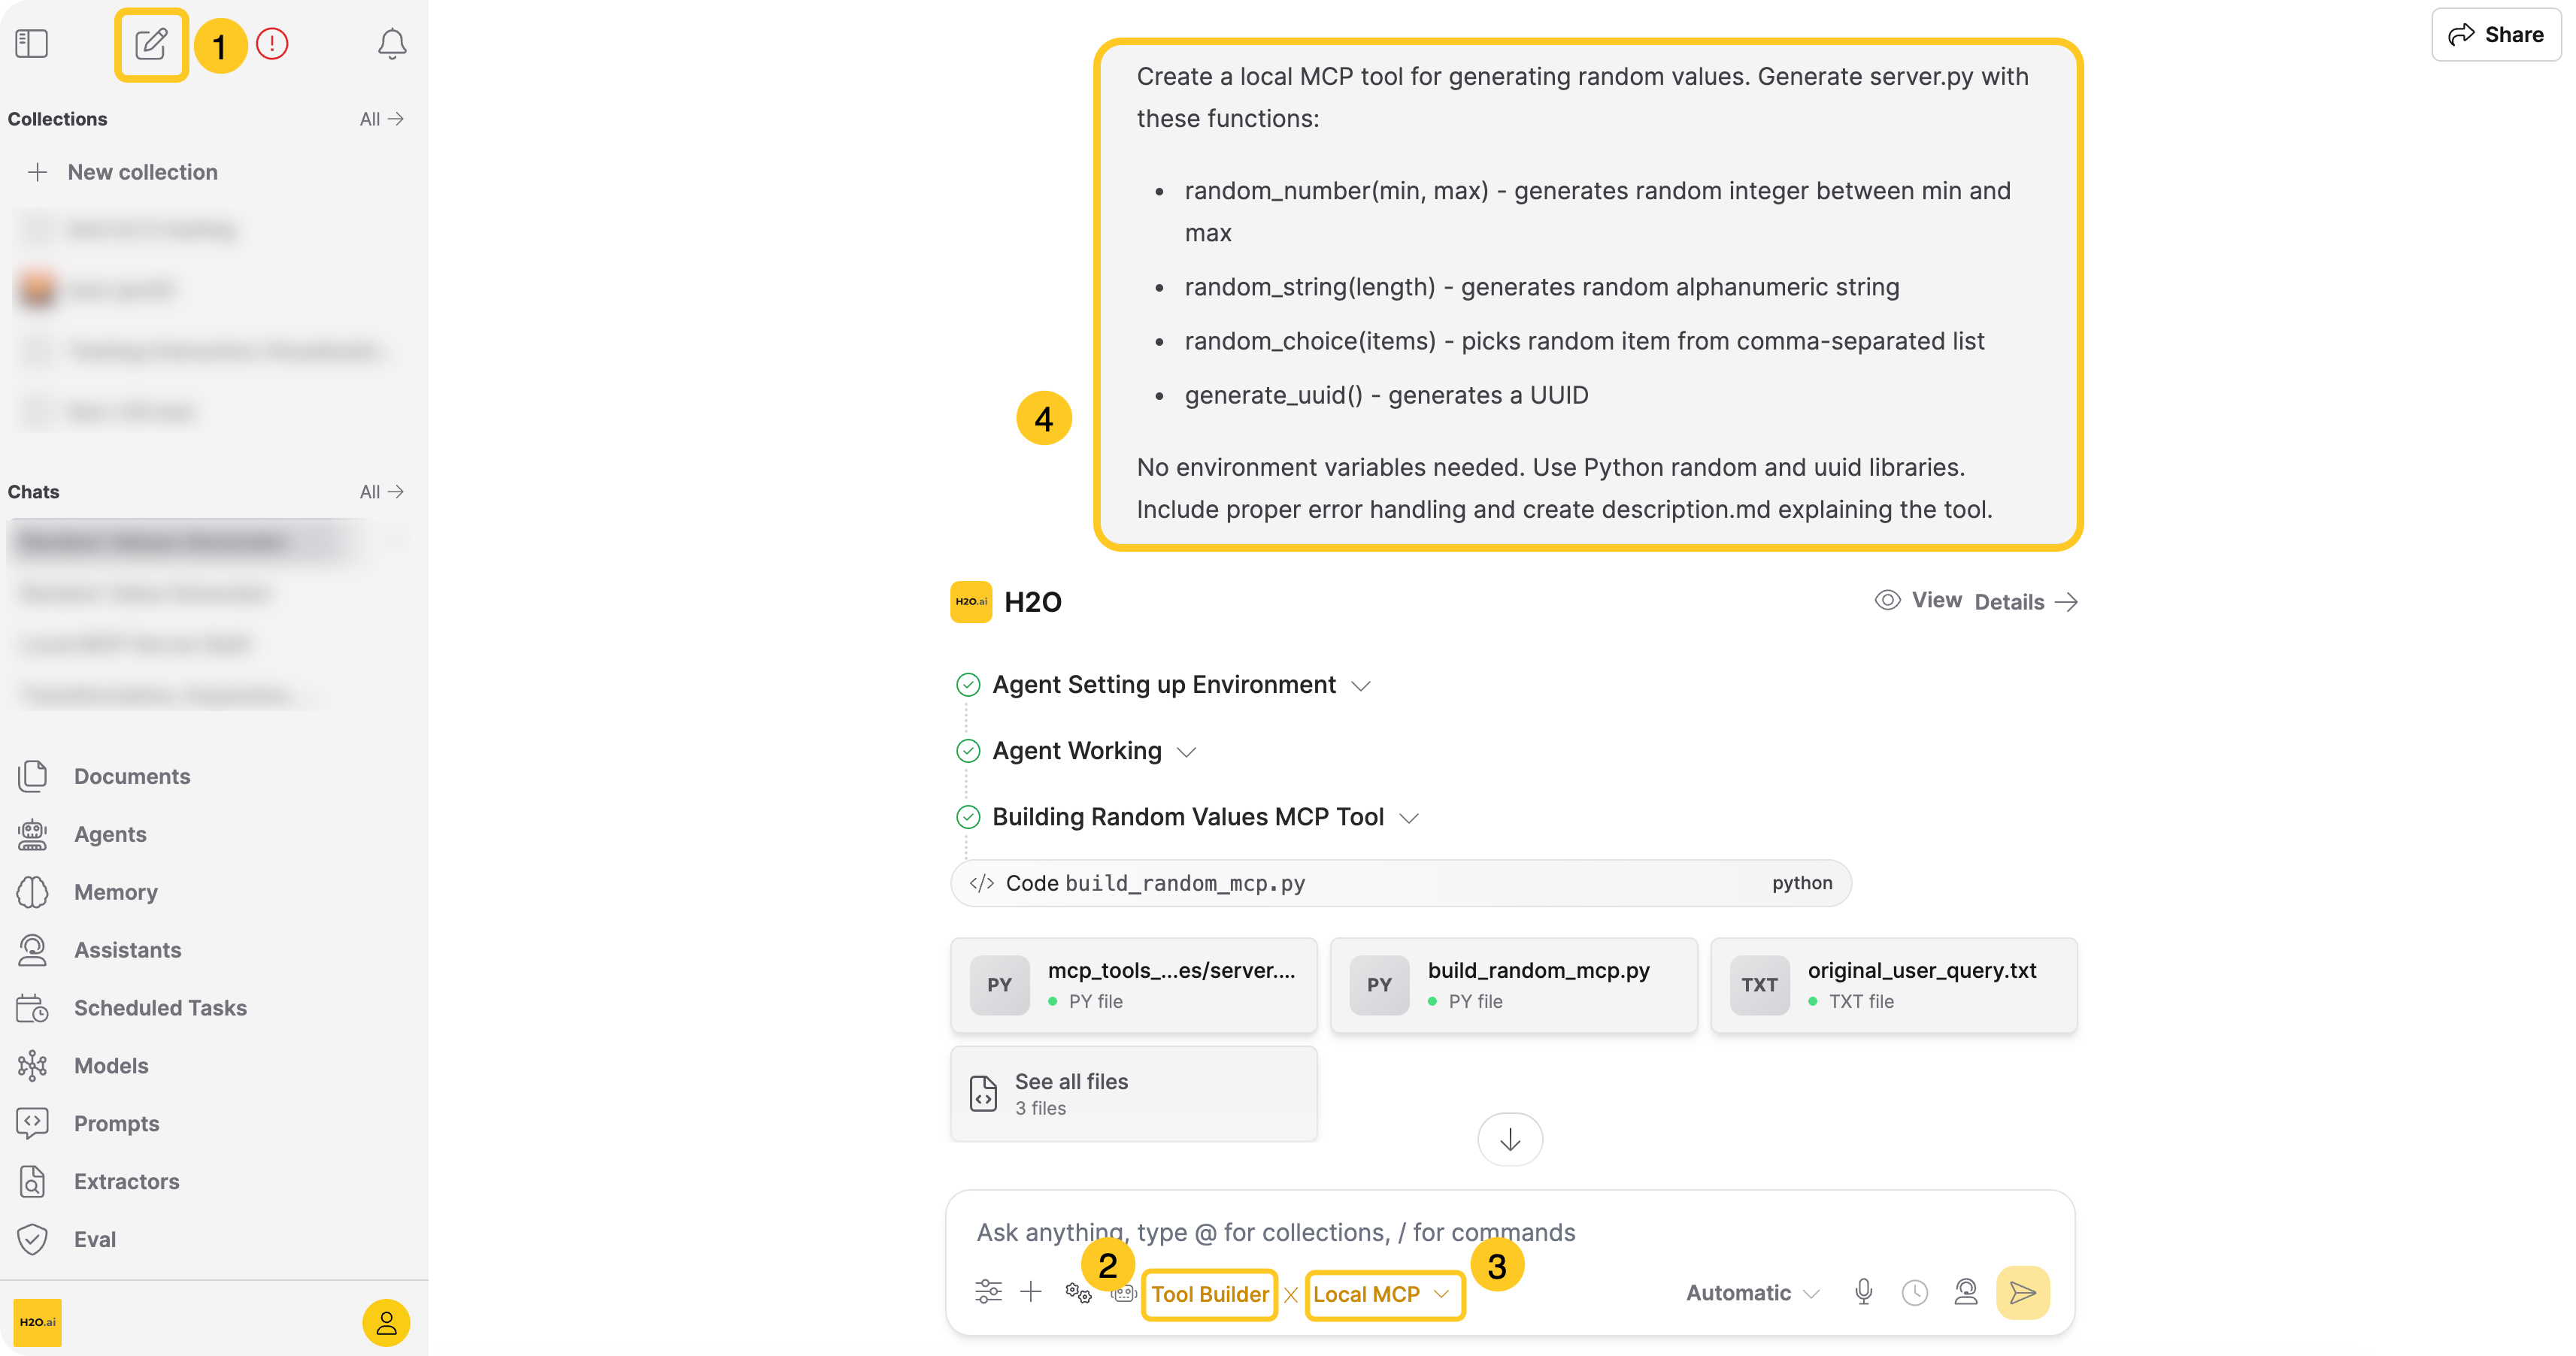
The Tool Builder agent will generate the necessary code files for your local MCP tool.
Note:
- Review the generated code to ensure it follows the MCP protocol correctly
- The Tool Builder agent usually provides complete, working code, but you may need to make minor adjustments based on your specific requirements
- You can also ask the agent to give you all the files in a zip folder with your desired name
Step 2: Save and Upload Your Tool Files
If the Tool Builder agent generated a complete .zip (or you packaged one in the workspace), you can skip the manual download-and-upload steps:
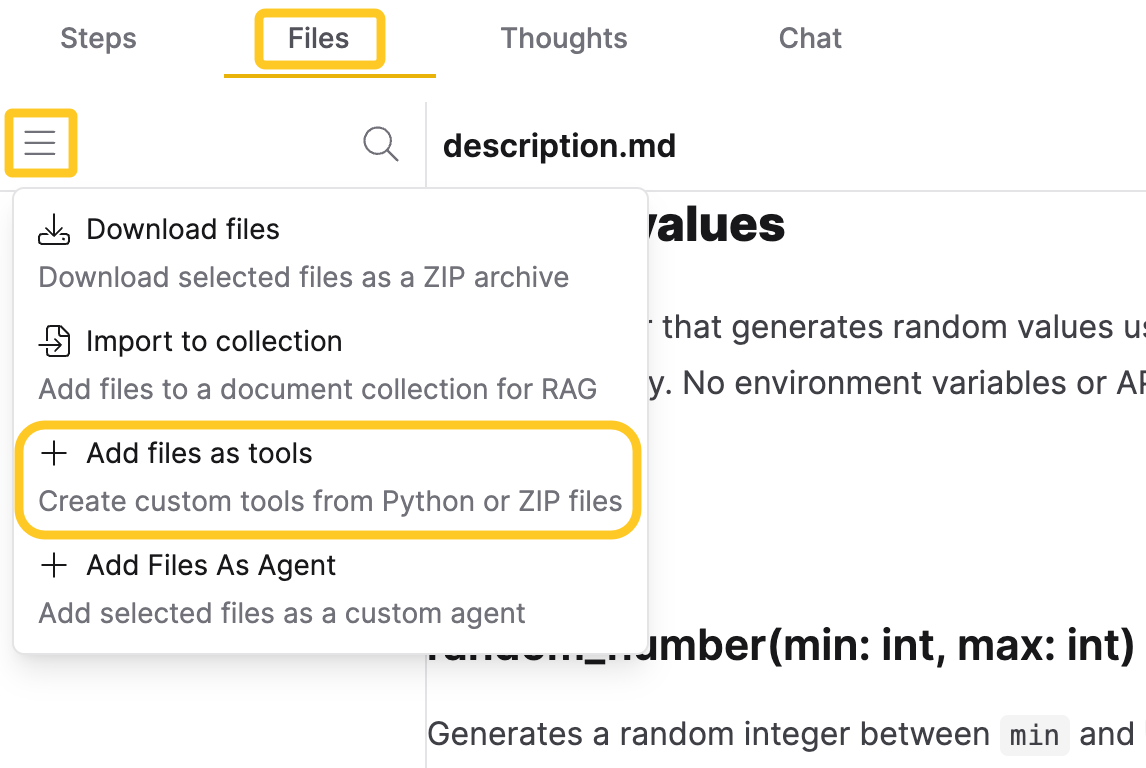
- In the agent response, click Files in the right panel
- Click the menu icon ()
- Select Add files as tools > Local MCP Tools
See Add files as tools for the full flow. The rest of this section covers the manual download-and-upload path.
- Download the generated code using one of these methods:
- From the chat response: Click the download button in the chat response
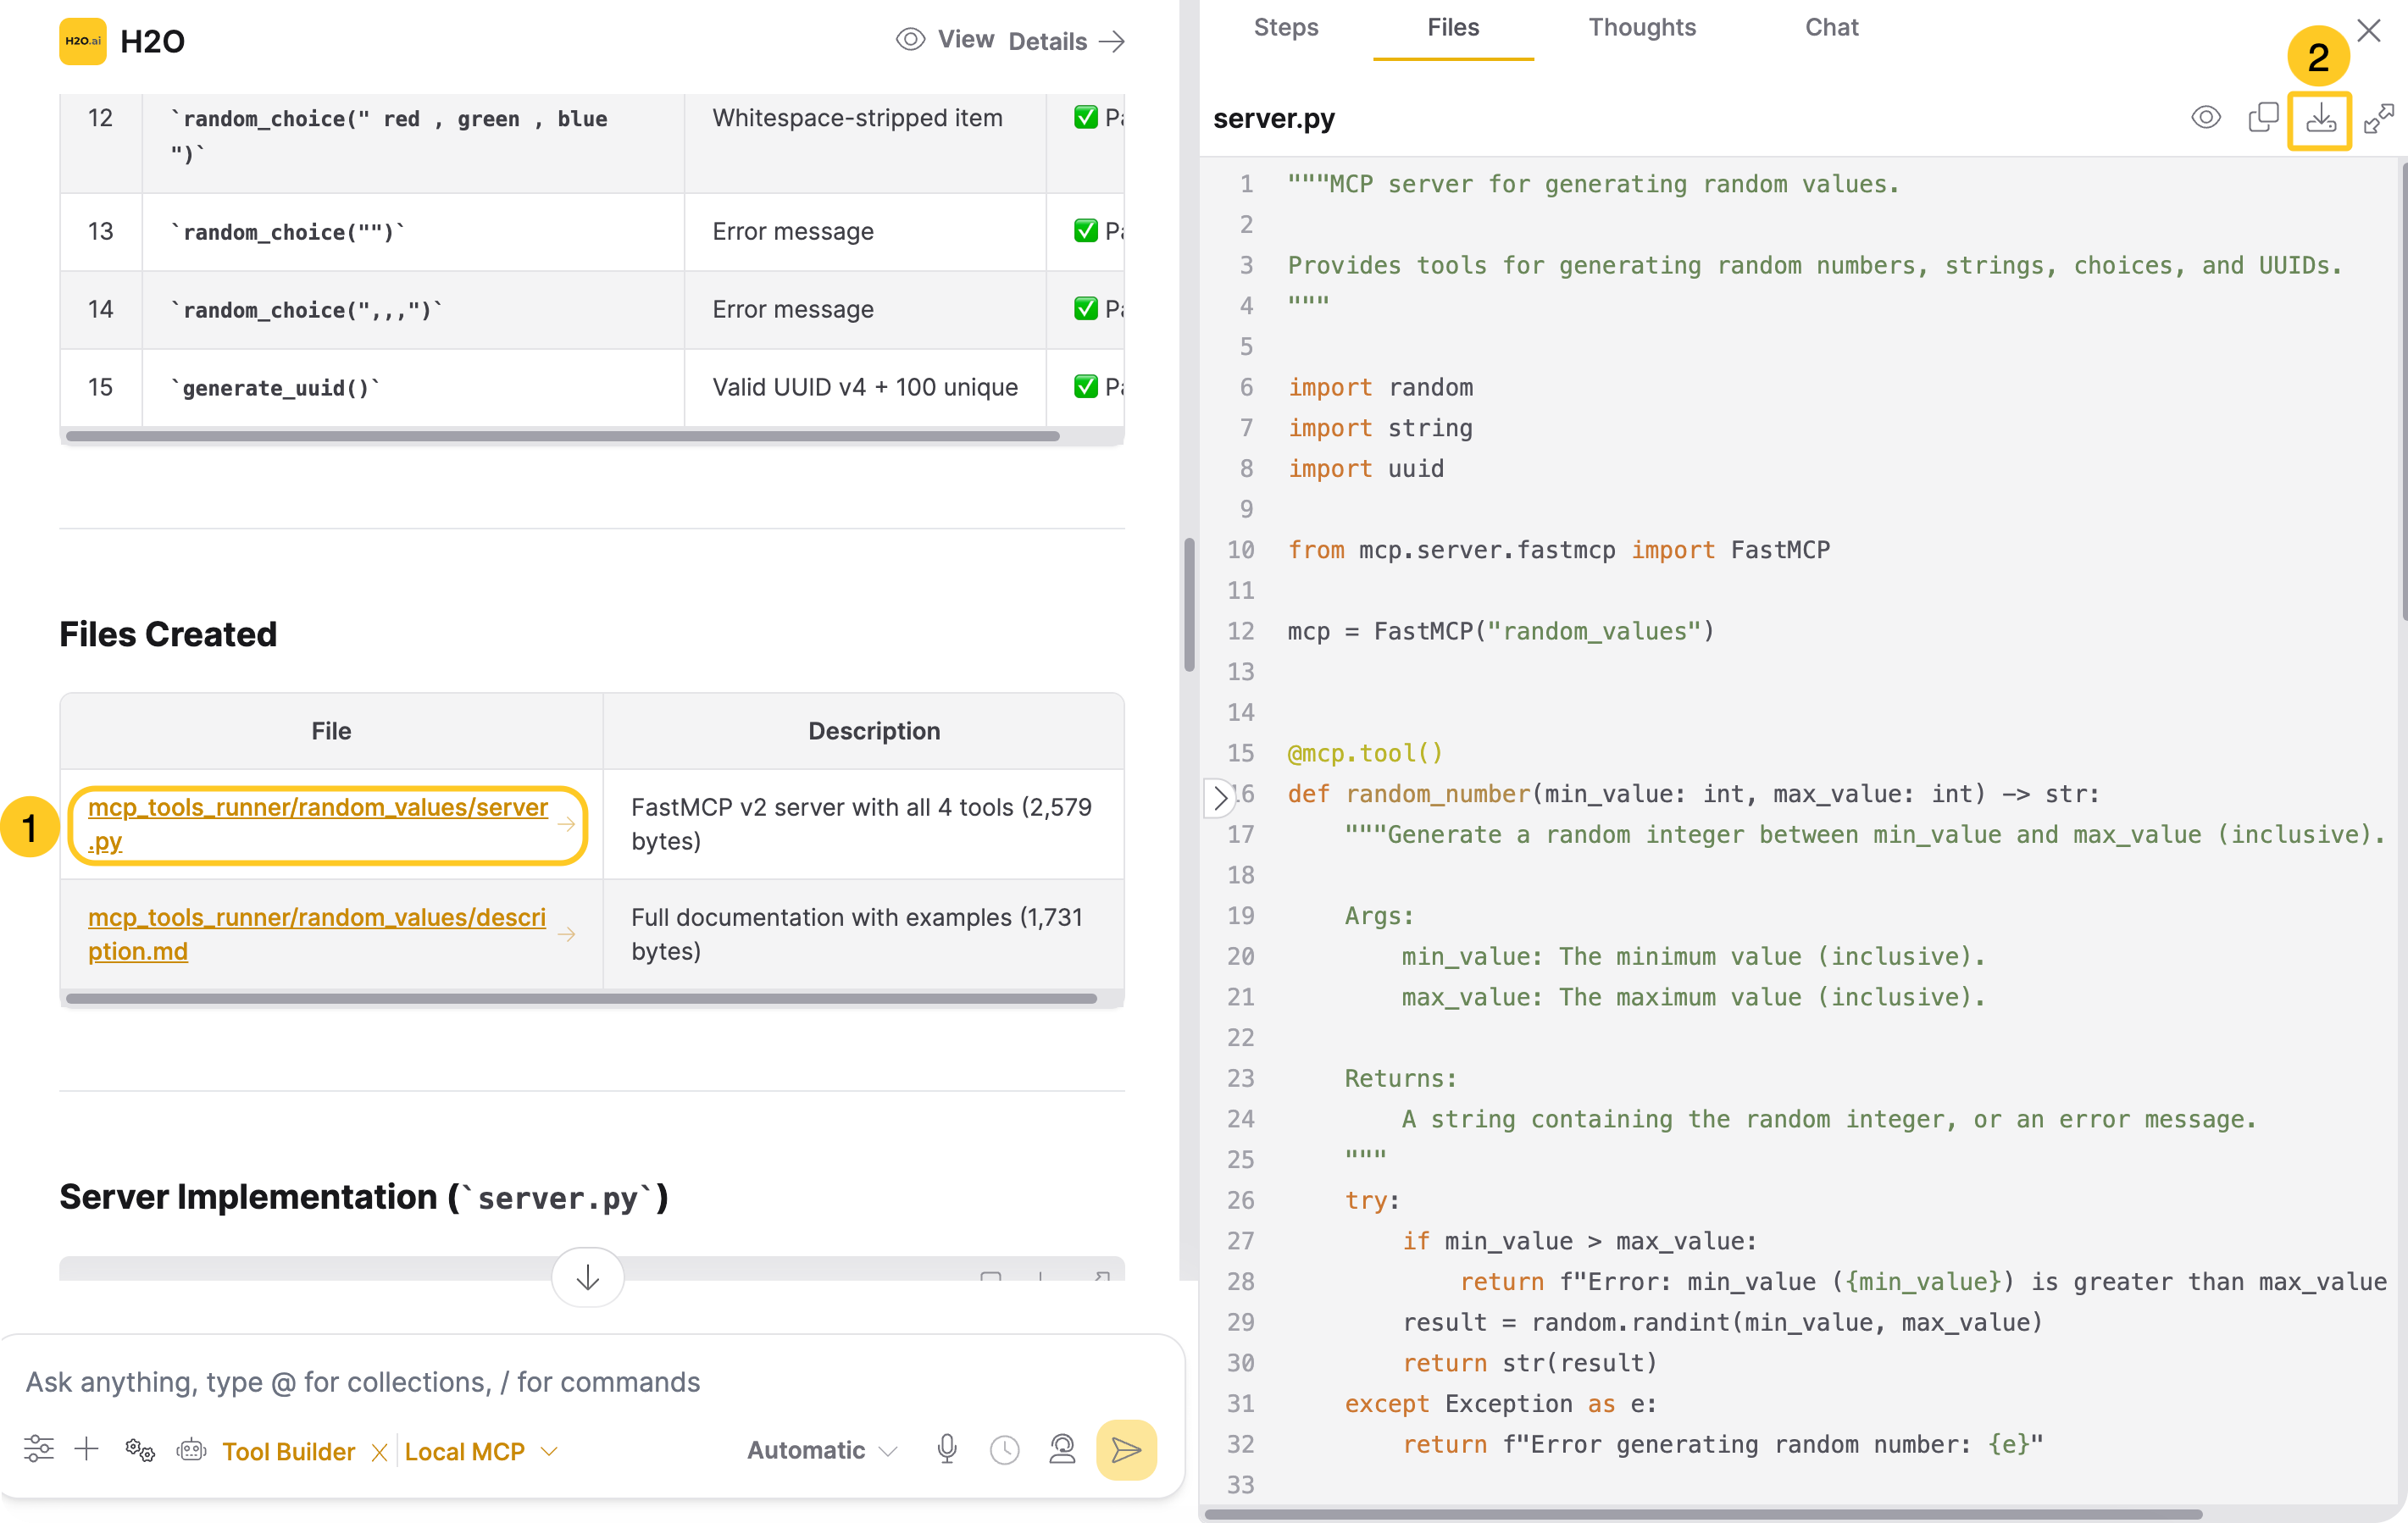
- From File actions: Navigate to the Details > Files tab, click the menu icon ,and click Download files to select and download files as a ZIP folder. See Download files for details
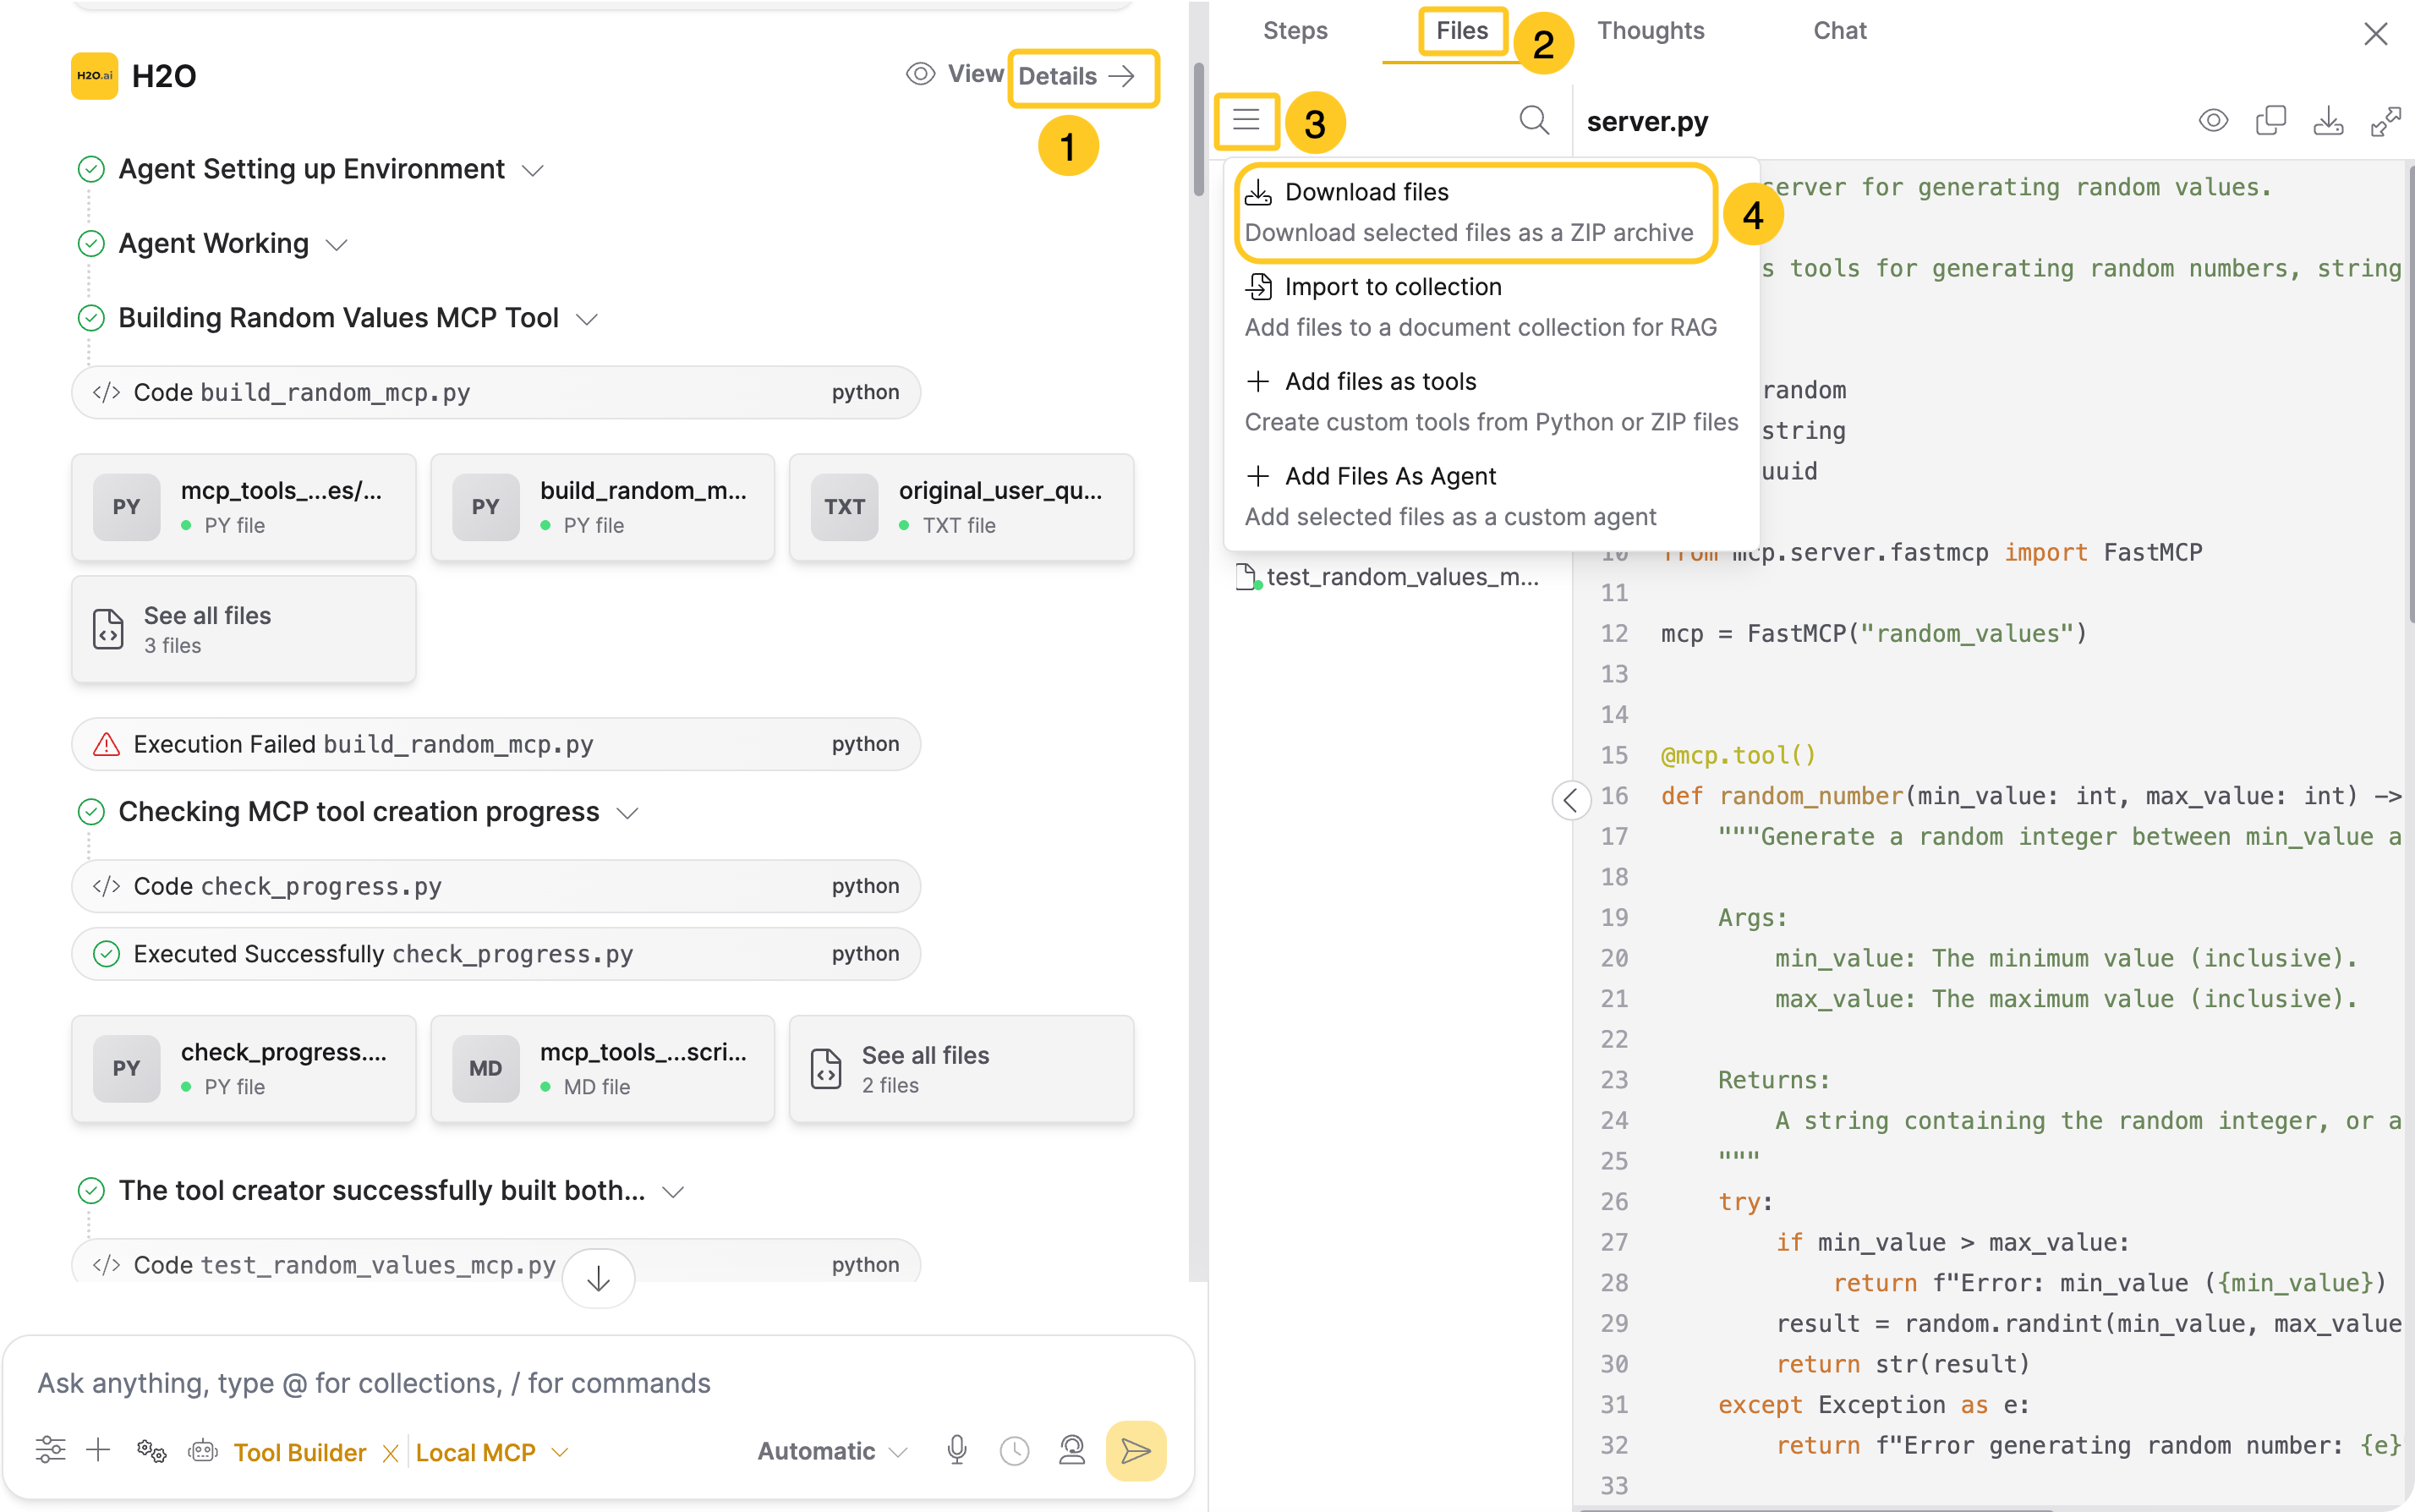
- From the chat response: Click the download button in the chat response
- Review the code to ensure it's complete and follows MCP protocol standards
- Create a directory for your tool (for example,
random-generator-tool) and save the following files in it:server.py(Python),index.ts(TypeScript), orindex.js(JavaScript) - Main MCP server implementation (required)description.md- Tool documentation (optional)
- Run the following command to create a ZIP file containing your tool directory:
zip -r random-generator-tool.zip random-generator-tool/
The maximum upload size is 100 MB. ZIP files can contain multiple tool directories (up to 20), each with its own entry point.
- Go to Agents in the main navigation
- Click on the Tools tab
- Click + Custom Tool
- Select Local MCP Tools from the dropdown menu
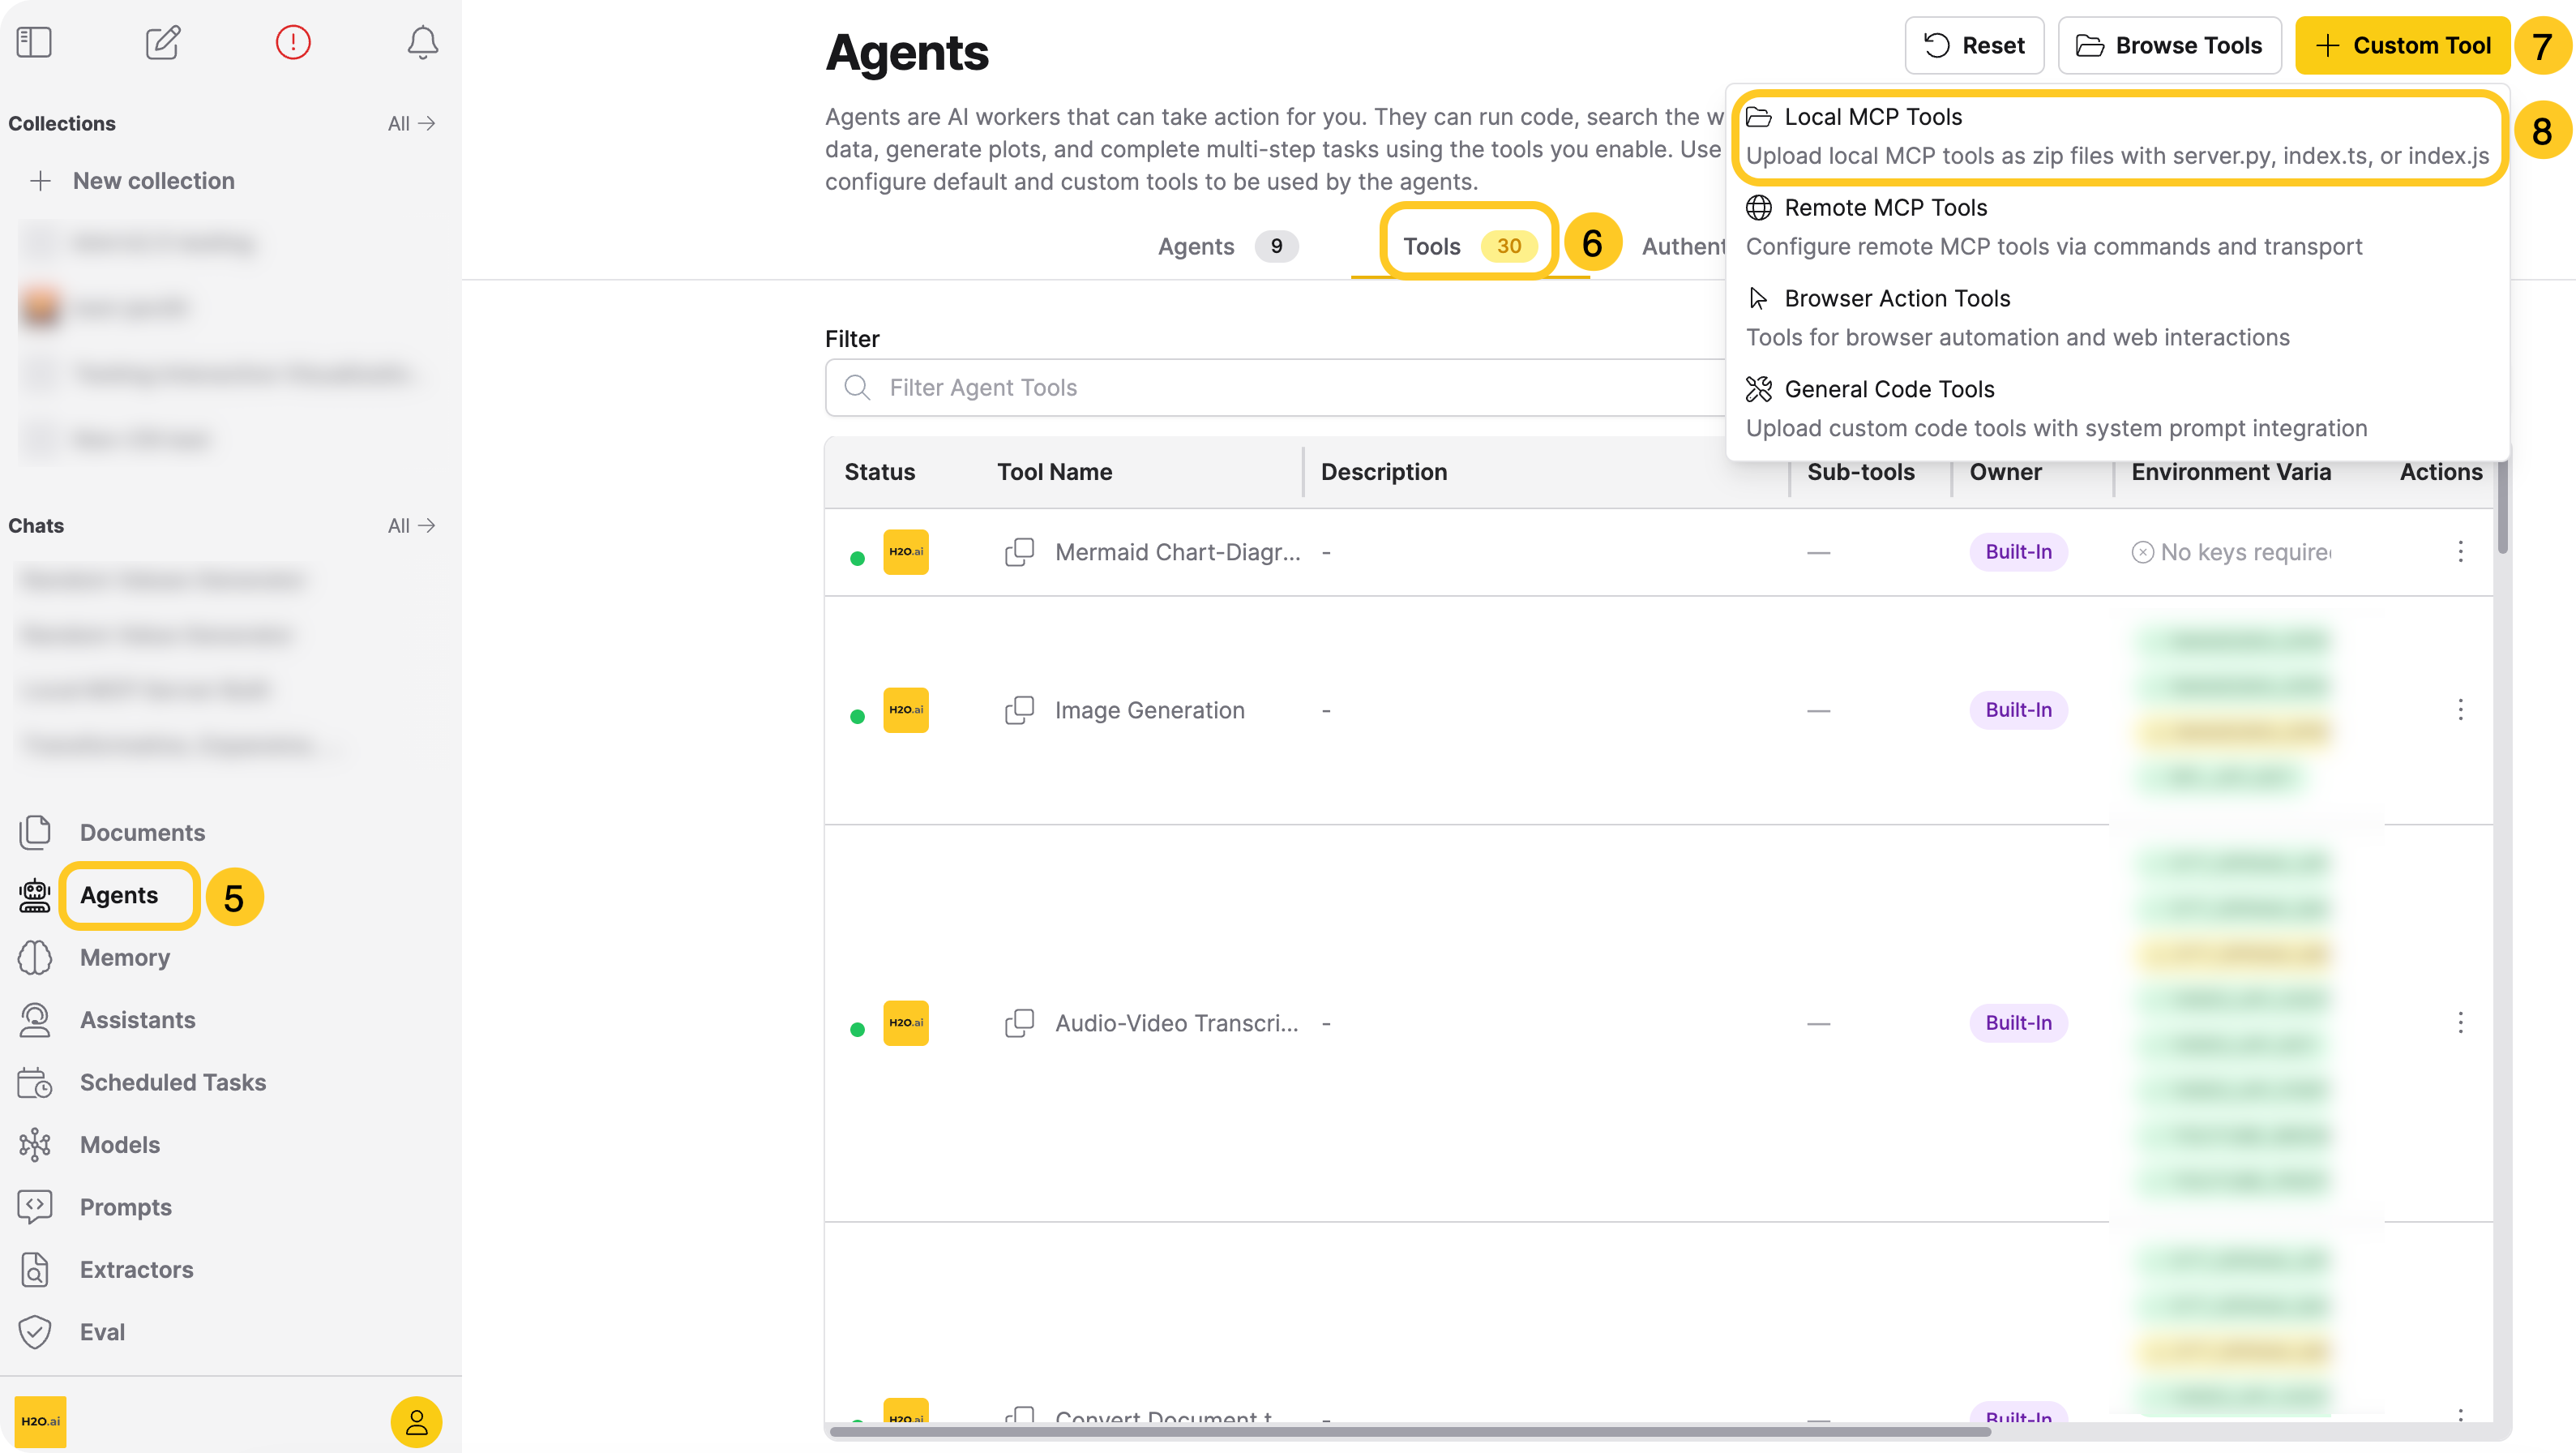
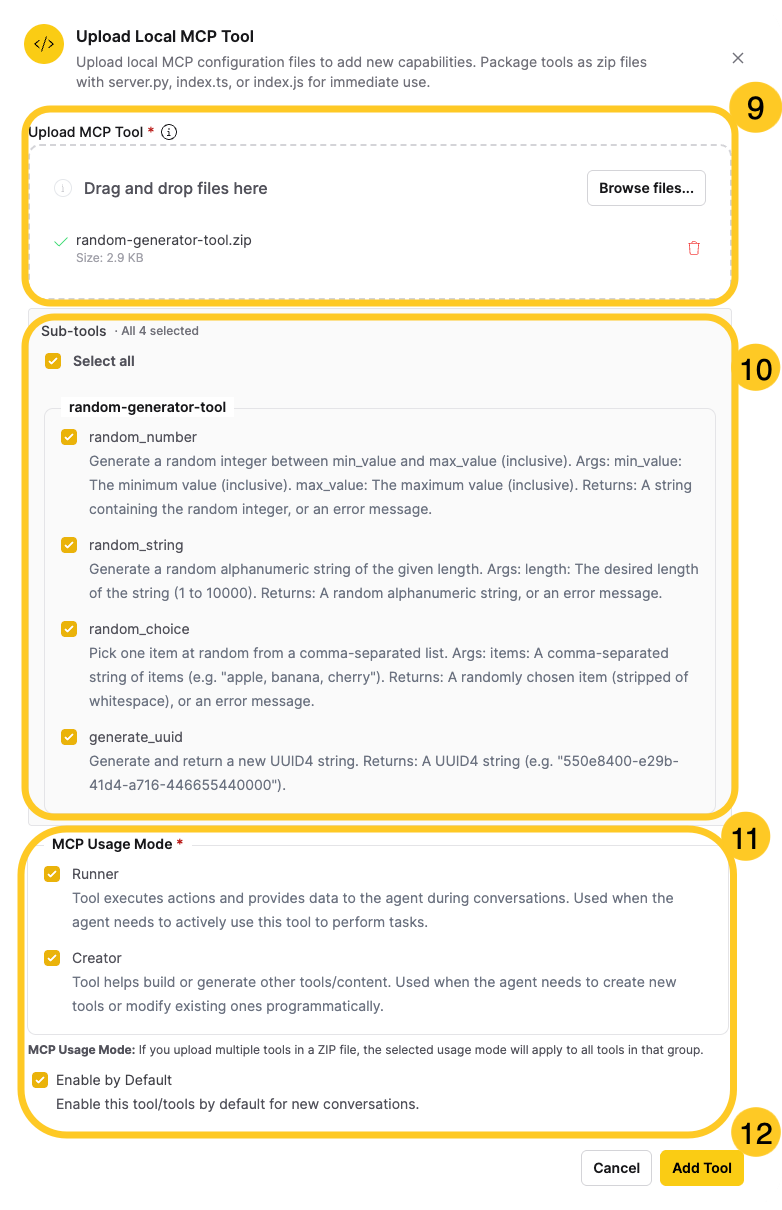
- Upload your ZIP file using the file upload dialog
- Review discovered sub-tools: After uploading, Enterprise h2oGPTe automatically inspects the package and shows discovered sub-tools as checkboxes. Select or deselect tools to control which ones are enabled.
- Configure tool settings (if available):
- MCP Usage Mode: Select "Runner" (default) or both "Runner" and "Creator" if applicable
- Enable by Default: Choose whether to enable the tool automatically in conversations
- Click Add Tool
You can also update sub-tool selection later. In Agents > Tools, click the actions menu (three dots) on your tool row and click Select Sub-tools. See Sub-tool selection for details.
Step 3: Enable and Test Your Tool
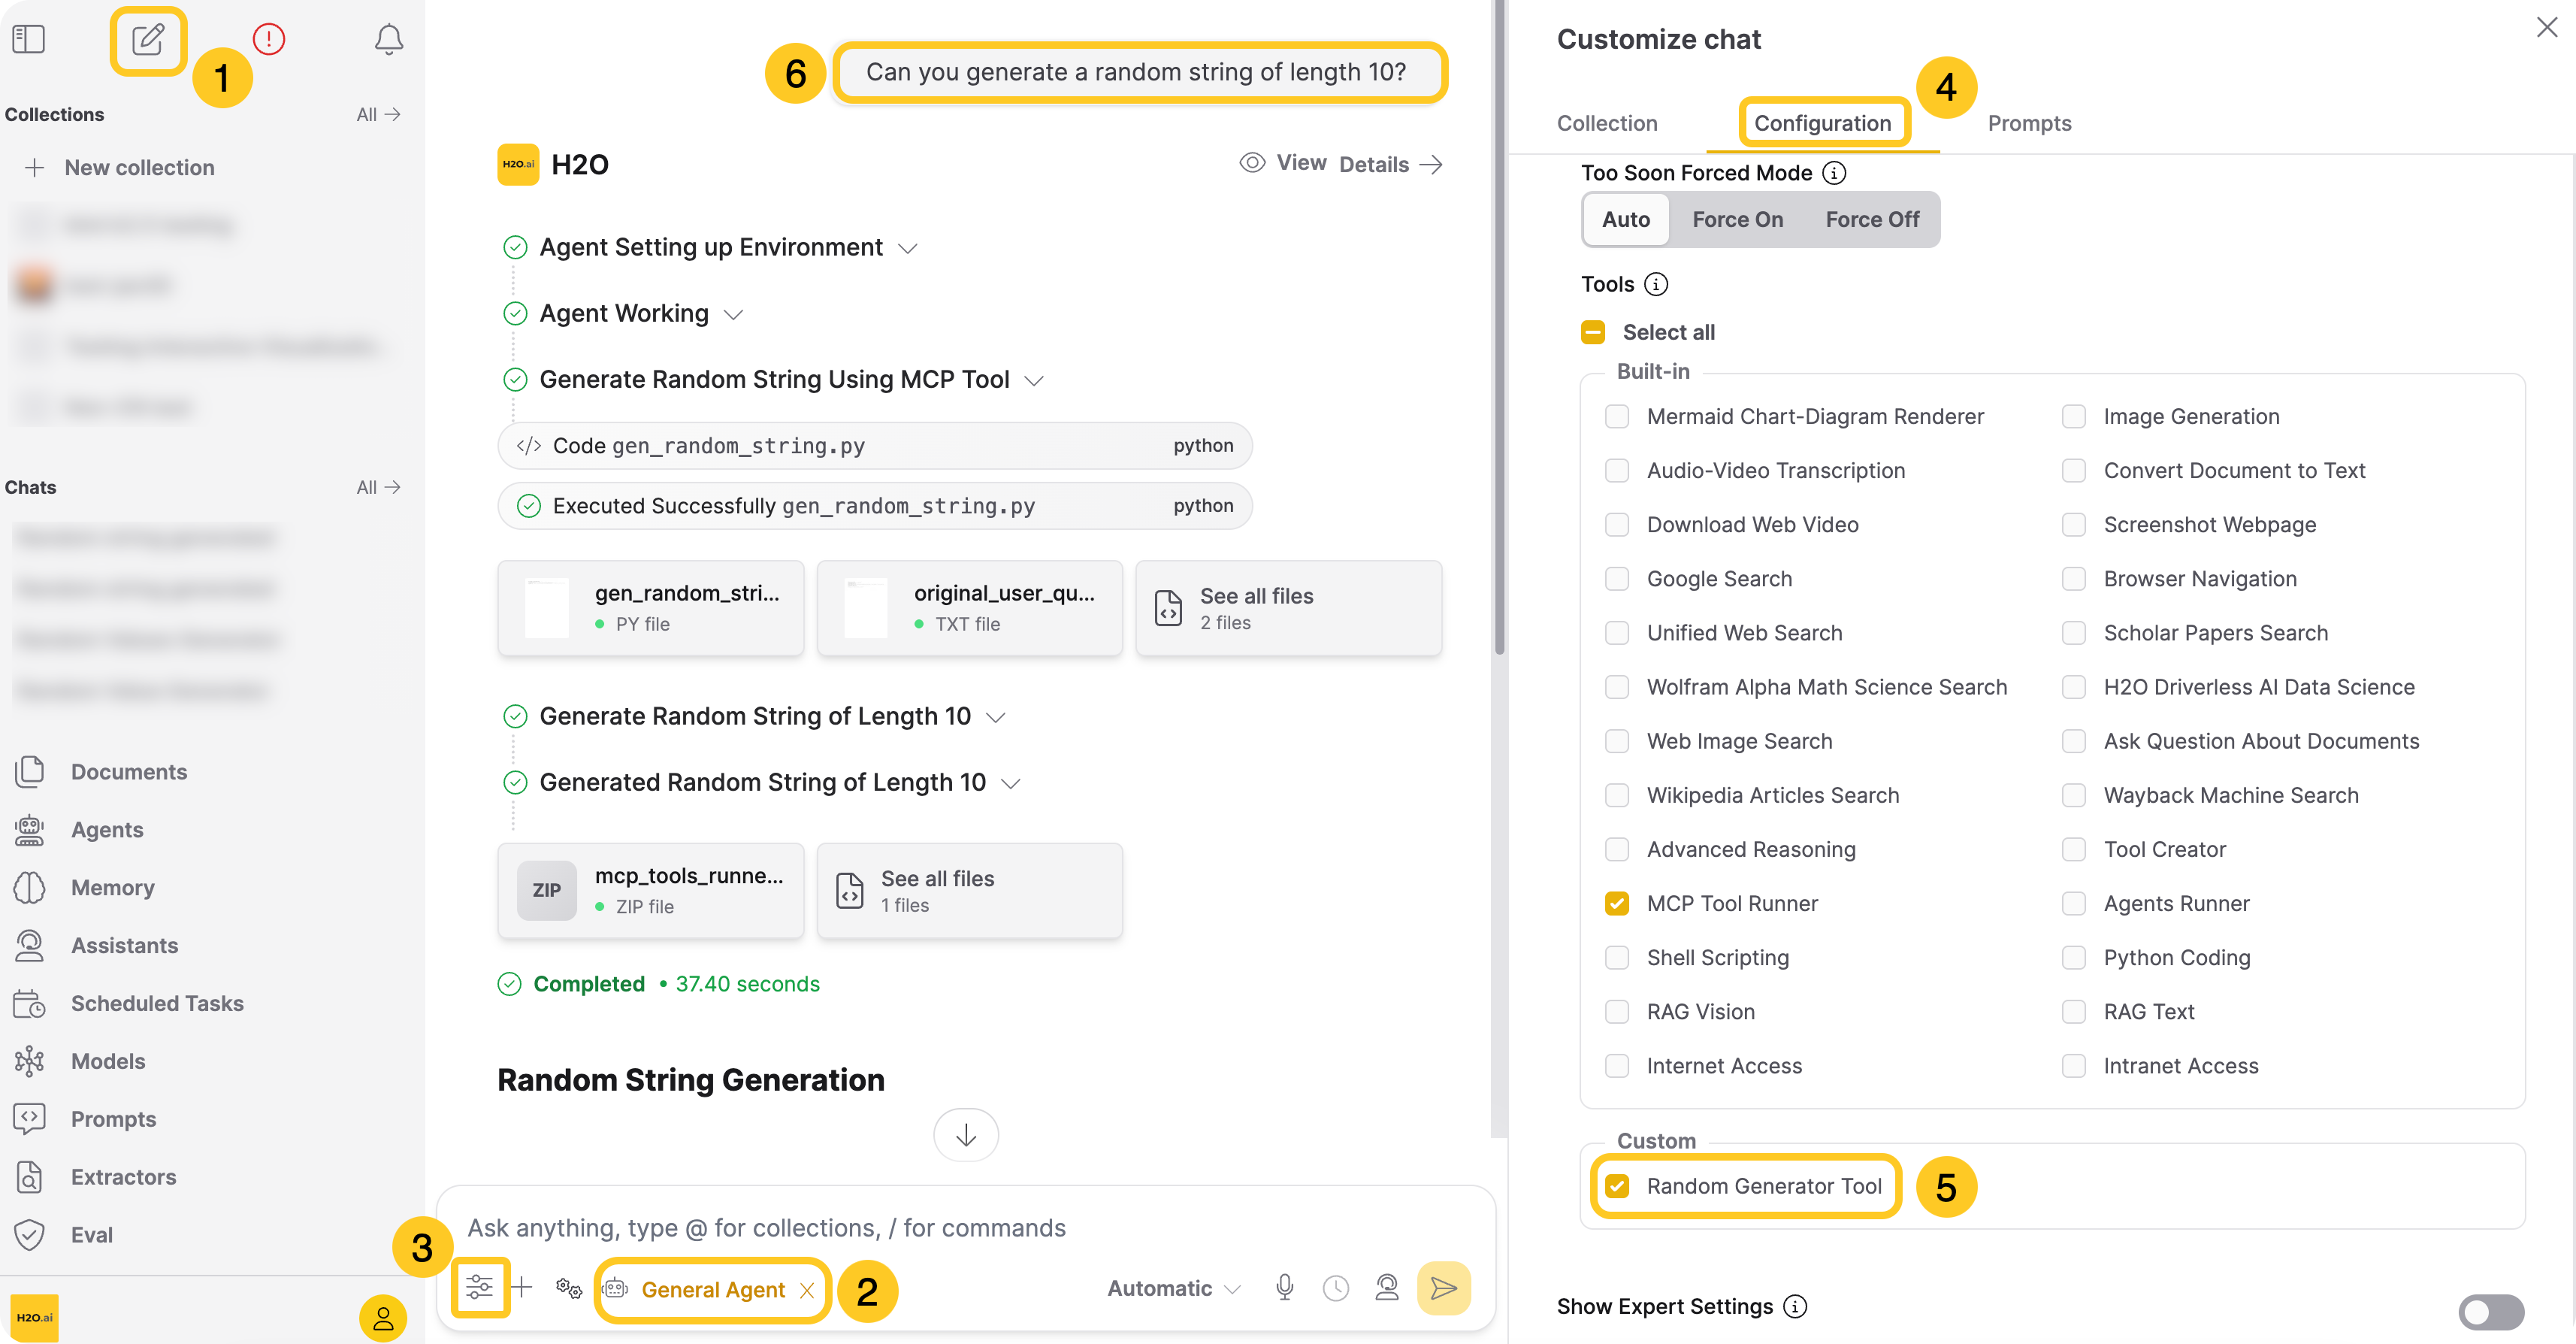
- Go to a new chat session
- Select your preferred agent (for example, General Agent or another agent)
- Click Customize
- Go to the Configuration tab
- Enable your local MCP tool by toggling it on in the list under Custom Tools
- Send a test message and verify the response
Example Test Messages:
- "Can you generate a random number between 1 and 100"
- "Can you generate a random string of length 10"
- "Can you pick a random item from: apple, banana, orange, grape"
- "Can you generate a UUID"
Step 4: Verify Tool Execution
After sending your message, check the response to confirm:
- The tool executed successfully
- The response contains the expected data
- Error handling works correctly (if applicable)
Next Steps
- Explore the MCP server directory
- Learn about Remote MCP Tools
- Submit and view feedback for this page
- Send feedback about Enterprise h2oGPTe to cloud-feedback@h2o.ai