Deploy a custom agent with a local MCP tool
This tutorial explains how to generate and deploy a local MCP tool and a custom agent in Enterprise h2oGPTe. You will create both packages in h2oGPTe Chat, register them, configure mappings when needed, and validate the workflow in h2oGPTe Chat. This tutorial uses a weather assistant example. The custom agent receives a weather question, calls the MCP tool, and returns a structured response. You can apply the same process to other use cases.
After you complete this tutorial, you can:
- Generate a local MCP tool package with Tool Builder.
- Generate a custom agent package with Agents Builder.
- Upload and connect both packages in Agents > Tools and Agents > Agents.
- Test the connected workflow in h2oGPTe Chat.
Prerequisites
Before you begin, confirm the following:
- You can sign in to Enterprise h2oGPTe.
- Your workspace has access to both Tool Builder and Agents Builder.
- You have read Custom agents for the Agents page layout and actions.
- You have a secret for your model provider API key in Secret Manager.
Step 1: Generate the local MCP tool package with Tool Builder
- Open h2oGPTe > Chat.
- Select Tool Builder from the agent selector.
- Open Tool Types, then select Local MCP.
- Enter a prompt that defines your MCP tool and server name.
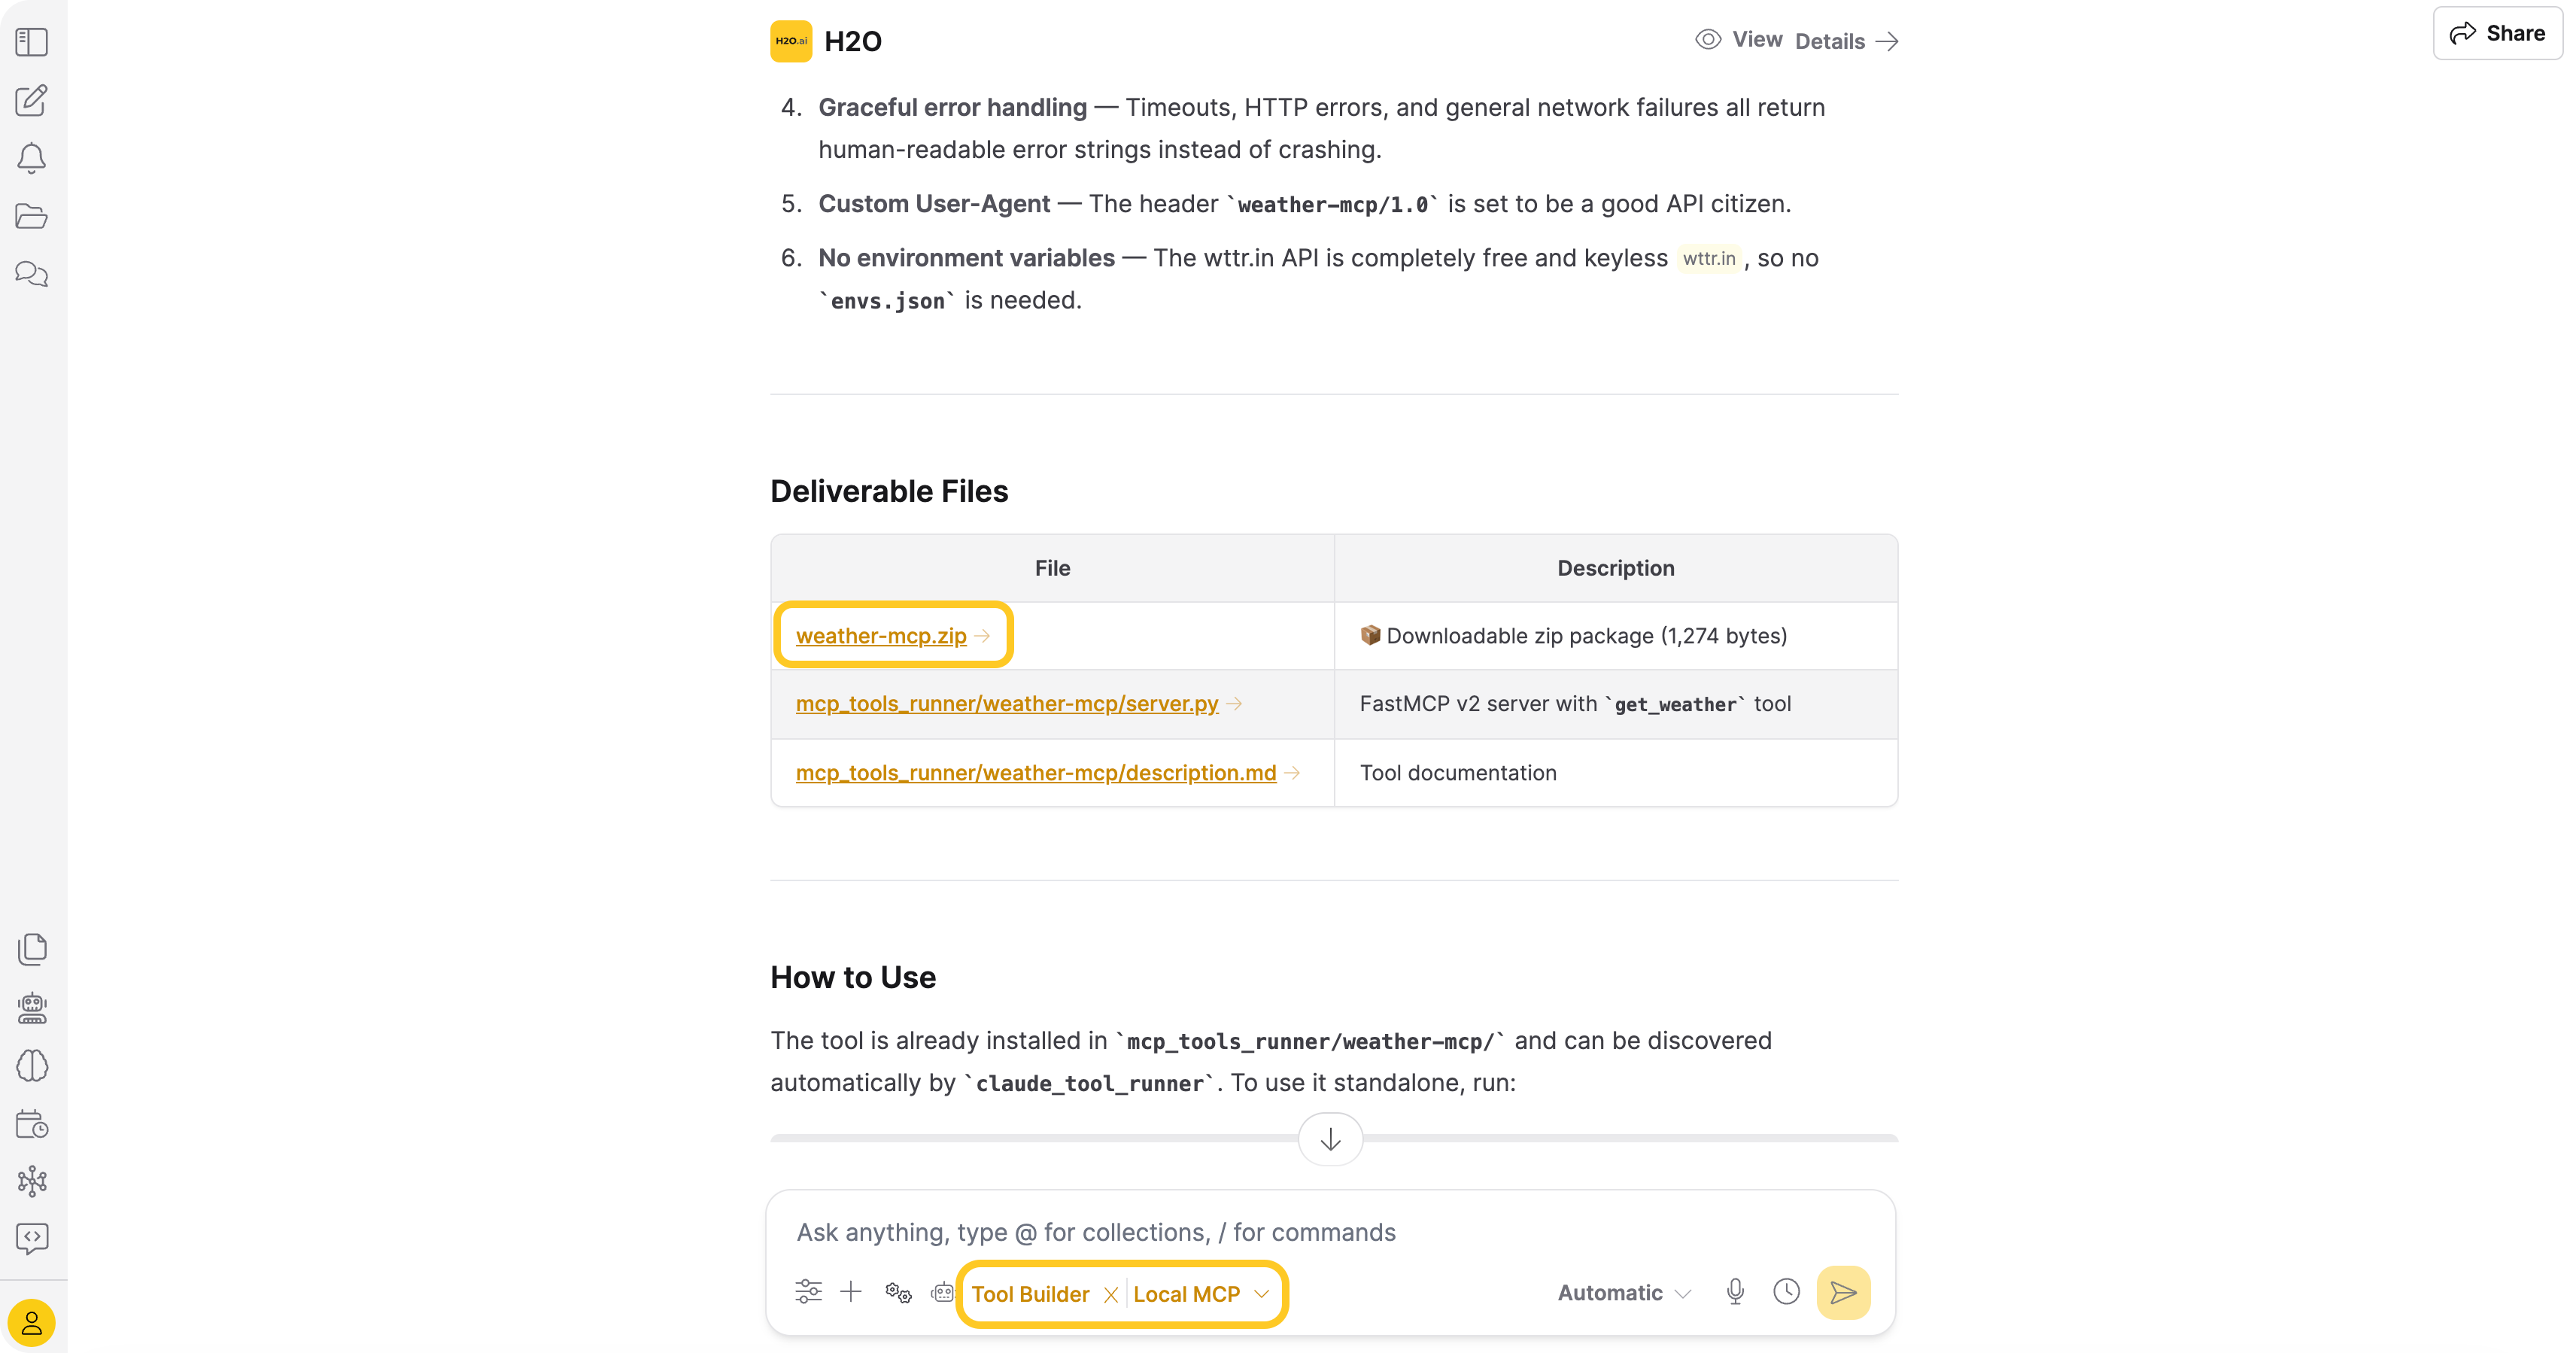
- Download the generated MCP tool package as a
.zipfile.
For this use case, include the following in your prompt:
- The MCP server name `weather-mcp`.
- The required file `server.py`.
- A single MCP tool named `get_weather(city: str) -> str`.
- Input validation requirements for `city`.
- Output format requirements for the returned weather summary.
- The optional file `description.md`.
- A statement that the tool does not require environment variables.
- A request to return a downloadable `.zip` package.
For UI steps, packaging requirements, and troubleshooting, see Create local MCP tools.
Step 2: Generate the custom agent package with Agents Builder
- In h2oGPTe > Chat, select Agents Builder from the agent selector.
- Describe a custom agent that calls the
weather-mcpMCP server. - Set the builder accuracy mode based on your use case:
- Quick for fast iteration.
- Basic for balanced speed and quality.
- Standard for default quality-focused generation.
- Maximum for deeper research and richer output.
- Open the generated package preview, then verify the environment variable section includes your required provider keys (for example,
CUSTOM_AGENT_API_KEYandCUSTOM_AGENT_BASE_URL). - Verify the generated package includes required agent files:
custom_agents.pymetadata.jsonrequirements.txtenvs.json
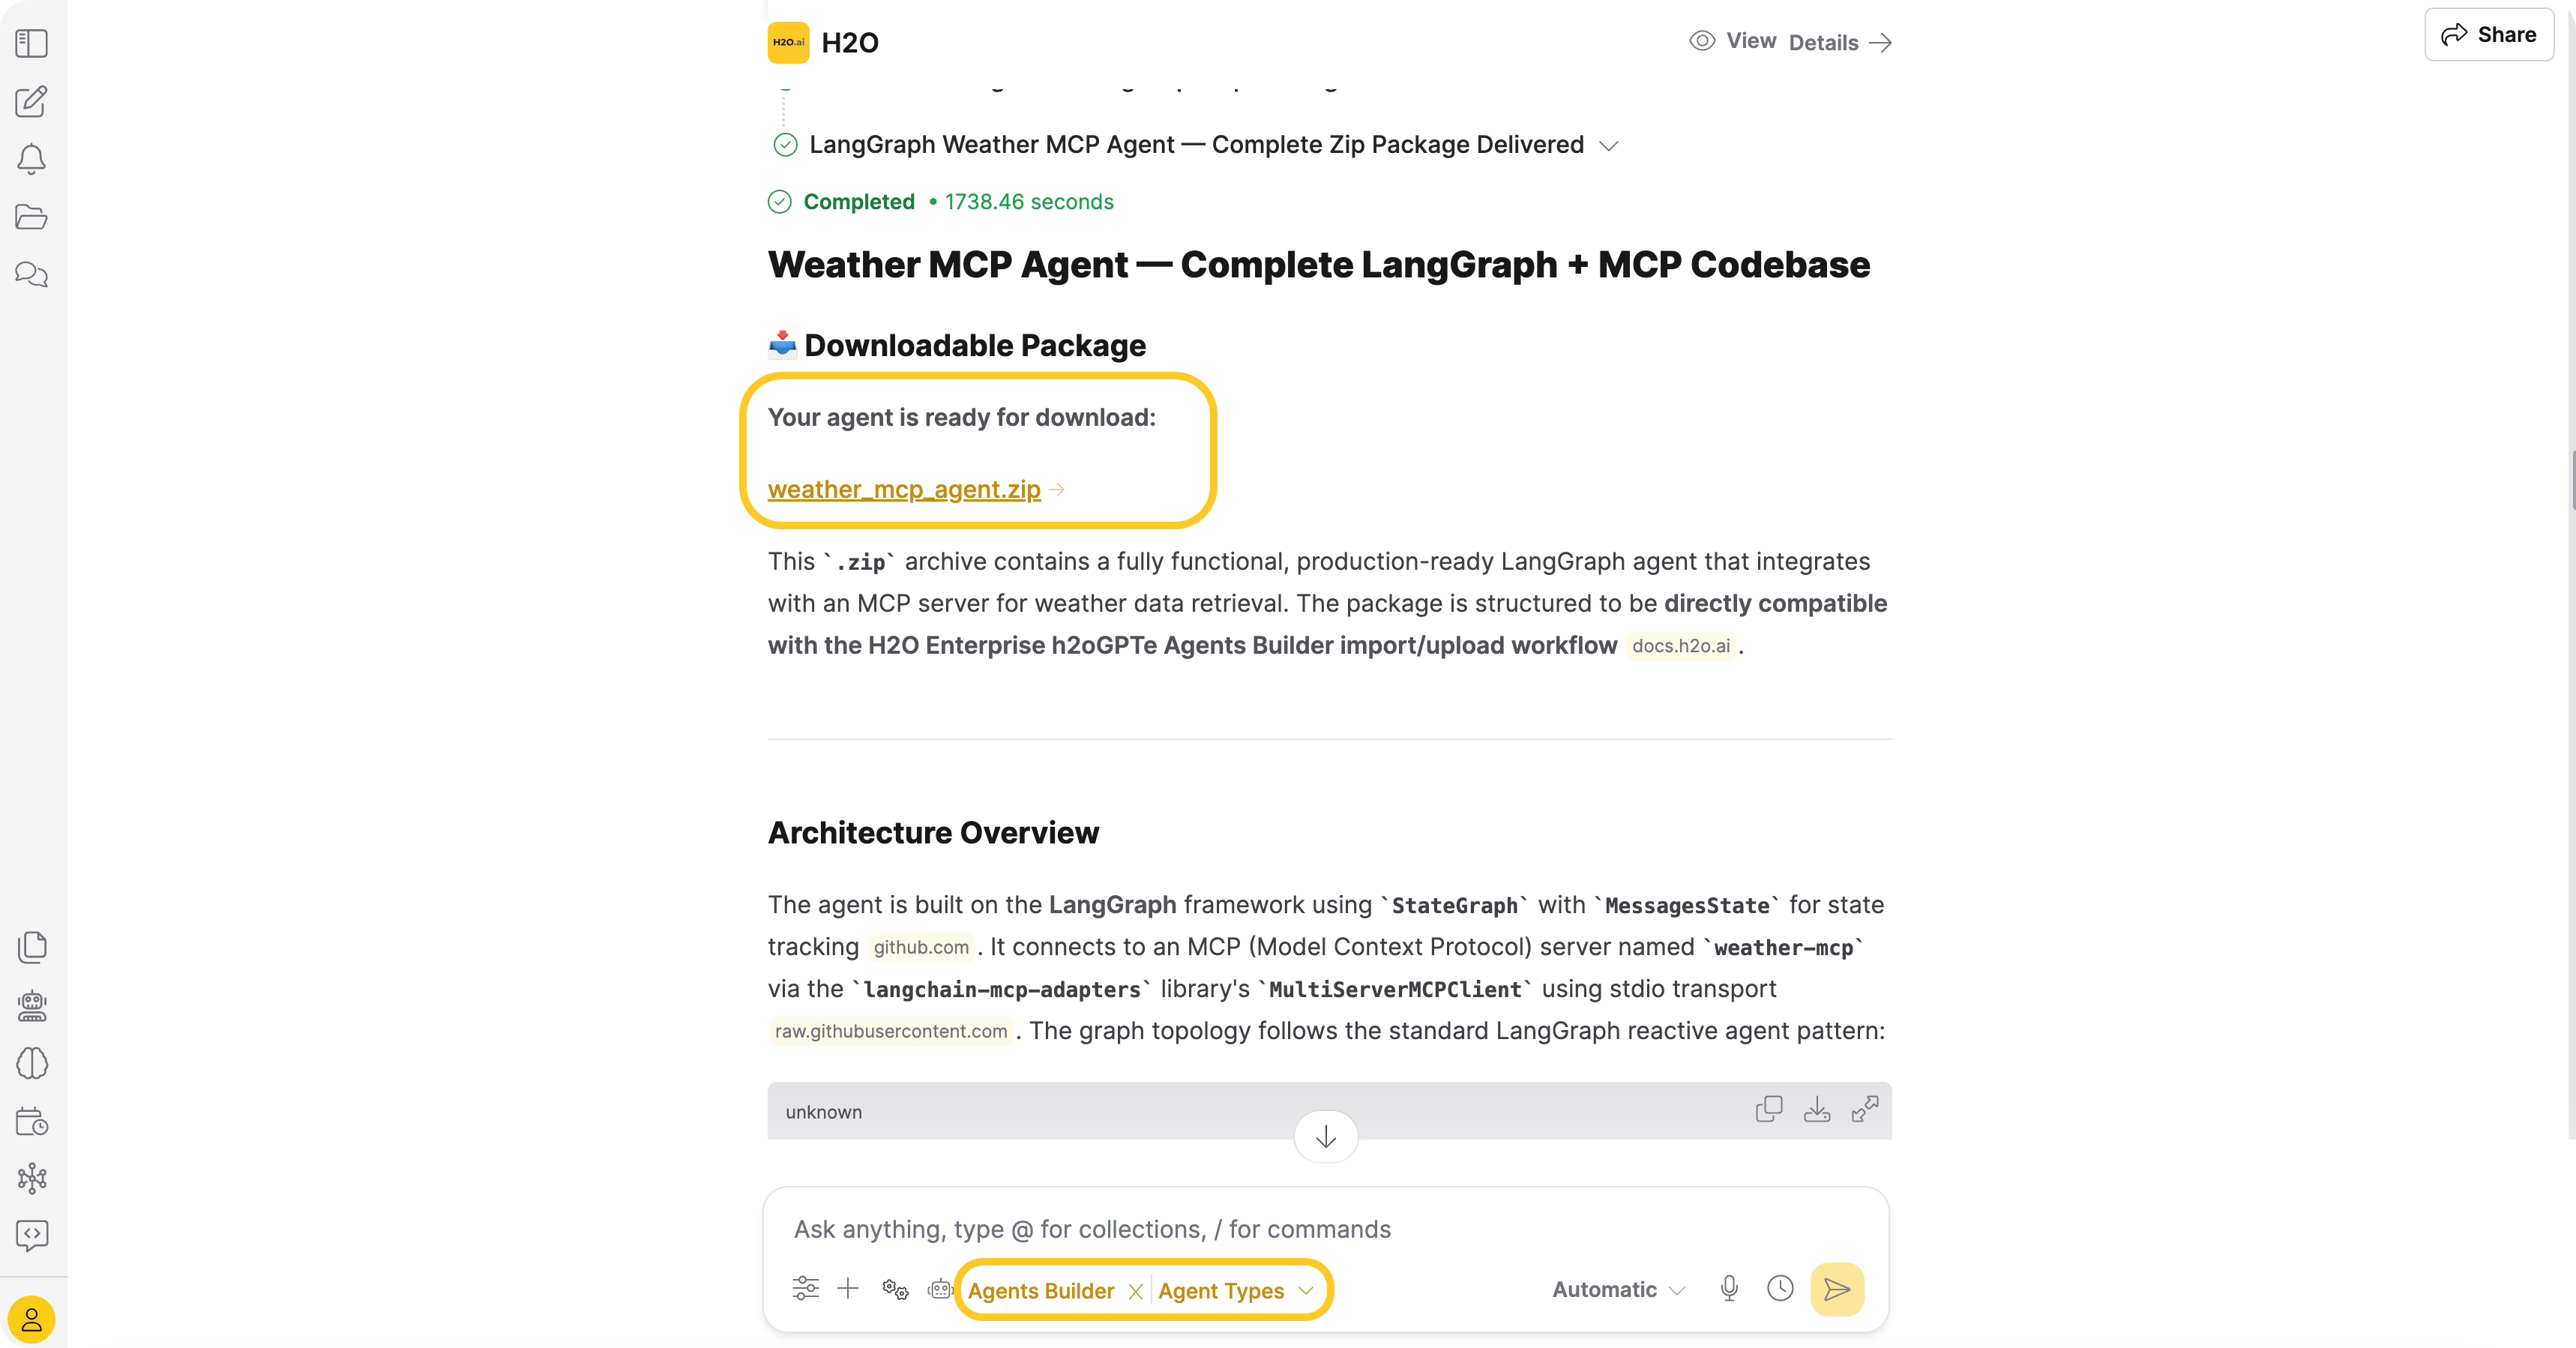
- Download the generated custom agent package as a
.zipfile.
For this use case, include the following in your prompt:
- The agent framework `langgraph`.
- A requirement to call the MCP server name `weather-mcp`.
- The MCP tool name `get_weather(city: str) -> str`.
- A requirement to extract one or more city names from a user question.
- A requirement to handle multi-city questions.
- Output format requirements for the final agent response.
- Required environment variables:
  - `CUSTOM_AGENT_API_KEY`
  - `CUSTOM_AGENT_BASE_URL`
- Optional environment variables:
  - `CUSTOM_AGENT_MODEL`
  - `CUSTOM_AGENT_TIMEOUT`
- Return a downloadable `.zip` package compatible with **Agents > Agents**.
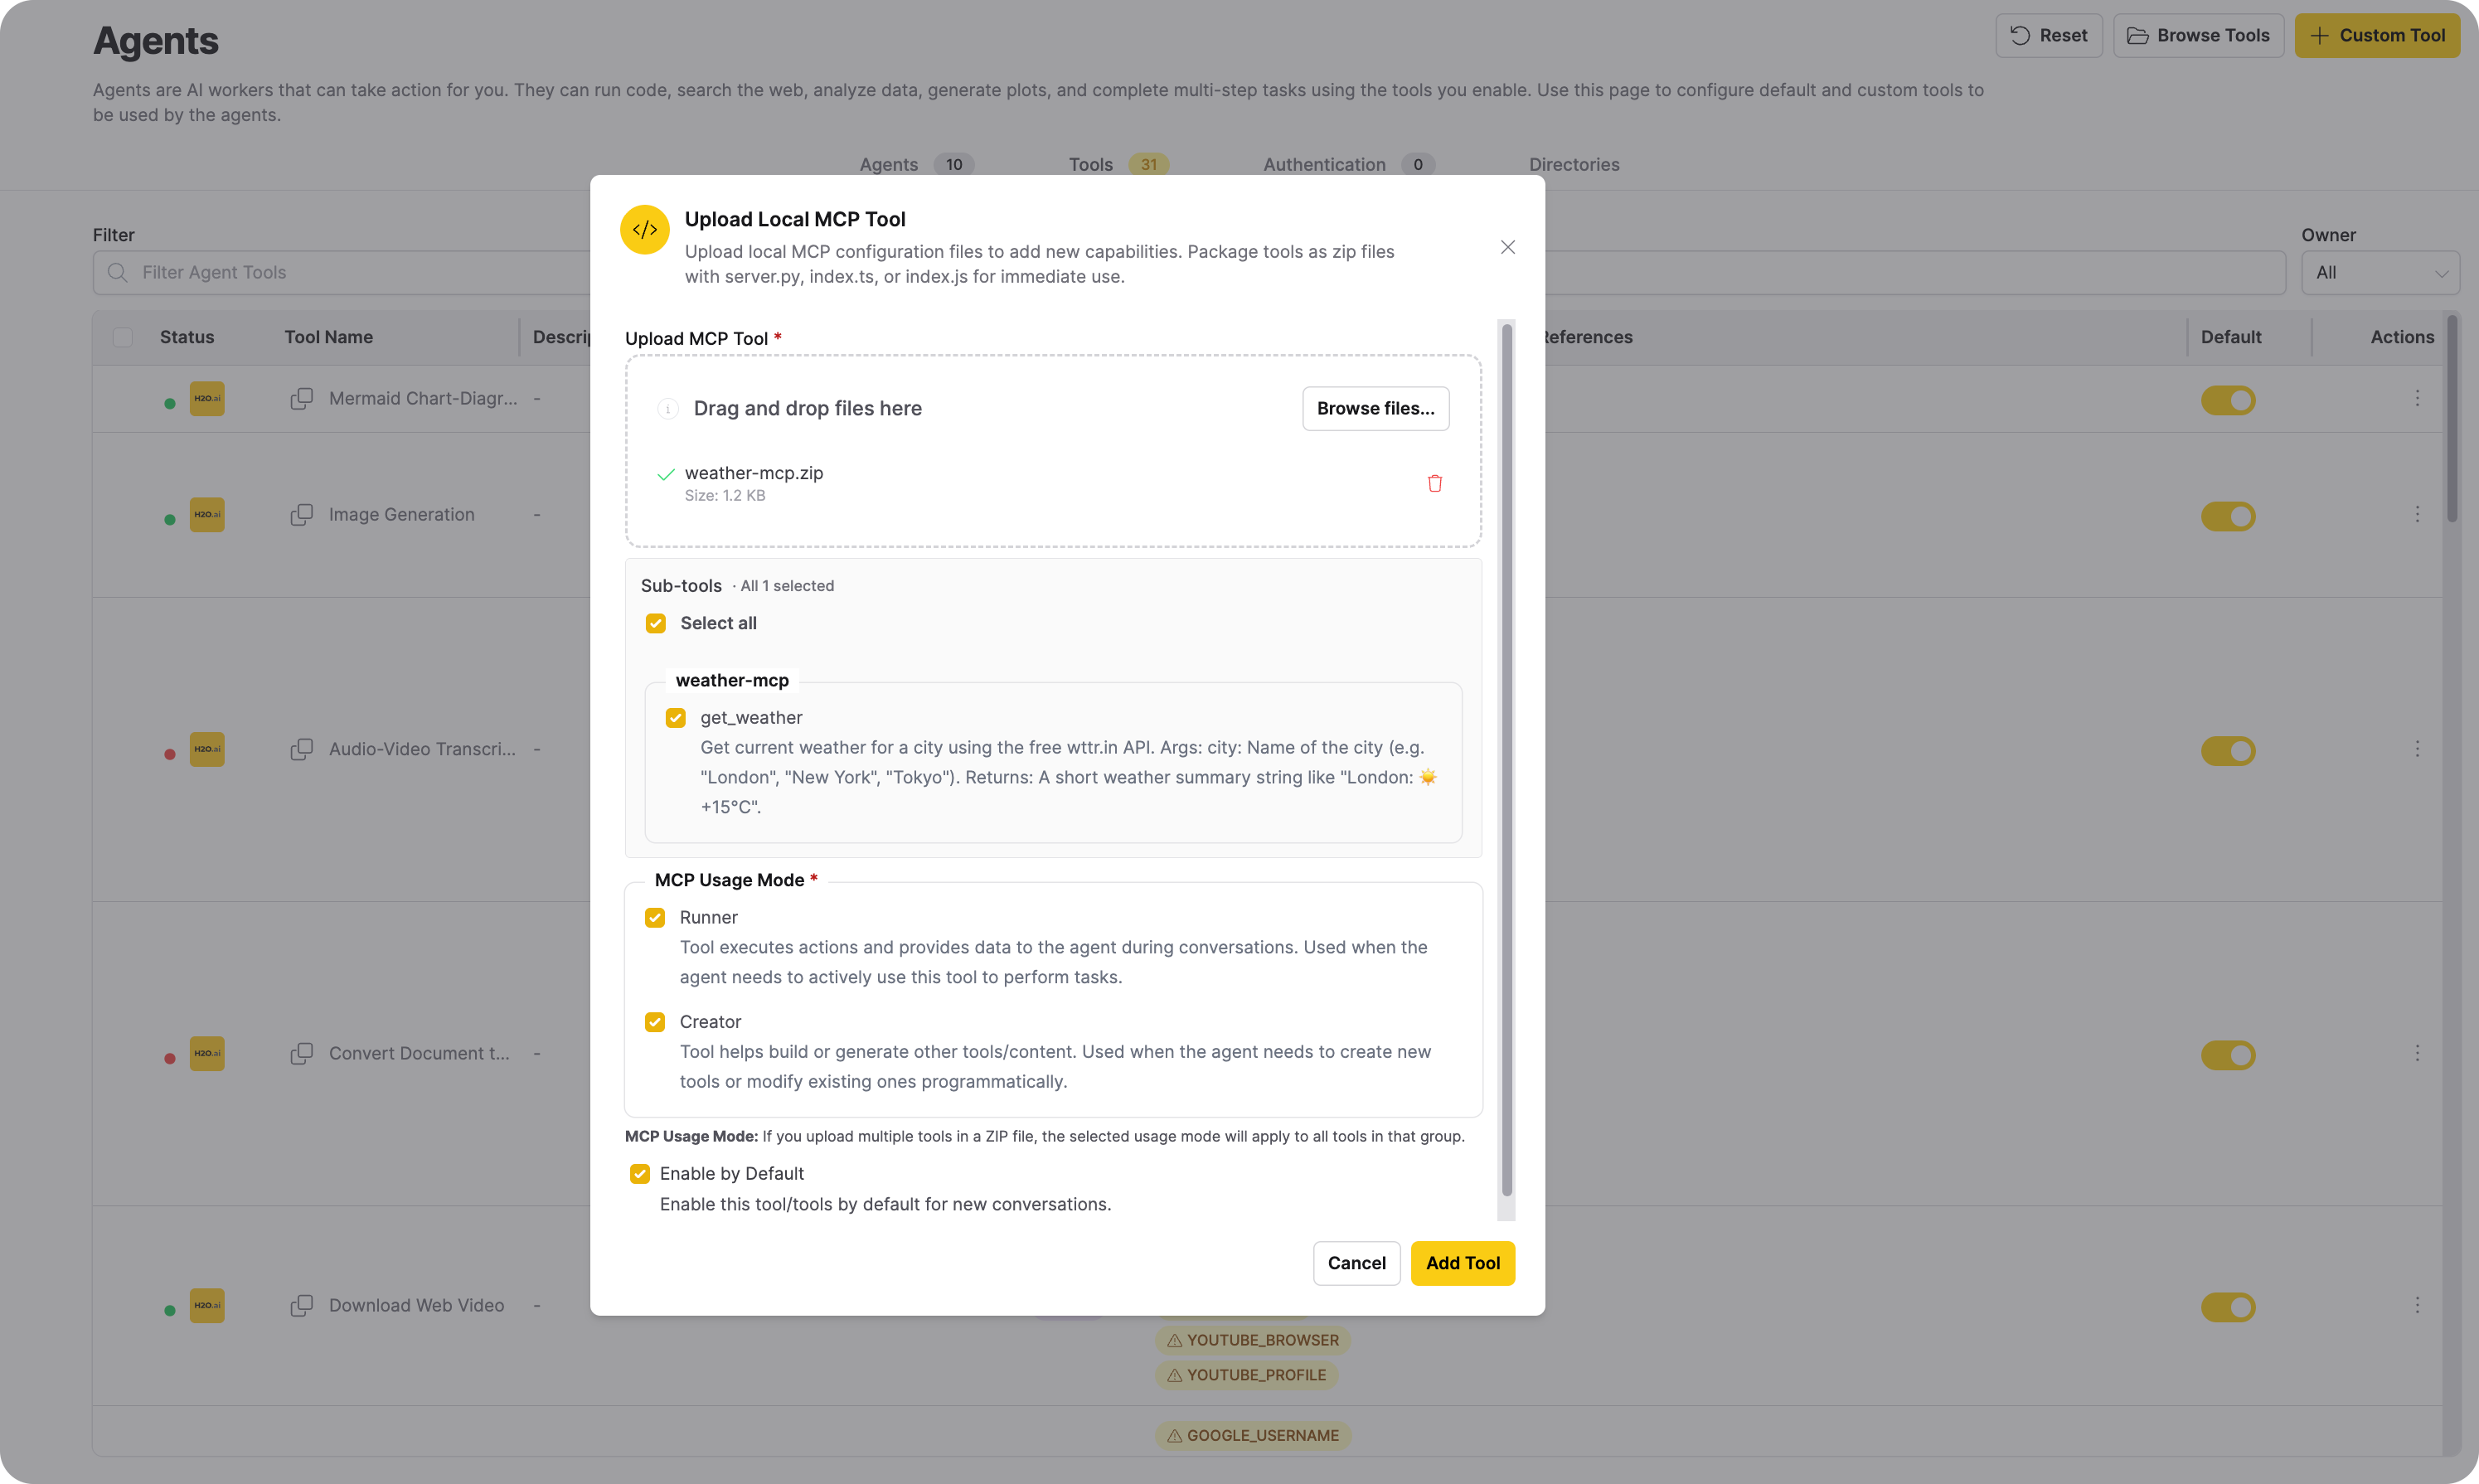
Step 3: Upload the local MCP tool package
-
In the left navigation, open Agents > Tools.
-
Click + Custom Tool. The Upload Local MCP Tool dialog opens.
-
Upload the MCP tool
.zipfile you generated. -
Under Sub-tools, verify that your tool and its capabilities are listed and selected.
-
Configure tool settings:
- Under MCP Usage Mode, select both Runner (executes actions during conversations) and Creator (builds or generates other tools).
- Keep Enable by Default enabled.
-
Click Add Tool.
-
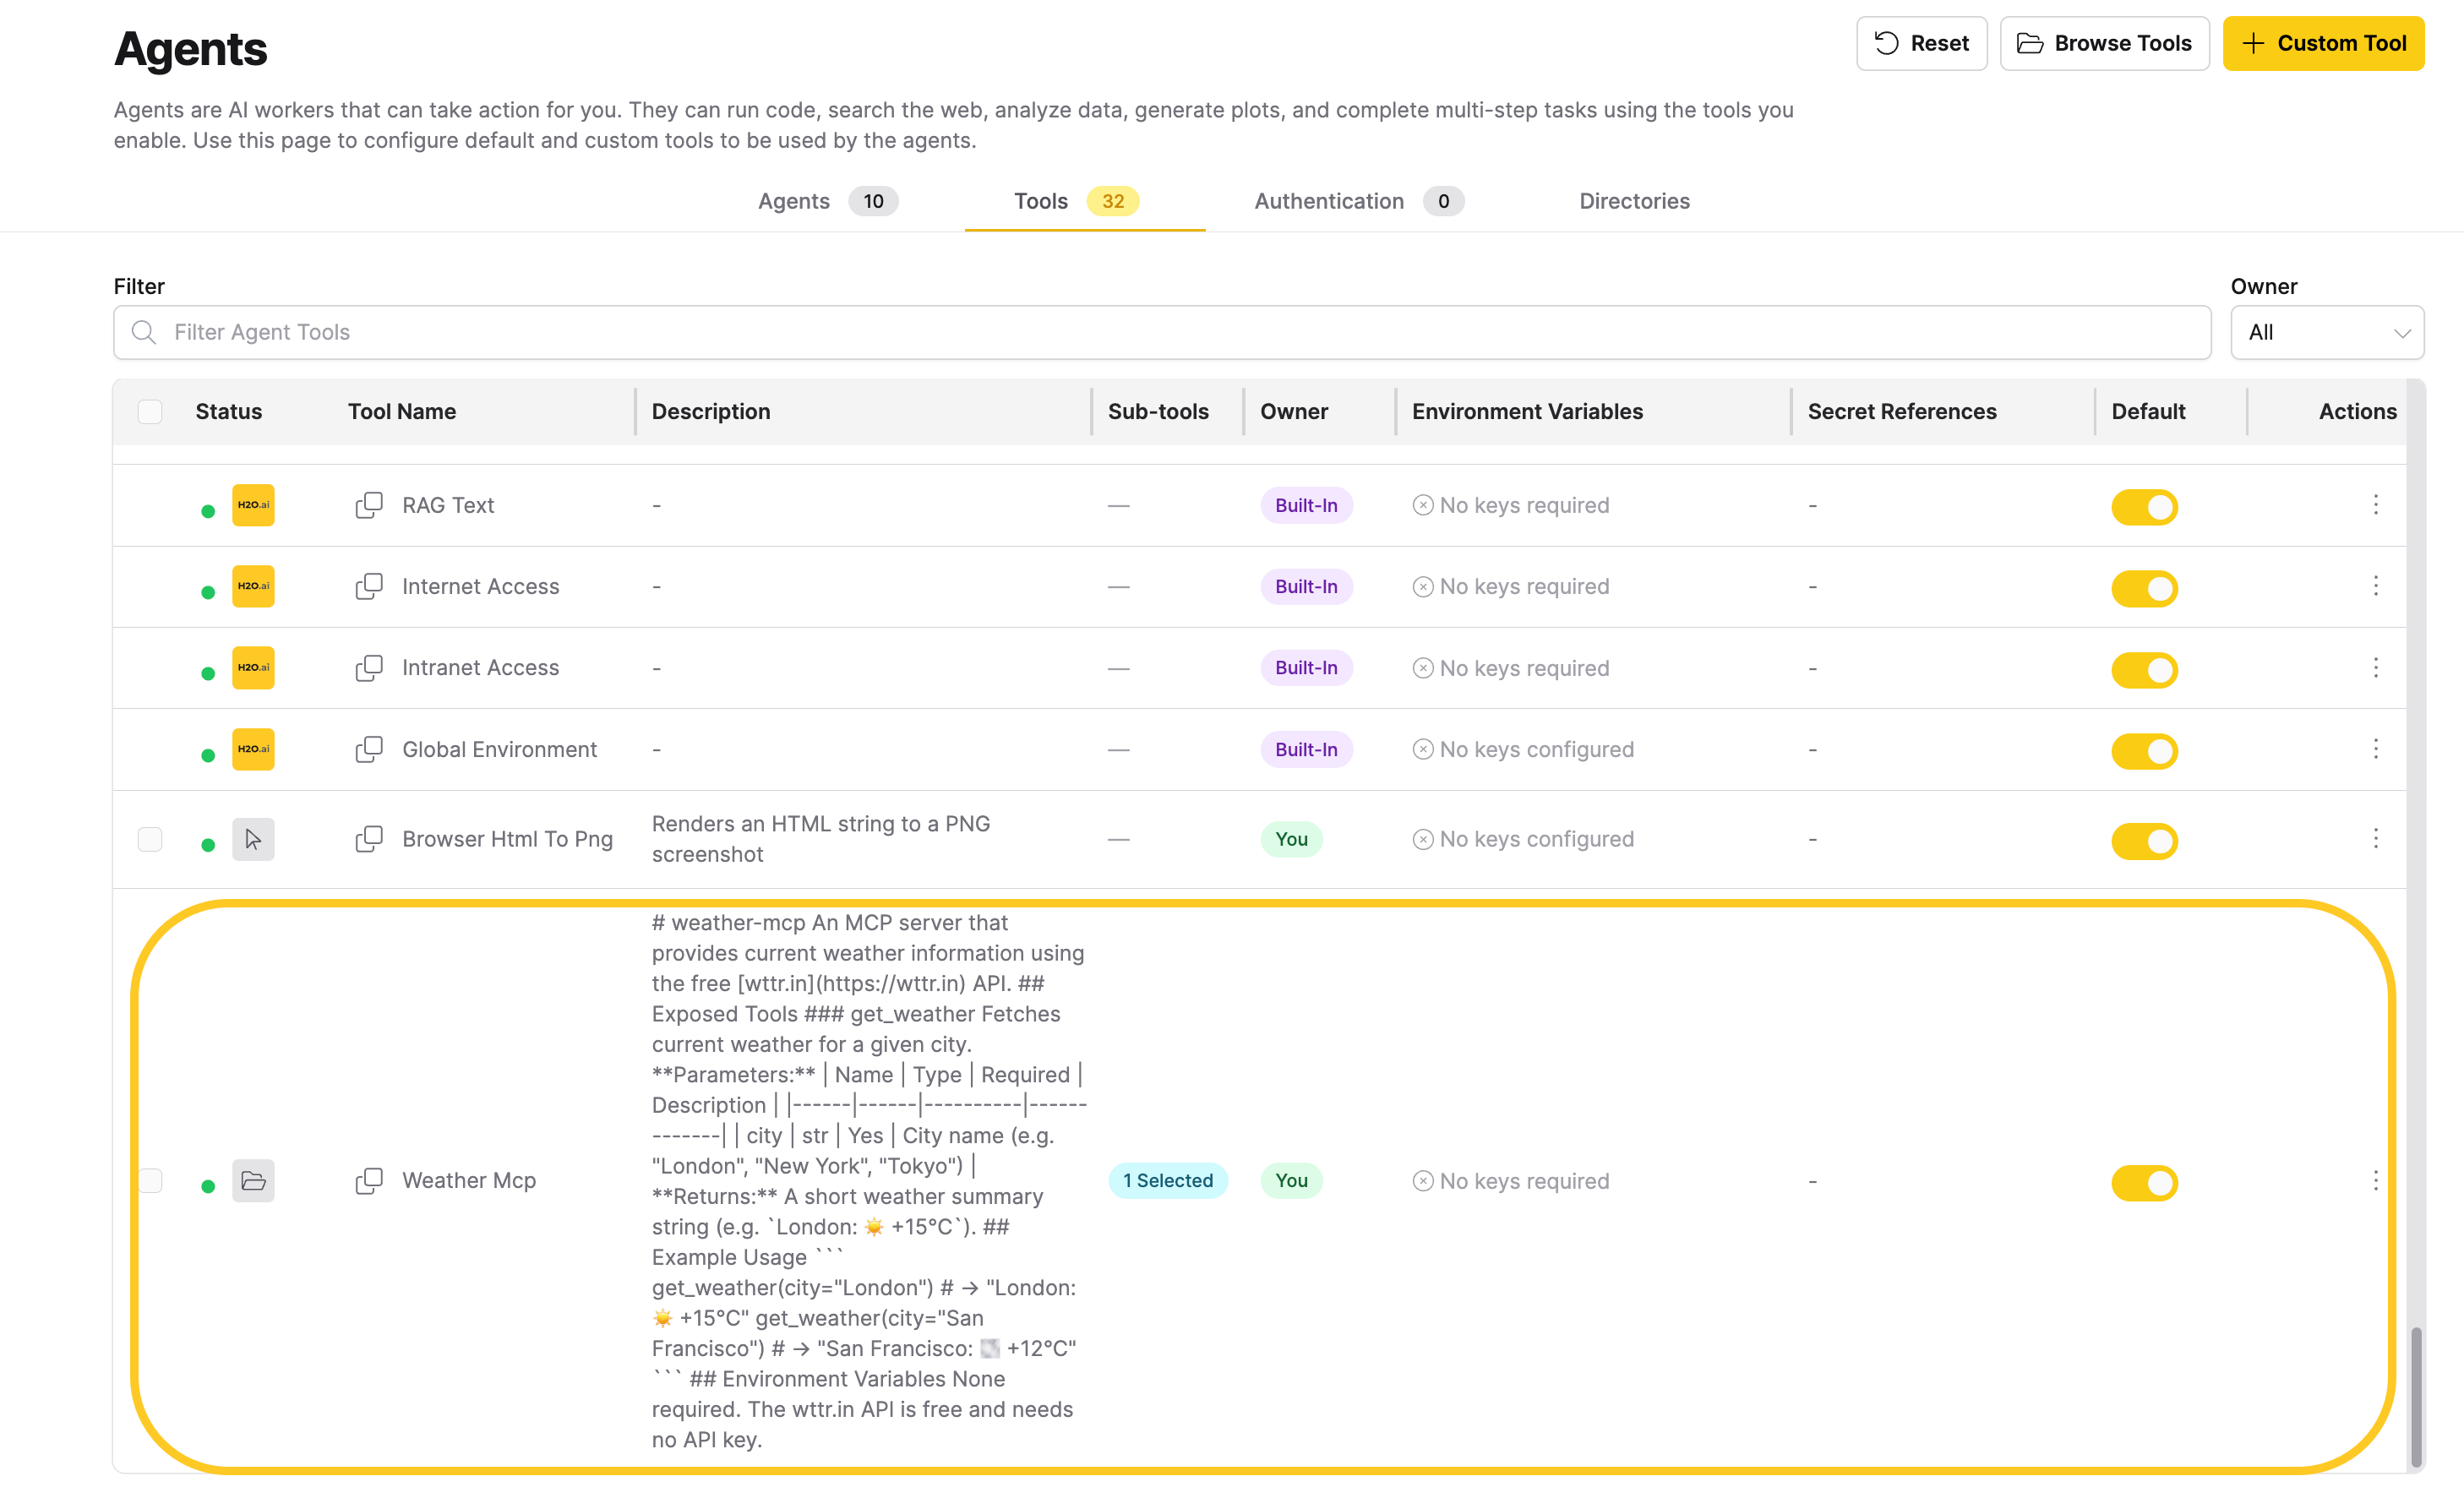
Verify that the tool appears in the Tools table with a green status indicator.
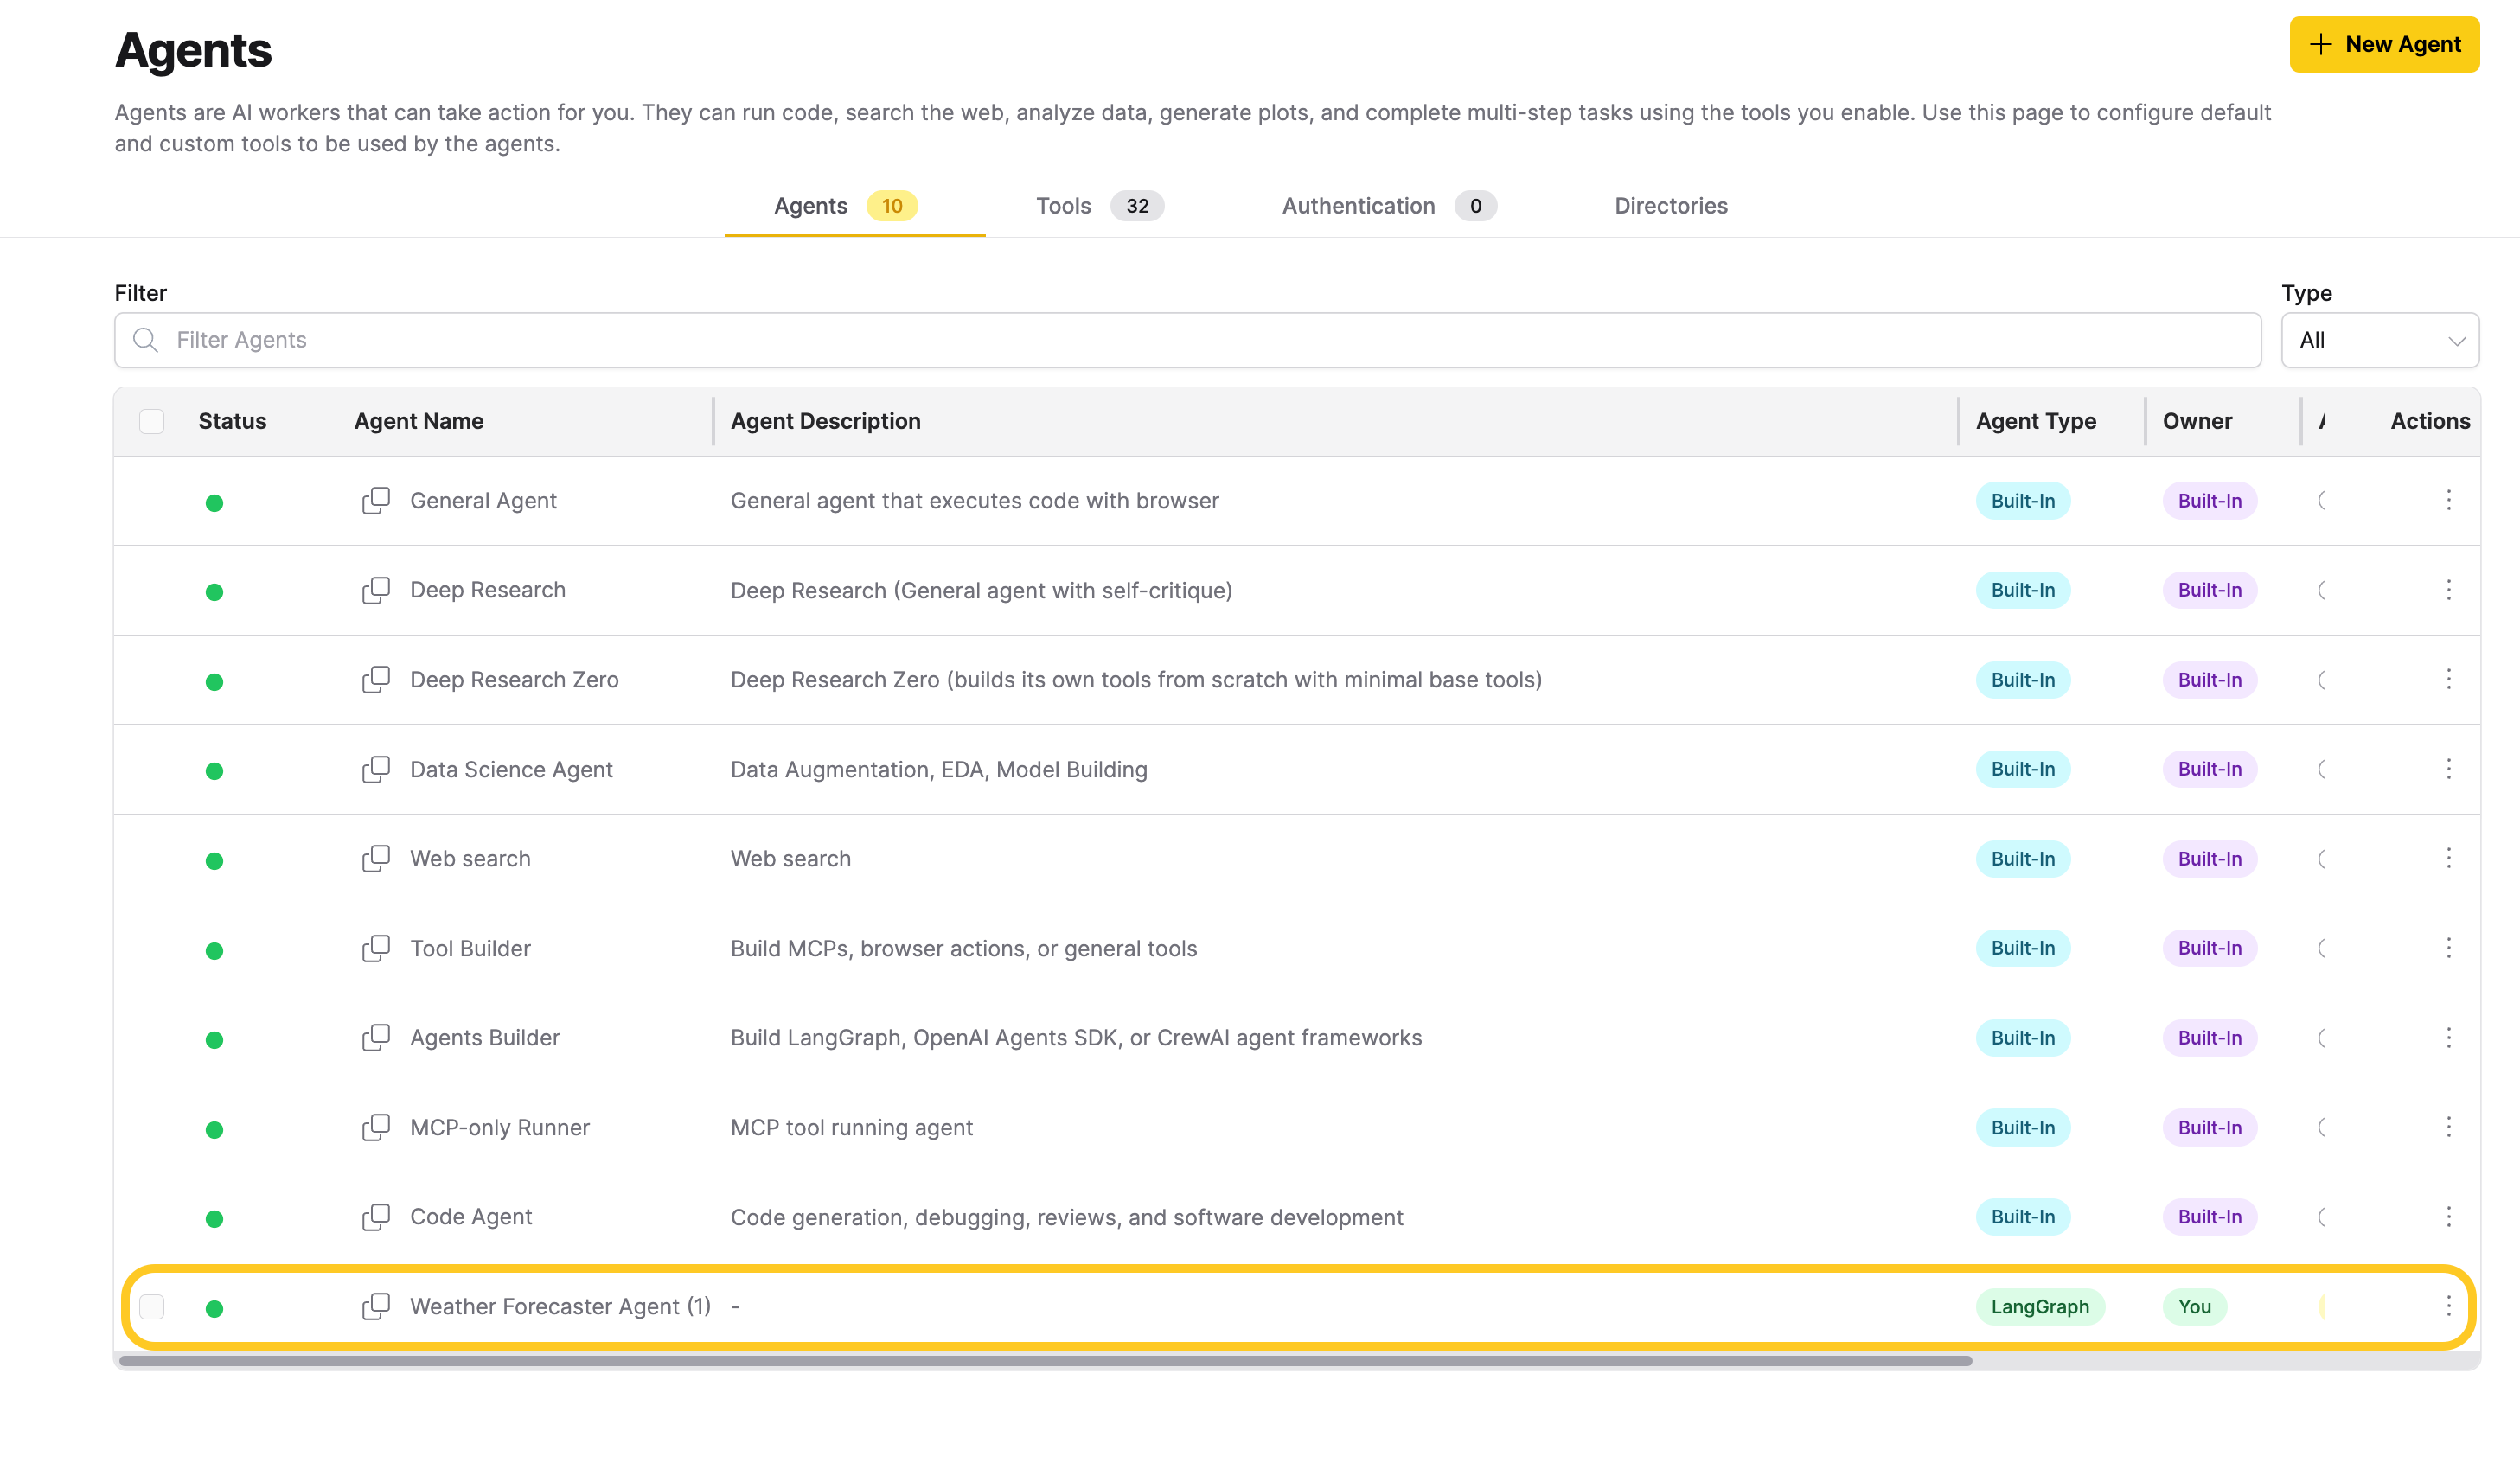
Step 4: Register the custom agent
-
Open Agents > Agents.
-
Click + New Agent.
-
Enter an agent name.
-
Upload the custom agent
.zipfile you generated.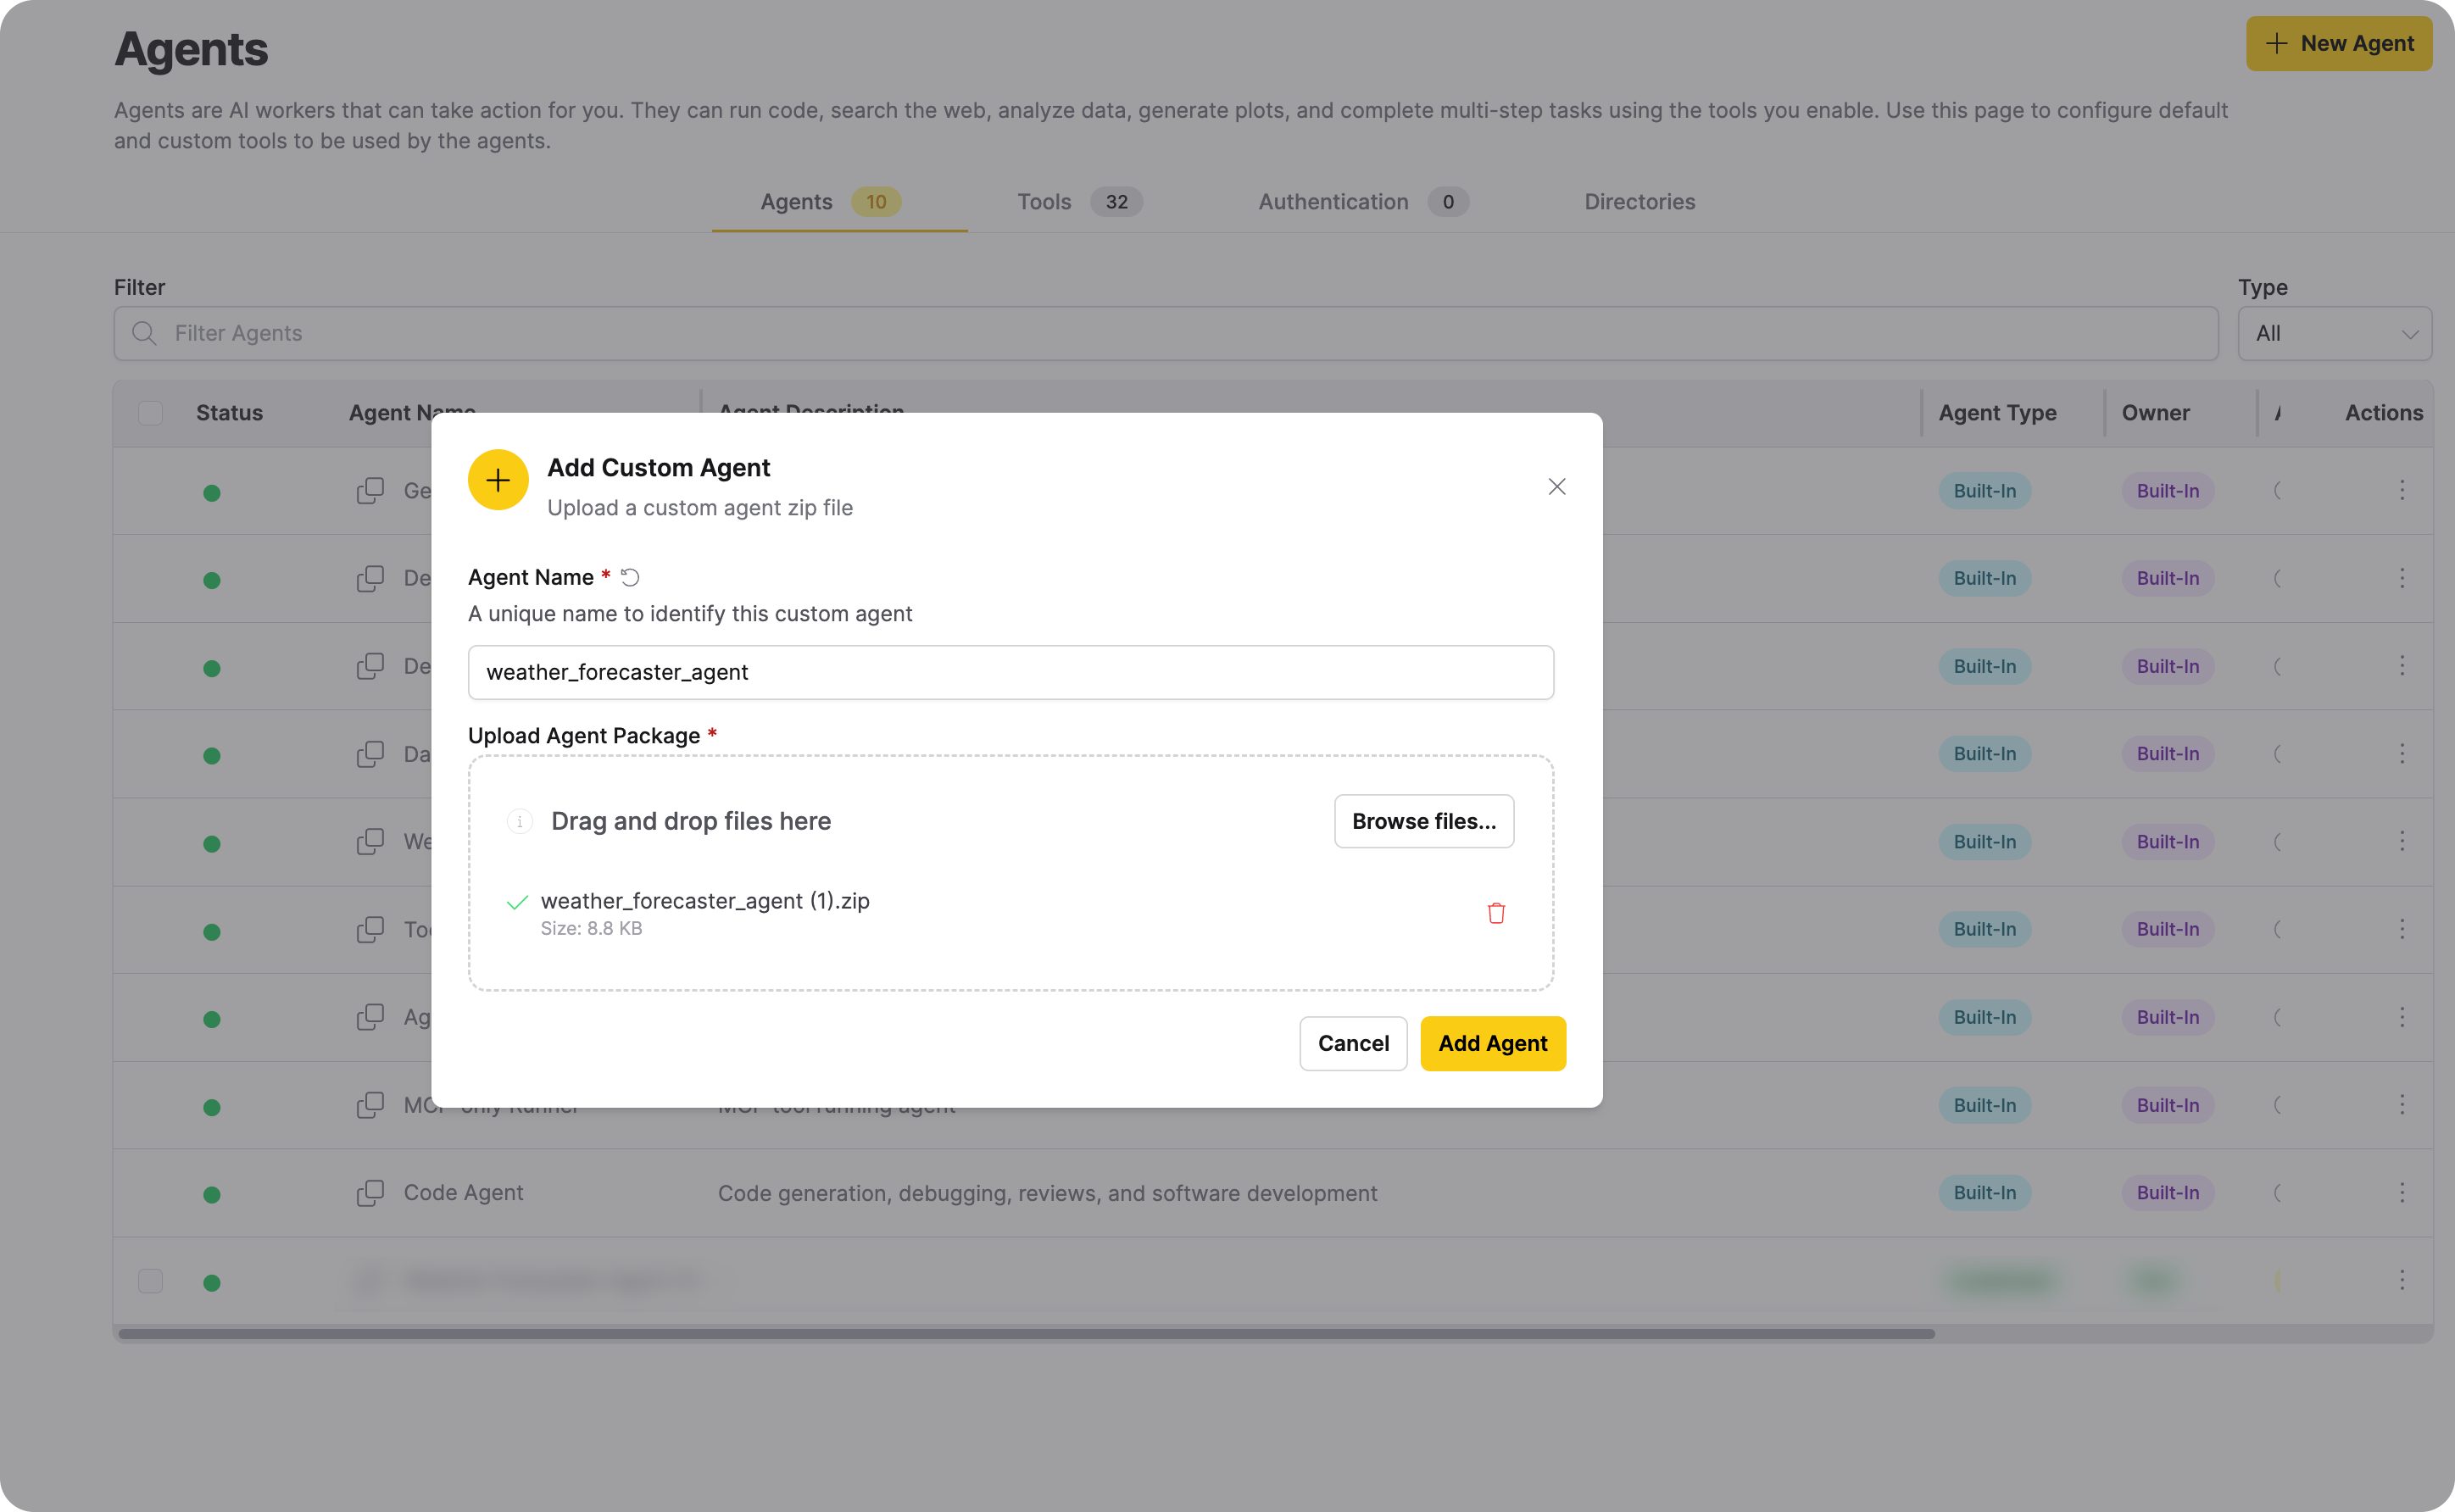
-
Click Add Agent.
-
Verify that the agent appears in the Agents table.
Step 5: Assign required keys and tools
Complete this step only if your custom agent requires API keys, MCP tools, or both. If your custom agent does not depend on keys or tools, continue to Step 6.
- Open the new agent action menu, then select Assign Keys.
- Map required values:
CUSTOM_AGENT_API_KEYto your model provider secret.CUSTOM_AGENT_BASE_URLto a secret that stores the provider base URL.
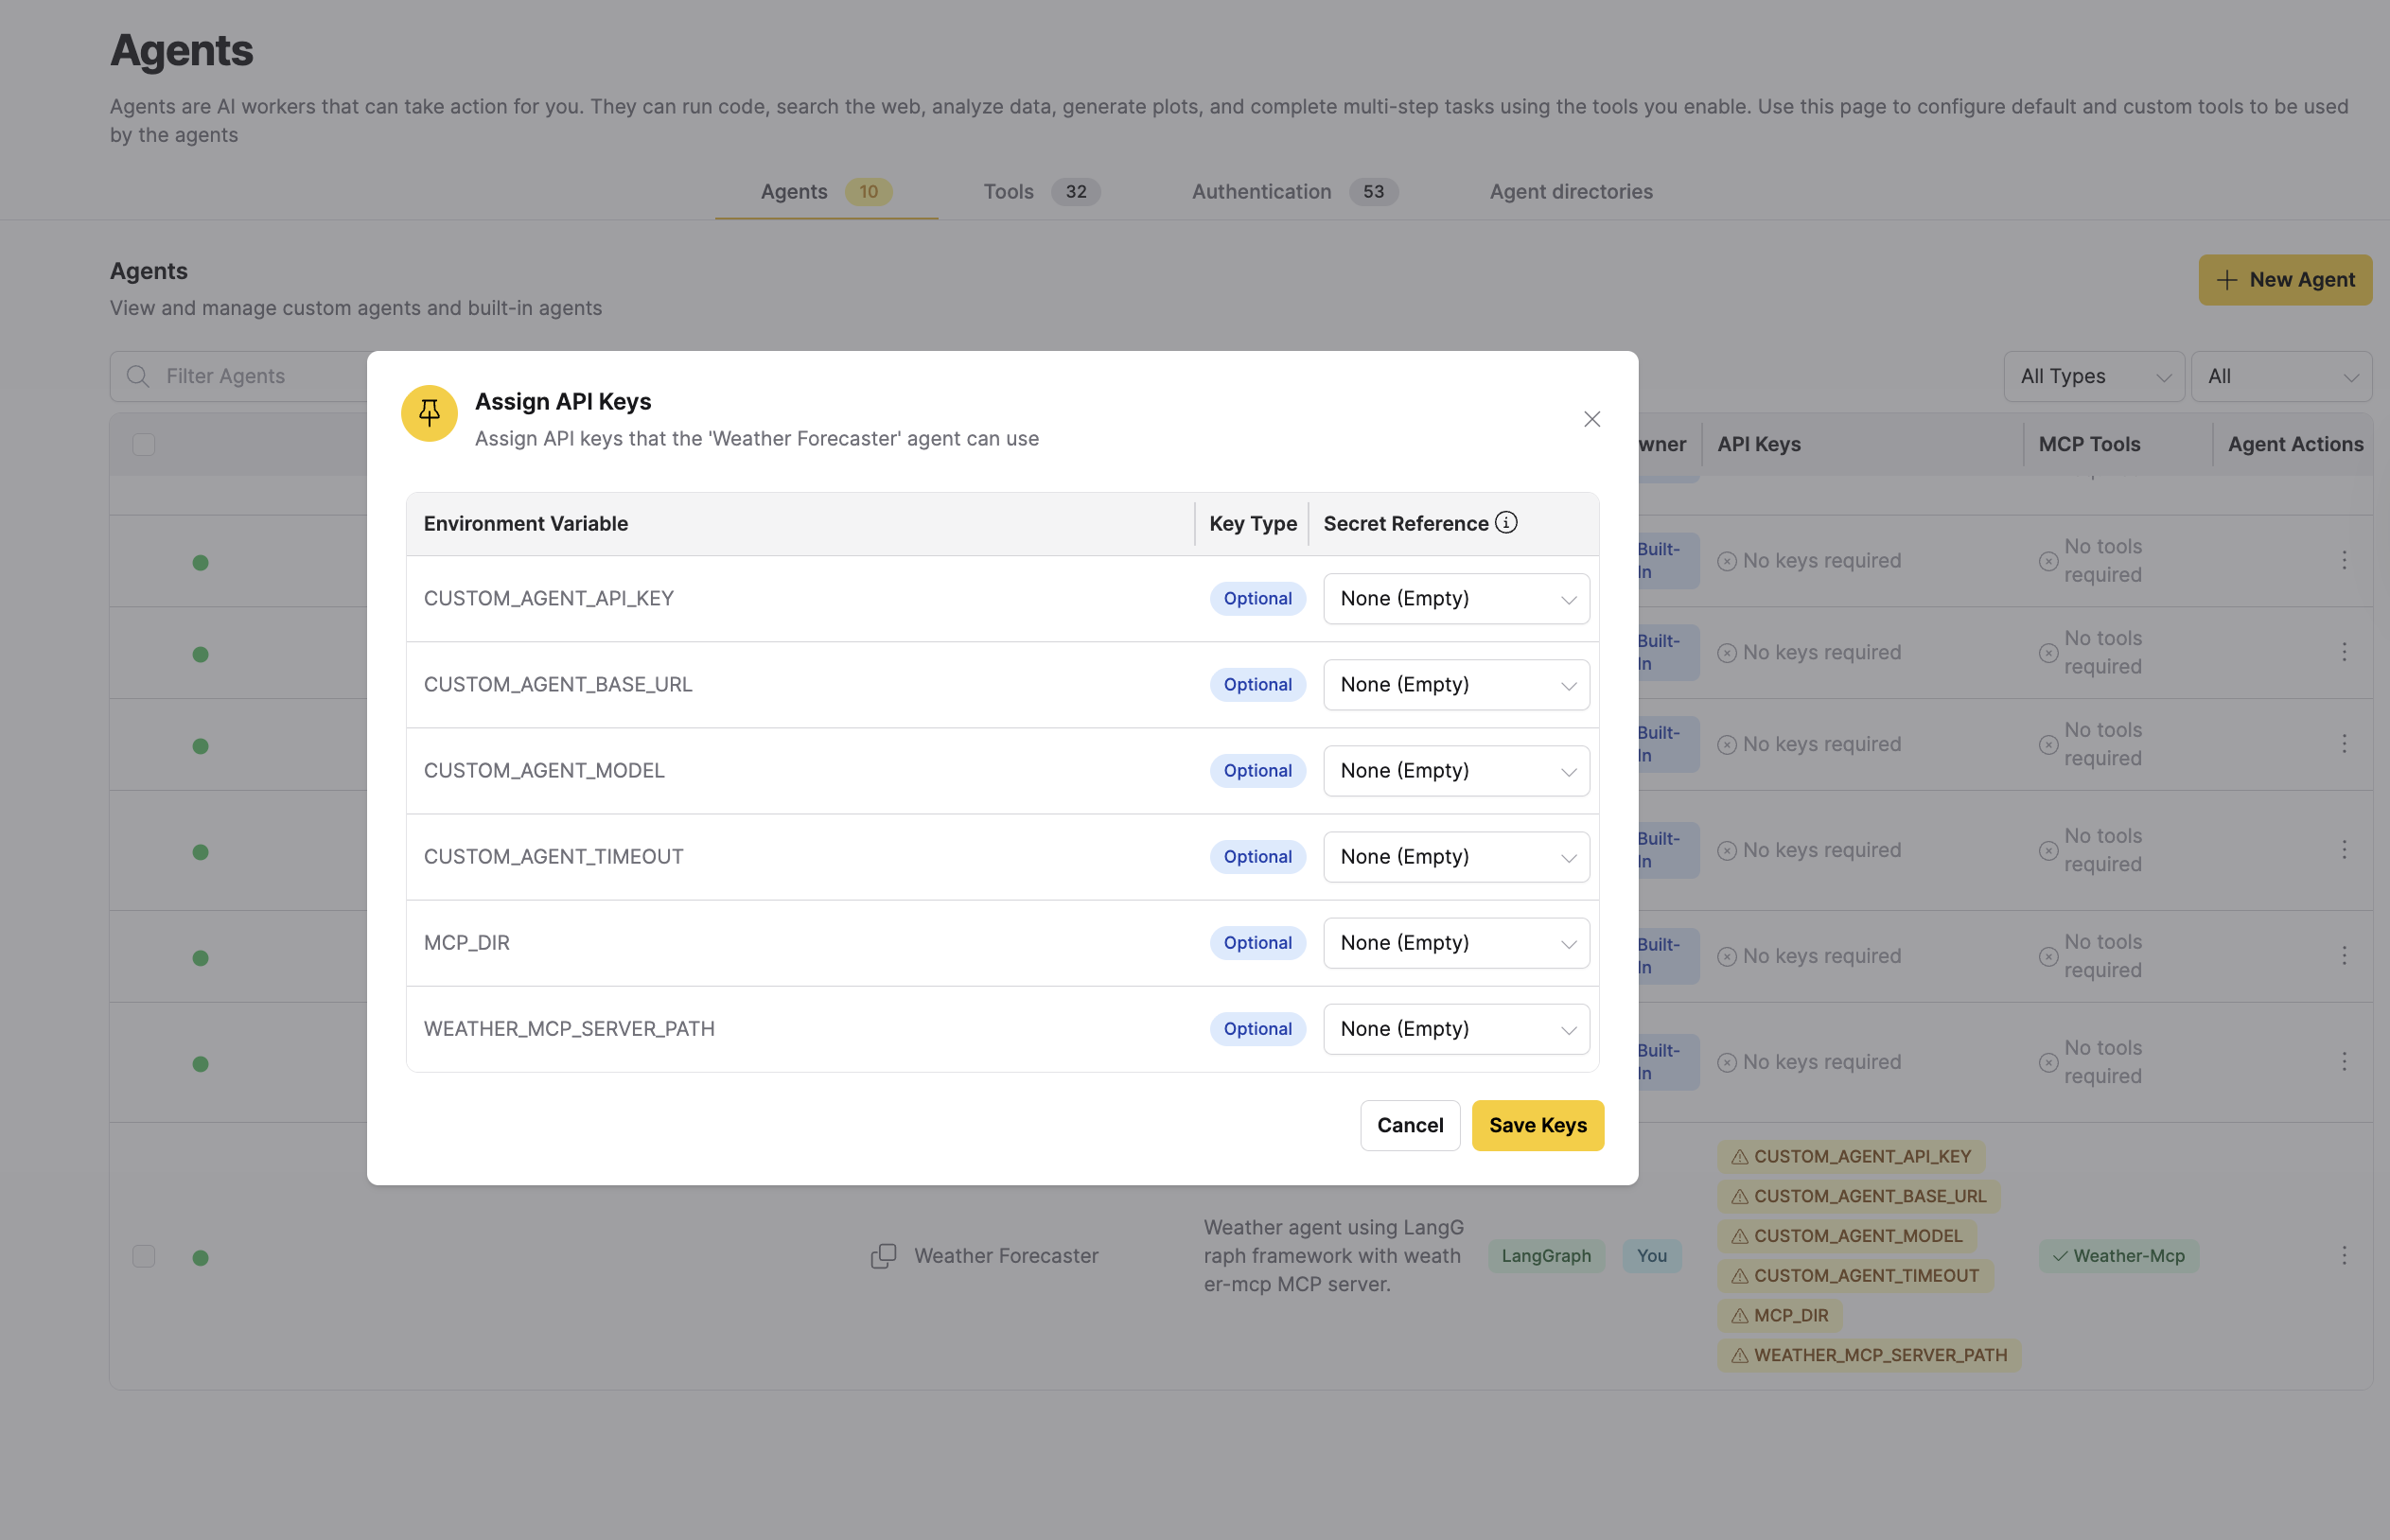
- Save key mappings.
- Open the action menu again, then select Assign Tools.
- Map
weather-mcpto the MCP tool you uploaded.
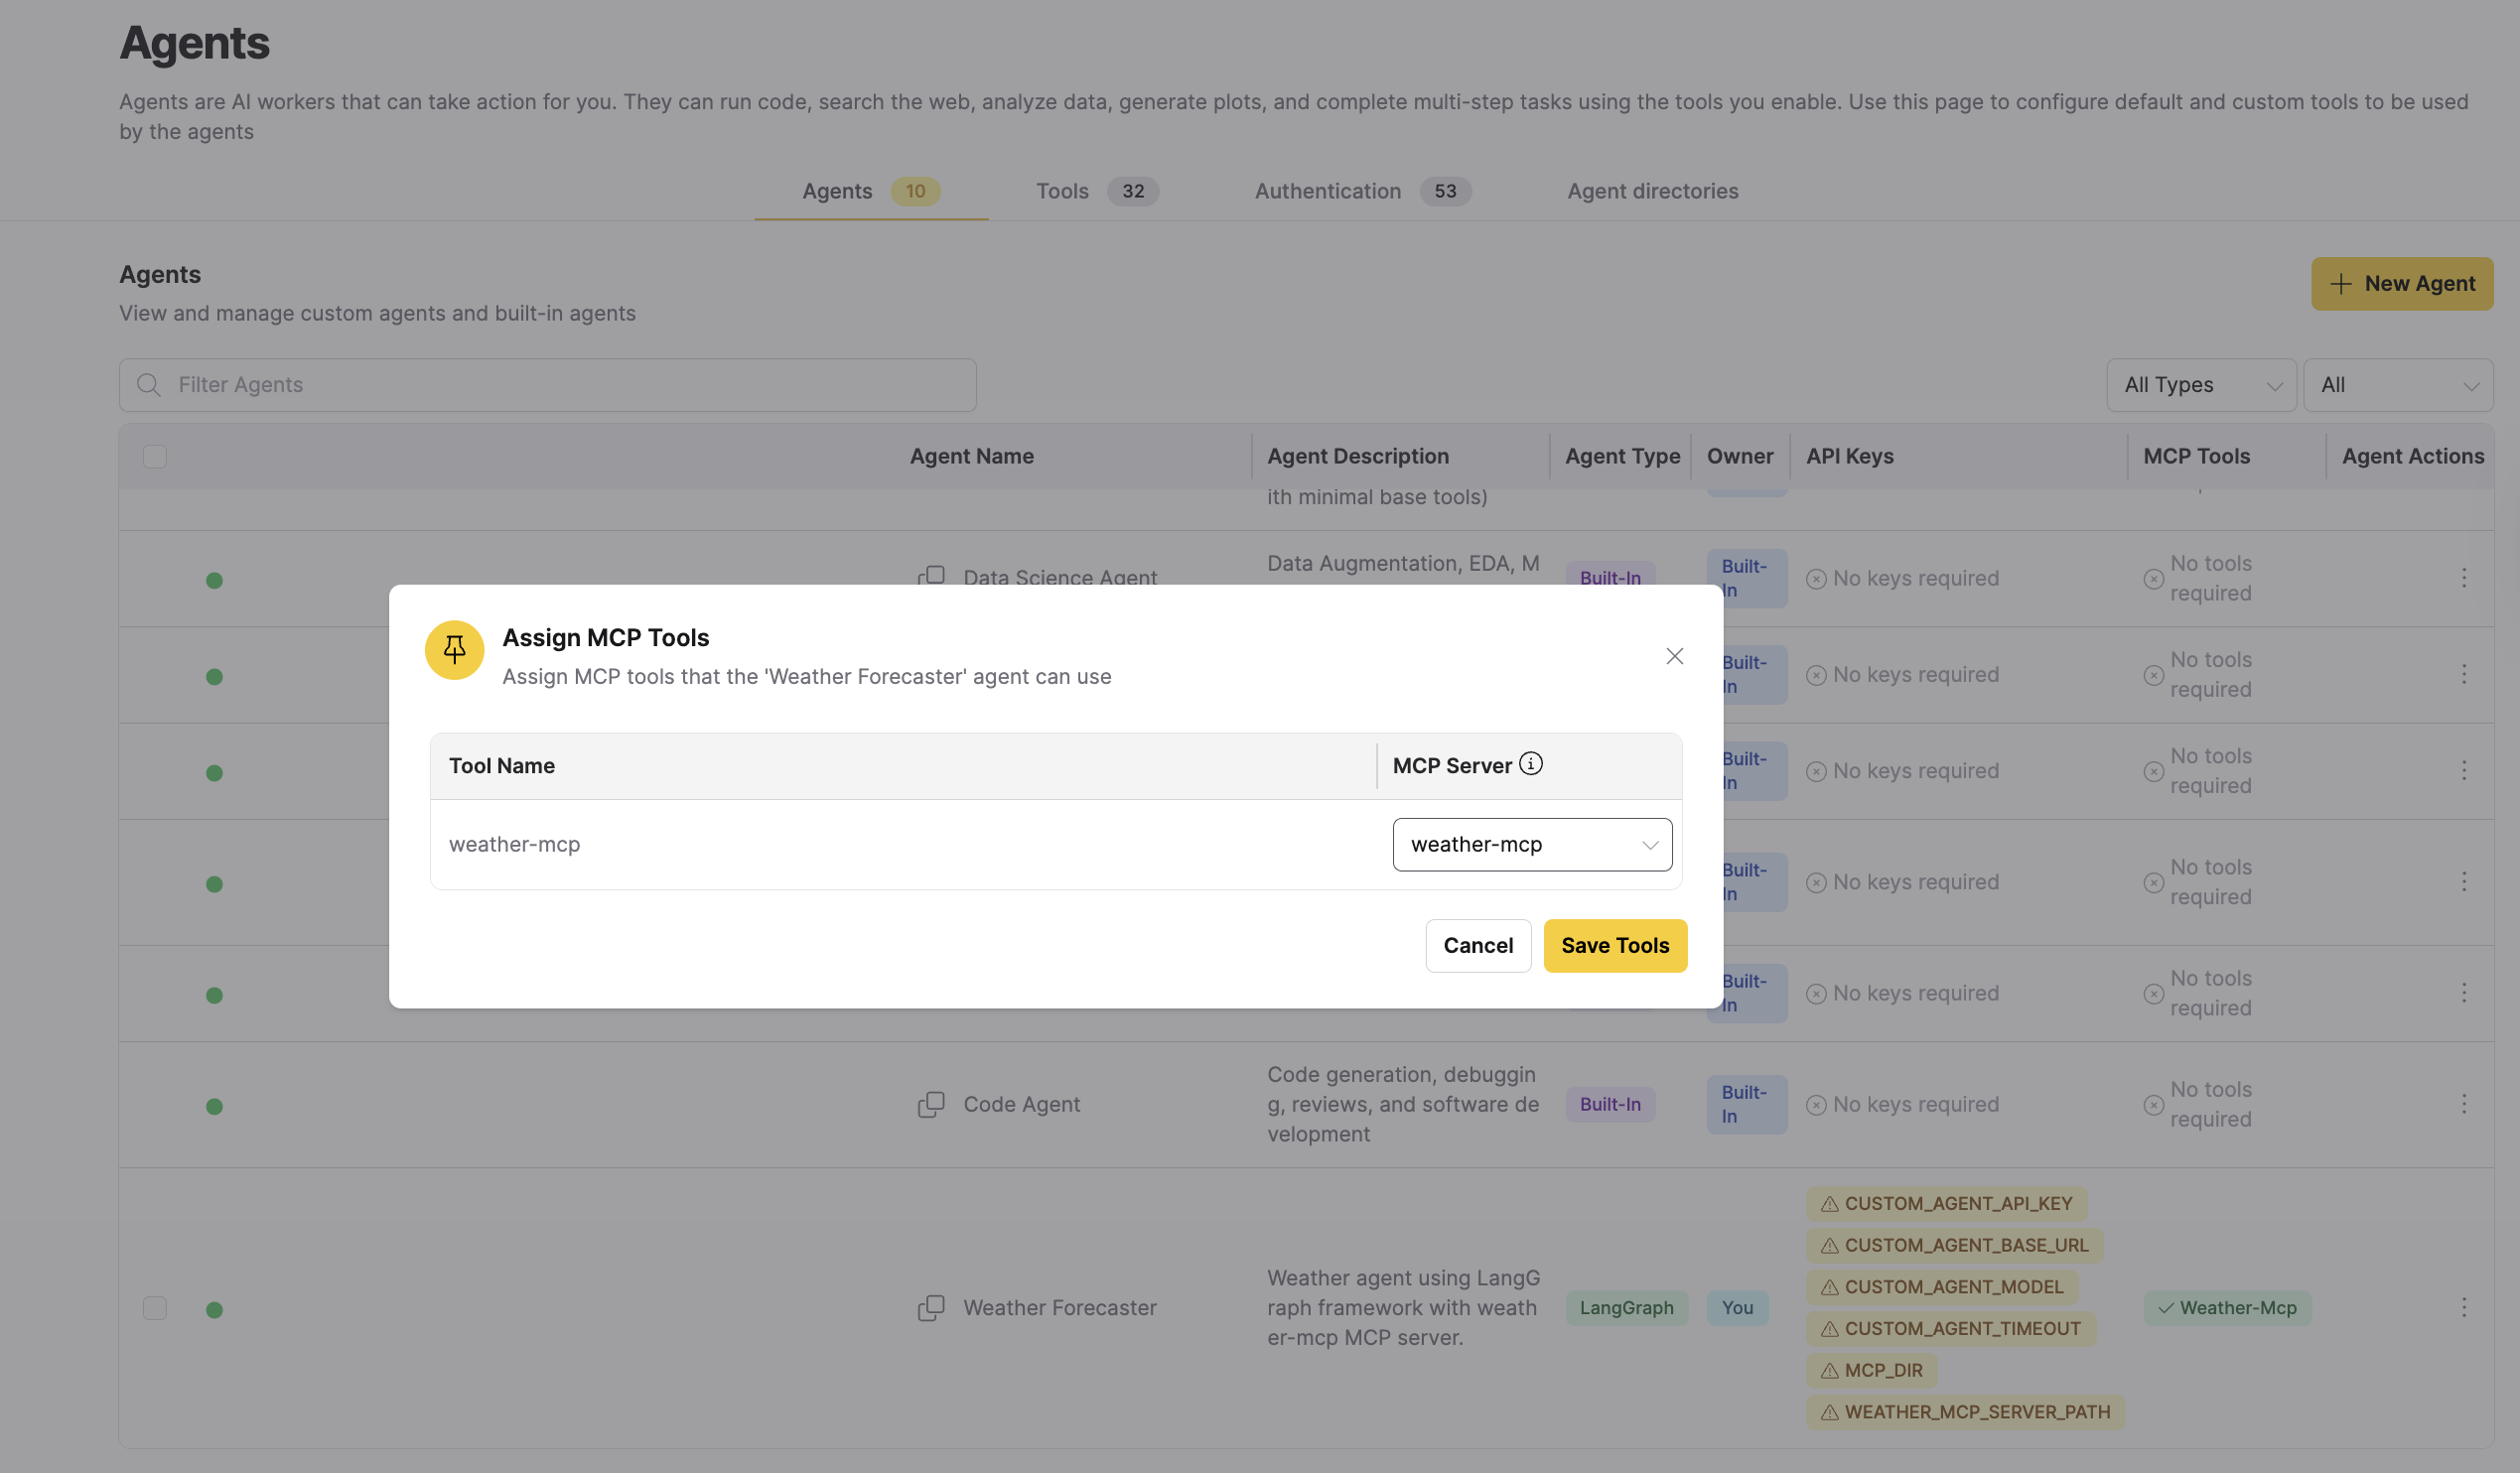
- Save the tool mapping.
- Verify that the agent status in the Agents table shows Ready.
Step 6: Test the workflow
- Start a new chat.
- Select the newly registered custom agent.
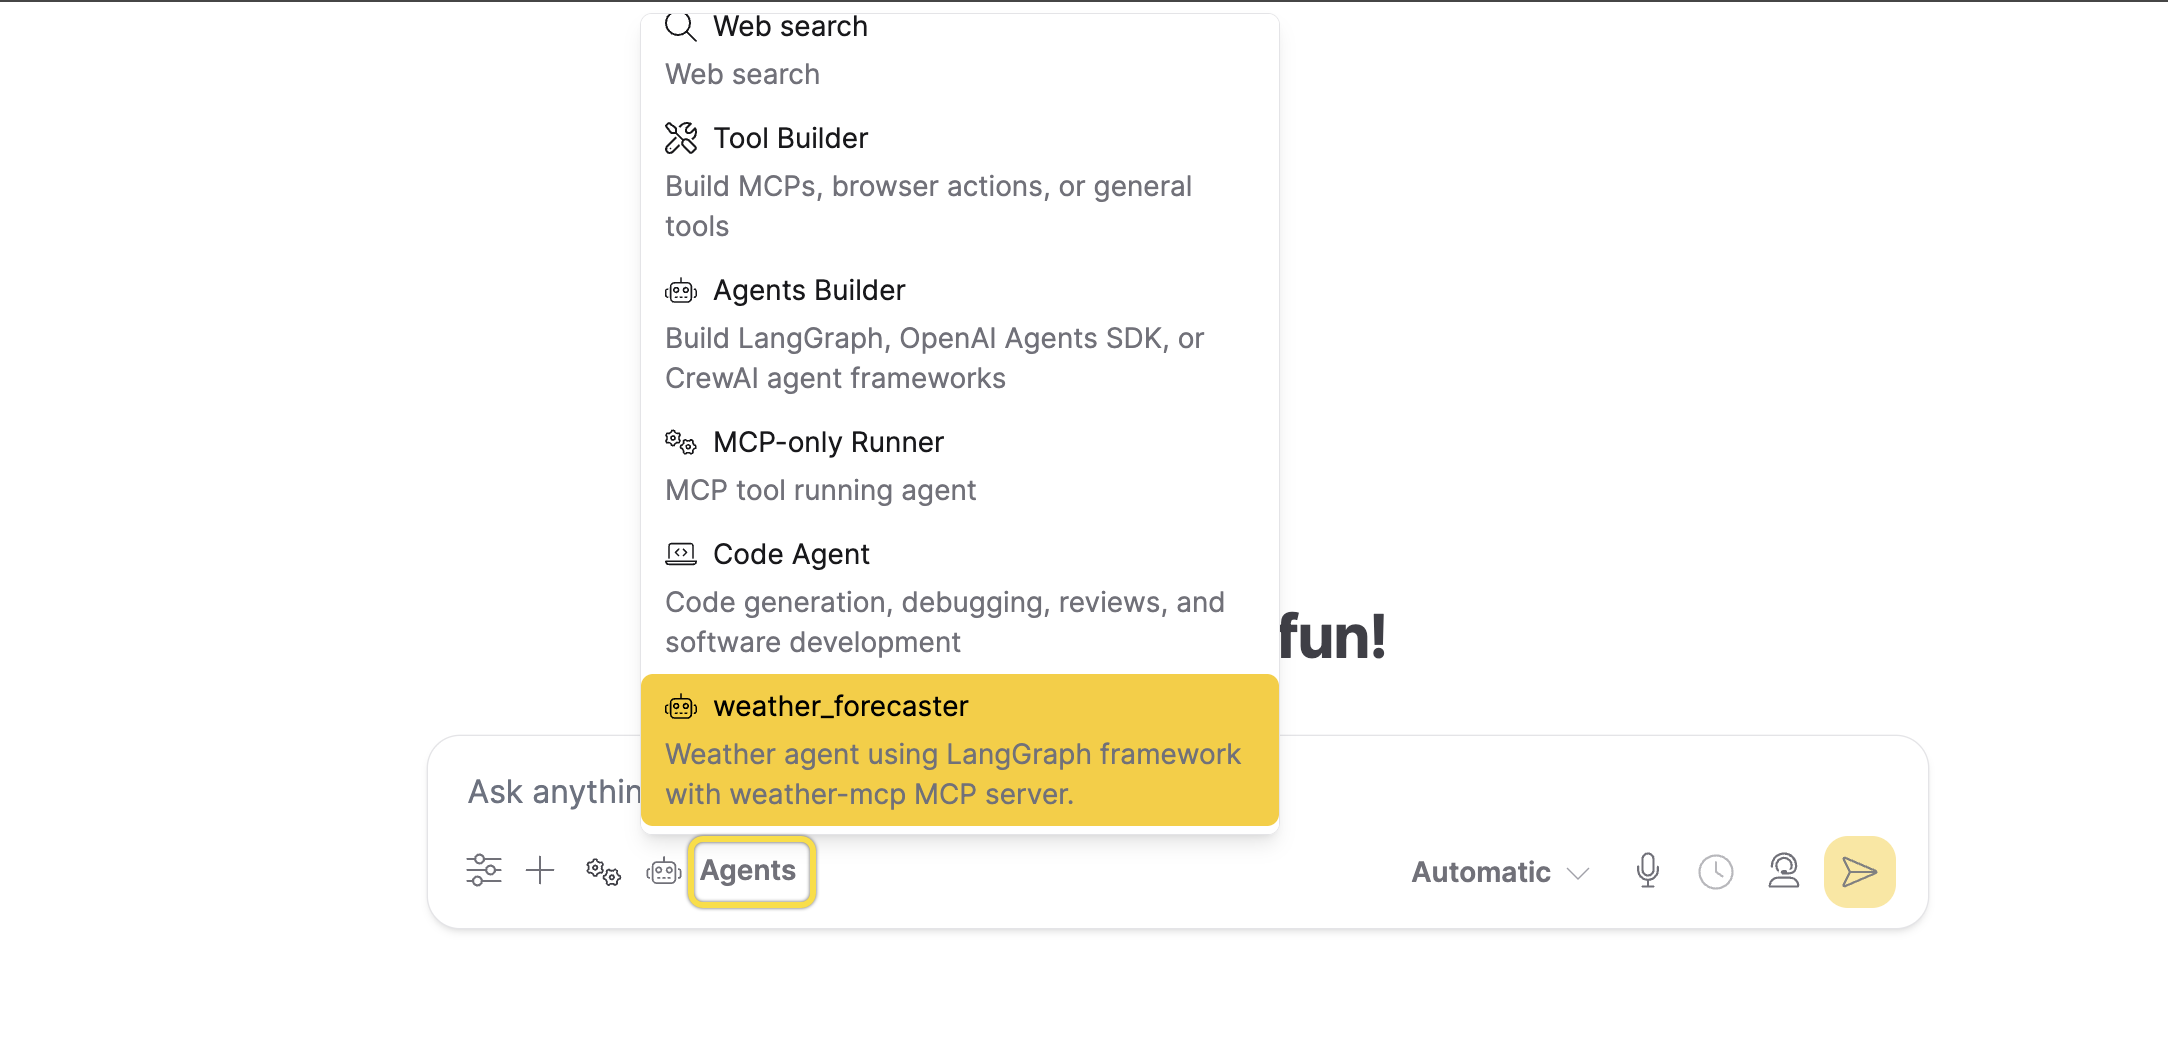
- Send a weather request, for example:
What is the weather in Tokyo?Compare weather in London and Paris.
- Confirm the response includes structured output.
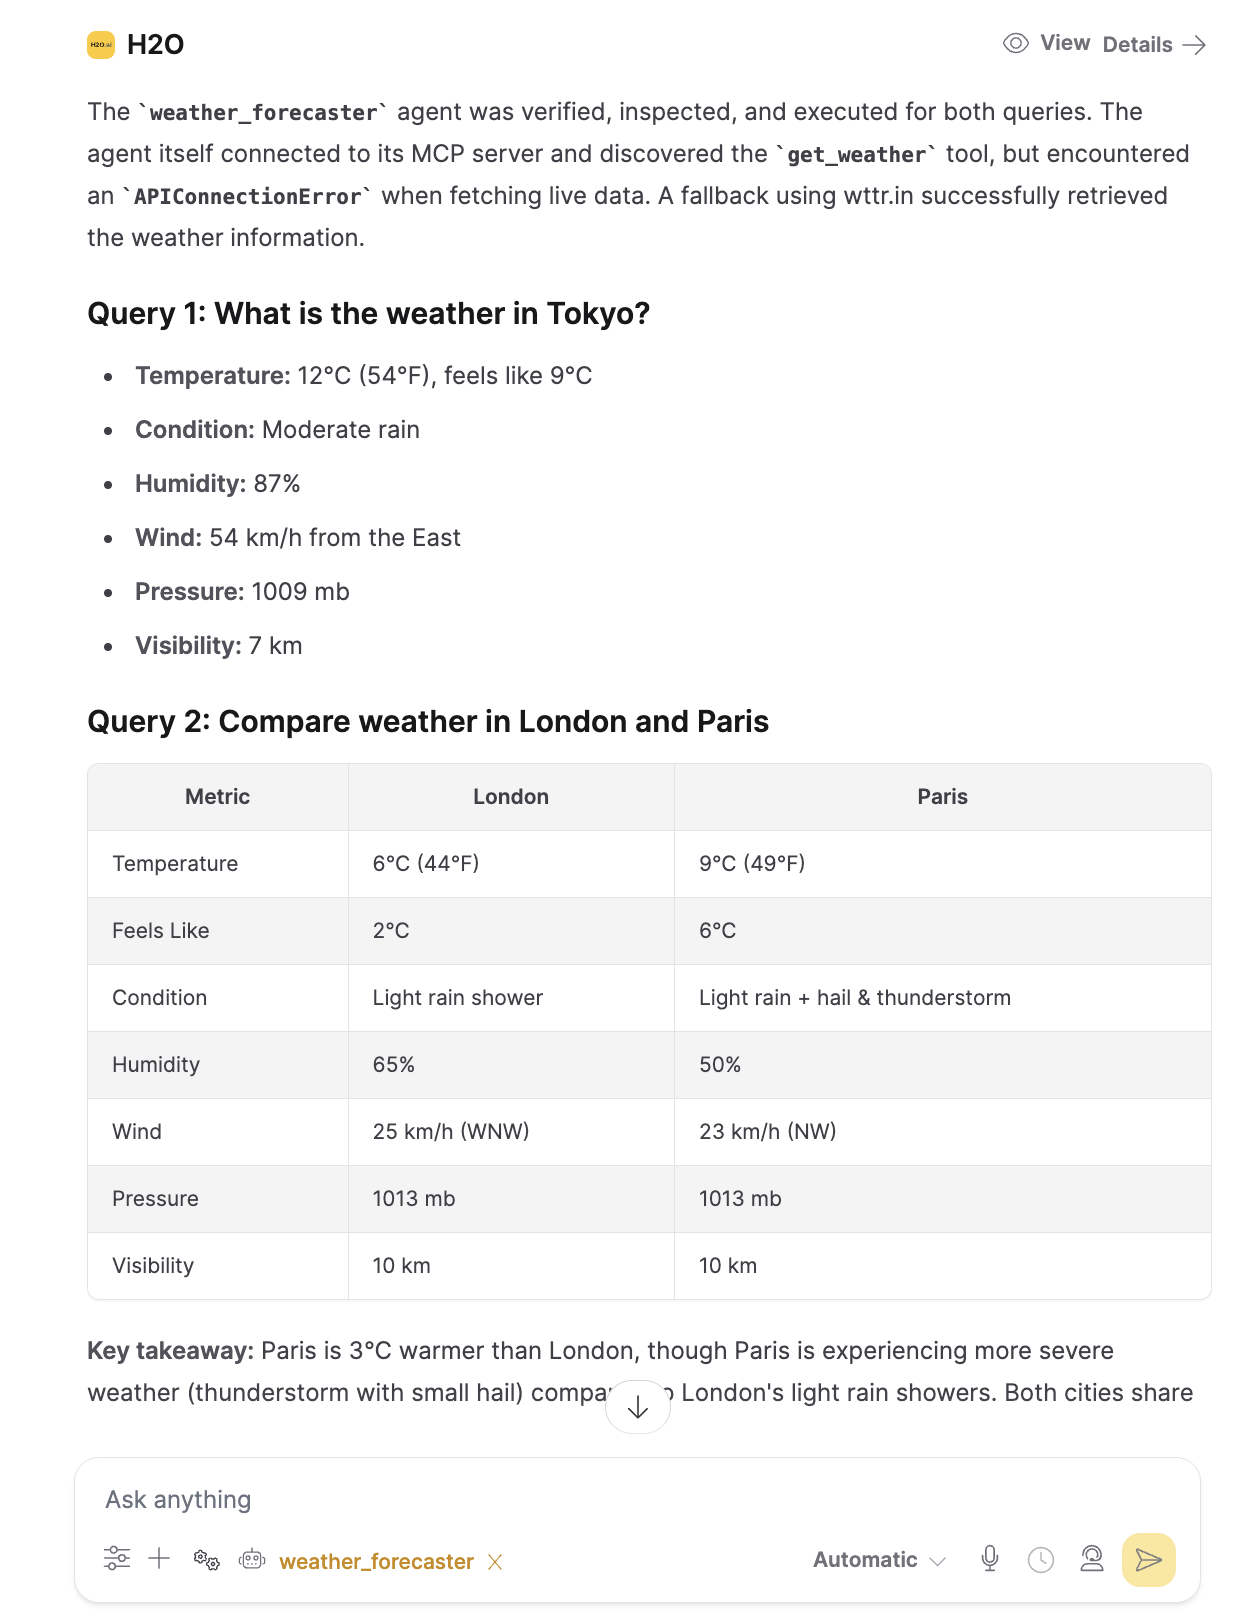
- The agent responds without configuration errors.
- The response includes the expected output for your use case.
- Tool invocation completes during the same chat turn.
Next steps
- Build additional MCP tools by following Create local MCP tools.
- Automate registration flows with the Custom Tools API.
- Automate agent lifecycle with the Custom Agents API.
- Submit and view feedback for this page
- Send feedback about Enterprise h2oGPTe to cloud-feedback@h2o.ai