Auto-Sync Connectors
Overview
The Auto-Sync Connectors feature enables automatic synchronization of documents from cloud storage services to your collections. When you configure a connector with a sync schedule, h2oGPTe periodically checks for new or modified documents and automatically imports them into your collection. This ensures that your collections remain up-to-date with the latest content without requiring manual intervention.
When to use
Use auto-sync connectors when you want to:
- Keep collections current: Automatically update collections as source documents change
- Reduce manual work: Eliminate the need to manually re-import documents after updates
- Monitor multiple sources: Track document changes across different cloud storage locations
Supported connectors
Auto-sync is available for the following cloud storage connectors:
- Amazon S3
- Azure Blob Storage
- Google Cloud Storage
- SharePoint Online
- SharePoint On-Premise
- Confluence
Setting up auto-sync
When adding documents from a supported cloud storage connector, you can configure automatic synchronization directly in the + Add documents dialog.
Configure the sync schedule
- In your collection, click + Add documents.
- Select one of the supported cloud storage connectors (S3, Azure Blob Storage, GCS, SharePoint Online, SharePoint On-Premise, or Confluence).
- Configure the connector settings and authenticate as required.
- In the Schedule dropdown, select your preferred sync frequency.
Schedule options
| Option | Description |
|---|---|
| Once | Single initial sync only. Documents are imported once when the connector is created. |
| Every hour | Automatically sync every hour. Checks for new or modified documents hourly. |
| Every day | Automatically sync every 24 hours. Checks for new or modified documents daily. |
- Click Add selected to import the documents and create the connector record.
Managing connectors
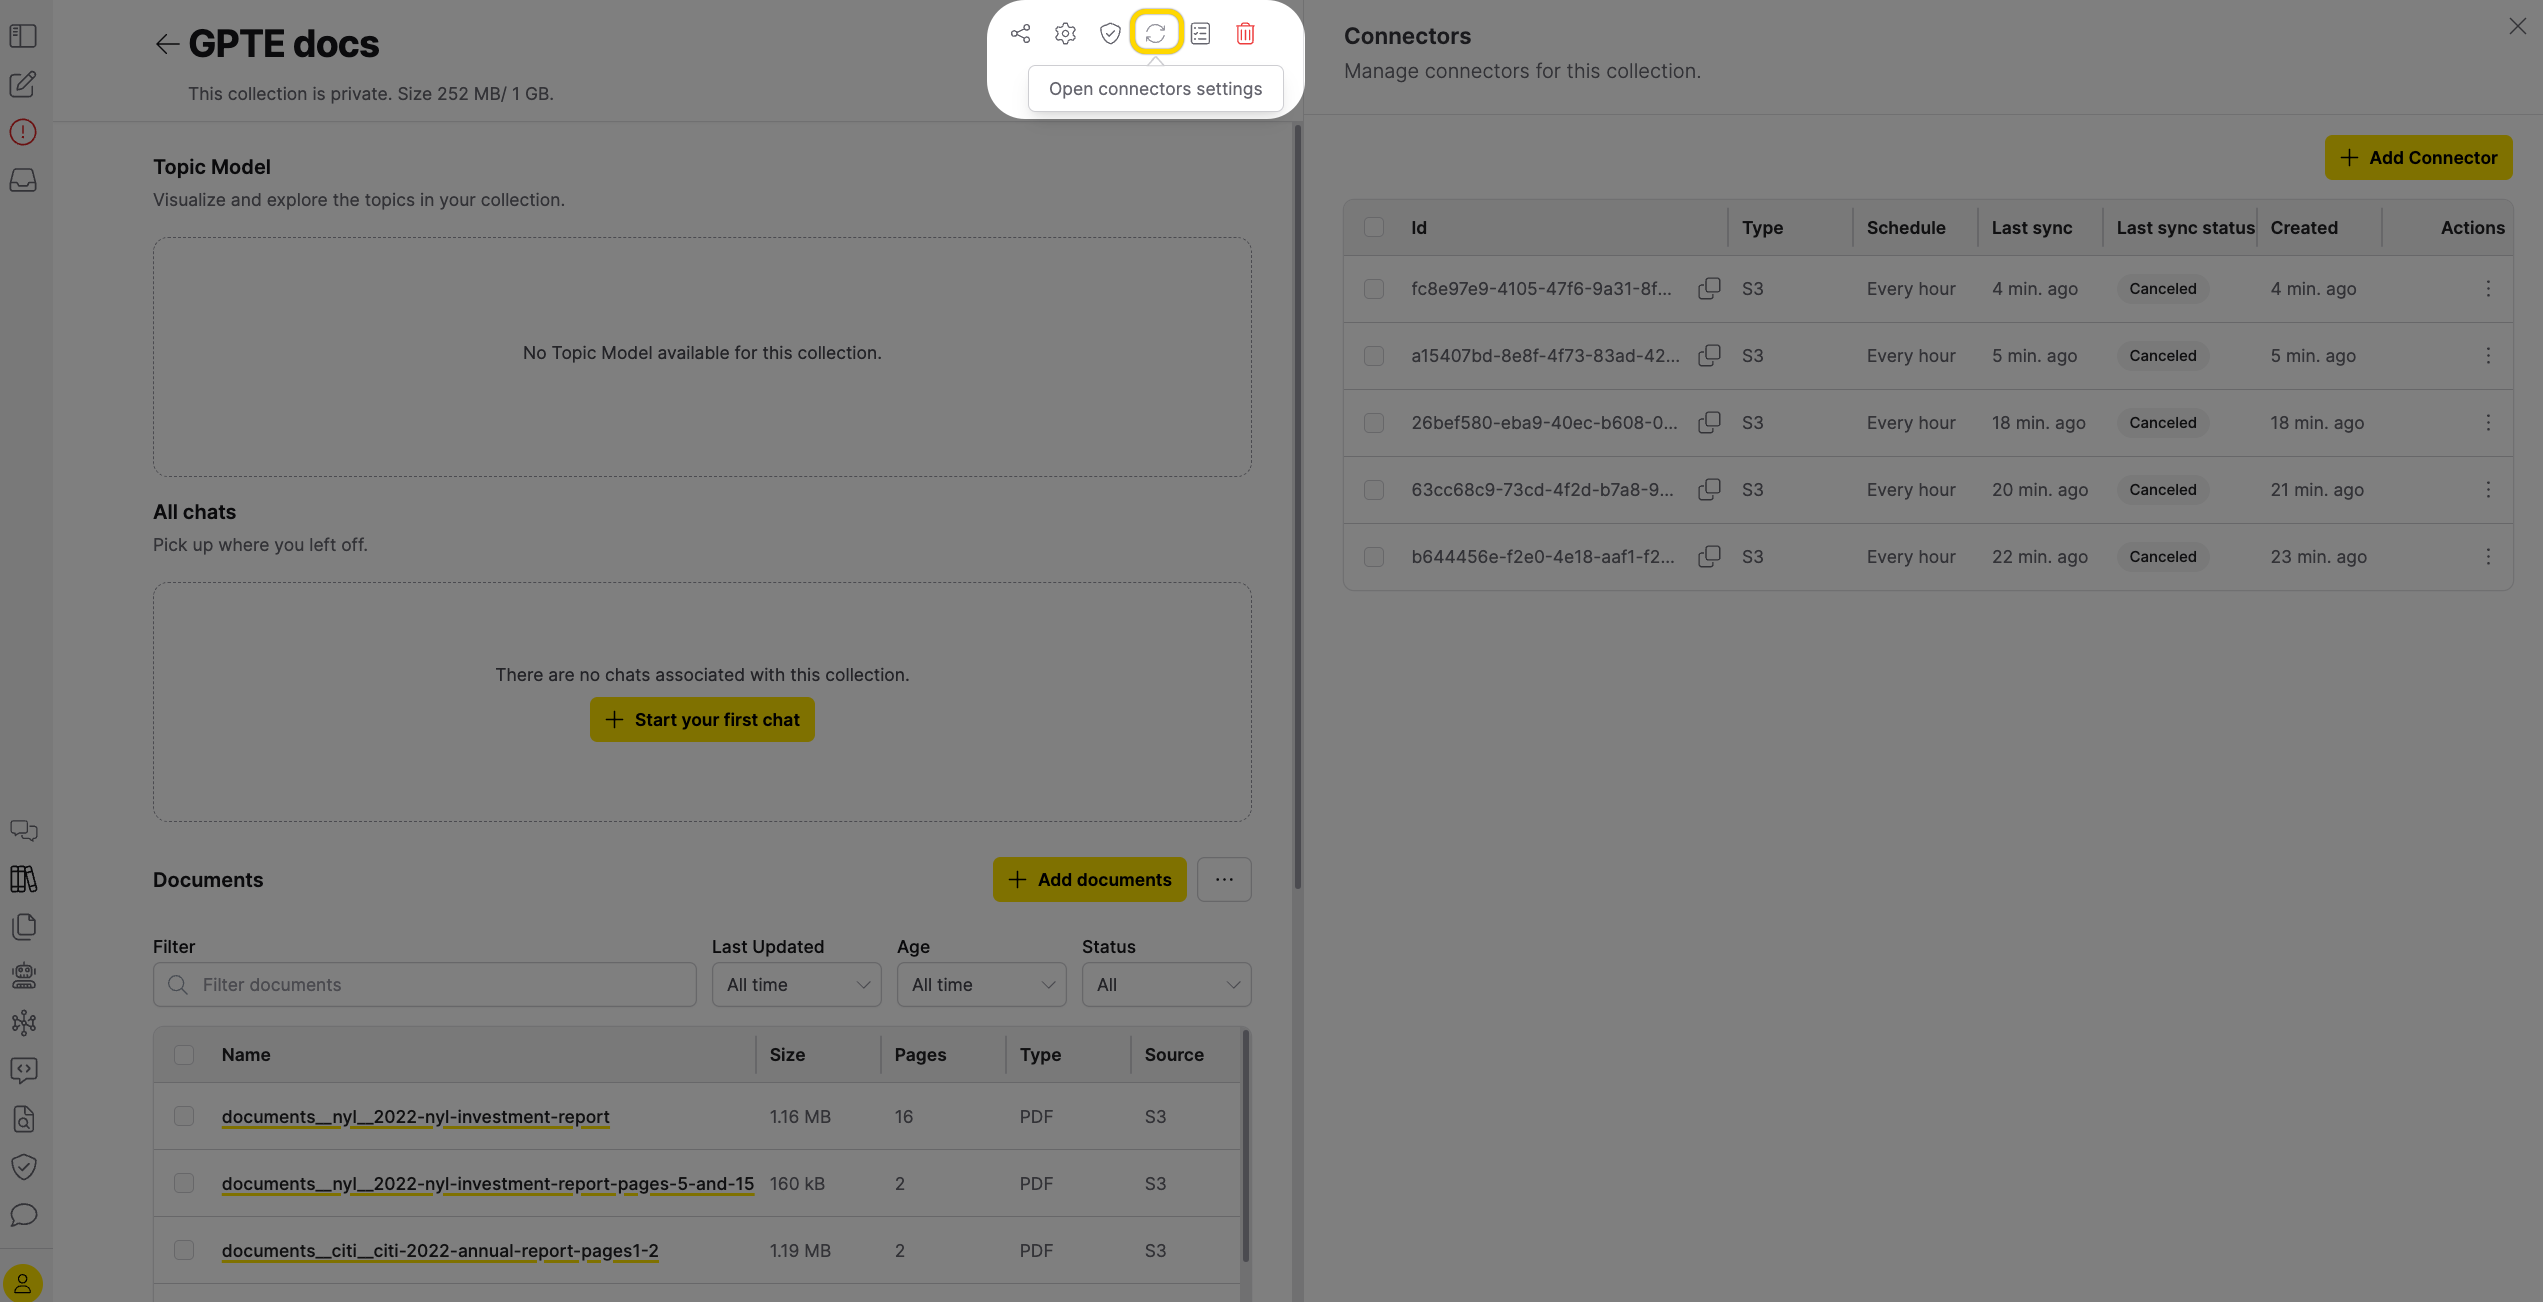
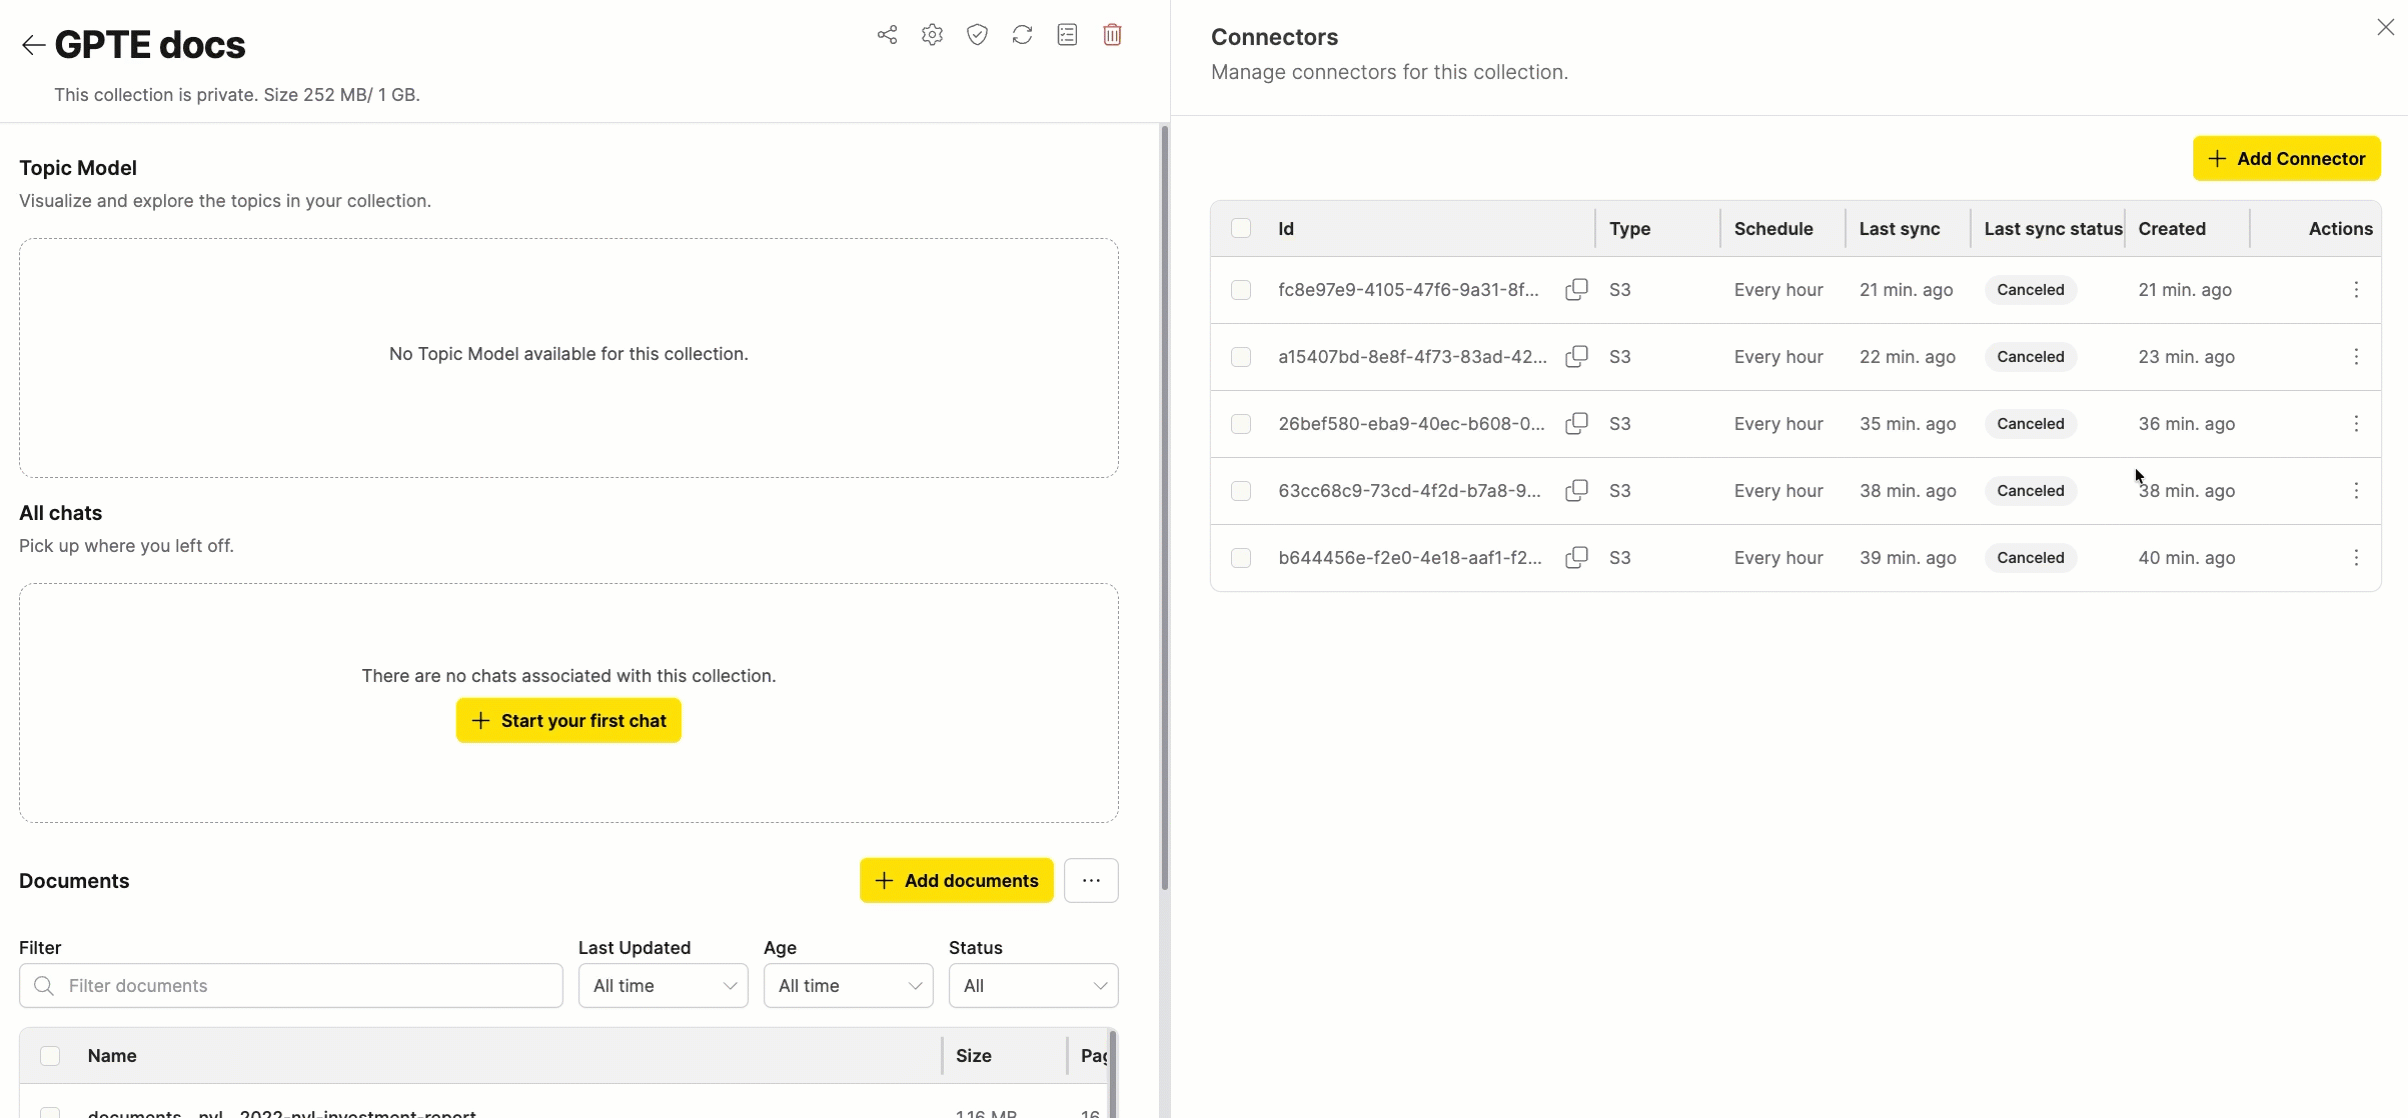
After creating auto-sync connectors, you can view and manage them from the connectors settings.
View connectors
- Open your collection.
- Click Open connectors settings at the top right to see all configured connectors.
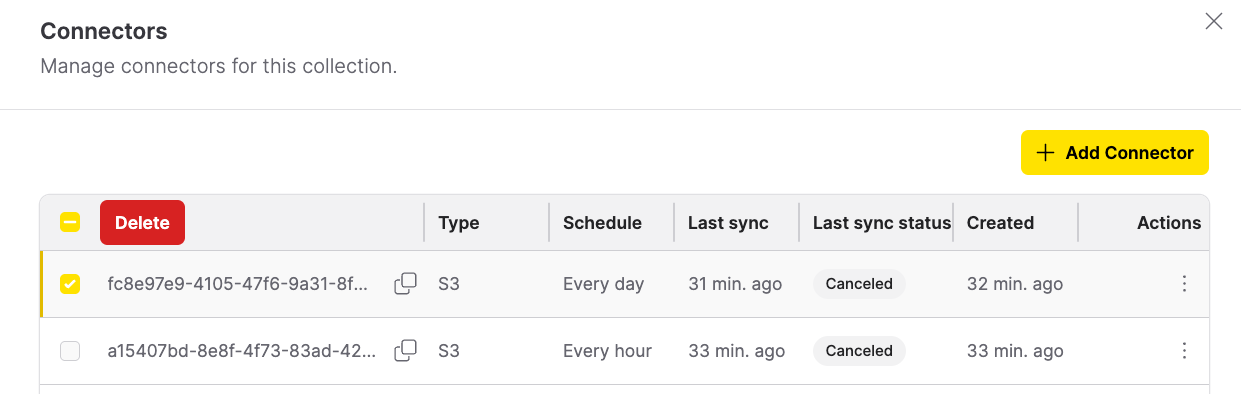
The Connectors tab displays all configured connectors for the collection, including their source type, schedule, and current sync status.
Edit connector
To modify a connector's schedule or settings:
- In the Connectors settings tab, locate the connector you want to edit.
- From the Actions column, select Edit.
- In the Edit Connector dialog, update the schedule or other settings.
- Click Save changes to apply your changes.
Trigger manual sync
To manually synchronize a connector at any time:
- In the Connectors tab, locate the connector.
- Click the Sync Now button.
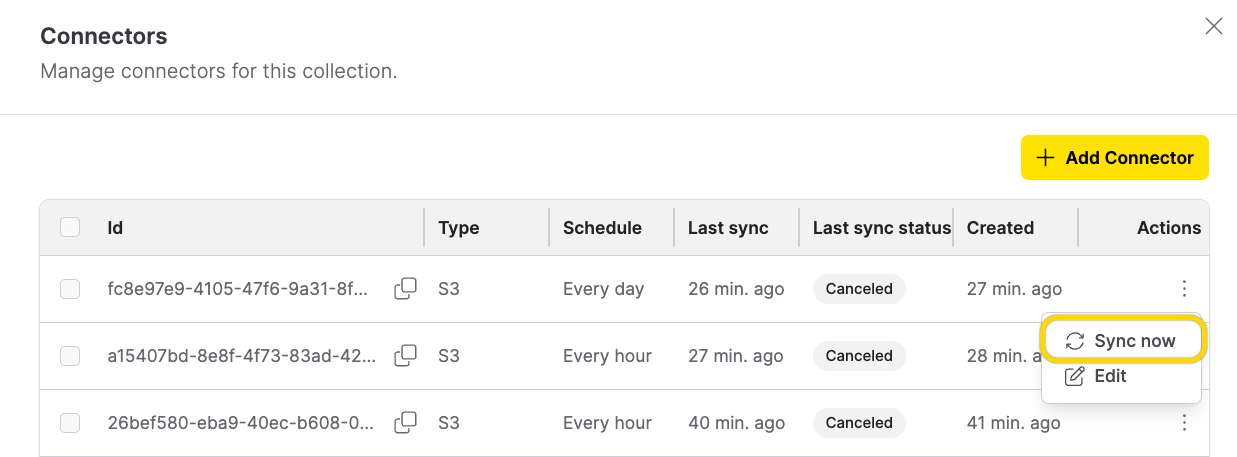
The connector immediately checks for new or modified documents and imports any changes. This is useful when you know documents have been updated and want to sync before the next scheduled run.
Delete connector
To remove a connector and stop automatic synchronization:
- In the Connectors settings tab, select the checkbox next to the connector you want to delete.
- Click Delete.
- Confirm the deletion when prompted.
Deleting a connector stops future synchronization but does not remove documents that have already been imported into the collection.
Understanding sync status
Each connector displays a status indicator showing the current state of synchronization.
| Status | Badge color | Description |
|---|---|---|
| Pending | Gray | Sync is scheduled but has not started yet. |
| Running | Blue | Sync is currently in progress. Documents are being checked and imported. |
| Completed | Green | Last sync finished successfully. All detected changes have been processed. |
| Failed | Red | Last sync encountered an error. Check the connector details for more information. |
| Paused | Yellow | An OAuth token issue paused sync. Hover over the status hint for details. See Paused connectors (OAuth re-authentication). |
Paused connectors (OAuth re-authentication)
Connectors that use OAuth authentication (such as SharePoint Online and Confluence) enter the Paused state if the OAuth token expires or is revoked. When this happens:
- First failure: The scheduled sync detects the invalid token and pauses the connector. An error message appears in the jobs tray indicating that the OAuth token is missing or expired and that you need to re-authenticate to resume automatic syncing.
- Subsequent sync intervals: The scheduler skips paused connectors entirely and does not create new sync jobs, which prevents repeated failure notifications.
- Re-authentication: When you re-authenticate with the connector's OAuth provider in Connectors settings (for example, by reconnecting your SharePoint or Confluence account), all paused connectors for that provider automatically resume and their status returns to Pending.
- Resumption: On the next scheduled sync time after resuming, the connector resumes normal synchronization.
Resolving a paused connector
- Open your collection and click Open connectors settings.
- Locate the connector with a Paused (yellow) status badge. Hover over the hint icon next to the badge to see the error details.
- Re-authenticate with the OAuth provider by completing the OAuth flow for the affected service in Connectors settings. For setup details, see Import from SharePoint Online or Import from Confluence.
- After successful re-authentication, the connector status automatically changes back to Pending.
- The connector resumes syncing at the next scheduled sync time. You can also click Sync Now to trigger an immediate sync.
- Submit and view feedback for this page
- Send feedback about Enterprise h2oGPTe to cloud-feedback@h2o.ai